Phoenix1
Member
- Joined
- May 7, 2021
- Messages
- 135
- Reaction Score
- 0
- Points
- 23
- #1
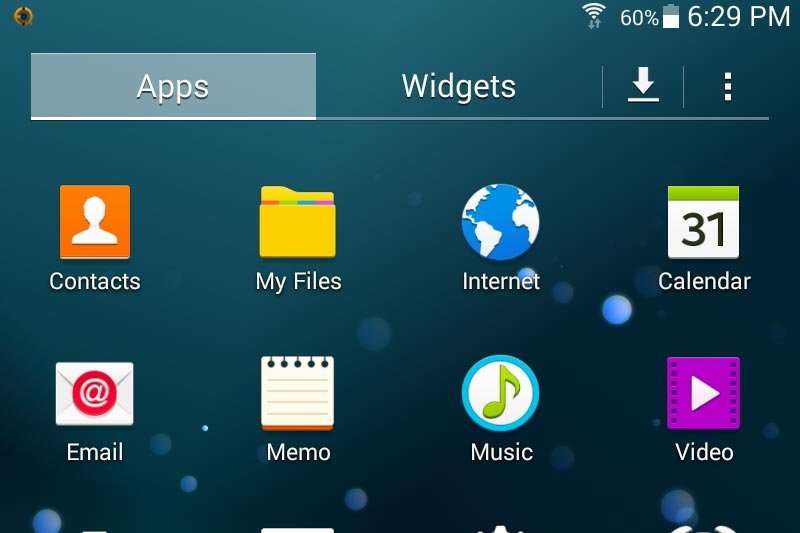
Beyond talking, texting, browsing, taking photos and videos, I’d say the most popular thing to do with a smart phone or tablet is to take screenshots. We’ve all seen them. The back and forth between two hilarious people in some sort of a chat session. One person thinks they’re texting someone and it ends up to be the wrong person. Correspondence ensues. What was written is shared on the internet for all of eternity. This “sharing” wouldn’t be possible without the ability to take screenshots of what’s shown.
Since I’m not the type of person who does such things (as I described above), I’ve long wondered exactly how to capture a screenshot on either a phone or tablet. Because of this, I had to do a bit of digging. What I found was startling. It’s actually really easy to do it.
In today’s post, I’m going to start off by demonstrating how to capture a screenshot on my Samsung Galaxy Tab 4 tablet. I purchased this a while ago, but it’s still great and rather peppy if I don’t say so myself. I’ll show you how to take the shot and then where it’s stored. After that, I’ll email it to myself right from the tablet. The reason I’ll be doing this is because I’ll need the screenshots in question for this very post.
After I’m finished with that, I’ll talk about some other phones and tablets and give instructions for how to go about doing the same thing. And finally, I’ll leave the comment section open to those of you who have different brands and makes of phones and tablets so you can chime in with your own instructions. I can’t cover everything in this post, so if you left a comment, you’d surely be helping out.
Creating a Screen Capture on the Samsung Galaxy Tab 4
This operation is very simple. The way to create a screen capture on my tablet is to swipe the edge of the hand over the screen either from the left or from the right. Now, I’ll tell you this much – it takes a bit of practice. First, you have to be sure it’s the “edge” of your hand, not the flat part of your hand. Second, you have to be sure you’re touching the correct spots and putting enough pressure on the screen. I’ve found that keeping my hand relaxed, so it sort of drags across, to be the best. Again, it’ll take a bit of practice.The reason this method works is because my version of Android (4.4.2 KitKat) has a feature called Palm Motion built in. In this next section, I’ll show how to check to see if this feature, and the others under it, are turned on.
Turning Palm Motion On
From my home screen, I’ll press the Apps icon.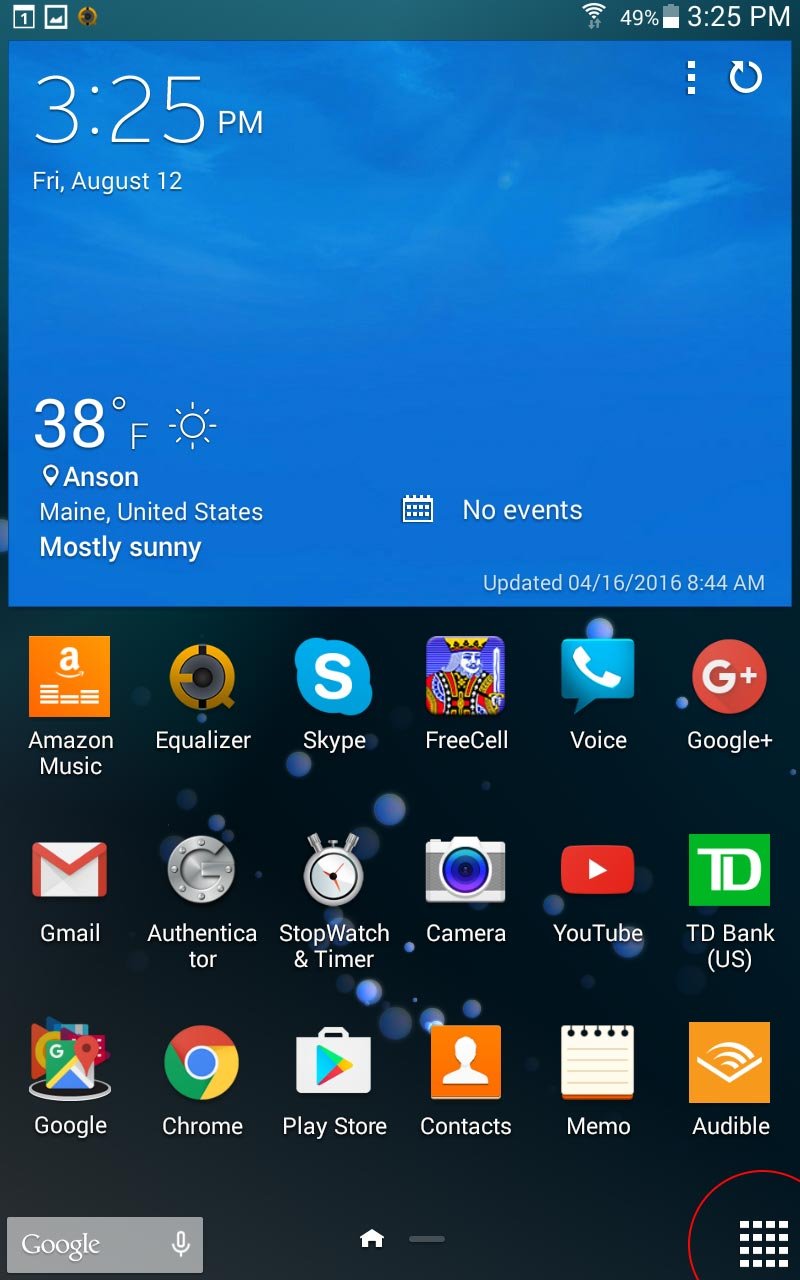
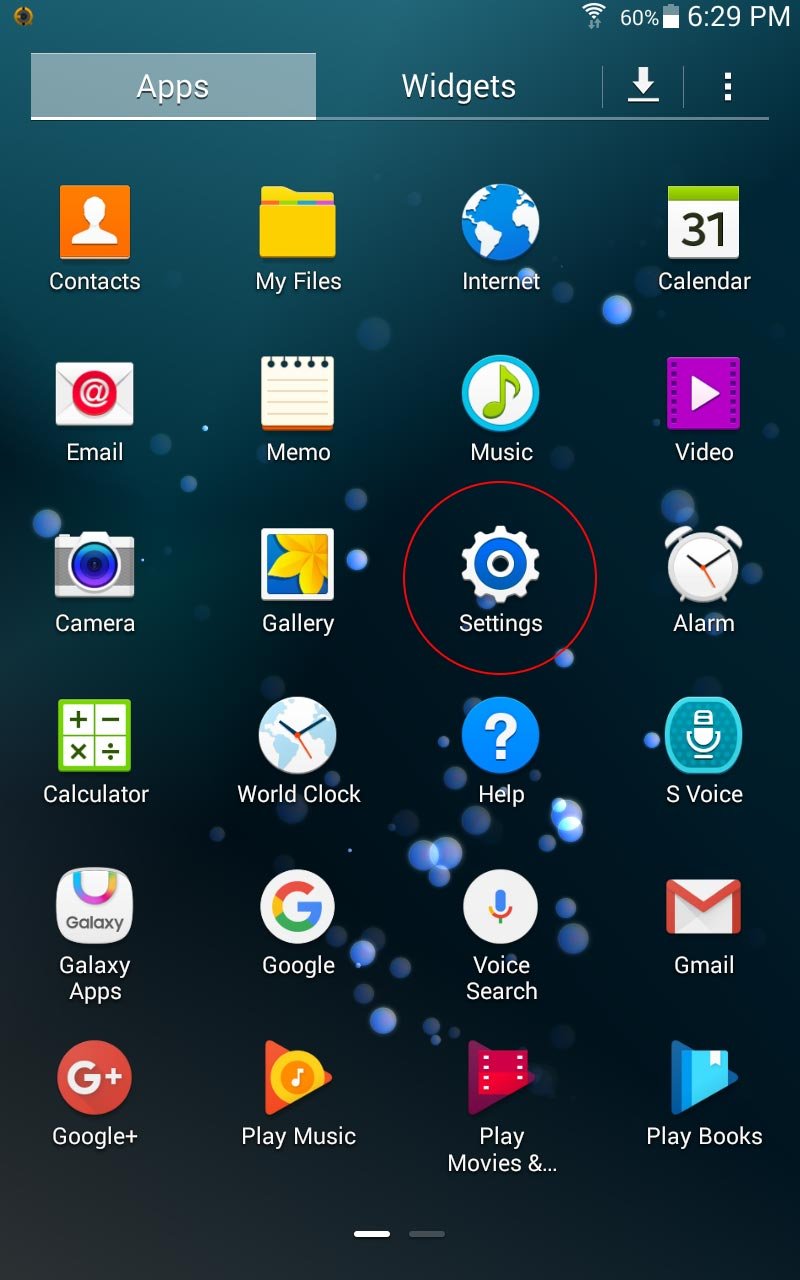
After I arrive at the Apps page, I’ll press the Settings icon.
And then, I’ll press the Controls link up at the top of the next screen.
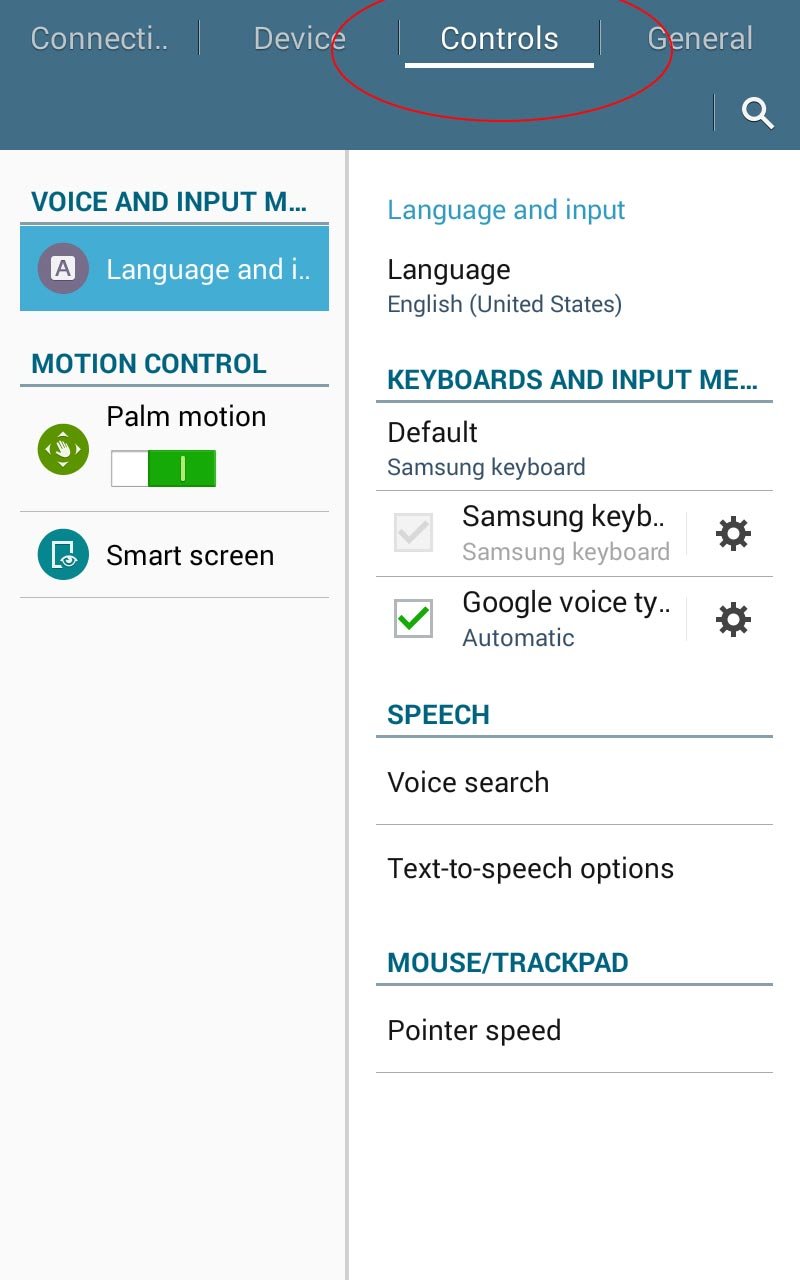
If you take a look at the above screenshot, you’ll see an area called Motion Control in the left column. Currently, on my tablet, this feature is turned on, as indicated by the switch being green in color. If yours isn’t green, go ahead and turn it on by pressing on the switch with either a stylus or your fingertip.
Once you do that, press, again, somewhere around the switch in the Motion Control area. This will bring you to the next screen, where the sub-controls are located. It’s on this screen that the Capture Screen setting is located.
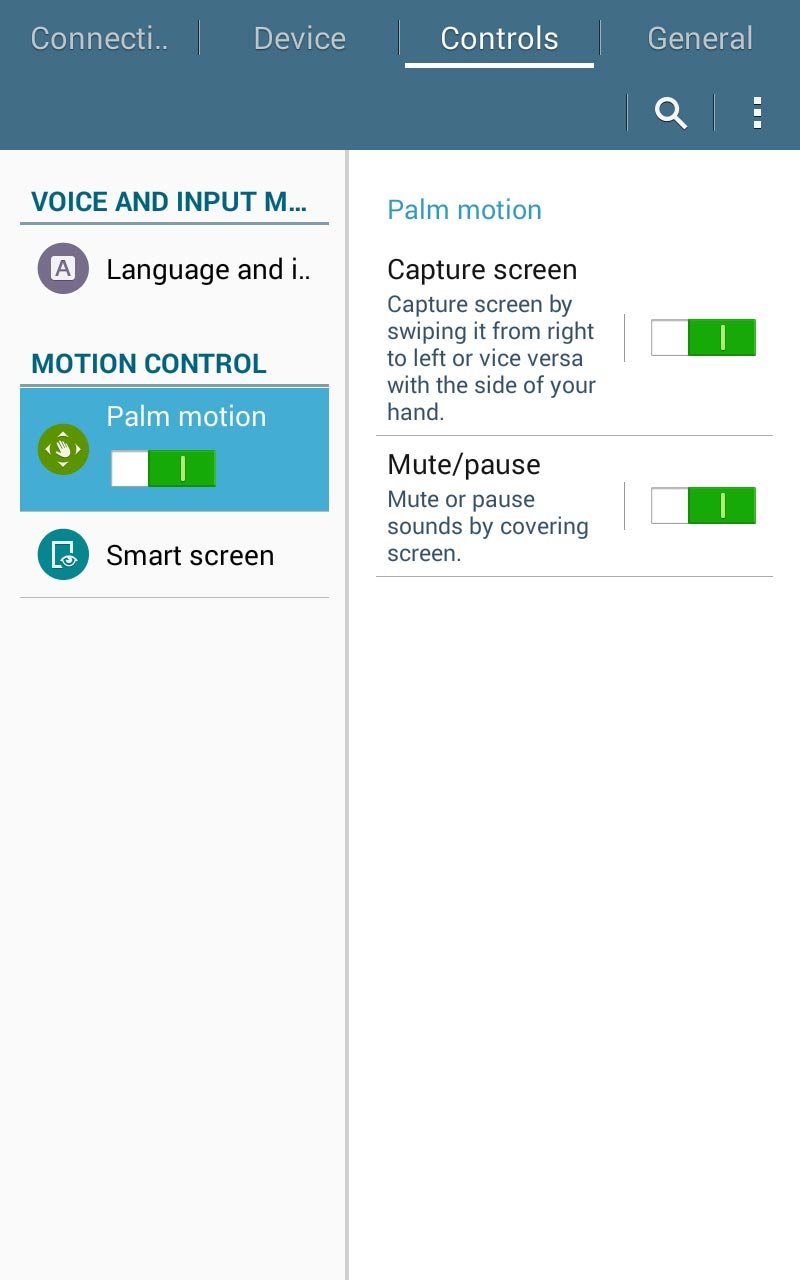
If you now look in the right column, you’ll see the Capture Screen setting. Again, be sure the switch is in the On position by clicking on it until it’s green. This should allow you to swipe your hand across any screen to take a capture of it.
Where are the Screen Captures Located?
Once I swipe my hand and successfully create a screenshot, I’ll hear a nice solid camera click. After that, I’ll be notified at the top of the screen that a capture was taken. If I swipe down from the top of the screen, I’ll end up on my Notifications shade.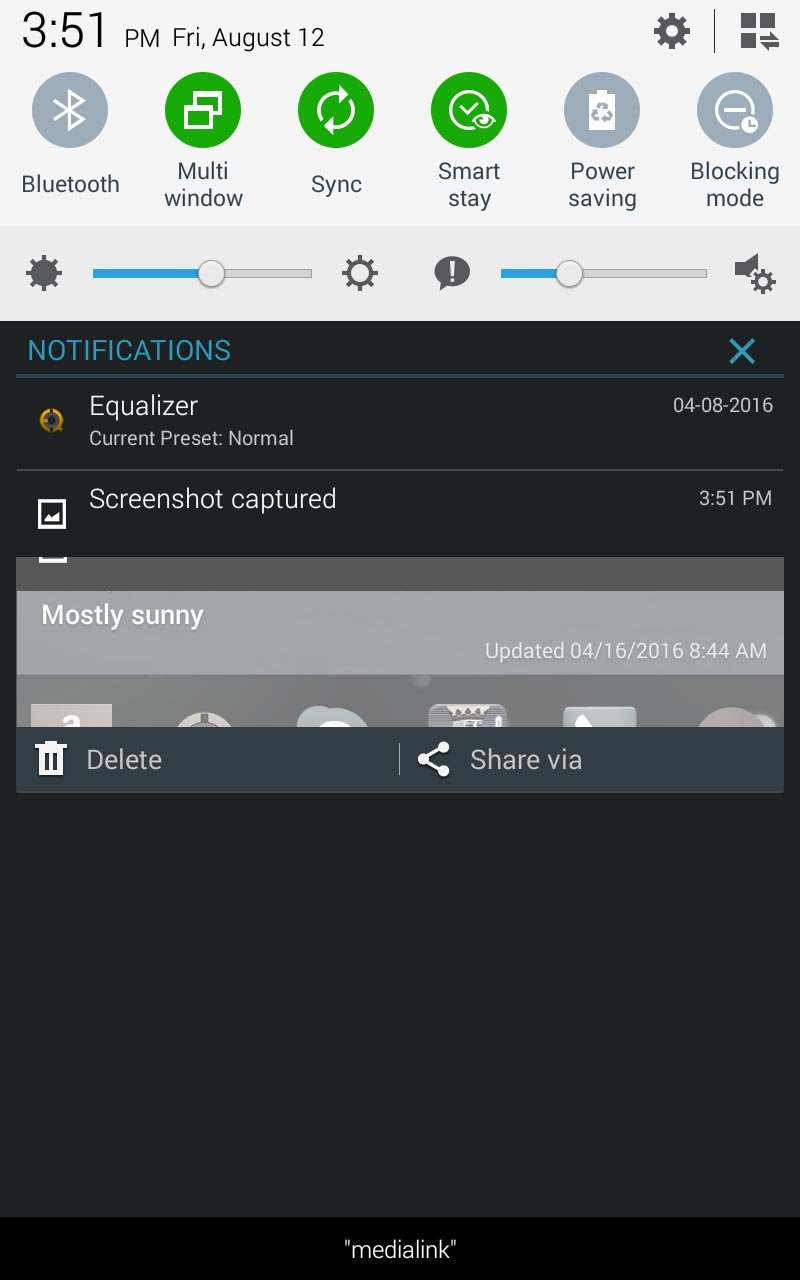
If I tap on the screenshot itself, that’s located under the Screenshot Captured title, I’ll see a popup that asks how I’d like to open it up. In my case, I’m asked if I’d like to use the Gallery or the Photos apps. I usually choose Gallery.
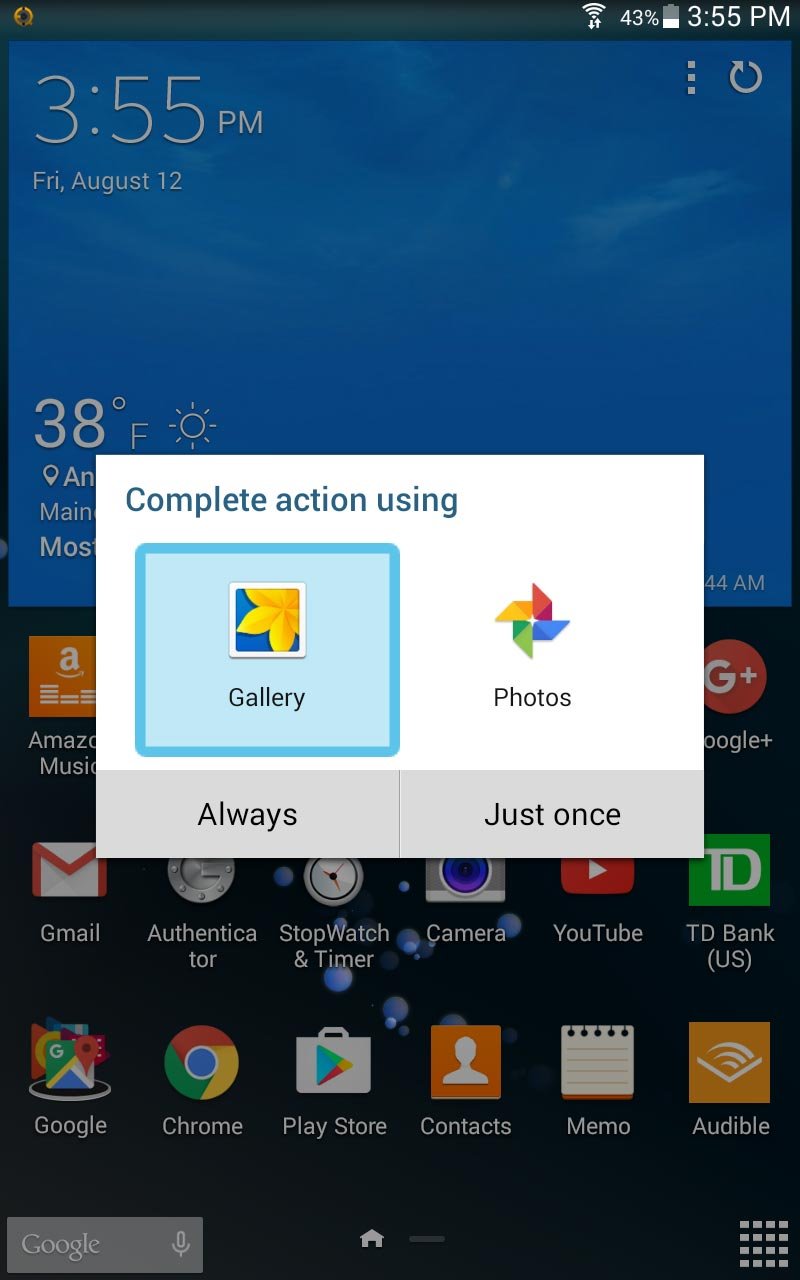
From there, the screen capture will open. And once it does, I can tap it once to email it, delete it or share it.
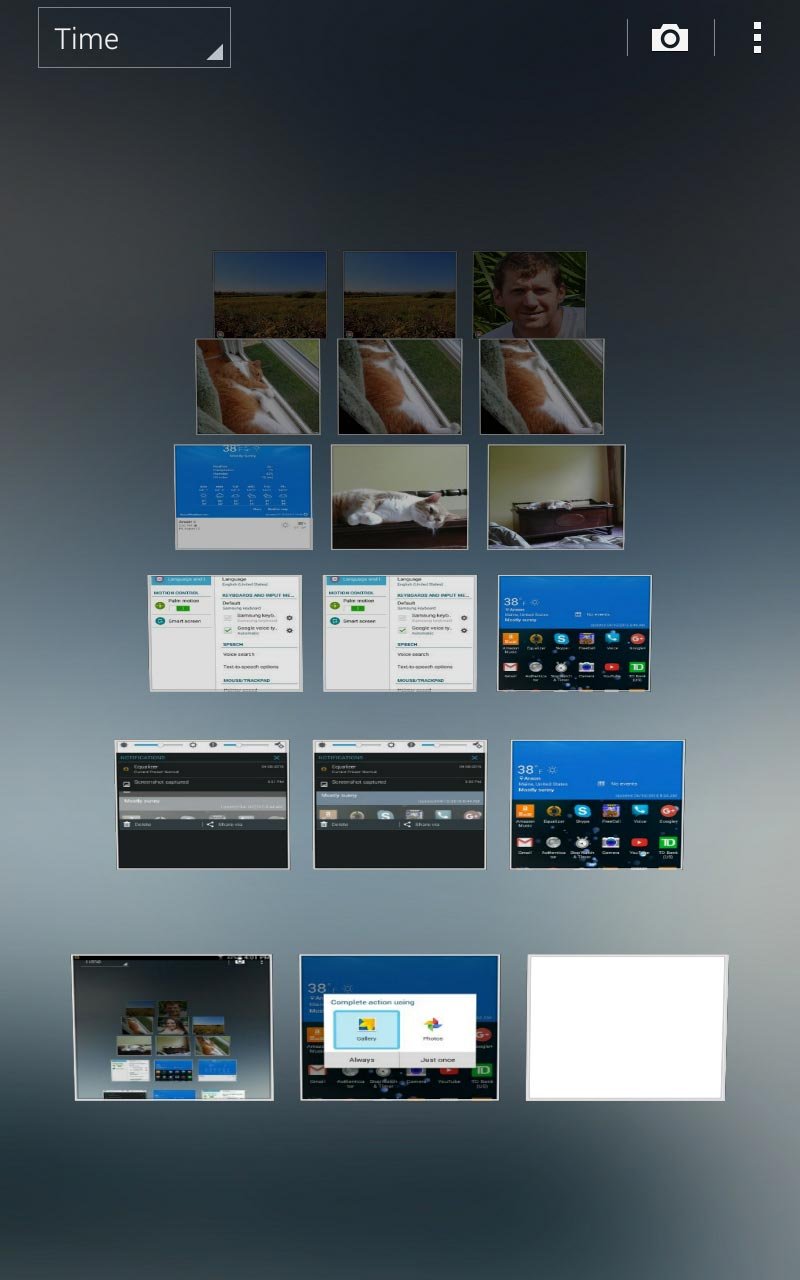
If you take a bunch of screenshots and want to browse through them later, that’s just as simple. Just click on the Apps icon from your home screen and then click the Gallery icon. On this next screen, you’ll see all the screenshots you’ve taken. Just click to select which one you’d like to open and, again, click on the shot to email, delete or share.
Other Devices
In this section, I’ll list a few other devices with very brief instructions for how to capture a screenshot.Most Widely Used: Volume down + power button combination. True for most Sony, LG and Google Nexus phones and tablets.
Some Samsung & HTC Devices: Home + power button combination.
Samsung Galaxy S2 & S3: Hold home button + power button until the screen flashes.
Samsung Galaxy Note & Note 2: Home button + power button combination.
Samsung Galaxy Note 10.1 & Galaxy Camera: Volume down + power button combination.
Samsung Galaxy Note, Note 2 & S3: Palm swipe as described above.
Samsung Devices with S Pen: Push the screen with pen and hold down until screen flashes.
HTC One X, Desire X & Desire U: Home button + power button (press power button first and then quickly press the home button).
Sony Xperia Phones (Xperia TX, Xperia V & Xperia J): Power button + volume down button.
LG Optimus G: Volume down button + power button.
Galaxy Nexus, Nexus 4, Nexus 7 & Nexus 10: Volume down button + power button until screen flashes.
Remember, if you know how to take a screen capture with your device, please list the instructions in the comment section below. Thanks!
