KristinaW
Member
- Joined
- May 7, 2021
- Messages
- 127
- Reaction Score
- 0
- Points
- 18
- #1
One of my favorite types of photography is photography where the sun (or a bright light) is directly in the shot. I've been taking sun shots for a long time and I feel that this type of picture taking adds a lot of mood to my images. It's tricky to do what I do though because when I point my camera at or near the sun, the camera wants to reduce exposure of the scene to such a degree that everything else in the image comes out far too dark. What I do to compensate for that is to allow the image to come out overexposed and then I reduce the exposure during post-processing. But unlike with typical post-processing of this type, I focus primarily on reducing the burned out highlights. Believe it or not, even when highlights are burned out and overexposed in an image, the camera still collects a lot of valuable data that can be used later on. Dealing with overexposed images is a lot easier and more productive than dealing with underexposed ones. Brightness can oftentimes be corrected while darkness oftentimes can't be.
In today's post, I'll walk you through the process of correcting burned out highlights in a photograph using Adobe Camera Raw. Getting rid of the burned out parts isn't too tough, but making the image look good afterwards can take some additional time. Nothing I'm going to show you in the post is actually tough at all. The entire process takes just a few moments.
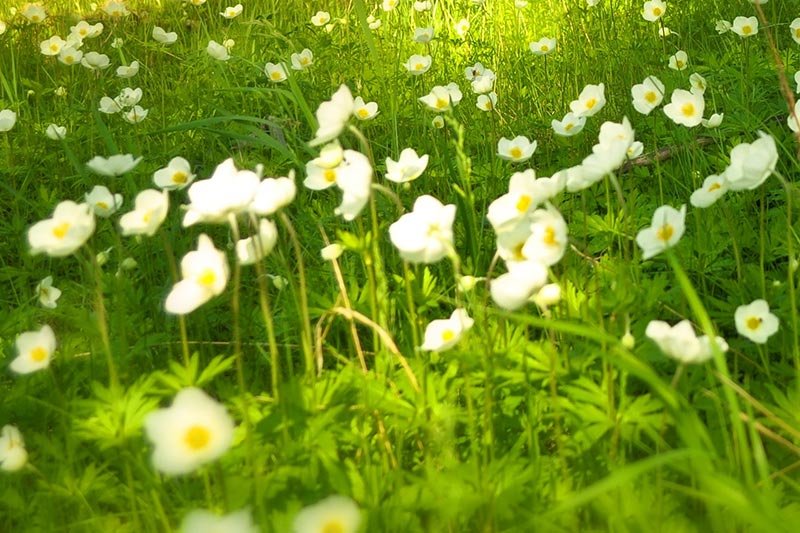
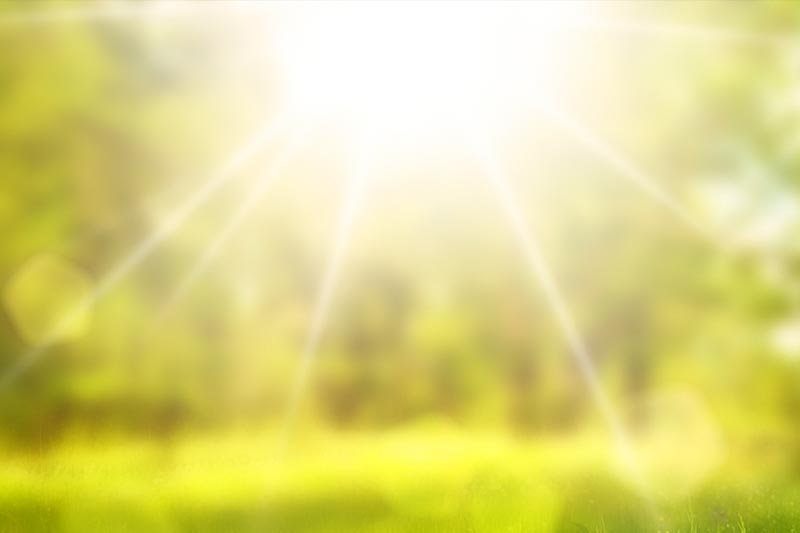
This is the original image in its entirety.

And these are the areas I'll be focusing on. Notice the overexposed flowers on the ground and the burned out sun. Both offer very little detail to the viewer.
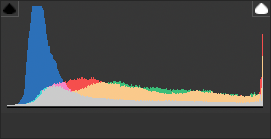
This histogram doesn't look terrible, but it does show some clipping on the right side (highlights). I doubt I'll be able to remove that, but I would like to even the remaining curve out across the entire spectrum as opposed to having it lean left, the way it is now. As far as the histogram goes currently, it's showing the image as slightly underexposed, which is typical of images that have burned out highlights. As I mentioned above, cameras like to reduce the exposure of a scene when there's something very bright in it.
Beyond the overexposed elements of this image, I'm finding it sort of dull. I'd like to regain some of the detail that's been lost. I'll push some sliders in the Basic panel of Camera Raw now and then explain what I did down below.
And here's the result of my efforts. The final image.
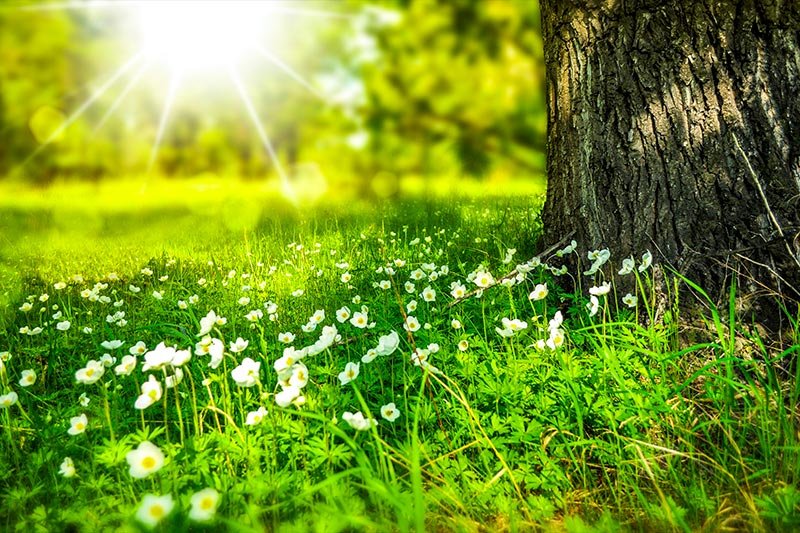
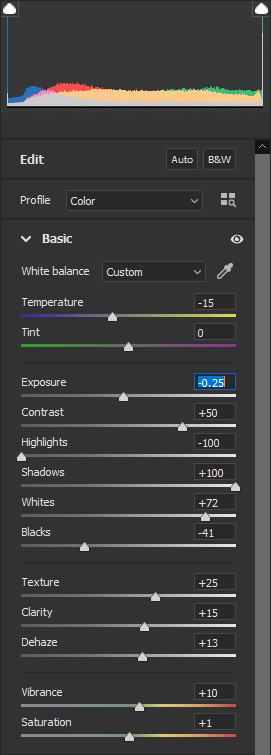
I think it's safe to say that I've regained some of the image's detail. Here are the settings I made in the Basic panel:
Temperature: -15
Exposure: -25
Contrast: +50
Highlights: -100
Shadows: +100
Whites: +72
Blacks: -41
Texture: +25
Clarity: +15
Dehaze: +13
Vibrance: +10
Saturation: +1
The Highlights and the Shadows required the most work, obviously. Those two sliders were pegged to the edges. By altering those areas, I corrected the exposure. With the other sliders, I was able to regain the proper white balance and contrast, which gave back a lot of lost detail. Whenever you adjust the Contrast, Whites, Blacks, Highlights, and Shadows in Camera Raw, you're essentially adjusting contrast. You can get a lot of result from the Contrast slider alone, but by taking advantage of the additional sliders, you can gain some fine tuned control. In this case, that's evidenced by more detail in the area surrounding the sun as well in the white flowers in the ground. But beyond that, there's a lot more detail in the grass and the tree overall. I think this effort was well spent.
If you've got any questions about what I've done above, please ask. I'd love to help. Also, if you have any suggestions, please let me know down below as well.
In today's post, I'll walk you through the process of correcting burned out highlights in a photograph using Adobe Camera Raw. Getting rid of the burned out parts isn't too tough, but making the image look good afterwards can take some additional time. Nothing I'm going to show you in the post is actually tough at all. The entire process takes just a few moments.
The Original Image
Let's take a quick look at the original version of the image that I'll be working on. I grabbed this one from a stock photo website, so it's already been processed. It'll still work for our uses though.This is the original image in its entirety.

And these are the areas I'll be focusing on. Notice the overexposed flowers on the ground and the burned out sun. Both offer very little detail to the viewer.


Reducing the Highlights + Processing the Photo
When I see an overexposed image like this, the very first slider I go to is the Highlights slider. By reducing the highlights right off the bat, I remove most of the lack of detail. But even before that, I take a look at the histogram to see if anything stands out.
This histogram doesn't look terrible, but it does show some clipping on the right side (highlights). I doubt I'll be able to remove that, but I would like to even the remaining curve out across the entire spectrum as opposed to having it lean left, the way it is now. As far as the histogram goes currently, it's showing the image as slightly underexposed, which is typical of images that have burned out highlights. As I mentioned above, cameras like to reduce the exposure of a scene when there's something very bright in it.
Beyond the overexposed elements of this image, I'm finding it sort of dull. I'd like to regain some of the detail that's been lost. I'll push some sliders in the Basic panel of Camera Raw now and then explain what I did down below.

And here's the result of my efforts. The final image.

I think it's safe to say that I've regained some of the image's detail. Here are the settings I made in the Basic panel:
Temperature: -15
Exposure: -25
Contrast: +50
Highlights: -100
Shadows: +100
Whites: +72
Blacks: -41
Texture: +25
Clarity: +15
Dehaze: +13
Vibrance: +10
Saturation: +1
The Highlights and the Shadows required the most work, obviously. Those two sliders were pegged to the edges. By altering those areas, I corrected the exposure. With the other sliders, I was able to regain the proper white balance and contrast, which gave back a lot of lost detail. Whenever you adjust the Contrast, Whites, Blacks, Highlights, and Shadows in Camera Raw, you're essentially adjusting contrast. You can get a lot of result from the Contrast slider alone, but by taking advantage of the additional sliders, you can gain some fine tuned control. In this case, that's evidenced by more detail in the area surrounding the sun as well in the white flowers in the ground. But beyond that, there's a lot more detail in the grass and the tree overall. I think this effort was well spent.
If you've got any questions about what I've done above, please ask. I'd love to help. Also, if you have any suggestions, please let me know down below as well.
