15Katey
Member
- Joined
- May 10, 2021
- Messages
- 130
- Reaction Score
- 0
- Points
- 23
- #1
If you’re a casual user of Windows 10, heavy duty customization probably ins’t all that important to you. After all, you most likely use your computer to simply create documents and browse the internet. If you work on your computer every single day of your life, however, making your workflow as efficient as possible is extremely important. As they say, time is money. As I say, too many clicks eventually makes your wrist hurt. Let’s try to reduce the number of clicks we have to put up with.
In today’s post, I’m going to quickly cover a tip that should speed up navigating your Windows 10 computer. I’m going to focus on which folders appear in your Start menu, ready to be clicked. By default, only a few options appear in the menu, but by the end of this post, you should know how to add a dozen or so more.
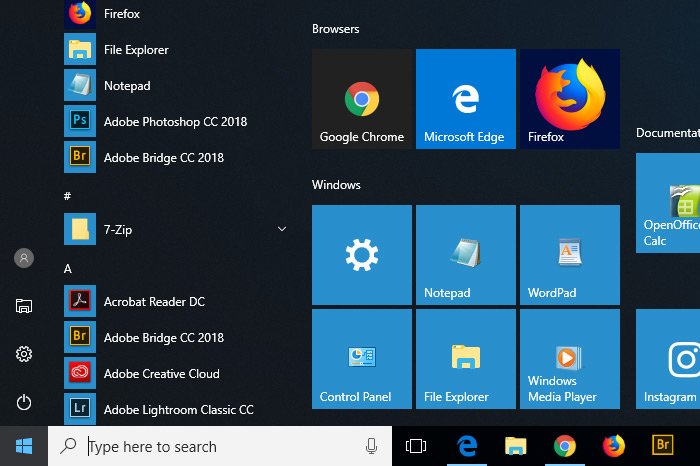
Here’s a screenshot of the Start menu.
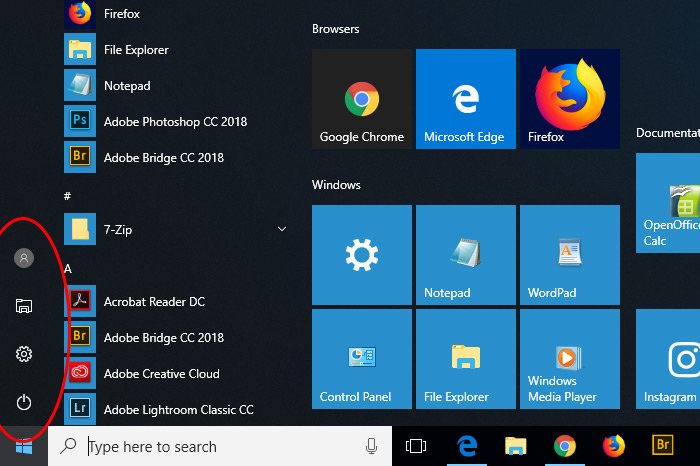
To be more clear, I circled the area I’m referring to in red below. These are the options we have the ability to add or remove.
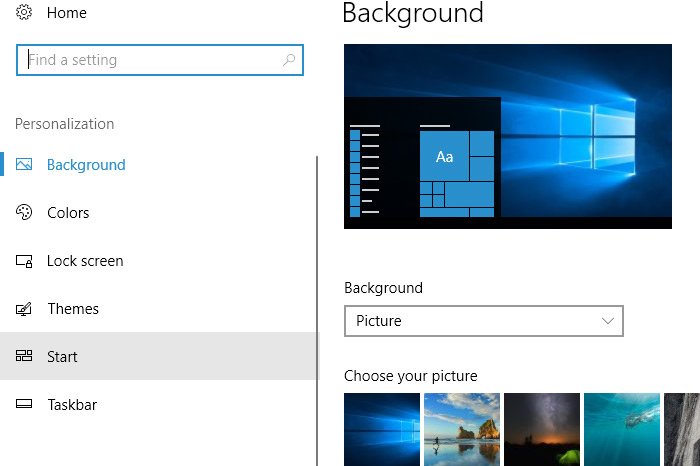
If I click on Personalization, I’ll land in a new window. From there, I’ll click on Start, which is where I want to be. This is the area that controls what’s visible in the Start menu.
Let’s take a look what’s in this area.
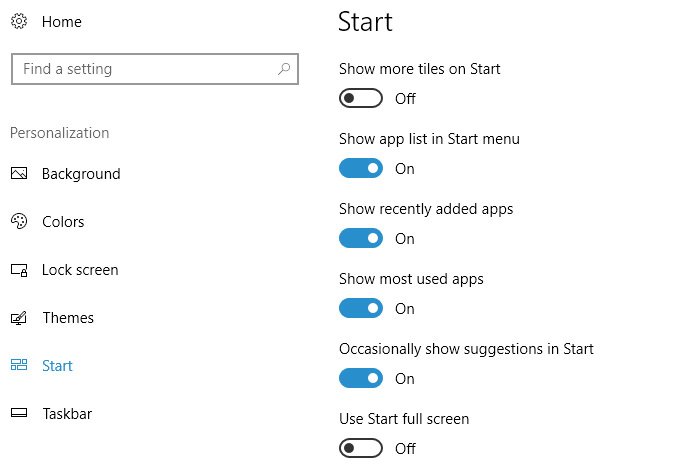
As you can see, there are a few switches that turn various options on and off. Things such as most recently added apps, most recently used apps and different types of suggestions. This is all well and good, but unfortunately, we’re not in the folders section yet.
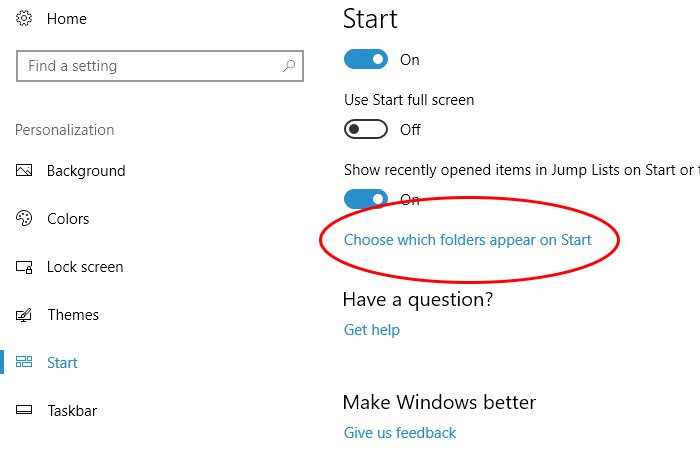
If I continue to scroll down in this same window, I’ll see some blue text that reads, Choose which folders appear on Start. I’ll click this to enter a new window.
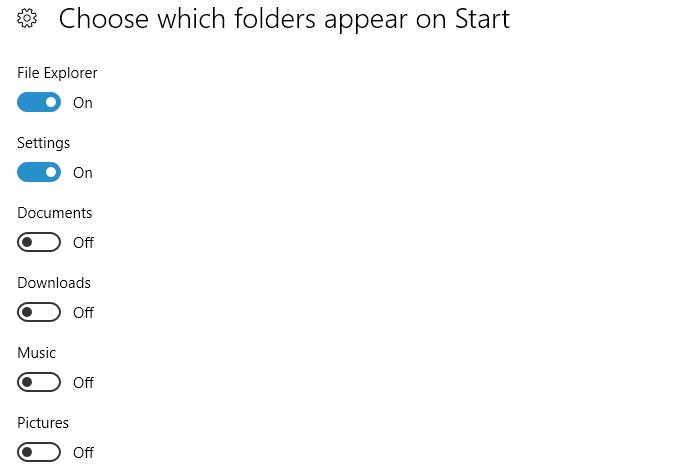
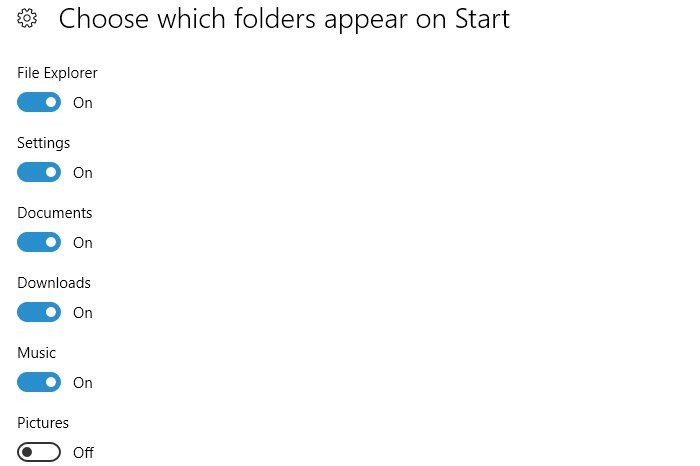
Currently, File Explorer and Settings are turned on and visible. The remaining list is as follows: Documents, Downloads, Music, Pictures, Videos, HomeGroup, Network and Personal Folder. To turn a folder on so it’s visible in the Start menu, simply click its switch. As an example, I’ll click Documents, Downloads and Music.
Now, I’ll click the Start menu to see the change.
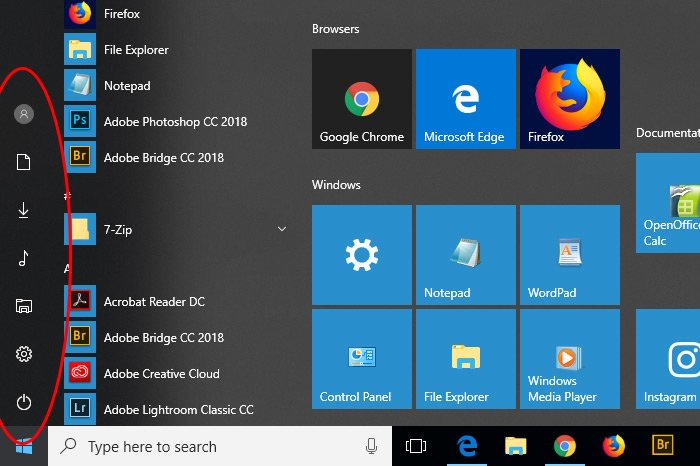
Pretty cool, huh? Now that these folder shortcuts are right in this Start menu, I can easily click them to access the area I’m interested in. That was pretty easy!
——
I hope I clearly explained how to add and remove different folder options to and from the Start menu in Windows 10. If you have any questions or concerns regarding this post, please leave them in the comment section below. Thanks for reading!
In today’s post, I’m going to quickly cover a tip that should speed up navigating your Windows 10 computer. I’m going to focus on which folders appear in your Start menu, ready to be clicked. By default, only a few options appear in the menu, but by the end of this post, you should know how to add a dozen or so more.
Here’s a screenshot of the Start menu.

To be more clear, I circled the area I’m referring to in red below. These are the options we have the ability to add or remove.

Accessing the Personalization & Start Options
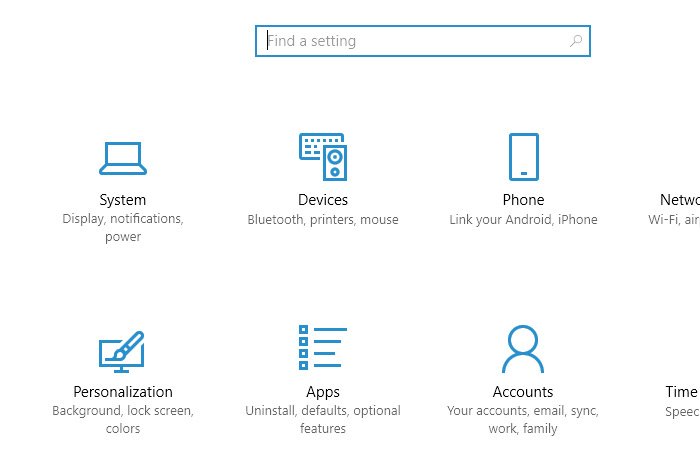
To access the location where these settings are located, I’ll use the keyboard shortcut of Windows+I. In other words, that’s the Windows button and the I key. If you press these keys together, the Settings window will open up.
If I click on Personalization, I’ll land in a new window. From there, I’ll click on Start, which is where I want to be. This is the area that controls what’s visible in the Start menu.

Let’s take a look what’s in this area.

As you can see, there are a few switches that turn various options on and off. Things such as most recently added apps, most recently used apps and different types of suggestions. This is all well and good, but unfortunately, we’re not in the folders section yet.
If I continue to scroll down in this same window, I’ll see some blue text that reads, Choose which folders appear on Start. I’ll click this to enter a new window.

Changing Start Menu Folder Options
Upon entering this new window, I’ll see a list of potential folders to add to the Start menu. Let’s take a look.
Currently, File Explorer and Settings are turned on and visible. The remaining list is as follows: Documents, Downloads, Music, Pictures, Videos, HomeGroup, Network and Personal Folder. To turn a folder on so it’s visible in the Start menu, simply click its switch. As an example, I’ll click Documents, Downloads and Music.

Now, I’ll click the Start menu to see the change.

Pretty cool, huh? Now that these folder shortcuts are right in this Start menu, I can easily click them to access the area I’m interested in. That was pretty easy!
——
I hope I clearly explained how to add and remove different folder options to and from the Start menu in Windows 10. If you have any questions or concerns regarding this post, please leave them in the comment section below. Thanks for reading!
