Phoenix1
Member
- Joined
- May 7, 2021
- Messages
- 135
- Reaction Score
- 0
- Points
- 23
- #1
I feel like I’m in the mood to whiz through a typical workflow, just to show you what goes on during any average day for a photo editor or graphic designer. I’d like to include very basic tasks that will bring you comfort if you’re new to all of this. So much that we do in these editing applications is really very simple. It’s only when we glue everything together that it looks challenging and difficult to understand. Hopefully I can help make things easier.
In today’s post, I’ll be taking some techniques I’ve shared with you in previous posts and I’ll be stringing them together. I’ll use both Adobe Bridge and Camera Raw to progress through an everyday workflow that includes an edit in Camera Raw, copying those edits in Bridge, making further edits in Camera Raw, creating a preset in the same application and then a review in Bridge. What I’ll cover below should take all of one and a half minutes in real time, if I wasn’t writing a post to go along with it. Of course, it’ll take me an hour and a half because of all the writing and screenshots I have to produce. Really though, once you get used to flipping back and forth between applications like this, it takes no time at all.
Once I do that, the photograph will be waiting for me in Camera Raw for editing.
When I’m finished making these edits, I’ll click the Done button down in the bottom right area of the application. This will bring me back to Bridge.
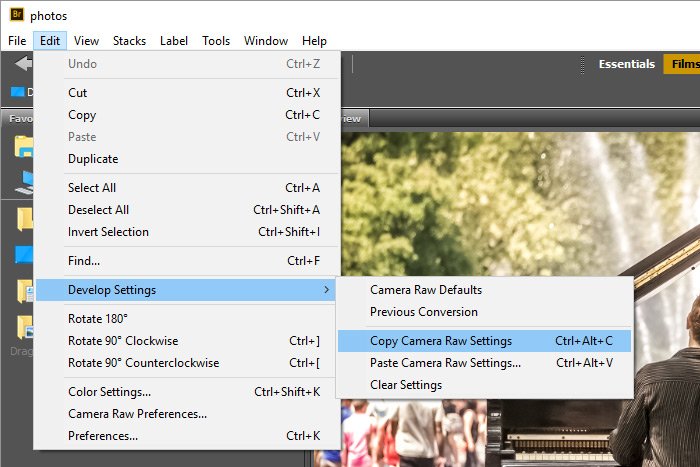
After that, I’ll head up to the Edit > Develop Settings > Copy Camera Raw Settings and click.
Then, once the settings have been copied, I’ll select the other thumbnail in Bridge and then I’ll go up to the Edit > Develop Settings > Paste Camera Raw Settings and click. Once I do that, the Paste Camera Raw Settings dialog box will appear.
I’ll keep everything the same in that box and I’ll just click the OK button to apply the changes. After that, I’ll have both thumbnail images looking very similar. You can see they’ve both been updated by the obvious change in their warmth.
Once I’m in Camera Raw, I’ll once again hold down the Ctrl or Shift key and click on the unselected image in the left vertical column. Doing this will make sure both images are selected and editable at the same time. Then, I’ll simply add some mid-tone contrast by pushing the Dehaze slider in the Basic panel to the right. By the way, the Dehaze slider has recently been moved from the Fx to the Basic panel in the most recent Camera Raw upgrade from Adobe.
Finally, I’ll move into the Presets tab and I’ll click the New Preset button down at the bottom of that panel.
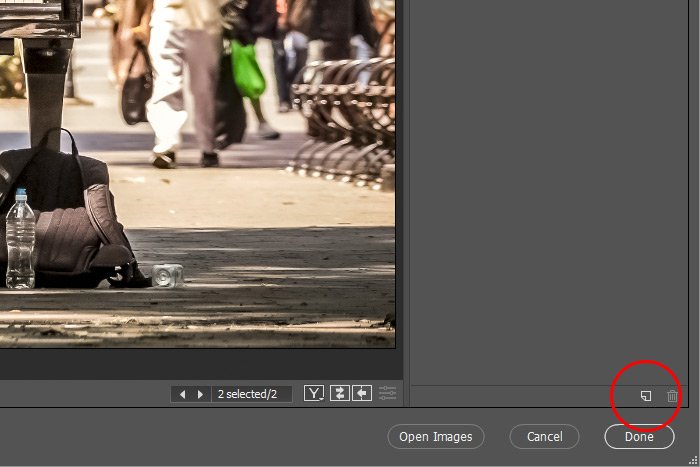
Basically, I want to create a preset that I can use again in the future, since this was such an awesome edit.
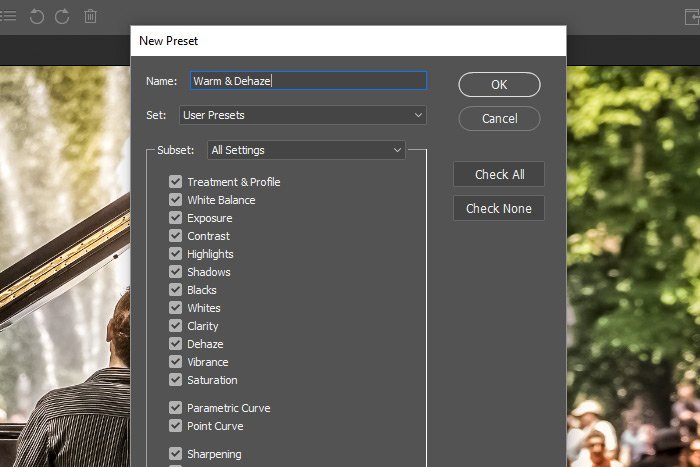
When the New Preset dialog box opens, I’ll keep all the check boxes the same as they were and I’ll just name the preset Warm & Dehaze, since those are the most pronounced edits I made.
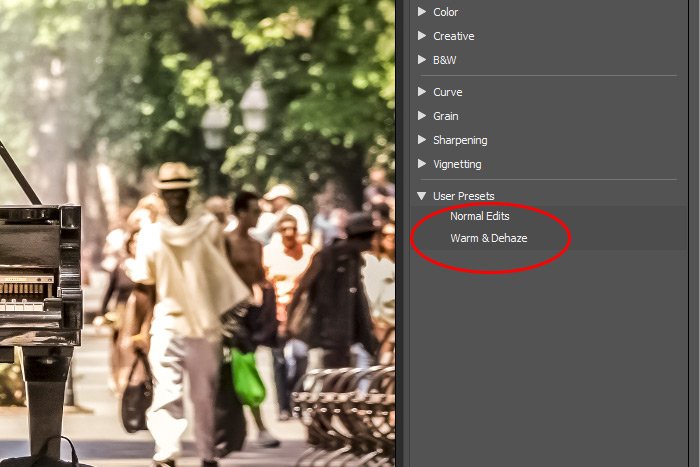
When I’m done with that, I’ll click the OK button and I’ll see the new preset waiting for me under the User Presets heading. This is another new feature from the most recent update.
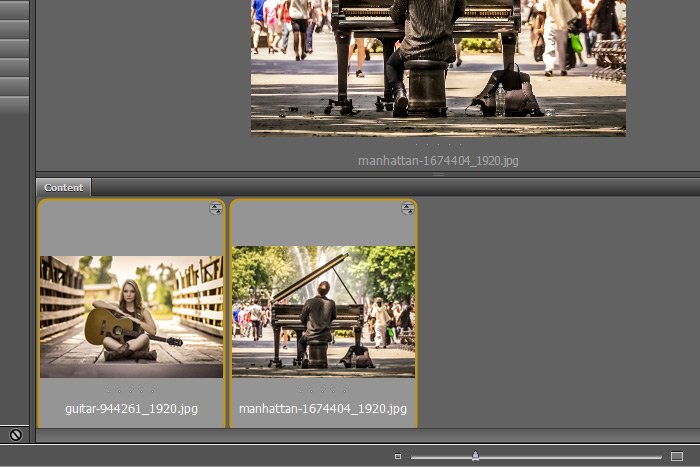
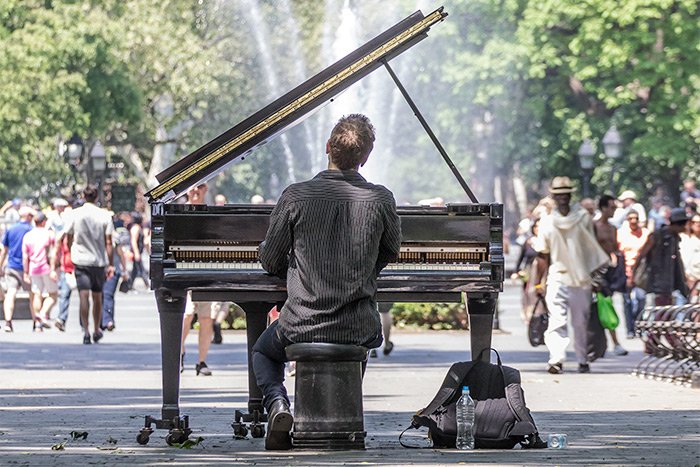
And finally, let’s take a look at the final piano player image. I like that one best.

What a great shot!
——
I hope I clearly explained a common workflow that’s used between Adobe Bridge and Camera Raw. If you have any questions regarding this post, please let me know in the comments section below. Thanks for reading and be sure to share this post (if you wouldn’t mind, of course)!
In today’s post, I’ll be taking some techniques I’ve shared with you in previous posts and I’ll be stringing them together. I’ll use both Adobe Bridge and Camera Raw to progress through an everyday workflow that includes an edit in Camera Raw, copying those edits in Bridge, making further edits in Camera Raw, creating a preset in the same application and then a review in Bridge. What I’ll cover below should take all of one and a half minutes in real time, if I wasn’t writing a post to go along with it. Of course, it’ll take me an hour and a half because of all the writing and screenshots I have to produce. Really though, once you get used to flipping back and forth between applications like this, it takes no time at all.
The Demo Photos
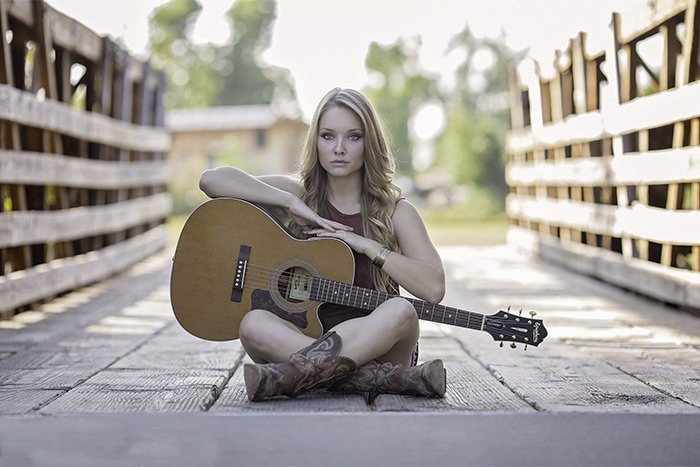
For this post, I’ll be using two musically themed photographs. I wanted to find some photos that were not only related in content, but also related in composition. If you’ll notice, both photos have very similar lighting and contrast, which will help things when I make my edits below. Here are the original photos.

Going From Bridge to Camera Raw
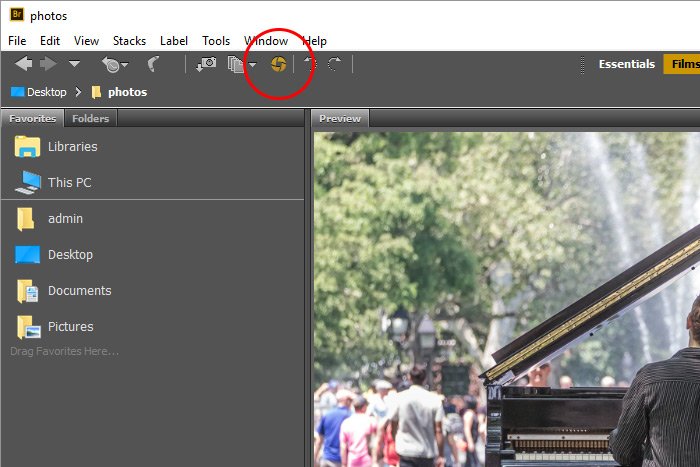
I placed both files in a folder on my Desktop. I’ll navigate to that folder now in Bridge, select one of the thumbnail photos by clicking on it and then I’ll open that one in Camera Raw. I’ll open the photo in Camera Raw by clicking on the Open in Camera Raw icon up towards the top of the application.
Once I do that, the photograph will be waiting for me in Camera Raw for editing.
Making My First Edit in Camera Raw
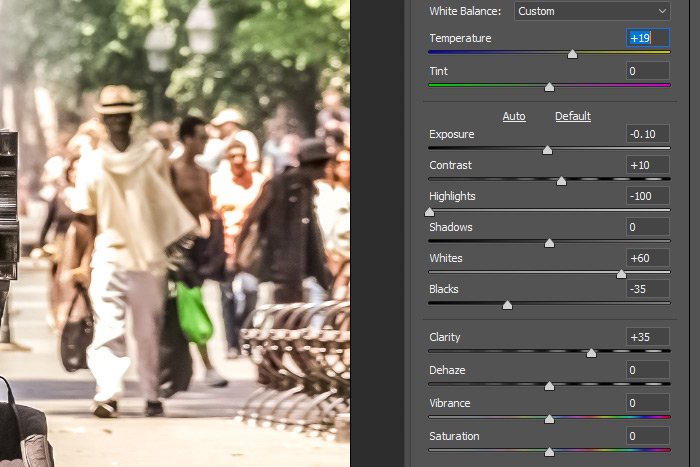
Okay, now that the photo has been launched in Camera Raw, I’m going to make a few quick edits to it. I think I’ll go ahead with my usual slider movements that will add some lighting, contrast and warmth. Most everything I adjust will be in the Basic panel.
When I’m finished making these edits, I’ll click the Done button down in the bottom right area of the application. This will bring me back to Bridge.
Copying & Pasting Camera Raw Settings
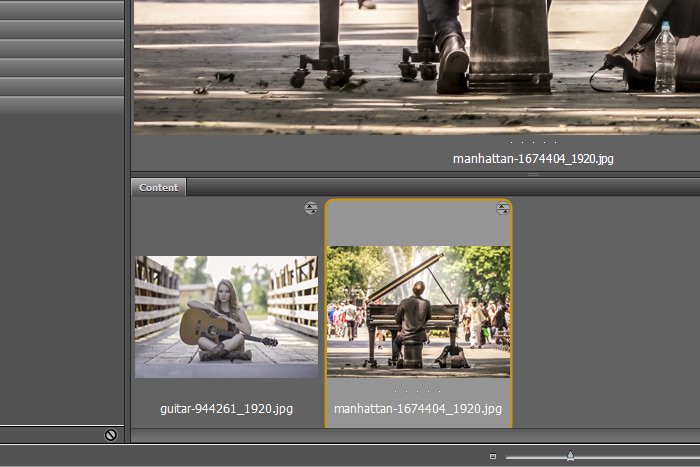
Now that I have the edits to one photo finished, I’d like to see how those same exact edits would look on the other photo. The fastest and easiest method for applying the first edits to the second photo is to select the first photo thumbnail in Bridge.
After that, I’ll head up to the Edit > Develop Settings > Copy Camera Raw Settings and click.

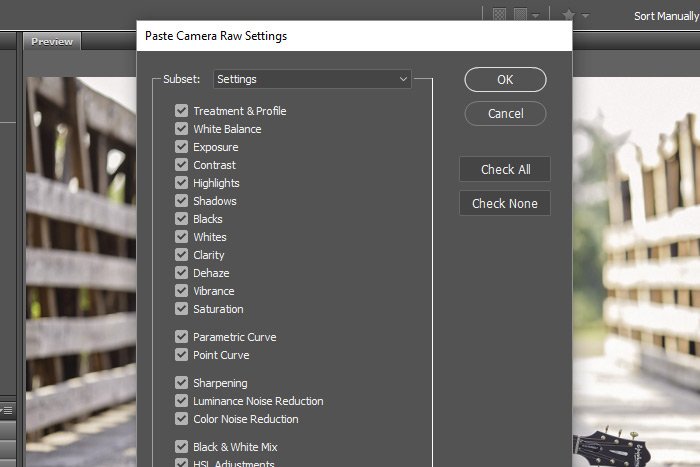
Then, once the settings have been copied, I’ll select the other thumbnail in Bridge and then I’ll go up to the Edit > Develop Settings > Paste Camera Raw Settings and click. Once I do that, the Paste Camera Raw Settings dialog box will appear.

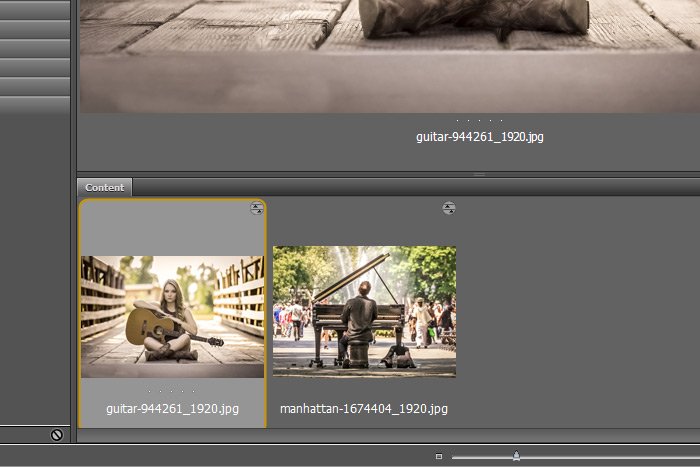
I’ll keep everything the same in that box and I’ll just click the OK button to apply the changes. After that, I’ll have both thumbnail images looking very similar. You can see they’ve both been updated by the obvious change in their warmth.

Creating a Camera Raw Preset
At this point, I’d like to bring both images into Camera Raw for one more tweak. Nothing major – just a finishing touch. To bring both images into Camera Raw simultaneously, I’ll hold down the Ctrl or the Shift key on my keyboard and I’ll click on each thumbnail in Bridge. Then, I’ll click on the Open in Camera Raw button up top again.Once I’m in Camera Raw, I’ll once again hold down the Ctrl or Shift key and click on the unselected image in the left vertical column. Doing this will make sure both images are selected and editable at the same time. Then, I’ll simply add some mid-tone contrast by pushing the Dehaze slider in the Basic panel to the right. By the way, the Dehaze slider has recently been moved from the Fx to the Basic panel in the most recent Camera Raw upgrade from Adobe.
Finally, I’ll move into the Presets tab and I’ll click the New Preset button down at the bottom of that panel.

Basically, I want to create a preset that I can use again in the future, since this was such an awesome edit.
When the New Preset dialog box opens, I’ll keep all the check boxes the same as they were and I’ll just name the preset Warm & Dehaze, since those are the most pronounced edits I made.

When I’m done with that, I’ll click the OK button and I’ll see the new preset waiting for me under the User Presets heading. This is another new feature from the most recent update.

Reviewing My Changes
I’d say I’m pretty much done. All I want to do now is to go back to Bridge to check on the thumbnails. They should be updated with their new looks there, so I just want to review them.
And finally, let’s take a look at the final piano player image. I like that one best.

What a great shot!
——
I hope I clearly explained a common workflow that’s used between Adobe Bridge and Camera Raw. If you have any questions regarding this post, please let me know in the comments section below. Thanks for reading and be sure to share this post (if you wouldn’t mind, of course)!
