Newman
Member
- Joined
- May 11, 2021
- Messages
- 106
- Reaction Score
- 0
- Points
- 23
- #1
I think I’ll go through a quick project today. I’m in the playful sort of mood. So many posts I write are about really technical aspects of photography, Photoshop and that sort of thing, so I think a slight deviation is in order. I’ve decided that today, I’ll alter the color of someone’s sweatshirt. Just for fun.
In today’s post, I’d like to use Adobe Camera Raw to change the color of a purple sweatshirt to blue. Doing something like this is a relatively simple task, but there are a few areas that need attention. The first step I’ll take below is going to be the most dramatic. The later ones will be much more subtle. They’re necessary though, so I’ll be sure to explain each and every one of them to you below.
Next up, I’d like to see what I can do in the HSL/Grayscale panel.
I’m going to first alter the color of the sweatshirt by using the Targeted Adjustment Tool and then I’ll slightly modify the saturation and the luminance of that color.
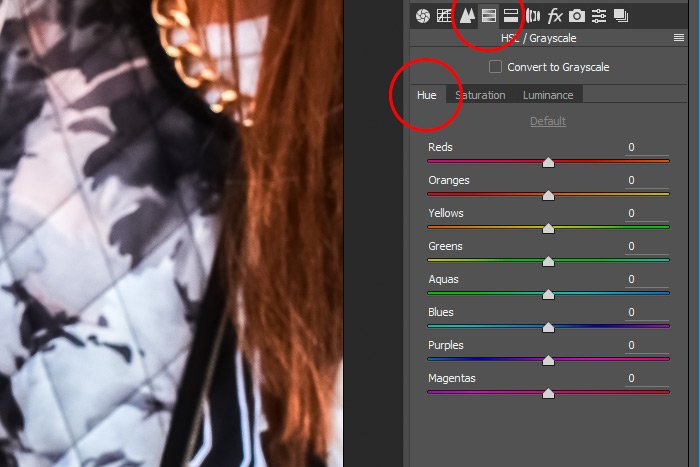
I’ll enter the Hue section of the HSL/Grayscale panel by clicking the appropriate tab in the left panel and then by clicking the Hue option once inside. I’ll outline both of these indicators in the screenshot below.
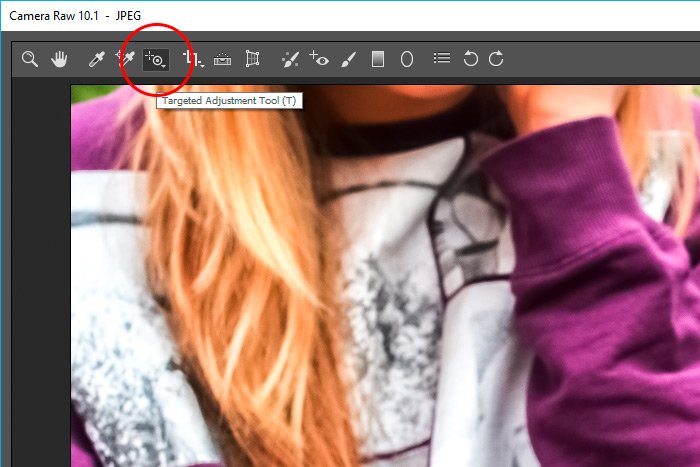
Next, I’ll click on the Targeted Adjustment Tool icon up in the top toolbar to activate this tool.
Finally, I’ll click the mouse pointer on an area of the sweatshirt and drag to the left and the right until I find a color I like.
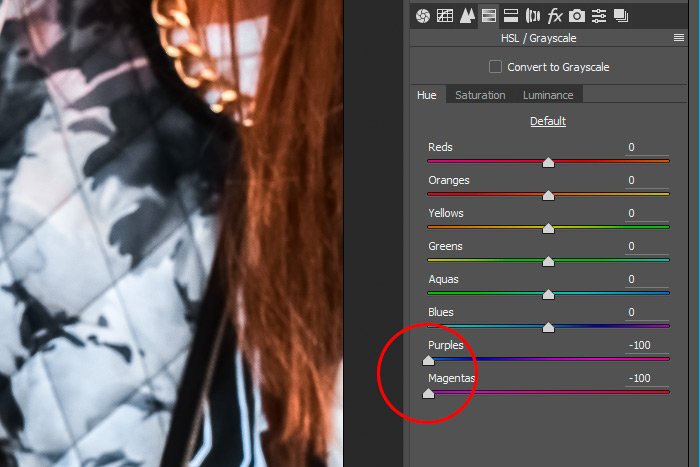
Since I wanted to go as blue as possible, I pulled all the red out of the shirt. I did this by pushing both the Purples and Magentas sliders all the way to the left.
Since those are the only two sliders that moved when I used the Targeted Adjustment Tool on this particular color, I know there are no other colors in the shirt. So, knowing this, I know not to touch any other slider in either of the two additional tabs. Other sliders will have no effect on this color.
Here’s the result so far.
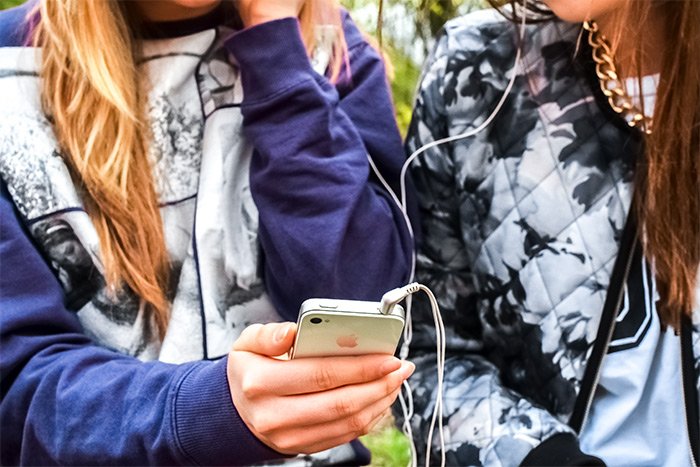
If I wanted to, I could have gone the other way and added some reds to the sweatshirt, making it much more pink. That would have taken the blues out of it.
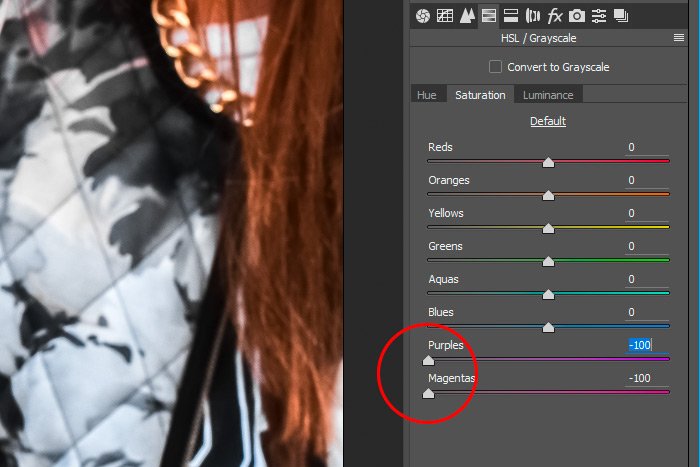
First, I think I’ll jump into the Saturation panel. I always like to see what things would look like if I sucked all the color right out of them, so in this case, I’ll push both the Purples and Magentas sliders to the left.
This is what it looks like after taking the color out of the shirt altogether.
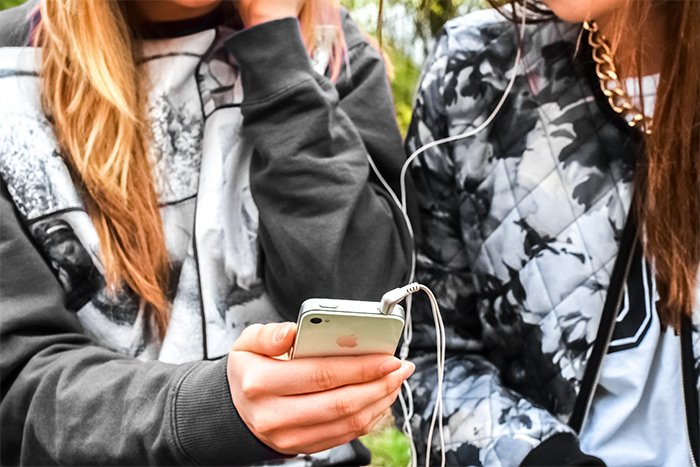
Since that’s not what I’m going for, I’ll push the sliders so they make sense. I’ll push the Purples slider to the right until the value reaches +20 and I’ll push the Magentas slider to the left until the value reaches -50.
Next, in the Luminance tab, I’ll push the Purples slider to the right until the value reaches +35 and I’ll leave the Magentas slider alone. This is the final result. I’d say that looks pretty good.
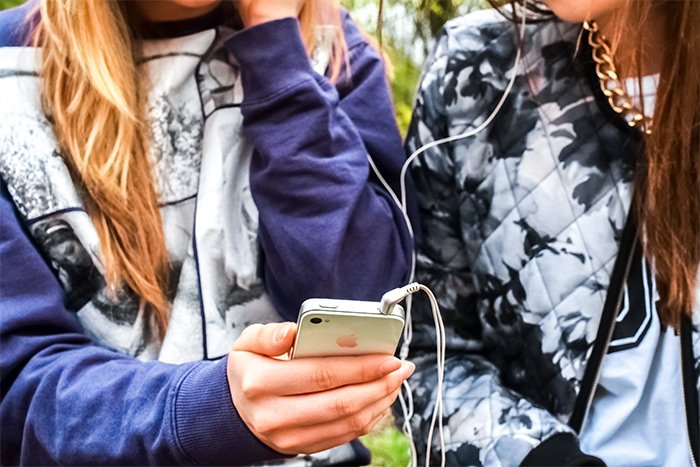
The reason I went ahead and edited inside the Saturation and Luminance tabs is because I needed a more natural look than what I got in the Hue panel alone. Since it appears that the sweatshirt had some age to it and that it had been washed and faded, I was able to duplicate that look by reducing part and increasing part of the saturation qualities. Also, lightening the shirt also gave it a highlighted and faded look. Here’s a before and after shot.
I hope I clearly explained one option for changing the color of an article of clothing when using Adobe Camera Raw. If you have any questions or concerns regarding this post, please let me know in the comment section below. Thanks for reading!
In today’s post, I’d like to use Adobe Camera Raw to change the color of a purple sweatshirt to blue. Doing something like this is a relatively simple task, but there are a few areas that need attention. The first step I’ll take below is going to be the most dramatic. The later ones will be much more subtle. They’re necessary though, so I’ll be sure to explain each and every one of them to you below.
Demo Photo
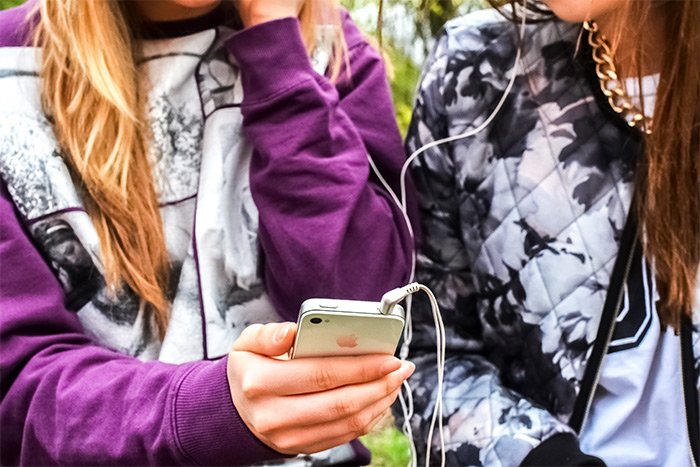
In the photo below, it appears that two girls are listening to something on an Apple device. The photo is fairly monochromatic, except for the colored sweatshirt the girl on the left is wearing. That’s the one I’d like to change. Everything else, I’d like to keep the same.
Making Adjustments in the Basic Panel
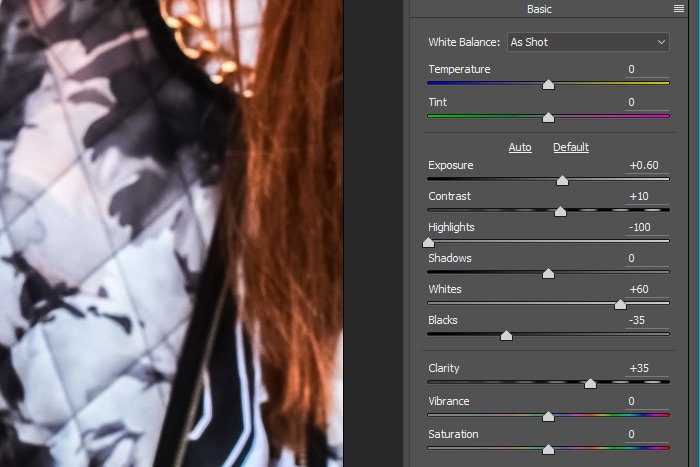
I’ve already gone ahead and opened the photo up in Adobe Camera Raw. I’ve also gone ahead and applied my usual adjustments to the photo, just to clean it up some. Actually, the photo above is the cleaned up version, just in case you were wondering.
Next up, I’d like to see what I can do in the HSL/Grayscale panel.
Changing Colors in the HSL/Grayscale Panel
Now, before I begin, I have to tell you that I’m going to use the quickest method available for changing the color of someone’s clothing in this post. I only have a few options when it comes to this because of the limitations of some specific settings in Camera Raw. If I wanted to really change the color of the sweatshirt to something very different, I’d have to bring the photo into Photoshop for some extra heavy lifting. Today though, I’m simply going from purple to blue.I’m going to first alter the color of the sweatshirt by using the Targeted Adjustment Tool and then I’ll slightly modify the saturation and the luminance of that color.
I’ll enter the Hue section of the HSL/Grayscale panel by clicking the appropriate tab in the left panel and then by clicking the Hue option once inside. I’ll outline both of these indicators in the screenshot below.

Next, I’ll click on the Targeted Adjustment Tool icon up in the top toolbar to activate this tool.

Finally, I’ll click the mouse pointer on an area of the sweatshirt and drag to the left and the right until I find a color I like.

Since I wanted to go as blue as possible, I pulled all the red out of the shirt. I did this by pushing both the Purples and Magentas sliders all the way to the left.
Since those are the only two sliders that moved when I used the Targeted Adjustment Tool on this particular color, I know there are no other colors in the shirt. So, knowing this, I know not to touch any other slider in either of the two additional tabs. Other sliders will have no effect on this color.
Here’s the result so far.

If I wanted to, I could have gone the other way and added some reds to the sweatshirt, making it much more pink. That would have taken the blues out of it.
Refining the Look
Now that I know which color sliders matter and which ones will have an effect, I can move over to the Saturation and Luminance tabs to put a few finishing touches on this shirt.First, I think I’ll jump into the Saturation panel. I always like to see what things would look like if I sucked all the color right out of them, so in this case, I’ll push both the Purples and Magentas sliders to the left.

This is what it looks like after taking the color out of the shirt altogether.

Since that’s not what I’m going for, I’ll push the sliders so they make sense. I’ll push the Purples slider to the right until the value reaches +20 and I’ll push the Magentas slider to the left until the value reaches -50.
Next, in the Luminance tab, I’ll push the Purples slider to the right until the value reaches +35 and I’ll leave the Magentas slider alone. This is the final result. I’d say that looks pretty good.

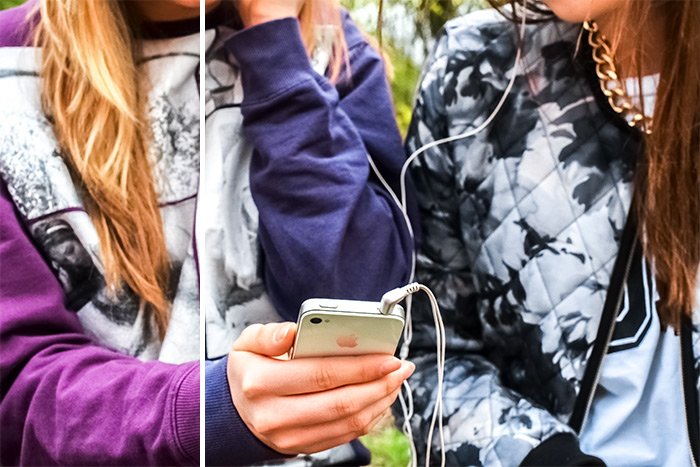
The reason I went ahead and edited inside the Saturation and Luminance tabs is because I needed a more natural look than what I got in the Hue panel alone. Since it appears that the sweatshirt had some age to it and that it had been washed and faded, I was able to duplicate that look by reducing part and increasing part of the saturation qualities. Also, lightening the shirt also gave it a highlighted and faded look. Here’s a before and after shot.

I hope I clearly explained one option for changing the color of an article of clothing when using Adobe Camera Raw. If you have any questions or concerns regarding this post, please let me know in the comment section below. Thanks for reading!
