CraigHardy
Member
- Joined
- May 11, 2021
- Messages
- 223
- Reaction Score
- 2
- Points
- 18
- #1
One of the tools I use almost every single time I edit a photograph in Adobe Camera Raw is the Clarity tool. It’s rather awesome and I’m not sure where I’d be without it. For those of you who don’t know what this tool is or what it does, Clarity adds midtone contrast to an image. It adds, well, clarity and makes almost any image look better by giving it the appearance of regular contrast, combined with sharpening. While it technically does neither of these things, it is an incredible all around tool that helps much more than it hurts. Dragging the Clarity slider to the left reduces its effect and dragging the slider to the right increases it.
When adjusting photos with the Clarity slider, you need to be mindful of its overall effect, which may need to be countered by other sliders. For instance, I know that when I’m increasing the clarity of an image, I need to adjust both the Whites and Blacks sliders a bit, just to keep things looking realistic.
Most of the time, I move the Clarity slider to the right, to make an image more vibrant and clear. There have been times, though, when I’ve pushed this slider to the left to soften certain elements of a photo. This is especially helpful when retouching skin tone in portraits, which almost never needs to be “hard.”
Since the Clarity tool oftentimes “lifts the fog,” I’ve often thought of it as a sister to another tool – a stronger one. This next tool is located in a panel to the right of the Basic panel, called Effects. The tool I’m referring to in the Effects panel is known as the Dehaze tool and this one does a magnificent job of really lifting the fog.
The Dehaze tool, simply put, is really cool. It’s not taken advantage of nearly as much as some other tools that are more easily accessible, but I think it should be in every editor’s toolbox. It’s a shame it’s hidden in such a deep panel, away from most of the action. In short, the Dehaze tool improves the look of an image by estimating how much light is lost by its own scattering through an atmosphere. Since our atmosphere has vapor in it, clarity all around us is lost. We mostly don’t notice this in everyday life, unless there is fog close to the ground or the weather outside is extremely humid. Camera Raw uses an algorithm to compensate for this naturally occurring water vapor and removes its effects in photography. The results are stunning and are quite accurate.
In today’s post, I’m going to briefly demonstrate the effects of these two sliders inside of Adobe Camera Raw. I’ll use two photographs to show you how pushing each of these sliders to the right can have a positive effect on the images they contain. While I won’t be “teaching” you anything, per se, I think you’ll definitely get something out of this post and may even begin incorporating the Dehaze slider in your everyday workflow.
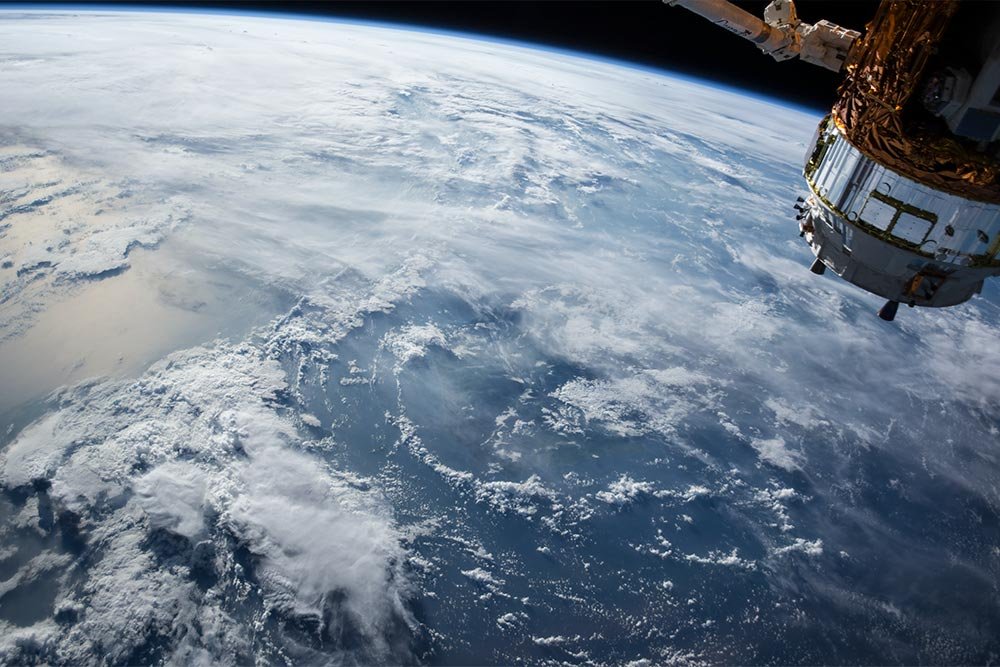
Here is the first photo. It’s obviously from space and was taken by either a craft of some kind of a satellite.
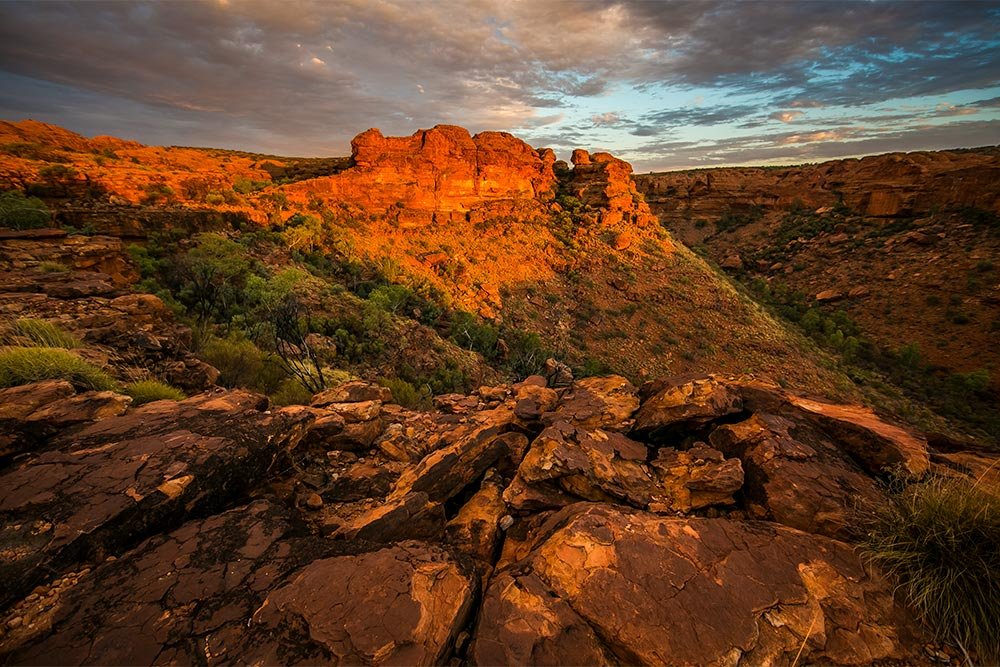
And this is the second photo. It’s of a desert. If you look closely, you can see a bit of haze that needs to be removed.
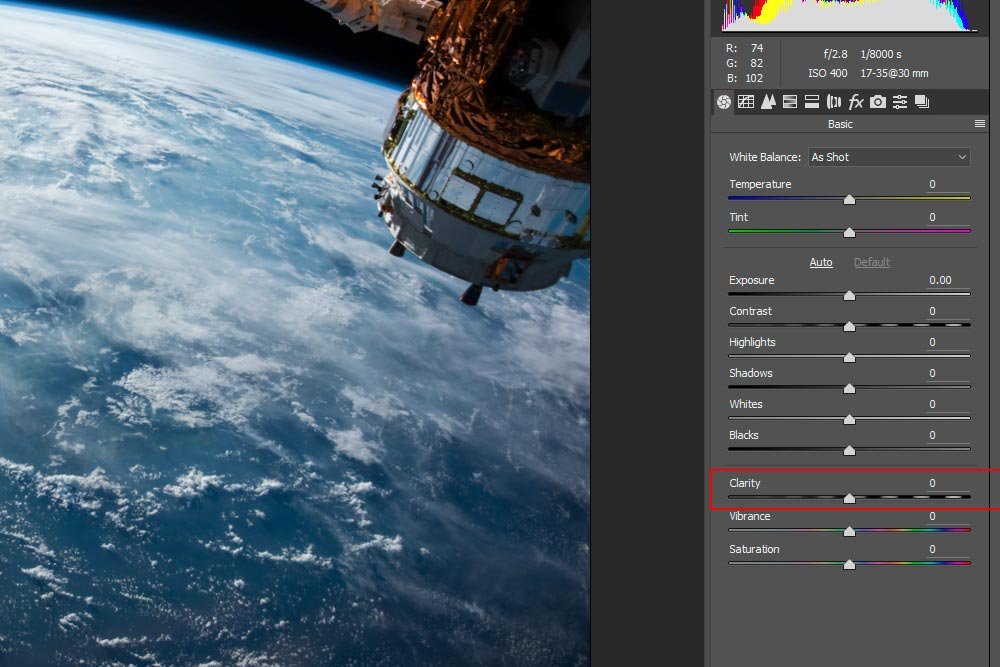
The first thing I’d like to do is to show you were the Clarity slider is located in Camera Raw. It’s at the bottom of the Basic panel. Take a look at the screenshot below. I outlined it in red.
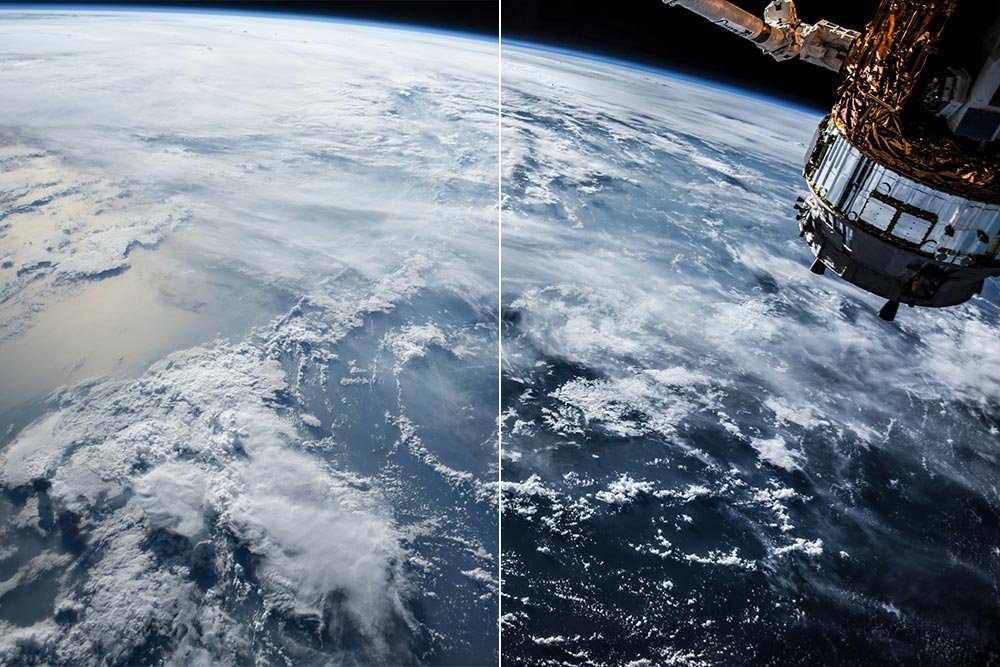
Next, I’m going to merely show you two photos. They will be before and after views of the images I displayed above, with the left half in its original state and the right half at 100% clarity. Here is the first one.
And here is the second photo.
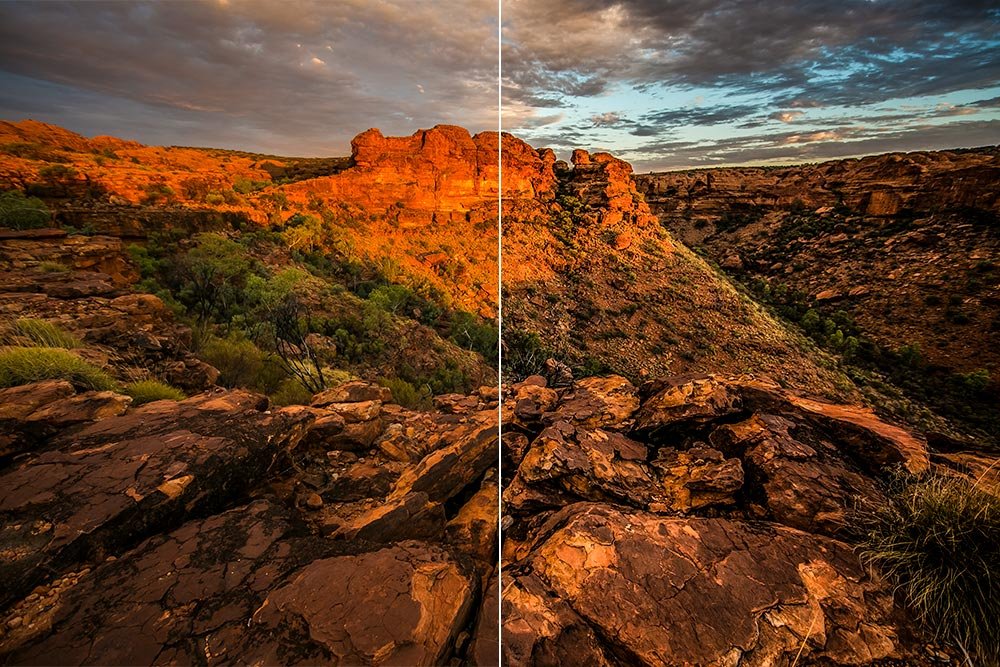
As you can see, the right side looks better in both of the photos. While they look more clear and a bit sharper, I’m not sure much of the haze has been reduced. Let’s move on to the next section.
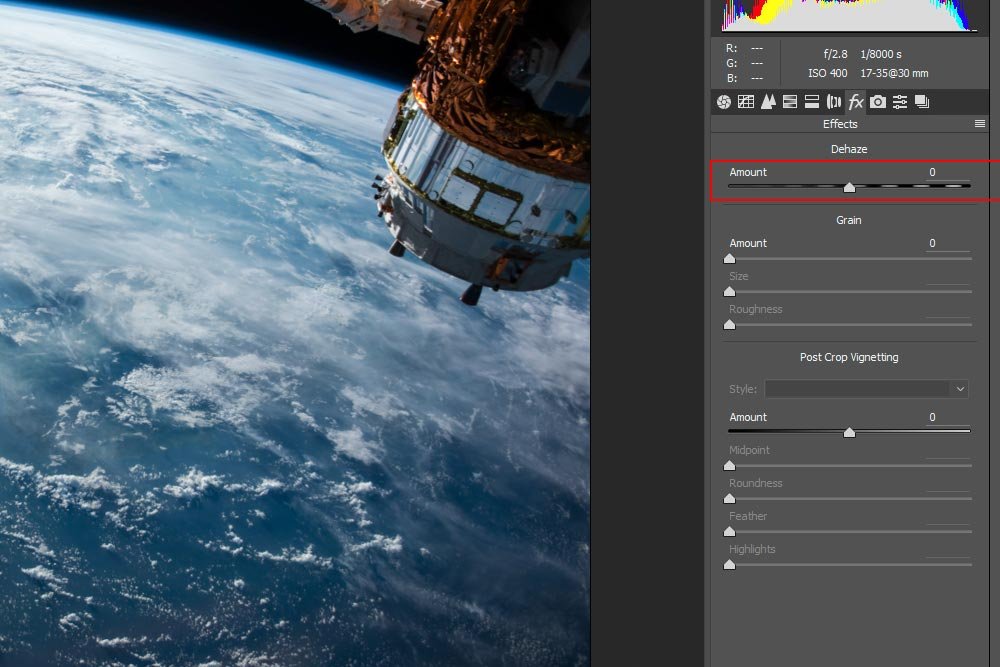
Again, I’ll display before and after shots. In the images below, the left side is the original and the right side is with Dehaze at 100%.
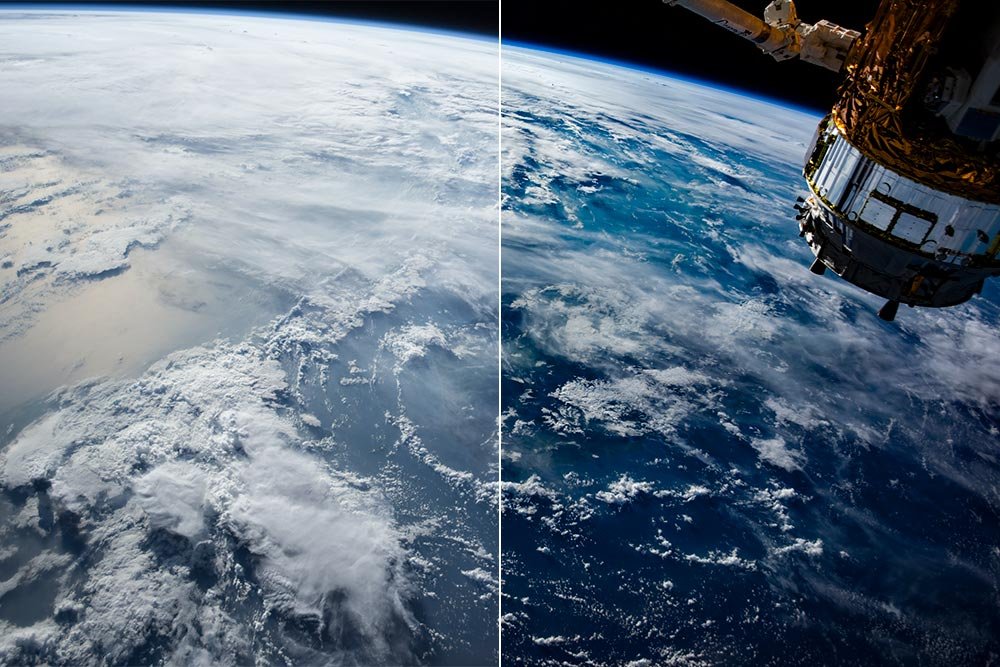
Here is the desert shot with Dehaze at 100%
In these images, while there does appear to be some additional color, they don’t look as clear or as sharp. Let’s move onto the final section.
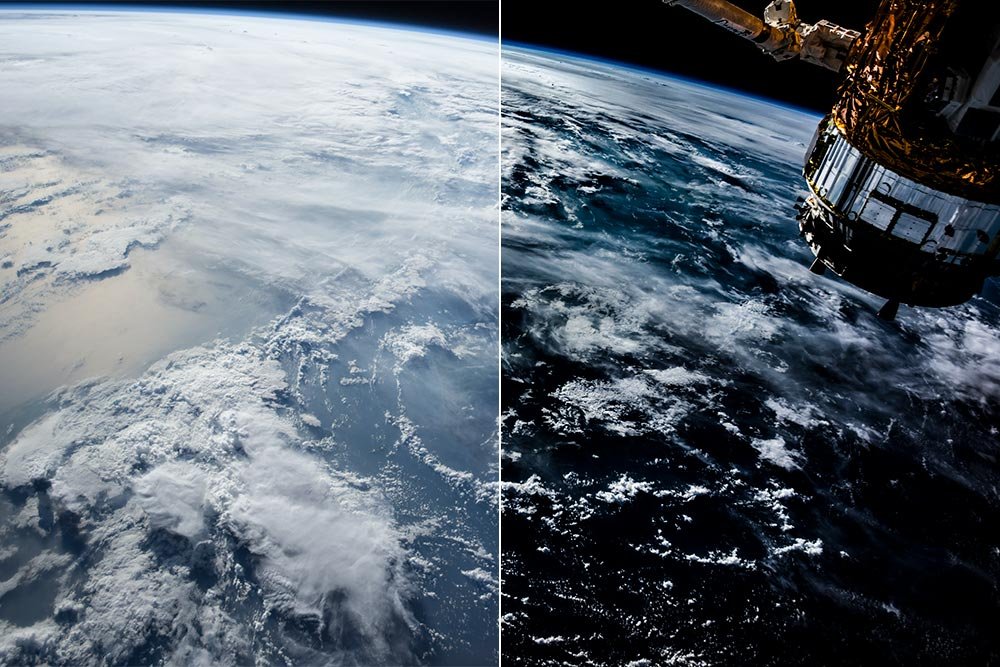
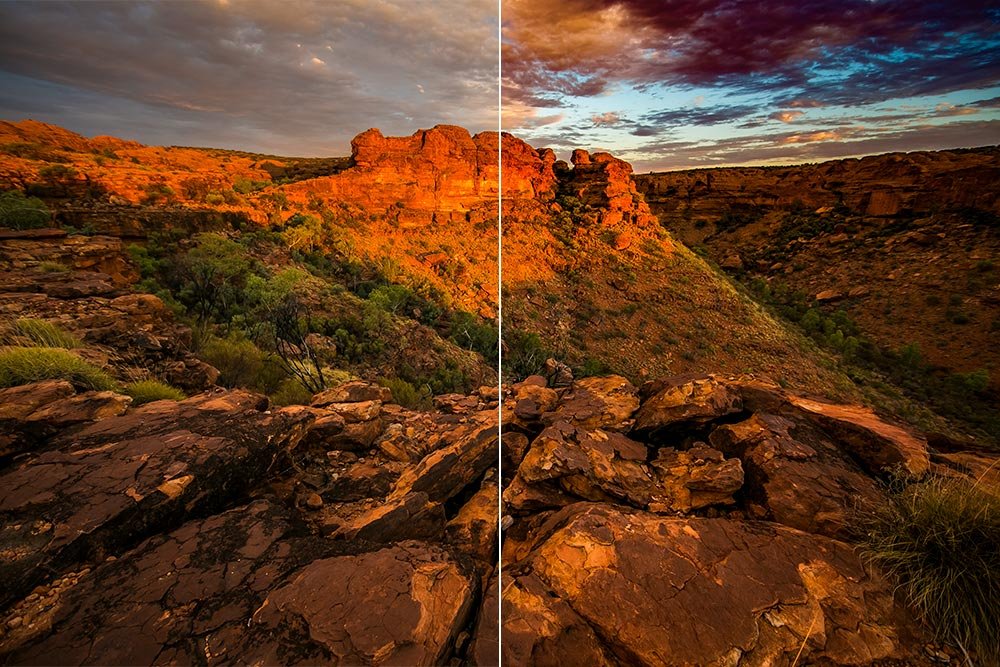
Now, let’s look at the desert shot with both Clarity and Dehaze at 100%.
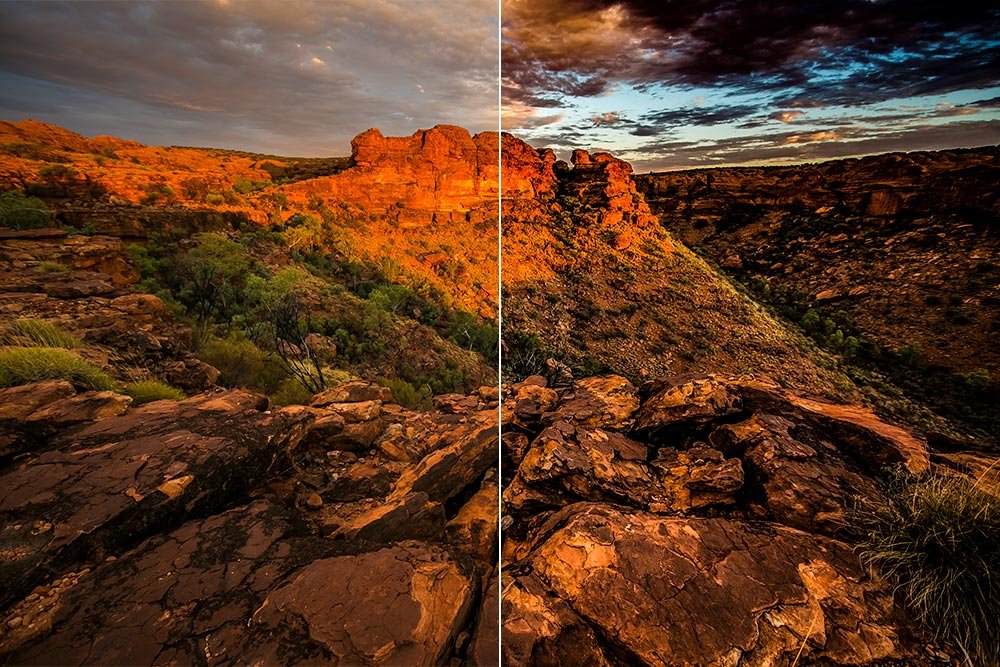
Wow, that’s quite the difference. Even though the effects are quite strong, these examples give you a sense of what you can accomplish with just these two sliders. Again, use them in moderation, but if you want additional drama in your photos, look no further than to start off with the Clarity and Dehaze sliders in Adobe Camera Raw.
——
I hope I clearly explained what the results of using the Clarity and Dehaze sliders in Camera Raw can look like. If you have any questions or concerns regarding this post, please leave them in the comment section below. Thanks for reading!
When adjusting photos with the Clarity slider, you need to be mindful of its overall effect, which may need to be countered by other sliders. For instance, I know that when I’m increasing the clarity of an image, I need to adjust both the Whites and Blacks sliders a bit, just to keep things looking realistic.
Most of the time, I move the Clarity slider to the right, to make an image more vibrant and clear. There have been times, though, when I’ve pushed this slider to the left to soften certain elements of a photo. This is especially helpful when retouching skin tone in portraits, which almost never needs to be “hard.”
Since the Clarity tool oftentimes “lifts the fog,” I’ve often thought of it as a sister to another tool – a stronger one. This next tool is located in a panel to the right of the Basic panel, called Effects. The tool I’m referring to in the Effects panel is known as the Dehaze tool and this one does a magnificent job of really lifting the fog.
The Dehaze tool, simply put, is really cool. It’s not taken advantage of nearly as much as some other tools that are more easily accessible, but I think it should be in every editor’s toolbox. It’s a shame it’s hidden in such a deep panel, away from most of the action. In short, the Dehaze tool improves the look of an image by estimating how much light is lost by its own scattering through an atmosphere. Since our atmosphere has vapor in it, clarity all around us is lost. We mostly don’t notice this in everyday life, unless there is fog close to the ground or the weather outside is extremely humid. Camera Raw uses an algorithm to compensate for this naturally occurring water vapor and removes its effects in photography. The results are stunning and are quite accurate.
In today’s post, I’m going to briefly demonstrate the effects of these two sliders inside of Adobe Camera Raw. I’ll use two photographs to show you how pushing each of these sliders to the right can have a positive effect on the images they contain. While I won’t be “teaching” you anything, per se, I think you’ll definitely get something out of this post and may even begin incorporating the Dehaze slider in your everyday workflow.
Original Photos
Both of the photos I chose for this post contain haze. The first shot is from space and the second is in a desert. Since both of the photographs display part of the earth’s atmosphere, I think they are excellent candidates to manipulate.Here is the first photo. It’s obviously from space and was taken by either a craft of some kind of a satellite.

And this is the second photo. It’s of a desert. If you look closely, you can see a bit of haze that needs to be removed.

The Effects of Clarity
In this post, I’m going to be pushing both the Clarity and Dehaze sliders all the way to the right. I’m not going to mess around by dabbling in between. Throughout their histories, they have been refined to such a degree that even if they are pushed to the max, they still don’t look all that much overdone. You’ll see what I’m talking about below.The first thing I’d like to do is to show you were the Clarity slider is located in Camera Raw. It’s at the bottom of the Basic panel. Take a look at the screenshot below. I outlined it in red.

Next, I’m going to merely show you two photos. They will be before and after views of the images I displayed above, with the left half in its original state and the right half at 100% clarity. Here is the first one.

And here is the second photo.

As you can see, the right side looks better in both of the photos. While they look more clear and a bit sharper, I’m not sure much of the haze has been reduced. Let’s move on to the next section.
The Effects of Dehaze
For this section, I’d like to show you where the Dehaze slider is, just as I did for the Clarity slider in the previous section. In the screenshot below, notice the new tab that this slider is contained in.
Again, I’ll display before and after shots. In the images below, the left side is the original and the right side is with Dehaze at 100%.

Here is the desert shot with Dehaze at 100%

In these images, while there does appear to be some additional color, they don’t look as clear or as sharp. Let’s move onto the final section.
The Effects of Both Clarity & Dehaze
If I were to edit a real photo to use in a project, I’d likely use both of the effects I’m referring to in this post, but with moderation. But, since I’m trying to make a point here, I’ll push both the Clarity and Dehaze sliders to the right all the way. Let’s see what the earth photo looks like.
Now, let’s look at the desert shot with both Clarity and Dehaze at 100%.

Wow, that’s quite the difference. Even though the effects are quite strong, these examples give you a sense of what you can accomplish with just these two sliders. Again, use them in moderation, but if you want additional drama in your photos, look no further than to start off with the Clarity and Dehaze sliders in Adobe Camera Raw.
——
I hope I clearly explained what the results of using the Clarity and Dehaze sliders in Camera Raw can look like. If you have any questions or concerns regarding this post, please leave them in the comment section below. Thanks for reading!
