JodyBuchanan
Member
- Joined
- May 10, 2021
- Messages
- 138
- Reaction Score
- 0
- Points
- 21
- #1
I’m not sure I can remember how many times I’ve dug a hole so deep during my editing in Adobe Lightroom that I couldn’t find my way out. I mean, there have been times where I pushed far too many sliders. After I do this, I usually let an image sit for a while as I go do something else. When I come back, I say “Wow, I went too far.” and reset everything to the way the image was when I first opened it. Sometimes, this is the only way to go. Attempting to find each and every setting I touched is not an enjoyable chore.
Even though I’ve reset everything quite a bit, I reset individual sliders far more often. When I push a slider and don’t like the effect, I don’t like to drag it back to zero. It’s a challenge to actually find zero again, so I use a better method.
In today’s post, I’m going to demonstrate three methods for resetting edits that have been made in Adobe Lightroom. I’ll start off easy. I’ll talk about individual sliders. Then, I’ll move on to groups and then finally, I’ll discuss how you’d go about resetting everything to the photo’s original state.
The first thing I’ll do is make some edits. I’ll push around a few sliders so the image looks pretty good.
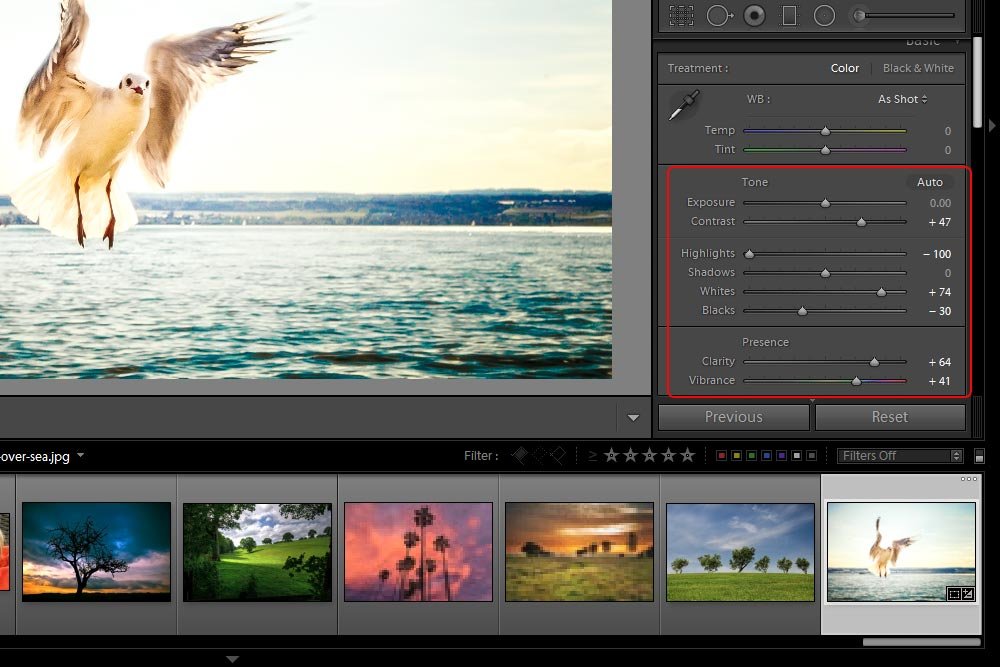
If you look at the Tone and Presence groups in the Basic panel of the screenshot above, you’ll see my edits. I’ve pushed a variety of sliders here and there. I also made a few further edits in different groups, but those aren’t visible in the screenshot.
Now, let’s say that I don’t like where the Whites slider is sitting. I feel that I might want to ignore that slider in its entirety. Instead of grabbing it and trying to push it back to the zero position, I can simply double-click it and it will automatically find its original state.
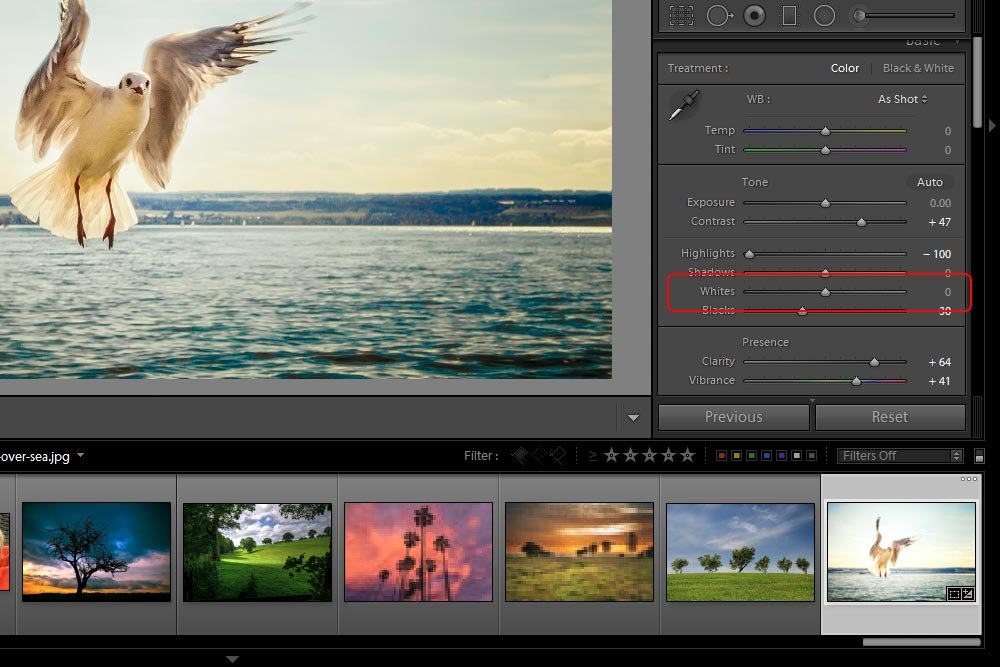
This is very simple, so it’s the method most editors use.
If you look at the screenshot below, you’ll see that I made a mess of the Noise Reduction panel. I pushed every slider in a way that I’m not even sure where I am.
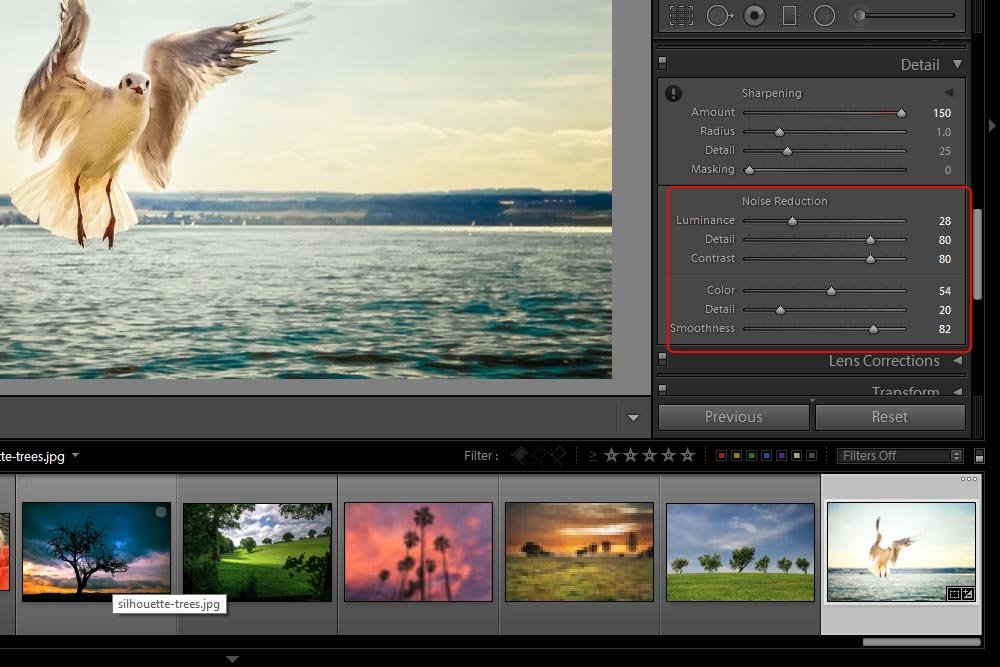
And in all honesty, I can’t remember where each slider’s initial position was. Sometimes they sit all the way to the left and sometimes they sit somewhere else. I’m going to go ahead and reset the group so I can start over.
To reset a group of sliders, press the Alt (Windows) or Option (Mac) key on your keyboard and click the group name. When you press the key on the keyboard, the name will change from just the name by itself to “Reset Whatever the Name Is.” In my case, Noise Reduction will change to Reset Noise Reduction after I hold down the Alt key. Take a look.
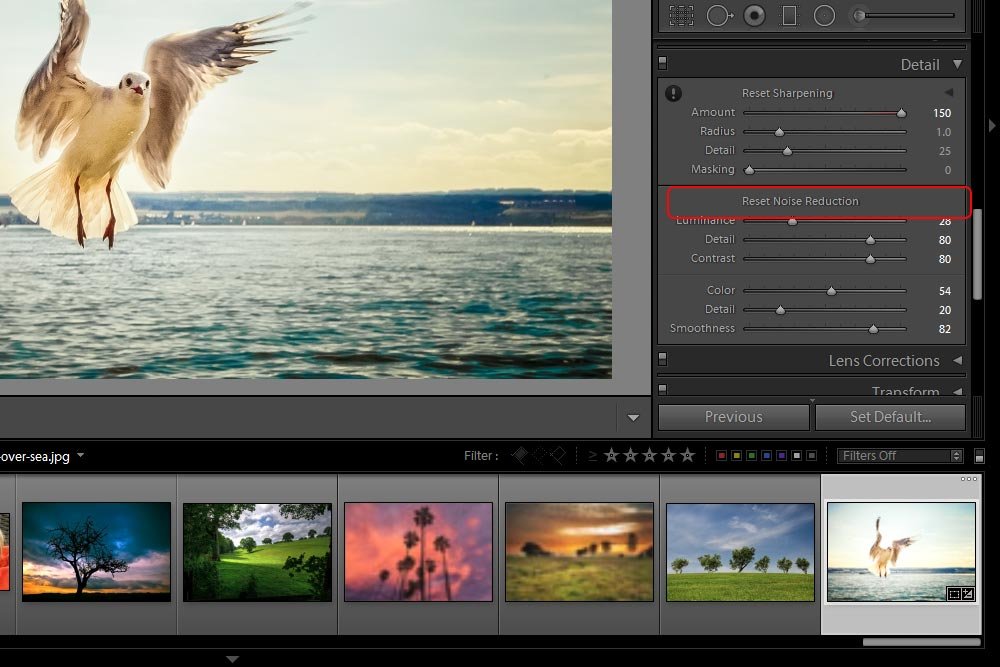
Once the Reset appears, all you have to do is mouse-click on the name and all the sliders will fall back to their original positions.
To reset all edits you’ve made to an image, you can use two methods. The first one is to simply click on the Reset button that’s located at the bottom of the right panel.
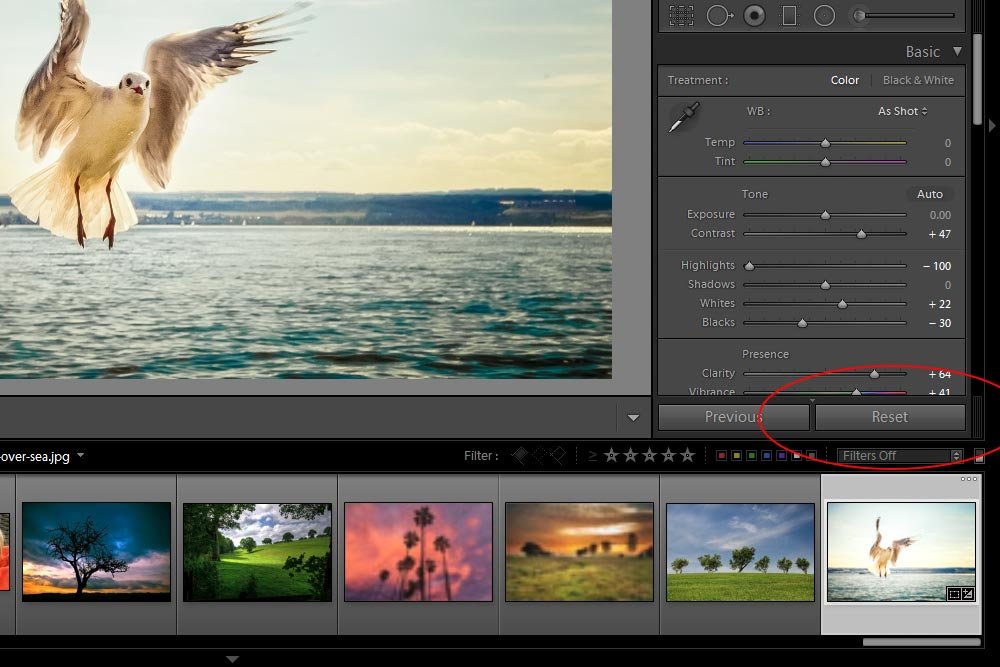
This will reset all sliders in all groups in all panels.
If you’re not into buttons and prefer keyboard shortcuts instead, you can press Ctrl+Shift+R (Windows) or Command+Shift+R (Mac) on your keyboard. This will accomplish the same thing. If you’re interested, the same keyboard shortcut works to accomplish the same thing in Camera Raw.
I want to mention one final thought before ending this post. There may come a time when you press the Reset button by accident or you change your mind after pressing it. To undo the reset, just press Ctrl+Z (Windows) or Command+Z (Mac) on your keyboard. This will undo the last thing you did.
There you have it. I hope I thoroughly explained the various methods for how to reset edits in Adobe Lightroom. If you have any thoughts about this post, please leave them in the comment section below. Thanks for reading!
Even though I’ve reset everything quite a bit, I reset individual sliders far more often. When I push a slider and don’t like the effect, I don’t like to drag it back to zero. It’s a challenge to actually find zero again, so I use a better method.
In today’s post, I’m going to demonstrate three methods for resetting edits that have been made in Adobe Lightroom. I’ll start off easy. I’ll talk about individual sliders. Then, I’ll move on to groups and then finally, I’ll discuss how you’d go about resetting everything to the photo’s original state.
How to Reset Just One Slider
For this post, I’ll be using a demo image. I’ll also be inside the Develop module, so if you’re following along, you should head in there as well.The first thing I’ll do is make some edits. I’ll push around a few sliders so the image looks pretty good.

If you look at the Tone and Presence groups in the Basic panel of the screenshot above, you’ll see my edits. I’ve pushed a variety of sliders here and there. I also made a few further edits in different groups, but those aren’t visible in the screenshot.
Now, let’s say that I don’t like where the Whites slider is sitting. I feel that I might want to ignore that slider in its entirety. Instead of grabbing it and trying to push it back to the zero position, I can simply double-click it and it will automatically find its original state.

This is very simple, so it’s the method most editors use.
How to Reset a Group of Sliders
Sometimes, editors make edits within a group. Groups are simply subsets of a panel. In my case, I made edits in the Tone, Presence, Sharpening and Noise Reduction groups within the Basic and Detail panels.If you look at the screenshot below, you’ll see that I made a mess of the Noise Reduction panel. I pushed every slider in a way that I’m not even sure where I am.

And in all honesty, I can’t remember where each slider’s initial position was. Sometimes they sit all the way to the left and sometimes they sit somewhere else. I’m going to go ahead and reset the group so I can start over.
To reset a group of sliders, press the Alt (Windows) or Option (Mac) key on your keyboard and click the group name. When you press the key on the keyboard, the name will change from just the name by itself to “Reset Whatever the Name Is.” In my case, Noise Reduction will change to Reset Noise Reduction after I hold down the Alt key. Take a look.

Once the Reset appears, all you have to do is mouse-click on the name and all the sliders will fall back to their original positions.
How to Reset Everything
As I mentioned at the beginning of this post, there are times when you want to start over. Maybe someone else sat down to edit the image or perhaps you don’t like where things are heading. Whatever the reason, you can easily bring any photo back to its original state.To reset all edits you’ve made to an image, you can use two methods. The first one is to simply click on the Reset button that’s located at the bottom of the right panel.

This will reset all sliders in all groups in all panels.
If you’re not into buttons and prefer keyboard shortcuts instead, you can press Ctrl+Shift+R (Windows) or Command+Shift+R (Mac) on your keyboard. This will accomplish the same thing. If you’re interested, the same keyboard shortcut works to accomplish the same thing in Camera Raw.
I want to mention one final thought before ending this post. There may come a time when you press the Reset button by accident or you change your mind after pressing it. To undo the reset, just press Ctrl+Z (Windows) or Command+Z (Mac) on your keyboard. This will undo the last thing you did.
There you have it. I hope I thoroughly explained the various methods for how to reset edits in Adobe Lightroom. If you have any thoughts about this post, please leave them in the comment section below. Thanks for reading!
