KodyWallice
Member
- Joined
- May 7, 2021
- Messages
- 123
- Reaction Score
- 1
- Points
- 23
- #1

If you frequently work with Adobe Photoshop, you already know that selecting objects is almost an every day occurrence. Besides cropping and adjusting colors, it’s a really, really popular thing to do. The thing is, when selecting areas of a photo or a graphic, it’s critical to think about and choose the most efficient tool for the job. You can oftentimes get whatever it is you want to do finished with a good number of selection tools, but you have to ask yourself – “How long is this going to take?” And – “Am I going to be shaking like a lunatic when I’m finished?” Let’s just say that when it comes to selections, there’s usually a pretty good tool already built into Photoshop that will help you out immensely. All you need is the wisdom to choose the correct one.
I’ve already written about selection tools quite a bit. If you’re interested, you can read my posts on the topic here:
Changing Colors with Color Range Selection in Adobe Photoshop
How to Move a Selection While Editing in Adobe Photoshop
Growing, Shrinking & Transforming a Selection in Adobe Photoshop
How to Invert a Selection in Adobe Photoshop
Using Selection Tools to Enhance Photos in Adobe Photoshop
Making Selections in Adobe Photoshop
These are the posts I have as of this moment. If you’re reading this after April 7, 2016, there’s most likely many more. To find them, simply search Selection in the site search above.
In today’s post, I’m going to run through a quick project. I’m going to use the Polygonal Lasso Tool to select a rectangle in the photo you see above. More specifically, I’m going to select the screen of the smart phone. After that, I’ll add the selection to its own layer and add some effects. My goal is to demonstrate why the Polygonal Lasso Tool is the proper selection tool to use in a case like this. I’d also like to offer a tip or two that will help out when dealing with selection areas that have rounded corners, like in the photo I’ll be using. I’ll zoom in quite a bit, because the tip I have is clever and I want you to see exactly what I’m talking about.
Original Photo
This is the original photo that I’ll be using for this project. At first glance, I thought it looked pretty good. Then, after thinking for a while, I decided that I wanted the screen of the smartphone to pop out more. To accomplish this, I think the screen needs to come to the front and everything else needs to go to the back. I’ll show you what I’m talking about below.
Setting Up Guides
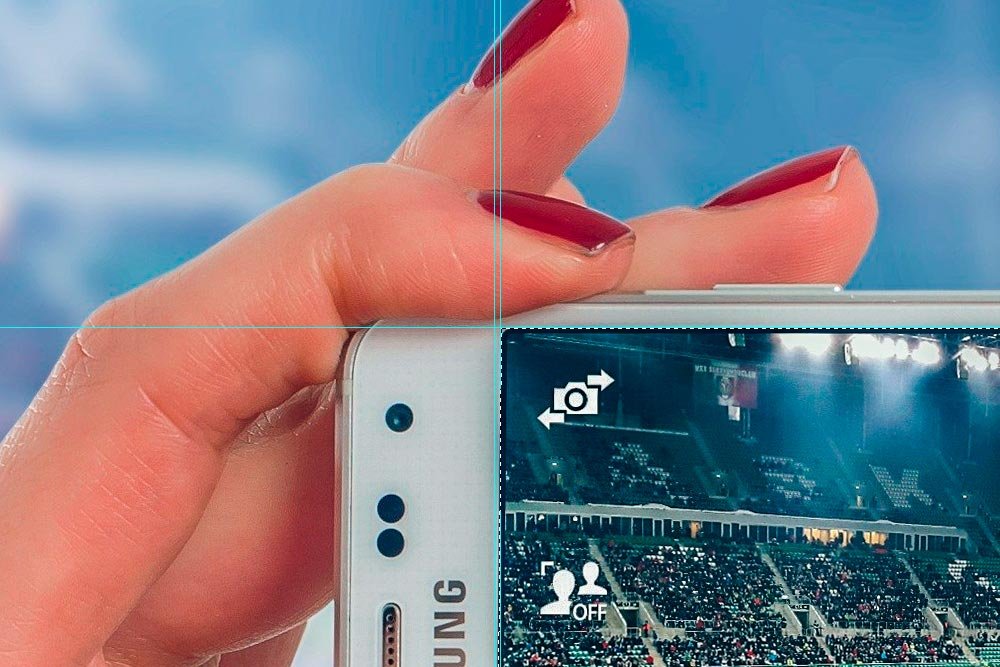
Since the screen area has tightly rounded corners and since I want my selection to be as accurate as possible, I’m going to set up a few guides. If you aren’t familiar with how to do this, please see my post that covers it:Tips For Tabs & Guides in Adobe Photoshop
I’m going to place the guides on the outer edge of the corners. The reason I want to do this is because when it comes time to use the Polygonal Lasso Tool, I’ll know exactly where to place the selection anchor – right on the corners that the guides create. If I don’t set the guides, I would have to guess where to place the anchors. I really try to avoid guessing when I can.
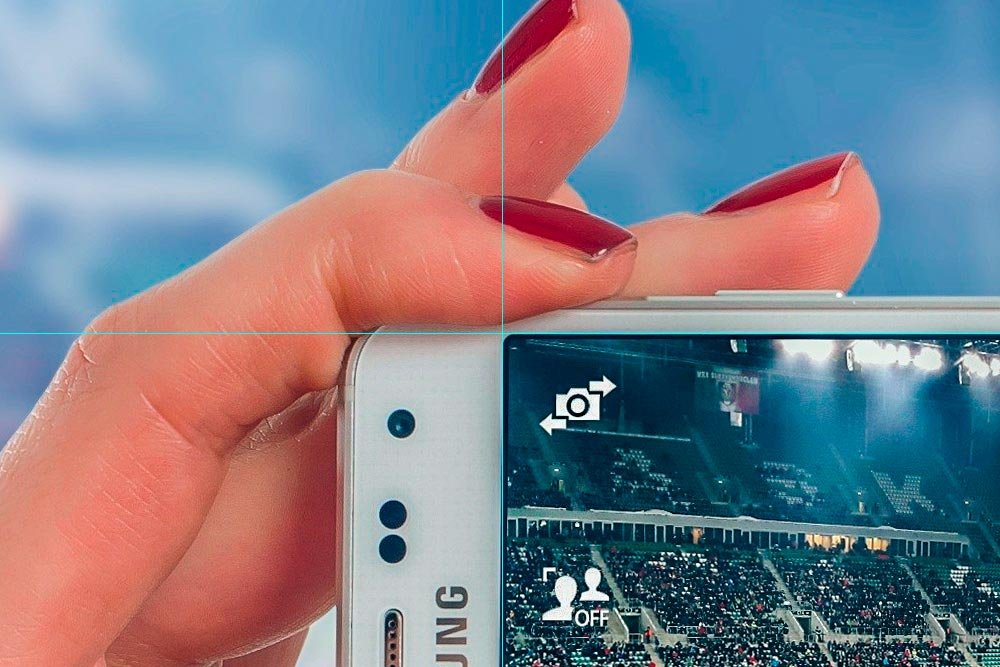
Since the screen isn’t exactly vertical and horizontal, I’m going to continue setting more guides. There will be quite a few of them.
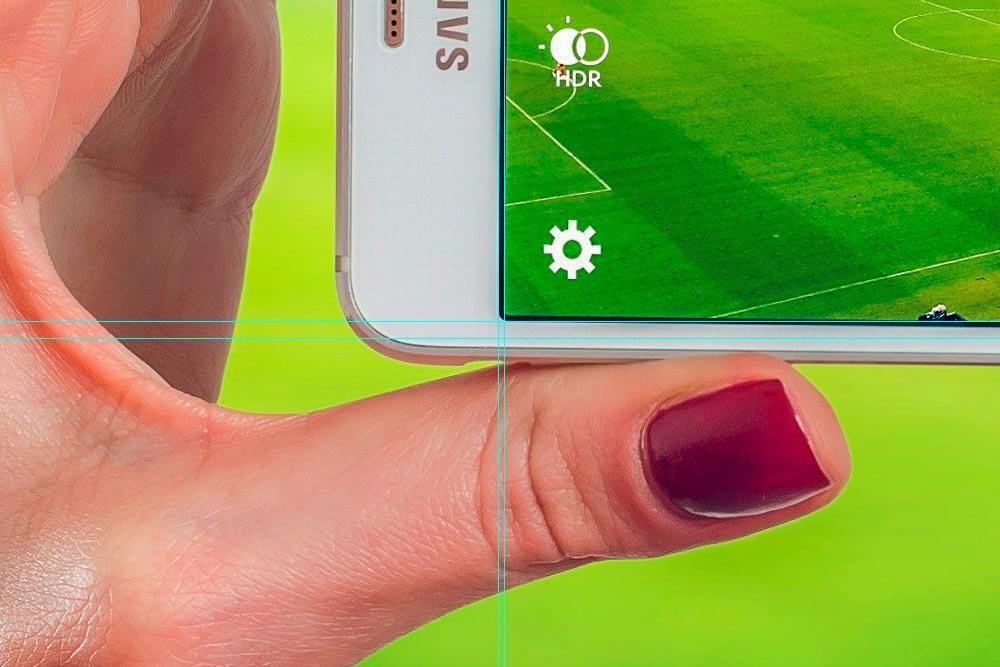
Do you see what’s happening here? I’m placing guides as necessary at each outer corner of the smartphone screen.
Using the Polygonal Lasso Tool
The Polygonal Lasso Tool is perfect for this project because it can easily select shapes with straight edges. Here’s what Adobe has to say about it:Photoshop Help / Select with the Lasso Tools
Basically, all I need to do is activate the tool by clicking its tool icon in the left toolbar…
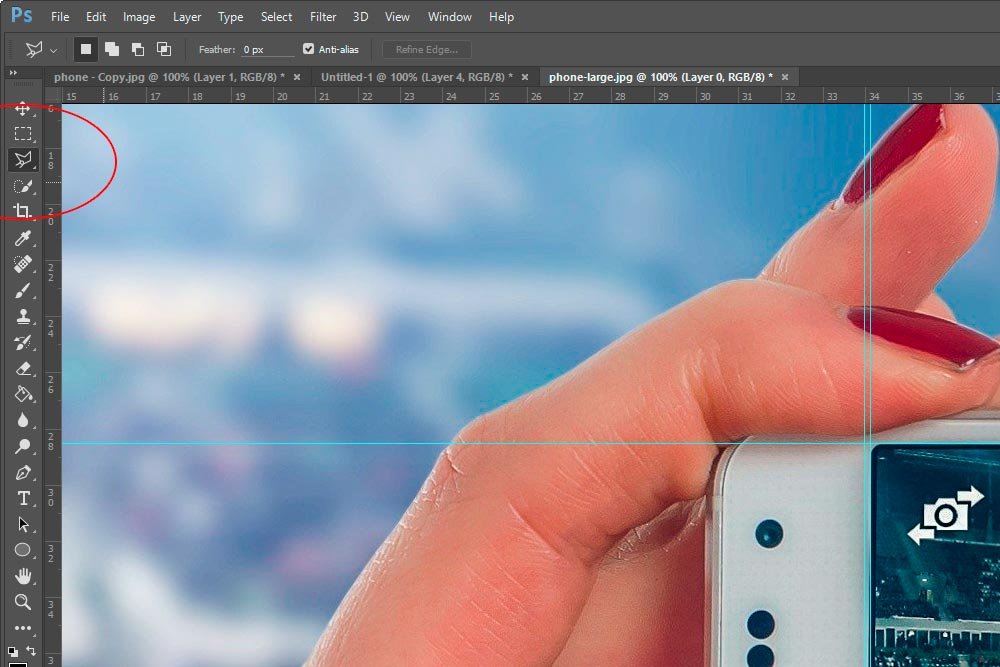
…and then click each corner of the guides that I set up around the screen. The way this tool works it this; the first click on my photo that I make creates a selection anchor. When I let go of my mouse, I can see that I’m now dragging around one of the edges of my future selection. Take a look at that edge in the screenshot below.
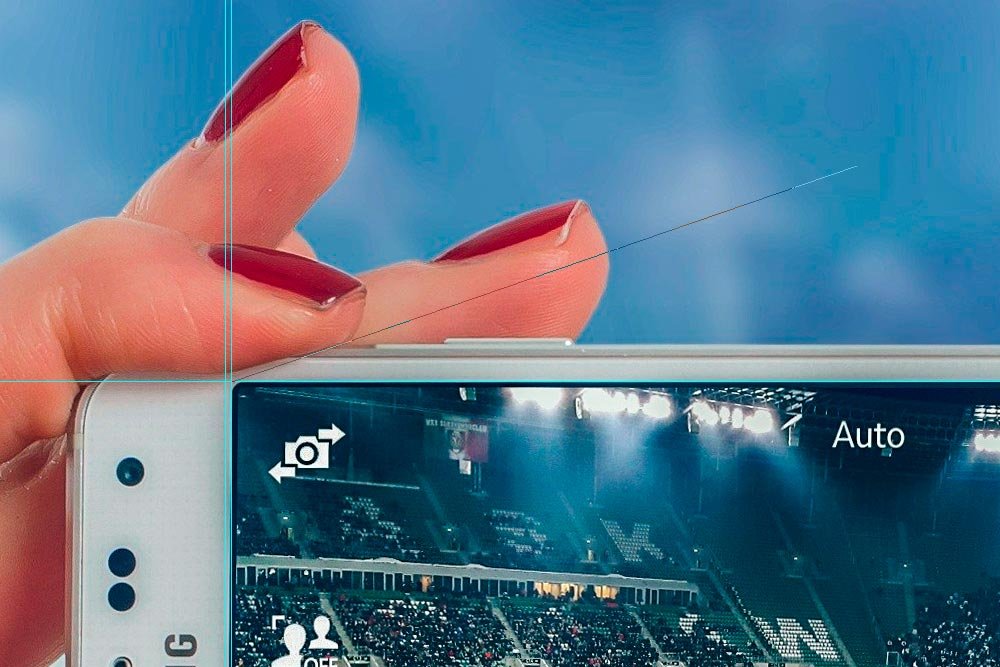
The next time I click on the photo, the tool will create another anchor. This means that the first edge will be fixed to the image. From there, I’ll continue clicking and laying anchor points around the screen until I’ve made it back to the beginning. When I do make it to the first anchor point I set and hover over that area with my mouse, I notice a small O appear. This means the loop is closed and that, if I click, the selection will be made. That’s what I did below and the smartphone screen is now accurately selected. You can see the marching ants.
Copying Selection to its Own Layer
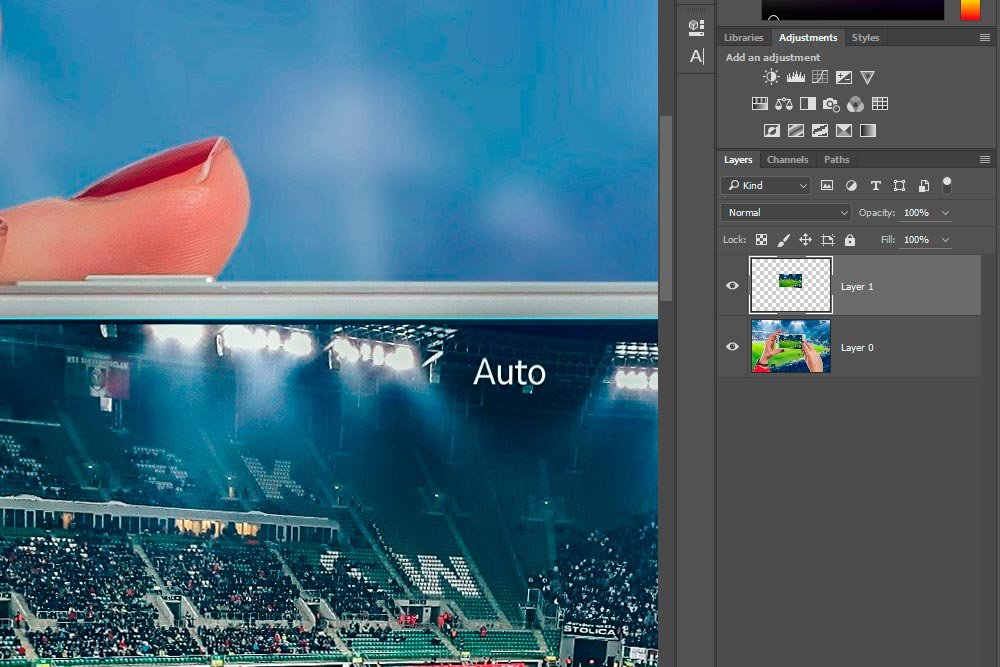
At this point, this tutorial is over. My goal was to demonstrate how to make a selection with the Polygonal Lasso Tool. Mission accomplished. But, since we’re all here and we’re having fun, why don’t we continue on to see if we can shake things up a bit? Remember – I would like to make the screen somewhat stand out.From here, I’m going to copy the selection to its own layer. Using keyboard shortcuts, I can either click Ctrl+J for a one step solution or click Ctrl+C and then Ctrl+V for a two step solution. The first one jumps the selected area to its own layer and the second one copies and pastes it to its own layer. It’s up to you which you use. They both do the same thing.
Lets see the layers so far.
Reducing Saturation in Background Layer
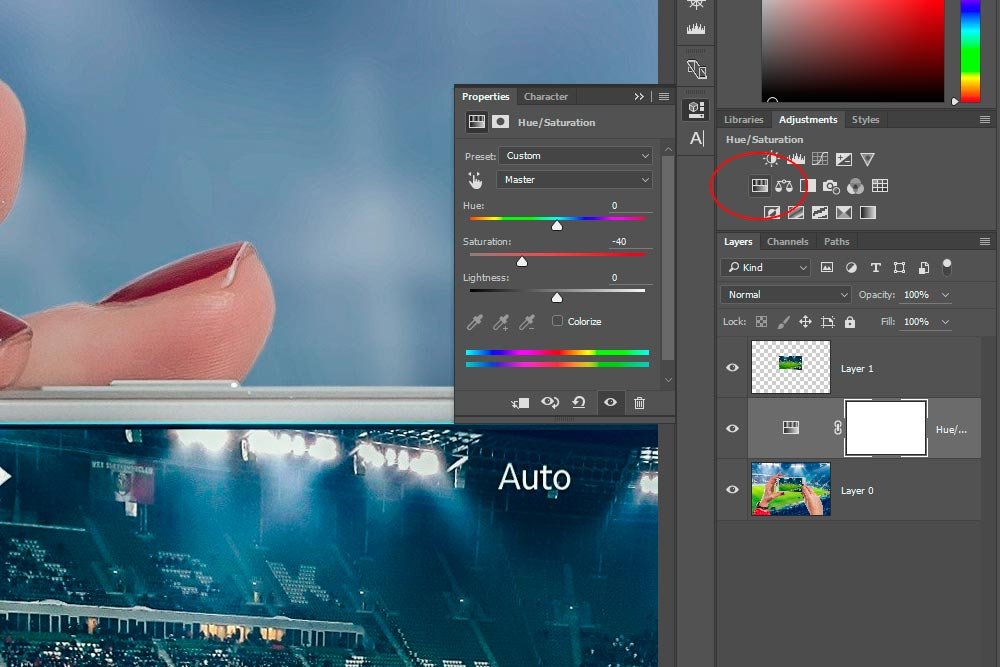
One method for making something stand out is to reduce the noticeability of everything else around it. Think about it this way – if you have an orange sweater on in a group of people wearing orange sweaters, you’ll be lost in the crowd. If everyone else is wearing black sweaters though, you’ll surely be seen. This type of logic is what I’m trying to emulate here.To reduce saturation in a non-destructive manner, I’m going to select the layer I’d like to work on. In this case, it’s the photo layer. Next, I’m going to move up to the Adjustments panel that’s directly above the Layers panel. Inside that panel, I’m going to click the Hue/Saturation icon. I circled that in the screenshot below. When I do that, two things happen. First, a Layer Mask Thumbnail appears and second, the Properties panel opens up. It’s inside the Properties panel that I can reduce the saturation of the photo layer. In this case, I moved it down to -40. I don’t want to remove all color – just some of it.
Adding a Blend Mode
Let’s quickly take a look at the photo as it stands.
This looks pretty good, but in my opinion, the screen doesn’t pop out enough. I’d like to add a blend mode. To do this, I’m going to double-click the screen layer thumbnail. When I see the Layer Style dialog box appear, I’ll click Blending Options in the left column. Inside that area, I’ll click the drop-down box and choose Overlay.
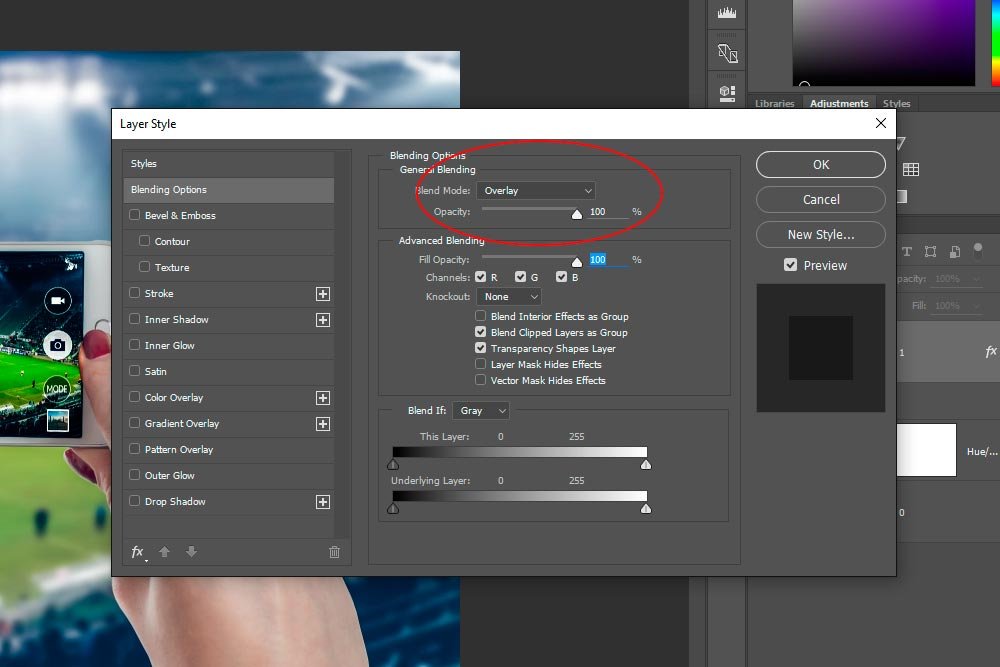
After that, and in the same dialog box, I’m going to select Outer Glow and apply some settings to that area.
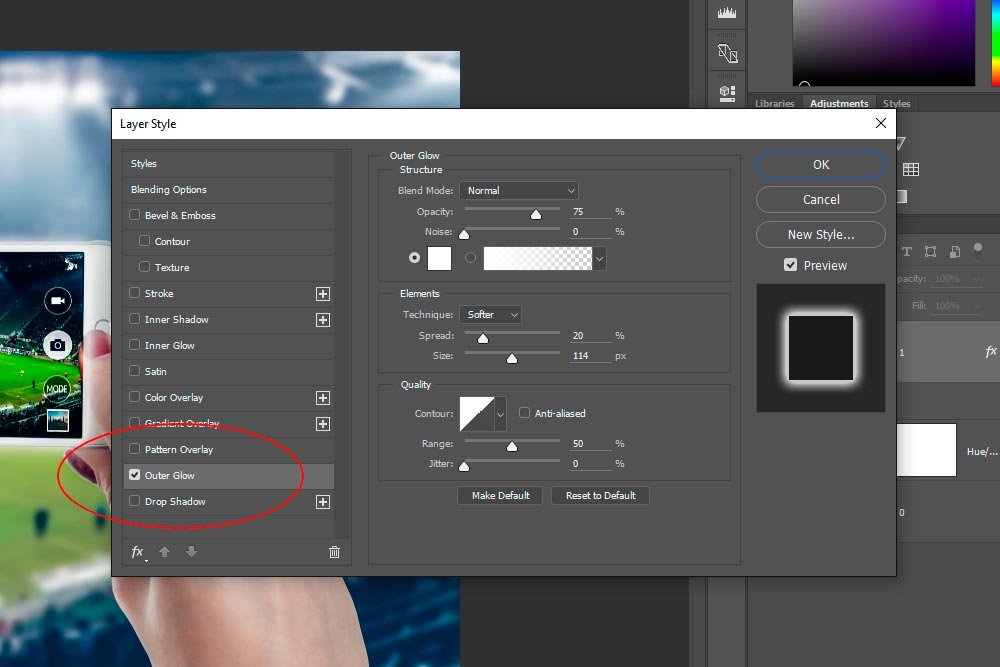
This is what the photo currently looks like after these adjustments.

Now, you may be asking why I chose to apply the blending mode inside the Layer Style dialog box. The reason I did this was for future flexibility. If I wanted to reduce the opacity of the blend mode, but not the outer glow, I have the ability to do that inside the Layer Style dialog box. If I simply applied a blending more the more traditional way and tried to reduce the opacity, I would reduce the opacity of the glow as well. This way, both of these effects remain distinct.
Using the Erasure Tool
I’d say this photo is look pretty good. There are two small items I need to take care of though. The first one is to erase the part of the finger that’s partially covering the screen. Currently, I’m blending that and it doesn’t look very good. So, to get rid of it, I’m going to choose the Erasure Tool from the left toolbar, set it’s size and edge softness, select the screen layer and click on the area of the finger I don’t want included anymore. Simple enough.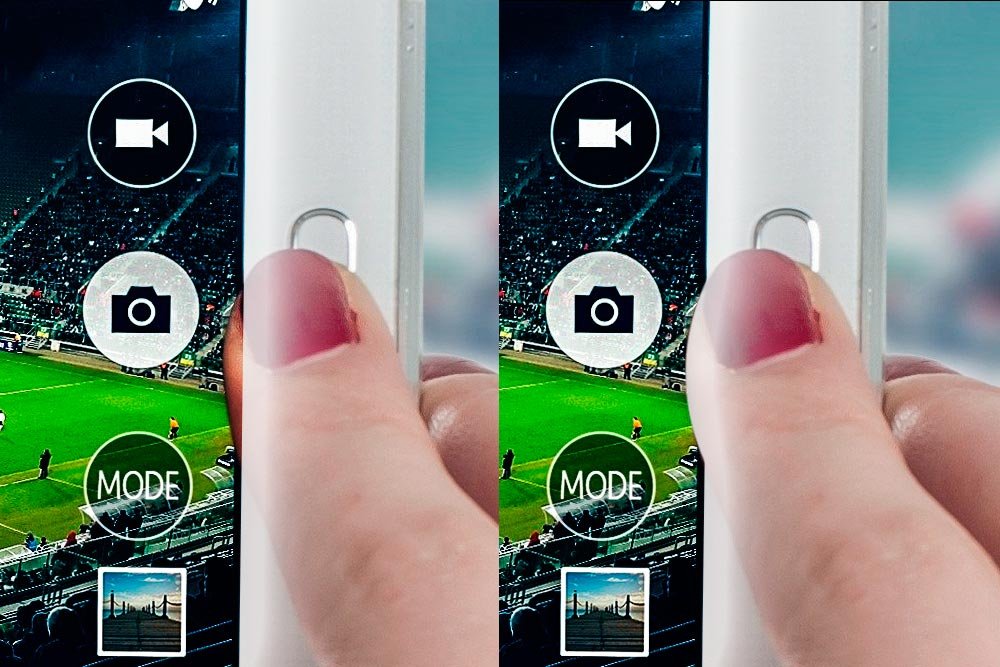
Removing an Area of the Layer Mask
I’m going to be talking about masks a lot in later posts, but for right now, I’ll move quickly through this final section. Back when I non-destructively reduced the saturation of the photo layer, Photoshop created a Layer Mask. This layer mask can be seen as a white box in the Layers panel directly above the photo layer. Now, because I reduced the saturation in this mask, any blend mode I apply to any layer that’s above that mask won’t actually be blending the original photo. It’ll be blending whatever attributes the layer mask possesses. I don’t want this. What if I completely removed all saturation from the photo layer? Would I want to apply a blend mode to a layer above and have it react to the desaturated layer? No, certainly not. I’d want it to react to the original saturation. So, to fix this, I’ll have to paint some of the mask to remove the desaturation effect for part of the photo.I’ll select the photo’s Layer Mask layer (the white box) and then use the Rectangular Marquee Tool to select the area around the smartphone screen.
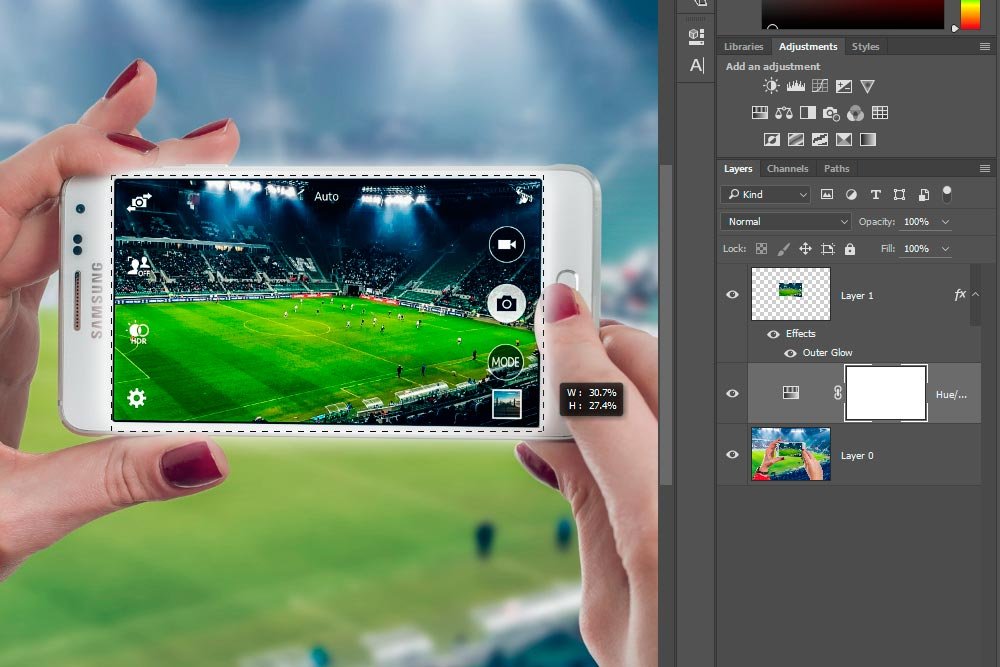
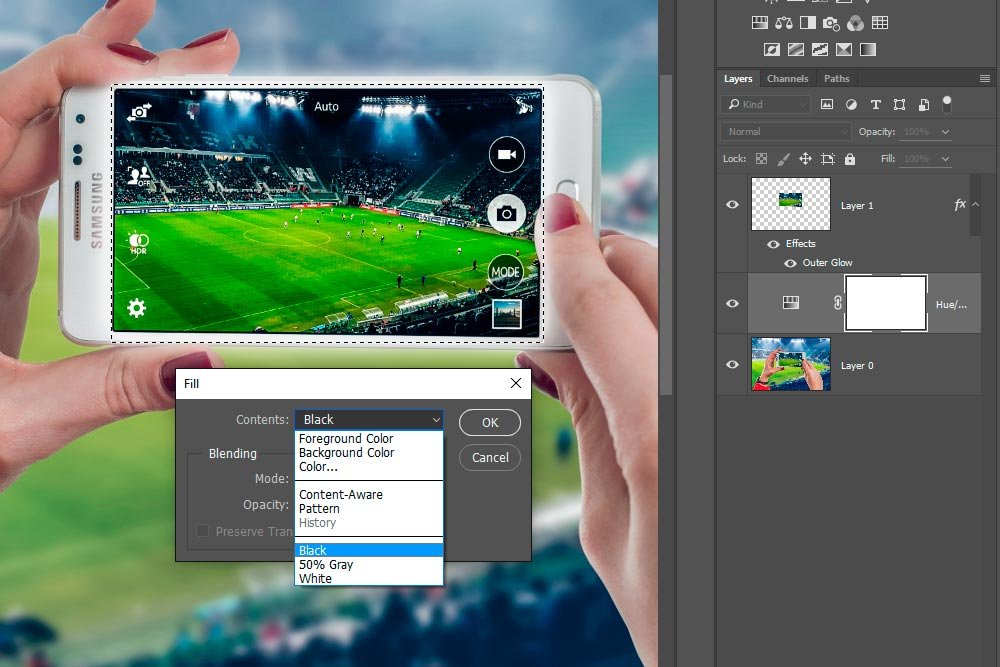
From there, I’ll right-click inside the selected area and choose Fill from the menu that appears.
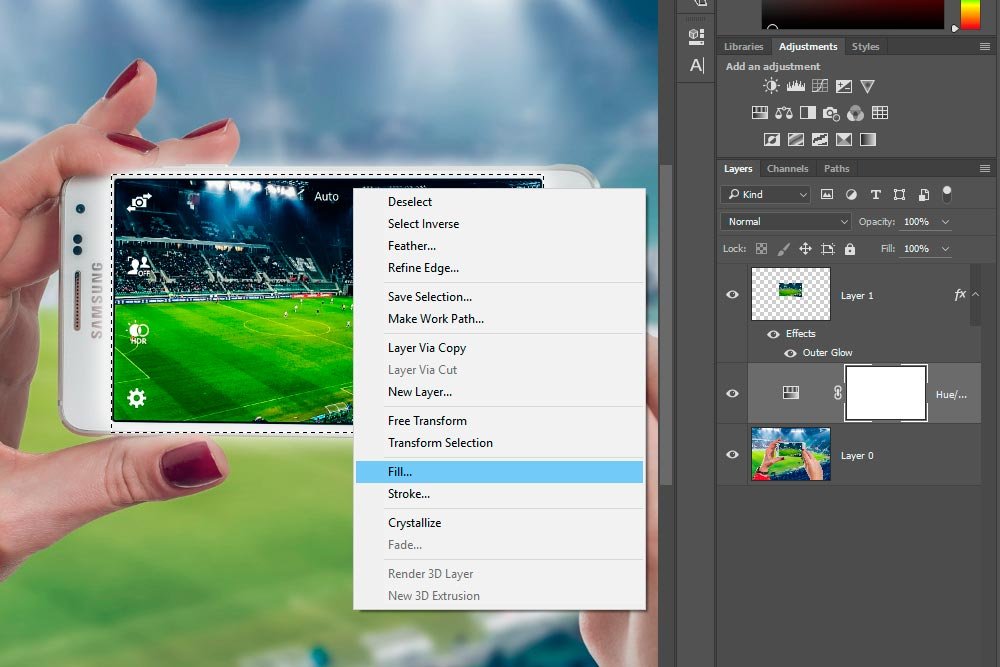
After that, a Fill dialog box will appear.
To remove an area of a mask, it needs to be painted or filled with black. So, from the drop-down box, I’ll choose Black. I’ll hit OK and then revel in the fact that the desaturation is no longer having an effect on my layer above.
If I click Alt on my keyboard and then click the Layer Mask, I’ll get an enlarged view. In this case, we can definitely see that an area has been filled with black.
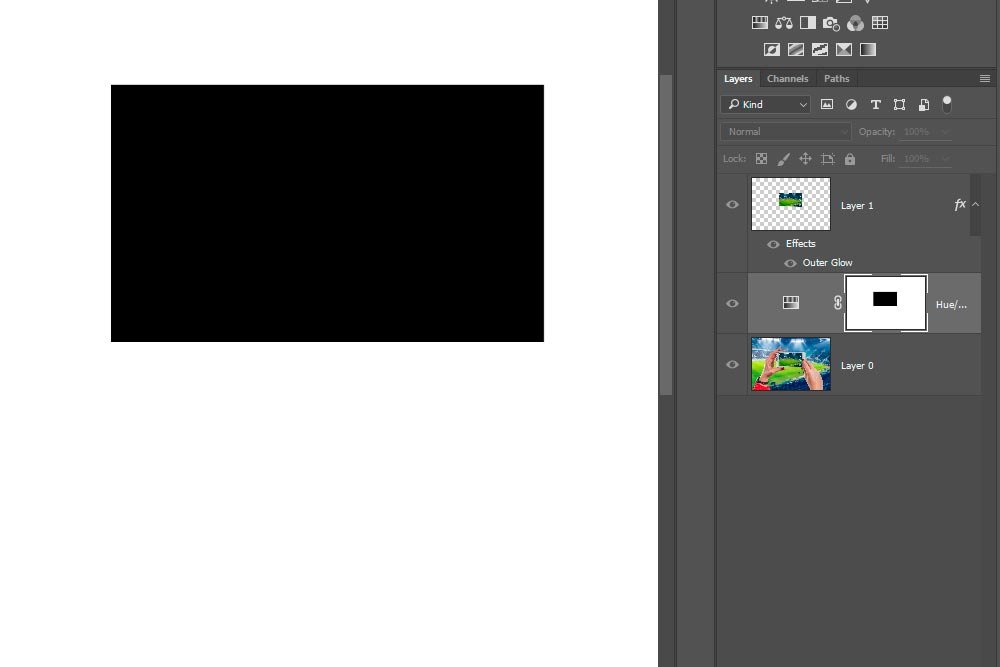
To return to the original view, I’ll just click Alt and the Layer Mask again.
Just to be sure what I did is working, I’ll reduce the saturation of the photo layer all the way. If everything is good, the screen should remain vibrant and colorful and everything else should be black and white.

And that’s exactly what I got. It’s sort of like checking answers in math class. There’s always a method to see if what you did is correct.
Please ask me questions. This was a long post, so I’m sure you’re scratching your head about something. Nothing that I did in this tutorial is overwhelmingly challenging, so with a bit of time, you can become an expert. Thanks!
Last edited:
