CraigHardy
Member
- Joined
- May 11, 2021
- Messages
- 223
- Reaction Score
- 2
- Points
- 18
- #1
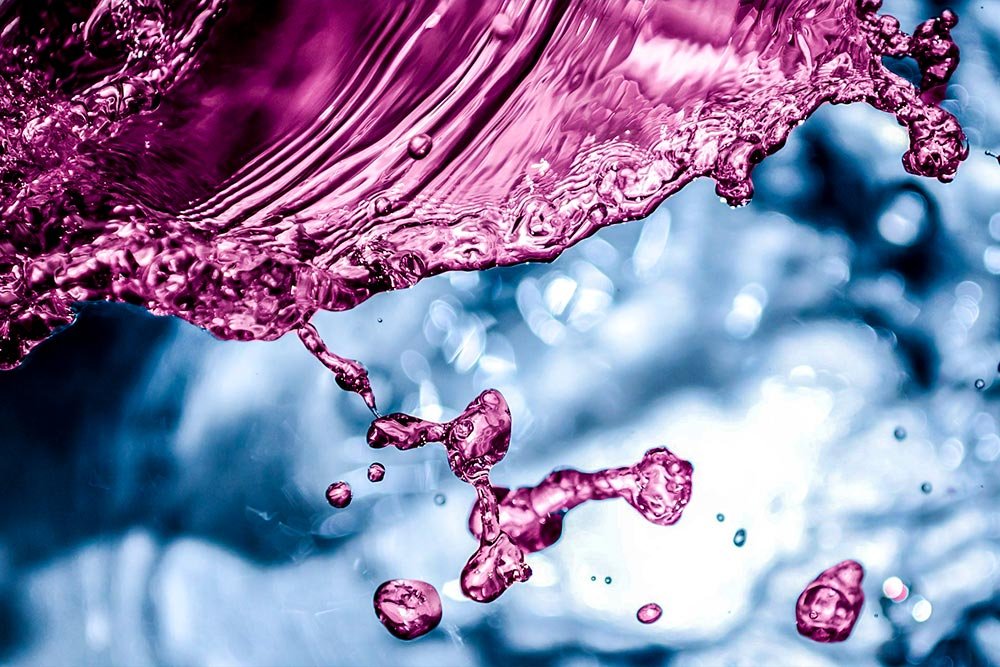
If you take a lot of photos that have distinct focus areas, this post may be just for you. What I’m referring to here is a photo, such as an apple, that’s on a table and is completely in focus. In the photo, there’s a narrow depth of field that blurs out virtually everything but the apple. The apple is one focus area and everything else is the rest.
Did you know that Adobe Photoshop has a tool that allows you to select an object in a photo based on that object’s focus area? It’s true and it’s extraordinarily handy. Now, as I’ve stated in many previous posts that talk about making selections in Photoshop – there are many tools that can accomplish the same task. It’s your job to decipher between these tools and choose the one that’s best suited for you.
In this post, I’ll be discussing the Focus Area Selection Tool. When using this tool, Photoshop looks for defined edges and objects contained within those edges. Sometimes Photoshop gets what you want selected immediately and sometimes we need to help it along some. I’ll show you the tools that assist in both of these scenarios.
Original Photo
I looked for a photo that had some good distinction between foreground and background. After playing with this one for a while, I thought it would work well for demonstration. Even though there are a few droplets of liquid in between, the edges of the foreground are defined enough to make a good selection.
Making the Selection
My goal here is to select what’s in focus within this photo. I’m not concerned with anything in the background.I’ll head up to the Select > Focus Area menu item and click.
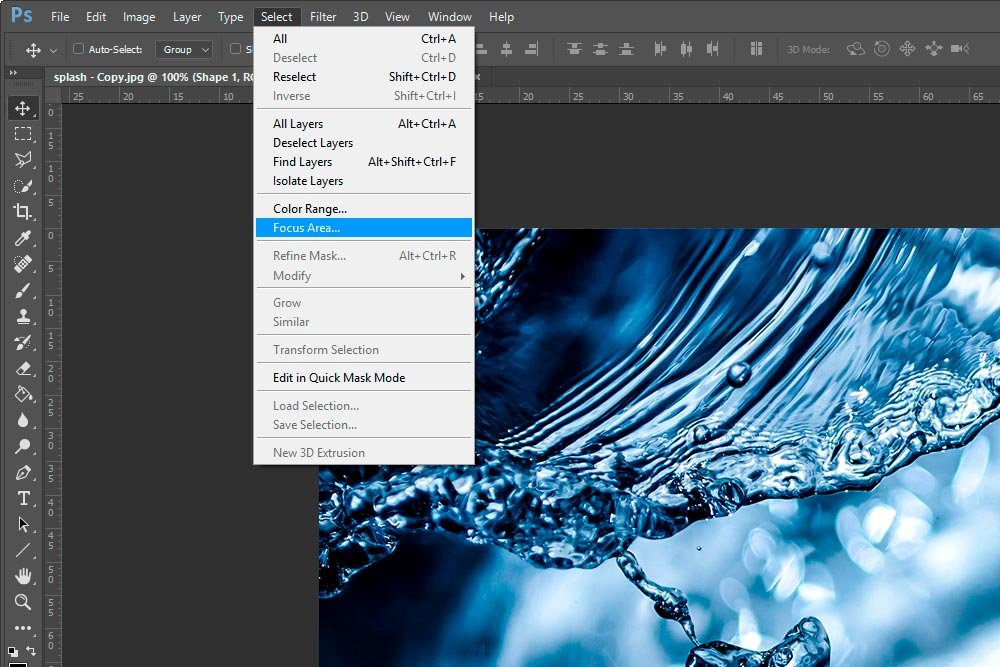
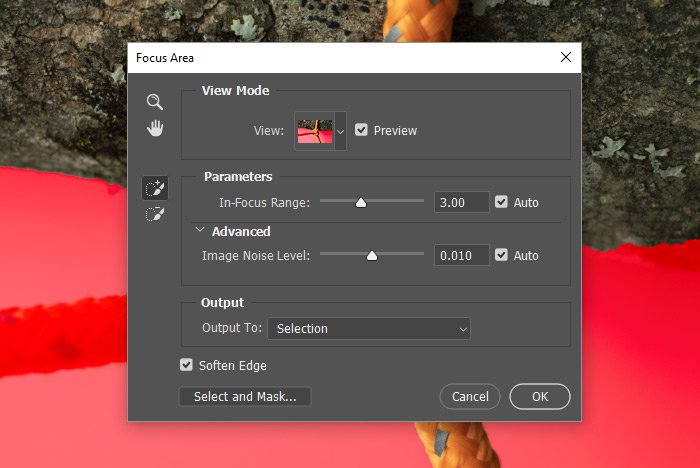
After I click on this item, the Focus Area dialog box appears. When the box opens, it immediately begins making an analysis of the photo based on the specs that are already set.
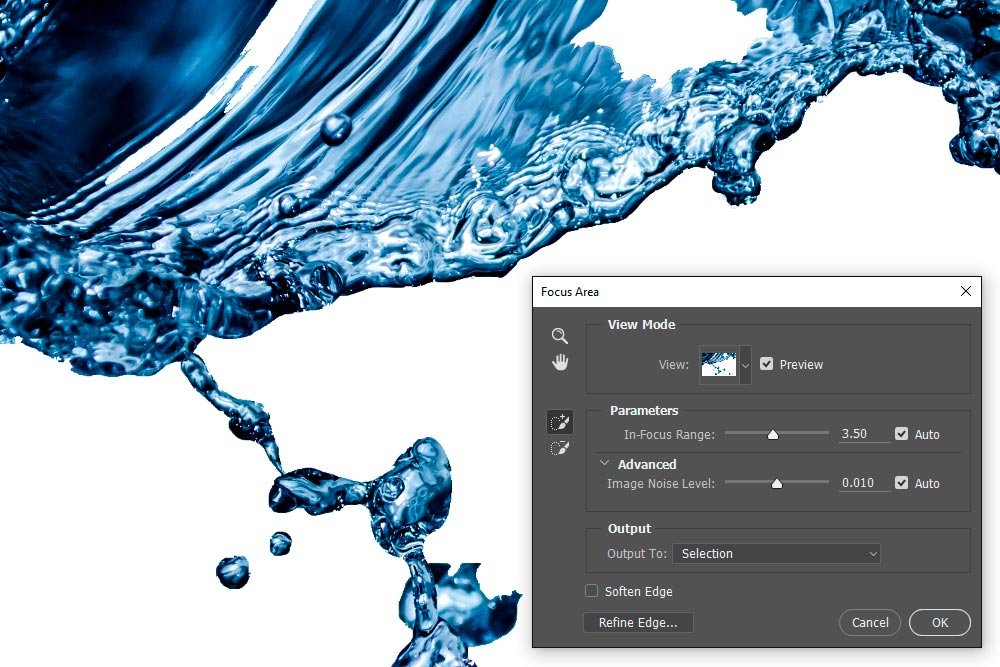
In this case, since some of the liquid doesn’t have edges that are defined, Photoshop thinks those areas aren’t in focus. Every area that has turned white will not be in the ultimate selected area.
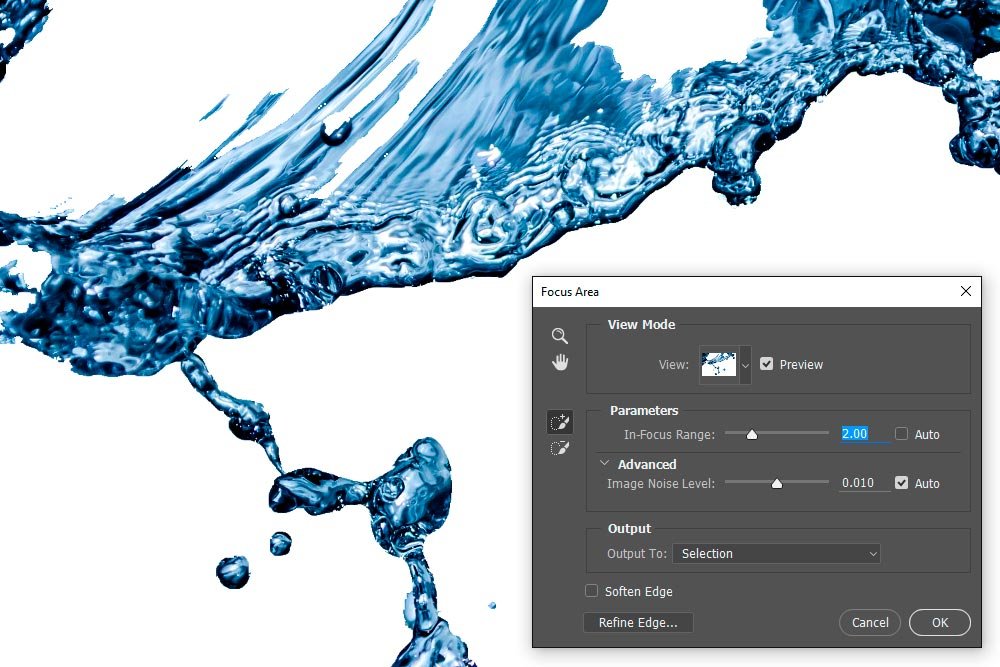
The slider I’m most concerned with first is called In-Focus Range. This is the slider that tells Photoshop what you consider to be in focus and what you would like included in the photo. To show you the type of effect this slider can have on a selection, I’ll move it a bit to the left and then a bit to the right. Be sure to notice what gets dropped out and what gets added back in.
Less in Focus
More in Focus
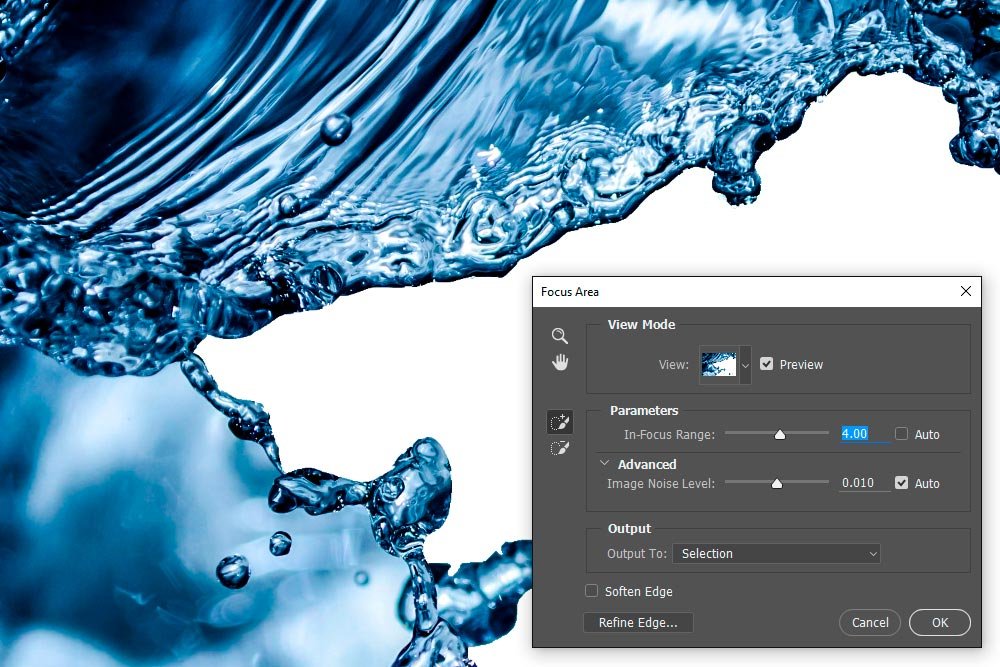
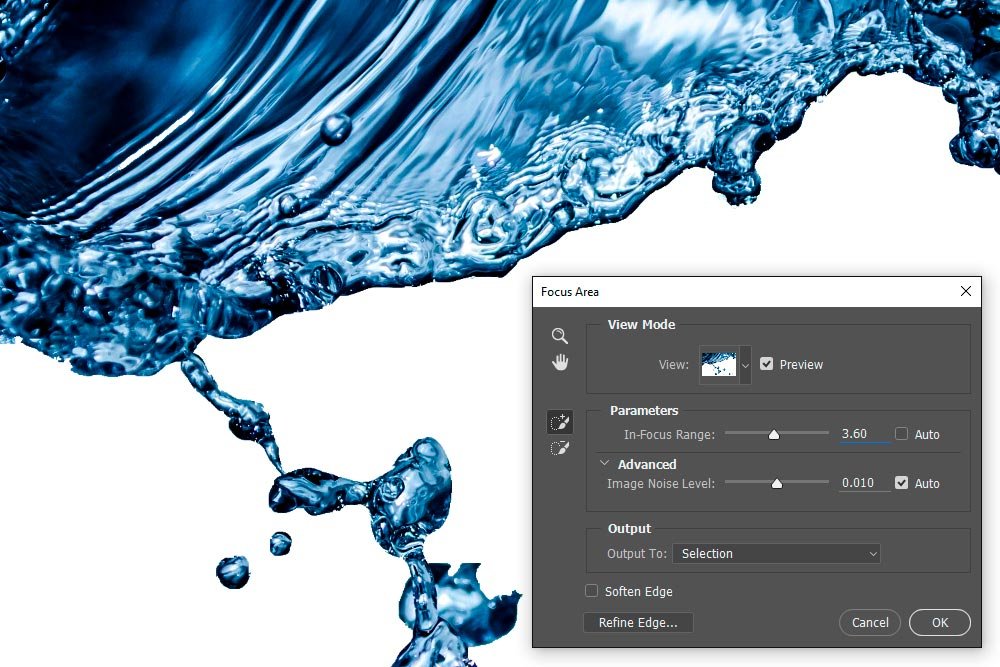
What I have to do is move the slider back and forth until the selected area is as accurate as it’s going to get.
Optimal In-Focus Range
Refine Edges
Now that I’ve figured out a pretty good selection area, I have the ability to use the Refine Edge tool that’s built right into the Focus Area tool.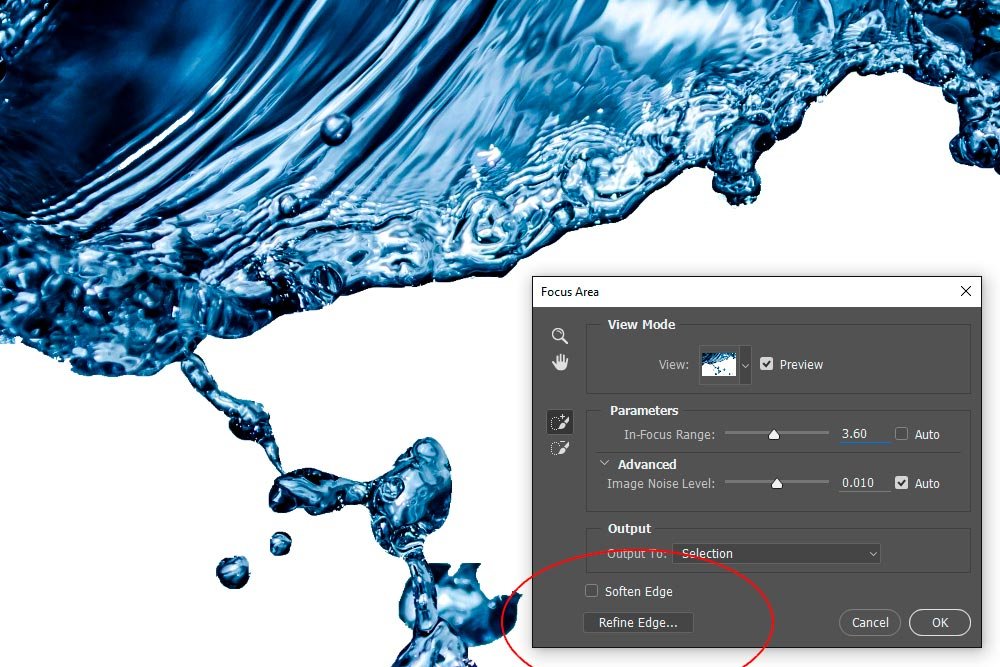
If you aren’t familiar with refining selection edges, I encourage you to take a look at my post where I discuss this very topic. You can view it here:
Selecting Objects & Refining Edges in Adobe Photoshop
After I click the Refine Edge button, the Refine Edge dialog box appears. I can make some changes to the sliders from there that will really clean up the jagged edges. In the case of this photo, I want to define them and smooth them.
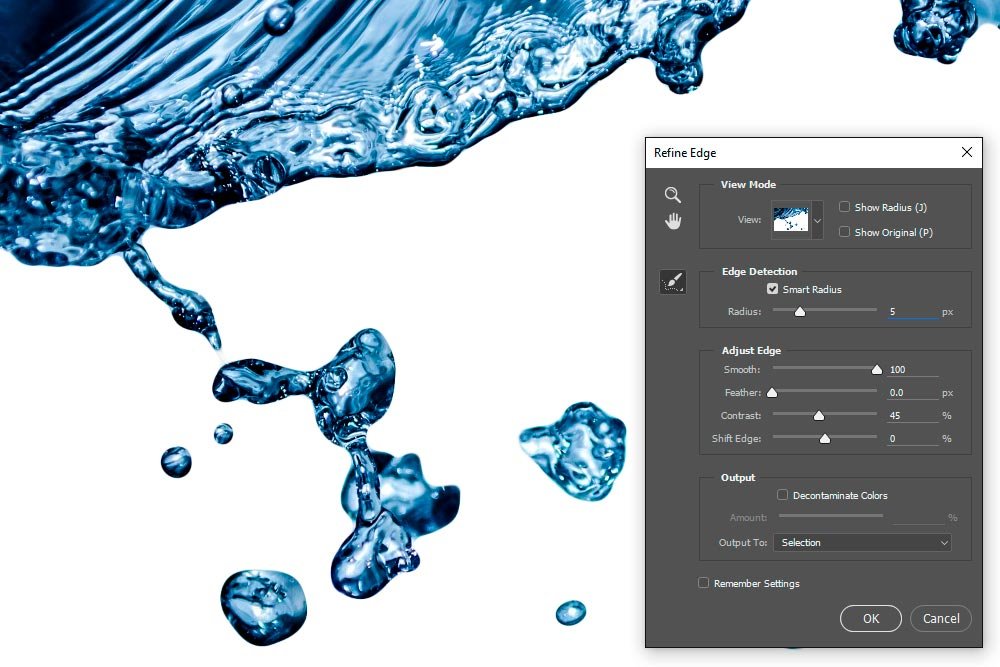
When you compare the edges of the screenshot directly above to those in the screenshot above that, you can see a difference.
Making the Selection
Once I’m satisfied with what the selected areas look like, I can click OK in the Refine Edge dialog box to make the selection. Here is what part of it looks like, with marching ants and all.
I do have a bit of an issue though. If you take a look at the screenshot above, you may notice that there is an area in the upper right corner that shouldn’t be selected. Also, some of the droplets down at the bottom aren’t selected when they should be.
Since the selected area is active, I can use another selection tool, such as the Quick Selection Tool, to add to or subtract from what I already have. If you aren’t familiar with the Quick Selection tool, you can read all about it here:
Selecting & Changing a Photo Background in Adobe Photoshop
Selecting Objects & Refining Edges in Adobe Photoshop
I’ll go ahead and clean up those areas with this tool.

Ah, that’s better. Now, I have an accurate selection based on what’s in focus. I can do whatever it is I wish with it.
Changing Color
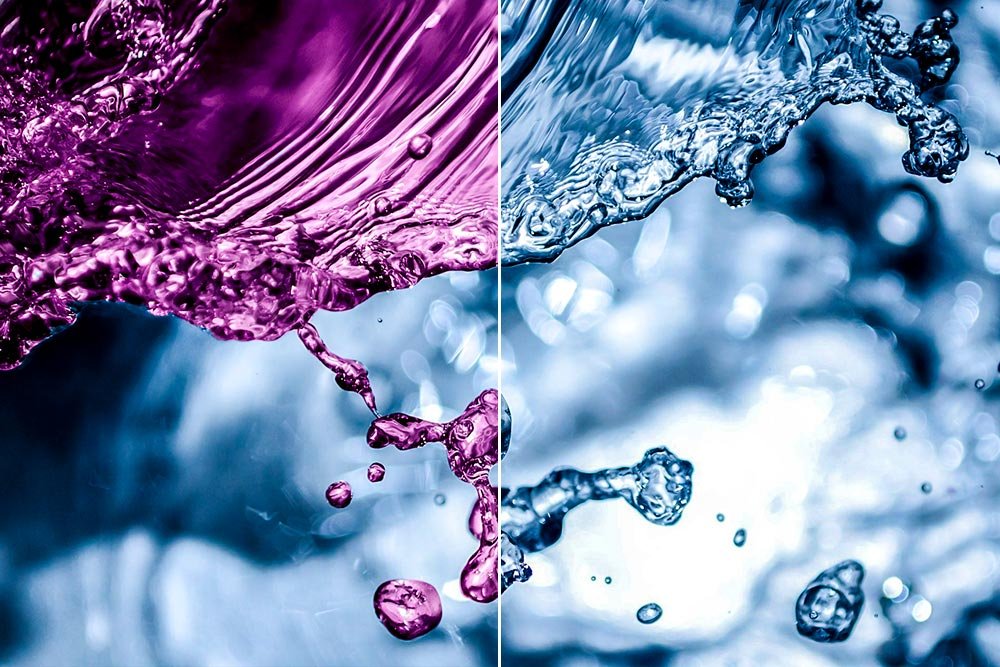
Just for fun, I think I’ll go ahead and make the water that’s in focus pink/purple. I’ll do this simply to demonstrate, in a more clear way, what’s been selected. I’ll head over to the Layers panel and select the layer I’m interested in adjusting. Since I have only one layer, this is quite easy to do. Also, it should be selected already because I’ve been working on it. After that, I’ll click the Hue/Saturation icon in the Adjustments panel that’s directly above and move the Hue slider to the right until I see the color I like.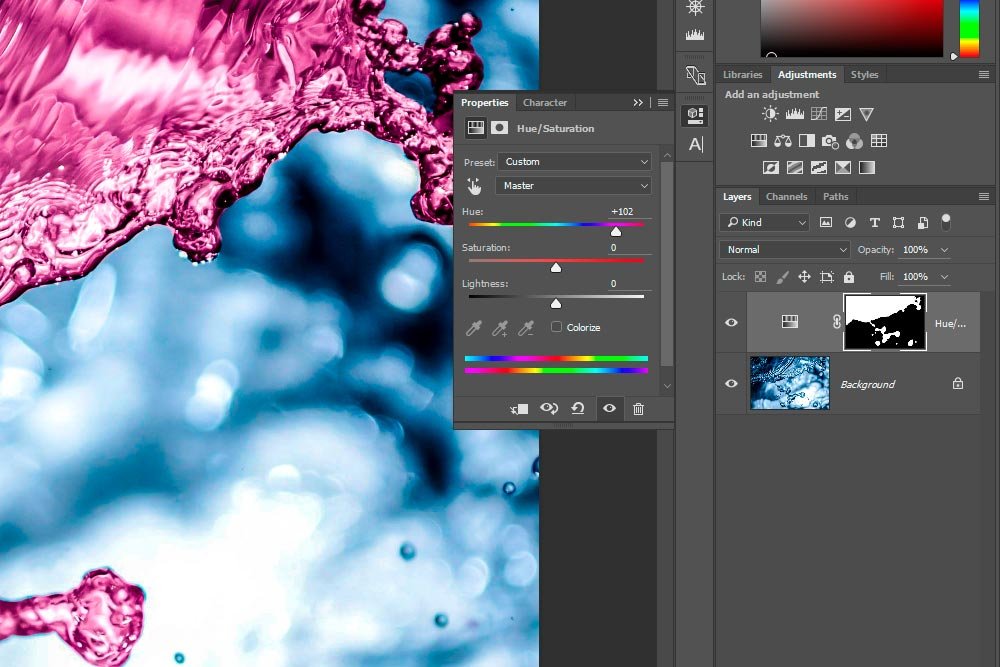
This is the final image. Pretty cool, huh?
