JodyBuchanan
Member
- Joined
- May 10, 2021
- Messages
- 138
- Reaction Score
- 0
- Points
- 21
- #1

The reason I chose to select text today, is because, in general, text has nice defined edges. The colors between the letters and their backgrounds are likely contrasted, which offers a perfect environment for selecting them with the Magnetic Lasso Tool.
As you may have guessed by reading the previous paragraph, the Magnetic Lasso Tool likes crisp edges. It’s a great tool to use for selecting complex shapes where other selection tools can’t do the job efficiently. For example, say you have an odd shape, filled with a gradient, that you’d like to select. Many of the selection tools would be challenged by this type of a task. With the Magnetic Lasso Tool, as long as there are defined edges, it should do a good job.
In this post, I’m going to discuss what the Magnetic Lasso Tool is, how it operates and how some of it’s features work. Then, I’ll walk through a quick project that uses this tool to select a letter or two from a photograph.
The Magnetic Lasso Tool
To activate this tool, head over to the left tool bar and click and drag out the third icon from the top. There are three tools in this area. The one we’re interested in is the one on the bottom. It’s got a small picture of a magnet in it.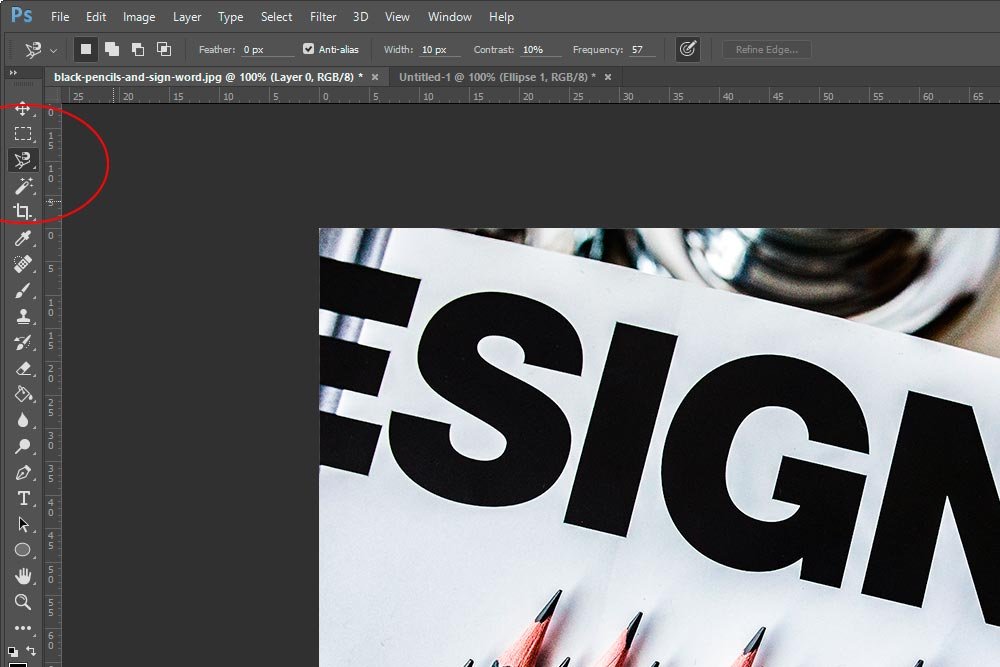
Alternatively, you can simply click L on your keyboard to choose the Lasso Tool. Once you do that, you can cycle through the various lasso tools by holding down the Shift key and then clicking L a few times.
Once you make this selection, you’ll notice a new menu appear at the top of the canvas area. This is the options bar for this particular tool.
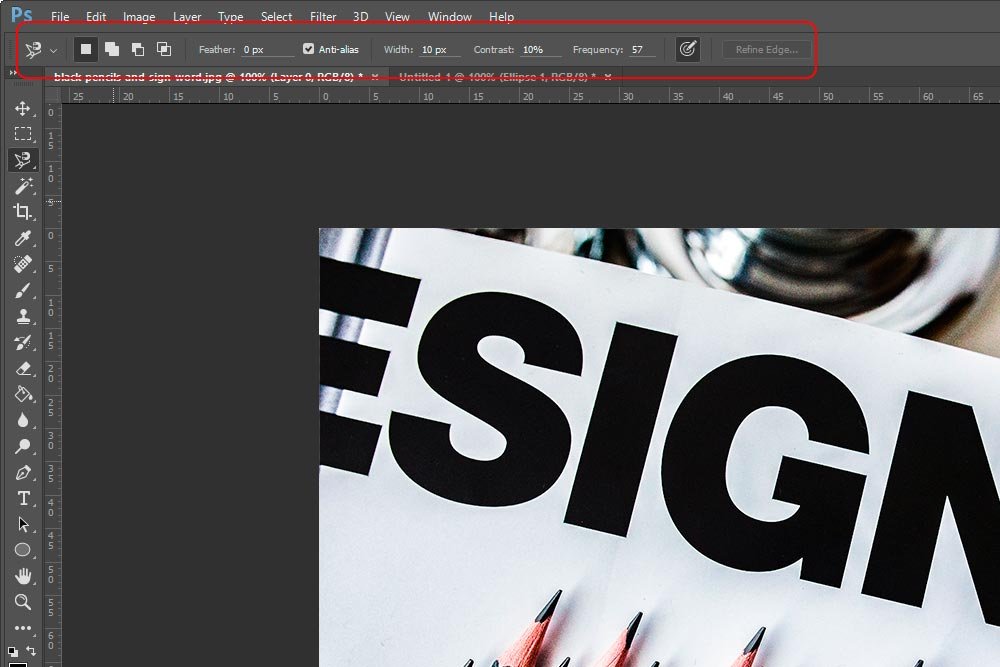
I’ll cover some of these options below.
Beginning the Selection
Once I select the Magnetic Lasso Tool, I’ll see my mouse pointer change. It turns into a smaller black pointer with a magnet attached to it. If I hit my Caps Lock key, the pointer changes once again. It turns into a circle with a + sign in the middle of it. The circle is the radius that the tool searches for an edge to magnetically attach to. So, if you have a tiny radius, such as 5 pixels, you’ll have a really tough time finding an edge. Although, this small number may be good in tight areas. If you have wide open areas, you’ll most likely want a larger radius. The distance from the edge to consider for a path is controlled by the Width area in the options bar.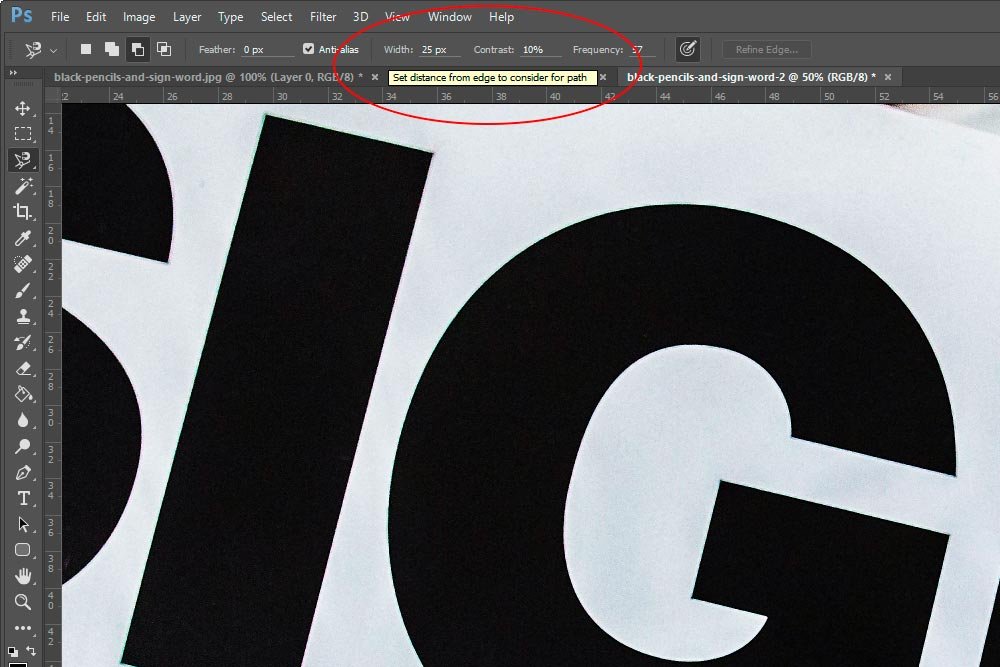
I’m going to start making a selection. I’m going to set the Frequency setting in the options bar to 10. I want you to look at the next screenshot to see what happens. More specifically, notice the number of anchor points that are set on the edge of the letter.
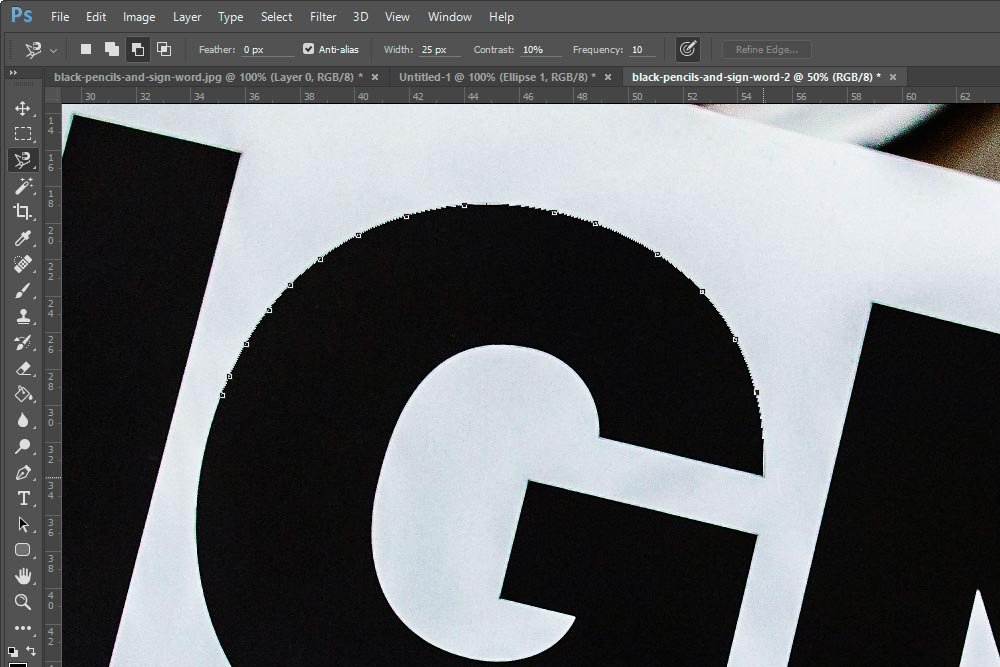
Now, I’ll raise the Frequency setting to 100. Again, take notice of how many anchor points are added to the edge.
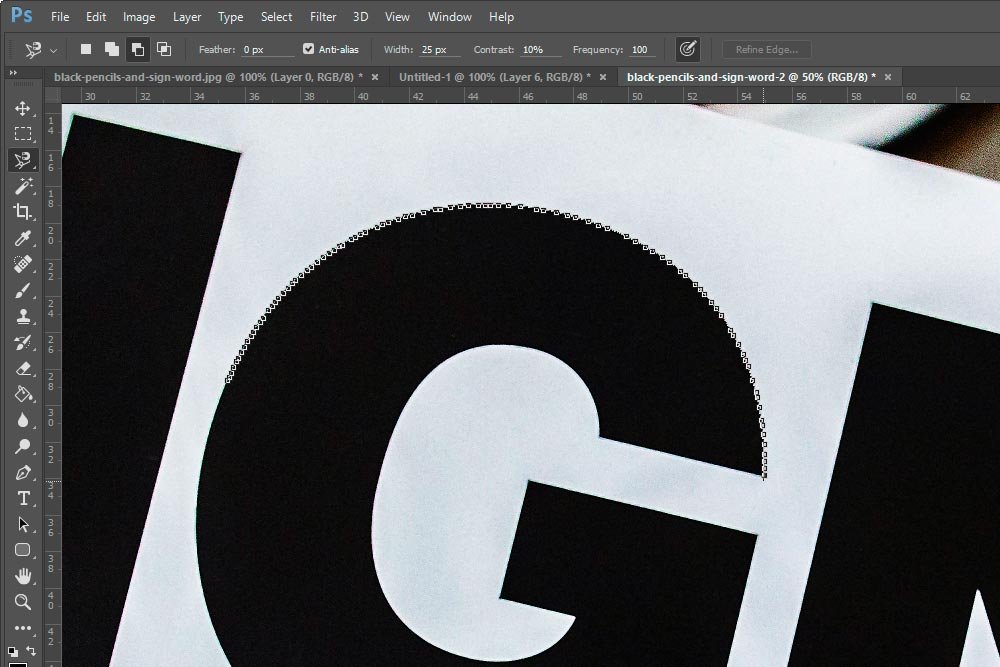
Anchor points control the accuracy that you’re able to apply a selection to an edge. If you’re in tight areas, more anchor points might be beneficial. You’ll have the ability to add and remove them to really zero in on where you want the selection to be. If you’re out in the wide open, such as where I am with these letters, fewer anchor points are probably more appropriate. There’s less of a chance that I’ll need to add some or remove some. These letters are fairly straightforward.
Now, I want to mention that once you make your first click on the edge of a shape with this tool, all you need to do with your mouse is trace the edge of the shape. The line of the selection will follow your mouse and the anchor points will automatically appear as you move. If you want to manually add an anchor point, say – for a corner or something, all you need to do is click your left mouse button. An anchor point will appear at that precise spot. Then, continue dragging until you’re back at the beginning of the selection area.
Deleting Anchor Points
Take a look at the screenshot below.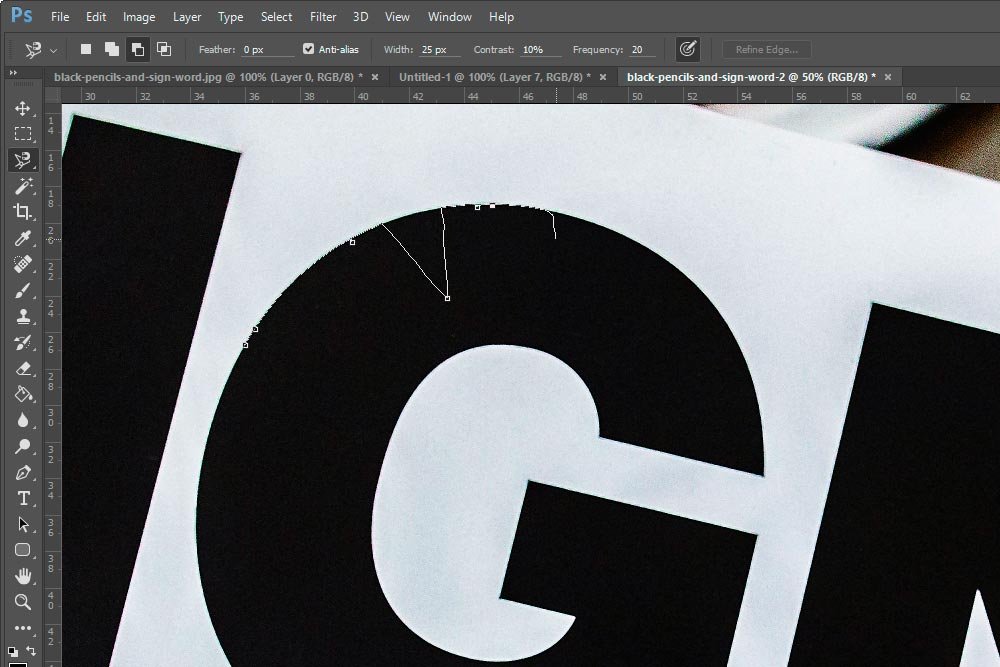
Obviously, something went wrong there. Say my tracing gets screwy and I mistakenly click and place an anchor point where it’s not supposed to be or the magnetism of the tool makes a mistake. To delete the last anchor point and every anchor point, one by one, before that, all I need to do is hit the Backspace key on my keyboard.
Setting Contrast
In the options bar, there’s a setting for Contrast. This is another adjustment variable that allows you to control how Photoshop selects edges with this tool. If you enter a low value, such as 5%, Photoshop will look for edges that offer only low contrast. If the setting is high, such as 90%, then Photoshop will only select edges that contrast sharply with their surrounding. So, if the letters in my demo photo were on top of a muddled background, I would want to set this number higher, so all of the background is ignored. I’d want Photoshop to zone in specifically on the high contrast edges of the letters.If you’d like to change the Contrast value as you’re working, you can hit the . (period) key to increase the value and the , (comma) key to reduce it.
Adjusting Width on the Fly
I mentioned the Width setting earlier in this post. Specifically, Width is the detection area of this tool. If you have a small value set, Photoshop will only look inside that small radius for an edge. If you have a large width set, Photoshop will look inside a larger area for an edge.The problem with this setting is that, once you begin using the Magnetic Lasso Tool, you’re kind of stuck with it. It doesn’t stop tracing just because you decide that you want to bring your mouse pointer up to the options bar to change the Width value. This is problematic when you’re working on a photo or graphic that is diverse. Say you need a small width in one area, but a larger one in another. What do you do? How do you change that value?
Well, I’ve got a tip for you. If you want to change the Width value as you’re selecting with the Magnetic Lasso Tool, all you need to do is to click the bracket keys on your keyboard. The ] key enlarges the width and the [ key shrinks it. And the best part is, you can change this value as you’re actively tracing your edges.
Adding To & Subtracting From a Selection
When you first click on this tool, the New Selection option is chosen. You can see the choices in the screenshot below. They are the squares inside the circle.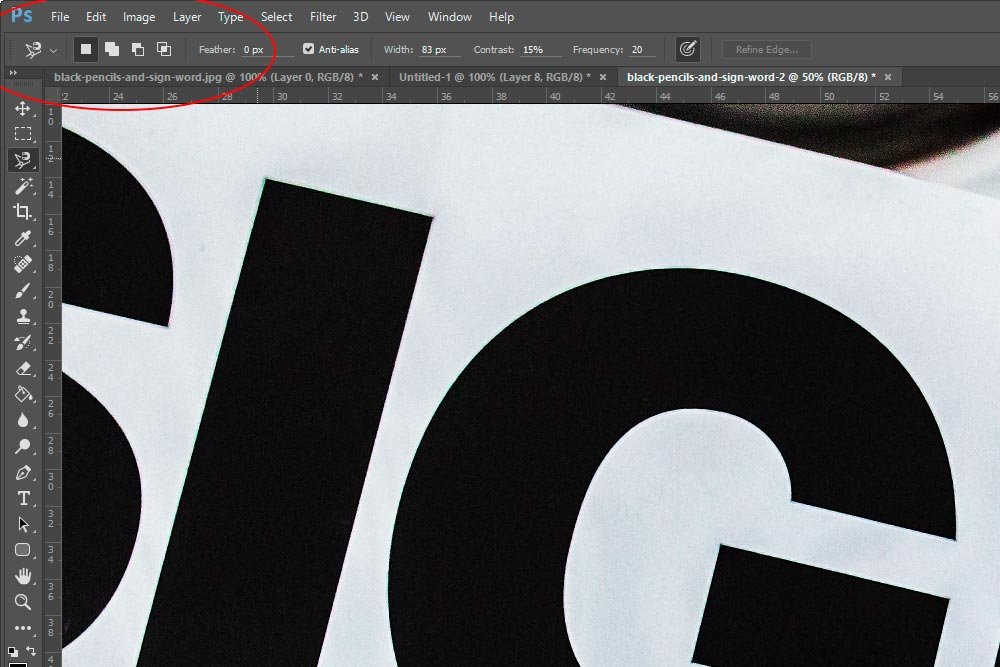
Currently, the four choices are New Selection, Add to Selection, Subtract from Selection and Intersect with Selection. As you have probably already guessed, these choices give you an opportunity to do exactly what they describe.
I’m going to go ahead and select the I in the photo I’m using. I’ll be using the New Selection option.
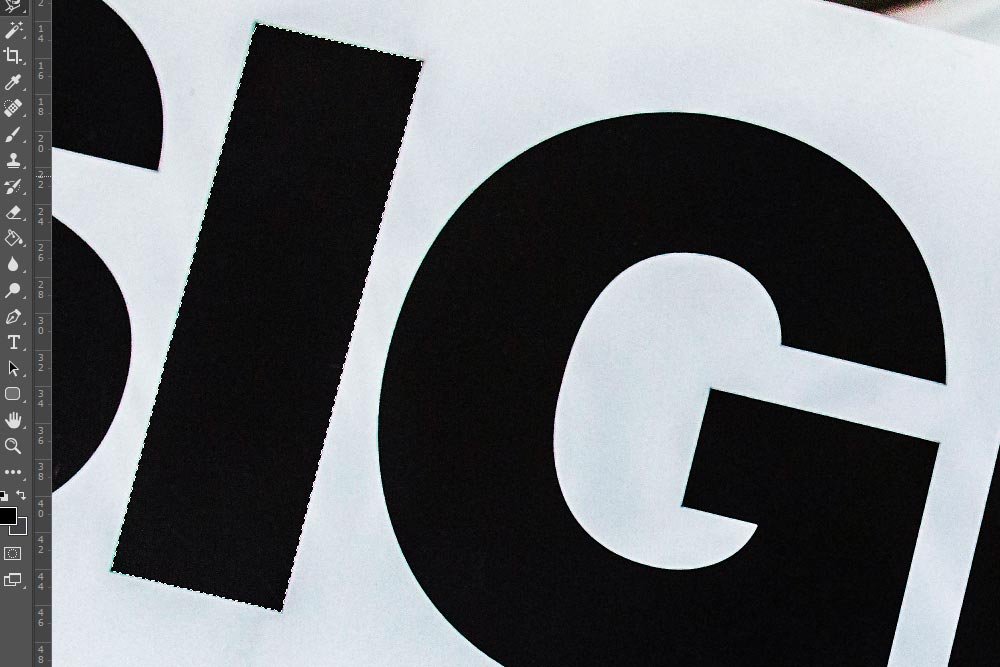
If I wanted to continue selecting letters, which I would probably want to do in this case, I’d have to click the Add to Selection option in the options bar. I’ll do that and continue on and select the G in the photo.
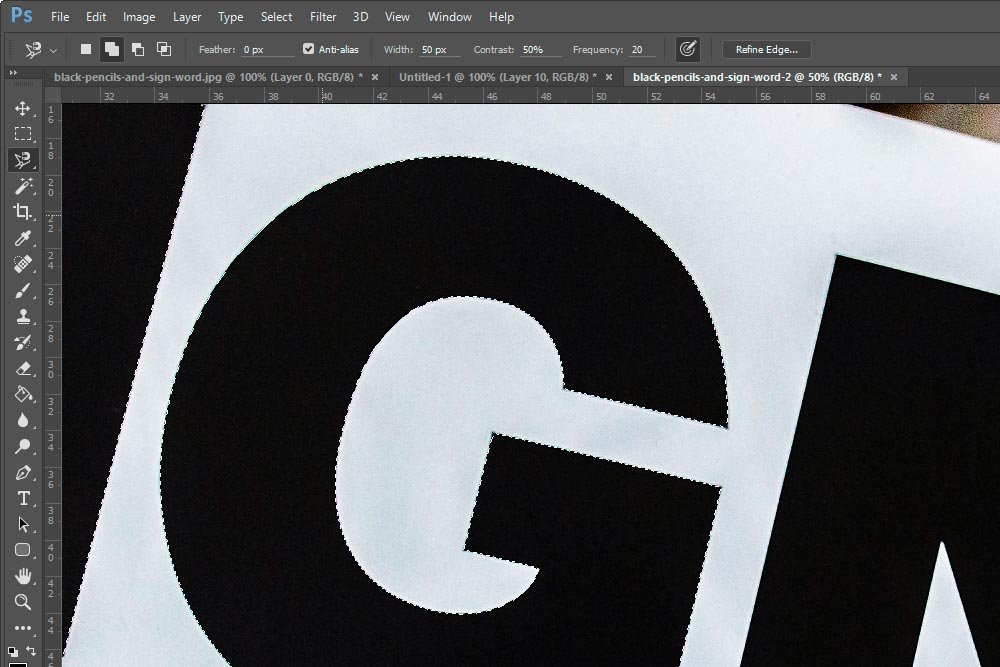
If you look inside the boxes I just discussed, you can see that I had to pick the Add to Selection one to continue on with the second letter.
If I wanted to subtract from the selection (un-select a letter), all I’d have to do is click the Subtract from Selection option and re-trace that selection. Once I’m finished, the area won’t be actively selected any longer.
This is a tool that will take some experimentation to get used to. As I mentioned in this post, there are a few options that you need to take note of. Once you do though, I think you’ll find it an invaluable addition to your work flow. Making selections in Photoshop is par for the course, so it’s a good idea to get used to the available tools.
——
If you’ve enjoyed today’s post and found it helpful, please share it with a friend. Thanks!
