JodyBuchanan
Member
- Joined
- May 10, 2021
- Messages
- 138
- Reaction Score
- 0
- Points
- 21
- #1

Through the years, there have been a good number of instances when I’ve wanted to change, or customize, the color or size of the checkerboard transparency background of my canvas in Adobe Photoshop. Most of the times, it’s been because of conflicting colors. And by conflicting, I mean far too close to one another. If my image has a lot of light gray in it and the background checkerboard has a lot of gray in it, it becomes a chore to differentiate between the two. It’s for this reason, I update the transparency background until it offers a much different feel – simply put, so I can tell the difference between it and the layer I’m working on.
In today’s post, I’m going to walk you through the necessary steps to update or customize your checkerboard canvas area. Luckily, there aren’t many of them, so you’ll find the task fast and easy.
A Bad Workspace
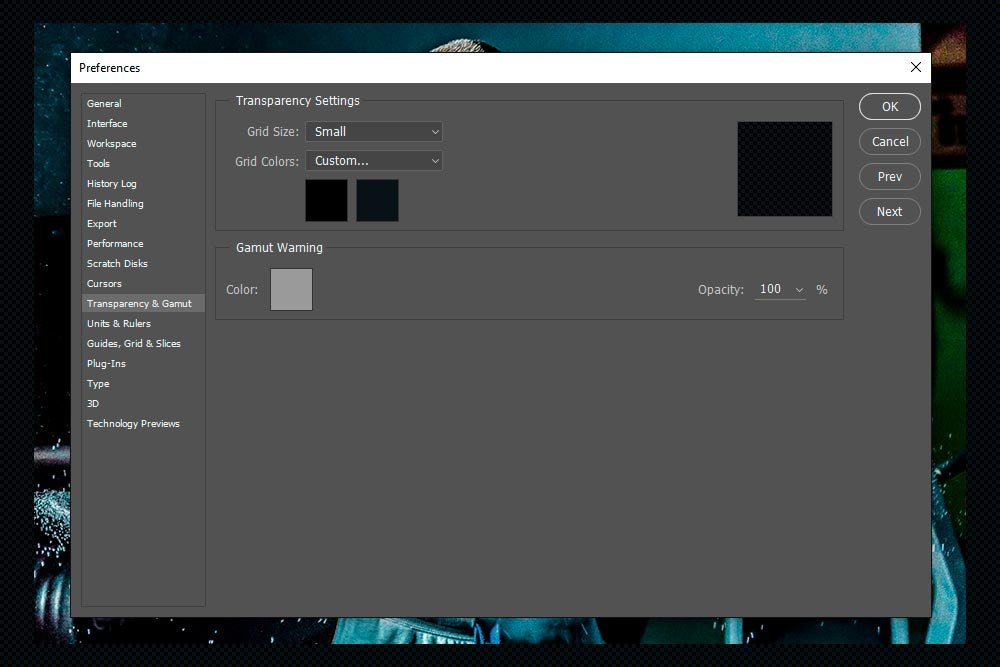
I’m going to start things off by showing you what a bad workspace looks like. I’ve gone ahead and customized the checkerboard so it’s very dark. The reason I did this is so it shows little differentiation between it and the photo I’ve decided to use.
I also shrunk the opposing color squares a bit. This makes it an even worse situation. Now, imagine having to work on the lower left corner of the image. What if you were trying to select something or paint something else? Can you imaging how difficult that would be? I’d say I need to lighten the background up a bit so I can get a better visual of what’s going on.
Customizing the Canvas Transparency Checkerboard
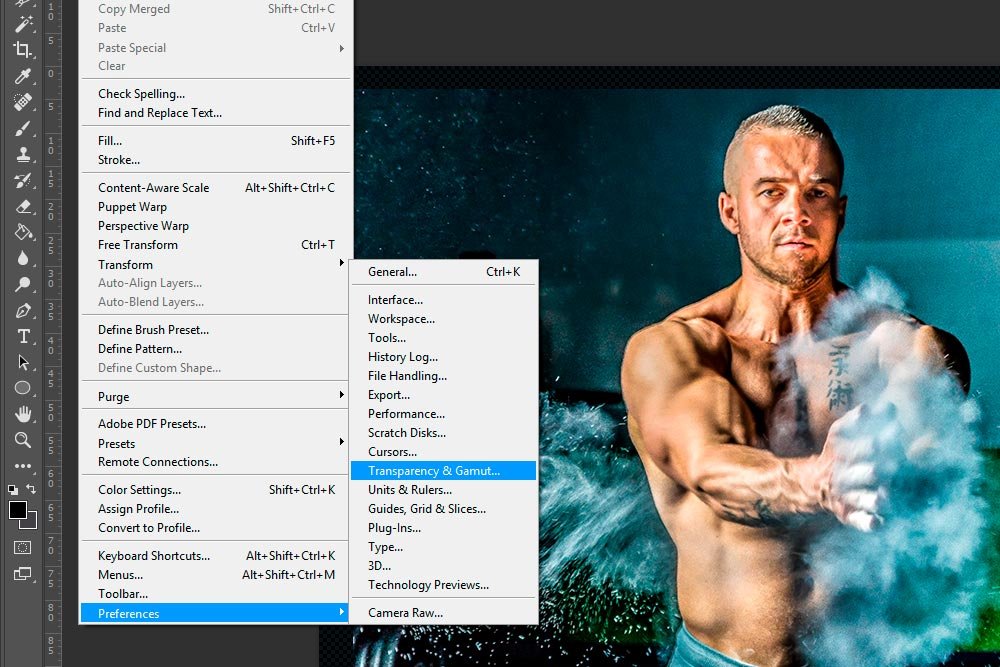
To fix this situation, I’m going to head up to the Edit > Preferences > Transparency & Gamut menu item and select it.
When I do this, the Preferences dialog box opens up. More specifically, the Transparency & Gamut section of the Preferences dialog box appears.

Adjusting Grid Size
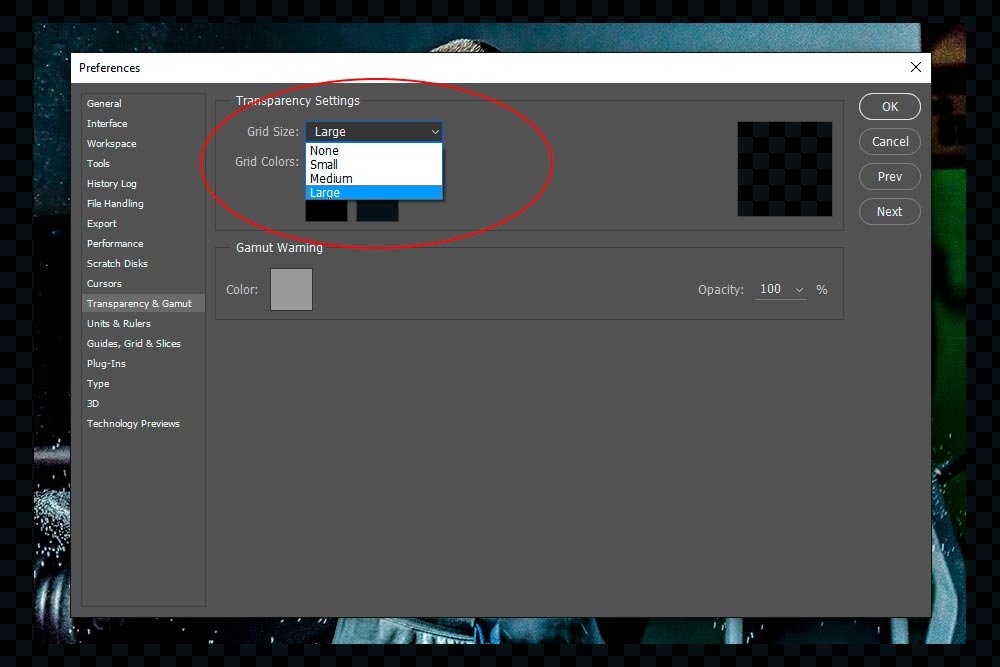
The first thing I’m going to do is to adjust the Grid Size. To do this, I’m going to click on the Grid Size drop-down menu and select something other than Small. That’s what it’s currently set to. For demonstration purposes, I’ll choose Large. What’s great is that I get a preview of what things will look like if I click OK in the dialog box.
Adjusting Grid Colors
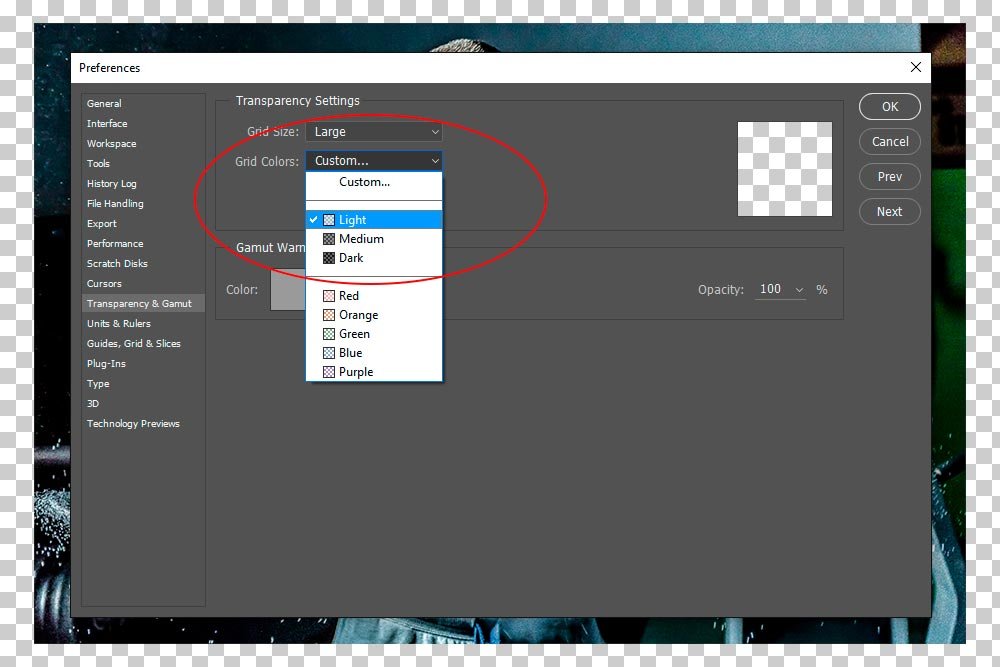
Now that the grid size is nice and large, I can go ahead and change the Grid Colors so they stand out from the image layer. I have a few options here. I can either customize the colors by clicking on the two color boxes that are located in the Grid Colors area or I can simply click the Grid Colors drop-down menu to select something that’s already been created for me. I’ll choose the latter option.
As you can see, this selection (Light) is quite similar to what Photoshop’s default looks like. It also differentiates nicely from the image layer.
Default Grid Size & Colors
Honestly, I find the large setting slightly annoying to look at. I’m going to revert back to Photoshop’s default settings. They are Grid Size: Medium and Grid Colors: Light. I think those settings will work best for this project. Let’s take a look.
As I mentioned above, customizing your transparency grid checkerboard is really easy. It can be done in a matter of seconds, once you get used to it. It’s helpful to become familiar with this option because there may be occasions when you need to distinguish between the background and your layer.
——
If you’ve enjoyed today’s post and found it helpful, please share it with a friend.Thanks!
