Search

Channels in Photoshop

  • Thread starter KristinaW
  • Start date
KristinaW

KristinaW

Member
Joined
May 7, 2021
Messages
127
Reaction Score
0
Points
18
  • #1

Working with Channels in Adobe Photoshop​

working-channels-adobe-photoshop-1.jpg

In Adobe Photoshop, channels are sort of confusing. Before sitting down to write this post, I went back and forth for quite a while trying to reduce the amount of information into something that’s as easy to understand as possible. I think I have it, so I’ll begin writing about it. Be warned though, working with channels isn’t day-one stuff. It’s something you’ll likely get into as you progress through the intricacies of Photoshop.

I know what it’s like for someone who is new to this application. All they want to do is open an image, make some changes to it and get out. I get that. The thing is, there’s a lot to Photoshop that can greatly help you in your journey to become more proficient. Oftentimes, you’ll need to grasp the basics of a topic, simply to know it’s out there. You may never use it, but if you hear about it a few times and think it may be helpful later on, you’ll probably look into it in more depth as time goes on.

Photoshop has spent years building it’s tools in a way that allows the everyday user to avoid aspects that are complicated. I was watching a tutorial a few days ago that walked through the process of merging images together before Photoshop offered the ability to work with layers. This was back with Photoshop 2.5. Let me tell you, it was no easy task. If you’ve never heard of the Calculations command or the Apply Image command, consider yourself lucky. Fortunately, gaining an understanding of channels isn’t nearly as complex as the information in the video I sat through.

What are Channels?​

In the most simple terms, channels are the building blocks of an image’s colors we see in Photoshop. If we limit this discussion to RGB images (there are many more topics, but I’ll tackle them in later posts), I can tell you that the three channels that make up a color image, Red, Green and Blue (RGB), consist of varying degrees of black, white and gray. When you combine the three grayscale channels, the result is a color image.

Now, if you’re anything like me, you’re scratching your head at the explanation I just gave you. Don’t worry, I’m going to talk further below. For now, just try to follow along. I’ll even copy and paste a blurb from Adobe itself on channels:

Color information channels are created automatically when you open a new image. The image’s color mode determines the number of color channels created. For example, an RGB image has a channel for each color (red, green, and blue) plus a composite channel used for editing the image.

How Do I Access Channels?​

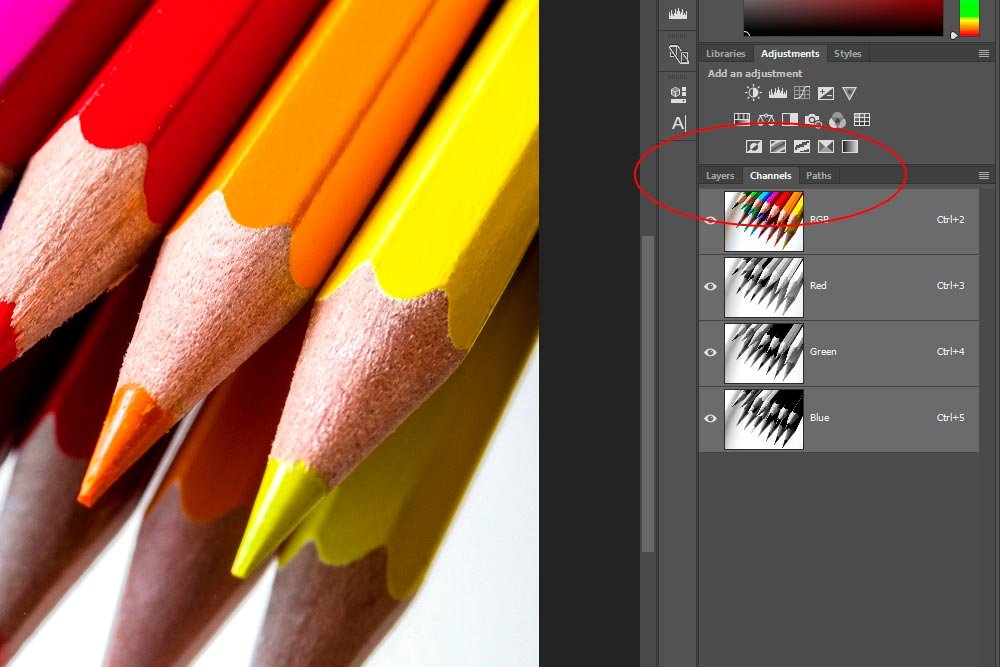
Accessing color channels is very simple. If you have the Layers panel open, you can click the Channels tab.

channels-panel.jpg

Inside the Channels panel, you’ll see a composite channel and the three color channels. As I mentioned above, each of the color channels appears in grayscale.

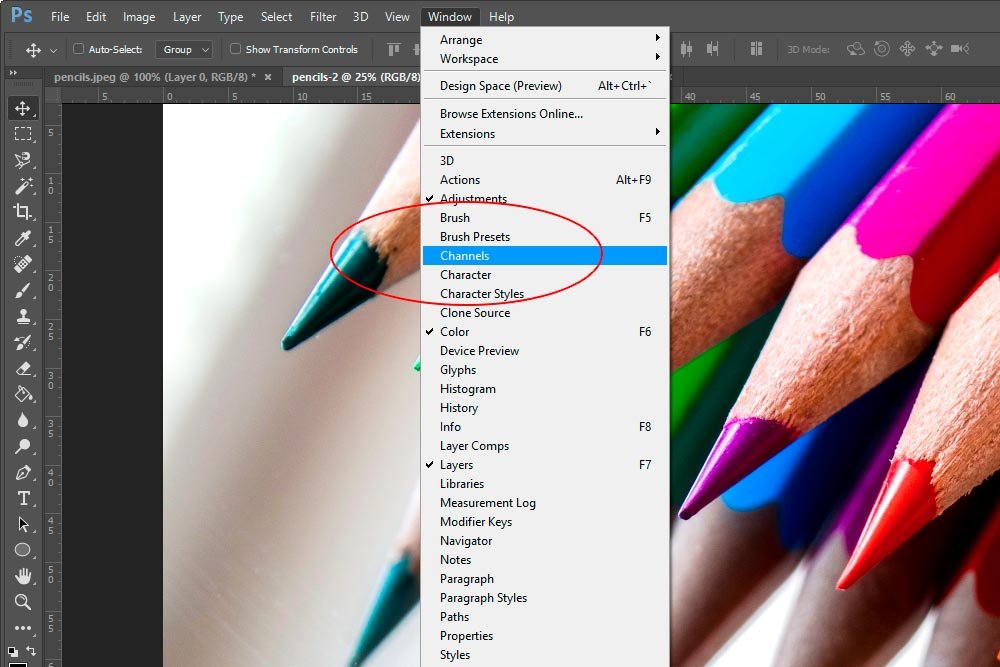
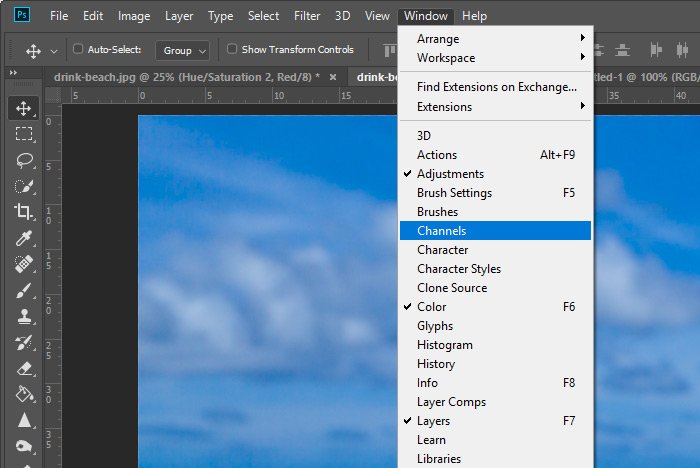
If, for some reason, you don’t have the Layers panel open or if the Channels tab isn’t available, you can head up to the Windows > Channels menu item and click. This will open the Channels panel.

window-channels-menu-item.jpg

A Closer Look at Each Color Channel​

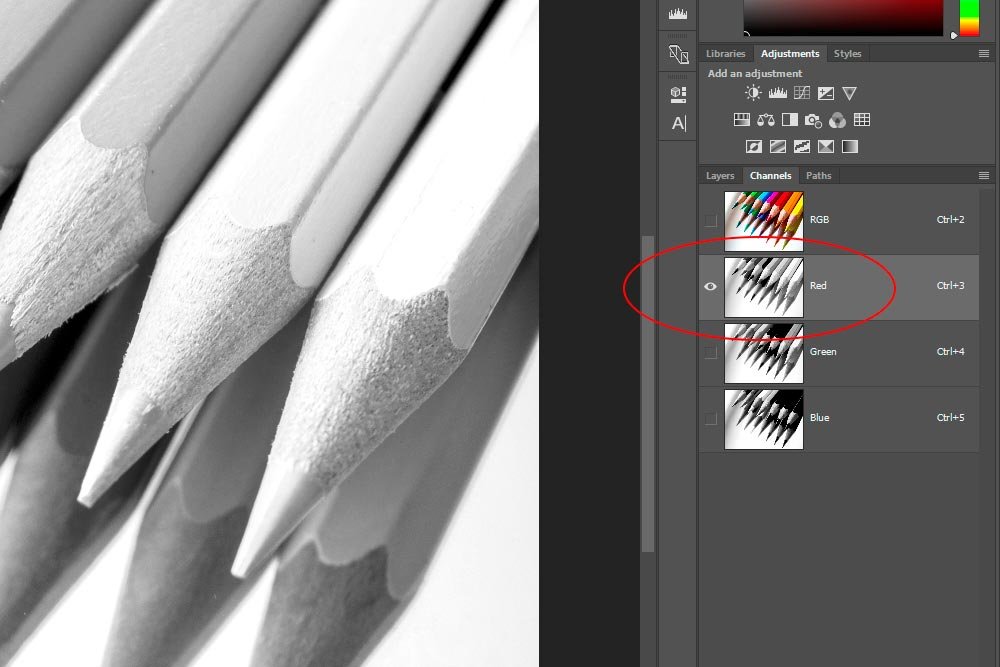
When you look at individual color channels in RGB mode, the lighter the shade, the more saturated that specific color is. For example, if we have a solid red image and we look at the Red channel for that image, it will appear white. The same goes for Blue and Green. If we select the Blue or the Green channels for blue and green images, respectively, they’ll appear white as well. For all the colors in between, they’ll appear different shades of gray. Let’s take a closer look now. I’ll go back into Photoshop and click once on the Red channel for the image I’m using for this post. By doing this, the Composite, Green and Blue channels will be deactivated. You can verify this by looking at the eye icon at the left side of those channels.

individual-selected-channel.jpg

Now, if we take a look at the photo, we’ll notice that the areas that were most red are now white or whitish.

red-channel.jpg

Let’s take a look at the Green channel. Notice how the whites, blacks and grays have shifted.

green-channel.jpg

And finally, we’ll look at the Blue channel.

blue-channel.jpg

Determining the Exact Amount of Red, Green and Blue in an Image​

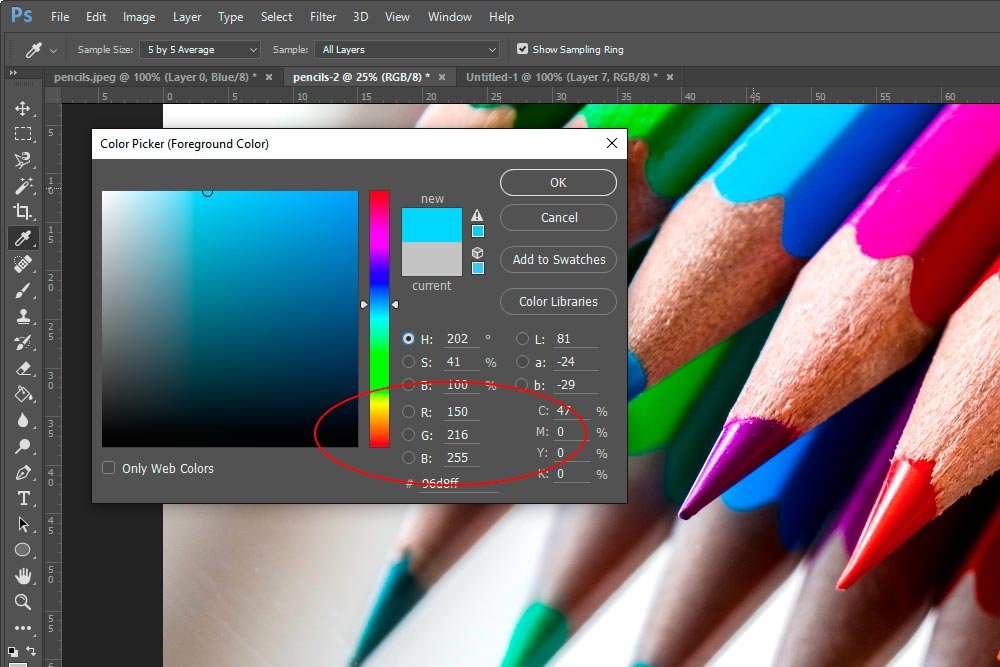
Sometimes, when you look at images through the gray areas of their channels, you get thrown for a loop. What you thought was blue or green or red comes out looking a shade of gray. The method I use for checking the exact measurements of these colors is through the Color Picker. I launch the Color Picker and use the dropper to select an area. Then, I look at the RGB fields in the picker.

color-picker-rgb.jpg

In this case, I clicked on, what I thought was, the blue pencil. As it turns out, the blue pencil is actually a combination of red, green and blue.

Editing Channels Through an Adjustment Layer​

I’m going to tell you that there are many methods available for turning a color image into a black and white image inside of Photoshop. Each has their advantages and disadvantages. It’s healthy to explore all of the methods because you’ll never know when you’ll need one over another.

If you look back to my post that covered creating a black and white photo in Adobe Camera Raw, things might look familiar here. Well, the concept is familiar, but the steps are slightly different. Below, I’ll explain how we can turn the above color image black and white and adjust each of the RGB channels to produce an image we can use.

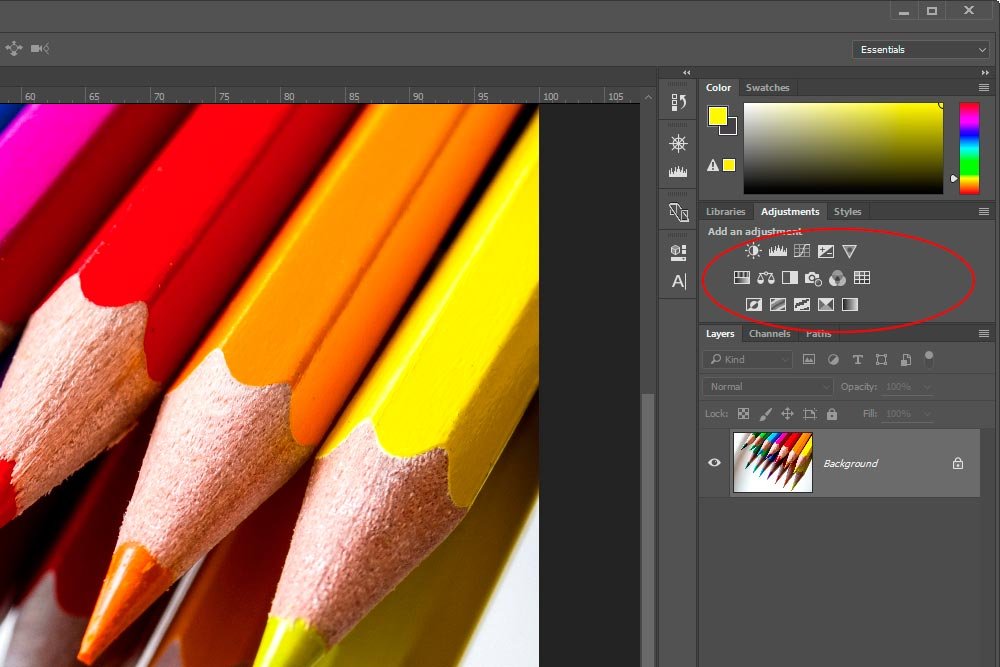
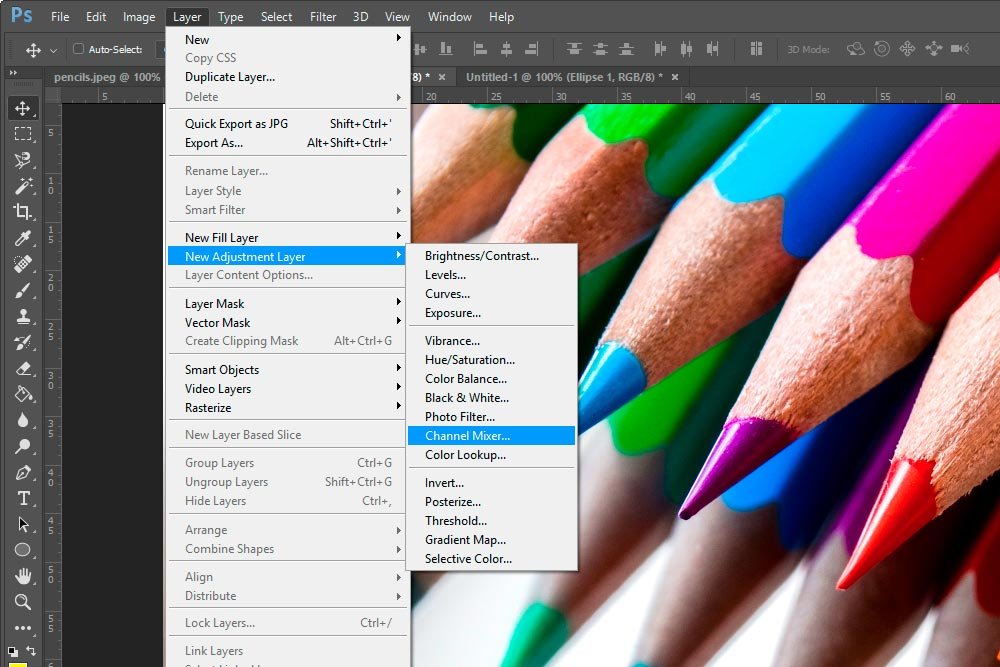
To edit the three channels in question, I’ll be using an adjustment layer. The specific tool I’ll be taking advantage of is called the Channel Mixer. I can access the Channel Mixer adjustment by either clicking the icon in the Adjustments panel or by heading up to the Layer > New Adjustment Layer > Channel Mixer menu item and clicking.

channel-mixer-adjustment-layer.jpg

layer-new-adjustment-layer-channel-mixer.jpg

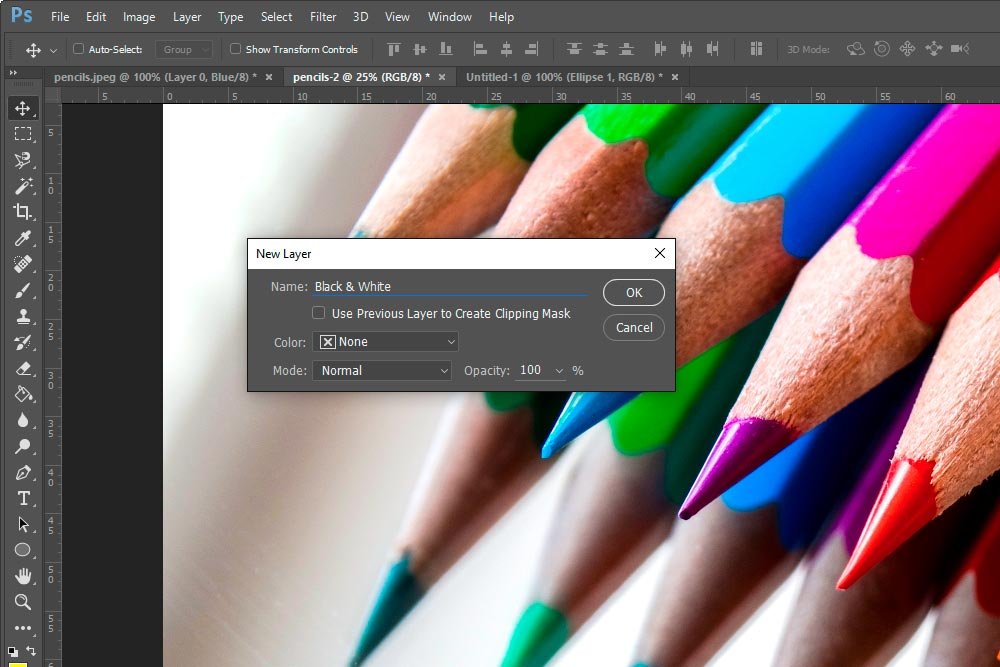
The benefit of using the top menu is that you’re able to name the adjustment layer via the New Layer dialog before creating the layer as opposed to naming it after it’s created.

naming-channel-mixer-adjustment-layer.jpg

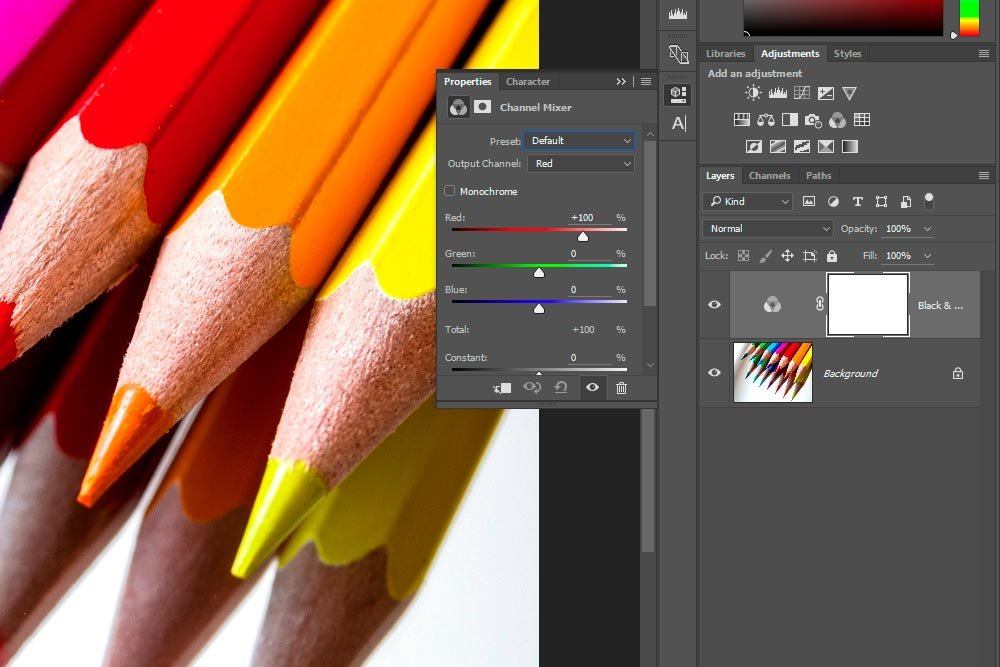
Whichever method you choose is up to you. Either way, the result will be a new adjustment layer. Also, once the layer is created, the Channel Mixer Properties panel will open.

channel-mixer-properties-panel.jpg

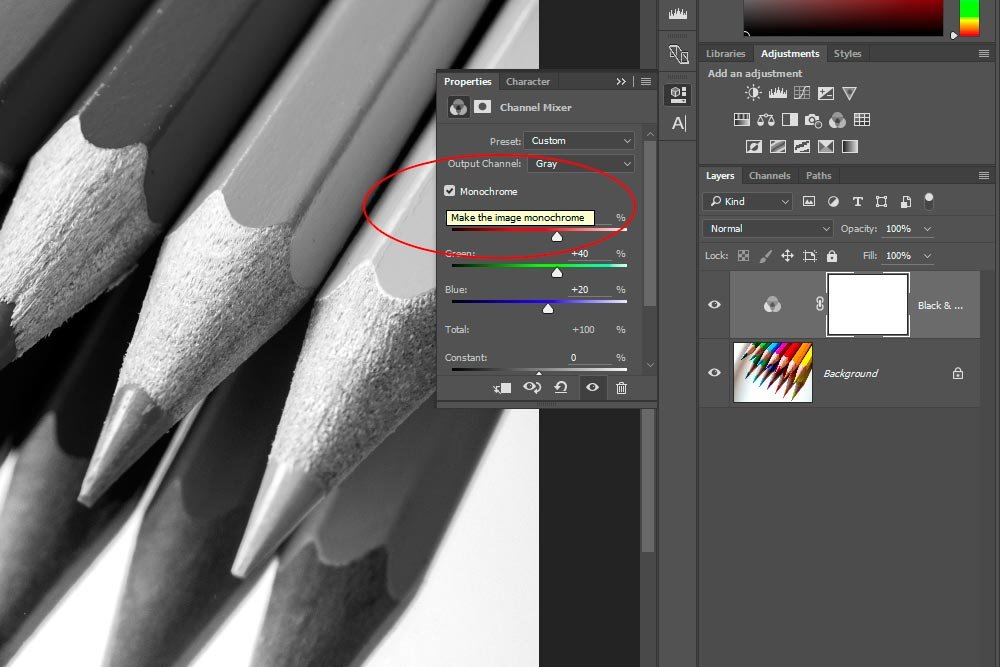
To convert the color image to black and white, I’ll click the Monochrome check box in the Properties panel.

monochrome-channel-mixer.jpg

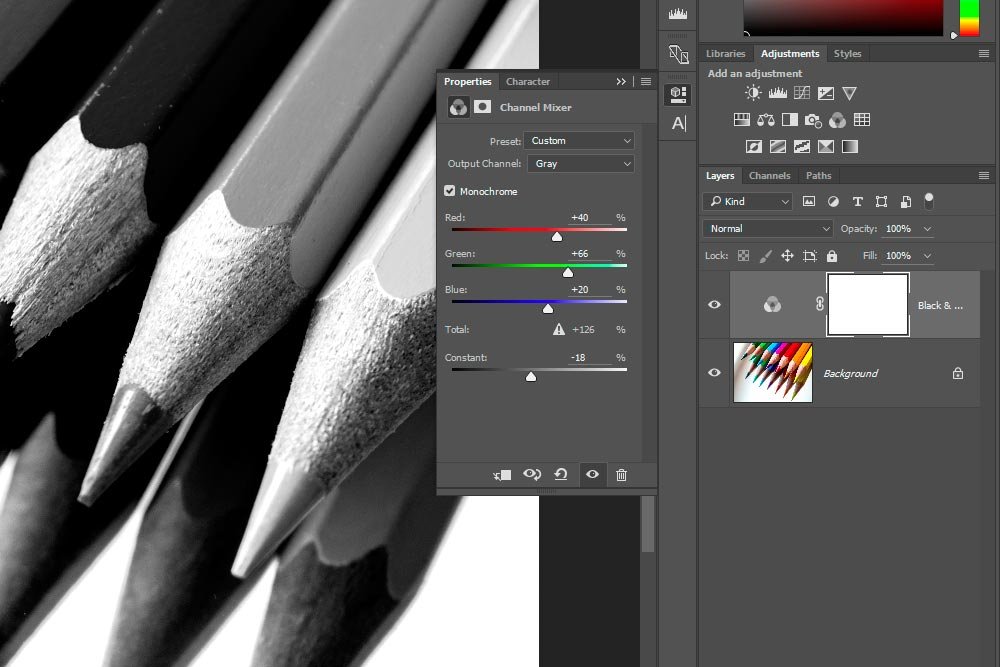
From here, I can adjust any of the sliders I want. Since I’m going for a bold look, I’ll simply move the Green slider to the right a bit and the Constant slider to the left. If I had a more interesting image, I might do more to it. For this demonstration, this is fine.

adjusting-monochrome-channels.jpg

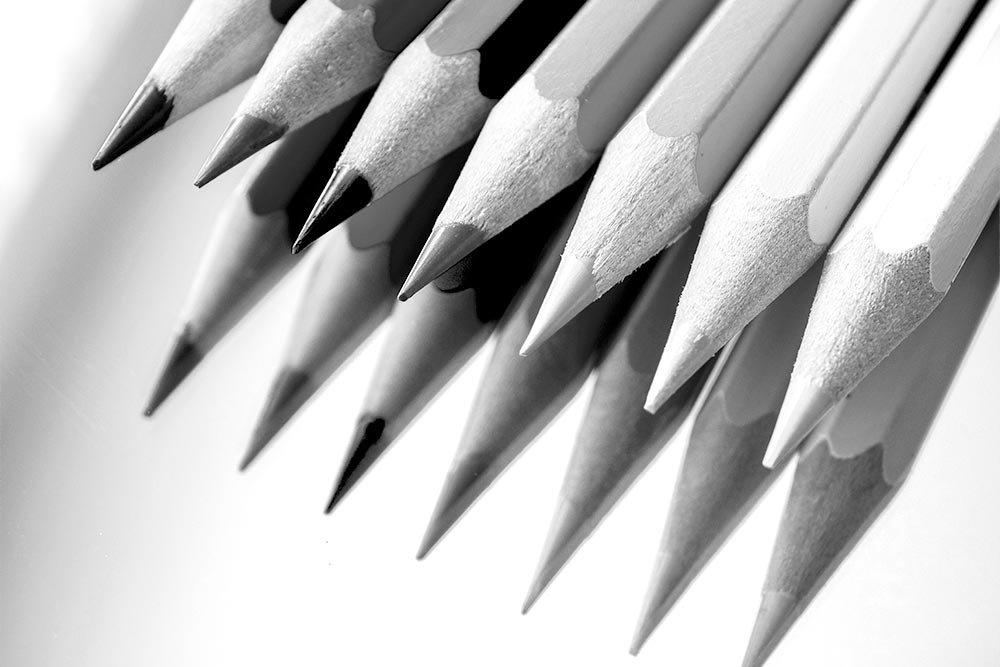
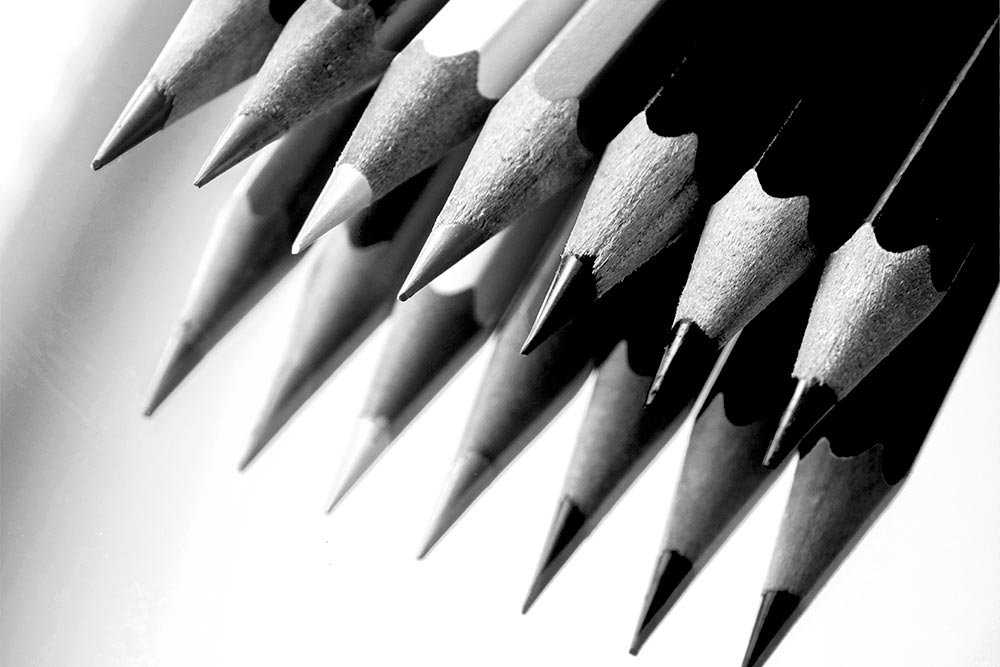
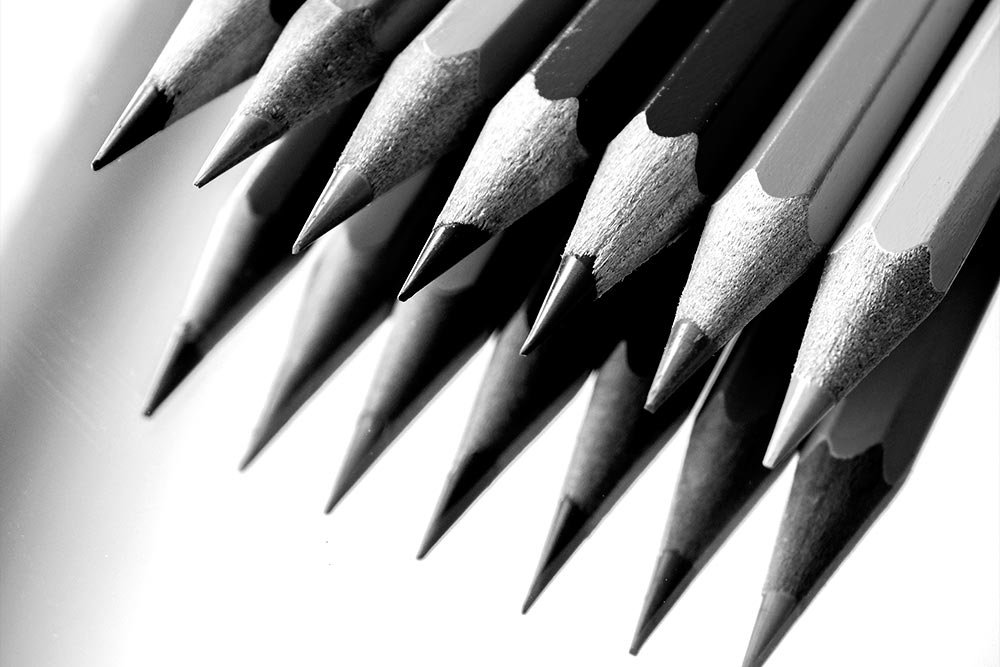
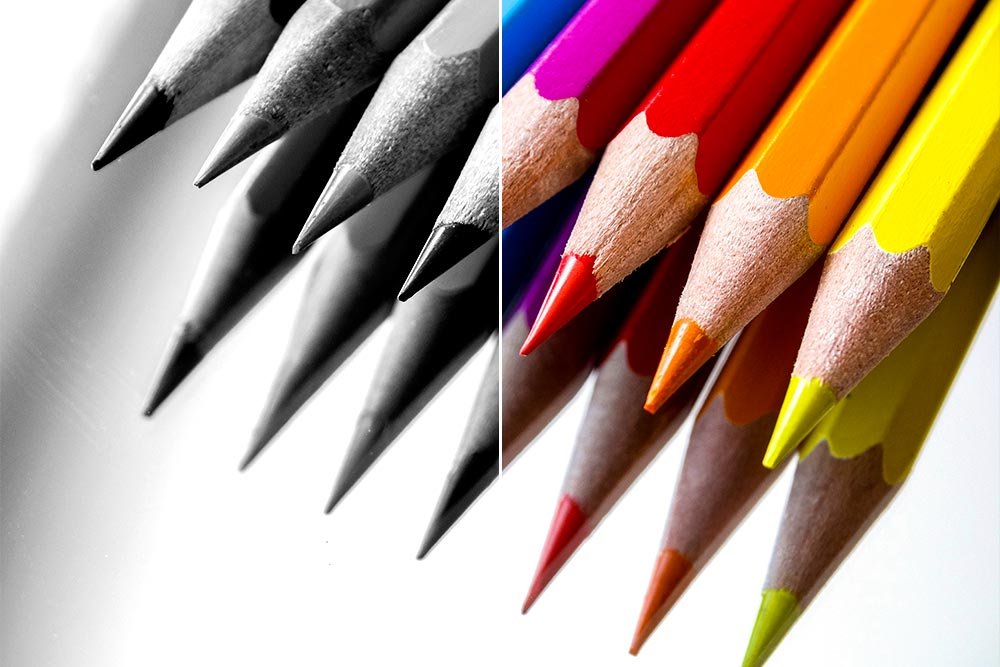
Here’s the image after adjustment.

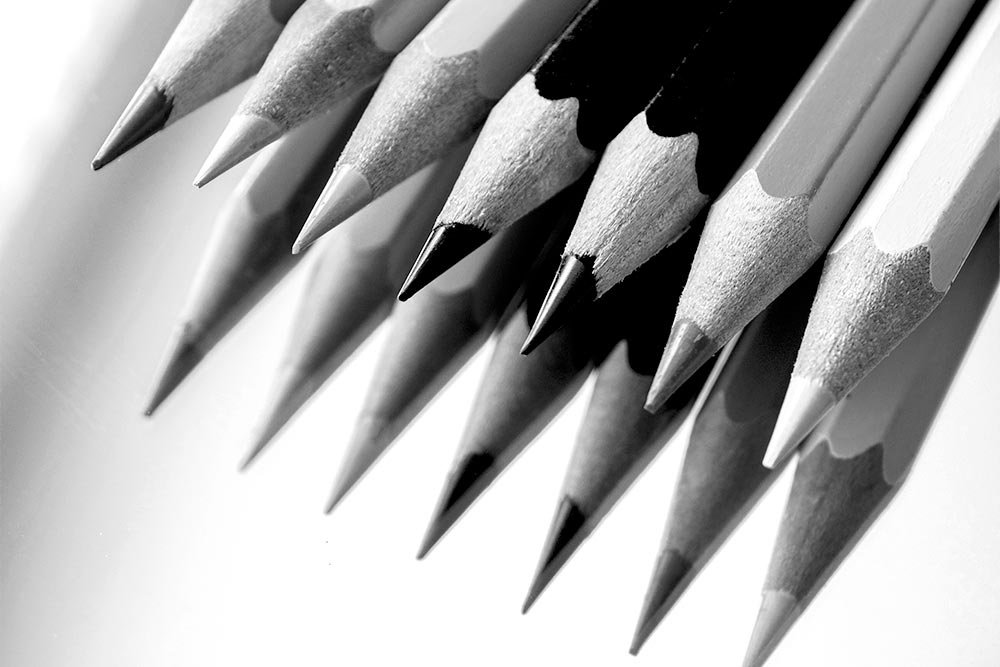
black-white-color-pencils.jpg

Since I created this black and white image by using an adjustment layer, I could always turn the adjustment on and off by clicking on the eye icon in the color layer in the Layers panel. It’s a non-destructive edit, which is why we use adjustment layers in the first place.

I wrote this post to give you a background on channels. I wanted to offer a glimpse of what they are and what they are capable of doing. I also wanted to demonstrate their powers through a real world example. I’d say this is a job well done. If you have any questions, I’m always here and I’m always will to help where I can. Thanks!
 
KristinaW

KristinaW

Member
Joined
May 7, 2021
Messages
127
Reaction Score
0
Points
18
  • #2

How to Make Selections Based on Channels in Adobe Photoshop​

I’ve been trying to avoid channels in Adobe Photoshop for years and years. I’ve heard about them, seen them and have even messed around with them a bit, but have never appreciated them in the least. It seems that every time I visited the Channels panel in this application, I pressed something that made everything look screwy. After that, I ran for the hills. I went back to the trusted Layers panel and got on with my work. I’ll admit that I was scared of channels because I didn’t know what to do with them. They were in unfamiliar territory and because of that, I never really appreciated all the power they possess. Well, you know what? No more. From here on out, I’m going to tackle channels head on and I’ll even bring my learnings to you.

In today’s post, I’m going to venture into the Channels panel in Adobe Photoshop. I’ll start off by giving you a very brief primer on what color channels are and then I’ll show you a hugely helpful tip on how you can create a selection based on a specific channel. Finally, I’ll alter that selection by applying an adjustment layer to it. You don’t need to know anything about the long history of channels (they were in existence before layers) to enjoy this post. All you need to know how to do is to push a few buttons and make a couple of clicks with your mouse to get something out of what I share. I really do think you’ll appreciate it.

Today’s Demo Photo​

I think this might just be the perfect image to use for what I’d like to show you today. It’s got such nice color separation. It’s not going to be difficult at all making the selections I’d like to make.

drink-on-beach.jpg

What are Color Channels?​

There are different types of channels, but to keep things ultra simple, I’m only going to discuss one type; color channels. And even then, I’m going to leave a lot of information out. From what I’ve learned, people lose interest in these things very quickly when they’re inundated with information about them. Because channels are so useful and powerful, it would be a shame to make you roll your eyes and click off this page, simply because I decided to show off how much there is to know.

Anyway, let’s get going. In Photoshop, channels are separate grayscale images that contain different types of information. Each cluster of information is stored in an individual channel, or container. The type of channels we’ll be dealing with today are called color information channels, or color channels. These are things that are created automatically when you open a new image inside of Photoshop. The reason you don’t see them right away is because the panel they’re held in either isn’t opened by default or is tucked away behind the Layers panel.

When you open an image, the channels are created, but they’re created based on what color mode the image has initially been created in. RGB images (for the web) contain three channels (red, green, blue), plus an overall composite RGB channel and CMYK images (for print) contain four color channels, plus a composite one. Images in Lab color mode contain three channels, plus a composite and images in Multicolor mode contain three total channels. Let me show you what I’m talking about with this RGB image I just opened up in Photoshop.

If I click on the Channels tab that’s next to the Layers panel tab, I’ll see the channels in question. If that panel isn’t available, I can just as easily head up to the Window > Channels menu item and click.

window-channels.jpg

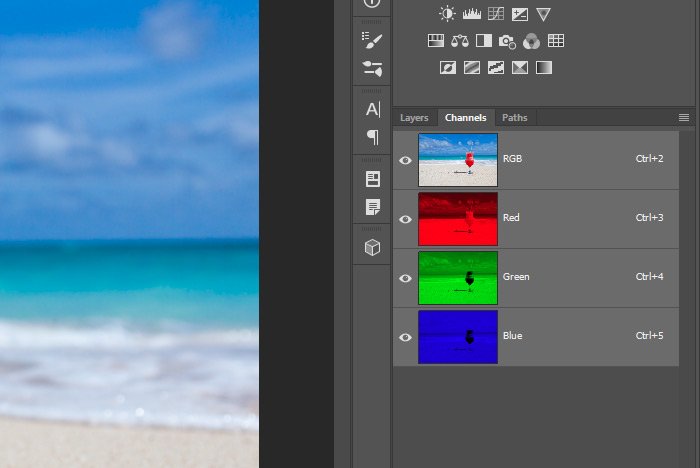
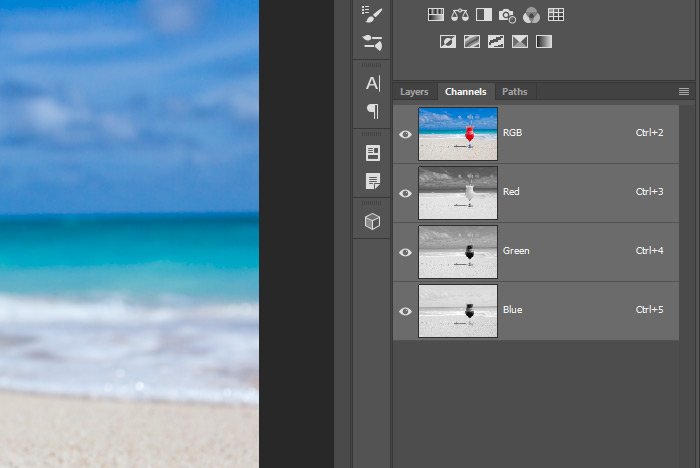
Once the panel is open, I’ll see the composite I was talking about, plus the other three individual colors.

rgb-channels.jpg

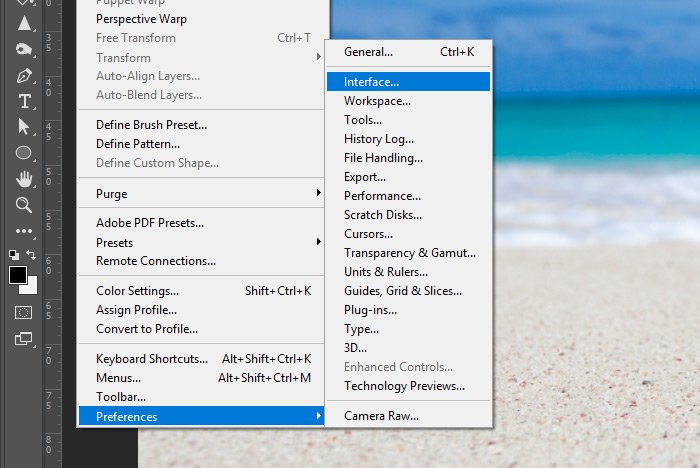
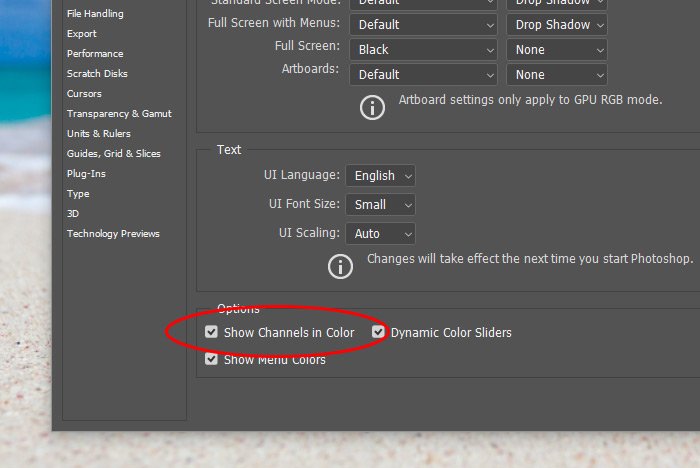
Treat each color as a film or a layer. Separately, they only contain their respective colors, but combined, they make up the full color image. Also, we’re seeing these thumbnails right now in color. We can also see them in black and white if we wish. To see them in that view, I can visit the Edit > Preferences > Interface menu item and uncheck the Show Channels in Color option.

edit-preferences-interface.jpg
show-channels-color.jpg

When I do that and click the OK button, I’ll see the color in each individual color channel disappear and turn black and white.

black-white-channels.jpg

If you look at the channel thumbnails closely, you’ll see black, white and gray areas. The black areas are those that don’t contain that specific color, the white areas contain that color completely and the gray areas contain some of that color. So if an image was completely solid red, the red channel would be totally white and the blue and green would be black.

For the time being, I think I’ll keep the channels in black and white mode. I can see things more clearly this way.

Making a Color Selection via a Channel​

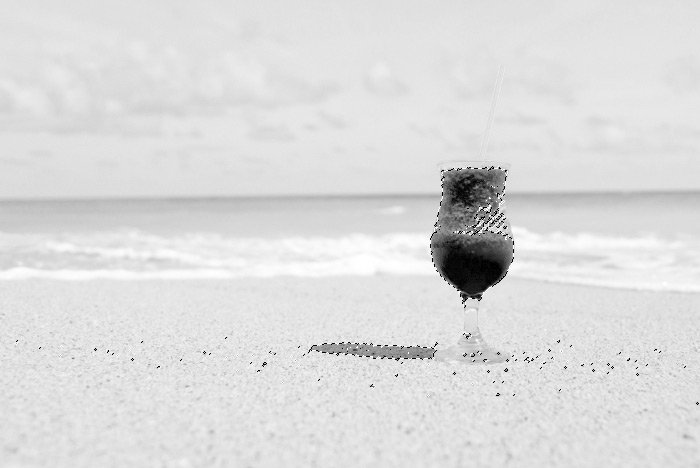
This is so cool. You’re going to love it. Let’s say that I wanted to alter this demo image somewhat. I’d like to get rid of a lot of the blues and greens and accentuate the red contents of the glass that’s sitting on the beach. To do this channel by channel, it wouldn’t be difficult at all. To start off with, I’ll make a selection. I think I’ll select the blues first. I’ll click on the Blue channel to make it active so I can see things better in the actual image itself and then when I’m sure that it’s the one I would like to make my selection in, I’ll hold down the Ctrl (Command on Mac) key and click once on the channel thumbnail. Doing this will select all the blues in the image. Take a look at the marching ants.

selected-blues.jpg

The above screenshot is a bit deceiving. It appears that the glass is selected. In actuality, almost everything is selected but the glass.

Okay, so that’s how you can make a color selection via the Channels panel. In the next section, I’ll do this and add some adjustment layers as well.

Adding an Adjustment Layer for Each Selection​

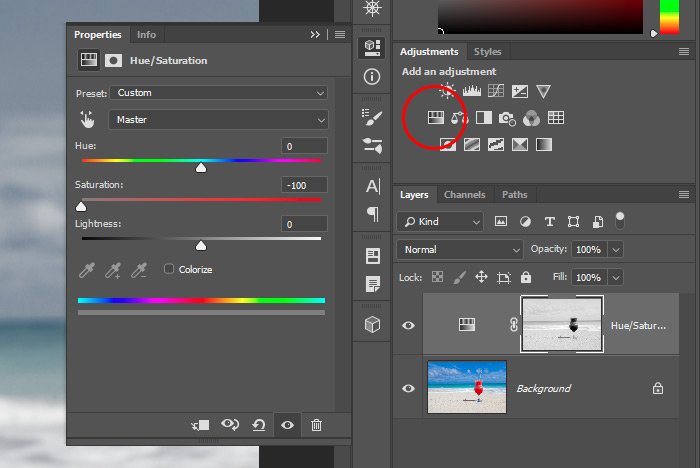
To create the effect I’m after, I’ll first select the blues from the Blue channel. Then, once I see the marching ants, I’ll click back into the Layers panel so I can see what I’m doing. After that, I’ll click on the Hue/Saturation icon up in the Adjustments panel.

hue-saturation-adjustment.jpg

Finally, I’ll push the Saturation slider in the Properties panel all the way to the left to remove as much saturation as I can. So, from the above screenshot, you can see that a new adjustment layer was created, the Properties panel was opened up and that I pushed the Saturation slider to the left. Let’s take a look at the resulting image.

desaturated-blues.jpg

Next, I’ll follow the same exact steps for the Green channel and then again for the Red. For the Red channel though, I’ll push the Saturation slider slightly to the right to increase that color a bit. In all, I’ll have made three selections; one for each channel. After making those selections, I’ll have created three different Hue/Saturation adjustment layers that will have reduced the saturation of the blues and greens and increased the saturation of the reds. Let’s take a look at the final image.

saturated-reds.jpg

See? Pretty cool, right? Honestly, when was the last time you made a selection from different channels in the Channels panel? I’m guessing it was either a long time ago or maybe even never. You learn something new every day! And if you think about it, you can take this concept and apply it to about a million different things. It’s so versatile.

I hope I clearly explained how to work a little bit inside of the Channels panel in Adobe Photoshop. You should now know how to make a selection from a specific color channel and how to apply that selection to create an effect by way of adjustment layers. If you have any questions regarding this post, please let me know in the comment section below. You may also ask questions in my new discussion forum. Thanks for reading!
 
KristinaW

KristinaW

Member
Joined
May 7, 2021
Messages
127
Reaction Score
0
Points
18
  • #3

Using Alpha Channels for Masking in Adobe Photoshop​

If you’re one of the 99 people out of 100 I’m thinking of right now, you’ll likely never need to know what an alpha channel is when it comes to Adobe Photoshop, but if you’re that one out of 100, you most likely do. Alpha channels (or channels overall) are those things you sort of hear about, but never quite understand. They’re hidden somewhere near the Layers panel, but not often looked into, which is a shame, because they’re actually quite handy to have around. And once you get a handle on what they are, you realize that they aren’t all that mysterious or difficult to comprehend after all. They’re very straightforward, but not talked about nearly enough.

In today’s post, I’d like to do two things that have to do with Adobe Photoshop. First, I’d like to give you the simplest description of an alpha channel as I possibly can and second, I’d like to show you what they’re good for. I’ll quickly run through that description and then leave it up to you to do what you will with it. Once you understand that alpha channels are tools that can be used for a variety of things, I think you’ll return to them time and time again.

Working Image​

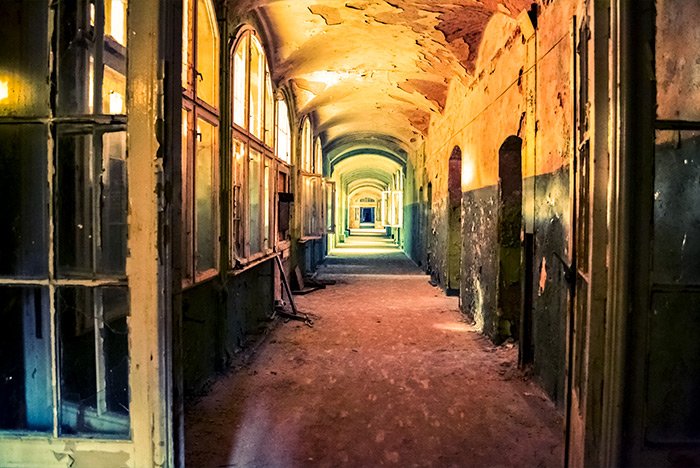
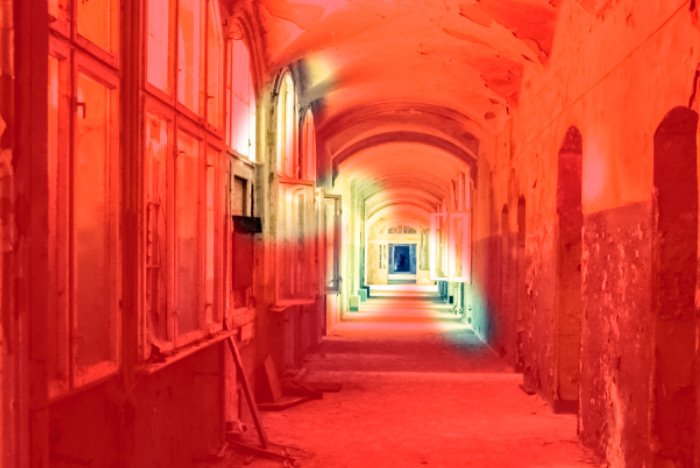
It makes absolutely no difference which image I use today. All I need is for something to be opened up in Photoshop to assist me with what I’d like to cover. I pretty much closed my eyes and pulled this picture of an aging hallway out of a hat. Here you are.

old-hallway.jpg

What is an Alpha Channel?​

I’d like to let you know that I’ve already written a few posts that discuss channels in general on this website. If this is your first experience with these things, you most likely won’t click on the following links because you don’t yet know how they’ll benefit you. But, if by the end of this post, I’ve piqued your interest, please feel free to come back up here to learn a bit more. Channels really are interesting creatures.

Working with Channels in Adobe Photoshop
How to Make Selections Based on Channels in Adobe Photoshop

Okay, let’s get going. To kick things off, I’d like to define an alpha channel as best I can. Here you are:

Basically, an alpha channel is an additional “layer” in the Channels panel that controls the transparency for specific colors or selections. You already know that the Channels panel contains the RGB, Red, Green and Blue elements by default, but what you may not know is that we can also create new elements that can determine the opacity for an object in an image. If what I just wrote isn’t entirely understood, please continue on below and by the end of this post, everything should be clear.

How to Create an Alpha Channel​

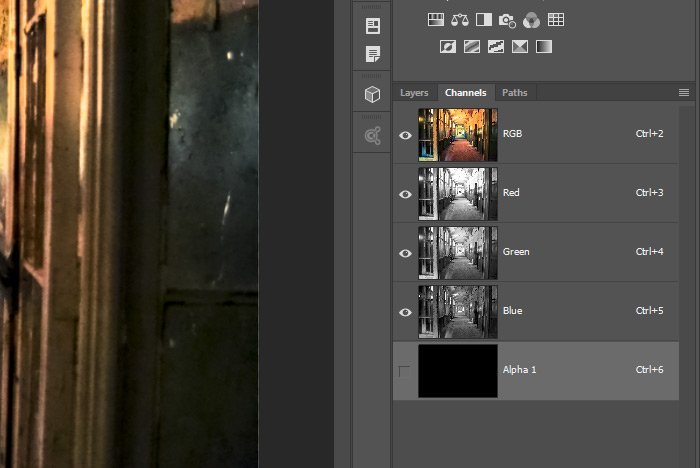
To create a new alpha channel, I’ll head into the Channels panel by clicking on the tab to the right of the Layers tab. If you’re following along and don’t see this tab, you can go up to the Window > Channels menu item and click. That’s just as easy.

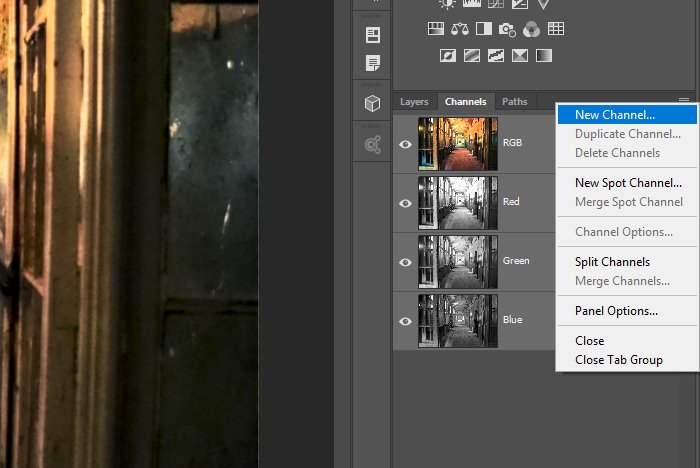
Once I’m in the correct panel, I’ll click on the small menu icon that’s located in the upper right and then, from there, I’ll select the New Channel menu item.

new-channel.jpg

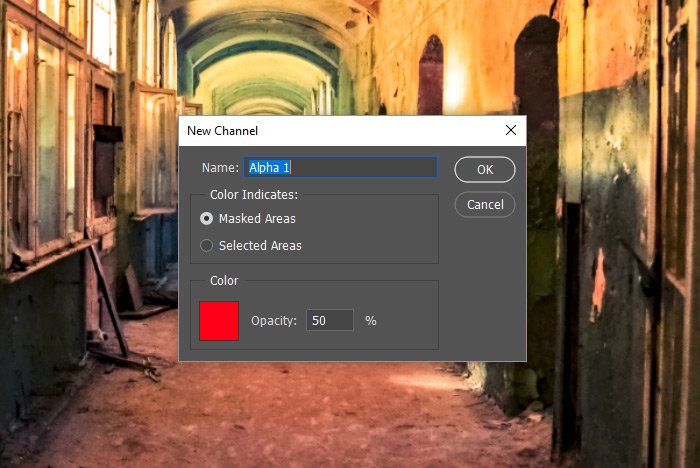
After I select that item, the New Channel dialog will appear. Inside this dialog, I can change a few settings. For now, I’ll simply keep things the way they are and click the OK button to move forward.

new-channel-dialog.jpg

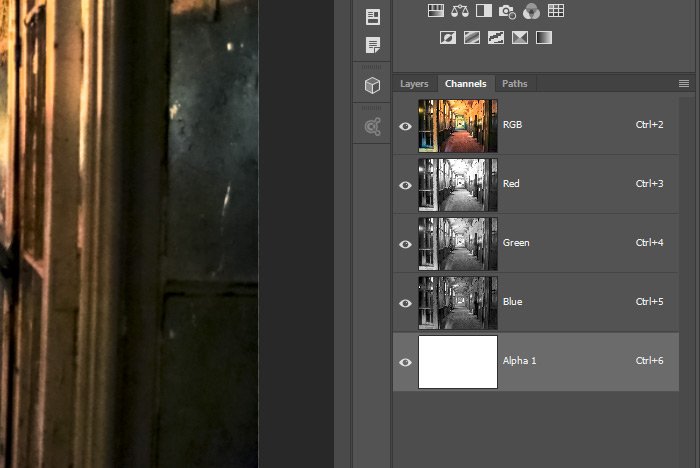
After I click the OK button, the dialog box will disappear and I’ll be left with a new element in the Channels panel. The thumbnail will be black and it’ll be located directly below the other channels. Also, the visibility will be turned off by default.

alpha-channel-element.jpg

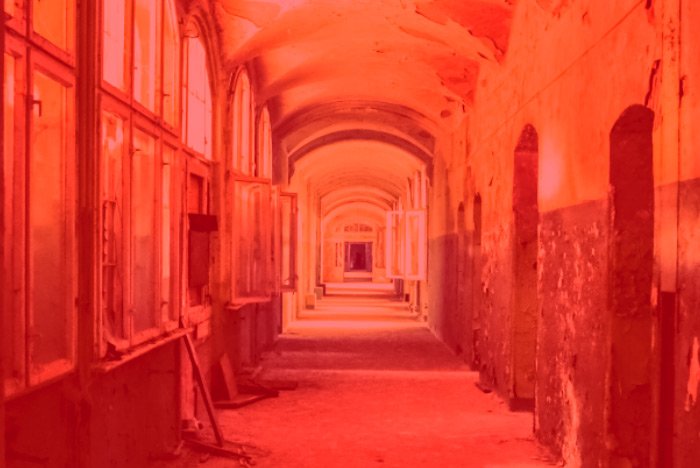
If I were to turn the visibility for this channel on and off, I’d see those settings that were in the dialog box come alive and then disappear again. In my case, since the overlay value was red and 50%, I’ll see a semi-transparent red overlay.

overlay.jpg

I’ve Just Created a Mask​

If you complete the steps in the above section, you should be able to create an alpha channel. That’s not so difficult, is it? That’s actually half the battle. From here on, all that’s left are a few things to understand. And they aren’t even that challenging of ideas.

Let’s first talk about what just happened. The only reason this might throw you for a loop is because you’re making too much of it. In the simplest sense, by following the steps above, I created a mask. That’s it. If you take a look inside the Channels panel located in one of the above screenshots, you’ll see that the new alpha channel’s thumbnail is black. That means that the mask that is the alpha channel is blocking the other channels from being visible, just like any other more traditional mask would do. Call it a “channel mask” if you want. And the only reason this mask is red and semi-transparent is because those are the settings I chose inside of the New Channel dialog box. The mask could be black or blue or any other color I choose. It just happens to be red and at 50% opacity today.

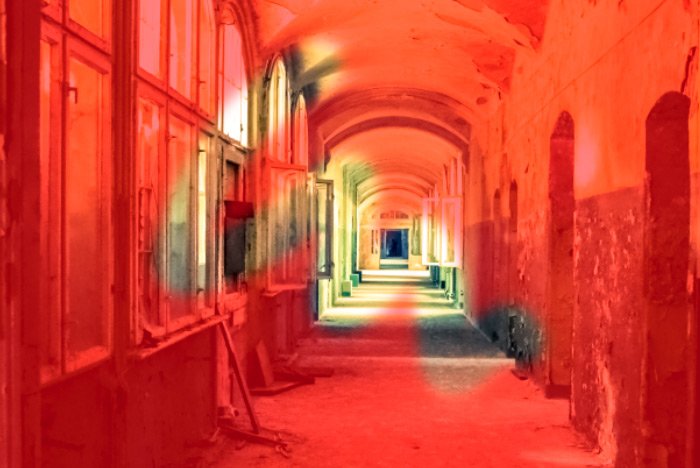
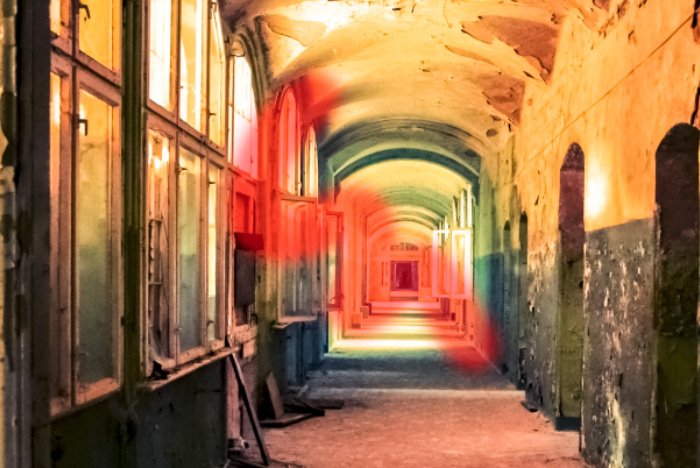
Here’s something else for you to chew on. If I were to save this image out as a JPEG file or something else, there would be no evidence of this mask at all. That’s why I like to think of these things as tools for use inside of Photoshop. In the sections below, I’ll show you what they can do and why they are so cool. First though, let me really hammer this mask point home for a moment. I’m going to use my Brush Tool to draw a squiggly line in white right on the image. Right on top of this alpha channel. Check this out.

drawing-white.jpg

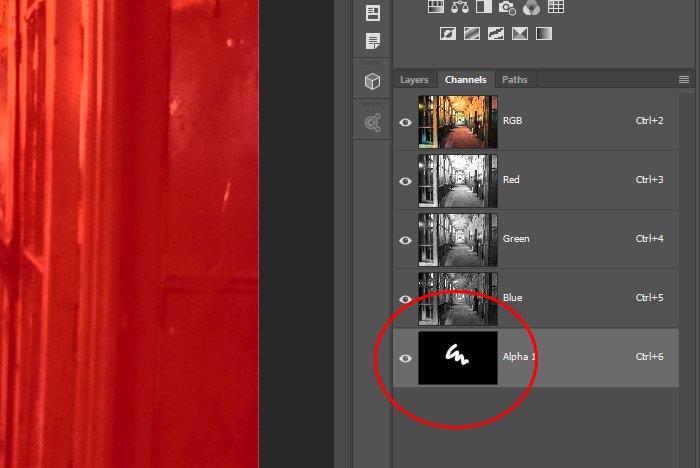
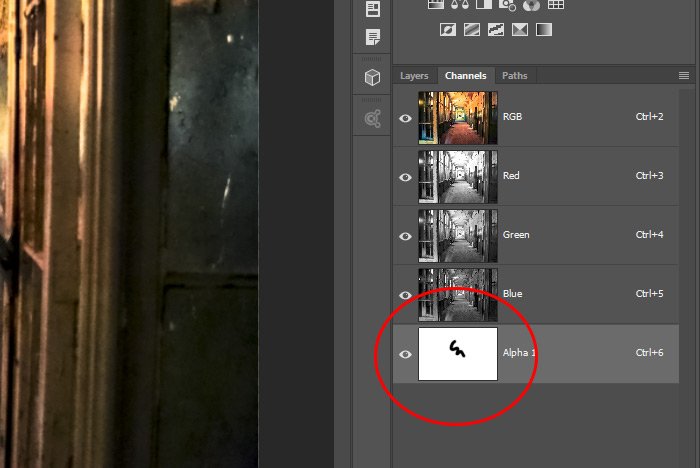
That sort of looks like what happens when you draw on a mask in white, right? That’s because it is. To prove it, I’ll show you the alpha channel thumbnail. It’s black with a white line drawn on it.

channel-mask.jpg

Inverting a Channel Mask​

In this section, I’m going to quickly show you how to invert a channel, meaning, change the mask from being black to being white. When the thumbnail is black, that means the red overlay will be visible (the mask will be intact, hiding the other channels). When it’s white, that means it won’t be. I’ll show you why this is important in a moment. Just stick with me here.

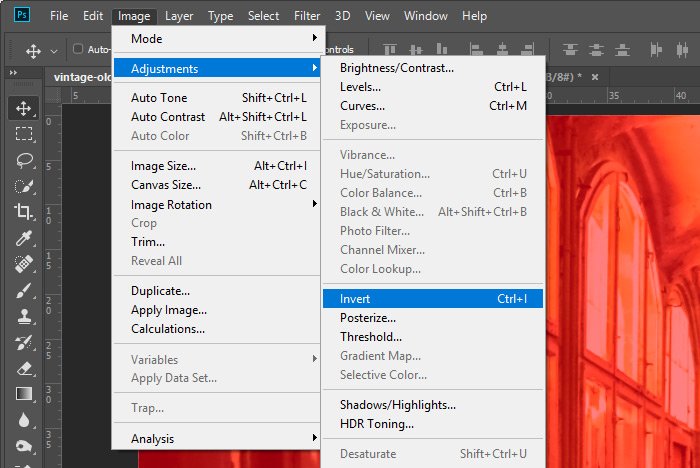
Okay, after creating the alpha channel, I can either use the keyboard shortcut of Ctrl+I to invert it or head up to the Image > Adjustments > Invert menu item and click. Both will change the black to white.

image-adjustments-invert.jpg

Check out the next screenshot. The alpha channel is now white and that means that it’s not blocking any of the other channels from being shown. It’s behaving just like any other mask would. Remember, black conceals and white reveals.

white-alpha-channel.jpg

Really, all I’ve done so far in this post is create an alpha channel and invert it. I also showed you that you can draw on a mask with white. But now that the mask is white itself (no mask at all), let’s see what happens when we draw with black to hide some of the other channels. I’ll use the Brush Tool again to draw another squiggly line. This time though, I’ll draw with black instead of white.

drawing-mask.jpg

Oh man, now we’re getting somewhere. By drawing with black, I just hid some of the other channels. I guess my question now is, who the heck cares? What can I do with this? Why is it important? I’ll answer those questions below. I needed to lay some groundwork before I covered this new material. Before I forget though, take a look at the alpha channel thumbnail now. It’s got the black squiggly line in it.

white-thumbnail.jpg

Creating a Selection​

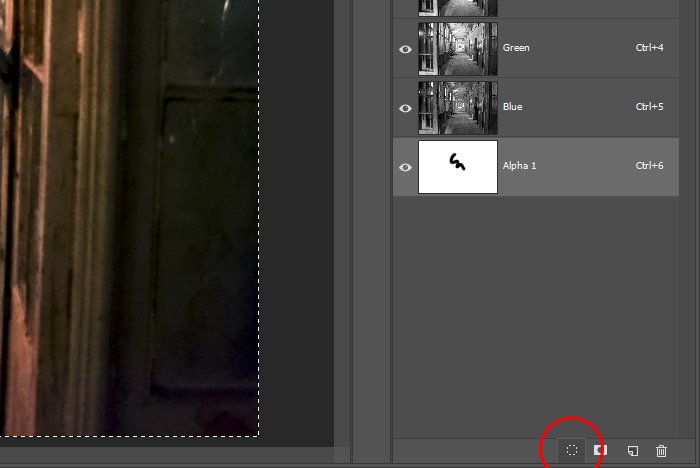
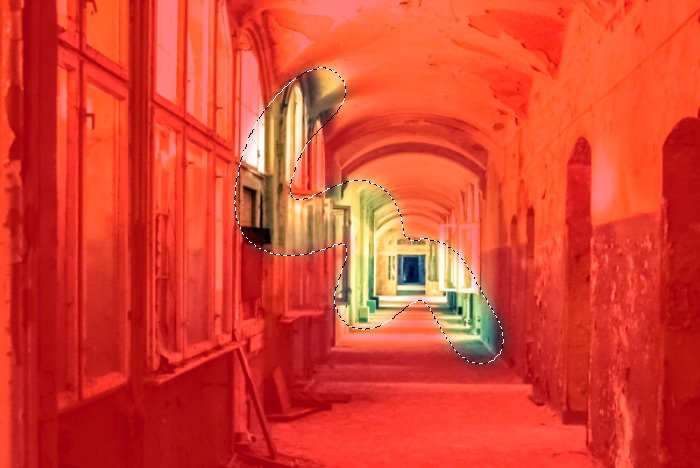
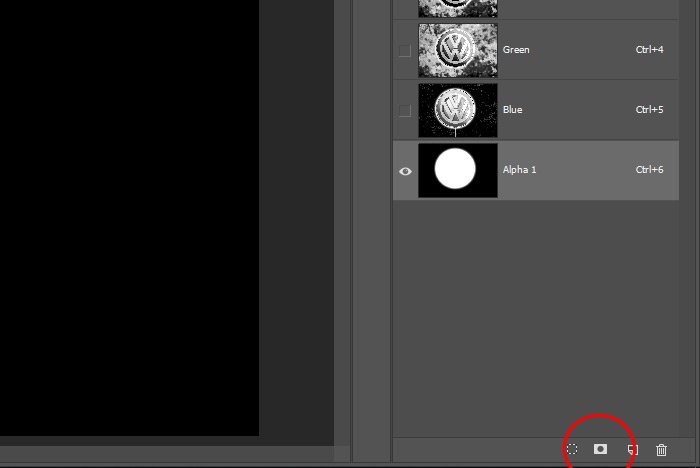
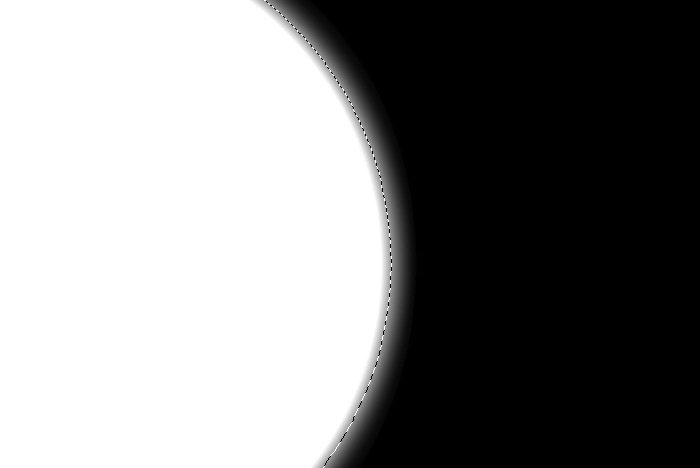
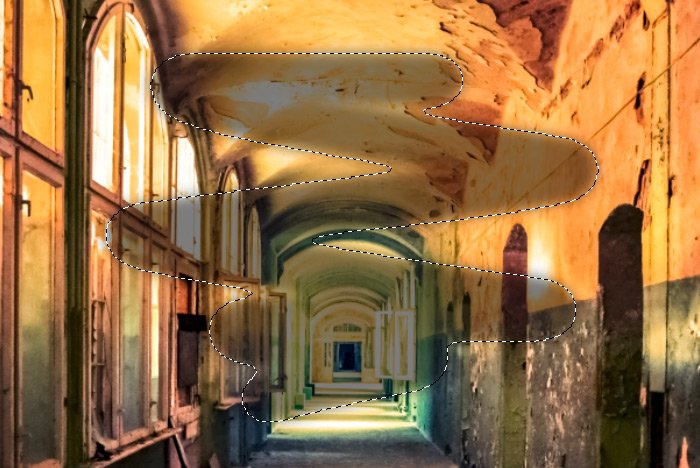
Okay, check this out. It’s going to knock your socks off. If I head down to the bottom of the Channels panel and click on the Load Channel as Selection button, the area other than the squiggly line will turn into a selection.

load-channel-as-selection.jpg
selected-mask.jpg

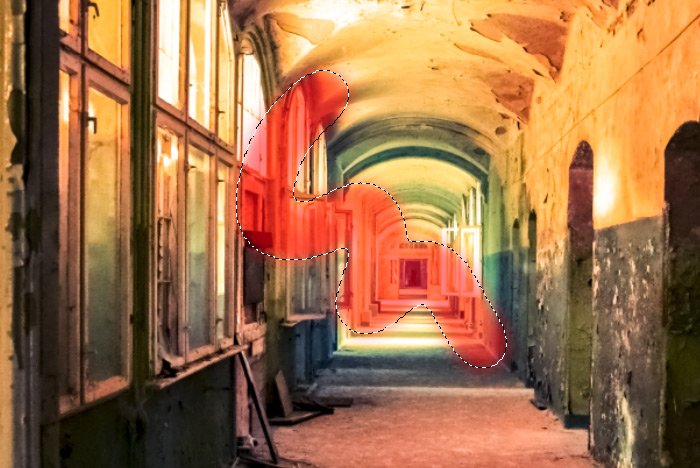
If I wanted to select the area that isn’t masked, I can simply deselect what I just selected by using the Select > Deselect menu item and then invert the mask. Then, I’d click that same button as I just did to create the selection. Actually, I think I’ll do that. Take a look. Now just the squiggly line is selected and not the other way around.

no-mask-selected.jpg

Using the Selection For an Adjustment​

Okay, we are now rocking and rolling. We’ve gone over how to create an alpha channel and how to make a selection inside of it. Now, let’s talk about why in the world you’d want to do something like this.

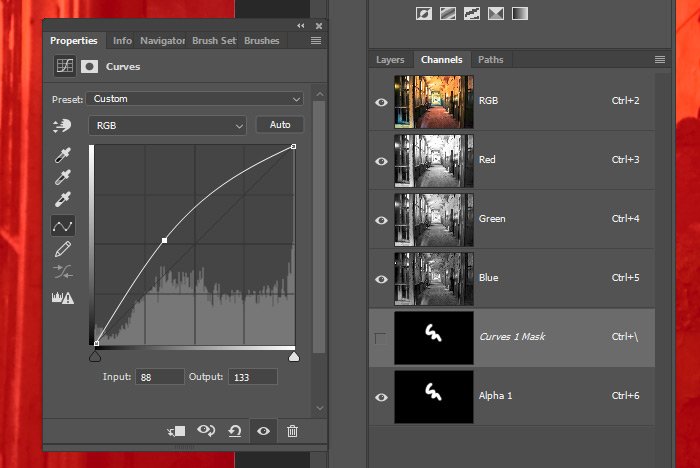
Since I have an existing selection, all I have to do is click on one of the adjustments up in the Adjustments panel to work with that selection. For this example, I’ll click the Curves adjustment, which will immediately place a new Mask channel in the Channels panel. Take a look.

curves-mask.jpg

I’ll pull up on the curve, just to show you that it can edit whatever content is inside the selection. Here you go.

edited-selection.jpg

Do you see how the squiggle is now brighter? This works exactly the same way as if I had created a selection on the image the regular way and then applied an adjustment after that. All I did in this post was go through the back door and do things a bit differently.

What’s the Point of an Alpha Channel?​

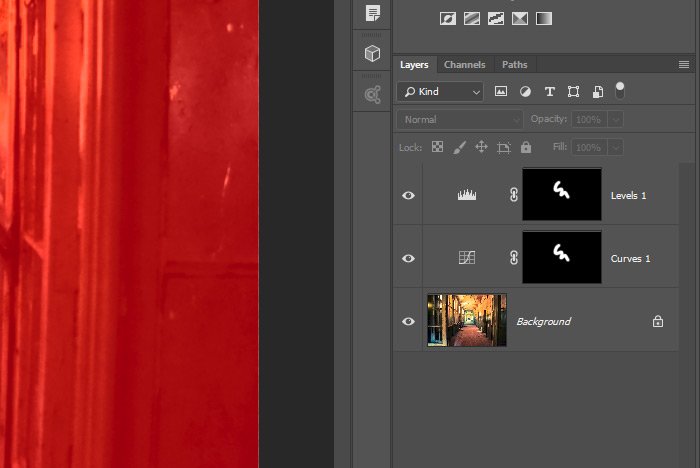
You’re probably asking yourself what the point of an alpha channel is. Here’s the point: creating an alpha channel and editing it as you would edit a mask, saves that mask for you to work with again in the future. It’s stored right there in the Channels panel. So in my case, if I wanted to create many very intricate masks that I’ll need to use over and over, I’ll have them all stored as alpha channels. As an example, after applying the Curves adjustment, I went ahead and made the same alpha channel a selection again. Then, I applied the Levels adjustment from it. Let’s take a look at the Layers panel now.

levels-curves-adjustments.jpg

Now I’ve got two adjustment layers that have been created off of the same mask in the Channels panel. I could keep working from that same channel if I needed to. It’s quite versatile.

Creating a Channel From a Mask​

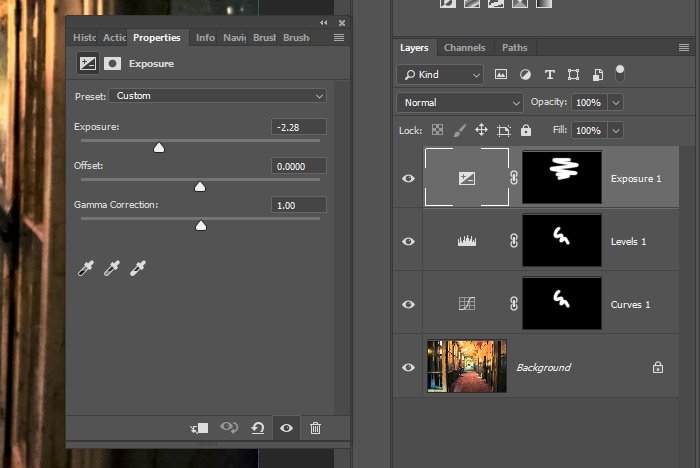
To really bring my point home about how regular masks and alpha channels work together, I’ll move back into the Layers panel. Then, I’ll apply the Exposure adjustment. I’ll invert the mask in the adjustment so the thumbnail is black and then I’ll use the Brush Tool to paint some white on the image. Finally, I’ll reduce the exposure a bit. Let’s take a look at the Layers channel now.

exposure-adjustment-layer.jpg

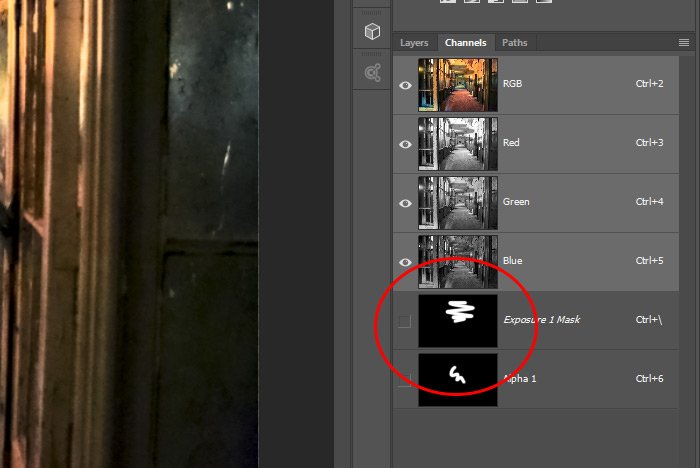
Do you see the new Exposure adjustment layer? Good. There’s nothing new going on here. All I did was apply a regular old adjustment layer and then adjust the mask that comes with it. Now let’s check out the Channels panel again to see if anything new was added there.

exposure-mask.jpg

Well lo and behold, a new channel has been formed. This one is called the Exposure 1 Mask. Do you see how these things are actually one and the same? Masks are alpha channels and vice-versa. Since we’re now in the Channels panel, let’s make sure this new mask channel is selected and then I’ll go down to the bottom of the panel again and click the Load Channel as Selection button, like I did up above. Let’s check out the selection that’s created from this mask.

channel-selection.jpg

Yup, just as it should be. Another selection was created. I could go on forever like this, flipping back and forth between the Layers and Channels panels.

Saving a Selection as an Alpha Channel​

This will be the last section, I promise. I know this post is getting a bit long.

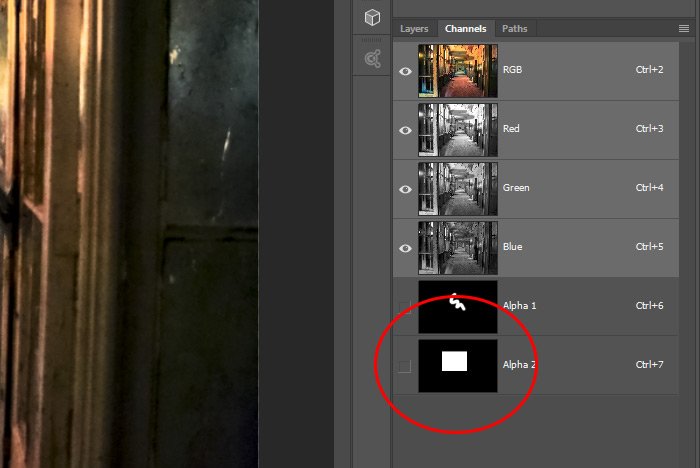
One of the most helpful features when it comes to working with alpha channels is having the ability to save regular selections as these types of channels. To show you what I mean, I’ll go ahead and use the Rectangular Marquee Tool to draw a square (or rectangle) selection on the image. I’m doing this the way I would normally do this, as if I had just opened the image in Photoshop and made the selection. Nothing fancy here.

Now, I’ll click into the Channels panel and head down to the bottom of it and click the Save Selection as Channel button. Let’s see what happens.

second-alpha-channel.jpg

Notice how there has been another alpha channel saved. It’s the selection I just made. Now it’s a mask and I can use it over and over in my project. Very handy!

I know this post was long, but there was a lot to cover. You’ll likely have some questions, so please don’t hesitate to ask in the comment section below. Also, if you’d like to discuss how to save selections as alpha channels or how to create and work with alpha channels in Photoshop in general, please visit the Photoshop discussion board to do so. Thanks for reading!
 
KristinaW

KristinaW

Member
Joined
May 7, 2021
Messages
127
Reaction Score
0
Points
18
  • #4

How to Save Selections & Smart Objects as Alpha Channels in Adobe Photoshop​

I’d like to follow up on my most recent post regarding alpha channels in Adobe Photoshop. There’s one thing I need to touch on that might make all the difference when using this feature of the application. It has to do with selecting a layer that has layer styles applied to it. As it stands, when selecting a layer and that layer has a style attached to it, the selection ignores the style (or styles). This is an issue because the whole purpose of selecting something and then creating an alpha channel from that selection is to create a mask that can be saved for immediate or later use. When the layer style doesn’t carry over, a lot of extra work can be created.

In today’s post, I’d like to work through a very brief process of showing you how to deal with the issue I described above inside of Adobe Photoshop. It’s such a simple solutions, but I feel that incorporating it into a wider scenario will be helpful. I promise to keep it brief though.

The Demo Image​

I needed to find an image that I could cut something out of to place on its own layer. I think this Volkswagen emblem on a stick is perfect for that. Take a look.

vw-logo.jpg

Selecting & Copying the Emblem​

For this first step, just to keep this type of scenario realistic, I’m going to go ahead and select the emblem and then copy and paste it onto its own layer. To do that, I’ll set up two guides, one across the top and the other down the left side. I’ll use those to make my selection.

selected-emblem.jpg

The way I managed to make this perfectly round selection that sits right on top of the emblem is like this; I used the Rectangular Marquee Tool to make the selection. I activated the tool and then I sat my mouse pointer on top of the intersection of the guides. Then, I held down the Shift key on my keyboard to lock the proportion and finally, I dragged the mouse down and to the right, across the emblem. When I saw the selection match up with the edges of the emblem, I let go of the mouse.

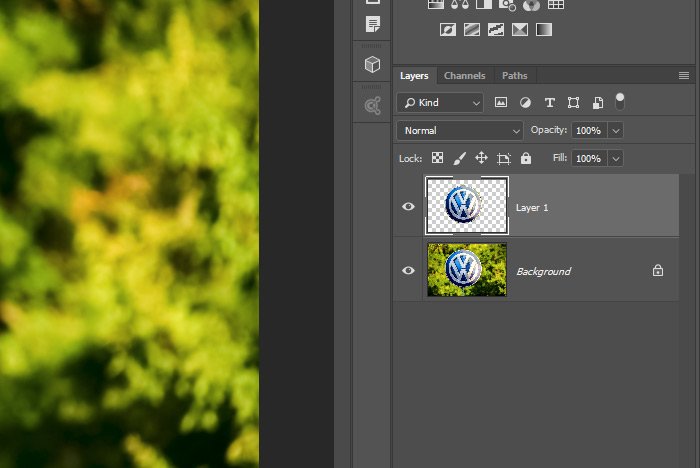
Once the emblem was selected, I simply used the keyboard shortcuts of Ctrl+C to copy and then Ctrl+V to paste. That put just the emblem on its own later. Take a look at the Layers panel.

layers-panel-emblem.jpg

Applying a Layer Style​

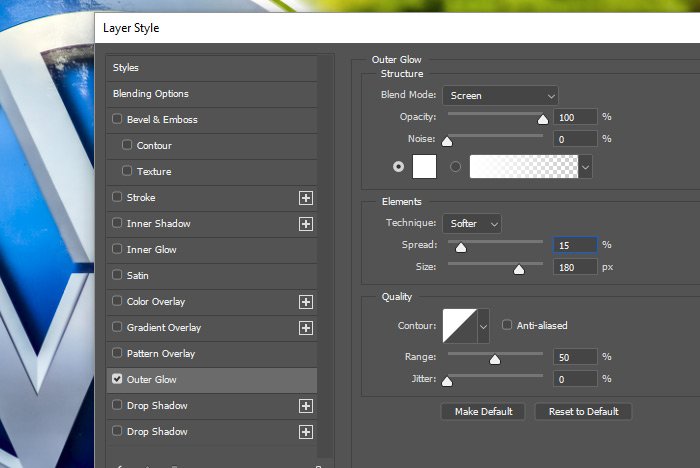
The next thing I’ll do is create a layer style. I’ll double-click on the new layer in the Layers panel to open up the Layer Style palette and then I’ll click on the Outer Glow option. I’ll push a few sliders, just to make the style appear clearly for this demonstration. When I’m finished with that, I’ll click the OK button to close this palette out.

layer-style-palette.jpg

As you can see, I now have a nice outer glow around the emblem.

emblem-outer-glow.jpg

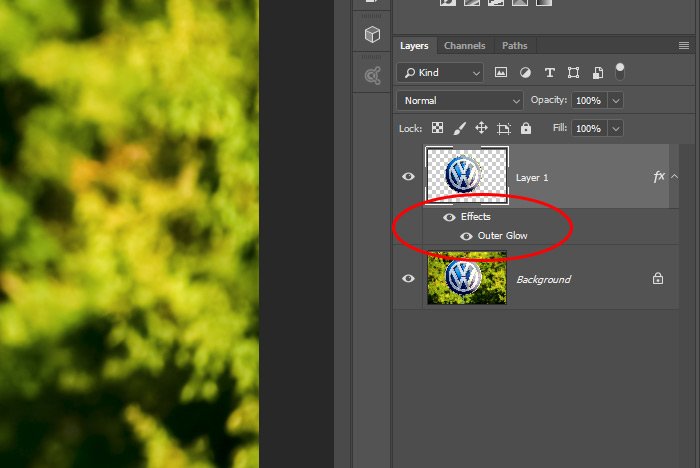
You can also see the style in the Layers panel as well.

effects-outer-glow.jpg

Selecting the New Layer​

Here’s something you might not know. If I go ahead and hold the Ctrl (Command on Mac) down and click the thumbnail of the new layer in the Layers panel, the emblem will become selected. Take a close look at this next screenshot.

selected-emblem-no-glow.jpg

Do you notice how just the emblem is selected and the glow isn’t? If I were to head into the Channels panel to create a new alpha channel from this selection, the outer glow style would be completely ignored. You can see that already because the selection ignored it.

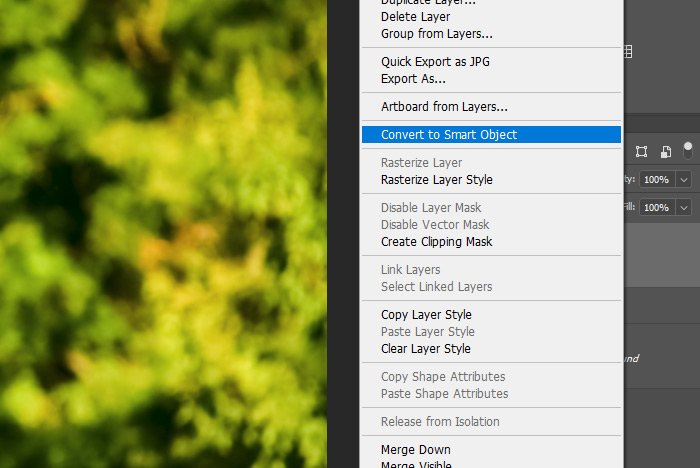
Now, if I deselected the layer and then right-clicked on it in the Layers panel and then chose the option of Convert to Smart Object and converted this emblem layer, things would change quite a bit.

convert-to-smart-object.jpg

Now that the layer is a Smart Object, I’ll hold down the Ctrl key and click on the layer thumbnail again. Let’s see what happens.

selected-glow-effect.jpg

Ah ha! Do you notice anything different? In the previous screenshot, the glow wasn’t selected and in this one, it is. You can see that by looking at the marching ants in the above screenshot. The moral of this story is that you can’t select layer styles in layers unless the layer is first converted to a Smart Object.

Creating an Alpha Channel​

Okay, at this point I can move into the Channels panel to create the alpha channel. I’ll first click the Channels tab that’s next to the Layers one or just go up to the Window > Channels menu item and enter the panel that way. Then, I’ll head down to the bottom of the panel and click on the Save Selection as Channel button. This will create the alpha channel, layer style and all.

save-selection-as-channel.jpg

And as you can see from a larger view of the mask that was created, the layer effect has come along for the ride, just as I wanted it to.

alpha-channel-layer-mask.jpg

And there you have it. Again, if you’d like to learn about what alpha channels are good for, please read all about there here. It’s a great post to get caught up with.

I hope I clearly explained how to select layers styles in Adobe Photoshop by first converting layers into Smart Objects. If you have any questions regarding this post, please let me know in the comment section down below. You may also ask any question you wish in the Photoshop forum as well. Thanks for reading!
 
KristinaW

KristinaW

Member
Joined
May 7, 2021
Messages
127
Reaction Score
0
Points
18
  • #5

Converting Selections into Alpha Channels​

Now that I’ve discussed alpha channels on multiple occasions, I thought I’d talk about one final method for creating one. This is the method most designers and photographers use and it’s an extremely helpful tactic to choose for many different purposes. I’ll get to all that below. First though, I’d like to offer you a few different resources to get you caught up on alpha channels in Adobe Photoshop as a whole. If you’d like to read about alpha channels, you can do so above.

Okay, here’s the deal. While working on any graphic, you can make a selection, move into the Channels panel and click on the Save Selection as Channel button down at the bottom of the panel. That’s easy and doing this will create a brand new alpha channel that looks just like the selection. This is what we want. Since alpha channels are there to stay for the life of the graphic, you can use that channel over and over again to recreate the selection for various purposes and uses.

A problem arises when you apply layer effects to the original item you selected because if left in its original state, when creating an alpha channel from that object, those layer effects won’t be taken into account. All that will be taken into account will be the original selected area, as if there are no layer styles anywhere nearby.

Since most designers want or need those styles taken into account, they use a workaround. Basically, they right-click on the layer that the object is in that they intent to select and convert that layer into a Smart Object. Then, they head into the Channels panel and click the same button as earlier. This takes into account the layer styles and all is good afterwards. The new alpha channel will not only look like the original selection, but the selection with the layer styles applied to it.

I know this is somewhat of a confusing topic to read about if you aren’t familiar with alpha channels and even what I just wrote above is somewhat confusing because it’s so brief. If you’d like an expanded discussion on this topic, I have one for you. I wrote about alpha channels, selections and smart objects, all in one post. Please stop by to learn a bit more about Photoshop today.

If you have more to add to this discussion about alpha channels and selections, please add it below. If you have questions about all of this, you can ask them below as well. Thanks!
 
KristinaW

KristinaW

Member
Joined
May 7, 2021
Messages
127
Reaction Score
0
Points
18
  • #6

Masking Images with Alpha Channels​

Alpha channels and masks go hand in hand when it comes to Adobe Photoshop. They’re pretty much one and the same. If you aren’t familiar with masks, you can read up on them in my what are masks post and if you aren’t familiar with alpha channels, you can read up on them in my what are alpha channels post. In these two posts, I explain everything you’ll need to know about these two topics.

In this post, I’ll explain why someone would want to create an alpha channel as well as what they might do with one. It’s actually a very simple topic, so this shouldn’t take long at all.

The reason people create alpha channels in Adobe Photoshop is to save either a selected area or a mask. When working with both masks and selections, you’ll find out that they’re almost single use sorts of things. When you go into the Channels panel and use the menu in its upper right to select New Channel, you’ll have created a new alpha channel that’s there to stay. You can use that channel over and over and since you now know what a channel is by reading my post, you can definitely see the benefit of that.

Now let’s move onto explaining what someone might do with an alpha channel.

Since an alpha channel is just a mask for channels, and since, after creating it, it’s hiding all of the other channels, I could use the Brush Tool set to white to reveal some of the image. This is perfect for when I have areas that I’d like masked or selected and to save those masks or selections for either later or multiple uses. So, I’ll paint an area white and that area will be revealed. If I were to head down to the bottom of the Channels panel and click the Load Channel as Selection button, I could turn the area I just painted into a selection. I’d see the marching ants and everything.

Now, the really cool part is that once the selection is made, I could apply an adjustment to that selection by visiting the Adjustments panel and choosing one of the available options, just as if I had created the selection the traditional way. And again, the value in using alpha channels for this process is that you can save them for later use. They don’t just go away and disappear once you’re finished with them.

For much more thorough coverage of this topic, you can read through my post that I shared just a few days ago. It includes much longer and drawn out commentary as well as screenshots that will help you grasp what I’m referring to. Trust me, this is easy stuff. You just need to try it out for yourself in your own installation of Photoshop to get it.

If you have anything to add regarding Channels in Photoshop, please comment below. Also, if you have any questions, please ask below as well. I’m always here to help. Thanks!
 
KristinaW

KristinaW

Member
Joined
May 7, 2021
Messages
127
Reaction Score
0
Points
18
  • #7

Creating Selections From Channels in Photoshop​

I just finished up with writing a post right here on the site. It had to do with creating a selection from a color channel in Photoshop. I wrote a lot in that post and thought that I’d offer a much more simplified process here. Creating selections from channels is really easy and all it takes is one or two steps. Check them out below.

– Open a photo or graphic in Photoshop.

– Open the Channels panel by going to the Window > Channels menu item.

– When you see the individual color channels, click on one to inspect it in the larger image view in the workspace.

– When you’re sure you have the channel for the colors you’d like to select, hold down the Ctrl (Command on Mac) key and then click once on the channel thumbnail.

– Doing this will create the selection for the colors in the channel.

Once the selection is made, you can do whatever you wish with it. In the post, I used adjustment layers to desaturate some colors and saturate others. It created a pretty cool effect.

If you have any questions regarding this process, please ask below. Thanks!
 
Top