Search

Filling In a Basement Crawl Space + Encapsulation

  • Thread starter JGaulard
  • Start date
JGaulard

JGaulard

Administrator
Staff member
Site Supporter
Sr. Site Supporter
Power User
Joined
May 5, 2021
Messages
319
Reaction Score
2
Points
18
  • #1
This thread contains information regarding my efforts to fix a wet basement crawl space in Maine. I moved into a house in 2013 and upon visiting the lowest level, I quickly learned that I had a serious water problem. After attempting to remove the water via a sump pump, I gave up and just filled the basement in with sand and then encapsulated it with plastic and rigid foam insulation. I'll share my posts below. I'll post them in chronological order. If you're viewing this post, you likely face the same, or a similar, challenge. If you've got questions, please ask down below. I'd be happy to help any way I can. I know this type of ordeal can be extremely frustrating.

Please use the following links to jump around this page. Each one leads to its respective section.

Installing a Sump Pump in a Crawl Space
Covering Basement Crawl Space Floor With Plastic Vapor Barrier
Filling In a Basement Crawl Space
Crawl Space Encapsulation
 
JGaulard

JGaulard

Administrator
Staff member
Site Supporter
Sr. Site Supporter
Power User
Joined
May 5, 2021
Messages
319
Reaction Score
2
Points
18
  • #2

Installing a Sump Pump in a Crawl Space​

There truly isn't much more rewarding than removing water from one’s basement. Things become flooded, things become fixed. It makes me smile.

I just wrote a post that covered the flooding in our new (old) basement. In that post, I mentioned that the primary issue was the water infiltration in the dirt crawl space. While I’m going to have to wait until spring to rectify the cause of the infiltration, I figured that I can at least remove the water that had found its way in the basement now. And to do that, I would need a sump pump.

I made a visit to the Home Depot yesterday. I had a few items in mind to purchase, but the main items were a sump pump, a discharge hose and a five gallon bucket. I already had an extension cord to plug the pump in with. I did need to purchase a new shovel and pick axe as well. I wouldn’t be able to complete this project without them.

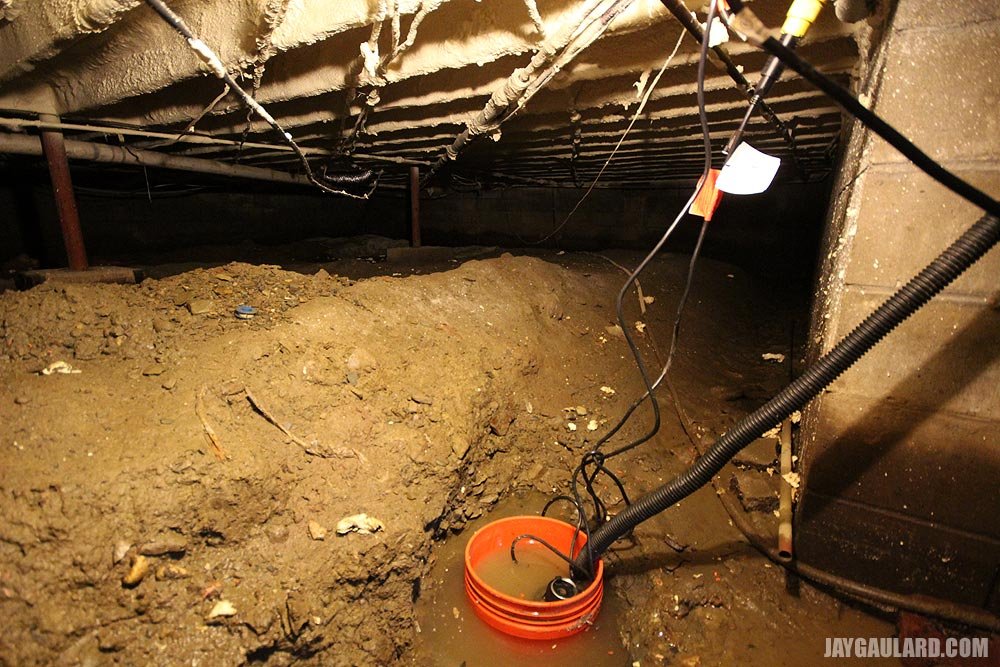
Basically, all I needed to do was to drill about a hundred holes in the five gallon bucket, drill a hole in the exterior wall for the hose to go through, dig a hole in the basement floor about two feet deep, put a ten pound weight in the bucket, sink the bucket in the hole, put the sump pump in the bucket, plug the pump in and watch the water flow into the back yard. I did most of this last night around 10pm. Since I hadn’t eaten dinner yet, I decided that the project could wait until the morning to finish. I only got down about a foot in the hole but was able to remove about half the water down there.

When I woke up this morning, I went downstairs to see if I could get a bit more water out before I started digging again. Problems arose when I plugged the pump in and found no water flowing from the hose. Apparently, my haste and the lack of pitch in the hose outside froze some water that was trapped in a valley. I was forced to disconnect the hose from the pump, bring the hose inside and submerge it into hot water in the bathtub. Within a few minutes, I was able to pour some water and ice chunks from the hose and reconnect it to the pump. This time, I set the hose up outside the correct way – with a pitch.

IMG_3651.jpg IMG_3652.jpg

With most of the water out of the basement, I got back to digging. Luckily, the dirt down there wasn’t full of rocks like we had at the Pine Bush house. It seems like every project I tackled at that house was stymied by a boulder or two. Not the case here. All I found was sort of gravely type dirt. It wasn’t difficult to dig through.

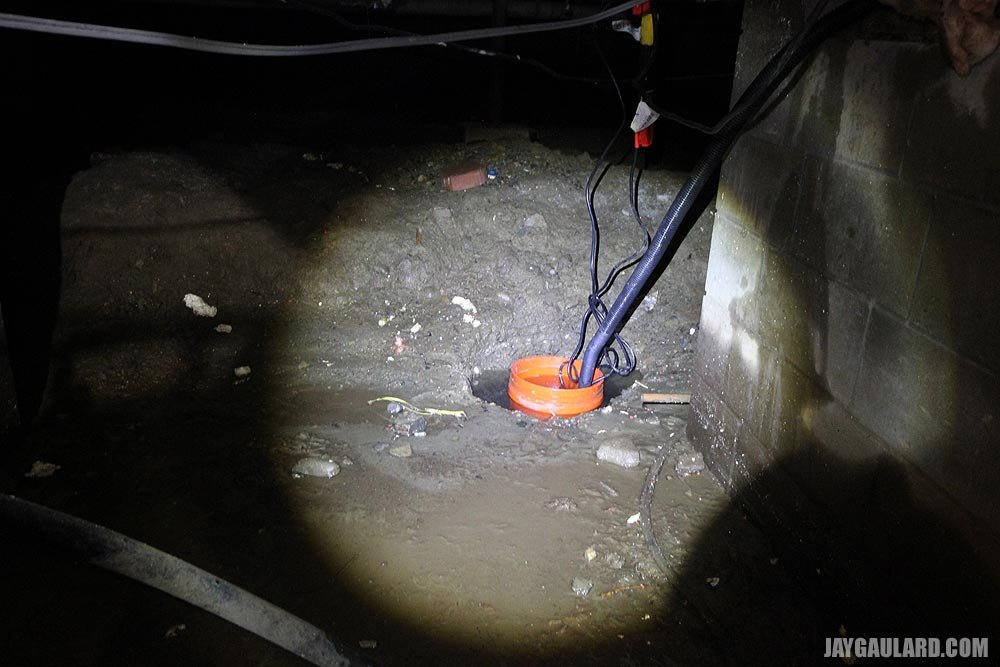
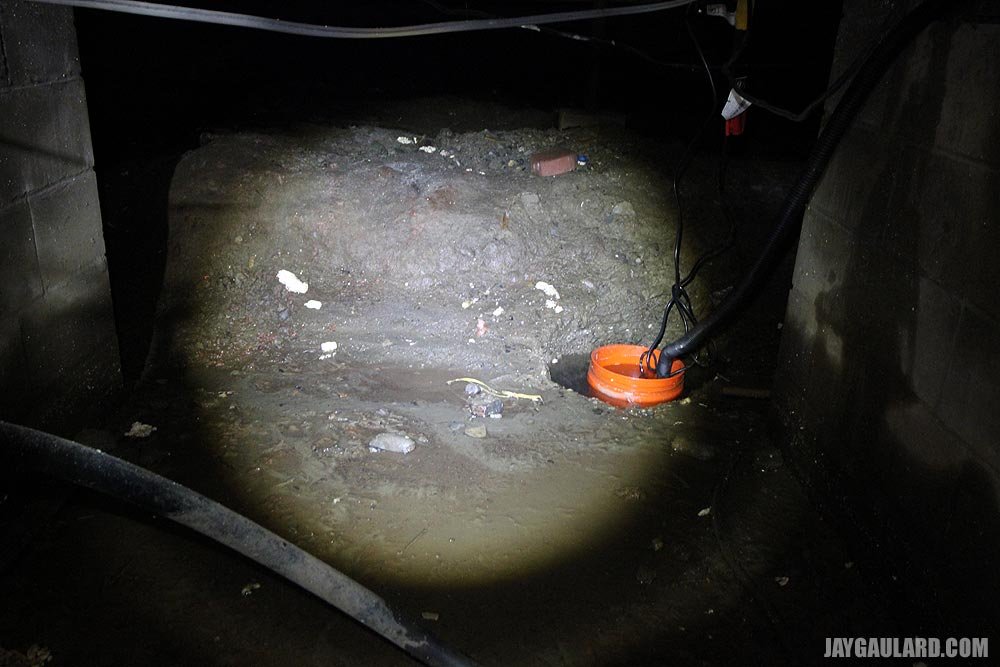
I got the bucket down where I needed. Although the picture below doesn’t show it very well, the lip of the bucket is actually below grade, which is good because I think this is the proper place for it. The pump is down deep and can continue to pump out any water that makes its way into the hole.

IMG_3654.jpg

This is almost the same picture, but shows the water level a bit clearer. As you can see, most of the water is out of the basement. There are pockets still trapped down there, but I’m hoping they’ll absorb into the dirt and will eventually be removed by the pump.

IMG_3659.jpg

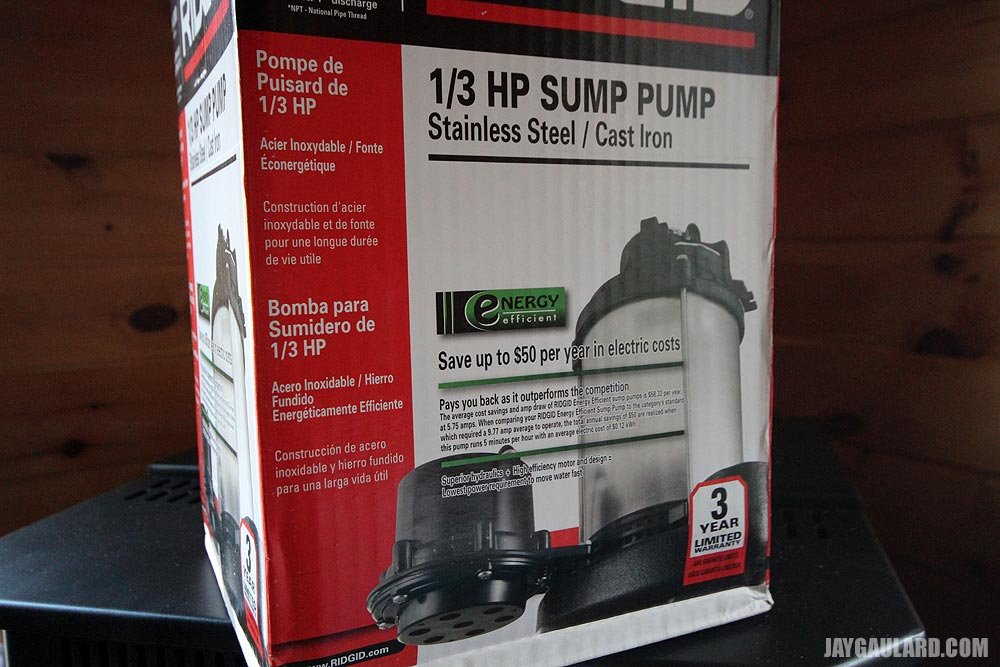
So, what kind of sump pump did I buy? I got the “P-330D 1/3 HP Submersible Sump Pump with Diaphragm switch.” It put me back about $160. Ridgid is a good brand and many of the other pumps looked like plastic junk, so I bit the bullet and got this. Hopefully it’ll last for years to come.

IMG_3660.jpg

I would like to eventually lay the plastic down across the entire crawl space floor to complete this project thoroughly, but in order to do that, I’ll need flexible corrugated pipe and about two pallets of bagged gravel. I’d have to place the pipe up against the footing along the entire perimeter of the crawl space and cover it with gravel. I’d leave the openings (the two ends) of the pipe right up against the hole where the sump pump is. Then, when I have a dry flooring, I can lay the plastic over the dirt and gravel. That’s going to have to wait until next Summer when it dries out down there. For now, I’ll have to be content with keeping things as dry as possible with the sump pump.

Sump Pump Discharge Piping​

I just finished up my sump pump discharge project. I finally got around to ordering two check valves for PVC pipe from Amazon and they arrive yesterday. I had almost everything I needed, except for a ten foot length of 1 1/2 inch PVC tubing. I got that yesterday while I was picking up supplies for another project. I’ll get to that later.

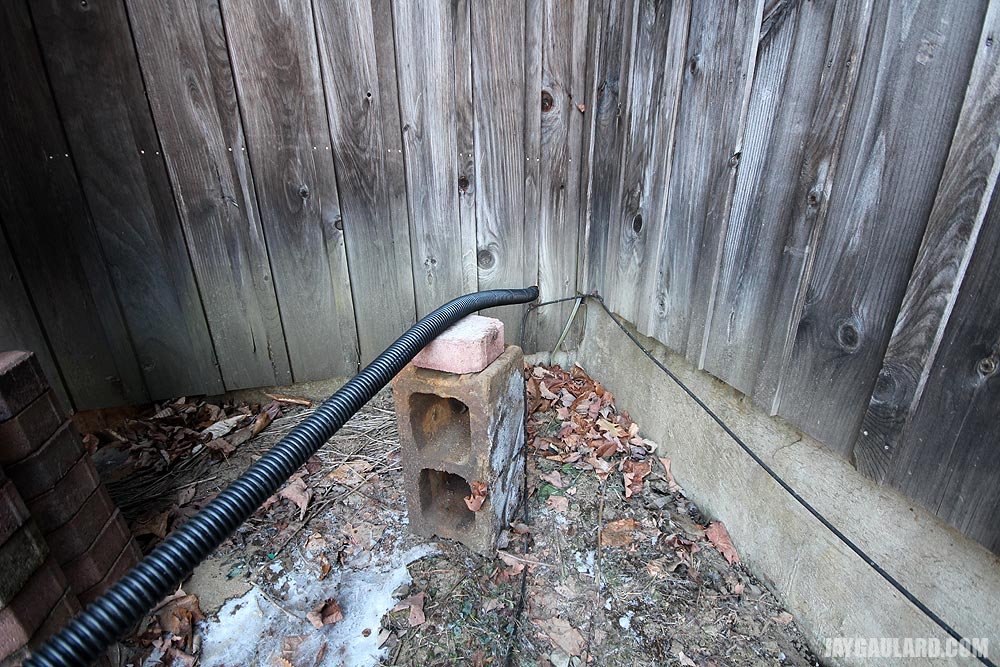
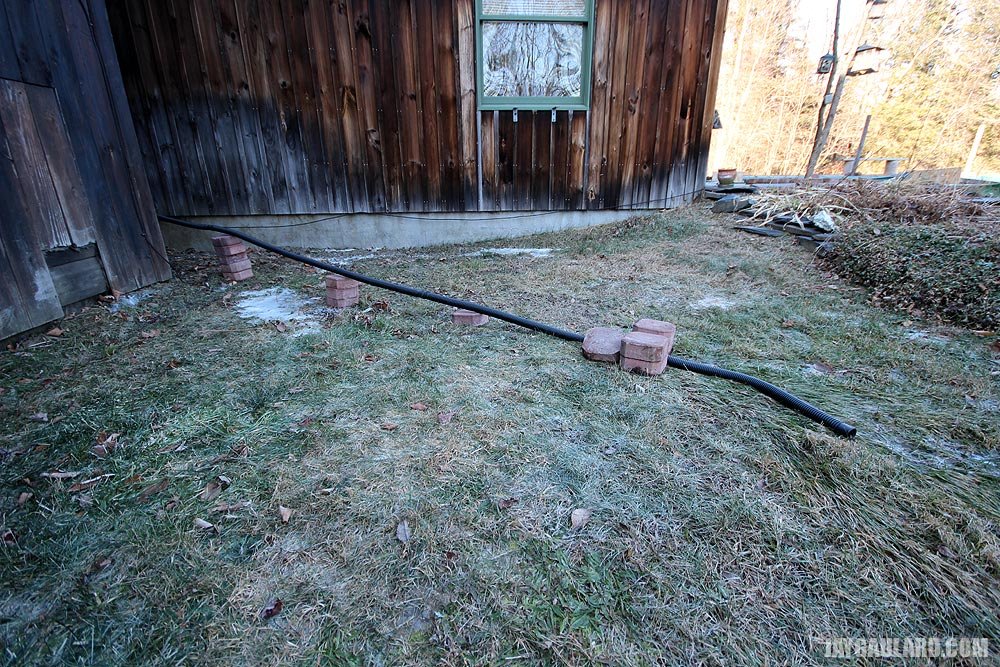
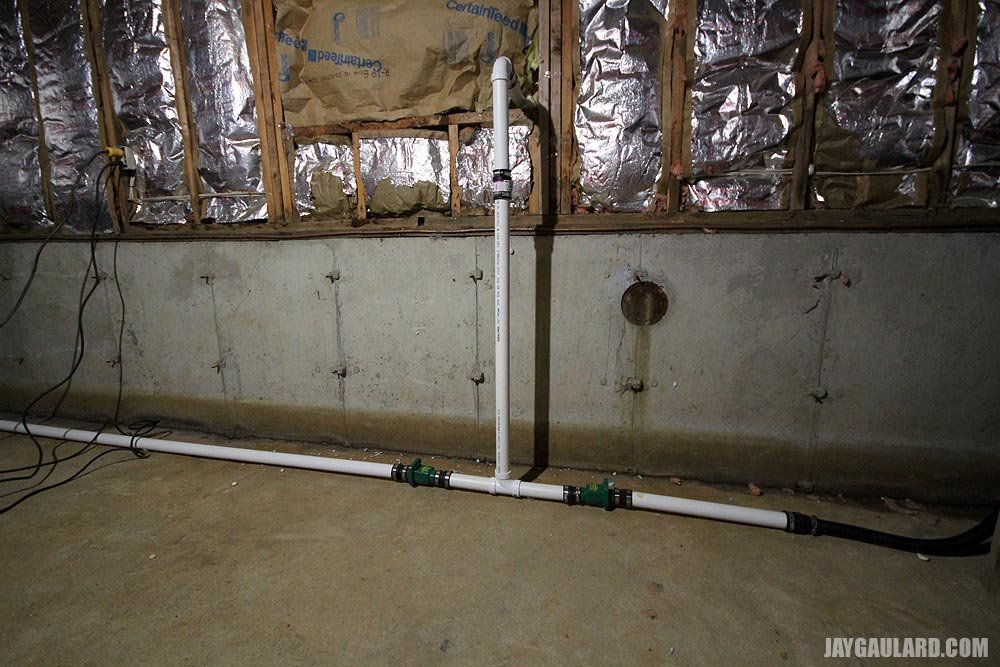
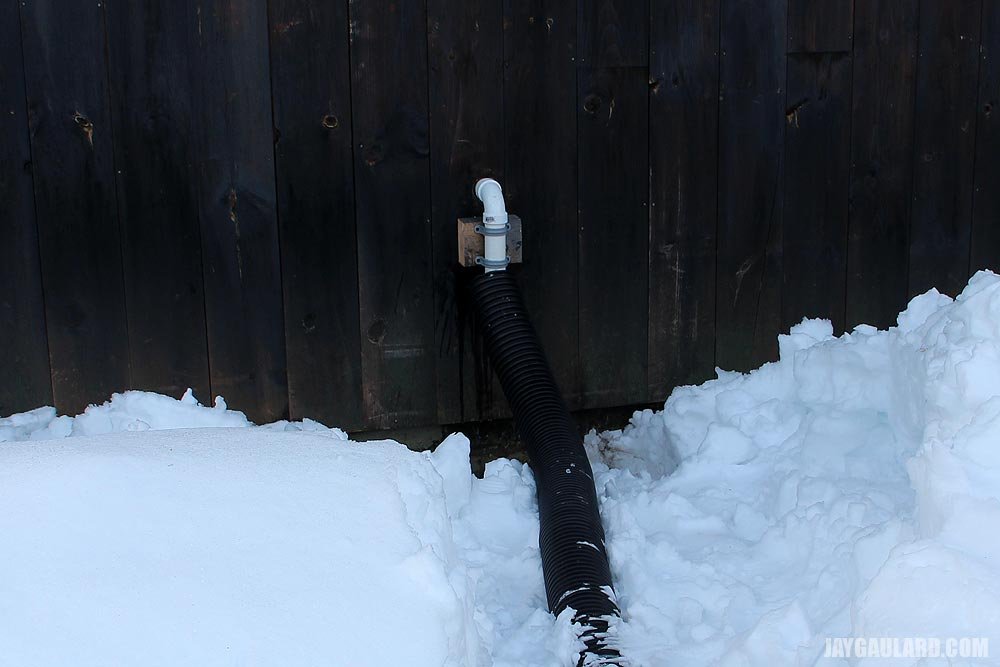
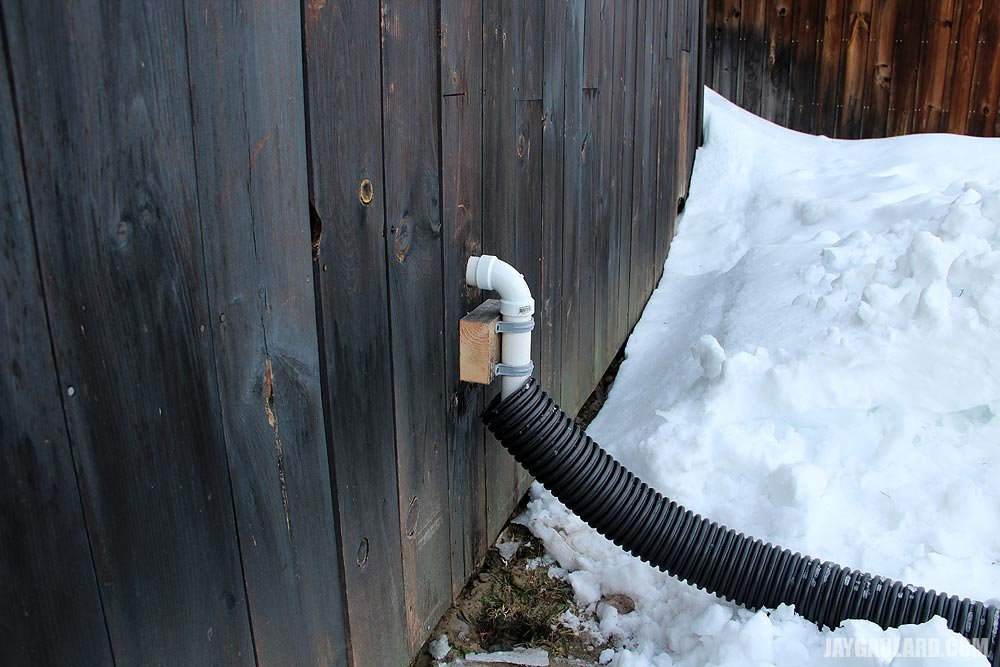
I have two sump pumps – one for each section of basement. I used to have each pump attached to its own small 1 1/2 inch tube that would exit the house at different points. After thinking about it for a while, I decided that connecting both pumps in the interior and have them exit the house at one point would be better. From there, I would have the exit tube attach to a large 4 inch corrugated pipe. I picked up a 100 foot long one and that I could pretty much run anywhere with little risk of it freezing. Those small pipes – no thanks. They freeze every which way.

Take a look at the pictures I just took.

IMG_3920.jpg IMG_3921.jpg

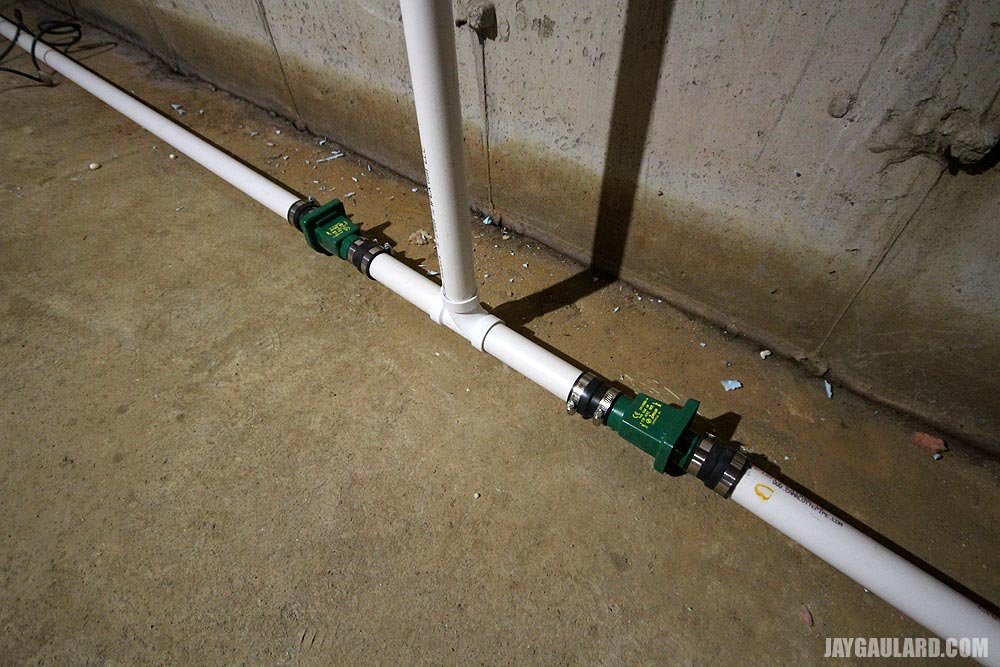
The way I have it set up is both pumps pump water into their respective pipes. If they are both running at the same time, hopefully the water will find its way out the exit pipe. If only one is running, the check valve attached to the PVC pipe of the other pump will stop the water from traveling through that pipe into the other section of basement.

IMG_3922.jpg

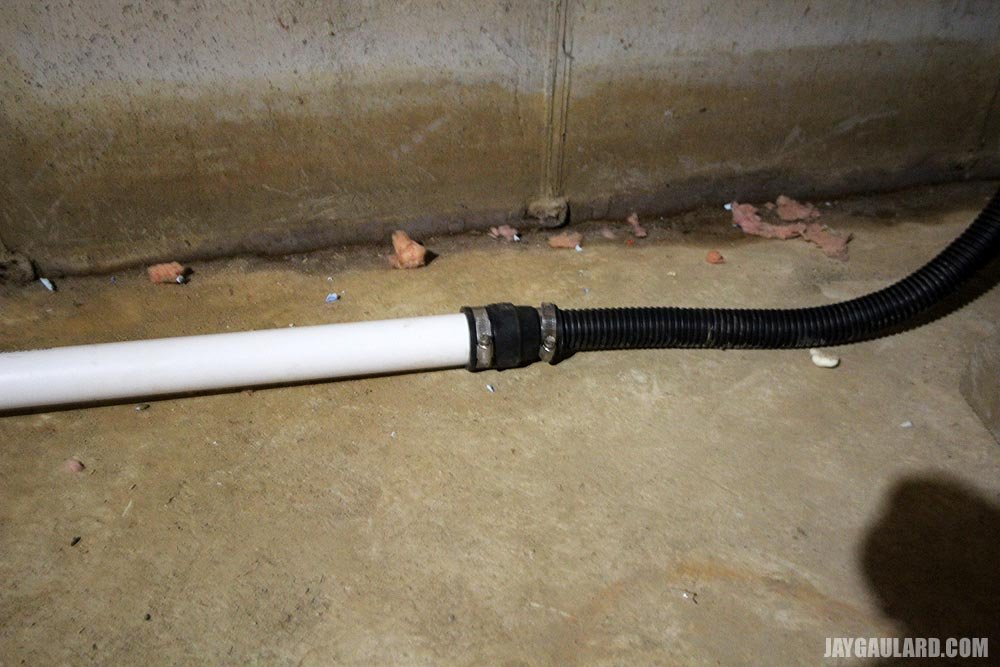
The flexible pipe comes from the sump pump. From there, I have it attached to the PVC with a rubber adapter. The adapter increases the size from 1 1/4 inch to 1 1/2 inch.

IMG_3924.jpg

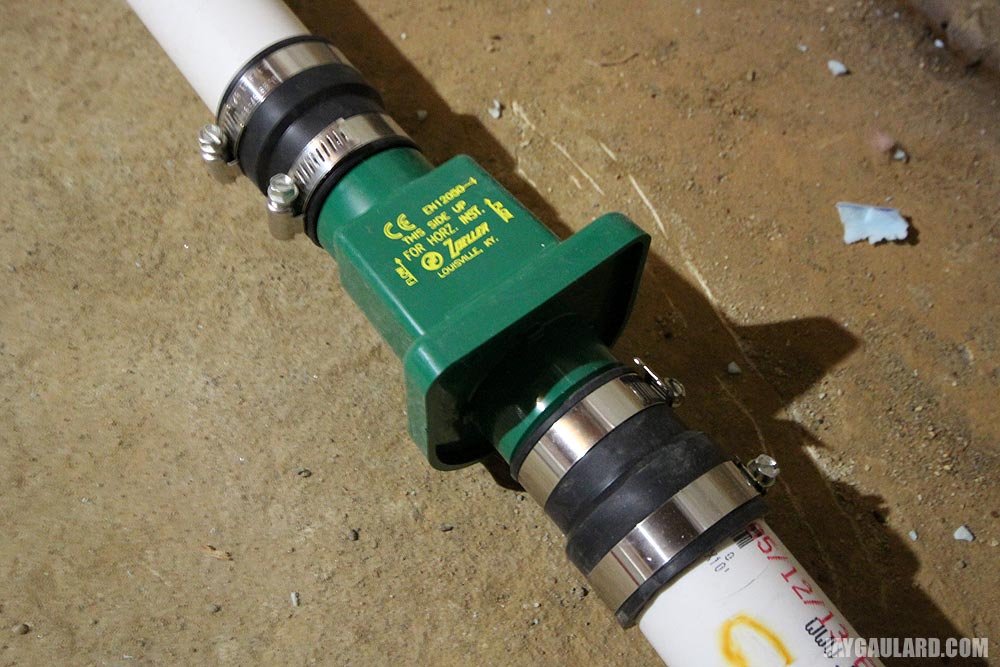
This is a Zoeller check valve attached to the PVC pipe. People seem to say good things about these check valves. They’re supposed to last a long time and they’re allegedly durable. I’m looking forward to a chance to seem them in action. Setting systems like this up is quite fun.

Sump Pump Hookup Before the Rain​

I called my father last night to tell him this story. I was just amazed at how the timing worked out. Since you didn’t hear it, I’ll have to tell it again.

As you know, I recently did some work on our sump pump discharge piping. I had to wait for my check valves to arrive from Amazon.com (I could only find the good ones there). Well, just as luck would have it, only a few mere hours after I finished hooking up the system, we had a short warm front move through that brought buckets of rain. So much rain, in fact, that the sump pumps have been kicking on and off all night.

I was reading a homesteading blog last week that emphasized the idea of not being lazy when living in rural areas. The blog said something along the lines of, “You can not be lazy. Ever. You CAN NOT be lazy when living in rural areas – EVER!” I’ve been thinking of that sentence a lot and last night, when I realized we’d be using the sump pumps for a few days, I also realized that I hadn’t yet hooked up the outside tubing. I purchased 100 feet of 4 inch flexible tubing a few weeks ago just for this very project.

IMG_3942.jpg

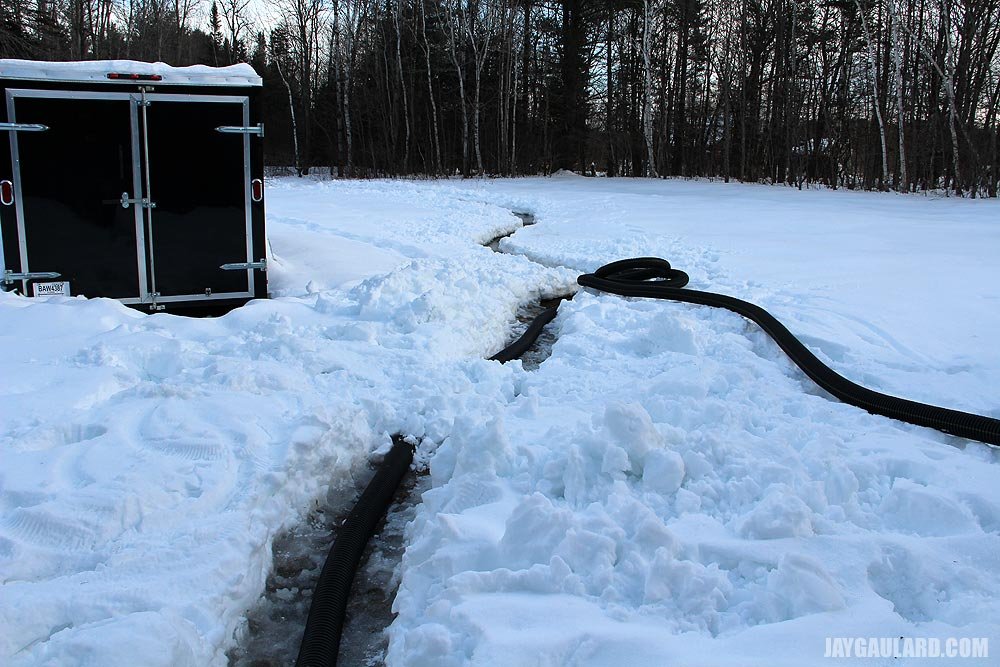
The problem was, we now have snow on the ground and if I were to roll out the tubing and lay it on top of the snow, I wouldn’t get the downhill slope I would need to allow all the water to flow through without freezing. I knew I would have to go outside and shovel a trench. For what distance? I wasn’t sure. And I was racing against the clock because the warm weather was set to disappear that very night (last night). If I didn’t move fast, I would lose all opportunity to shovel anything. All the snow and six inch thick slush would quickly freeze and I wouldn’t be shoveling anything.

IMG_3943.jpg IMG_3944.jpg

As I was shoveling last night, the pump kept turning on and off. Since I had already hooked up the corrugated tubing, the water was getting trapped. Good thing the tubing is thick.

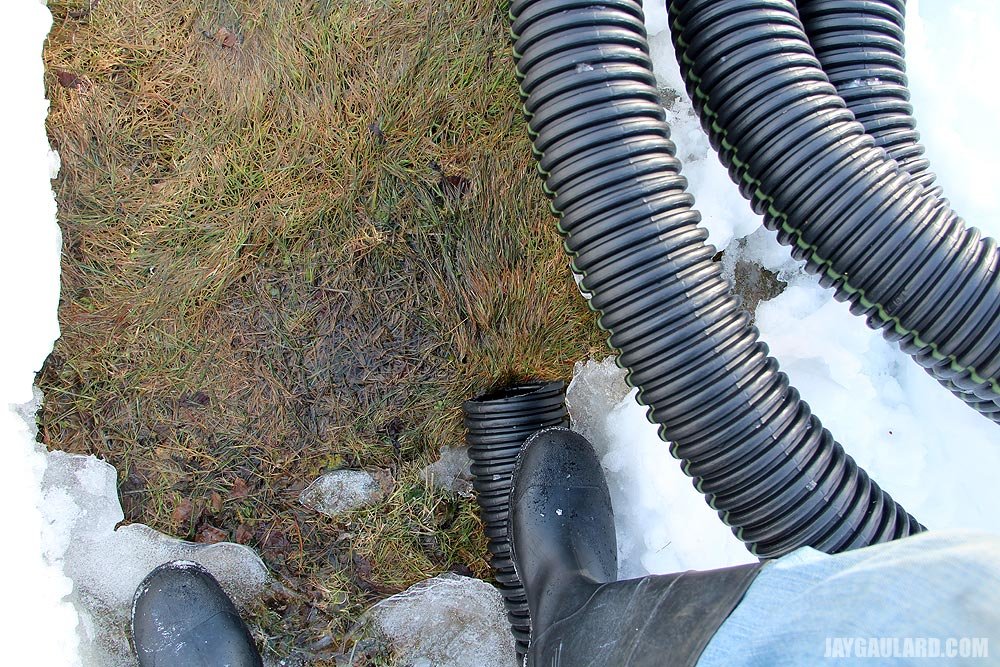
When I reached a certain point and when I was certain the slope was enough so the water wouldn’t make it back into the house, I cut the pipe. I was left with a rising pool of water that would only freeze overnight and that would prevent further flow of water.

IMG_3945.jpg

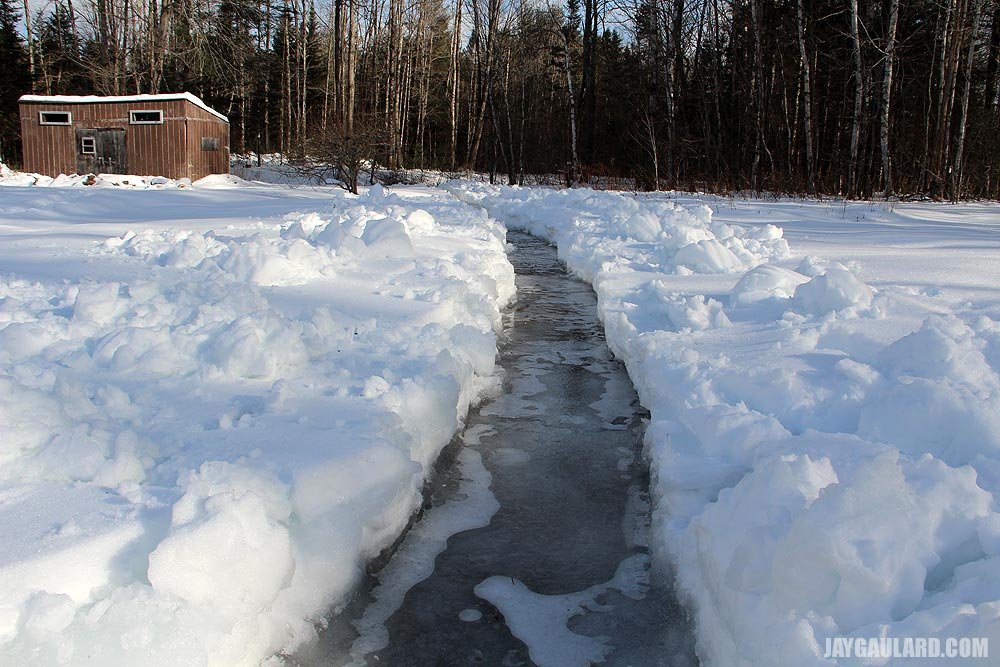
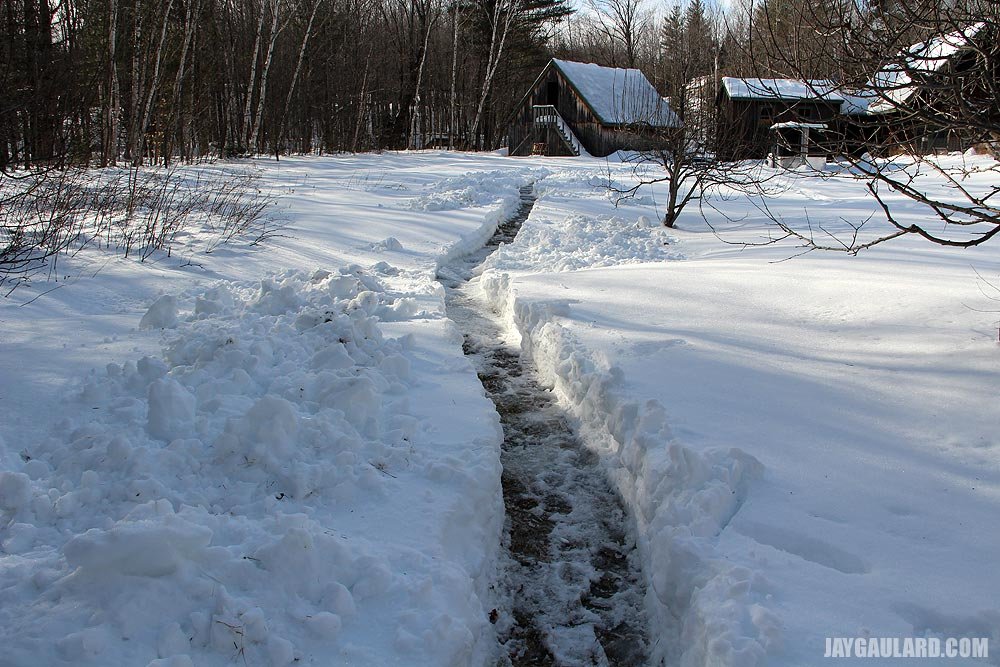
As I stood there, I knew I was at a crossroads. Oh how dramatic. I could either let the water flow to a point about 30 feet from the house or I could continue digging through very wet, heavy snow all the way to the pond. If I made it to that point, the channel I created would act as a riverbed and the water would have nothing to hinder its flow. I decided to go for it. The homesteading blog authors would be proud because all my shoveling took a good long time in the dark.

IMG_3948.jpg IMG_3950.jpg

When I was finished shoveling, you should have seen that water flow. It was like a torrent, making its way all the way to the back of the property. I’m not sure if any of it made it to the pond, because there’s a dip right before it, but I’m sure the water flowed a good distance. And the ice is a few inches thick this morning, so I know a good amount of it was pumped out overnight.

I’ll tell you, that was quite the chore. But at least it’s done now, that is, until the next time it snows.
 
JGaulard

JGaulard

Administrator
Staff member
Site Supporter
Sr. Site Supporter
Power User
Joined
May 5, 2021
Messages
319
Reaction Score
2
Points
18
  • #3

Covering Basement Crawl Space Floor With Plastic Vapor Barrier​

I kind of got ahead of myself with this project. I have been doing something, sitting and thinking about it, then doing something again, thinking and on and on. One thing leads to another and I find myself laying on my back looking up at the floor joists. Last night I did just that – wondering, “How did I get here?”

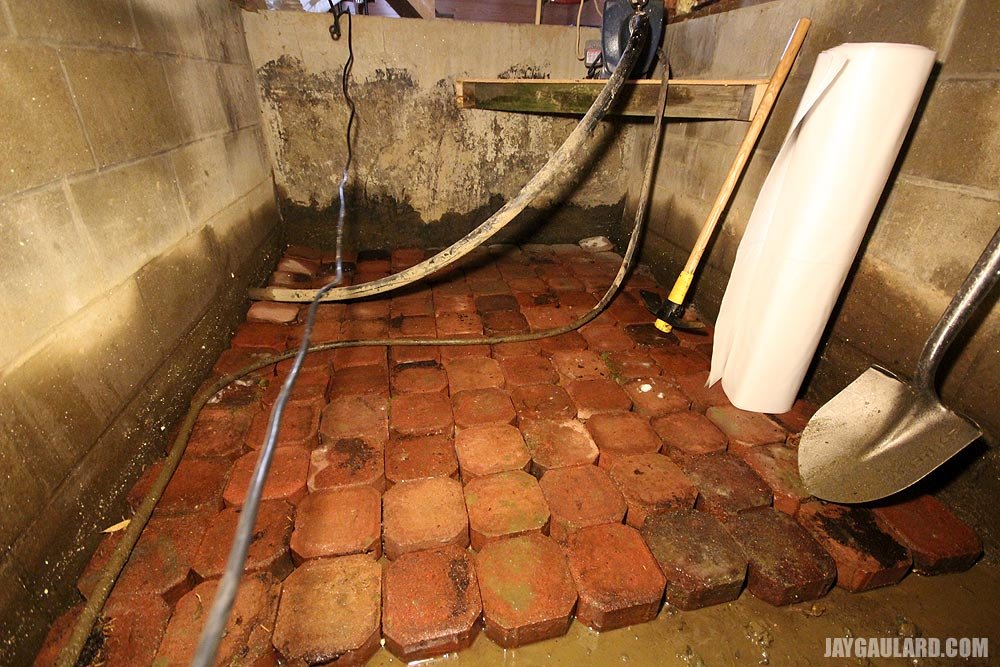
All right. I know I already showed you that small section of basement that leads to the dirt crawl space. The one that filled with water a few days ago. I’ve been thinking about that small section for a while now and wanted to do something to it that would allow me to be elevated enough as to not have to walk in the mud anymore. I initially was going to put gravel down there and cover the gravel with plastic. Then, I remembered that we have about a zillion pavers out back. I decided to use the pavers instead.

IMG_3691.jpg

As you can see, the pavers keep me above the wet floor below. Eventually, I’ll cover the pavers with plastic to keep the moisture down.

Let me tell you something about these pavers. Holy cow they are heavy. It took about eight trips carrying two 5-gallon buckets each. Each bucket held ten pavers and weighed a hundred pounds. I swear. Carrying the buckets from the back yard, through the snow, into the basement was a workout I’d rather forget. But at least it’s done.

After I finished up laying the pavers on the floor, I thought I’d have a little fun digging a short trench from the side wall to the sump pump. By doing this, I let in a bunch more water that was just sitting there. Eventually, I’m going to have to dig a trench around the whole footer, but for now, what I did yesterday will suffice.

IMG_3695.jpg

I think my plan was to get as much standing water out of the basement so I could lay the plastic vapor barrier. I knew the barrier wouldn’t be air tight – that wasn’t the plan. All I wanted to do was to cover as much dirt as I could, until I’m ready to do a more thorough job.

IMG_3694.jpg IMG_3696.jpg IMG_3697.jpg IMG_3698.jpg

I believe I achieved my objective. I covered about 95% of moisture releasing earth. There’s already a big difference upstairs. Things seem to be more dry. What’s to do next?

1. Dig trench around entire crawl space.
2. Lay 2″ or 3″ perforated pipe in trench.
3. Cover pipe and trench with gravel.
4. Buy more plastic and adhere it to the cement block walls.
5. Tape all seams in plastic on floor.
6. Tape all seems from wall plastic to floor plastic.
7. Basically, encapsulate entire moisture releasing area.
8. Have a beer.

This all can be done next Summer. That is, of course, unless I become motivated before then. Remember, I wasn’t going to cover the floor until next Summer and I did that yesterday.
 
JGaulard

JGaulard

Administrator
Staff member
Site Supporter
Sr. Site Supporter
Power User
Joined
May 5, 2021
Messages
319
Reaction Score
2
Points
18
  • #4

Filling In a Basement Crawl Space​

I’ve got a project to complete that I’m really not looking forward to. It’s called something like, “filling in the basement crawl space with gravel, dirt, sand…whatever.”

Do you remember back when I told you about my nifty installation of our sump pump? Well, that installation worked wonderfully. Every time the basement filled with water, I heard the pump go on and off – and on and off. And so on. It was fun to listen to in the beginning, but as time went on, listening to that pump, and connecting the sound of it to the electric bill, became less and less fun of an experience. And today, this very moment, listening to the pump turn on and off is ready to drive me crazy. It stopped raining a week ago and the pump is still working. Albeit it only turns on every hour or so, but it’s got me wondering, “Why in the world do we need to get this water out of the basement so bad?” I mean, I’m not sure if it’s just simple conditioning from what I’ve seen on TV or read on the internet, but really, why do we even have a crawl space? It was there when we moved in, but do we need it?

The answer is no. If we had a much more shallow crawl space, say 3 feet deep instead of 4 1/2, I would never see any water at all. It could rain all it wants to and the basement would never fill. I could keep the entire area covered with my plastic vapor barrier and no one would be the wiser. And the moisture down there would be virtually non-existent. The only problem is – yeah, you guessed it – actually filling in the crawl space. Who’s going to do that? My back truly isn’t looking forward to this one.

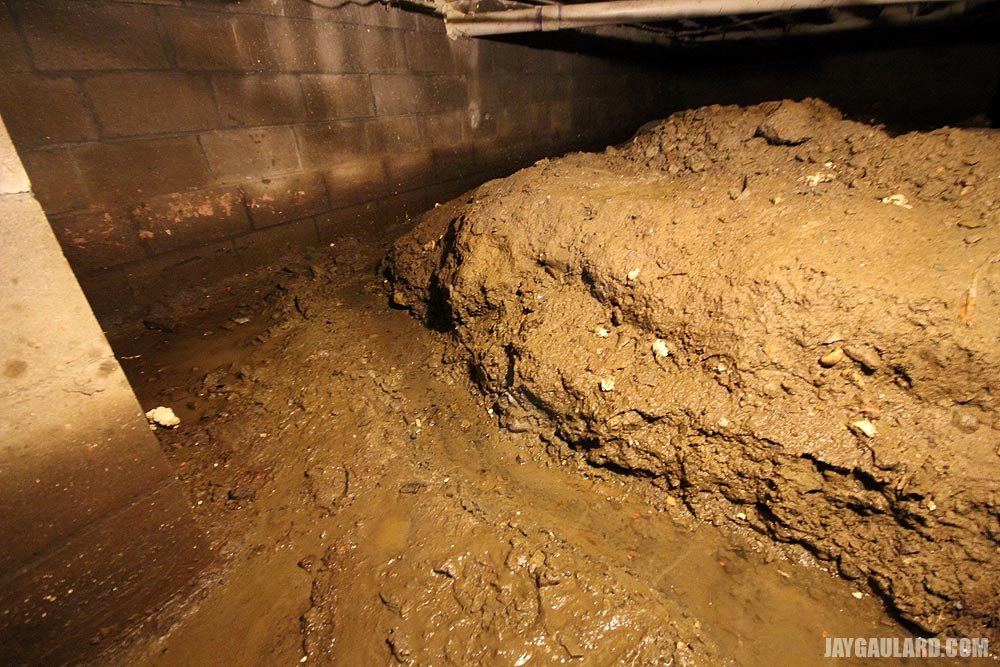
I just went downstairs with my pickaxe and shovel, with the intention of moving some of the dirt that was pushed to the middle of the crawl space, back out to cover the footings. I figured that all the material I needed was there. Currently, there’s sort of a moat around the perimeter of the entire area, with the dirt in the middle. Sort of like a donut. I was going to see how much of that moat I could fill in, as to raise the floor level down there.

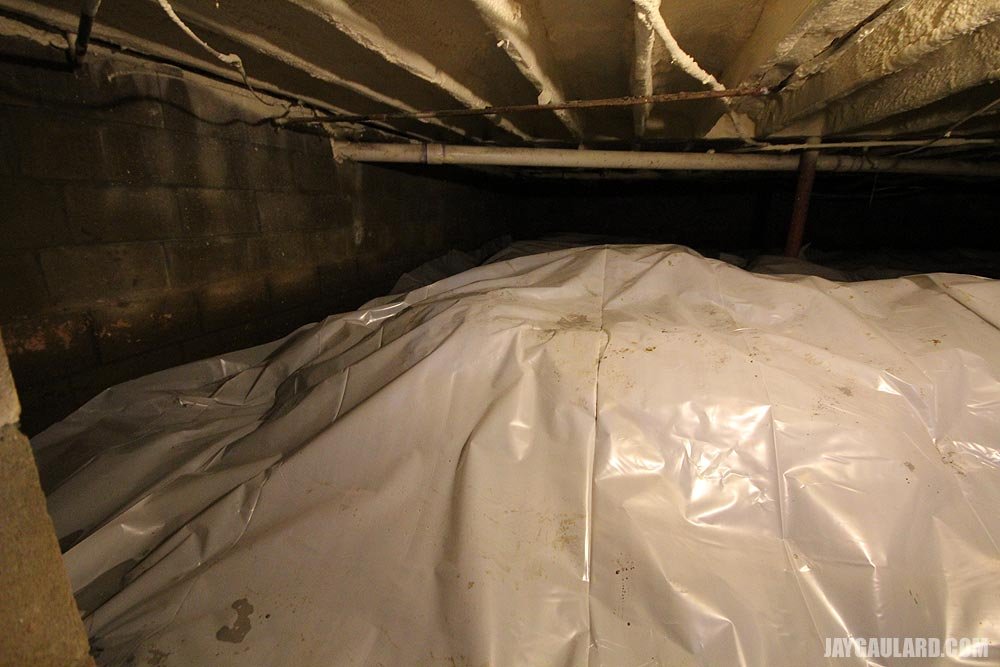
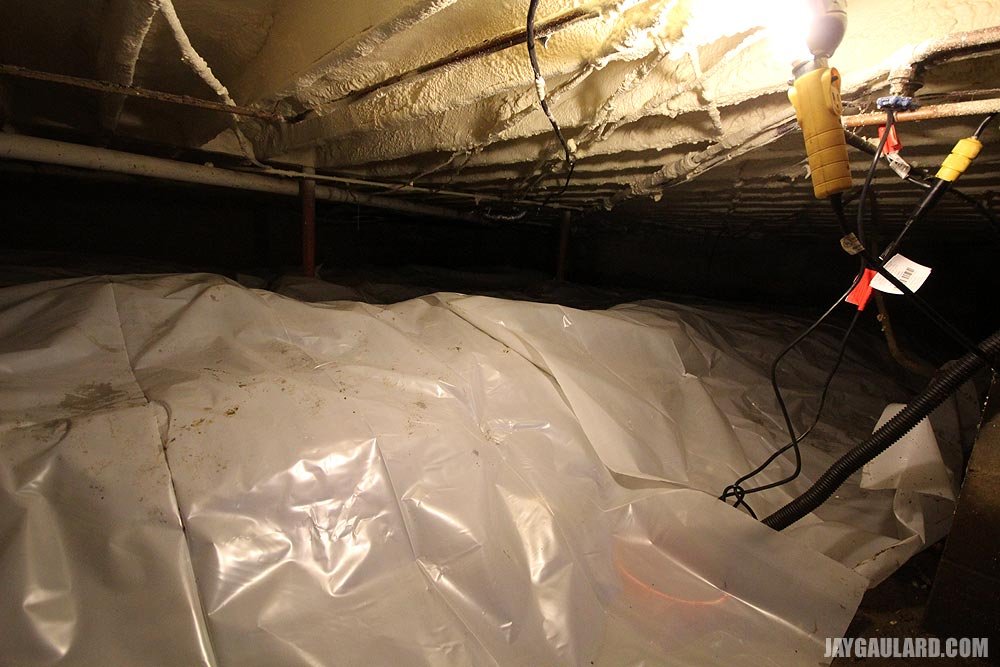
Here is what the basement looks like if you were standing in the first section, looking into the crawl space. What you see is the vapor barrier with the sump pump underneath. Also, the lump under the vapor barrier is the existing soil.
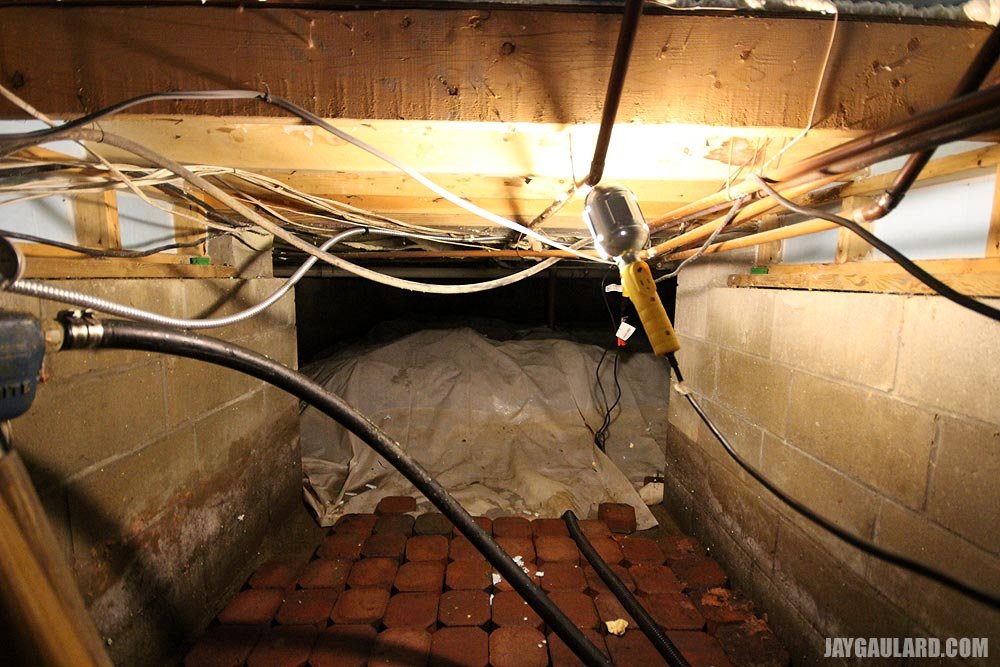
IMG_4704.jpg

Moving further into the crawl space, if you look left and then right, here is what you see. I figured I could smooth out those dirt lumps and be done with it.
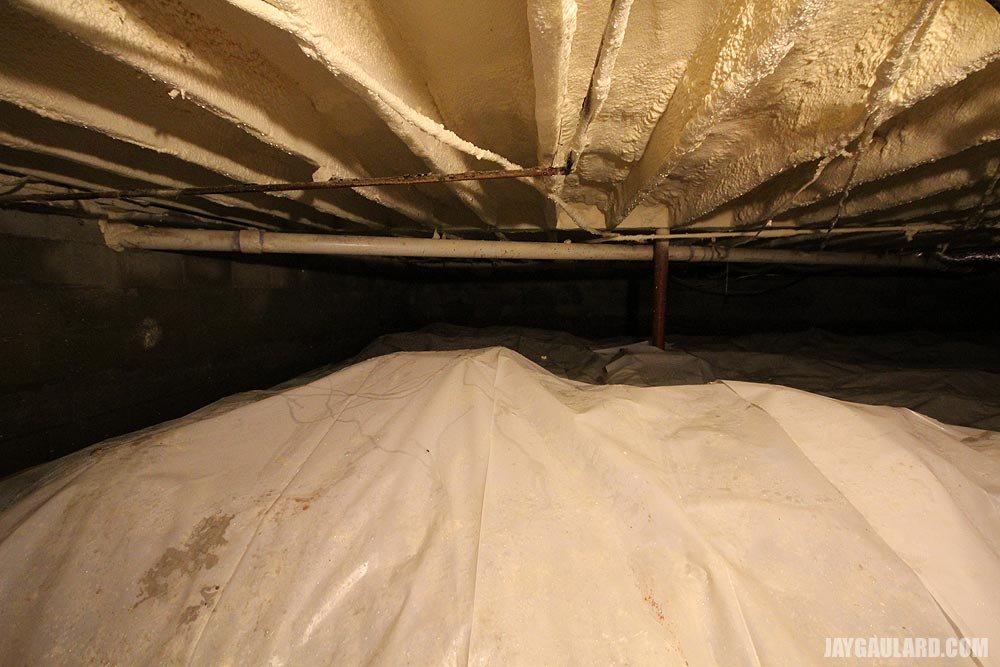
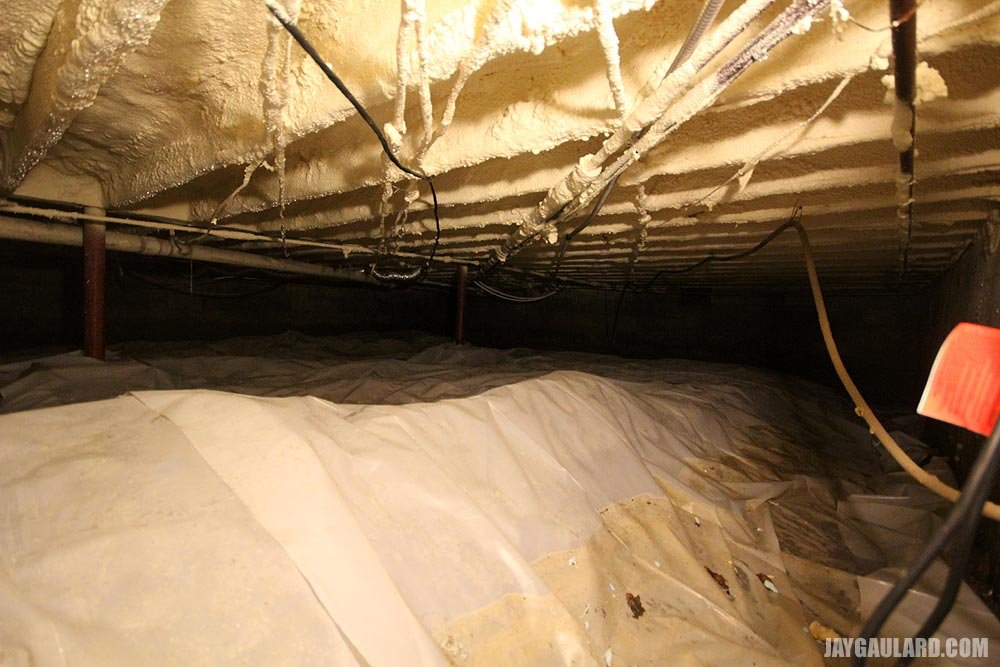
IMG_4705.jpg IMG_4706.jpg

While I may be able to get away with moving some dirt around in the front section of the basement, there simply isn’t enough material down there to fill in the rear. And that’s where the major issues are. When water enters the crawl space, it sits on top of the plastic and puddles up. You can see how high the water gets, as indicated by the brownish color of the plastic in the above photograph.
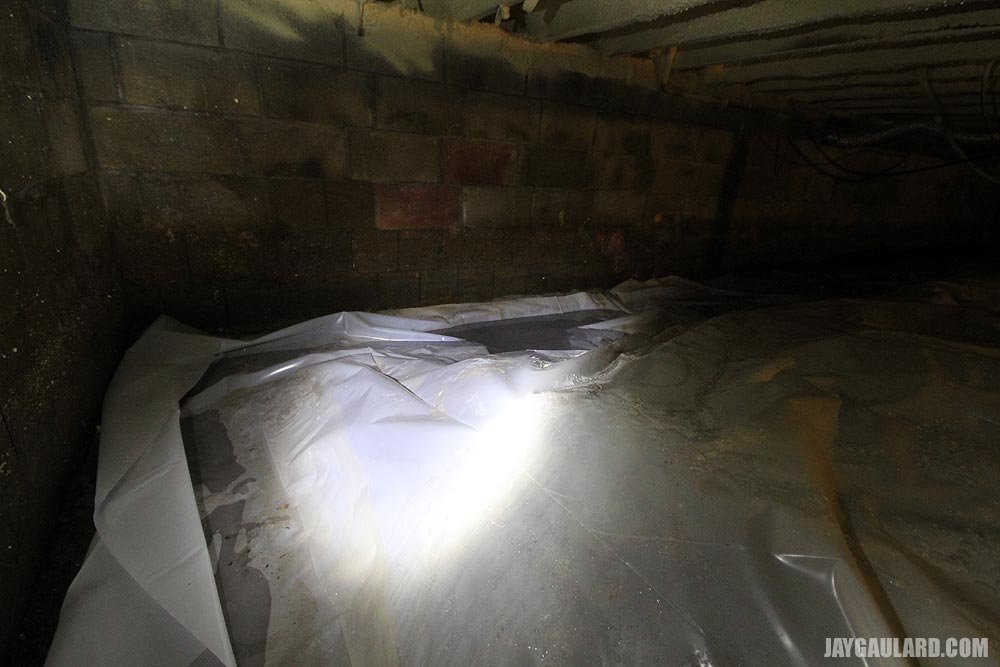
IMG_4707.jpg

When I lift up and move the plastic over, what I just told you becomes even more evident. There just isn’t enough dirt in the crawl space to make a difference.
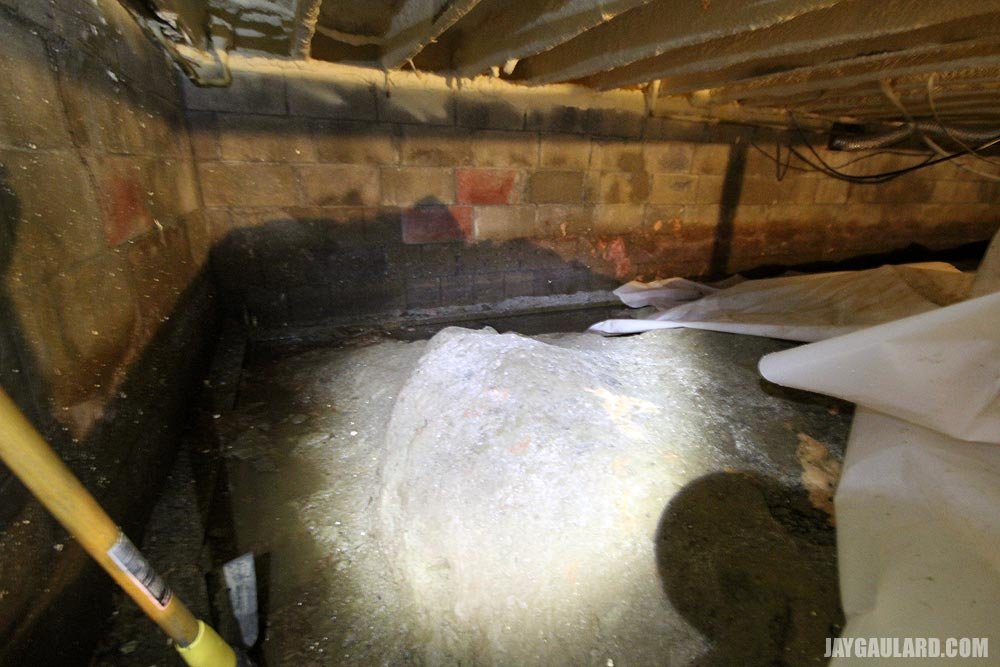
IMG_4708.jpg

I think the plan is going to be something like this – order about 5 yards of pea gravel, or sand, or dirt – whatever is cheaper – and move the material down to the crawl space via 5-gallon buckets. I’m really not quite sure how that would work out over the run of this project, but it’s the only way I can think of right now. We also have a missing cement block that we use to vent the dryer, so I may be able to build some sort of a chute that I can slide gravel or whatever down. We’ll see what happens.

COMMENT: I am living on a small 100 year old farm in California. I have a poured concrete root cellar under the back room of the house, and it floods all the time, currently at nearly two feet of standing water. It destroys sump pumps, and the cracks in the walls flow with water, making it impossible to close with concrete. I am seriously considering filling with gravel and covering with plastic. How did it work out for you? Was there any settling due to added weight in there? Did you remove concrete flooring under the area you filled, or just fill on top of the concrete? Any help in this would be taken into consideration without liability.

COMMENT: Unfortunately, I haven’t gotten around to this project yet, although I have made up my mind about it. I’ll be ordering probably around 10 yards of pea gravel (or whatever is cheapest) and will fill the basement so it’s a few feet higher than it is now. I’ll need to use 5-gallon buckets to do this, which is why I haven’t bothered yet. In all honesty, I think this is the only way to solve the problem both of us face. We simply need to raise the level of the basement floor. Once that’s done, the plastic will cover it. I personally wouldn’t worry about settling or removing the concrete floor. I’m going to just cover everything up. If you do end up doing this before I do, I’d love to hear about your experience.

COMMENT: I have the same problem and plan on purchasing several yards of sand to build up the crawl space to make it higher than the outside. My plan is to use the cinder block size vent holes in the foundation of the house. I will get the sand under the house using the same method used at 1:01 of this video. You will see that they have taken a 10-12 ft piece of PVC and cut it long way – they push the sand using a hoe or shovel:


COMMENT: You could dig a trench around the perimeter of your house and fill it with flofill. Or, simply fill the crawl space with flofill or concrete to level that you like. I would definitely look into that if you want to save the back breaking work.

I Finally Filled the Basement Crawlspace with Sand​

Did you know that basement crawlspaces were a “thing”? They are. There are people around this world who deal exclusively with them and there are websites dedicated completely to them. I should know. I just ordered some specialized tape from one of these websites. Crawlspaces are a hot topic on Youtube as well because they go hand in hand with the ever-popular subject of home insulation and to a lesser degree, the semi-popular structure of the home.

Okay, here’s the deal – crawlspaces are disgusting areas of a house that no one ever wants to spend any significant length of time in. Because of this, they’re often neglected and aren’t set up properly. This is especially true for older houses that aren’t up to modern coding standards. Many basement crawlspaces are damp or downright wet places that are breeding grounds for mold and rot. If you don’t attend to an area in this type of condition, your house can collapse. It’s true. Forget about the mold for a minute – your house can actually collapse. It can rot away right under your feet.

So, what’s the primary cause of mold and rot in a crawlspace? Many people think it’s water that accumulates under a home in the winter and spring. Since water tables are usually elevated during these times of the year, houses that were built in locations that are prone to either flooding or lack of drainage can have more than a foot of water sitting down in the basement for months. The truth of the matter is, most of the damage is actually caused by condensation during the humid summer months. Crawlspaces are notoriously cool and when the humid air from outside flows into these cooler spaces, the humidity condenses on anything it can and simply soaks what it touches. Think about taking a cold can of soda from your refrigerator and leaving it on your countertop at noon in July. Within an hour, you’ll have a puddle of water surrounding that soda. Now think about humid air flowing into your cool crawlspace 24 hours a day all summer long, via a vent of some other sort of air gap. All that wood down there is getting soaked to the core. And the insidious thing is, you can’t even tell it’s happening because the wood looks and feels dry. You have to use a special tool to measure the moisture content of the wood.

Our house had two issues. First, because it sits low in a high water table location, the basement would fill with about a foot of water during the months of April and May. This was just a given and I let it happen. When we first moved here, I freaked out when I saw this and I tried to pump the water out with a sump pump. That stupid thing ran all day and all night for weeks until I realized that the effort was futile. The basement kept filling up to that level, so I unplugged the pump and let it sit. It’s been that way for years. When the ground thawed, the water disappeared until the next year.

The second issue we had down there was general condensation and moisture. Apparently, there were quite a few gaps in areas that there shouldn’t have been and those gaps were letting air in. I mentioned in a previous post that we have two areas of the cement block foundation that had missing cement blocks. One of these openings was under ground and the other had the dryer vent sticking through it. Neither were sealed and when I went into the crawlspace to inspect the area, I found sitting water directly surrounding both of these spots. Also, any copper pipes above those areas had water dripping from them. Condensation is real and it works fast. It can create a four inch deep puddle overnight.

Another area of condensation was the concrete walls of the foundation. Those are generally cooler than the outside temperature, so they’re always wet. The condensation combined with groundwater leaking through the porous concrete can do a lot of damage. And finally, the dirt floor of the crawlspace itself is just plain terrible. It’s wet when it seems dry. Water incessantly evaporates from it. The problem is, covering it with plastic to stop the evaporation does little if the other issues I discussed are still allowing groundwater and condensation to infiltrate the area under a house. It’s a real mess that needs to be tackled aggressively.

I knew a sump pump didn’t work. I actually had two of them down under and they both didn’t work. The only alternative I had was to fill the crawlspace in with some sort of medium to raise the floor above the top of the outside water table. Essentially, to fill in the pond. The problem with that was, I didn’t have the greatest entry points. I considered filling five gallon buckets with sand or gravel and walking them down into the basement for about a year. Then I thought better of it. If I had tried that, none of you would have ever heard from me again. I would have jumped off a cliff half way through.

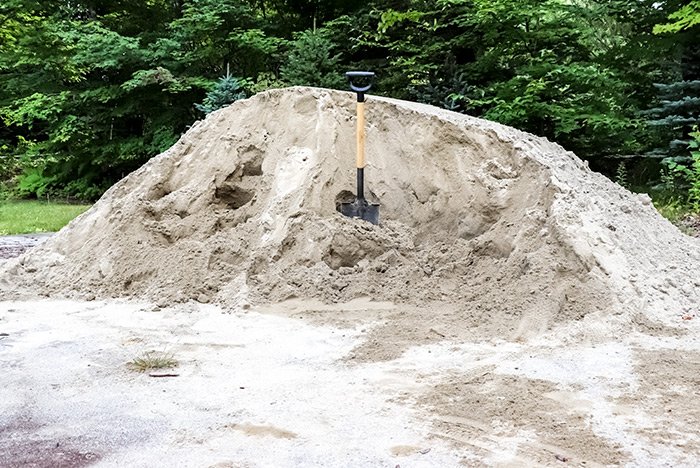
After cutting that concrete from the back pool deck (I'll write about that another time), I decided the best way to go would be to fill the basement with sand by shoveling that sand through both of those missing cement block holes I mentioned above. It was a thought, but I had no idea what type of effort would be needed until I started doing it. So I ordered some sand.
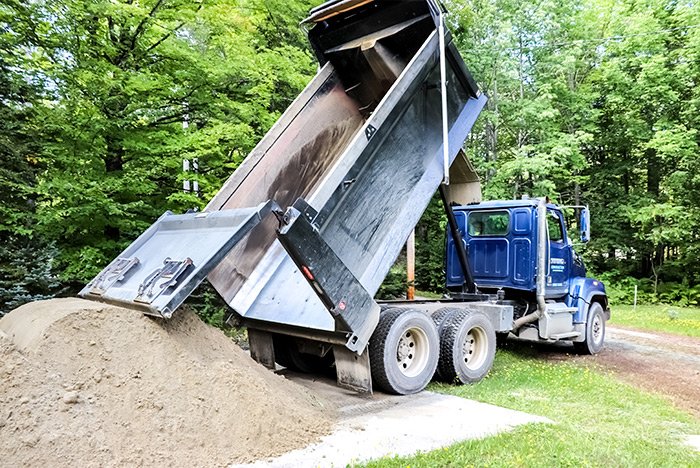
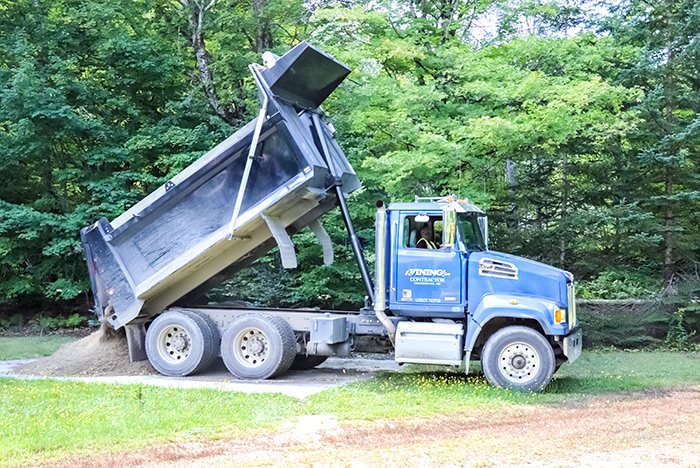
dumping-sand.jpg dump-truck.jpg pile-sand.jpg

I first ordered ten yards and when the guy delivered it to me, he said that he gave me 12. It was a lot of sand and it took me about a week and a half to shovel it into a wheelbarrow, walk it around to the back of the house, dump it next to that small opening and then shovel it into the hole. Then, when I couldn’t fit anymore in, which usually took about five wheelbarrow loads, I’d have to go down into the basement to spread it around. I have no idea how many loads I had to walk around to the back of the house, but it was a horrible experience. I felt weak, it was hot outside and it was backbreaking labor.

After I finished moving the first pile, I called the sand people back and had them deliver another one. In all, I had 24 yards of sand delivered and I shoveled it all into the wheelbarrow and then shoveled it through those holes in the foundation. It was hundreds of wheelbarrow loads and I got it all done in less than three weeks. There were times when I was out there in the dark, leaning against my shovel, wondering when I would fall over. I didn’t though and as I sit here today and write, the crawlspace is chock full of all that sand. I still can’t believe it. By the way, the reason I ordered sand was because it was cheap at $11 per yard and because it shoveled easily. It also packs well.

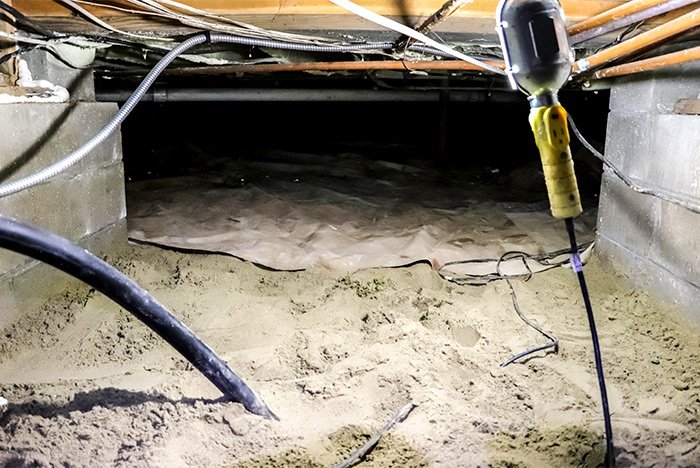
I think I raised the floor above the water table. Take a look.
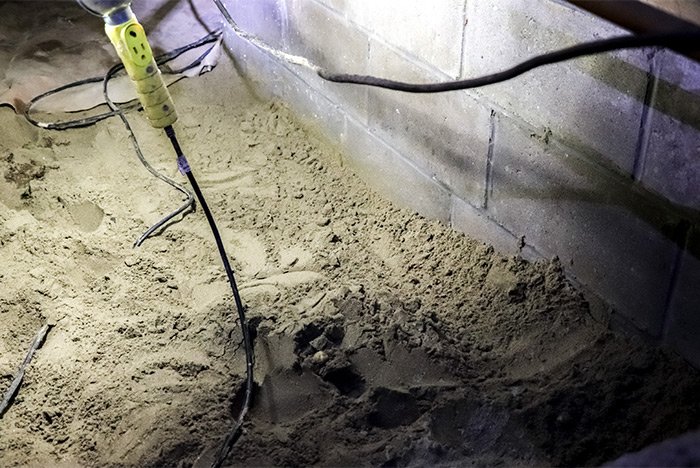
basement-sand.jpg filled-carwlspace.jpg

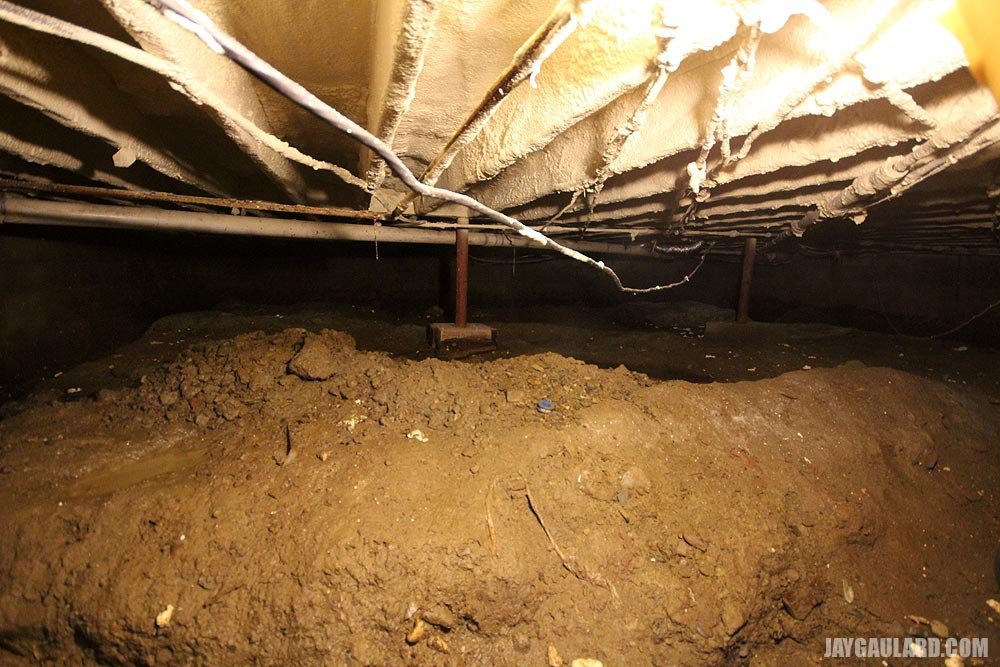
I used to be able to squat down there. Now I have to crawl and my back scrapes up against the ceiling. That’s what I wanted. For a before-view of the area, check out the photos above.

I still can’t believe I fit 24 yards of material down in that basement. My initial estimate was for about eight yards. It’s always more than I think.

Now that the basement has been filled and the water table issue has been dealt with, I’m tackling the condensation problem. To do this, I’m going to, what they call, “encapsulate” the area. That means that I’m going to fill in any air gaps that exist in the entire basement and then line the walls with rigid foam insulation and the floor with plastic. I already sealed the two fill holes with four inches of insulation and some very messy looking spray foam. It may be messy looking, but it’s good and solid and no air is leaking through. I’ll trim that later.
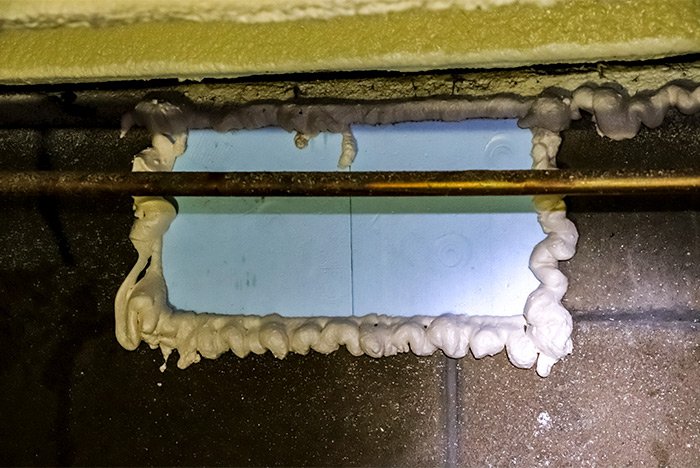
rigid-foam-block.jpg

Again, that’s four inches of foam, which will give me an r-value of 20, albiet only in one area.

As I was sealing these two openings, I noticed that I could see daylight coming through from under the sill plate all around the house. All of these small leaks combined would probably equal a decent amount of humid air leaking into the basement. Since I had some of that foam sealer left over and since I have an itchy trigger finger, I decided to use up the rest of the can, sealing some of these leaks. If you ever have to use that foam for any reason, I suggest that you wear some arm and hand protection. I got a little on my arm yesterday and the foam dried. I had to shave part of my arm last night to get it off. Don’t tell anyone. It’s embarrassing.

Here’s what an unsealed sill plate looks like.
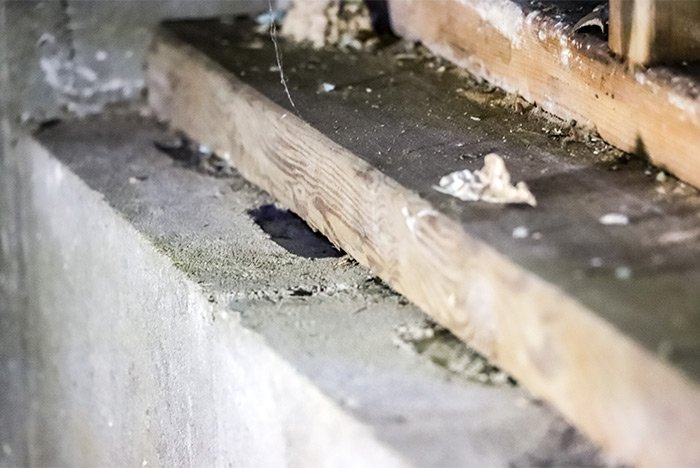
unsealed-sill-plate.jpg

And this is what a sill plate looks like after it’s been sealed with the foam sealer.
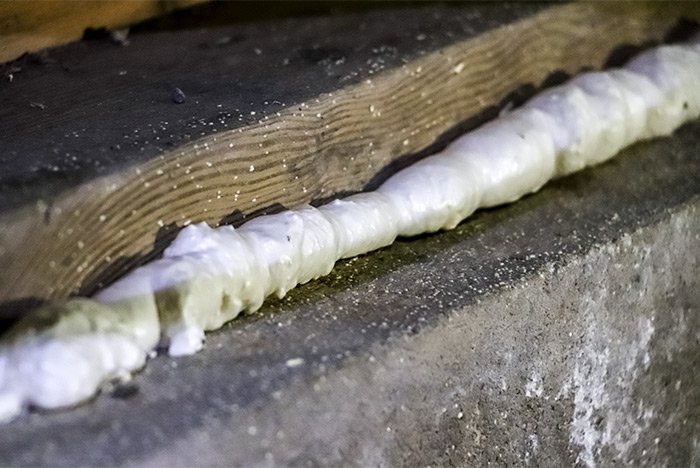
foam-sealer-sill-plate.jpg

Since I ran out of foam, I went back down today with four tubes of siliconized caulk and finished the job. I went through everything with a fine toothed comb, so I know it’s solid and there are no air infiltration. The next step is to purchase about ten sheets of 2-inch thick rigid foam to attach to the walls using construction adhesive. This will make for a warmer basement in the winter and will create a vapor barrier to block all that moisture that comes through the walls from outside. It will also hide that cool cement surface so if any humid air does manage to get in, it won’t condense on it. I’ll tape any seams so the insulated surface is solid. After that, I’ll cover the floor with 6-mil plastic sheeting (on top of the existing plastic) and then tape that plastic to the insulation on the walls. Doing this will seal the area and no moisture from the floor or walls will be able to permeate the airspace. As a matter of fact, just by sealing the sill plate and the missing cement block areas, I can feel it drying out a bit down there. It’s incredible.

I’ll have to go to the store to get the insulation. That will cost about $30 per sheet. I ordered 12 10-ounce tubes of construction adhesive for about $56 two days ago. I also ordered a 10’x100′ sheet of 6-mil plastic for about $52, as well as a 4″x180′ foot roll of special “crawlspace” tape for about $80. Actually, it’s a 3-roll pack and it allegedly sticks to anything.

As for moving the sand around the crawlspace, most of it was straightforward. I threw each shovel full and eventually most of the basement was even. For the areas I couldn’t reach with my throwing, I built a sled to help out. I purchased a hard plastic tub from Tractor Supply as well as a pulley and some rope. I tied the rope to the tub and then snaked it through the pulley. I attached the pulley to the wall where I wanted to dump the sand. Then, I’d fill the tub, pull the rope and watch as the tub slide across the floor. Again, this was an awful experience that went on for far too long, but I got it done. I also feel a bit like a genius for coming up with the whole pulley idea.

After I encapsulate the basement, I’ll take some photos and post them here. If you have a crawlspace that’s wet, this is what you have to do to fix the situation. There’s no other alternative out there. Sump pumps can only do so much. Eventually, you’ll have to engage in some hard labor to get dry again.

Thanks for reading!

COMMENT: Great series of write-ups about your experience and efforts fixing up your home. Concerning the crawl space filling, how did you handle the sump pump tank/well/pit? Did you remove the sump pump, fill in the location, and forgo having a new sump installed since your now-filled crawl space is less likely to hold water? Or did you opt to still have a sump pump present, requiring you to raise the top of the sump tank/well/pit to match the new elevation of your crawl floor?

COMMENT: Great question. My goal with filling the crawl space was to remove the sump pump in its entirety. I wanted to make the floor inside the basement higher than the water table on my property. I pretty much did that. But since the sand settled about six inches after it got wet the first time, I'd actually like to put another foot of it in there. That'll be some day down the road. As of right now, I've got no sump pump and no plan on having one ever again.
 
JGaulard

JGaulard

Administrator
Staff member
Site Supporter
Sr. Site Supporter
Power User
Joined
May 5, 2021
Messages
319
Reaction Score
2
Points
18
  • #5

Crawl Space Encapsulation​

I just went downstairs to visit my freshly encapsulated crawl space and was shocked. I was shocked by the absence of smell. Have you ever smelled a crawl space that hasn’t been encapsulated? If you have or if you’re living above one, you surely know what I’m talking about. It’s like smelling dirt. Ugly, wet and rotting dirt. That’s the only way I know how to put it.

It took about two hours to lay down the final pieces of plastic sheeting and to tape them up to the rigid foam insulation, but I did it. This entire project has been much tougher and longer lasting than I anticipated. First, I had to muster up the energy to even start the project. That took about four years.

Then, I had to figure out what I was going to do and how I was going to get any fill I ordered into the area. That took about a day.

After that, I had to order 20 yards of sand and actually shovel that sand down into the crawl space and smooth it out. That took about three weeks.

And finally, I had to encapsulated the entire crawl space with insulation and plastic. That took about a week.

The job is almost entirely complete. I’m expecting delivery of a dehumidifier next week. That will remove any remaining humidity from the area and then we can enjoy some easy breathing. No more waves of musty odors coming from who knows where. It’s going to be so nice.

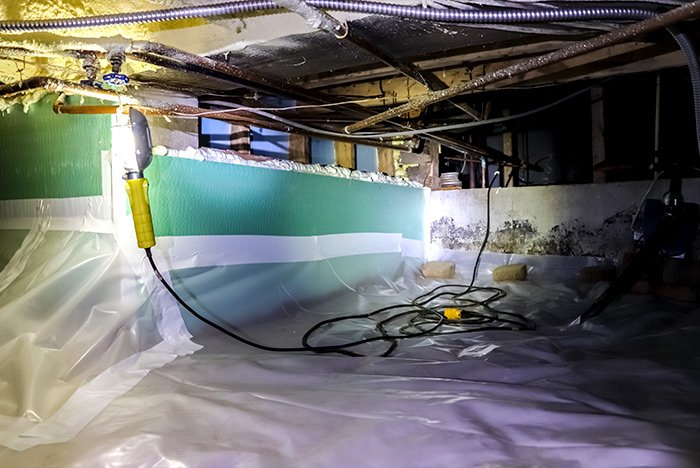
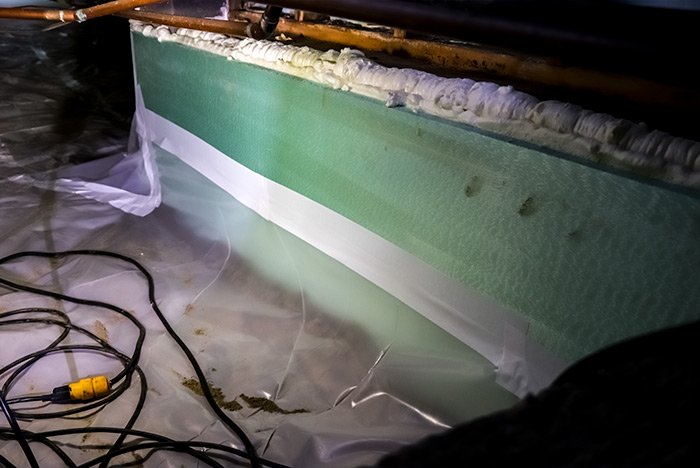
Here’s what I did to encapsulate the area down there. I had to think of a way to stop any moisture from condensing on the concrete block walls. The air is humid and warm, the walls are cool, you know what happens under those conditions. Wetness. Moisture. Dampness. Whatever. I decided that one inch rigid foam insulation would work best to hide the cool walls during the summer and would even help out keeping things warmer in the winter. I bought a case of construction adhesive and put blobs on the back of the boards and then placed the boards up against the walls. I had to creatively use tape and small strips of rigid foam to keep the boards in place, but I managed it and those things are now permanently there. That adhesive is solid.

basement-crawl-space.jpg

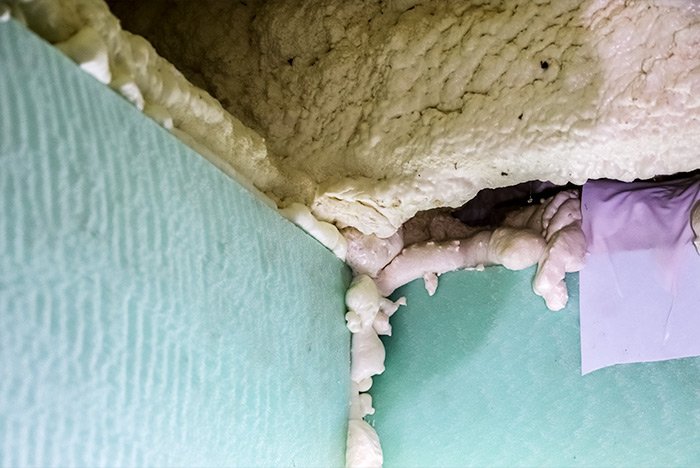
I taped all the rigid foam seams and used Great Stuff spray foam for any corners.

spray-foam-insulation.jpg

Mind you, the ceiling of this crawl space was previously insulated with closed cell spray foam that acted as a vapor barrier.

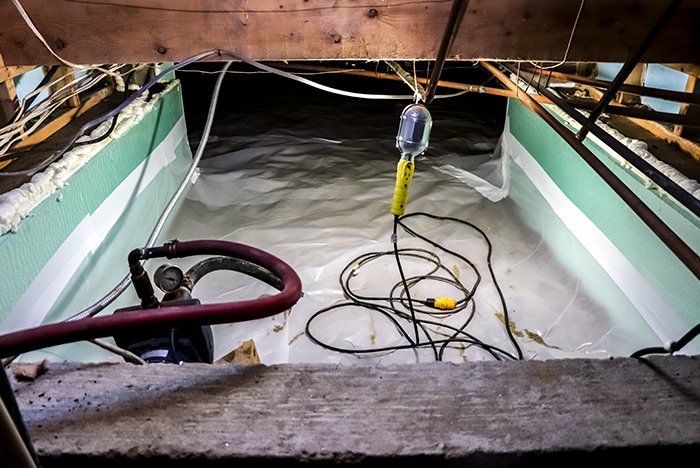
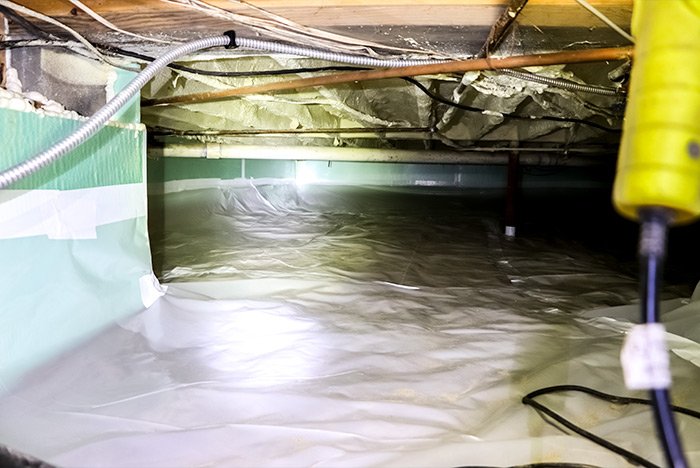
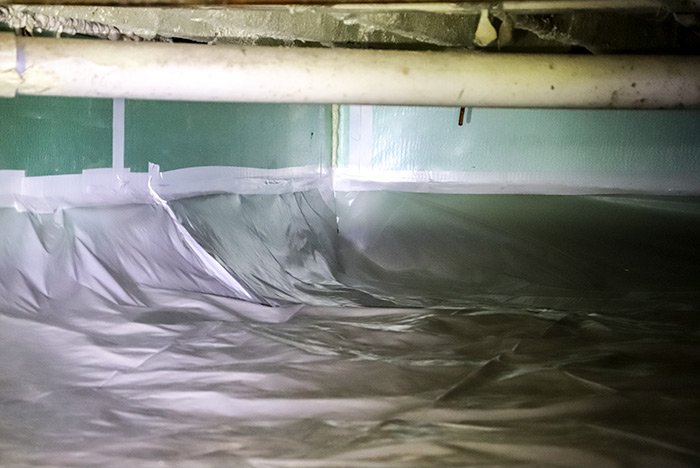
Anyway, once the walls were finished, I just had to roll out my 6 mil plastic sheeting and cover the floor. My plan was to tape the plastic about a foot up the walls to make things extra good. I did that, but for some strange reason, the plastic pulled and sort of sloped. It’s not a big deal and it won’t harm the performance or goal of the vapor barrier, but I wish it didn’t look like this. If this cheaper plastic begins to degrade in a few years, I’ll purchase the good stuff and cover the walls straight down first and then lay the floor down flat. I’ll worry about that later though.

vapor-barrier.jpg

I can’t even begin to tell you how much cleaner it is down there. I just went down there with my camera to take these photos and miraculously, I don’t need to take a shower. Incredible. Here are a few more photos.

covered-floor.jpg encapsulated-alcove.jpg insulated-crawl-space.jpg rigid-foam-wall.jpg taped-seams.jpg

I still have to figure out what I’m going to do with the dryer vent. I may run it through a wall upstairs. We’ll see.

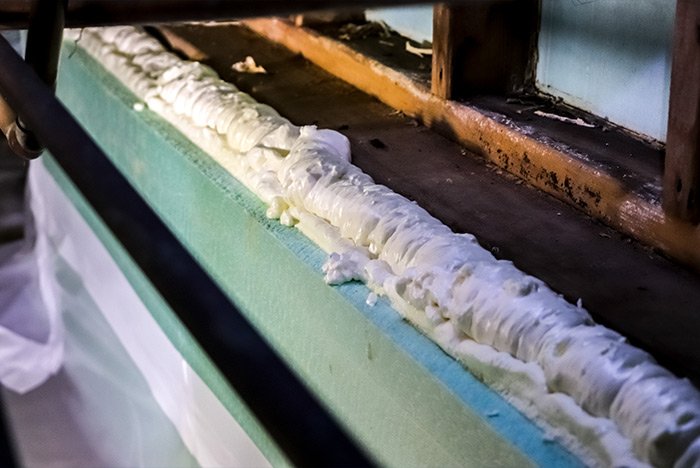
Since I didn’t want any moisture from the walls to leak out from above the rigid foam, I used the canned foam to seal those areas.

great-stuff-foam.jpg

Okay, okay, I may have had some extra foam and had to use it up. I decided to cap off the tops of the cement block walls with it. The more foam, the better.

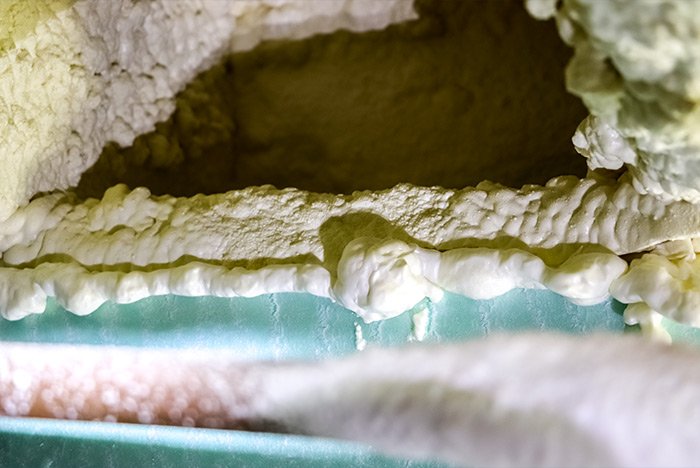
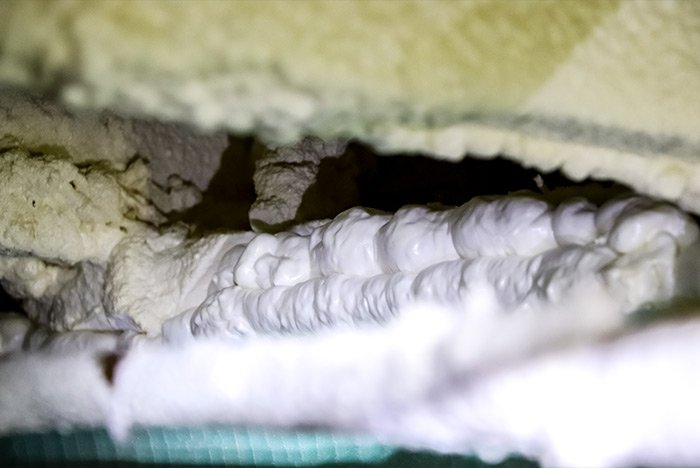
Here are two more shots of the seams. I’d say the area is completely sealed. I made it my mission to seal any cracks anywhere. Now, any moisture from the walls will simply slide down behind the insulation into the sand. From there, it’ll just absorb into the earth. There’s no floor under there. Only sand and dirt.

great-stuff-foam-1.jpg sealed-seams.jpg

It’s kind of hard to wrap my head around the idea that there’s no way for moisture to get up through that vapor barrier. I guess that’s why they call it “encapsulation.” I can tell you that last night, the humidity level was 84%, right after I was done with the project. Today, I’m sure it’s much lower. I can feel that it’s dried up down there. I’ll measure it tomorrow. As I said, I have a dehumidifier coming next week and that’ll suck any excess moisture right up. The humidity level needs to stay below 50% to be sure no mold and mildew grows.

Actually, I’ll write another post after I get that machine. I’ll take some photos of my little hygrometer. That should be fun.
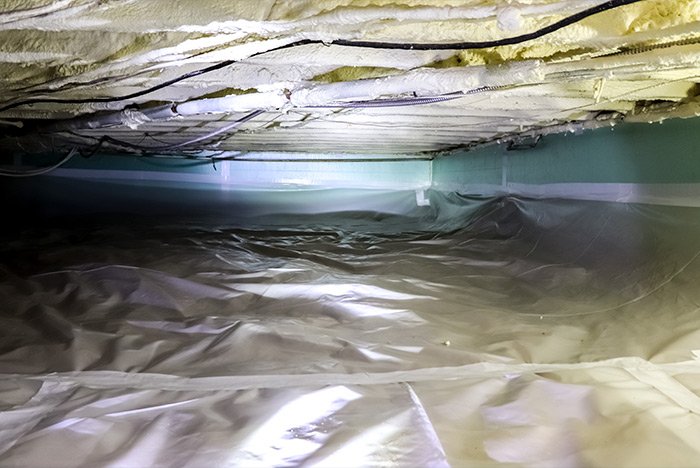
Check this out. I took a video when I was sitting down there a minute ago. It’s basically a 360 degree view of where I’ve been hanging out for the past month. A guy can get attached to an area like that. It’s weird. I sort of miss it down there. Luckily, we have another section to do in the spring.
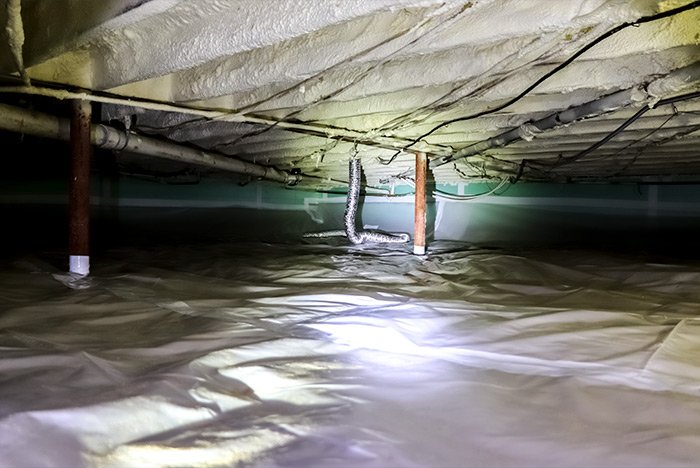
Encapsulated Basement Crawl Space


COMMENT: Something of a fellow traveler writing you from the Canadian side our North American thing. Came across your posts with great interest as it’s in many ways identical to something I’m dealing with in our four season cottage. Been working through a bunch of entertaining projects of our own and I’m dealing with an almost identical one as you did here. Preparing to get at it in the coming month. Wondered how this turned out for you? I’ve left my email, would appreciate if we could share thoughts/ experience on this.

COMMENT: It’s been working out very well. It’s mud season in my area and that means the water table is extremely high. Luckily, the basement hasn’t filled up like a bathtub, which means I was correct in my assumption that the water was filling from below. The sand was a good choice for this project. It has kept the water down below and the plastic is blocking any moisture that’s trying to come up. I can see all the droplets of condensation on the other side of the plastic. I’m guessing the insulation on the walls has done its job, but I wasn’t down in the basement much this winter, so I can’t be sure about that. All in all, the basement is sealed which means that it’ll be much drier this summer season. I’m looking forward to finishing the other side down there in a month or two.
 
Top