CraigHardy
Member
- Joined
- May 11, 2021
- Messages
- 223
- Reaction Score
- 2
- Points
- 18
- #1
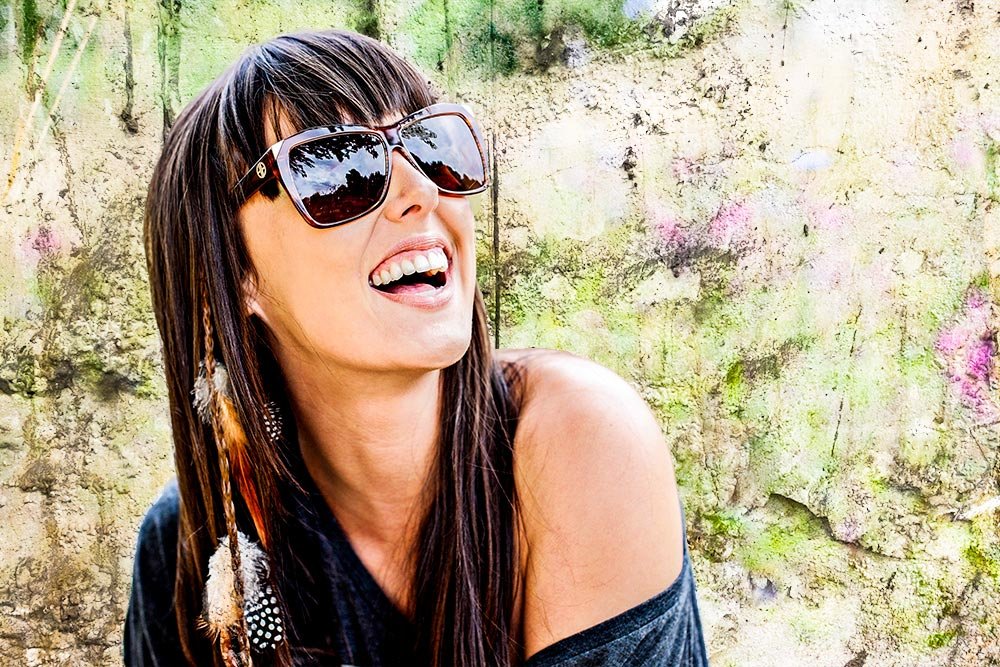
This is one of those really relevant and helpful posts that you’ll want to save for a rainy day (hint hint – bookmark). I say this because adding a textured background to a portrait in Adobe Photoshop is quite the popular undertaking. And depending on how the original photo was taken and how distinct the edges of the person are, it’s actually very simple. Once you have your selection made, you can easily apply the background of your choosing. After that, apply a blending mode and BAM – you’re good to go. The most time consuming part is making the selection itself, but we have tons of tools to help us with that, right? If you search the term “Selection” in the top search bar, you’ll find all the posts I wrote on the topic.
In today’s post, I’m going to change the background of the image below. As it stands, the girl in the photo is sitting in a meadow. It’s not that there’s anything wrong with the current background or anything – it’s just that I want to change it for demonstration’s sake.
Original Photo
The reason I chose this photo to work with is because the subject has good edges. If you’re a photographer and are planning on doing something similar, be sure to take the photo in such a way as to make the subject distinct from its background. If you do this, your life will be easier once you get the photo into Photoshop.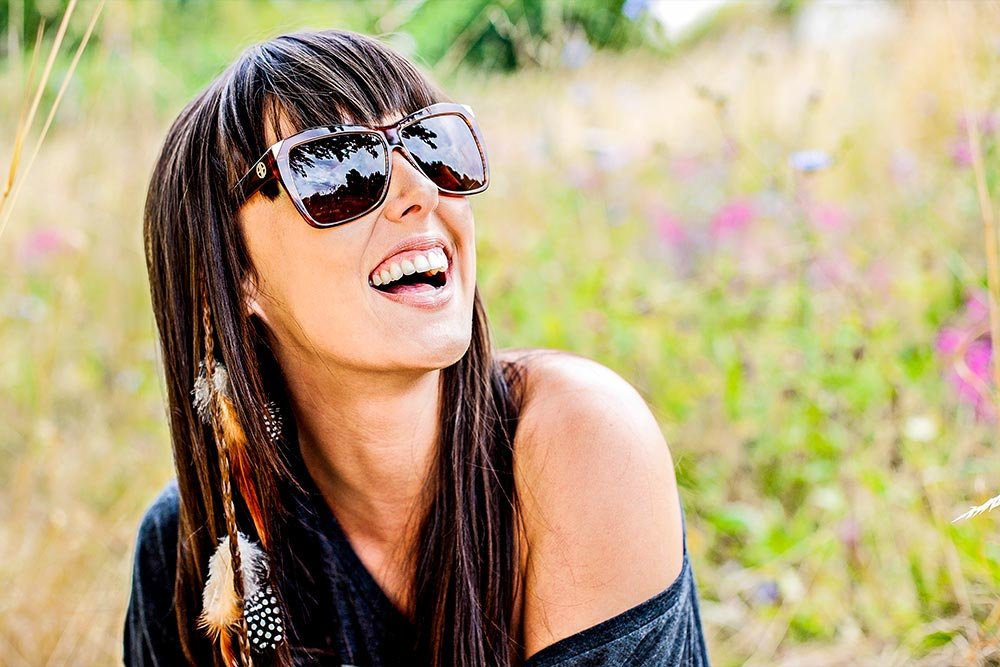
While most of the model’s edges are very crisp, some aren’t. As an example, her shoulders get a bit fuzzy at times. I don’t think they’ll pose too much of a challenge though, so I’ll just have to see how things go.
Selecting the Model
The very first thing I’m going to do is add both layers of this project to the same document. I’ve got the model layer at the bottom and the background right above that. Later on, I’ll need both. I’ve also turned off the visibility of the background texture layer so I can see what I’m doing with the other layer.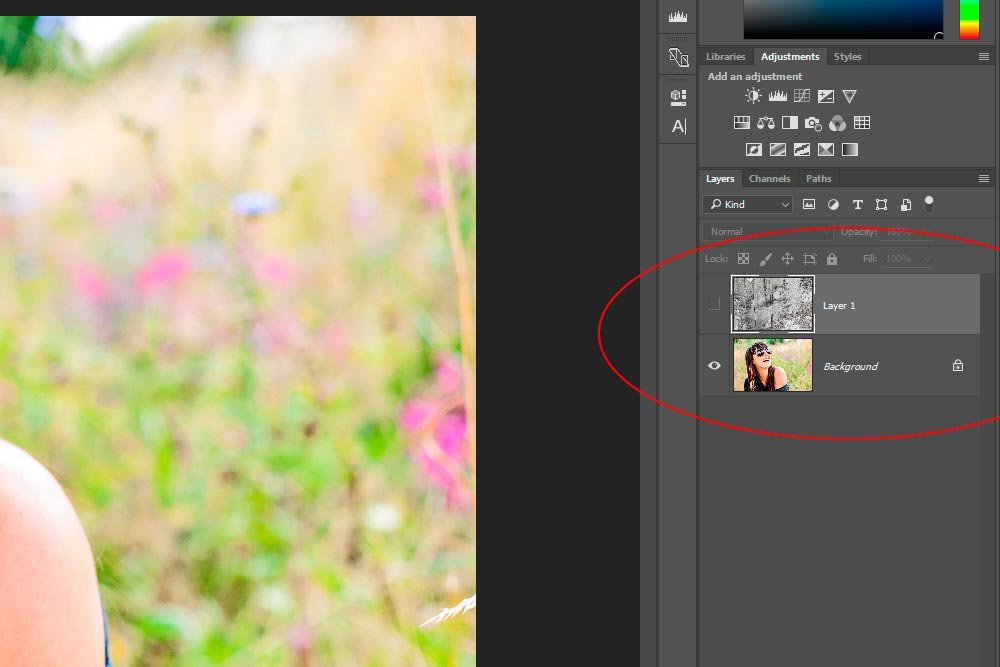
Before I select anything, I’m going to be sure to activate the bottom layer by clicking on it. Then, I’ll head over to the Quick Selection Tool in the left vertical toolbar and click on that. From there, I’ll choose an appropriate size for the tool up in the options bar and begin selecting the subject. My goal is to isolate the girl from her background.
If you aren’t up to snuff on the Quick Selection Tool, it’ll take no time at all to read my previous post where I cover it thoroughly.
Selecting Objects & Refining Edges in Adobe Photoshop
As you can see from the screenshot below, I’ve done a pretty decent job of making the selection. I know you can’t see the entire photo, but trust me, it’s decent. What I want to display below are the marching ants, so I had to enlarge the shot.
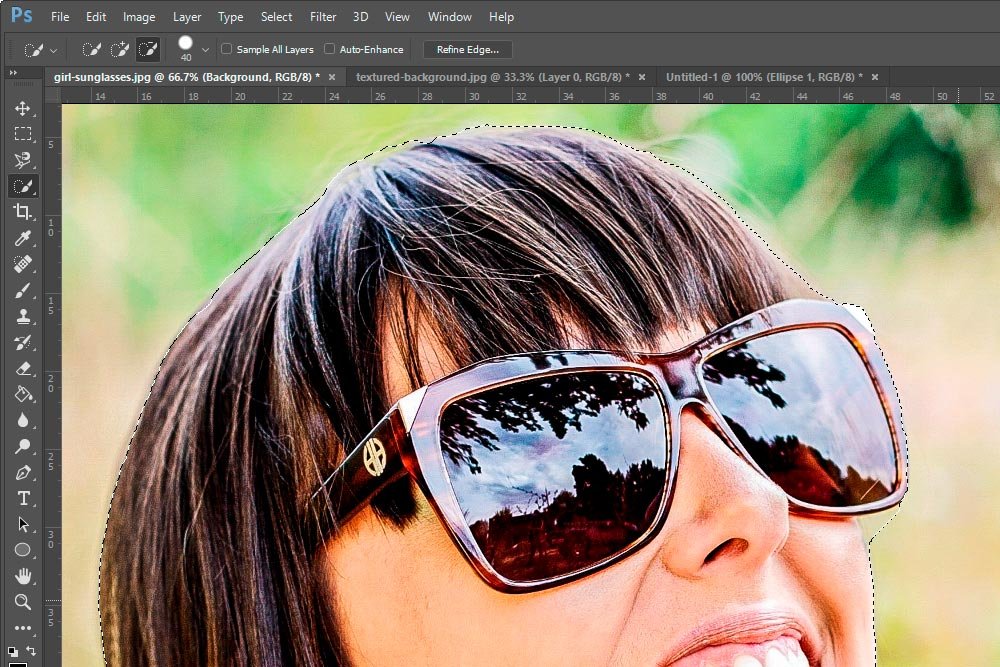
Now, just as I look at this enlarged shot, I notice that there’s some background selected where there shouldn’t be. The area I’m referring to is at the right side of the photo, right below the model’s glasses.
To deselect just this area, I’m going to head up to the options bar and click on the icon with the quick selection picture and the small minus (-) sign next to it.
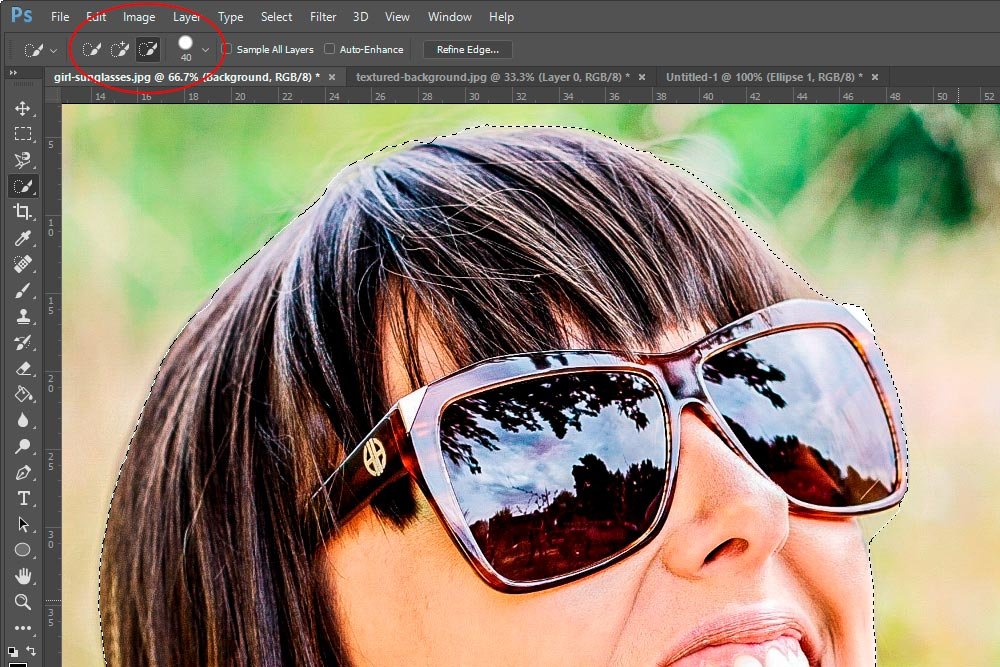
This tool will allow me to remove areas, or subtract them, from the rest of the selection. It acts just like the Quick Selection Tool, but in an opposite way – just like a brush. I’ll go ahead and remove that area.
As a quick tip – I’m using the Space Bar on my keyboard as a quick way to move around the image. When I press it, the little hand grabber appears and the selection tool disappears. I can move the photo and then let go of the space bar. After that, the selection tool reappears. Also, I’m using the [ and the ] keys to shrink and grow the size of the selection tool. These are keyboard shortcuts that save a lot of time.
Refining the Edges
The next task I’m going to complete is to refine the edges of my selection. To do this, I’ll go up and click on the Refine Edge button in the options bar. If you aren’t familiar with how to refine edges, check out this post. I explain everything that’s necessary.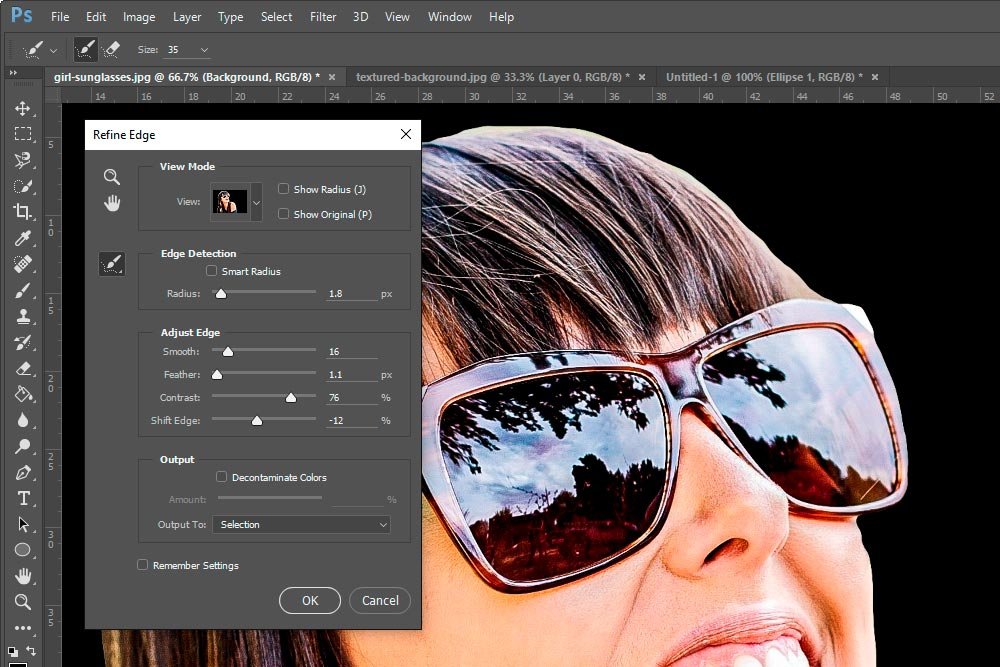
Inverting the Selection & Adding a Layer Mask
I feel pretty good about the selection I’ve made. It’s smooth and there’s nothing weird about it. From here, I want to invert the selection, so it’s not actually selecting the girl in the photo, but her background. To do this, I’ll head up to the Select > Inverse menu item and click it.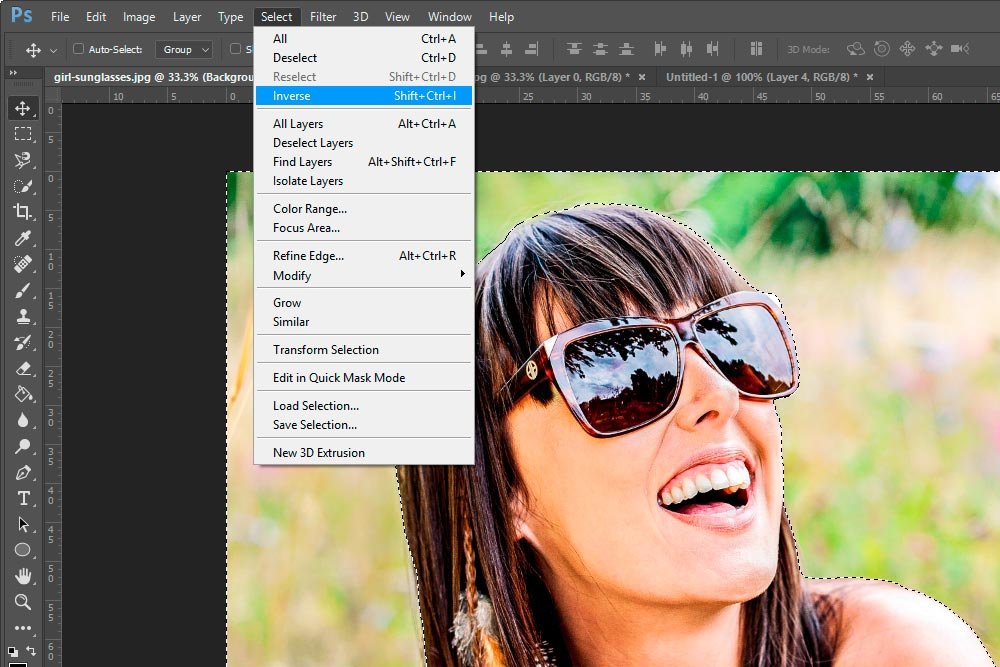
If you look at the marching ants now, you’ll see that everything but the girl is selected. Perfect.
Next up, I’ll head over to the Layers panel, make the texture layer visible and click on it to make the layer active.
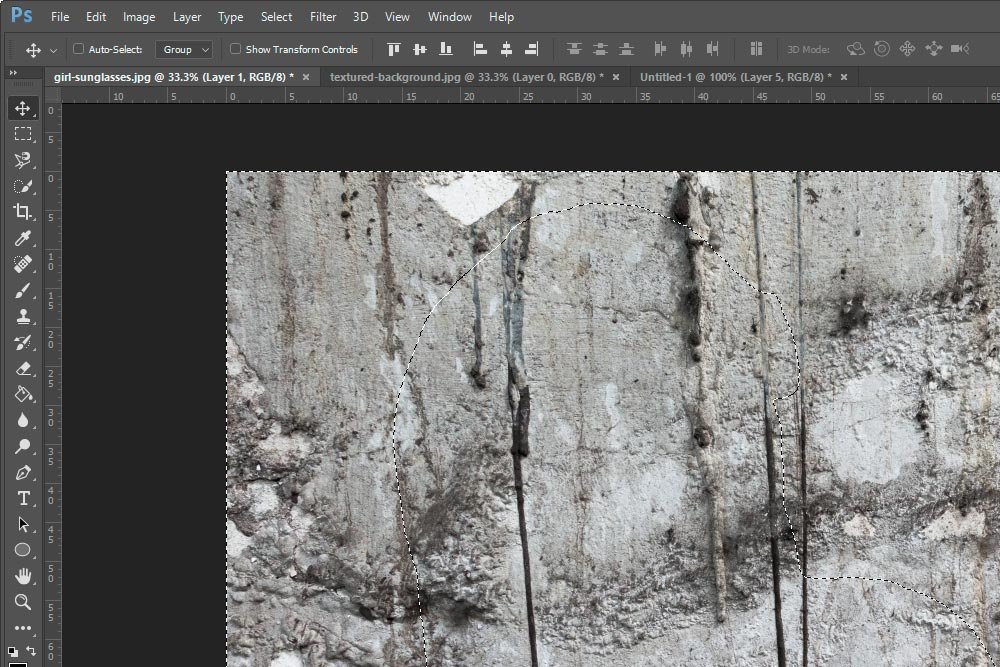
If you look closely, you can see that the selection is still active.
Now, I’ll go down to the bottom of the Layers panel and click on the Add Mask icon.
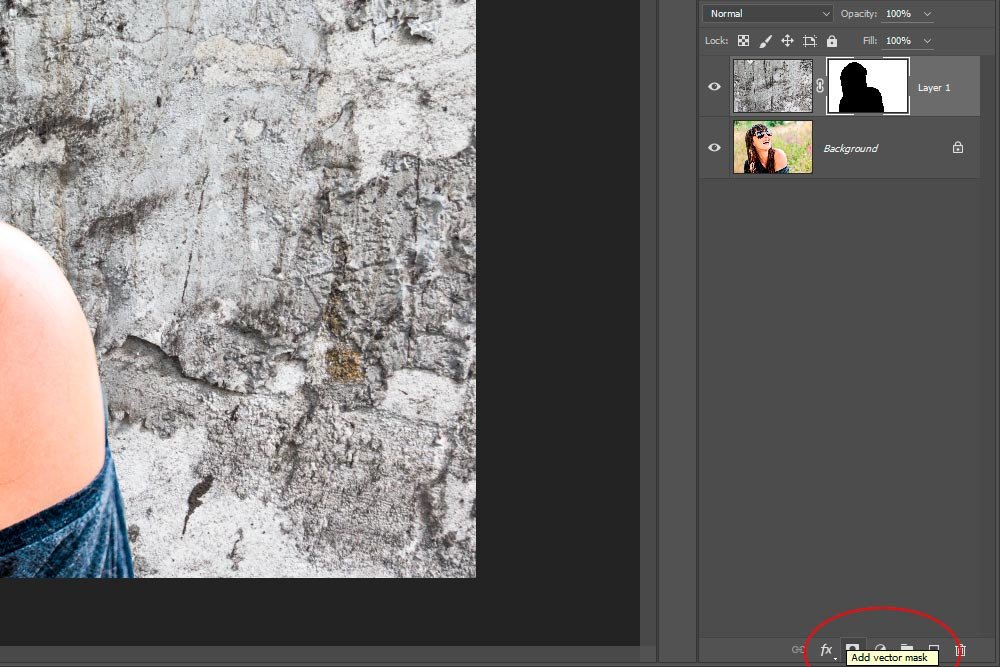
By adding the mask to the texture layer, I can now see the model. So far, this is the current state of the project.

As it stands, this is great. If my goal was to simply add a textured background over the original one, my work would be finished. The thing is, as I was playing with this project earlier in the day, I realized that by flipping through the blend modes, I could actually blend the texture in with the original background, which made for a really cool effect. If you aren’t sure how to fly through the blending modes quickly, be sure to read through my post on that, where I discuss this topic along with all the keyboard shortcuts that go with it.
Quick Keyboard Shortcut Guide For Blending Modes in Adobe Photoshop
Applying a Blending Mode to the Background
Like I said, the current version is really good. It looks as though the model is sitting in front of some sort of concrete wall. Let’s see how it would look by blending things a bit though.First, I’ll try out Linear Burn.
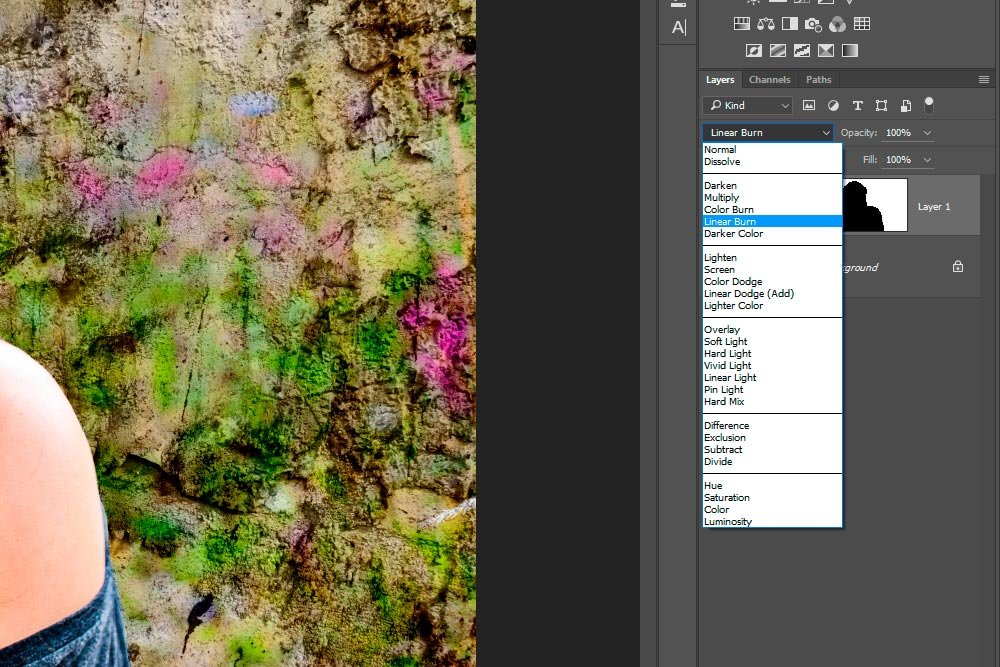
This is probably my favorite.
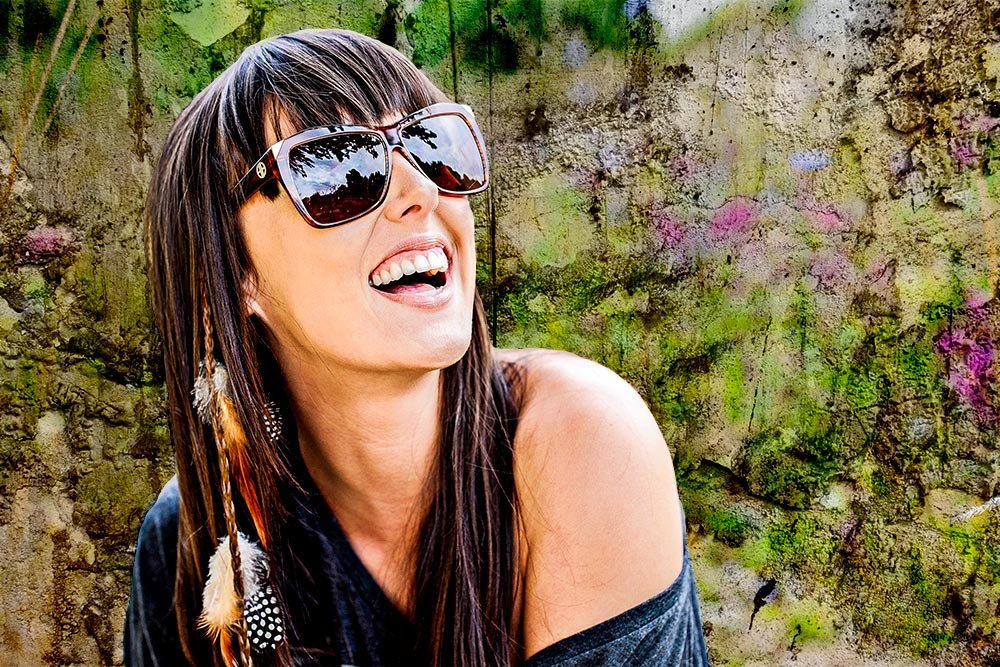
Darker Color blending mode looks good too.

Hard Light is probably the most realistic though.

By offering various views of the different blending modes, I’m attempting to show you that the sky’s the limit when you have the selection part of this project finished. That was the technical aspect, while this is more of the creative one.
Give this project a try and let me know what you come up with. I’d love to see some examples.
——
If you’ve enjoyed today’s post and found it helpful, please share it with a friend. Thanks!
