EmeraldHike
Member
- Joined
- May 10, 2021
- Messages
- 133
- Reaction Score
- 0
- Points
- 21
- #1
In the past, I’ve written posts that talk about changing specific object colors with Adobe Photoshop. I’ve also discussed how to use the color range selection tool. Finally, I covered how simple it is to use masks. Today, I’m going to work through a small project that uses all three of these topics. It’s going to be great.
In today’s post, I’m going to introduce a really cool feature that’s part of each adjustment layer’s Property panel. The feature is something I just mentioned that I’ve already covered on this blog – the Color Range selection tool. Now, this Color Range selection tool is just like the the previous one – it’s just that we can access it differently. Instead of choosing it through the Select > Color Range menu item, we’ll get at it through an adjustment layer. And the best part is, any changes made to the photo will come via a mask. It’s awesome. Don’t worry, I’ll explain everything below.
Project Goal
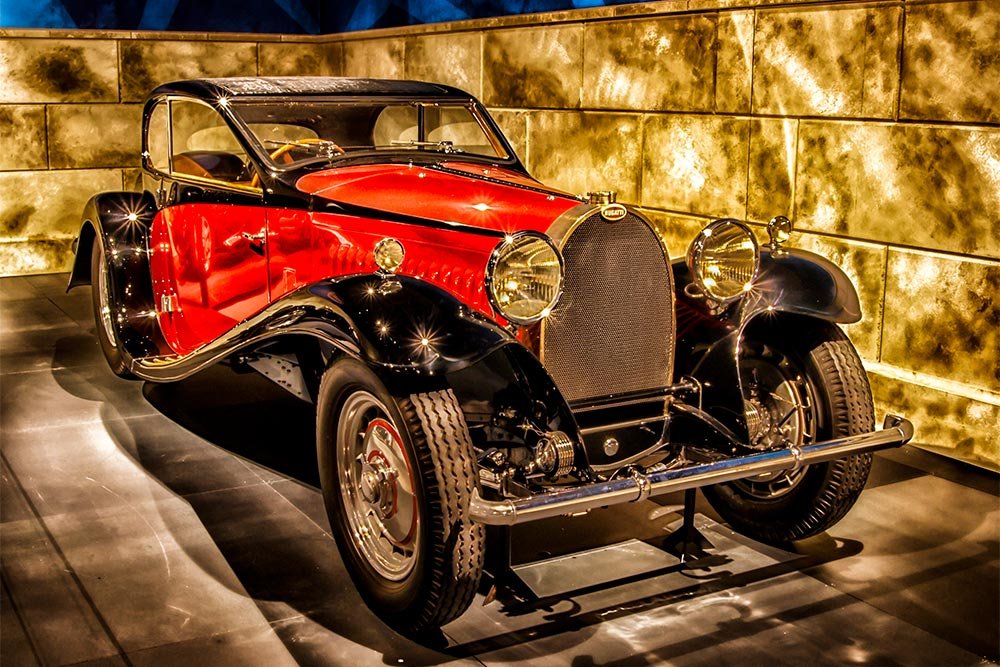
The goal of today’s project is to change one particular color of a photo, lessen the exposure of another section of that same photo and finally, desaturate another area of the photo. To do this, I’ll need to create three different adjustment layers that use three different masks. This is going to offer me tremendous, non-destructive, flexibility that I can go back to and edit time and time again.The photo below is the original version of the one I’ll be using in this project. Take note of all the colors, because they’ll soon be changing.
Changing Color
There’s a specific set of rules I’ll need to follow when making the types of changes I plan on making below. First, I need to think about exactly what it is I want to accomplish. Since this project will be broken up into three different parts, right now, I only need to consider the first goal. And that is to change the color of the car from red to pink or purple.To kick things off, I’m going to click on the Hue/Saturation icon in the Adjustments panel. This will create the first adjustment layer.
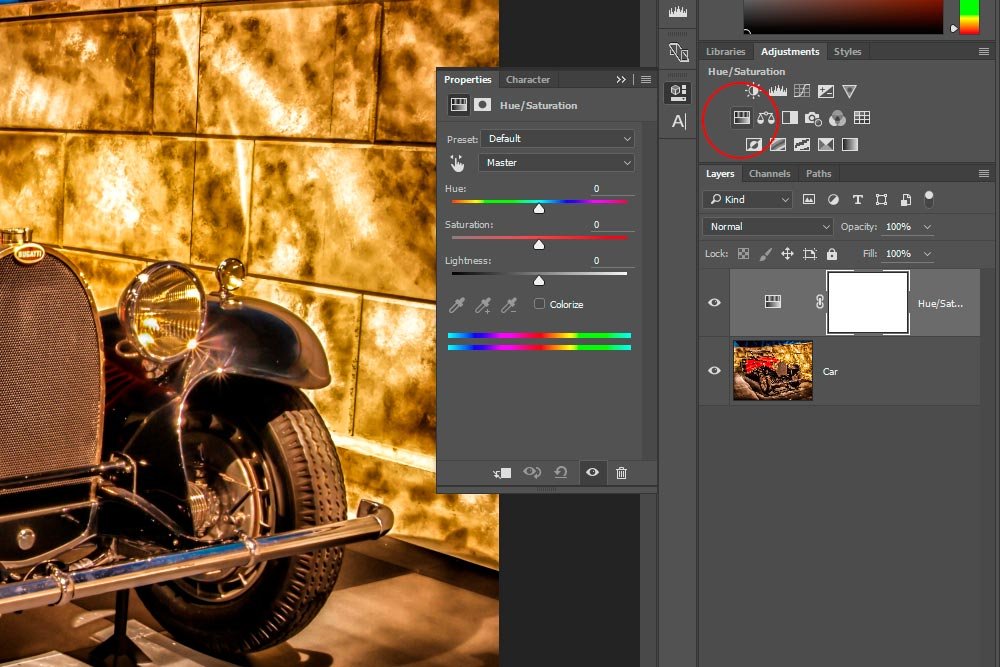
Next, I’m going to push the Hue slider to the left, focusing only on the area that I would like to see changed in color. I know that all areas of the photo are going to get funky looking, but that’s okay. I’ll push the slider until the red in the car turns pink.
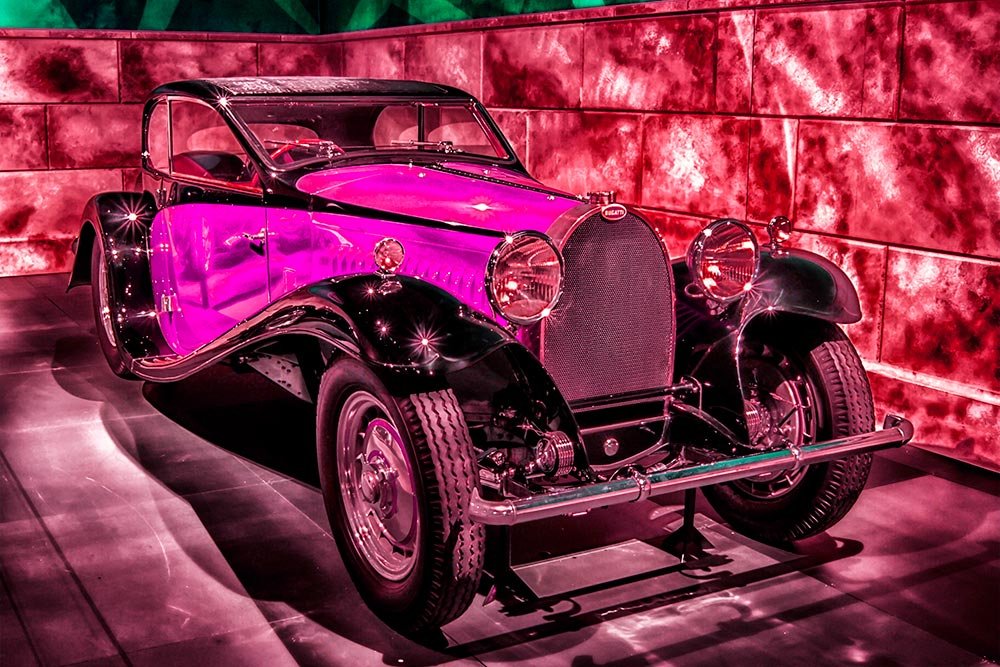
See? I told you stuff was going to get weird.
Right now, I’ve just accomplished something very simple. I’ve done this before and it’s far too easy to write about again. That’s why I’m going to take things up a notch. To isolate the new pink color of the car, I need to separate that from everything else. To do this, I’ll click the Masks icon in the Properties panel. This will bring me to a new area. From there, I’ll click on the Color Range selection tool button.
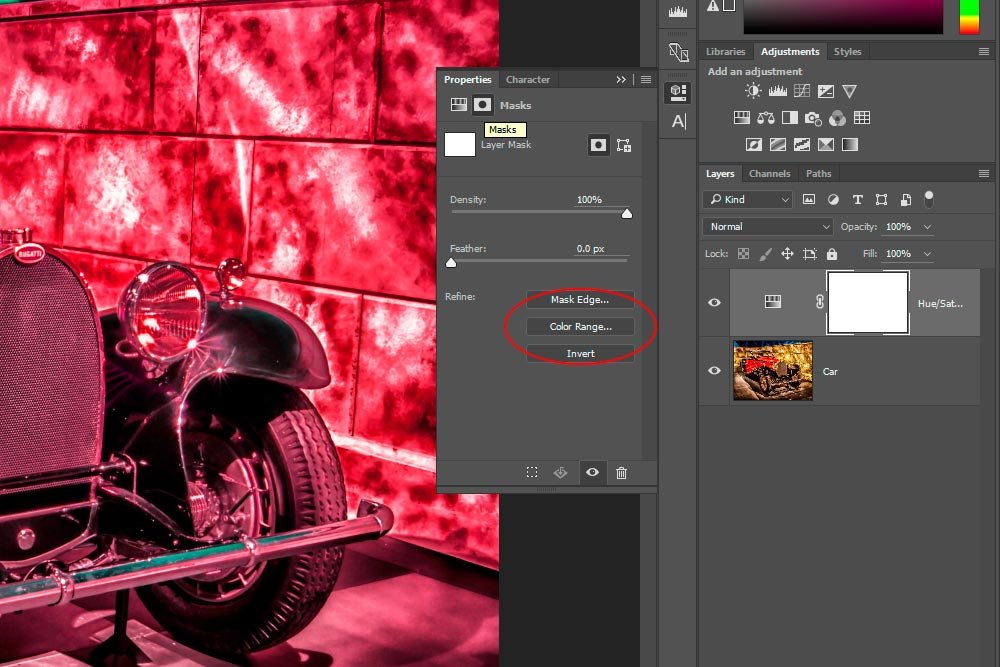
The moment I do this, all the colors in the photo will go back to their original state. Also, the Color Range dialog box will open up. From here, I’ll use the dropper to click on the area of the photo I want affected.
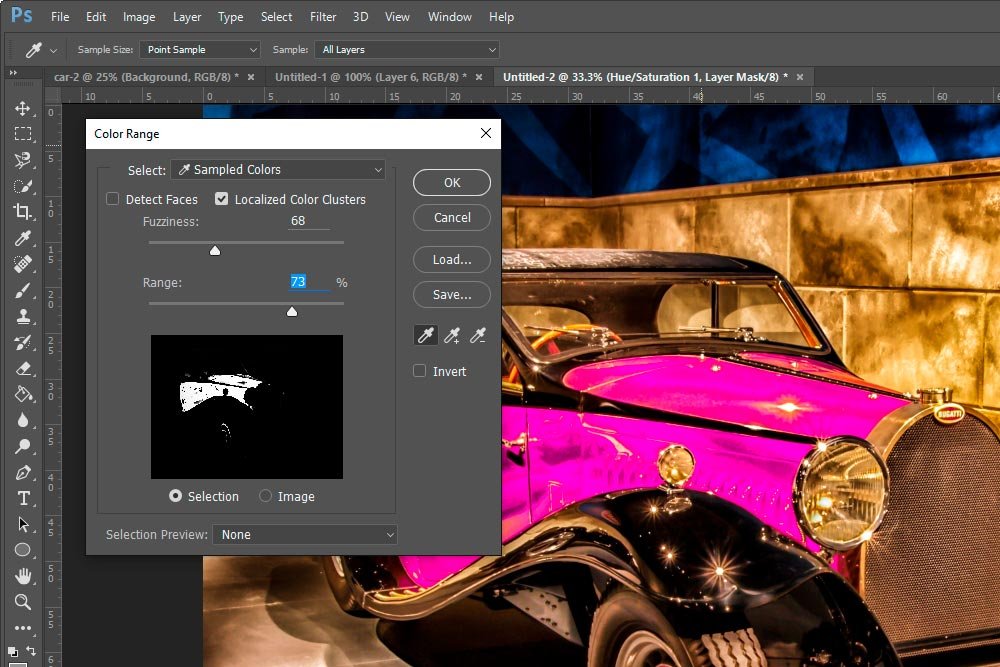
At this point, I’m not going to delve into the intricacies of how to select and use the Color Range selection tool. If you’d like to learn all about it, I encourage you to read this post:
Changing Colors with Color Range Selection in Adobe Photoshop
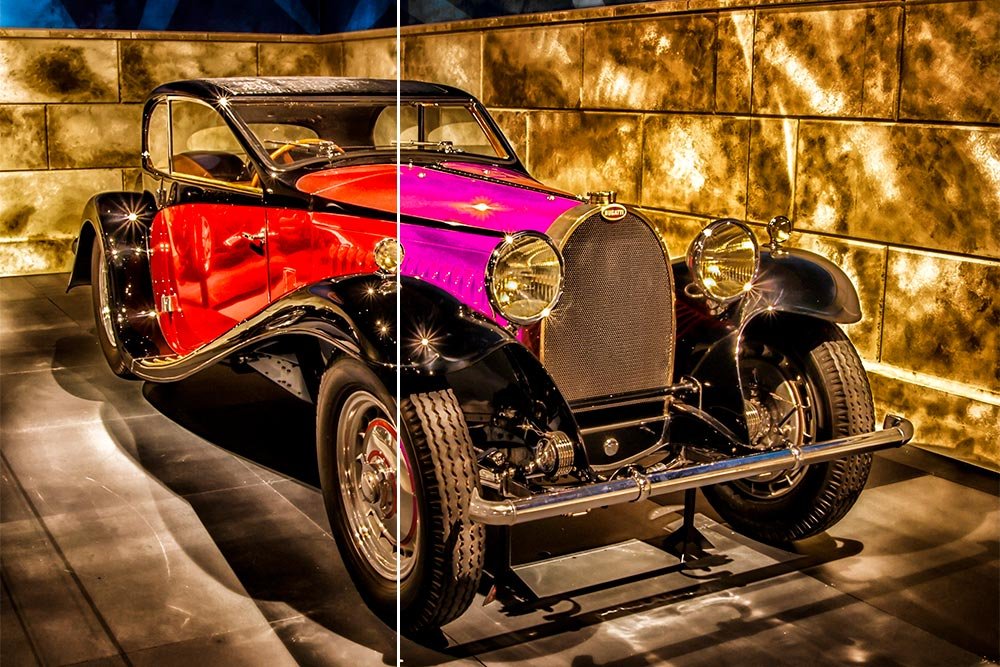
As you can see from the screenshot above, the hood of the car, among other more minor areas, has been changed in color from red to pink. Goal number one finished. I do want to point out, however, that the reason this method was so effective, is because I used a mask to isolate the colored area. At any point, I can go back into that adjustment layer mask and brush with either white or black to reveal or hide some of the color. I can do this on other areas of the photo as well.
Lowering Exposure
The next goal I have is to make the gold color walls slightly less exposed. I want to darken them a bit. As it stands, they’re far too bright and I think some of the focus is being taken away from the beautiful car and placed on the walls. I don’t want to show off the walls like I do the car.I’m going to click on a new icon in the Adjustments panel to create another adjustment layer. This time, I’ll choose the Brightness/Contrast icon.
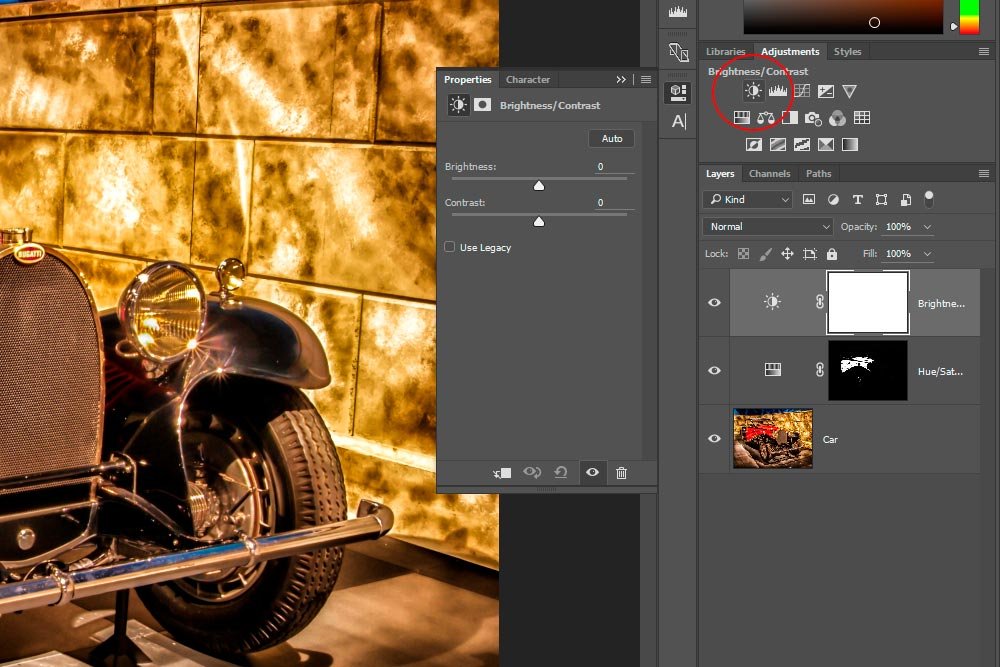
Once the adjustment layer is created and the Properties panel opens, I’ll follow the same steps as I did above. I’ll push the Brightness slider all the way to the left and then click on the Masks icon and then the Color Range button. Once the Color Range dialog box opens, I’ll click on the wall. Now, the wall is a bit strange in that it’s fairly dynamic with its coloring. To compensate for this, I’ll hold down the Shift key on my keyboard and drag the dropper across a section of the wall. Doing this will tell Photoshop to include all colors I drag over. Once finished, I’ll move the Fuzziness and Range sliders in the Color Range dialog box until they show me something appealing.
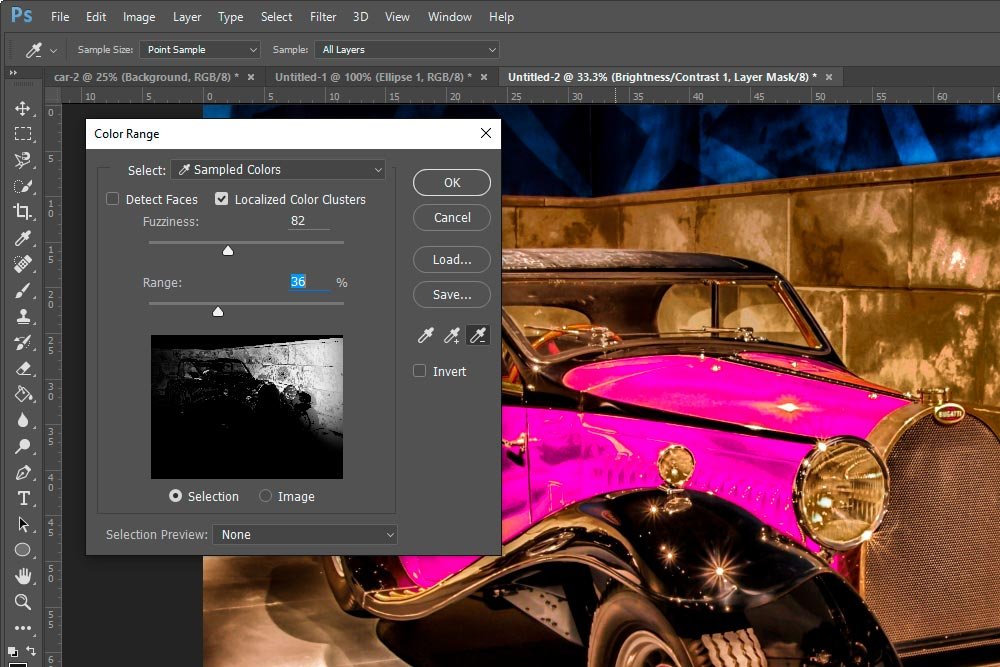
Do you see how I’m working inside a mask? The black hides and the white reveals. The goal is to have the area I want affected stay white, while making everything else black. Remember, at any time, I can use the brush tool to assist here. I may do that at the end of the project.
The second goal has been accomplished.
Desaturating Color
For this final section, I’m going to follow the same exact steps as I did for the two previous sections. The only change I’ll make is to click on the Black & White icon in the Adjustments panel.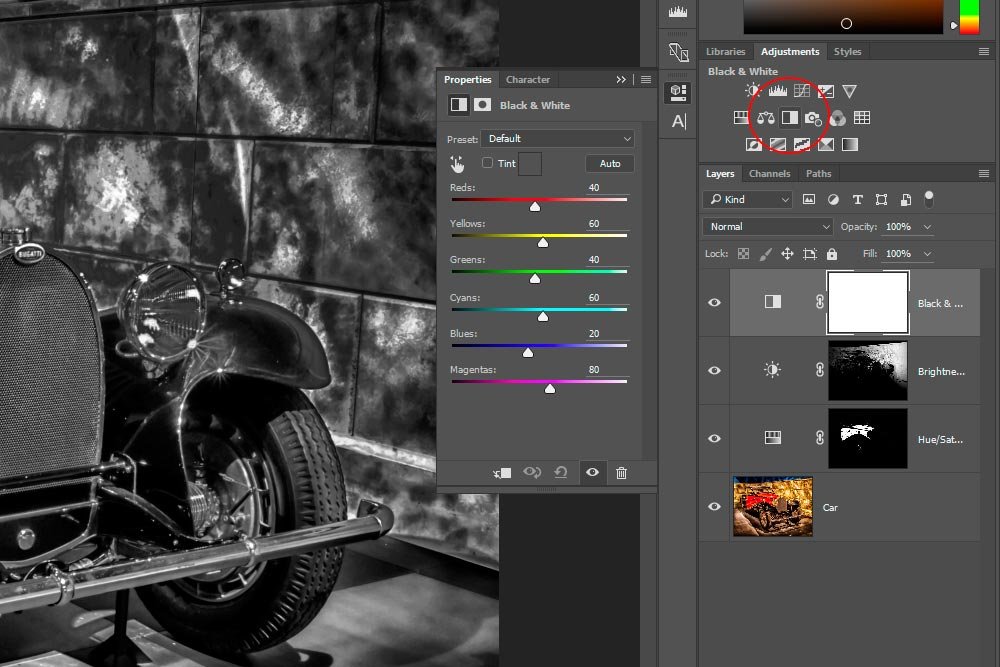
Doing this will turn the entire image black and white. It’s my job to work inside a mask to isolate the area I want affected. In this case, I want to desaturate only the top blue area of the upper portion of the image. So, I’ll again click on the Masks icon and then the Color Range selection tool button. This will open the Color Range dialog box where I can make my selection.
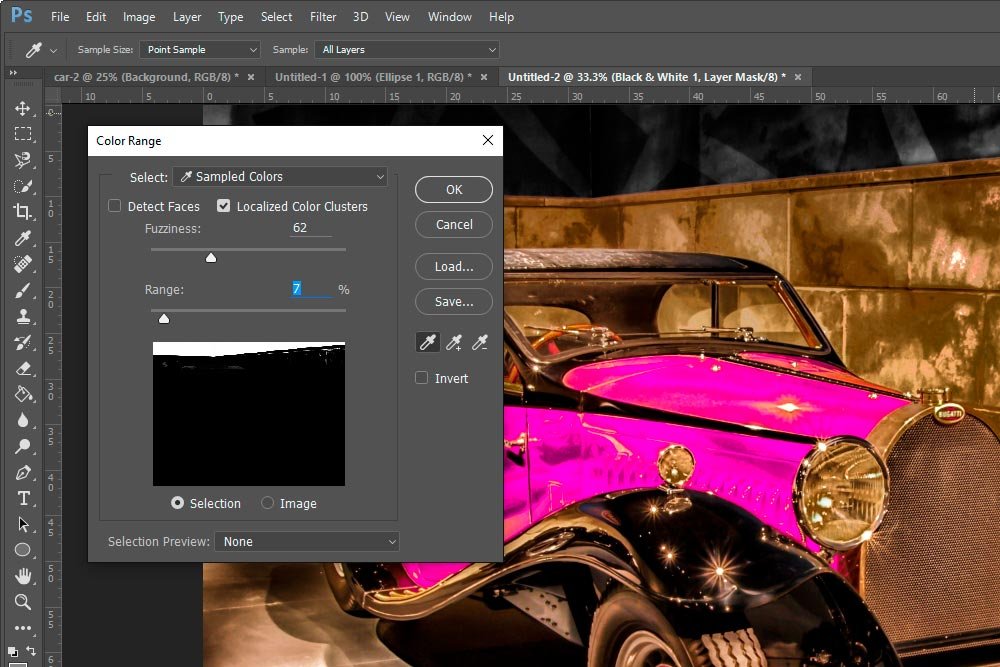
As you can see, where it was blue is no longer. It’s now black and white, which, again, brings the focus to the car.
Final Touches
As I mentioned earlier, I’m going to click on the masks in the Layers panel to touch up some of the selections. Since the heavy lifting is finished, this is easy. I’ll choose either black or white to hide or expose parts of the image. If you aren’t familiar with how masks in Photoshop work, I encourage you to read through these two posts:What are Layer Masks in Adobe Photoshop?
Using Masks to Colorize Only Part of a Photo in Adobe Photoshop
If you take a look at the mask thumbnails in the Layers panel of the next screenshot closely, you’ll see that the black and white areas are more distinct. Cleaning those areas up with the brush only took a few moments, since I didn’t have to worry about any edges or fine points like that. The Color Range selection tool covered them for me.
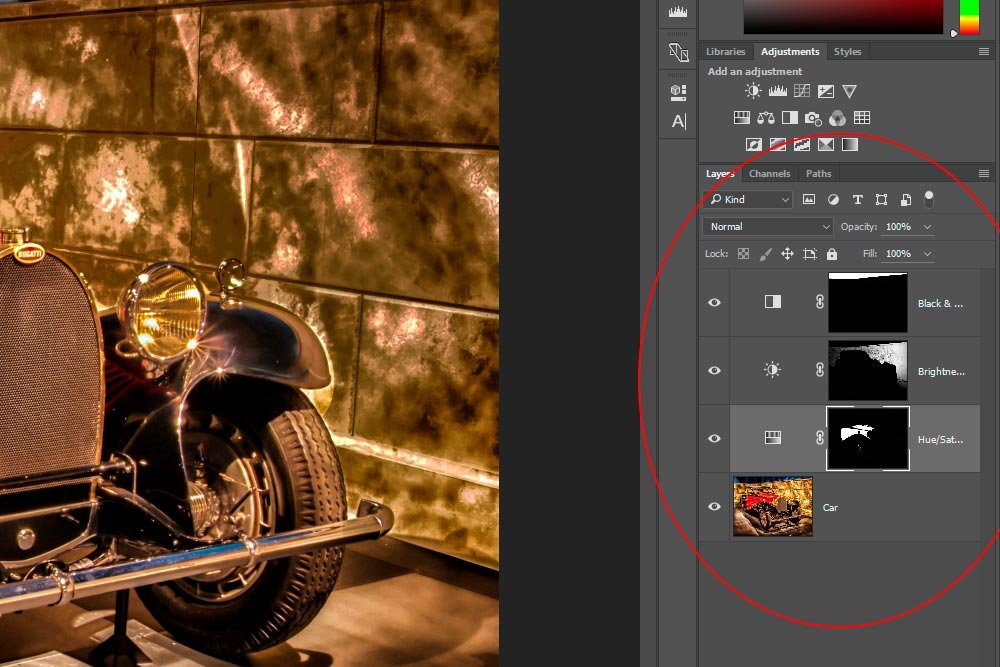
And with that, the entire project has been completed. I changed the color of the car and brought it to the forefront by muting out some of the surrounding areas. I’d say that’s a job well done.
