JodyBuchanan
Member
- Joined
- May 10, 2021
- Messages
- 138
- Reaction Score
- 0
- Points
- 21
- #1
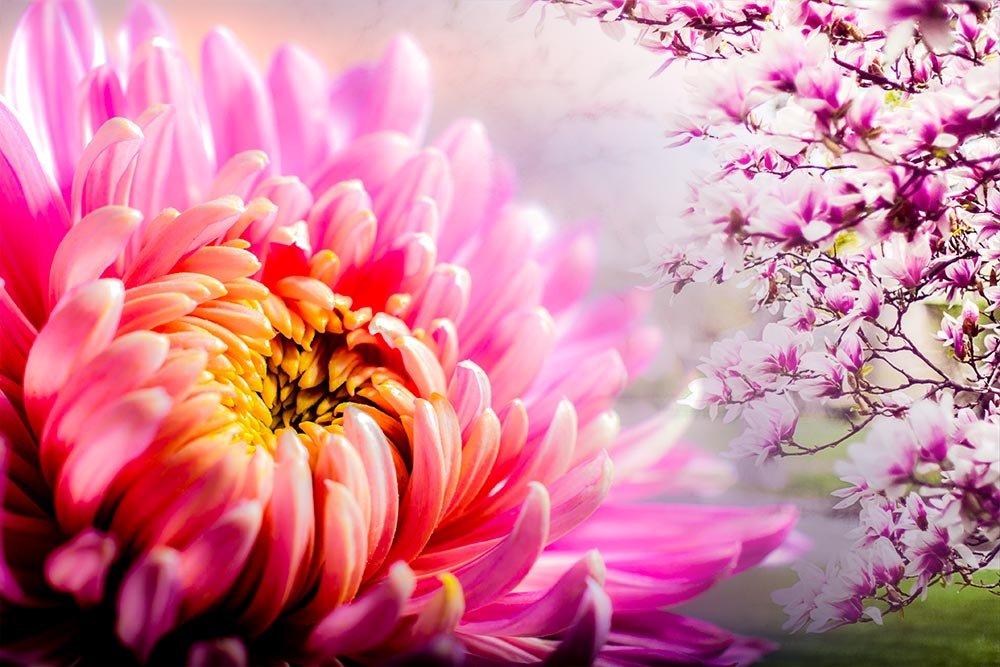
I can’t even count the number of times I’ve blended multiple photos together in Adobe Photoshop. Posters, newspaper ads, portraits…you name it. This is actually one of the most popular activities editors and photographers undertake with this application.
When combining photos, there are a few things to watch out for. First, of course, is the outcome. You want to have the most flexibility as possible, so you can make the result look as best it can. Second, you want to edit in such a way as to not destroy any data. In other words, if you need to change things in the future, you’ll still need to have the ability to access the original shots (layers). And third, you want to edit using a method that feels good. It’s quite inefficient to make a change, not like it, hit undo, make another change, not like it, hit undo and so on. If you use the proper tool in the first place, you can edit, edit and edit, never hitting the undo button.
In today’s post, I’m going to walk you through a project that uses a few different tools to merge two flower images together. First, I’ll situate the layers in a way that’s conducive to their blending. Next, I’ll use a mask to keep things non-destructive and finally, I’ll use the gradient tools to hide and reveal various areas of both photos. During these three steps, I’ll meet the goals of staying flexible, keeping the original layers intact and working efficiently.
The Original Images
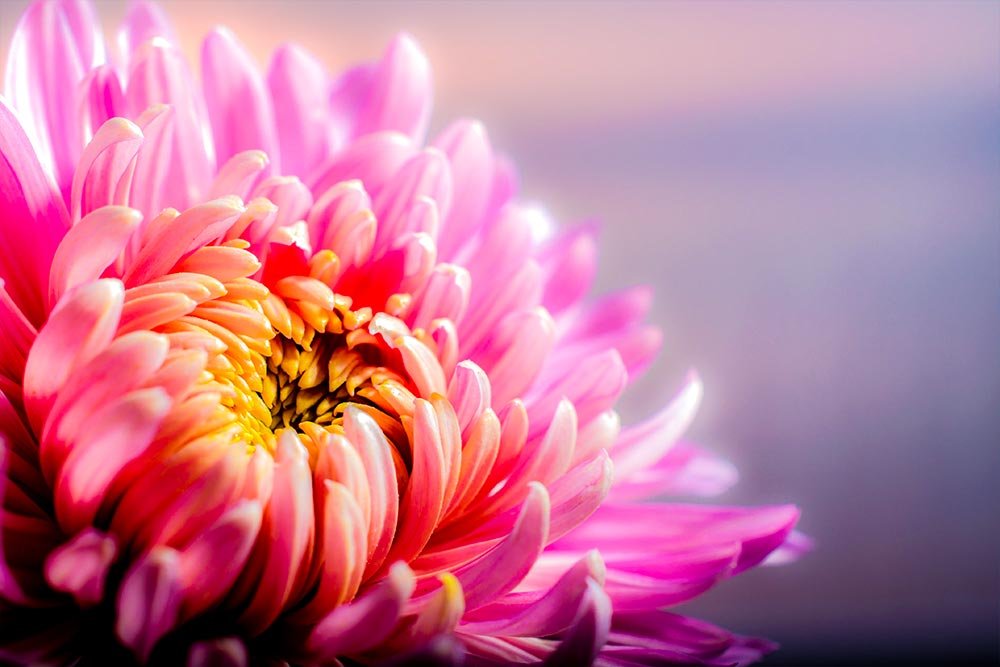
It actually took some time to find two example shots that would look good together. Normally, if you’re on a shoot, you’ll have the idea of doing something like this beforehand. With that in mind, you can setup your photography accordingly. With writing a tutorial post like this, I’m forced to take these steps backwards. I got lucky though and found two pictures that are bright, fun to work with and will look great blended at the end.The first one is a photo of a Chrysanthemum. If I don’t say so myself, this is a great picture. I particularly like the way it’s situated at the left side of the shot, which will work perfectly with the next photo.
For the next shot, I looked for a photo that had some flowers towards the right. Luckily, I found this one. The best part about it is that the Magnolias will wrap the curves in the first picture.
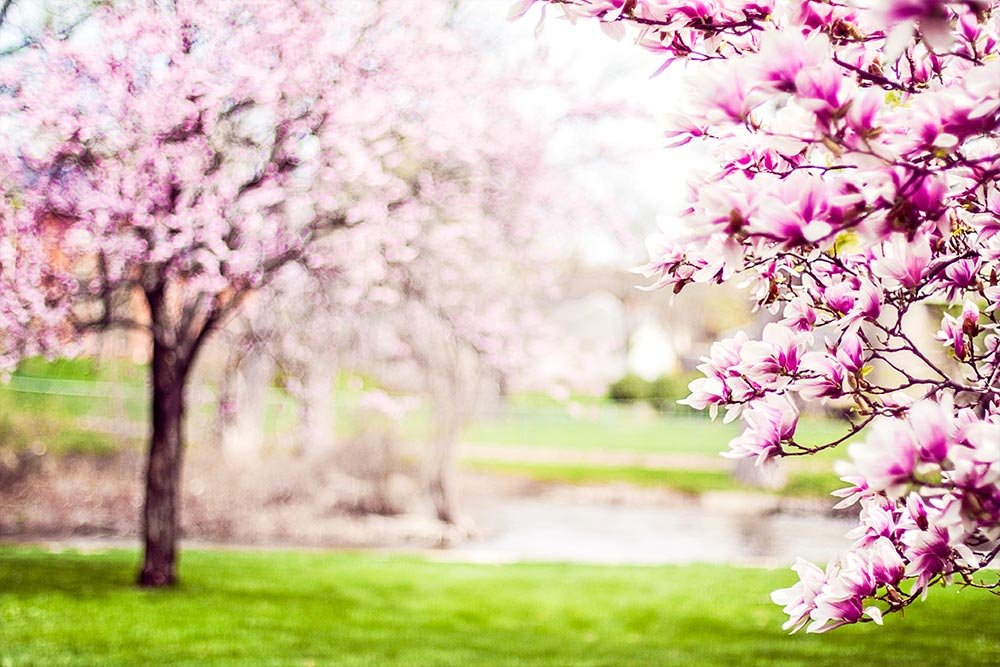
As I said earlier, the photos that you might want to blend can be of just about anything. It depends on your taste and your goals.
Opening the Images in Photoshop
There are any number of methods you can use to open these photos into Photoshop. If you’d like, you can read about many of them here:The Various Methods of Opening Files in Adobe Photoshop
For today, I’m going to take the easy way out. With the way I do it through Adobe Bridge, both photos will open directly into Photoshop into the same file. This is probably the most efficient way to get this task done.
While in Bridge, I’ll navigate to my destination folder and select both images. Then, I’ll head up to the Tools > Photoshop > Load Files into Photoshop Layers menu item and select it.
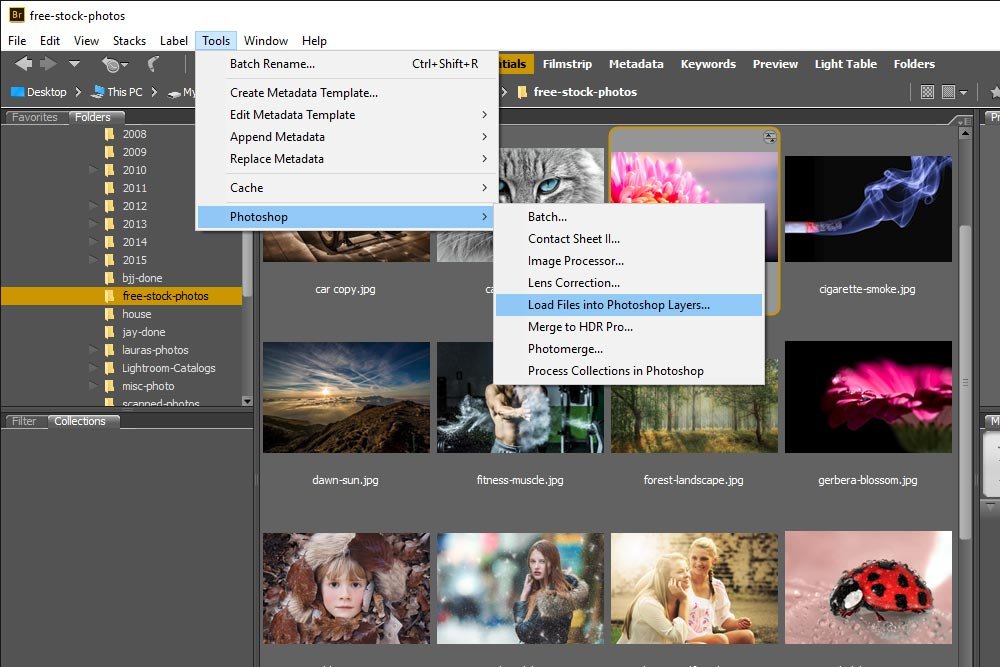
From there, both images should jump right into Photoshop, which will be visible in the Layers panel. And depending how you had the files named in the first place, you may not have to rename them.
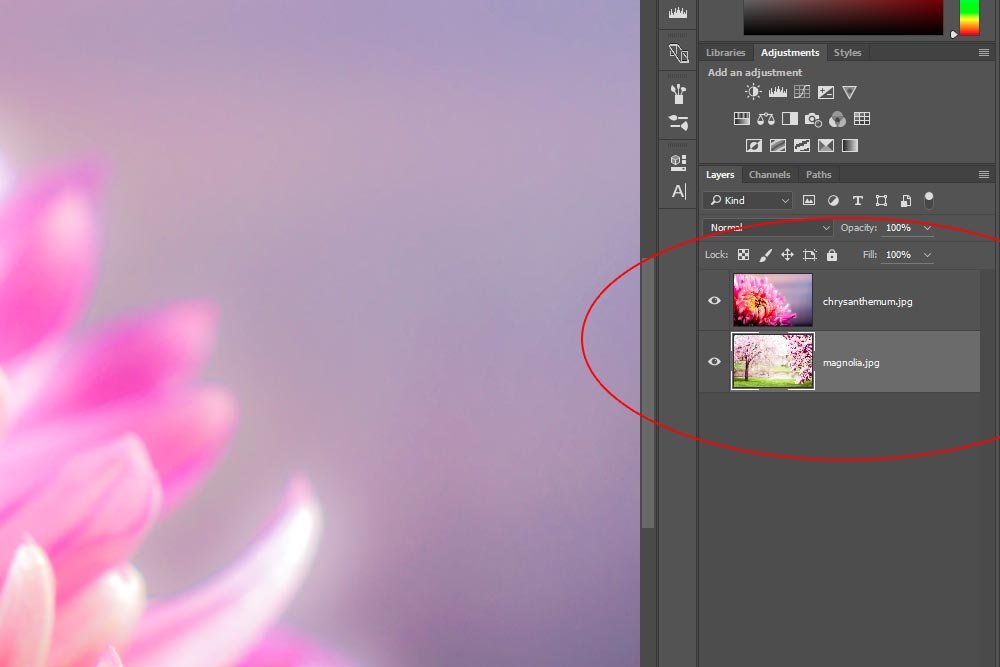
Now, there may be some necessary resizing with your photos. If you took them with the same camera, you most likely won’t have to do anything, but if you used different cameras or did some cropping, you’ll have to edit so both images have the same dimensions. This is all easy and I talked about how to accomplish these types of tasks in previous posts.
Using the Transform & Free Transform Tools in Adobe Photoshop
Using the Crop Tool in Adobe Photoshop
How to Crop a Photo to an Exact Size & Resolution in Adobe Photoshop
Once the cropping or resizing is completed, you’ll be ready to move onto the next step.
Adding a Layer Mask
Believe it or not, the most difficult part of this project is over. Once you have the photos open in the same file and have them set up in size, the creative fun begins.I’ve covered the importance of using masks on this blog ad nauseum, but if you haven’t read my posts or are interested in some review, I’ll link to the relevant posts here.
What are Layer Masks in Adobe Photoshop?
Using Masks to Colorize Only Part of a Photo in Adobe Photoshop
Using Multiple Color Range Masks in Adobe Photoshop
Basically, masks offer huge amounts of flexibility when editing and preserve the original layer data. By adding and working inside a mask, you avoid all the headaches involved with the Eraser Tool and History panel. Believe me, the more you can avoid those two areas, the better.
The first thing I’m going to do is consider which layer I want on top. For something like this, it doesn’t really matter, but for other types of projects, layer order is important. That’s why it’s good to develop a habit of knowing where your layers are. Since I got lucky and the images imported in the layer order I would have set them up anyway, I don’t need to do anything. So, since the mask will affect visibility, it only makes sense to apply it to the top layer. I’ll go ahead and select that layer, which happens to be the Chrysanthemum, and click on the small mask icon that’s located at the bottom of the Layers panel.
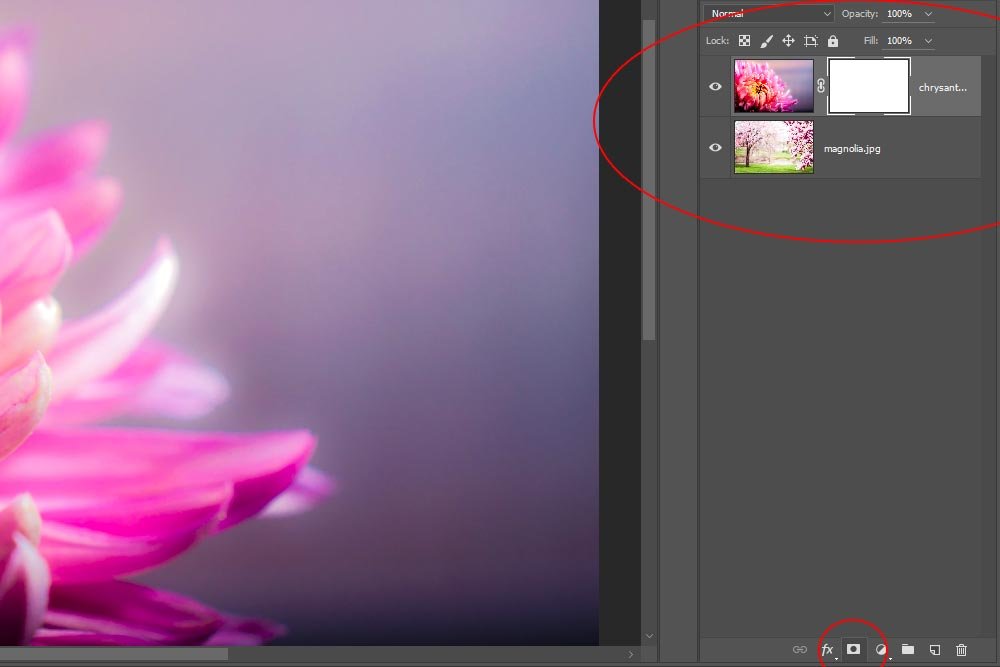
If you look inside the above screenshot, you’ll see that I circled two areas. The top one is the mask that’s applied to the top layer and the bottom one is the mask icon I just told you about (that I clicked).
Now, all I need to do is use the Gradient Tool to apply some white and black to either reveal or hide parts of the top photo. It’s that simple.
Applying a Gradient
The reason gradients are so efficient when working on projects like this is because you can apply them over and over and over again. Each time you apply a gradient, the previous one is reset back to the start point and the new one is applied in its place. In other words, they’re non-cumulative. They don’t compound and add up. It’s a one-shot deal. Because blending images is a trial and error ordeal, having a tool such as the Gradient Tool as our disposal is invaluable.While I’m not going to get into the ins and outs of the Gradient Tool in this post, I’ll tell you that it works well with masks when you limit it to two colors and set them to black and white. For today’s project, I’ll use the Linear Gradient option, just to demonstrate how they work.
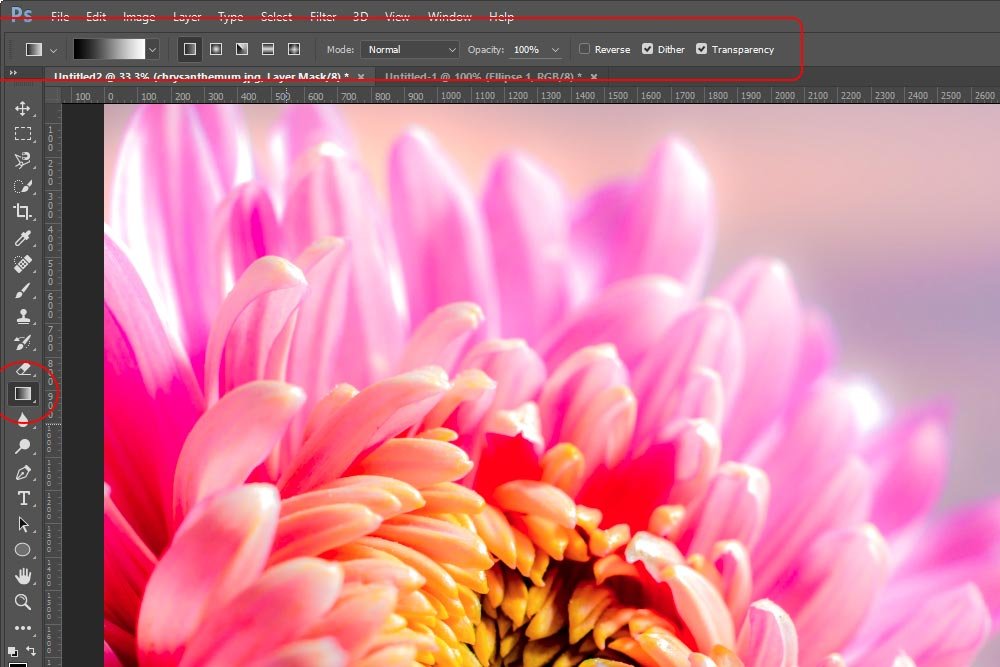
To access the Gradient Tool, head over to the left vertical toolbar and choose the icon that I’ve circled in the above screenshot. Currently, it’s the 12th one down. Then, look towards the top option bar and set things up the way you want them. As long as the gradient colors are set to black and white, you can work with any type of gradient you wish.
For today’s post, I’ll simply draw one gradient. I’ll click and drag from the beginning point to the ending point.
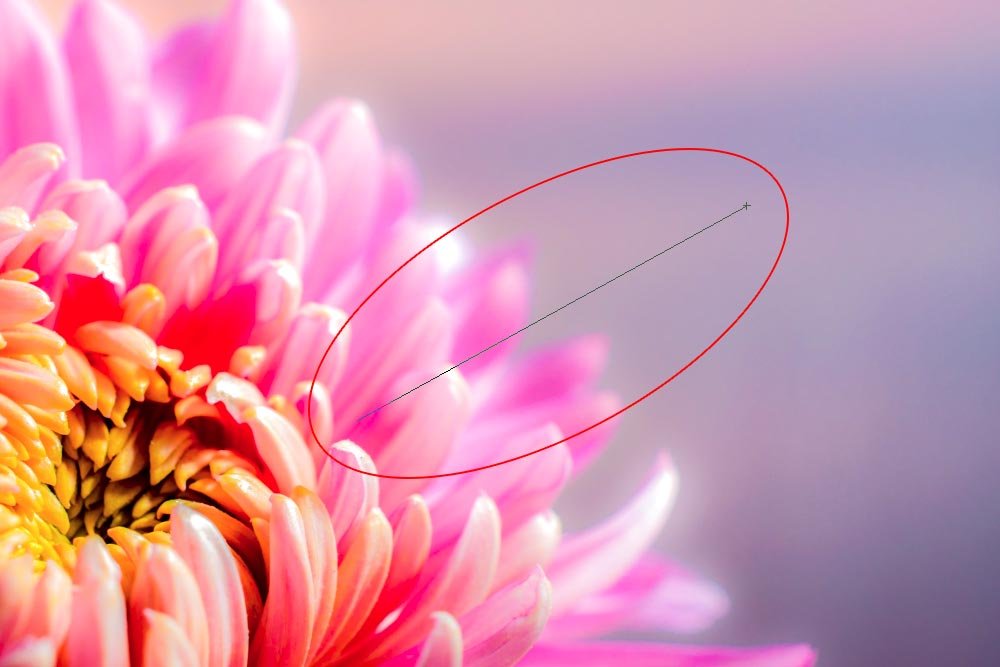
By doing this, I’ll end up with something like this:

Perfect. I’ve now blended the photos the way I wanted them. Since the gradient had black on the right side, that part of the top layer was hidden, revealing the bottom layer. Of course, the image data is still there, so I could continue editing inside of this mask as much as I want. If this first try didn’t come out so hot, I would continue drawing the gradient until I liked the result.
I do have a couple of tips for you when it comes time to draw a straight gradient. First, if you’d like to draw a straight gradient that is perfectly level with your photo, from side to side, hold down the Shift key on your keyboard. This will keep the line from wandering and will lock it in place. Second, if you reverse your start point and end points, your gradient will be reversed as well.
I encourage you to fool around with this tool. Open up two demo photos and practice a fair amount to see what happens when you do different things. Then, try a few of the other types of gradient tools. You never know, you just might want to use them on a serious project one day.
——
If you’ve enjoyed today’s post and found it helpful, please share it with a friend. Thanks!
