WendyMay
Member
- Joined
- May 11, 2021
- Messages
- 142
- Reaction Score
- 0
- Points
- 21
- #1
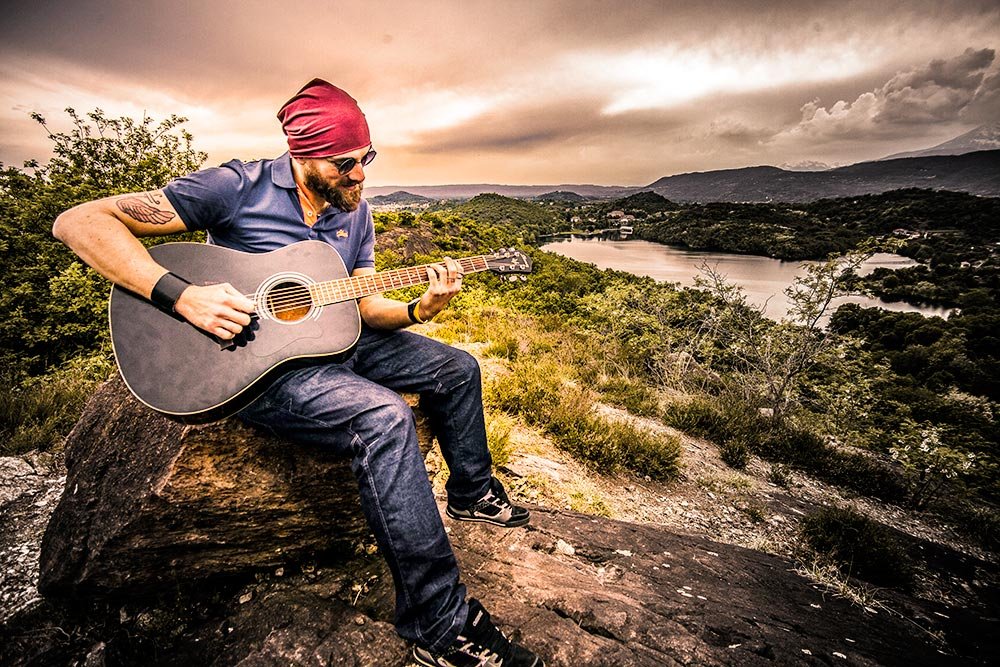
The tips I’m about to share in the post below would work perfectly for anyone who wants to add some pizazz to portrait, wedding, couple, engagement, or sports photography. Actually, they would work well for anything you’d like to place the focus on. With the use of masks and some simple tweaks to the built-in adjustment layer features, we’re able to quickly and easy take a lifeless photo and turn it into something that turns heads.
In today’s post, I’m going to show you how to work with a few features that come with virtually any adjustment layer. We’re going to take a photo that’s pretty good to begin with and then work it towards the goal of isolating the subject and casting some light and color on him. I’m excited to move through this short project, so keep on reading to see how I do it.
Original Photo
Below is the original photo. As I mentioned above, it’s not bad. I did some editing to add some contrast and vibrance already in Adobe Camera Raw, so that helped a bit.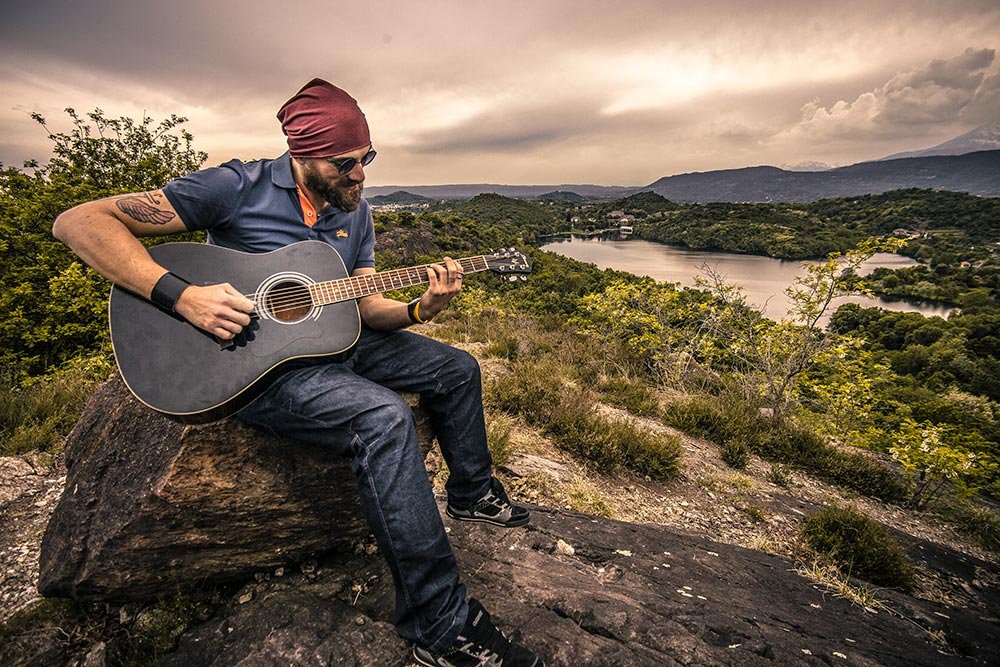
When attempting to bring a subject to the forefront a photo, it’s not all about making that subject pop. Sometimes, it’s just as important to mute out the background or the area around the subject that’s not all that important. Today, I’ll be working on both areas.
Adjusting & Masking
There’s a process to what I need to accomplish. First, I need to add some masks via adjustment layers. Then, I need to adjust them while keeping an eye on my subject. What I really need to focus on is how each and every adjustment layer affects the subject. Since I already completed the project, I’ll walk you through the steps I took. In the following screenshots, please notice how the adjustment layers already exist (as I just mentioned) and that I’ll make each one visible as I progress.Curves
First, I added the Curves adjustment layer. If you aren’t familiar with adjustment layers, please read my post on the topic:Using the Adobe Photoshop Curves Tool For Photography
I edited the RGB curve upward as to make the entire image brighter.
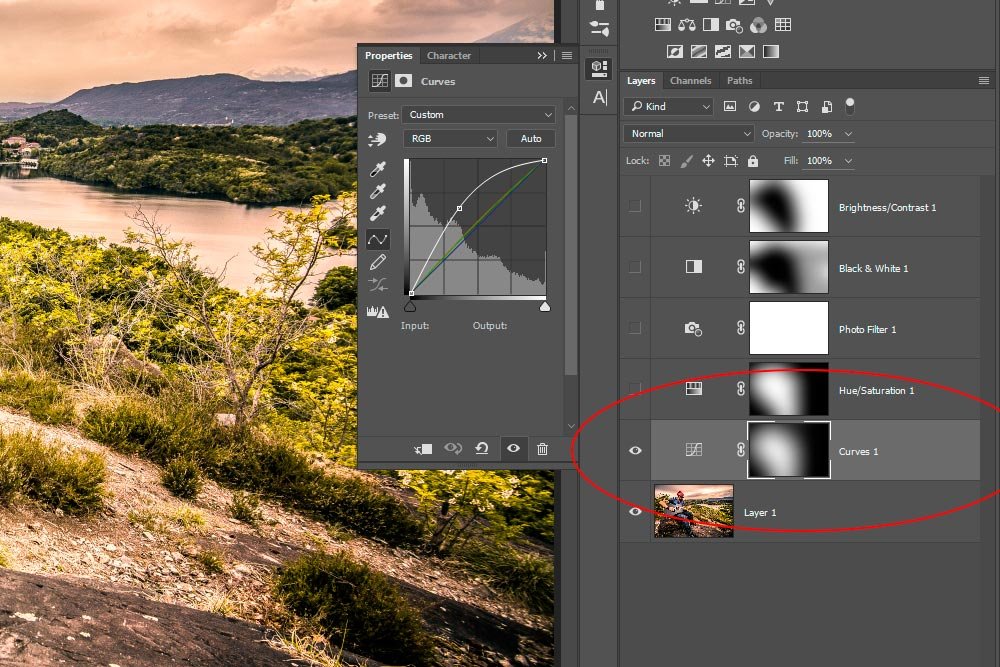
Then, inside the Properties panel for this adjustment layer, I clicked on the Masks icon. After that, I clicked the Invert button that’s located right inside this same panel.
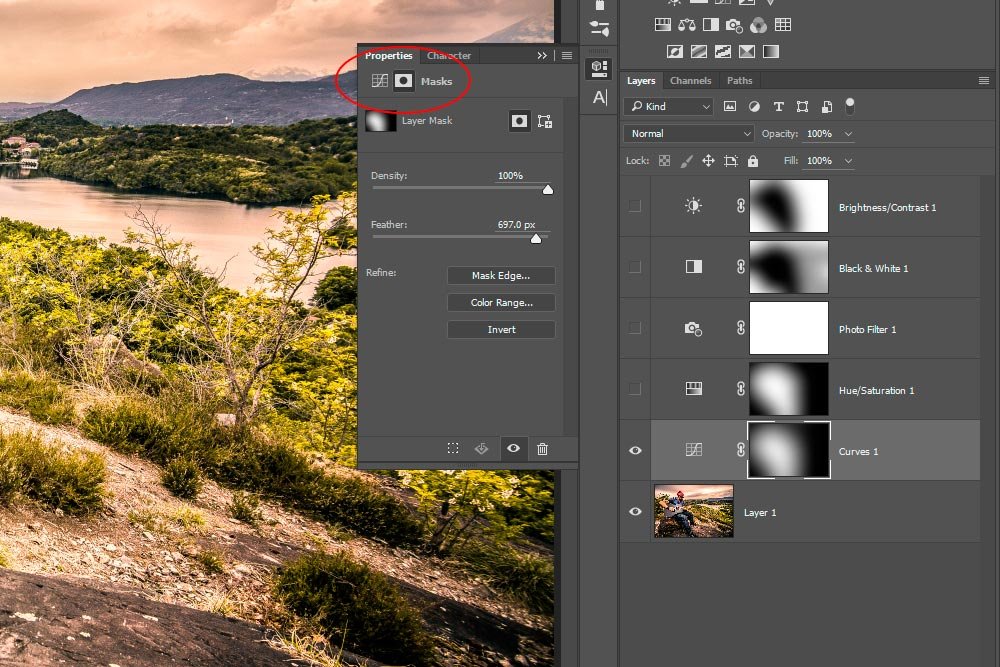
By clicking the Invert button, I basically hid any change that the initial adjustment layer made, so the photo looks as it did in its original state. When you first apply an adjustment layer, the mask is white, which reveals any change you make. When you invert it, the mask turns black, hiding the change. The reason I wanted to hide it is because I only want to show the change where the subject is. So, after I invert the mask, I can use the Brush Tool, with the color set to white, to paint over the subject. This will reveal my initial change. I know this sounds confusing. Let me offer some simple steps.
1. Select which adjustment layer you’d like to use.
2. Make your adjustment so it looks good in the area of the subject.
3. Invert the adjustment layer mask.
4. Brush away the inverse area around the subject.
That’s it! Once you get the hang of the process, you begin flying through more adjustment layers. For this first adjustment, all I did was brighten up the area around the subject. To soften things, I increased the value of the Feather slider in the same Properties panel I talked about above. The Feather slider is perfect to soften the edges of the area I brushed with the Brush Tool. Now, if you go back and take at the above screenshot – and in particular the fist adjustment layer in the Layers panel (the bottom-most one), you’ll see how the mask became black with a very soft white area where the man playing the guitar is. That white part is the only area that reveals the adjustment I made.
Hue/Saturation
For this next step, I felt that some additional saturation was in order. Again, I didn’t want to saturate the entire photo – only the area around the man. To accomplish this, I followed exactly the same steps as above. I click on the Hue/Saturation adjustment layer icon in the Adjustments panel and increased the saturation for the entire photo by pushing the Saturation slider to the right. While doing this, I only focused on the saturation of the subject.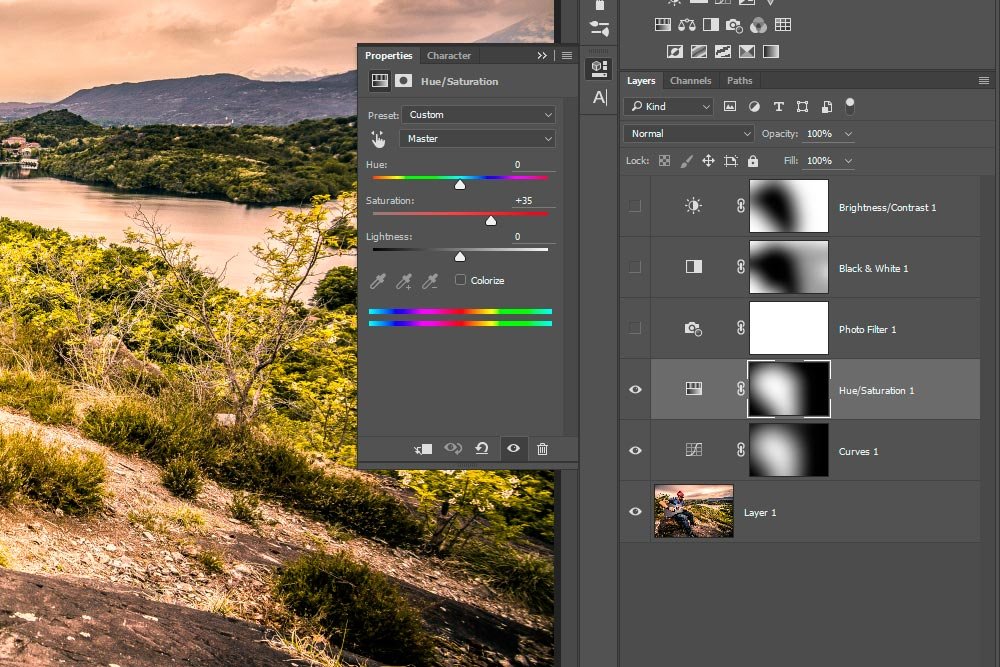
After that, I clicked the Masks icon in the Properties panel and then the Invert button contained therein.
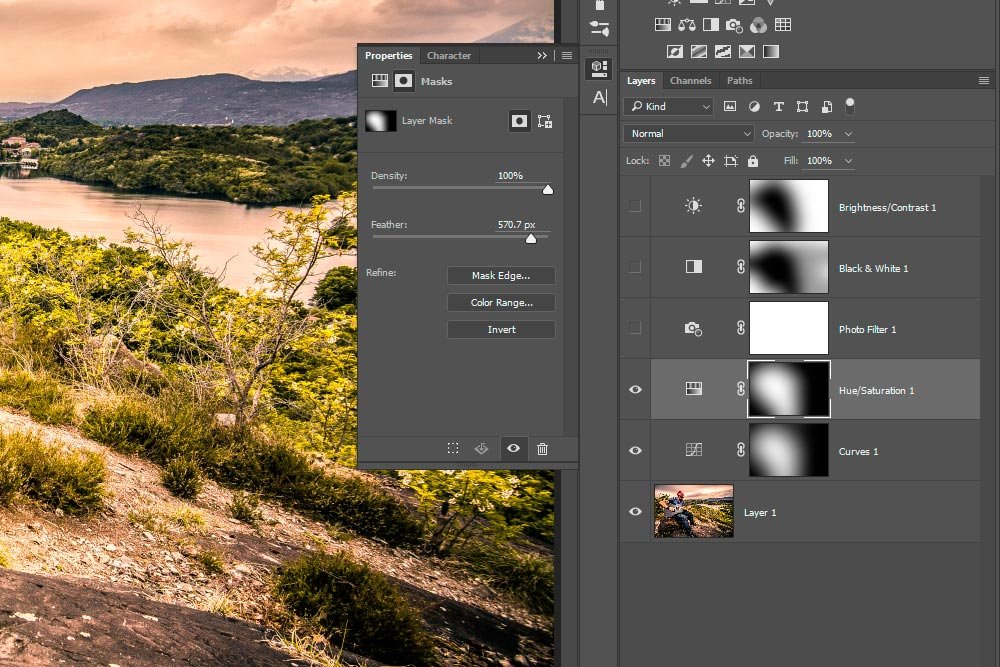
This hid the change I just made by turning the mask black, so I used the Brush Tool set to white to reveal the area only around the man playing guitar. This added some color to only him. Because the edges weren’t as soft as I wanted, I again pushed the Feather slider to the right to soften them.
Photo Filter
Since I wanted to add a slightly warmer tint to the entire photo, I clicked on the Photo Filter icon in the Adjustments panel. From there, I simply chose the Warming Filter from the drop-down box and pushed the Density slider to 25%. Since I wanted to affect everything in the photo, I didn’t need to invert anything or use the Brush Tool. This was an easy one.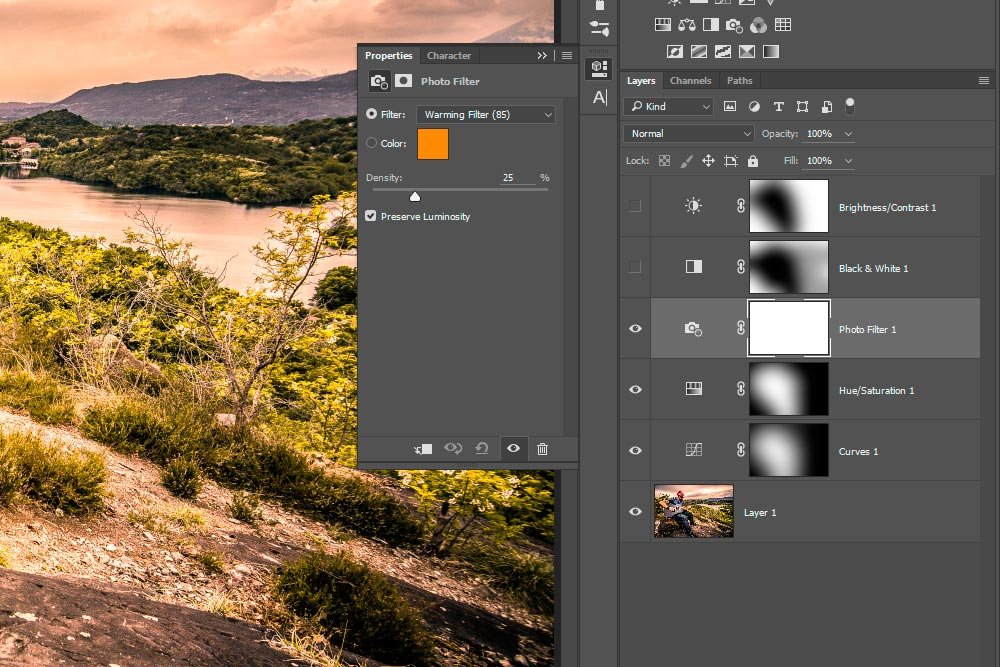
Black & White
The final two adjustments are a bit different than the first two in that I didn’t invert them. For these, I actually wanted to affect the area around the subject, as opposed to the subject himself. As I mentioned earlier in this post, sometimes it’s just as important to edit the surrounding areas to bring something out.For this step, I clicked the Black & White icon in the Adjustments panel and left the initial sliders the way they were. I merely wanted to desaturate everything in the photo.
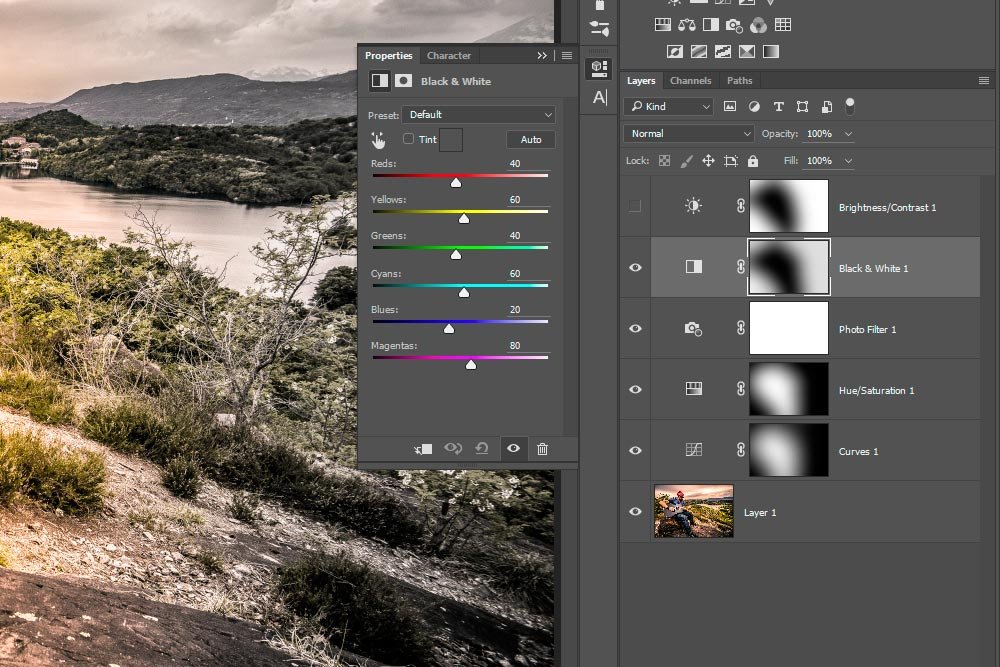
From there, I used the Brush Tool, set to black, at 100% opacity to hide the mask around the subject, therefore removing any desaturation from him. Then, I changed the opacity of the Brush Tool to 20% and brushed the entire photo. This gave it somewhat of a very muted black and white effect. Lastly, I went back into the Properties panel for this adjustment, clicked the Mask icon and pushed the Feather slider to the right to soften up the edges.
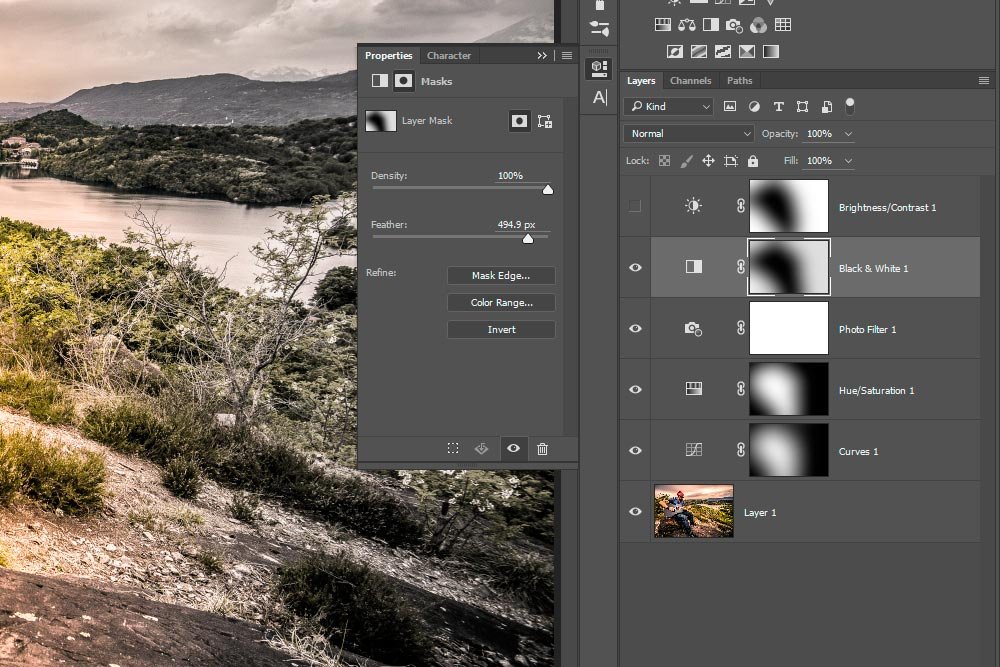
Brightness/Contrast
At this point, I was feeling pretty good. Although, when I looked at the photo, I felt there was something missing. I wanted to add some depth. So, to find the depth I was looking for, I clicked the Brightness/Contrast icon in the Adjustments panel.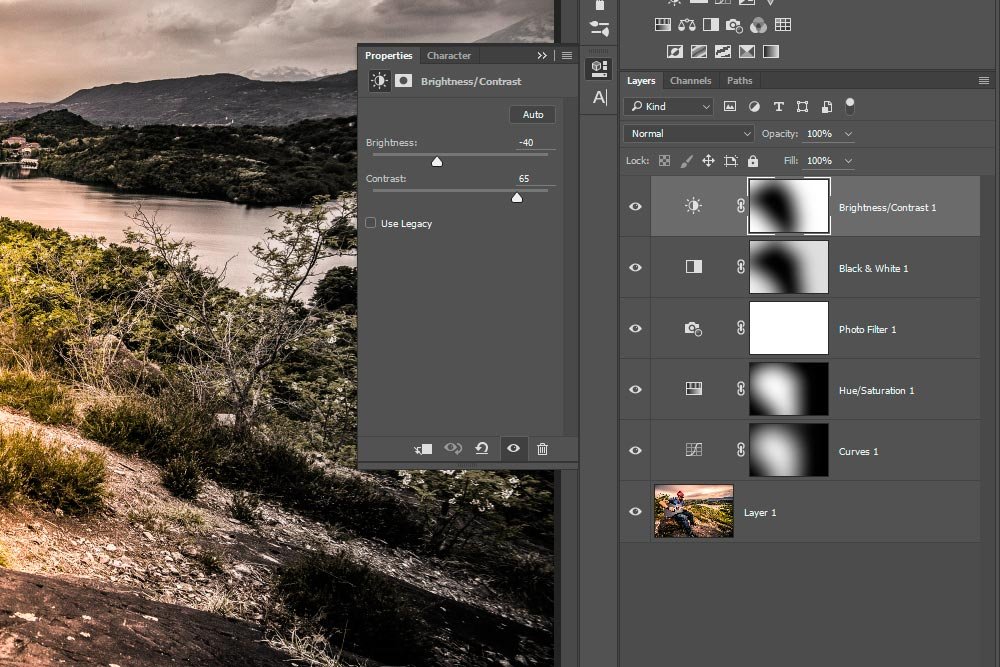
Inside the Properties panel for this adjustment, I pushed the Brightness slider to -40 and the Contrast slider to 65. This darkened and added contrast to the entire photo. Since I didn’t want this effect on my subject, I used the Brush Tool, set to black, to hide that area. I brushed the subject and then went back and clicked the Mask icon in the Properties panel for this adjustment and pushed the Feather slider to soften the edges.
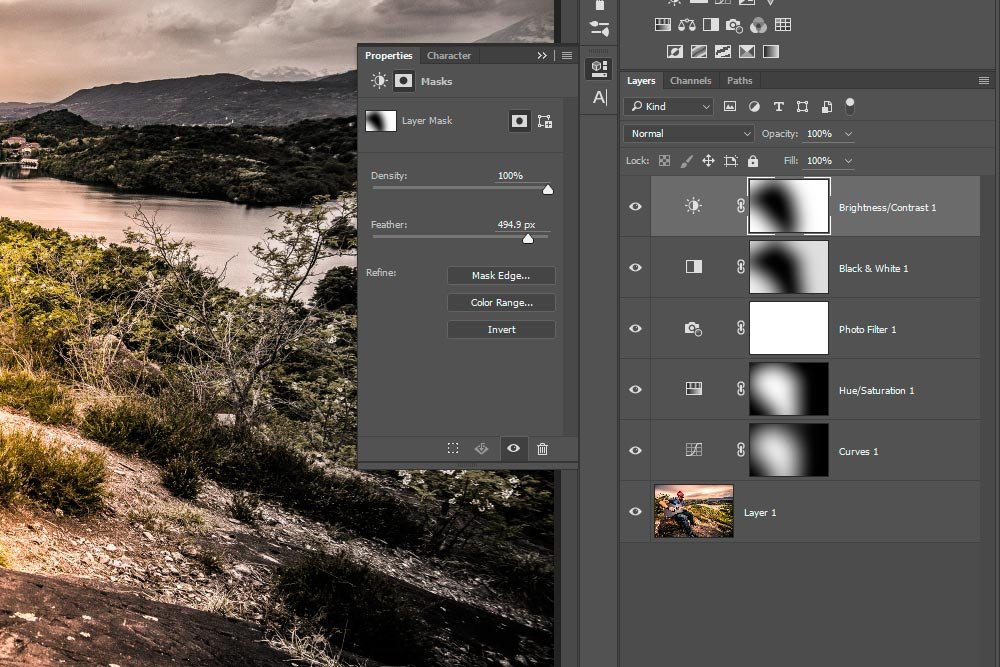
Those are all the changes I made. Even though the alteration isn’t major, I think it looks good. Also, since all the relevant adjustment layers are set up, if I ever want to embolden something in the photo, I can easily open the file and edit them. And since these are non-destructive adjustments, I can delete any of them at any time with no effect on the original photo layer.
If you have any questions, please ask in the comment section below. I’m always willing to help where I can.

