WendyMay
Member
- Joined
- May 11, 2021
- Messages
- 142
- Reaction Score
- 0
- Points
- 21
- #1
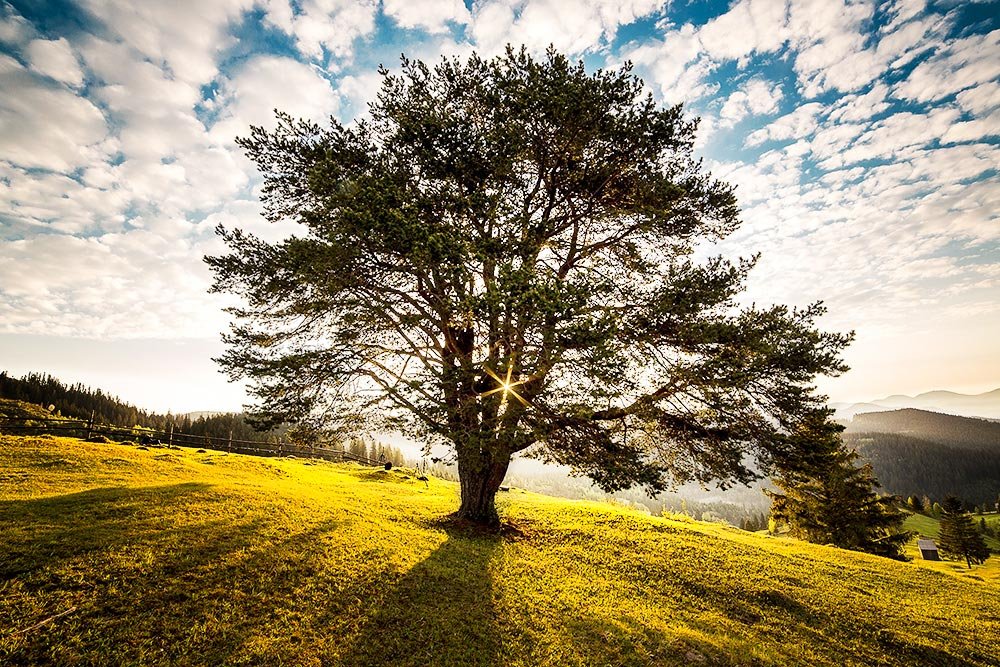
I’ve been writing a lot of posts that cover masking and adjustments in Adobe Photoshop lately. I love these kinds of topics because they’re so popular and useful. The thing is, I’ve been approaching the way I go about things in one general direction. As is the case in many other areas of Photoshop, there’s a whole other way to accomplish some of the tasks I’ve been working on. This other approach uses the Quick Mask Tool.
In today’s post, I’m going to make adjustments to a photo so the outcome is much like the photo I worked on my my previous Photoshop post. To check that one out, look here:
How to Add Glow & Color with Masks in Adobe Photoshop
I’m not going to do anything drastic, because, honestly, the original photo looks pretty good. I would, however, like to lighten up some areas, add some saturation to others and finally, add some contrast to a few more. The end result won’t look too terribly different from where I started, but the process will show you how I take on this sort of workflow. As I said above, I could choose to tackle this sort of project any number of ways, so what I’m about to demonstrate is simply one of them.
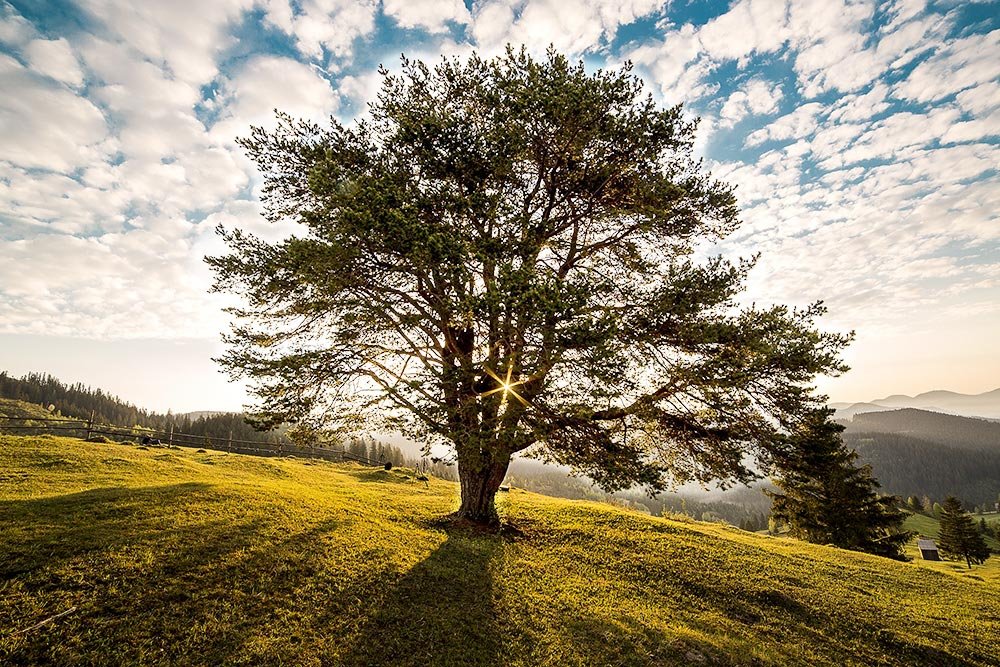
Original Photo
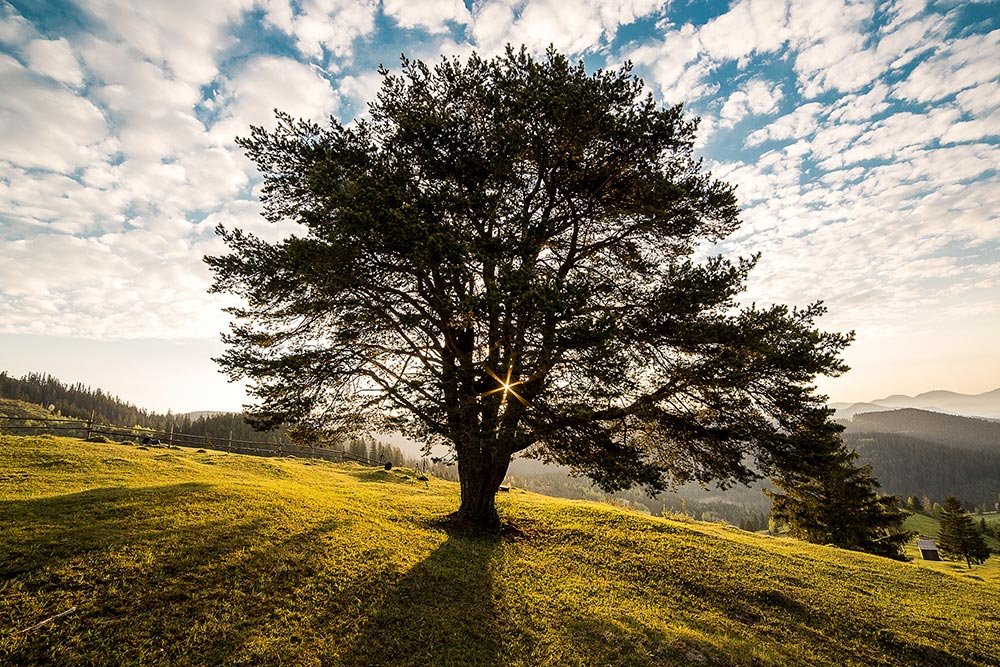
I haven’t done any editing to this photo in any other program, so what you’re looking at is the start point. Again, I think it looks pretty good. There are a few issues though.
The first thing that strikes me when I look at this picture is that I can’t see any color in the leaves on the tree. I know the leaves are green and the know the camera captured the pixel data when the shot was taken. Because of these factors, I’m confident that I can use an adjustment layer to brighten them up. The problem is that the sun is behind the tree, essentially shading the front side of it. I think I can turn things around. Second, while the grass looks nice, I’d like to give it some more color. Again (as with all of these changes), I’ll use an adjustment layer to fix this. Finally, the sky and the mountains could use a bit of contrast. I think that will give them a bump up in the interest category.
The Quick Mask Tool
The primary difference between the Quick Mask Tool and using a brush after applying an adjustment layer is that, when using the Quick Mask Tool, you brush first. After you paint the area you’d like to adjust, you then apply the adjustment layer and manipulate from there. In my opinion, it’s either six of one or a half dozen of the other. Both methods work exactly the same way and can give you the same result. It’s a matter of personal preference. For some reason though, I find the method I’m about to go over below slightly more intuitive than the method I used this post. I’m not sure why. I think it’s because I like to select first and then adjust as opposed to adjusting and then selecting.Using the Quick Mask Tool
The first thing I’m going to do is to brighten the tree. To accomplish this, I’ll select the Quick Mask Tool. This tool can be found at the bottom of the left vertical toolbar.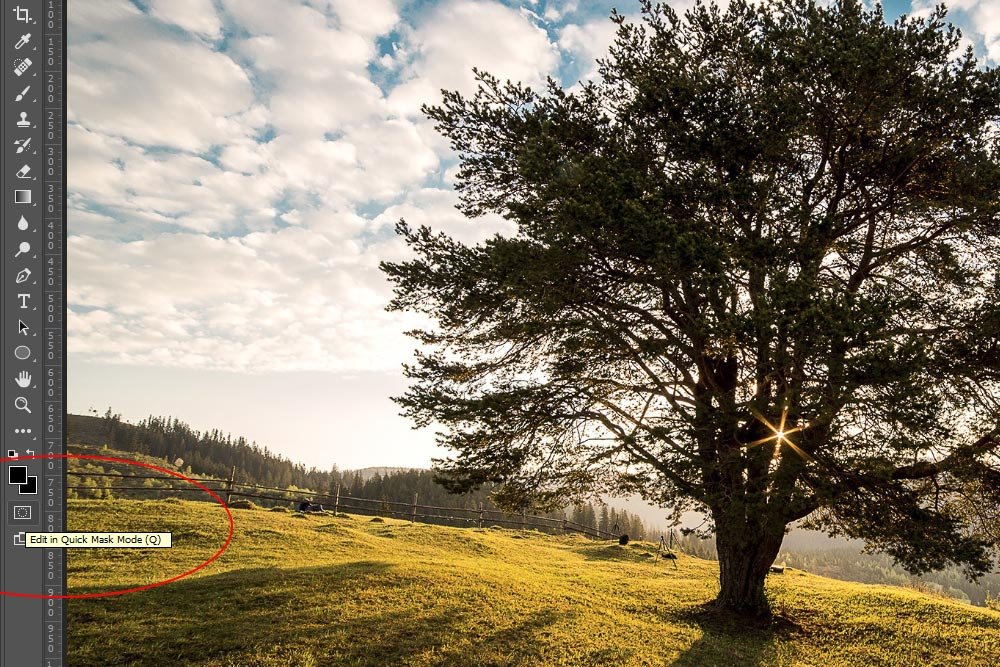
Once I select the tool, I’ll click on the Brush Tool and adjust its settings. In this case, I want the brush to be sized so it’s manageable and I want the edge softness to be right in the middle. Regarding the softness, I can leave the edge as hard as I want because I can feather it later on. I’ll talk about that further down. I’ll also adjust the opacity and flow of the brush. Again, these settings can be adjusted later on using the Opacity slider in the Layers panel if they are all uniform. If you would like varying opacities, it’s better to adjust them at this point.
I’ll also be sure the color picker is set to black.
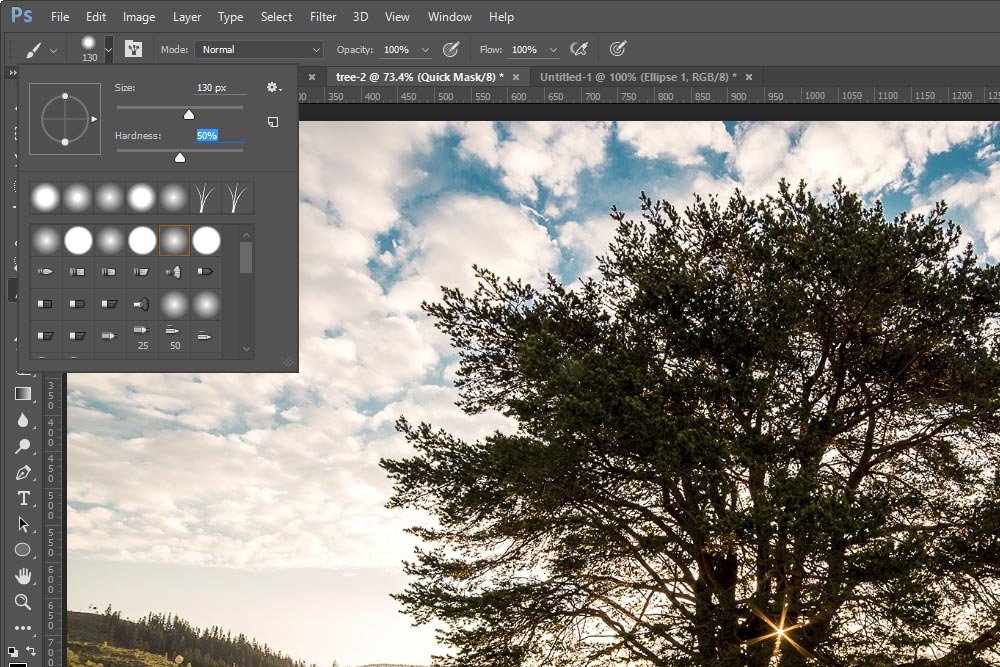
Once I have everything set, I can brush the area I want to adjust.
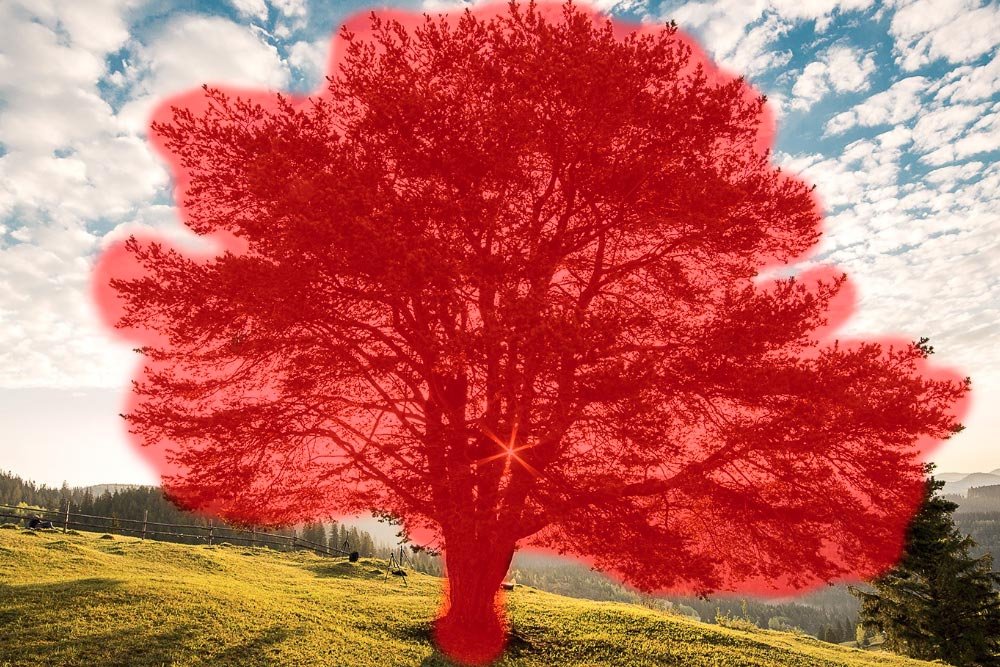
After looking at the above screenshot, you may notice something odd. The brushed area is colored red. Don’t get nervous – this is only an indicator of what I’ve like selected. To make the actual selection, I’ll need to go over and click on the Quick Mask Tool icon once again.
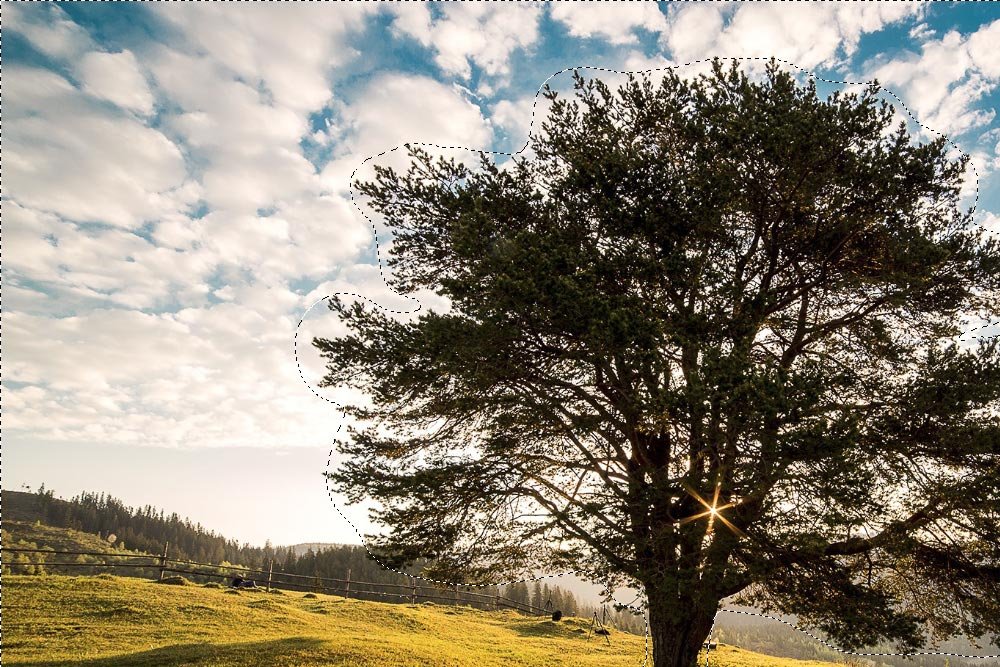
In the screenshot above, I wanted to show you the corner of the image so the marching ants were more clear. If you look closely, you can see them all the way around the image and around the area I just painted red. When using this tool, it selects everything but the area you’d like to work on. To work around this type of selection, you can head up to the Select > Inverse menu item and click.
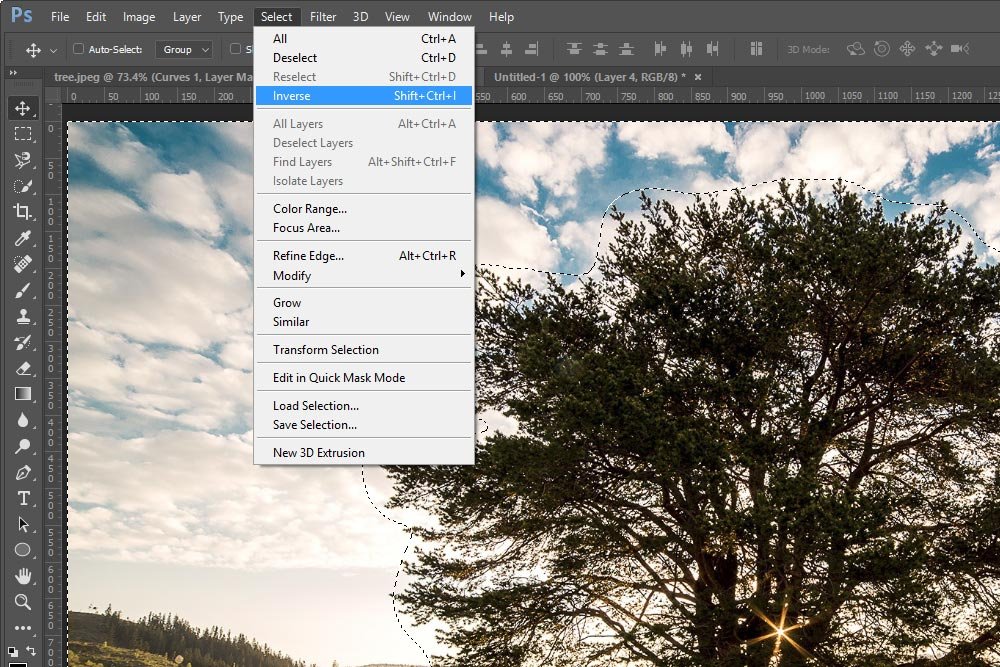
Once I click that menu item, the selection changes and now only the tree has the marching ants around it. Perfect.
Making an Adjustment
At this point, things should start looking familiar. If you’ve read my previous posts on this topic, you’ll know that I can stroll over to the Adjustments panel and choose whichever one will help me accomplish my goal. Since I want to brighten the tree, I’ll click on the Curves icon.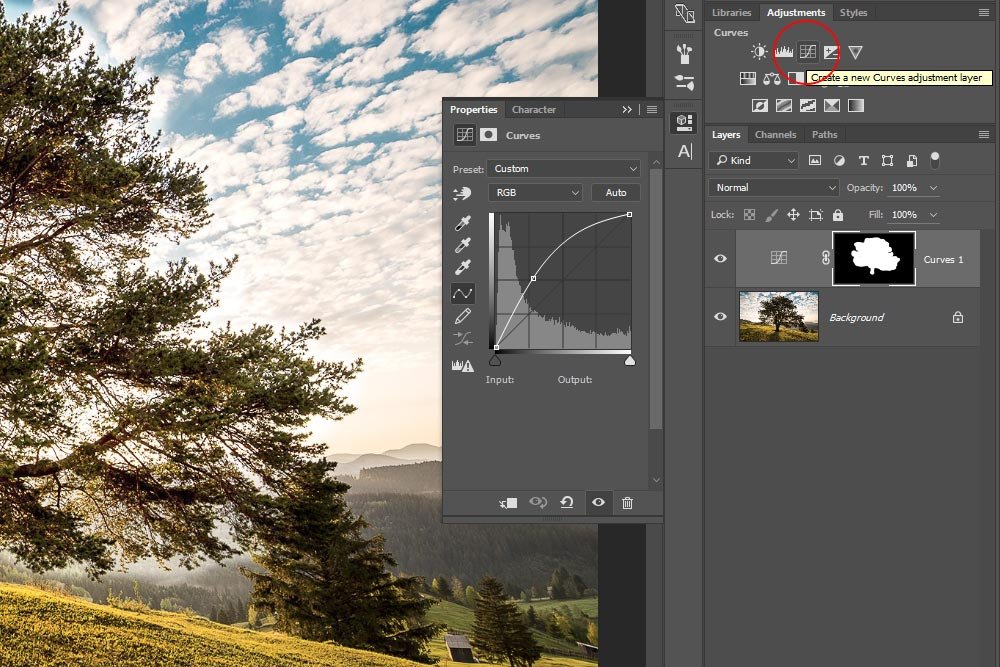
When the Properties panel appears for this adjustment, I can click and drag the curve upward to brighten the area I selected. This brightening happens when the second drop-down box is set to RGB. If I wanted to edit individual colors, I can click the drop-down and choose something else and work from there.
Take a look at the effect the Curves adjustment had on the tree. Now I can see the color of the leaves and things are much brighter. The image is already being woken up.
The next area I’d like to tackle is the grass. As I mentioned, I want to add a bit of saturation to it. To do this, I’ll follow the exact same set of steps I did for the previous edit. I’ll click the Quick Mask Tool, and then the Brush Tool, edit the size and softness (etc…) and then paint what I want to change.
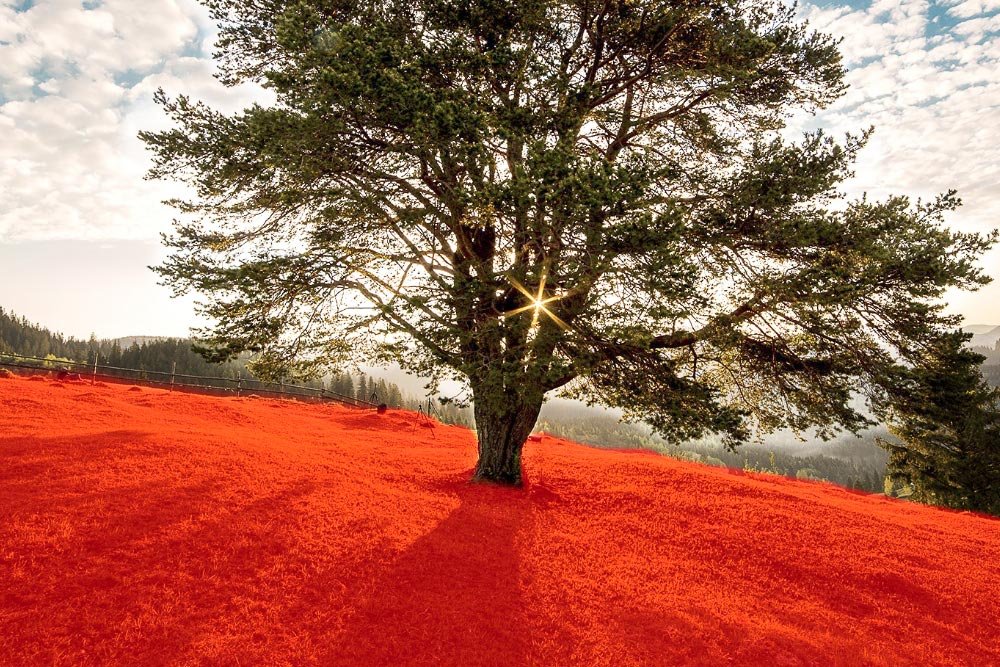
Quick Tip: While painting an area to select, you’ll likely want to change brush size on the fly. To do this, simply click the [ key on your keyboard to shrink the brush and the ] key on your keyboard to grow it. Also, if you “draw outside the lines” while using the brush, you can easily erase any area you’d like by changing the brush color to white. That will remove the red overlay for a specific area. When you’re ready to brush to select once more, change the color back to black.
After I brush the grass area, I’ll click the Quick Mask Tool icon again and then head up to the Select > Inverse menu item and click that. Finally, I’m ready to click on the Hue/Saturation icon in the Adjustments panel.
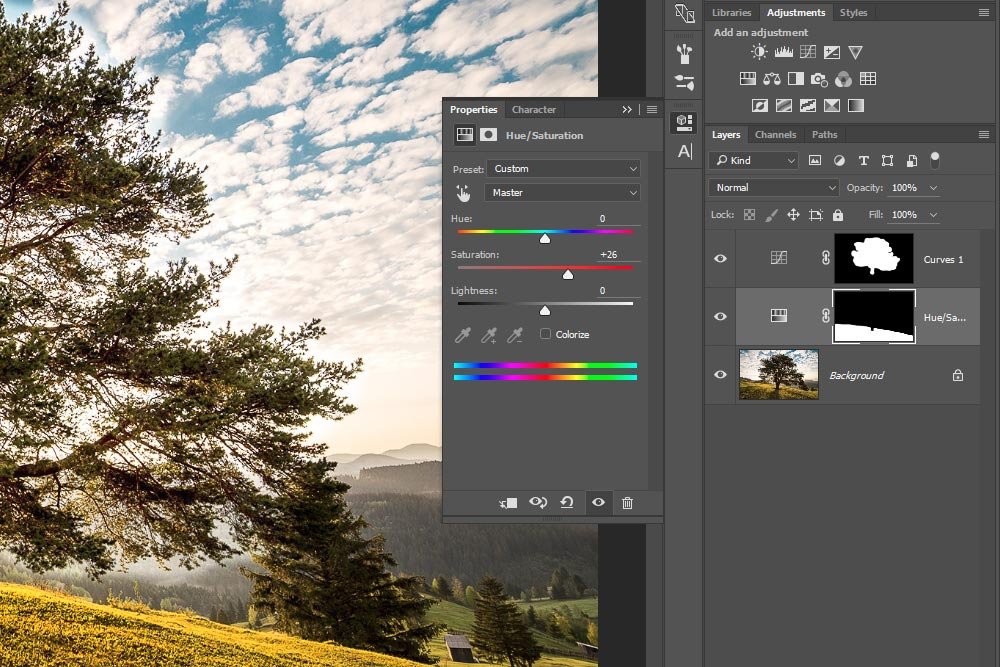
I’ll increase the saturation slightly and watch as the grass becomes more colorful. This is the image so far.
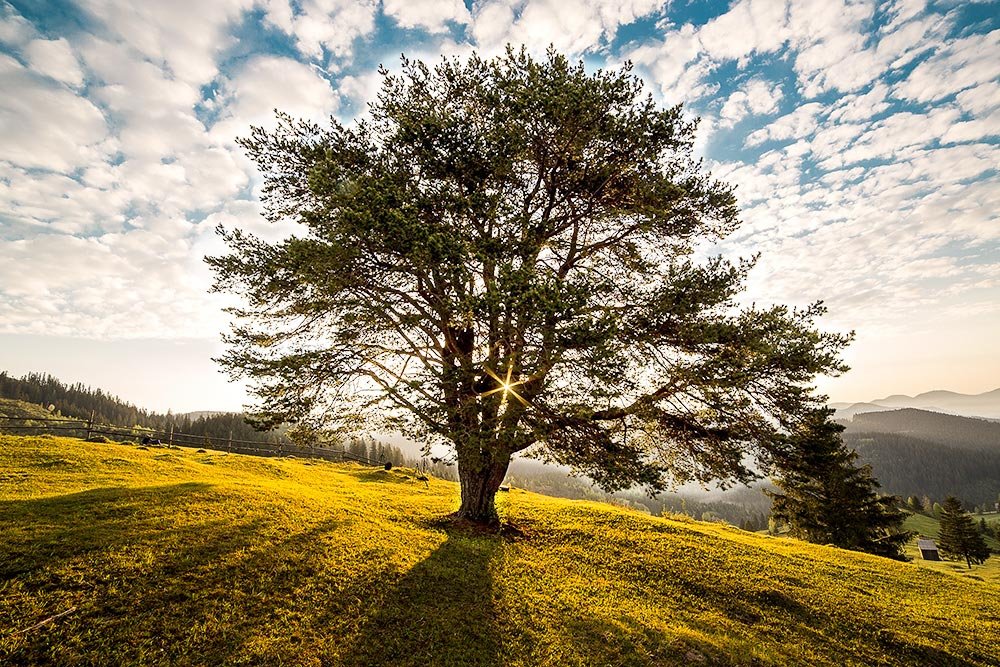
The last area I’d like to adjust is the sky and the mountains. I can do this one of two way. First, I can follow the above instructions and brush the sky and mountains, click the Quick Mask Tool icon and then invert the selection. Or, I can simply paint the tree and grass again and not invert the selection. Since all that’s left in the image is the sky and mountains, it really doesn’t matter which approach I take. To make things interesting, I’ll choose the second one. I’ll paint the tree and grass and skip the inverting step.
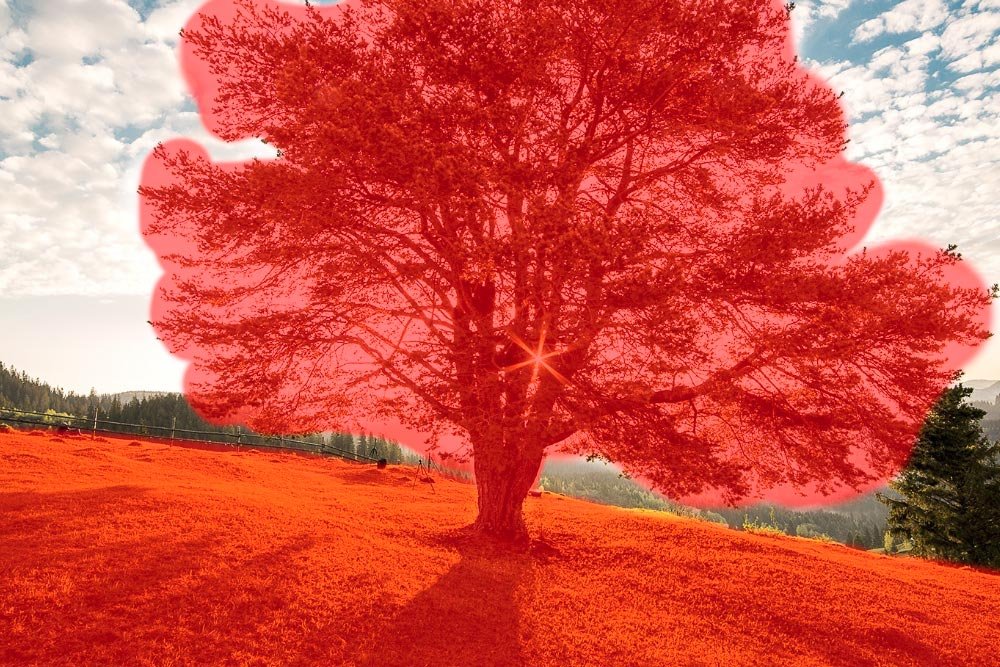
When I click the Quick Mask Tool icon now, the sky and mountains will be selected. After that, I can click the Brightness/Contrast adjustment icon in the Adjustments panel.
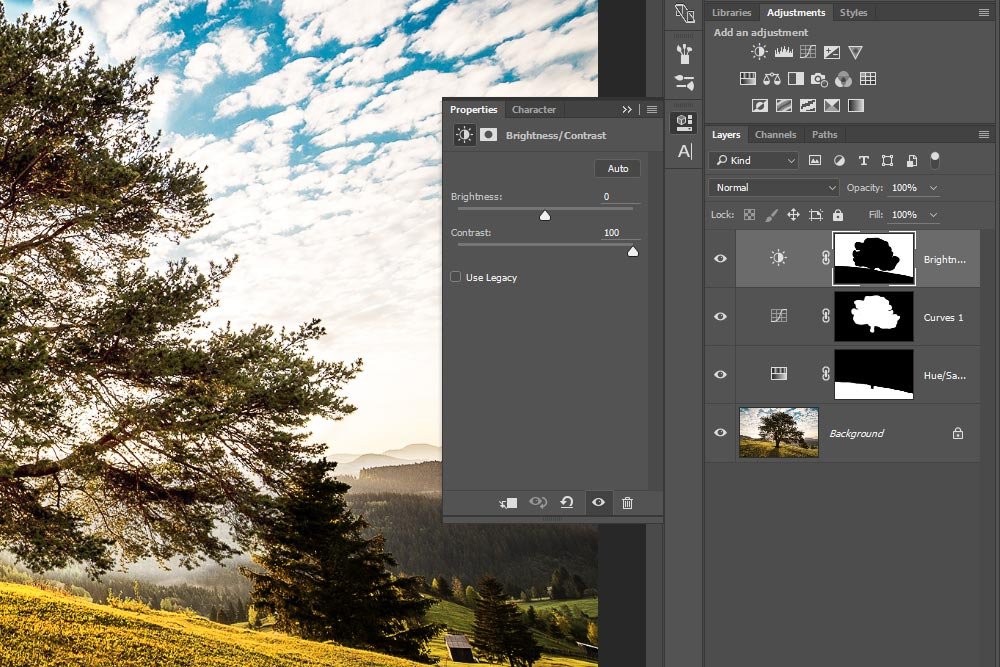
Since the selected area seems to take contrast well, I’ll push that slider all the way to the right. This will give me the final image.

I think it looks a lot better this way.
I wanted to mention one final thing. Above, I talked about how you can adjust the softness of an edge after you’ve made the selection. Do accomplish this, all you need to do is click the Masks icon in the Properties panel. From there, you can soften the edges of any adjustment layer.
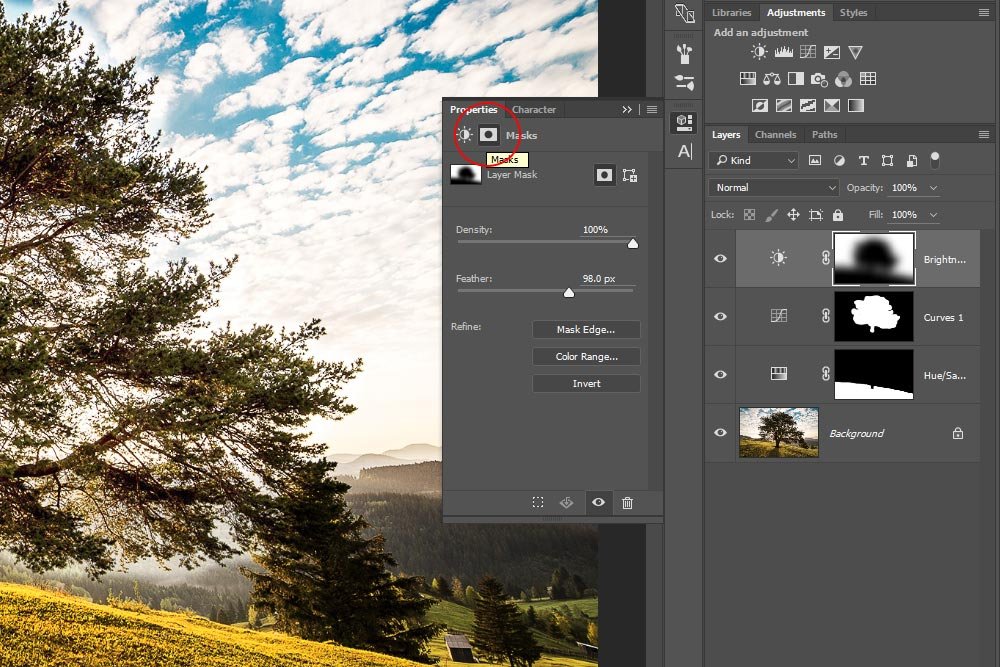
In the screenshot above, I pushed the Feather slider to the right, thus feathering (softening) the edge of that mask. If you look at the top layer thumbnail in the Layers panel, you can see that the mask is now blurry, or soft.
Also, if I wanted to dampen the effect of any adjustment, I can do so by moving the opacity slider in the Layers panel for the respective layer to the left. That will reduce the adjustment opacity, bringing things back to their original state.
——
If you’ve enjoyed today’s post and found it helpful, please share it with a friend. Thanks!
