LukeLewis
Member
- Joined
- May 7, 2021
- Messages
- 134
- Reaction Score
- 0
- Points
- 21
- #1

Have you ever taken a photo at the beach or of a landscape and found yourself looking at a dull sky? If you’ve ever taken either of these types of photos, I’m betting you have had sky issues. Good sky shots are terribly challenging to capture. They’re usually washed out or overcast. Nothing is worse than an overcast sky.
What would be nice is if we had the ability to add some great looking clouds, contrast, color and interest to an otherwise dull and dreary photo. Yeah…that would be nice. It would make all the difference.
I have good news for you. You can do just what I described above. You can add all those things to so many types of photos it’s not even funny. And the methods used to accomplish a task like this aren’t all too challenging. If you can make a selection, refine some edges, create a mask and make a few more tweaks, you’re pretty much done.
In today’s post, I’m going to show you how to complete a project like this in Adobe Photoshop. First, I’ll select the original sky area and then I’ll refine its edges. After that, I’ll create a mask and apply it to a few different sky photos. Finally, I’ll tweak the look of the result by applying a blending mode. This is going to be awesome, so please read on!
Original Photo
Below is the original photo that I’ll be using for this post. As you can see, while the town looks really cool, the sky leaves something to be desired. It’s flat, dull, overcast and can definitely be improved upon.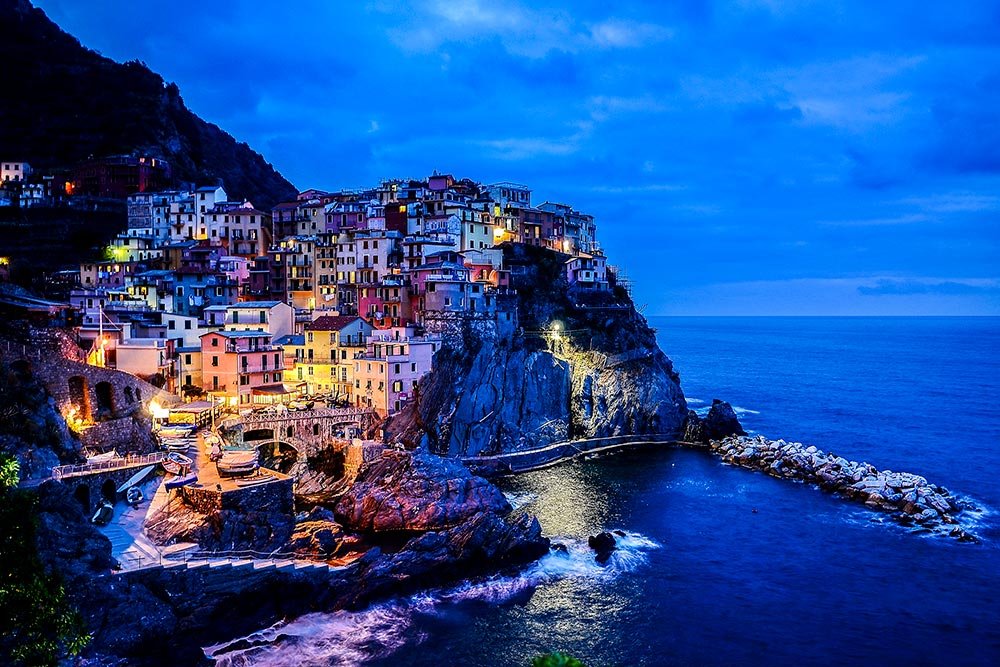
Back in the day, I used to frown on these types of projects. I thought photos should represent what’s viewed through the lens, no matter how good or bad. I was a purist. As I got older though, I have come to value what we can digitally accomplish. Let’s say, for example, that an advertising firm payed a photographer to visit this town and take some photos for a brochure. Something like this would certainly cost a fair amount of coin. Let’s also say that the weather for this town is sunny 99% of the time. During the photographer’s visit, however, it rained every single day. All the photographer could do was take photos like the one above – with a cloudy sky. Would it make sense to advertise a sunny destination while portraying gloom? No, certainly not. Especially when there’s good money at stake. What needs to happen is for a designer to take the photographer’s photos and make them look beautiful so they can more accurately represent the town. The way the town looks 99% of the time.
Sky Photos
Now, I want you to understand, I chose some sky photos to use specifically for this post. I want them to stand out and look remarkably different than the original. A designer wouldn’t necessarily use these sky shots in a professional brochure. They may not be as accurate as possible. But, for our purposes, these are perfect.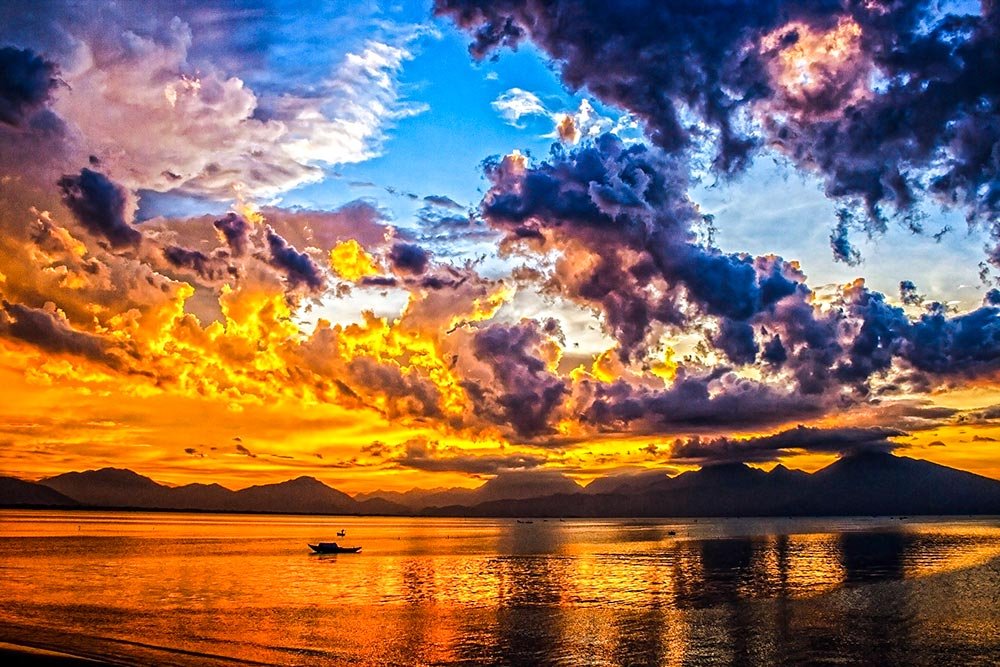
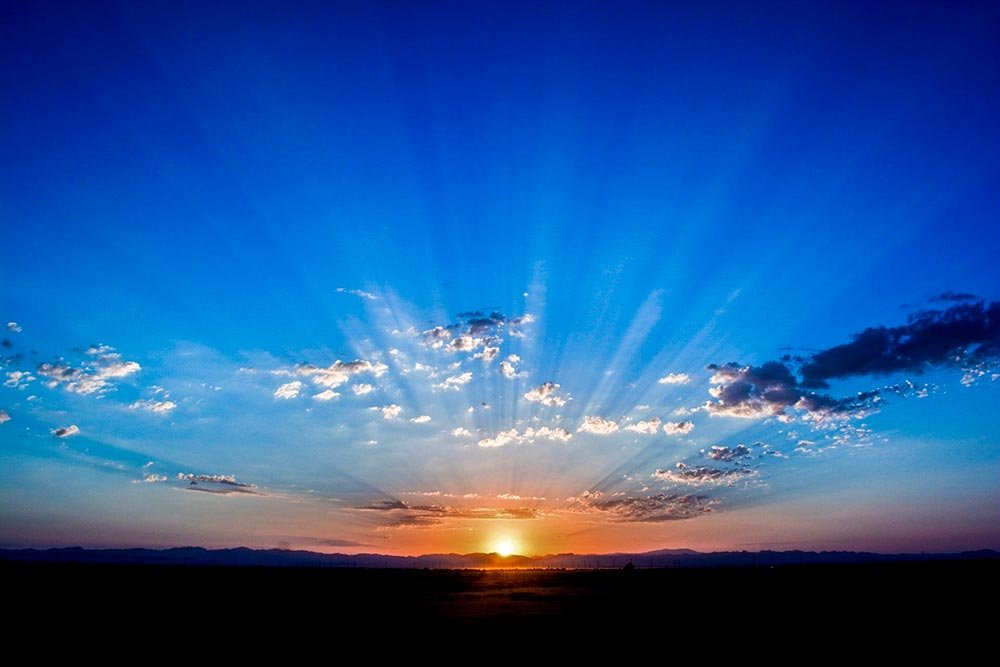
The best part of today’s tutorial is that after I’m finished making my selection, refining its edges and creating the mask, I can flip between any number or sky photos. All I need to do is click and drag the mask to the layer I’d like to apply. I’ll explain more down below.
Combining Images
The first thing I’m going to do is resize the images so they’re all of the same dimensions. It won’t help me at all if one image is 1920×1280 pixels and the others are twice that size. Since the smallest image was fairly large, I reduced and cropped the other two so everything is now the same.Next, I moved all three images into the same document. Initially, I had the three photos open in three different tabs in Photoshop. I dragged the two sky photos over into the town photo document. I made sure the town photo is at the bottom in the Layers panel and that the visibility of the two sky photo layers is turned off. I also aligned all the layers so they are in the same position. If you aren’t familiar with how to work with tabs in Photoshop, please feel free to read through this post:
How To Arrange the Tabs in Your Photoshop Workspace
This is what the Layers panel looks like now.
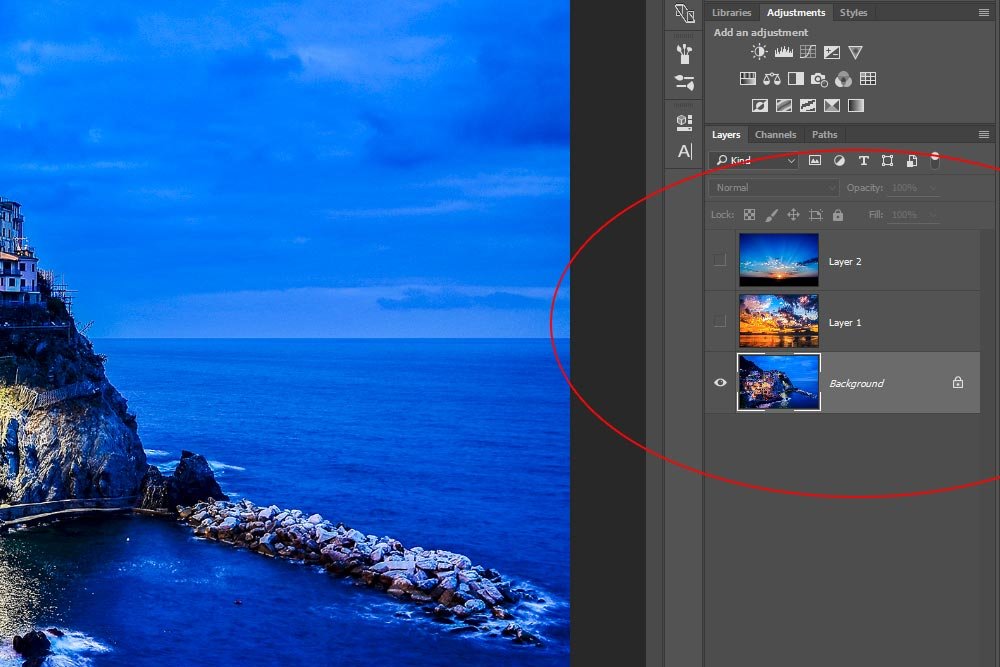
As you can see, the two sky layers have visibility turned off while the bottom town layer is still visible. I also selected that layer so it’s active.
Selecting the Sky
In this step, I’m going to use the Quick Select Tool to select the sky in the town (bottom) layer. My goal is to select only the sky, leaving everything else deselected. I also want to refine the edges of the selection, but I’ll take care of that in the next step. If you need a primer on how to use the Quick Select Tool in Adobe Photoshop, please read through this post. I covered all the interesting details there.Selecting Objects & Refining Edges in Adobe Photoshop
I’ll go ahead and make the selection now.
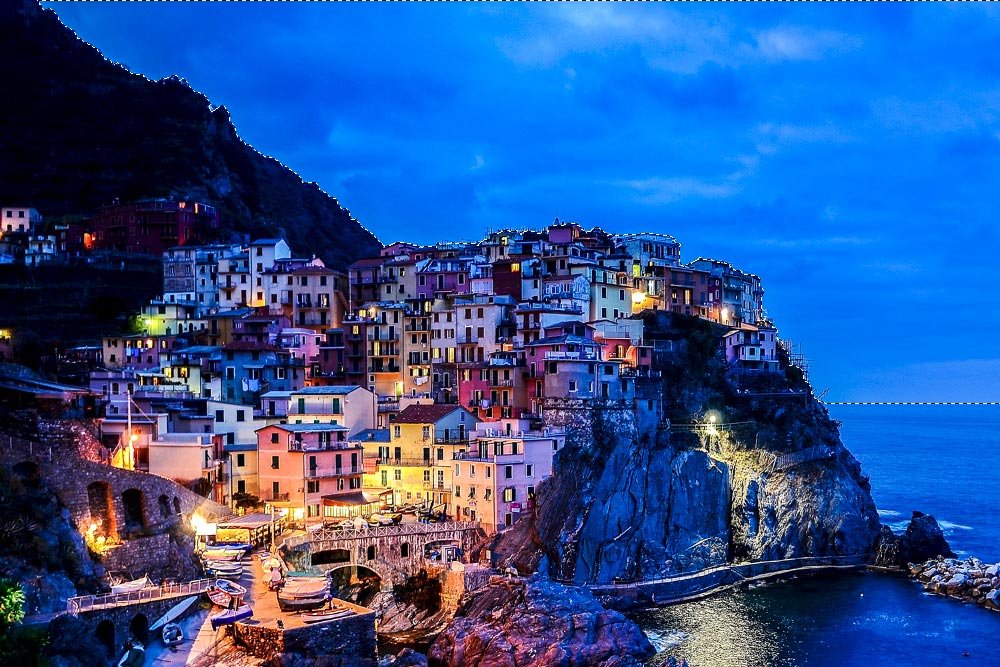
If you look closely, you can see the marching ants trailing down the mountainside and along the tops of the buildings. The problem is, those edges are a bit rough. I’ll need to clean them up some.
Refining the Edges of My Selection
To clean up the choppy edges of my selection, I’ll head up to the Select > Refine Edge menu item and select it.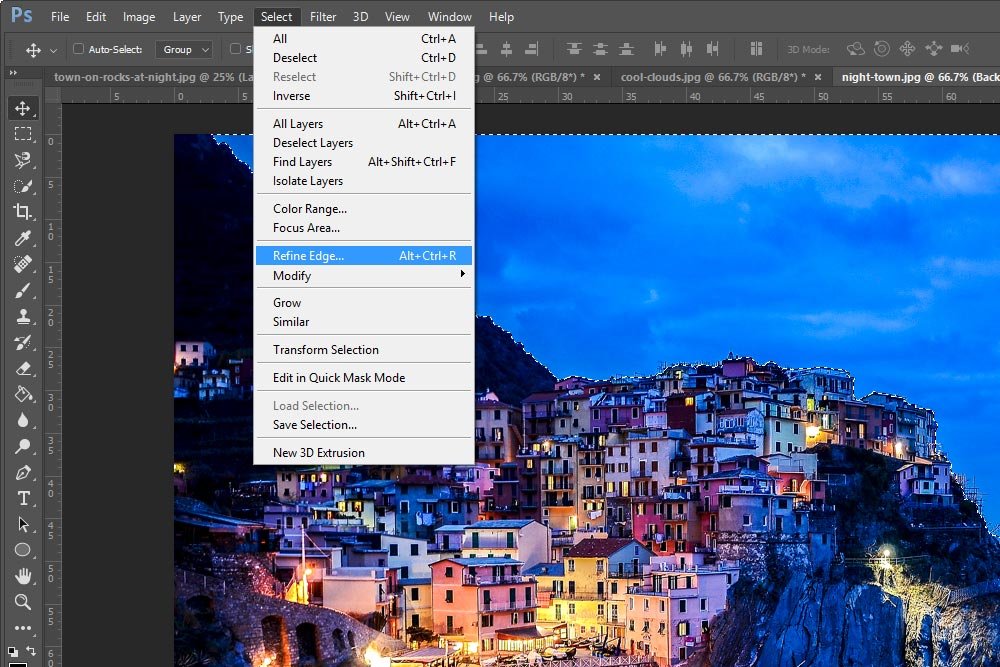
After I do that, the refine edge dialog box will appear. Inside this box, I’ll set the View Mode to Overlay, so I can see what I’m doing. Then, I’ll use the Refine Radius Tool, like I did in this post, to more accurately select the intricate details of the edge.
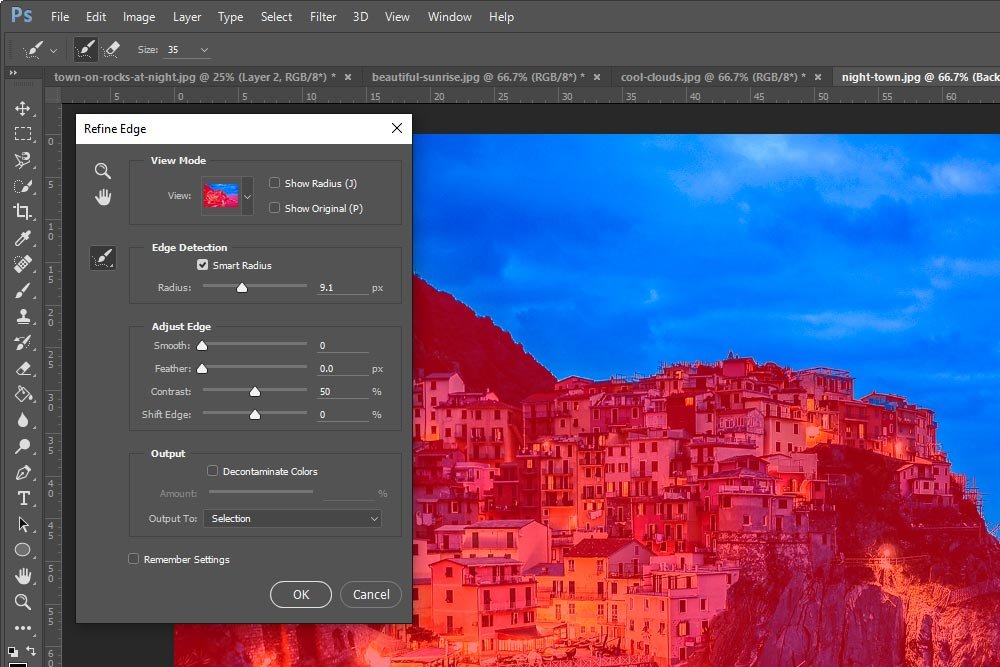
Finally, I’ll push the Adjust Edge sliders around a bit until I’m happy that they’ve selected everything they can.
Creating a Mask
Now that I’ve got a nice selection, I can create my mask. To do this, I’ll select the first sky layer (the one closest to the bottom layer) and make it visible. Then, I’ll head down to the bottom of the Layers panel and click the Add Layer Mask button. For a thorough review of layer masks in Adobe Photoshop, please read this post:What are Layer Masks in Adobe Photoshop?
This is what the Layers panel looks like now.
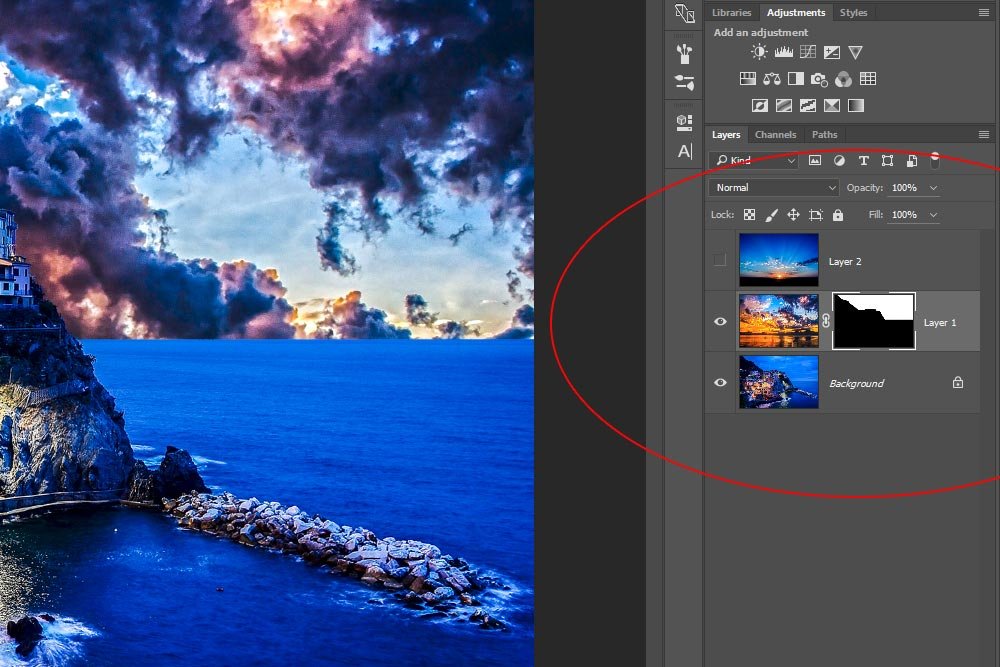
As you can see from the mask thumbnail in the Layers panel, only the sky area is visible, while everything else is hidden. This is perfect.
Let’s take a look at this project as it stands. The photo below represents the composition without any blend modes applied yet.
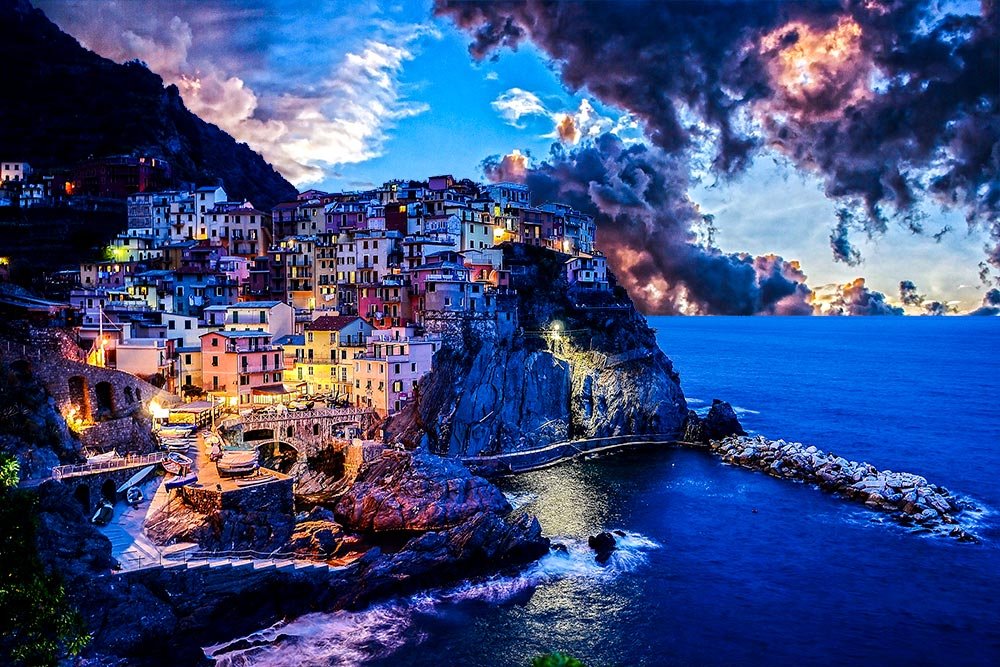
Applying a Blend Mode
I realize these clouds are pretty wild and might not look that realistic. If I wanted them to more match the town photo and to keep the focus on the colors of the buildings, I could apply a blend mode to that cloud layer. In this case, I’ll apply the Overlay blend mode. I think this one looks pretty good, although, many others do as well.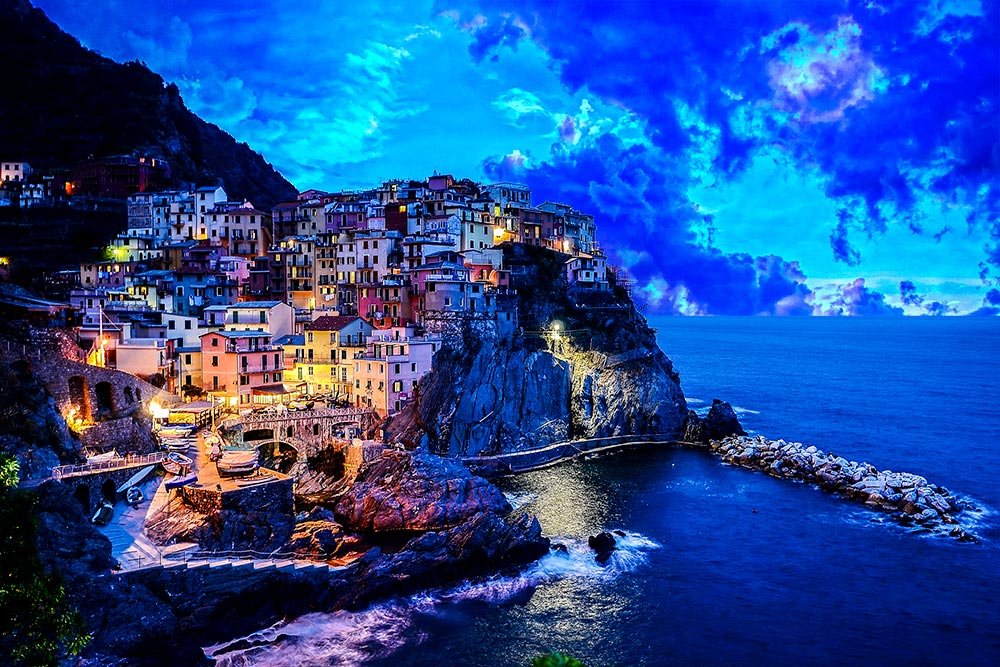
If you have no idea what blend modes in Photoshop are or if you just want to learn more about them, please take a look at this post I wrote a while back:
What are Blending Modes in Adobe Photoshop?
Moving the Mask
The really cool thing about working with layer masks is that you can move them. Right now, I have the mask applied to the first sky photo. What if I wanted to see what the second sky photo looked like with the mask applied to it? Well, all I’d have to do is click the mask thumbnail and drag it to the other sky photo layer. I’ll do that right now.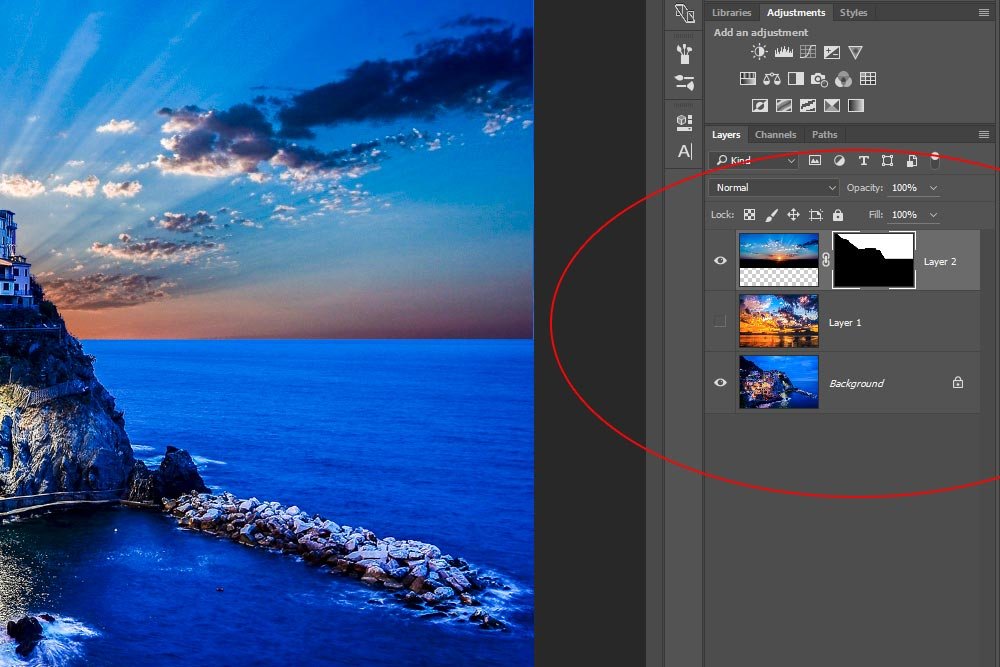
It’s that easy. If you look at the layers in the above screenshot now, you’ll see that the mask is applied to the lop layer as opposed to the middle one. The best part is, I didn’t have to go through all the work of making my selection and refining the edges again. Also, please note that I shifted the sky photo up a bit so it fit better with the town photo. I did this before moving the mask. Let’s take a look at the outcome of this variation.
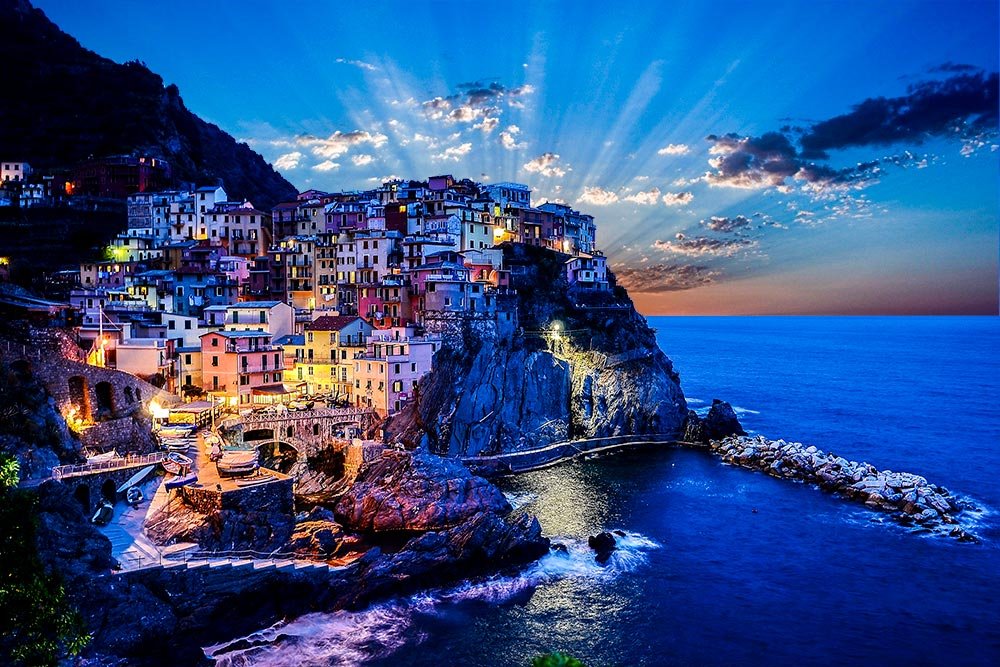
In my opinion, this looks really good. I could apply the Luminosity blend mode to make it match the photo more, but I think I’ll keep it just like this. I like it.
That’s it for this tutorial. If I saw that the layers needed improvements to their color, exposure, contrast, etc…I could always use some Adjustment Layers to take care of these issues. Since these look good the way they are, I’ll leave them alone.
If you have any questions or comments, please leave them in the comments section below. I love answering questions and I’d love to hear from you. Thanks!
