KodyWallice
Member
- Joined
- May 7, 2021
- Messages
- 123
- Reaction Score
- 1
- Points
- 23
- #1
I went out to start up my pickup truck a few days ago and it didn't start. For the first time in over eight years of owning this truck, the battery was dead. Not completely dead, but dead enough that the truck wouldn't start in cold weather. The problem is that I only use this truck about every six months and even then, I hardly use it at all. Just for very short distances. It's got two batteries in it and I would hate to think that I need to replace them.
This event got me thinking. I wonder if I need to hook up a battery tender to one of the batteries, just to keep them charged. I have a small tender that I bought for a motorcycle I owned years and years ago. Would this work? Should I hook it up? Is a battery tender the right thing to use here? Why use a battery tender at all? What's their purpose? To keep the battery charged when it's not in use for a long time? I know, so many questions.
COMMENT: Your situation is exactly what battery tenders (trickle chargers) were made for. They're for those vehicles or motorcycles that aren't used very much. Instead of going outside to find your battery dead, the tender will keep it charged. I have heard that it's also good for the battery to keep it changed like this.
Some people confuse regular battery charger trickle charge settings to be the same thing as a battery tender. This isn't the case. I believe, and this may have changed through the years, that trickle chargers can over charge a battery. Battery tenders have what the refer to as "brains." A battery tender, once hooked up, will trickle a charge back into the battery only when it's necessary. When the battery is full, it'll stop charging. They say there's a microprocessor inside the tender that tells it when it should turn on and off.
There are many sites online that describe how and when to use these tenders. The tenders have red and green lights and these lights mean different things when blinking and when they're solid. Really though, if your battery is already more than 30% charged, all you need to do is connect the tender, plug it in, and that's it. Just keep it plugged in until you want to use your truck again. Here's a good model to buy: https://amzn.to/3rExaqU. I don't know if that's like the one you already have, but it's decent for what you need.
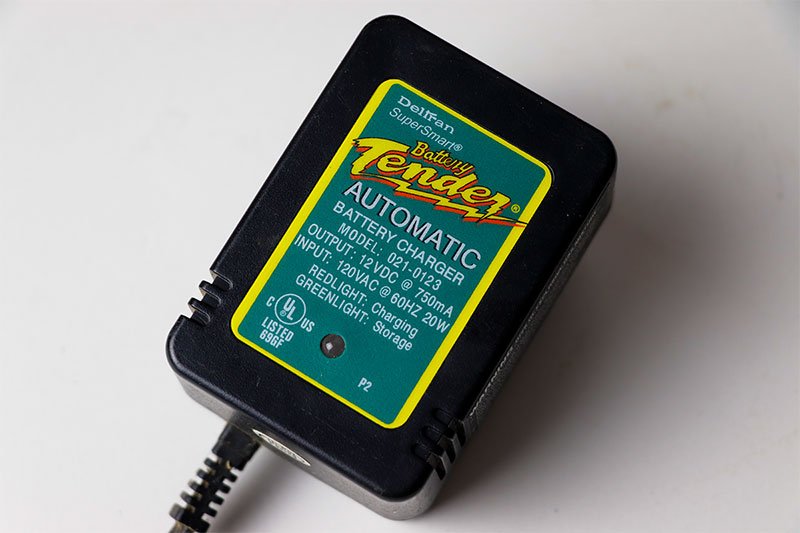
Here are a few photos of the one I bought a while back.
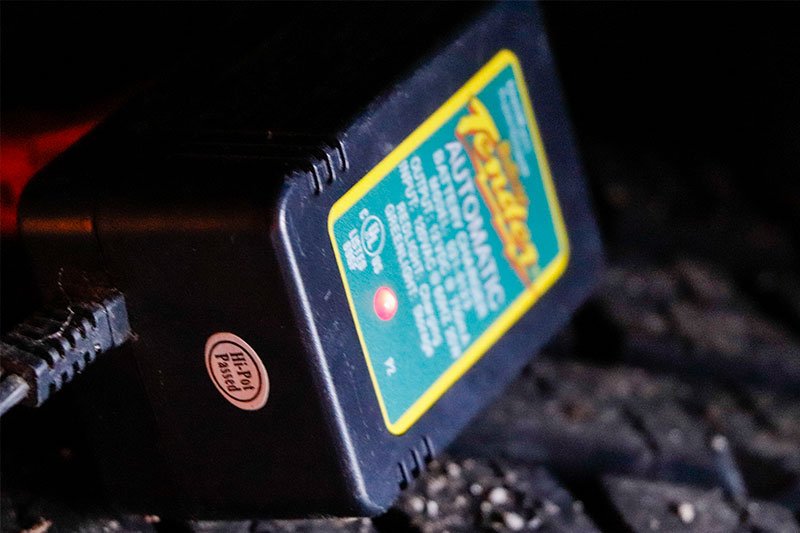
This is the tender itself. This is what plugs into the wall or extension cord.
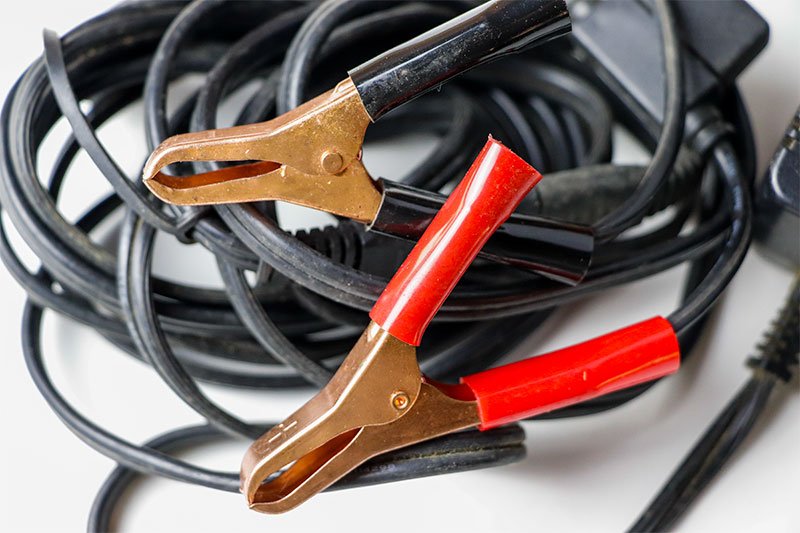
This charger comes with two connection types. These are the regular clips. They don't have teeth or I'd call them alligator clips. Almost the same thing.
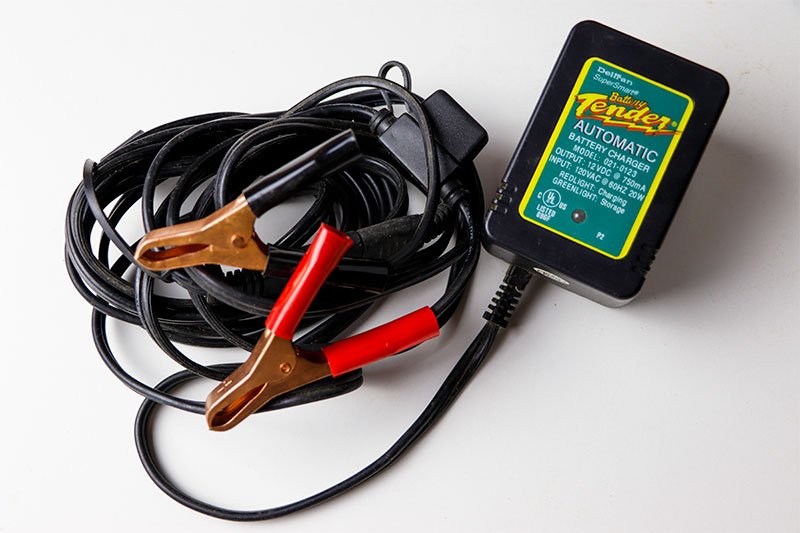
This is the entire setup. The charger (tender) and the clips.
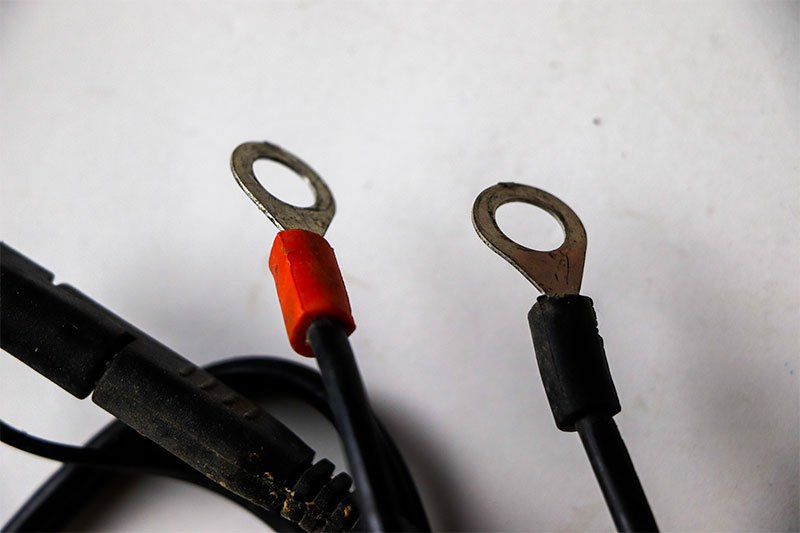
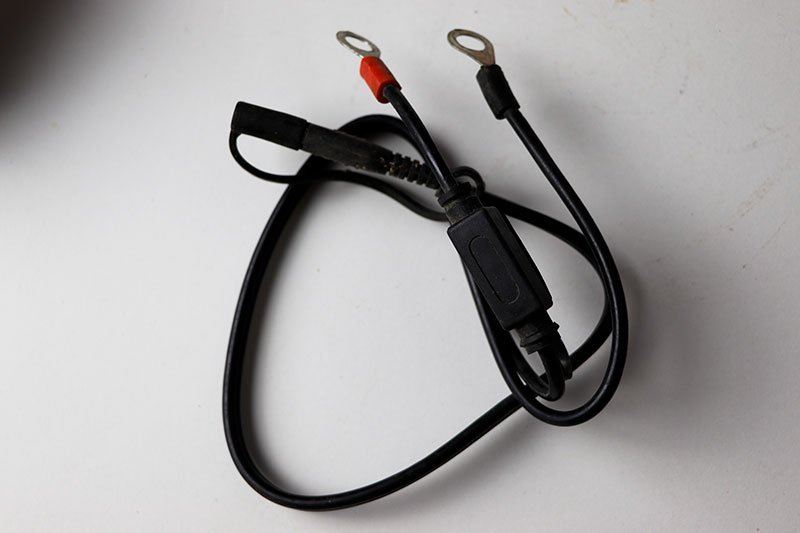
And finally, we have the eyelet connections, otherwise known as ring terminals. You can use these instead of the clips. The wires simply plug in to each other. These are particularly good for motorcycles that sit for a long time. Just disconnect the batter from the bike and bolt these connectors on. I suppose you can do the same thing with trucks and cars. Or boats - whatever.
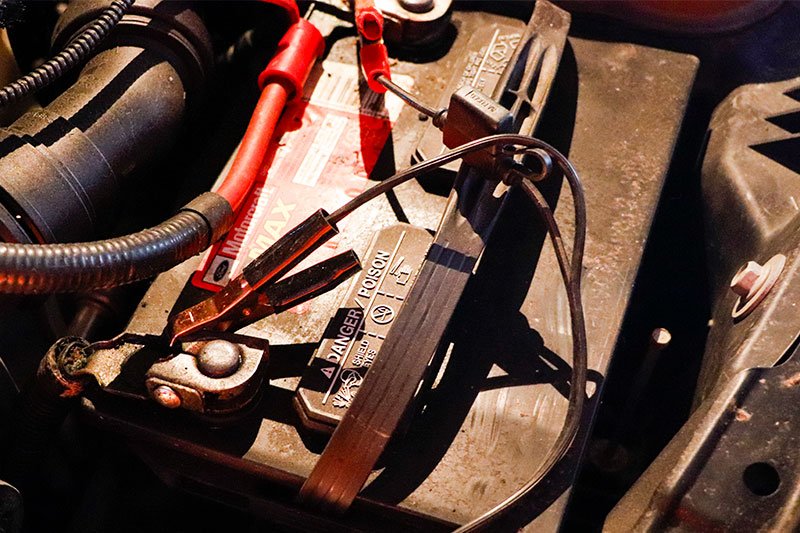
COMMENT: I have the same battery tender. I just hooked it up to my truck. I took some pictures that I'm including in this post. You can see the red light on. That means it's charging. I'll go back out later to see if it turns green.
I was reading that some trucks have what they call a "parasitic" draw on the batteries, which causes premature battery failure. Because of this type of thing, a few different companies make on-board battery tenders that you install right in the engine compartment. When you're not using the truck, you just plug the tender into an outlet. So the difference between these products is that for the one that I have, I need to pop the hood and connect the charger every time I want to use it and for the other one, it's already connected. I only need to plug it in. These are the two models that I just read about in a Ford Truck forum:
Schumacher SC1300 1.5A 6/12V Fully Automatic Battery Maintainer - https://amzn.to/3mY6yxx
NOCO Genius GENM1 4 Amp 1-Bank On-Board Battery Charger - https://amzn.to/2KBbATL
I think this is a great idea and I might invest in one of these. There are many more brands and models, so I'll check them out too. I like the idea of only having to plug the truck in as opposed to going through the whole opening the hood and then connecting the one I have up. I'll use that for my lawnmower or something. By the way, if you want to read that post I just referred to, here it is.
COMMENT: Actually, you know what I was just thinking? Can't I simply bolt the ring terminals from the charger that I already own to the battery and then zip tie the tender somewhere in my engine compartment? And then I could zip tie the cord (plug) somewhere near the front grill so I could plug it in easily. Isn't this the same thing as an "on-board" tender? It sure seems that way to me. I'll check it out.
COMMENT: I wouldn't do that. The on-board tenders are made for that. The one you're using isn't. Yours might not be able to handle the shaking, heat, or getting wet. Yours is made to sit in a dry garage doing what it's meant to do. Pick the right tool for the job.
COMMENT: Well, it's been almost a day of having the battery tender connected to my Ford F250 and the light is still red. That means it's not charged yet. I am wondering two things: does this little tender have enough power to actually charge the batteries, and do I need to actually put a charger on the batteries to fill them up first, before connecting the tender? From what I've been reading on the forums, I really don't think I'm going to be charging the batteries with this thing. I believe I need to top them off first. I'll let you know what I end up doing. I happen to have a real battery charger on hand, so I may put that on trickle charge for a while.
COMMENT: If your battery tender isn't sized properly for your truck, it may never charge the batteries. I assume you've got two pretty large batteries in that thing, so you might want to look at how many amps your tender is capable of putting out. I see from the photo above that the output is 750mA, which is about half of what you want. You probably need at least 1.5A.
COMMENT: I've actually been reading that a 1.5A won't be large enough either. I'm probably going to go with a 3A. Right now, I'm researching the:
Schumacher SP129 - https://amzn.to/3hwwcIK
and the:
NOCO GENIUS2 - https://amzn.to/37Zwpkl
Both look very good. The Schumacher is a 3A and the NOCO is a 2A. I'll have to read up and watch some videos on both before I buy. But yeah, my little 750mA ain't going to cut it.
COMMENT: I just went out to my truck to check on the battery tender again and the red light was still on. This has led me to wonder if it was keeping up with the demands of the batter. Because of this, I disconnected the tender and replaced it with my Black & Decker battery charger. I bought this a few years ago. Here's the official title:
BLACK+DECKER BC15BD Fully Automatic 15 Amp 12V Bench Battery Charger/Maintainer with 40A Engine Start, Alternator Check, Cable Clamps
https://amzn.to/34YagkM
Strange thing happened. When I pushed the Charge button, the interface told me that about 2-3 amps were flowing to the battery. But after only a few minutes, the charger switched over to FLO mode. I think that stands for float mode, indicating that the battery is completely charged. That's what the interface said as well. Take a look. I snapped a photo of it.
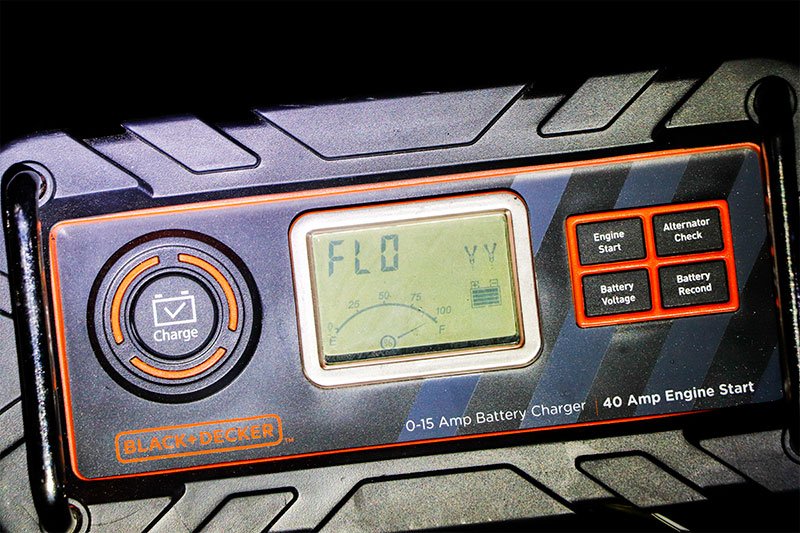
I guess that's good, but after reading some reviews on this charger, I'm not so sure. The reviews claimed that this charger gets stuck on FLO mode and never actually charges the battery. I'll have to check that out, but as of right now, it looks good. I've also used this charger over the summer to charge up my ride-on lawnmower battery and then this winter to charge up my truck batteries. Every time it has performed well. I should probably go out and start the truck up just to see.
COMMENT: I just read this on Amazon: According to the instruction manual, when the battery is completely charged, the unit automatically goes into float charge (FLO). This means your battery is fully charged and the charger will only charge to keep the voltage up.
COMMENT: I wanted to quickly update this thread. I have big news. The light on my battery tender has finally turned green. I just went out this morning to check on it and yes, it was green. I checked yesterday and it was still red. I did start the truck yesterday and I must say that the battery was very strong. Maybe the strongest I've ever felt it. The truck (diesel) started immediately and now today, that light on the tender is green. I guess it just took a while to charge, but it did. And all this with a 750mA charger. Not bad. I still want to get that other one though. The NOCO Genius 2.
COMMENT: I'm starting to read information about batteries all over the place. I just read this on Facebook:
Keep the battery stored out of the freezing cold environment and keep the battery charged.
There is a direct relationship between a battery’s state-of-charge and the temperature at which it will freeze. A fully charged battery can be stored at subfreezing temperatures (down to -75° F) with no damage. By contrast, a discharged (dead) battery will freeze at only 27° F. A battery not connected to anything can lose up to one percent of its charge each day at 70° F and more as the ambient temperature drops.
I had no idea that batteries can even freeze. I've got two auto batteries out there in the cold, a lawnmower one, and an ATV one. I'm starting to think that I'll need maintenance chargers on all of them. The lawnmower battery was dead this spring when I tried to start the mower. I just chalked that up to getting old, but now I know better. And I certainly don't want the ATV battery to die before its due. I need to get on the stick. I'm thinking about removing the two batteries to keep them inside over the winter. I'll connect tenders to them in indoors.
COMMENT: Two interesting things as of late. First, I ordered the NOCO Genius2 last night from Amazon. I picked it up for around $50, so I'll update this thread when I get it. I'm going to connect it to my ATV battery. I'm still deciding on whether I want to completely remove the battery from the quad and charge it in my garage or if I want to keep it installed and run an extension cord out to the charger. I really don't want to do either. I'd like to be able to just plug it into a wall, but it's too far away.
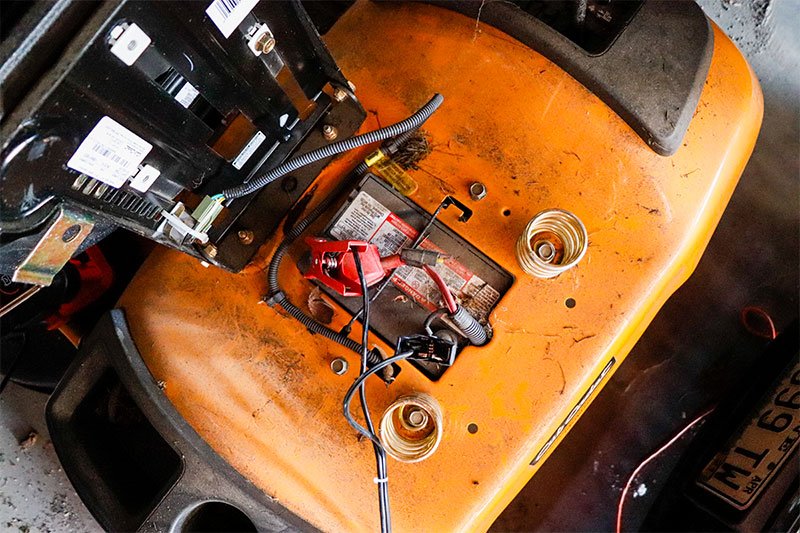
Second, I just connected my BLACK+DECKER BC15BD battery charger to my Cub Cadet ride on lawnmower battery and the charger went straight to FLO mode. That's a problem. I turned the key and the mower lights came up. The battery was pretty dead though, so it may need some charging before it gets up high enough for this charger to do its job. I'll figure that out. I may have to force charge it somehow and then let it trickle.
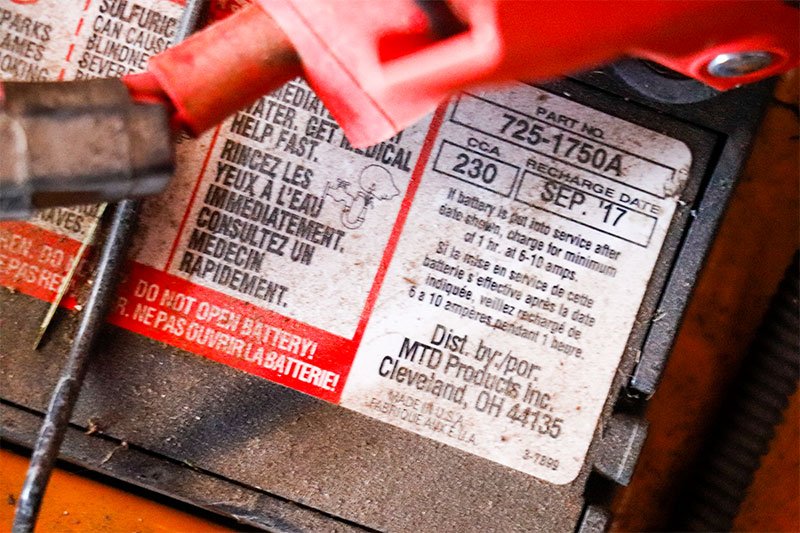
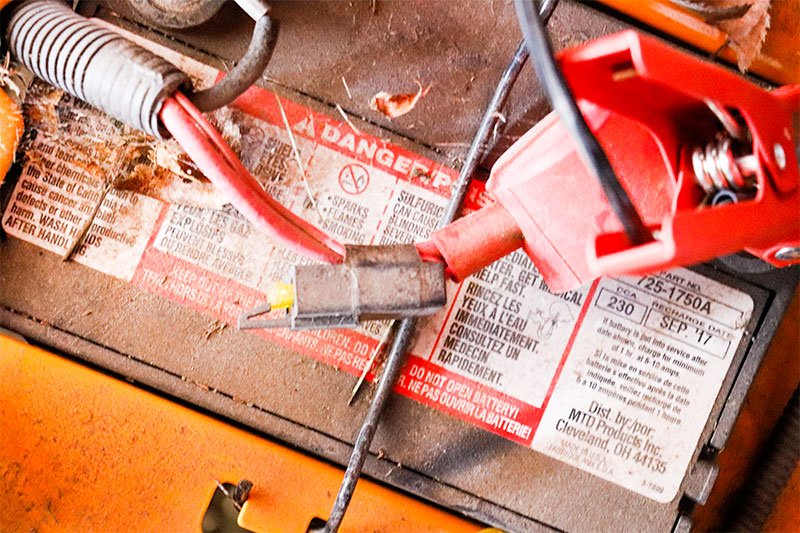
Here are some photos of that. The battery model number is 725-1750a. People say that if this charger goes straight to FLO, then the battery is completely dead. Well, it's not, so it should really charge the battery before going to FLO.
COMMENT: Update: Something very strange is going on. I decided to swap the Black & Decker battery charger for the Battery Tender I had connected to my truck. I connected the battery tender to the lawnmower battery and after about three seconds of displaying a red light, the light turned green, indicating a full charge and maintenance mode. I know for a fact that the battery doesn't have a full charge. I won't even turn the lawnmower over. So what's going on?
I just read something on another forum that made sense.
My experience is that the green light will remain steady when the battery cannot be charged any further. It does not indicate that the battery is at 100% of "new" rated capacity. It means that what ever the capacity of the battery is at present...it is charged to that point. A battery loses capacity over time with normal use. If the battery is fully discharged and dead ( like left the lights on overnight) it will only accept a charge of about 60% of it's previous capacity. Do that twice and you have a battery that is only capable of 35% rated capacity. And that battery if placed on a tender will show a "green light," just like a brand new battery with a CCA of 380.
That actually makes sense. I have not taken very good care of this battery at all. It's gone completely dead a few times. I think I'm going to go back and and connect the real battery charger back up and run the recondition mode, just to see what happens.
COMMENT: Yes, your battery certainly seems like it needs to be reconditioned. Most people throw their batteries out (or recycle them) at this point and buy new ones, but it's much more economical to recondition them. Allowing your battery to go dead just a few times is very bad news. Every time a battery discharges, lead sulfate crystals forum around the interior plates. As these crystals build up, they affect how much the battery is able to charge and discharge. By keeping a battery maintenance device, such as a tender, connected to a battery while not in use keeps the crystals at bay. In your case, it appears that your battery has gone dead one too many times and now the capacity is so low that every charger you attach to it thinks it's at full charge. The thing is, it may be. Your battery may actually be at full charge, even when it's nearly dead. That's why your Black & Decker charger and your Battery Tender are reading that the battery is full. Recondition it if you can. I'd like to see how this turns out.
Also, if you're curious, the types of batteries that are able to be reconditioned are AGM, Gel batteries, Lead Acid car batteries, Lithium-ion batteries, NiCad, and NiMH rechargeable batteries. The one you have in your mower is probably a lead acid. I looked up some replacements and that's what they were.
COMMENT: Thanks for your reply. If this works, I may just recondition all of my batteries and then keep tenders on them all. I'm sure the capacity of them has been diminished, as I've let them all go dead a few times. I'll keep this thread updated.
COMMENT: I received my NOCO GENIUS2 battery maintenance charger today. Boy, what a package. They did this up nice. I took some photos of the unboxing if you're interested. Also, I wanted to mention, I thought they'd include an extra wire with eyelet connections along with the clips, but they didn't. I see that I can unscrew them from the clamps, but that's kind of a pain. Whatever. This device looks very nice. Tomorrow, I'll take a look at my ATV to see exactly what type of battery it's got in it and I'll either run an extension cord to it and charge it in my trailer or I'll remove the battery to keep it charged inside my house. I'll take photos of that too.
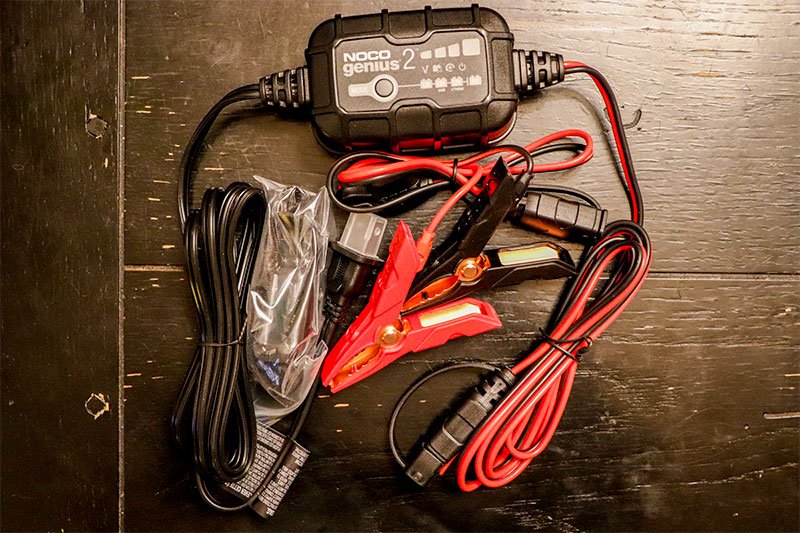
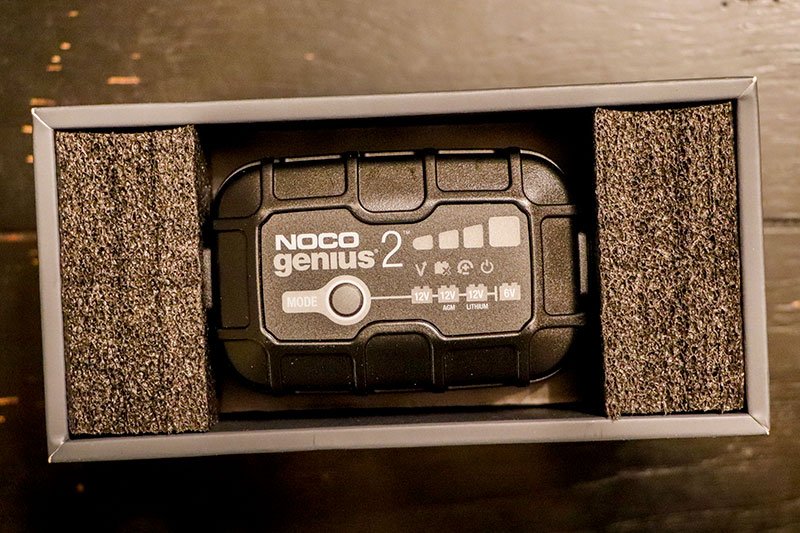

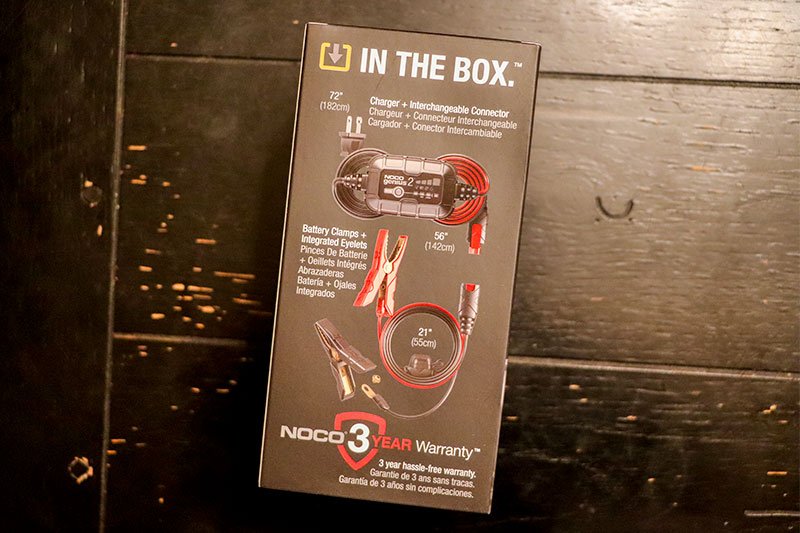
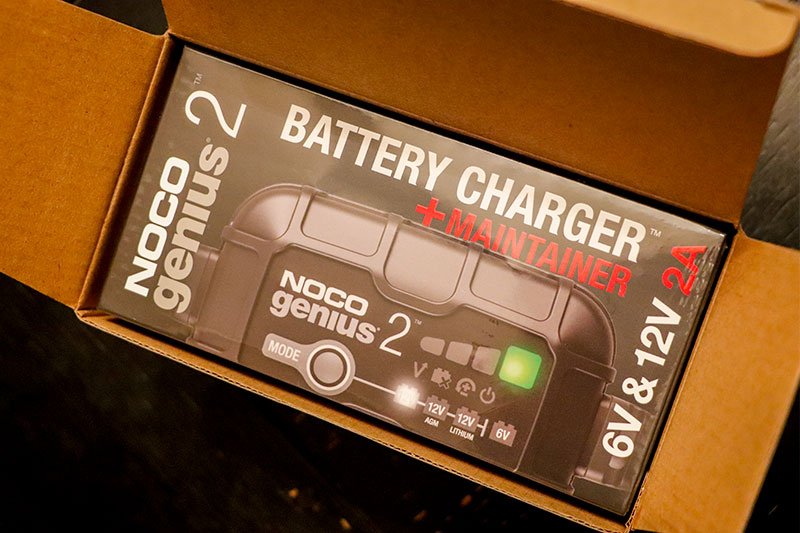
COMMENT: I removed the battery from my 2018 Polaris Sportsman 850 this afternoon (different post) and I just finished connecting my new NOCO GENIUS2 to it inside my house. Surprisingly, after just a few seconds, the green charger light went on, indicating that it was fully charged. This is good, but slightly disappointing. I sort of wanted to see it charge. Oh well. I'll keep the charger on the batter until springtime when I bring the quad back out for some work. At least I don't have to worry about it freezing and discharging outside in my trailer.
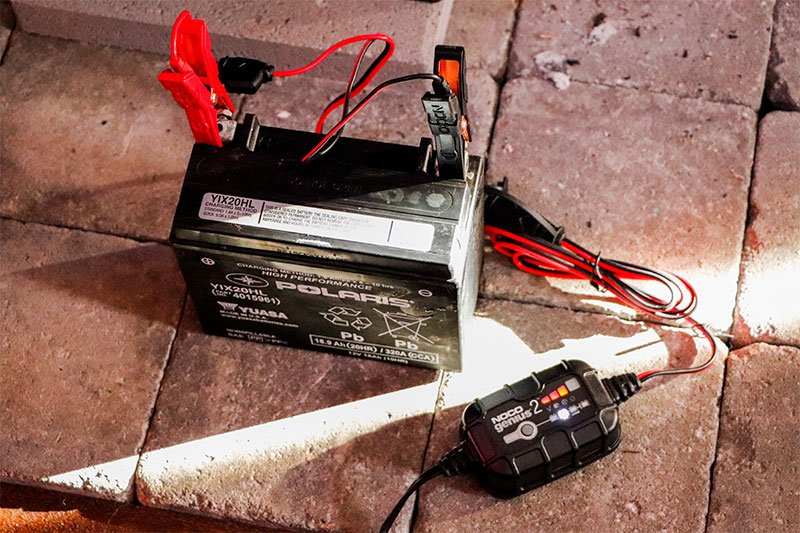
Here are a few photos of the battery maintainer connected to the battery.
First, I connected the charger to the battery and pressed the mode button on the charger. I chose AGM mode because that's what type of battery came with the ATV.
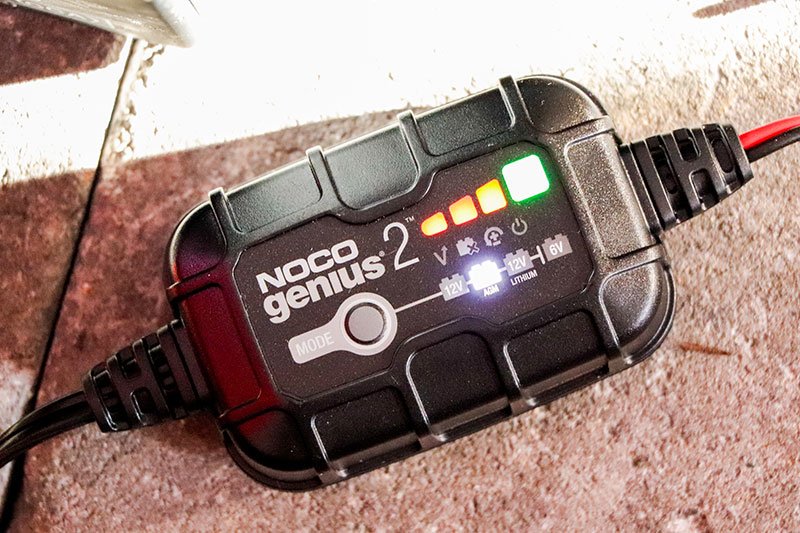
The lights on the NOCO GENIUS 2 began cycling and the AGM mode light was illuminated.
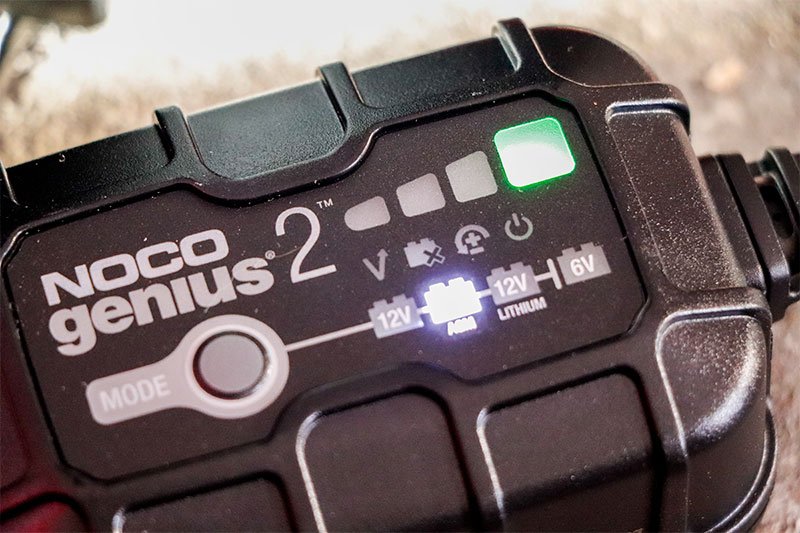
After a few seconds, the green "fully charged" light came on. As I sit here and type, that green light is slowing phasing on and off. I guess that indicates a full charge as well. It was steady green a little while ago.
Here's the entire setup. It's pretty nice.
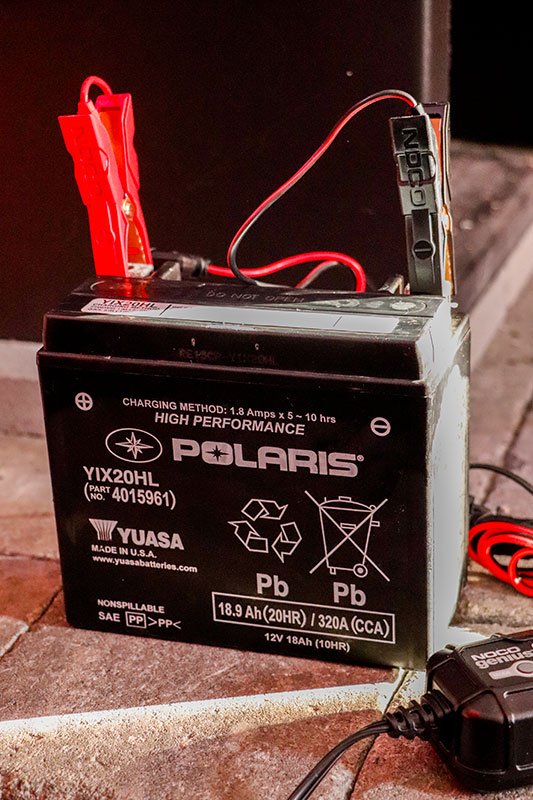
COMMENT: By the way, here's a post about how I removed this battery from my quad and a few videos about how to operate the NOCO charger. They cover how to set the mode and how to force charge the battery.
COMMENT: I connected my voltmeter to this NOCO charger yesterday to see if it was pulling any current in standby mode. Having three of these maintenance chargers connected to three different batteries has given me concern in regards to my house electricity usage. I don't want any surprises when I get my electric bill. If this 2 amp charger were to charge at the full 2 amps for a month, that would be like having a 240 watt light bulb on the entire time. That'll add to the bill, for sure. Basically, at 120 volts x 2 amps, I'd get 240 watts.
The charger displayed the steady green light, indicating that the battery was full and the charger was in maintenance mode. I connected the multimeter to check the amperage. At first, the charger displayed a red light and then an orange one. The initial current showed .5 amps for the red light and then it dropped down to .2 amps with the orange light. The closer the charger came to seeing the battery at a full charge, the less current it drew. After a few seconds, the green light became illuminated again and the amperage dropped to 0. So basically, when the battery is full and this charger is in maintenance mode, it doesn't use any electricity. Although, I'm sure it uses some from the wall outlet to keep it on. Maybe I'll test that next.
This event got me thinking. I wonder if I need to hook up a battery tender to one of the batteries, just to keep them charged. I have a small tender that I bought for a motorcycle I owned years and years ago. Would this work? Should I hook it up? Is a battery tender the right thing to use here? Why use a battery tender at all? What's their purpose? To keep the battery charged when it's not in use for a long time? I know, so many questions.
COMMENT: Your situation is exactly what battery tenders (trickle chargers) were made for. They're for those vehicles or motorcycles that aren't used very much. Instead of going outside to find your battery dead, the tender will keep it charged. I have heard that it's also good for the battery to keep it changed like this.
Some people confuse regular battery charger trickle charge settings to be the same thing as a battery tender. This isn't the case. I believe, and this may have changed through the years, that trickle chargers can over charge a battery. Battery tenders have what the refer to as "brains." A battery tender, once hooked up, will trickle a charge back into the battery only when it's necessary. When the battery is full, it'll stop charging. They say there's a microprocessor inside the tender that tells it when it should turn on and off.
There are many sites online that describe how and when to use these tenders. The tenders have red and green lights and these lights mean different things when blinking and when they're solid. Really though, if your battery is already more than 30% charged, all you need to do is connect the tender, plug it in, and that's it. Just keep it plugged in until you want to use your truck again. Here's a good model to buy: https://amzn.to/3rExaqU. I don't know if that's like the one you already have, but it's decent for what you need.
Here are a few photos of the one I bought a while back.
This is the tender itself. This is what plugs into the wall or extension cord.

This charger comes with two connection types. These are the regular clips. They don't have teeth or I'd call them alligator clips. Almost the same thing.

This is the entire setup. The charger (tender) and the clips.

And finally, we have the eyelet connections, otherwise known as ring terminals. You can use these instead of the clips. The wires simply plug in to each other. These are particularly good for motorcycles that sit for a long time. Just disconnect the batter from the bike and bolt these connectors on. I suppose you can do the same thing with trucks and cars. Or boats - whatever.


COMMENT: I have the same battery tender. I just hooked it up to my truck. I took some pictures that I'm including in this post. You can see the red light on. That means it's charging. I'll go back out later to see if it turns green.
I was reading that some trucks have what they call a "parasitic" draw on the batteries, which causes premature battery failure. Because of this type of thing, a few different companies make on-board battery tenders that you install right in the engine compartment. When you're not using the truck, you just plug the tender into an outlet. So the difference between these products is that for the one that I have, I need to pop the hood and connect the charger every time I want to use it and for the other one, it's already connected. I only need to plug it in. These are the two models that I just read about in a Ford Truck forum:
Schumacher SC1300 1.5A 6/12V Fully Automatic Battery Maintainer - https://amzn.to/3mY6yxx
NOCO Genius GENM1 4 Amp 1-Bank On-Board Battery Charger - https://amzn.to/2KBbATL
I think this is a great idea and I might invest in one of these. There are many more brands and models, so I'll check them out too. I like the idea of only having to plug the truck in as opposed to going through the whole opening the hood and then connecting the one I have up. I'll use that for my lawnmower or something. By the way, if you want to read that post I just referred to, here it is.


COMMENT: Actually, you know what I was just thinking? Can't I simply bolt the ring terminals from the charger that I already own to the battery and then zip tie the tender somewhere in my engine compartment? And then I could zip tie the cord (plug) somewhere near the front grill so I could plug it in easily. Isn't this the same thing as an "on-board" tender? It sure seems that way to me. I'll check it out.
COMMENT: I wouldn't do that. The on-board tenders are made for that. The one you're using isn't. Yours might not be able to handle the shaking, heat, or getting wet. Yours is made to sit in a dry garage doing what it's meant to do. Pick the right tool for the job.
COMMENT: Well, it's been almost a day of having the battery tender connected to my Ford F250 and the light is still red. That means it's not charged yet. I am wondering two things: does this little tender have enough power to actually charge the batteries, and do I need to actually put a charger on the batteries to fill them up first, before connecting the tender? From what I've been reading on the forums, I really don't think I'm going to be charging the batteries with this thing. I believe I need to top them off first. I'll let you know what I end up doing. I happen to have a real battery charger on hand, so I may put that on trickle charge for a while.
COMMENT: If your battery tender isn't sized properly for your truck, it may never charge the batteries. I assume you've got two pretty large batteries in that thing, so you might want to look at how many amps your tender is capable of putting out. I see from the photo above that the output is 750mA, which is about half of what you want. You probably need at least 1.5A.
COMMENT: I've actually been reading that a 1.5A won't be large enough either. I'm probably going to go with a 3A. Right now, I'm researching the:
Schumacher SP129 - https://amzn.to/3hwwcIK
and the:
NOCO GENIUS2 - https://amzn.to/37Zwpkl
Both look very good. The Schumacher is a 3A and the NOCO is a 2A. I'll have to read up and watch some videos on both before I buy. But yeah, my little 750mA ain't going to cut it.
COMMENT: I just went out to my truck to check on the battery tender again and the red light was still on. This has led me to wonder if it was keeping up with the demands of the batter. Because of this, I disconnected the tender and replaced it with my Black & Decker battery charger. I bought this a few years ago. Here's the official title:
BLACK+DECKER BC15BD Fully Automatic 15 Amp 12V Bench Battery Charger/Maintainer with 40A Engine Start, Alternator Check, Cable Clamps
https://amzn.to/34YagkM
Strange thing happened. When I pushed the Charge button, the interface told me that about 2-3 amps were flowing to the battery. But after only a few minutes, the charger switched over to FLO mode. I think that stands for float mode, indicating that the battery is completely charged. That's what the interface said as well. Take a look. I snapped a photo of it.

I guess that's good, but after reading some reviews on this charger, I'm not so sure. The reviews claimed that this charger gets stuck on FLO mode and never actually charges the battery. I'll have to check that out, but as of right now, it looks good. I've also used this charger over the summer to charge up my ride-on lawnmower battery and then this winter to charge up my truck batteries. Every time it has performed well. I should probably go out and start the truck up just to see.
COMMENT: I just read this on Amazon: According to the instruction manual, when the battery is completely charged, the unit automatically goes into float charge (FLO). This means your battery is fully charged and the charger will only charge to keep the voltage up.
COMMENT: I wanted to quickly update this thread. I have big news. The light on my battery tender has finally turned green. I just went out this morning to check on it and yes, it was green. I checked yesterday and it was still red. I did start the truck yesterday and I must say that the battery was very strong. Maybe the strongest I've ever felt it. The truck (diesel) started immediately and now today, that light on the tender is green. I guess it just took a while to charge, but it did. And all this with a 750mA charger. Not bad. I still want to get that other one though. The NOCO Genius 2.
COMMENT: I'm starting to read information about batteries all over the place. I just read this on Facebook:
Keep the battery stored out of the freezing cold environment and keep the battery charged.
There is a direct relationship between a battery’s state-of-charge and the temperature at which it will freeze. A fully charged battery can be stored at subfreezing temperatures (down to -75° F) with no damage. By contrast, a discharged (dead) battery will freeze at only 27° F. A battery not connected to anything can lose up to one percent of its charge each day at 70° F and more as the ambient temperature drops.
I had no idea that batteries can even freeze. I've got two auto batteries out there in the cold, a lawnmower one, and an ATV one. I'm starting to think that I'll need maintenance chargers on all of them. The lawnmower battery was dead this spring when I tried to start the mower. I just chalked that up to getting old, but now I know better. And I certainly don't want the ATV battery to die before its due. I need to get on the stick. I'm thinking about removing the two batteries to keep them inside over the winter. I'll connect tenders to them in indoors.
COMMENT: Two interesting things as of late. First, I ordered the NOCO Genius2 last night from Amazon. I picked it up for around $50, so I'll update this thread when I get it. I'm going to connect it to my ATV battery. I'm still deciding on whether I want to completely remove the battery from the quad and charge it in my garage or if I want to keep it installed and run an extension cord out to the charger. I really don't want to do either. I'd like to be able to just plug it into a wall, but it's too far away.
Second, I just connected my BLACK+DECKER BC15BD battery charger to my Cub Cadet ride on lawnmower battery and the charger went straight to FLO mode. That's a problem. I turned the key and the mower lights came up. The battery was pretty dead though, so it may need some charging before it gets up high enough for this charger to do its job. I'll figure that out. I may have to force charge it somehow and then let it trickle.
Here are some photos of that. The battery model number is 725-1750a. People say that if this charger goes straight to FLO, then the battery is completely dead. Well, it's not, so it should really charge the battery before going to FLO.


COMMENT: Update: Something very strange is going on. I decided to swap the Black & Decker battery charger for the Battery Tender I had connected to my truck. I connected the battery tender to the lawnmower battery and after about three seconds of displaying a red light, the light turned green, indicating a full charge and maintenance mode. I know for a fact that the battery doesn't have a full charge. I won't even turn the lawnmower over. So what's going on?
I just read something on another forum that made sense.
My experience is that the green light will remain steady when the battery cannot be charged any further. It does not indicate that the battery is at 100% of "new" rated capacity. It means that what ever the capacity of the battery is at present...it is charged to that point. A battery loses capacity over time with normal use. If the battery is fully discharged and dead ( like left the lights on overnight) it will only accept a charge of about 60% of it's previous capacity. Do that twice and you have a battery that is only capable of 35% rated capacity. And that battery if placed on a tender will show a "green light," just like a brand new battery with a CCA of 380.
That actually makes sense. I have not taken very good care of this battery at all. It's gone completely dead a few times. I think I'm going to go back and and connect the real battery charger back up and run the recondition mode, just to see what happens.
COMMENT: Yes, your battery certainly seems like it needs to be reconditioned. Most people throw their batteries out (or recycle them) at this point and buy new ones, but it's much more economical to recondition them. Allowing your battery to go dead just a few times is very bad news. Every time a battery discharges, lead sulfate crystals forum around the interior plates. As these crystals build up, they affect how much the battery is able to charge and discharge. By keeping a battery maintenance device, such as a tender, connected to a battery while not in use keeps the crystals at bay. In your case, it appears that your battery has gone dead one too many times and now the capacity is so low that every charger you attach to it thinks it's at full charge. The thing is, it may be. Your battery may actually be at full charge, even when it's nearly dead. That's why your Black & Decker charger and your Battery Tender are reading that the battery is full. Recondition it if you can. I'd like to see how this turns out.
Also, if you're curious, the types of batteries that are able to be reconditioned are AGM, Gel batteries, Lead Acid car batteries, Lithium-ion batteries, NiCad, and NiMH rechargeable batteries. The one you have in your mower is probably a lead acid. I looked up some replacements and that's what they were.
COMMENT: Thanks for your reply. If this works, I may just recondition all of my batteries and then keep tenders on them all. I'm sure the capacity of them has been diminished, as I've let them all go dead a few times. I'll keep this thread updated.
COMMENT: I received my NOCO GENIUS2 battery maintenance charger today. Boy, what a package. They did this up nice. I took some photos of the unboxing if you're interested. Also, I wanted to mention, I thought they'd include an extra wire with eyelet connections along with the clips, but they didn't. I see that I can unscrew them from the clamps, but that's kind of a pain. Whatever. This device looks very nice. Tomorrow, I'll take a look at my ATV to see exactly what type of battery it's got in it and I'll either run an extension cord to it and charge it in my trailer or I'll remove the battery to keep it charged inside my house. I'll take photos of that too.


COMMENT: I removed the battery from my 2018 Polaris Sportsman 850 this afternoon (different post) and I just finished connecting my new NOCO GENIUS2 to it inside my house. Surprisingly, after just a few seconds, the green charger light went on, indicating that it was fully charged. This is good, but slightly disappointing. I sort of wanted to see it charge. Oh well. I'll keep the charger on the batter until springtime when I bring the quad back out for some work. At least I don't have to worry about it freezing and discharging outside in my trailer.
Here are a few photos of the battery maintainer connected to the battery.
First, I connected the charger to the battery and pressed the mode button on the charger. I chose AGM mode because that's what type of battery came with the ATV.

The lights on the NOCO GENIUS 2 began cycling and the AGM mode light was illuminated.

After a few seconds, the green "fully charged" light came on. As I sit here and type, that green light is slowing phasing on and off. I guess that indicates a full charge as well. It was steady green a little while ago.

Here's the entire setup. It's pretty nice.

COMMENT: By the way, here's a post about how I removed this battery from my quad and a few videos about how to operate the NOCO charger. They cover how to set the mode and how to force charge the battery.
COMMENT: I connected my voltmeter to this NOCO charger yesterday to see if it was pulling any current in standby mode. Having three of these maintenance chargers connected to three different batteries has given me concern in regards to my house electricity usage. I don't want any surprises when I get my electric bill. If this 2 amp charger were to charge at the full 2 amps for a month, that would be like having a 240 watt light bulb on the entire time. That'll add to the bill, for sure. Basically, at 120 volts x 2 amps, I'd get 240 watts.
The charger displayed the steady green light, indicating that the battery was full and the charger was in maintenance mode. I connected the multimeter to check the amperage. At first, the charger displayed a red light and then an orange one. The initial current showed .5 amps for the red light and then it dropped down to .2 amps with the orange light. The closer the charger came to seeing the battery at a full charge, the less current it drew. After a few seconds, the green light became illuminated again and the amperage dropped to 0. So basically, when the battery is full and this charger is in maintenance mode, it doesn't use any electricity. Although, I'm sure it uses some from the wall outlet to keep it on. Maybe I'll test that next.

