Phoenix1
Member
- Joined
- May 7, 2021
- Messages
- 135
- Reaction Score
- 0
- Points
- 23
- #1
Installing a Harman P38 Pellet Stove
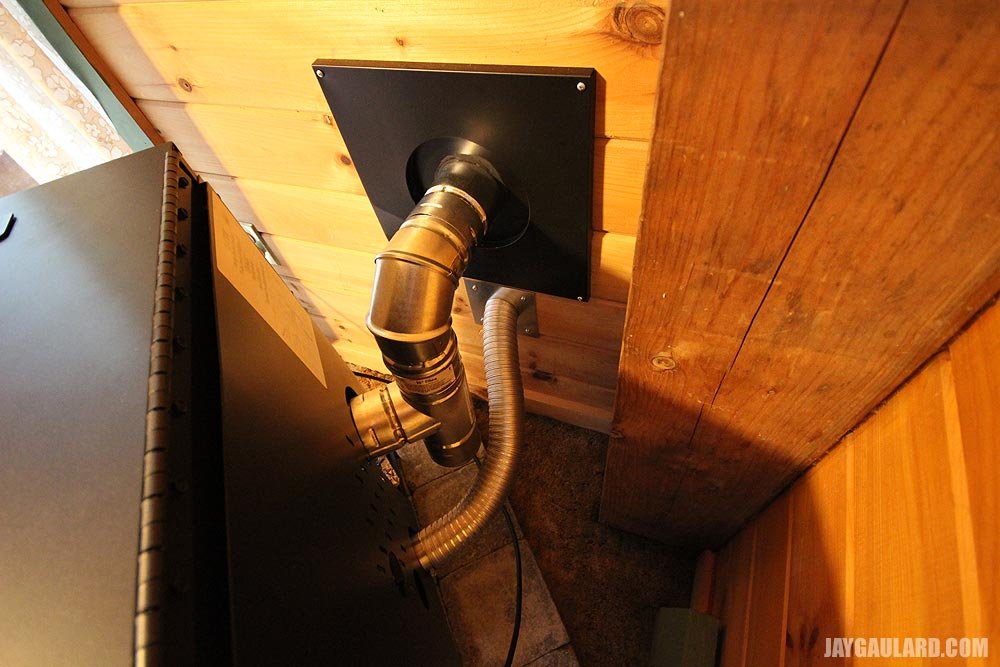
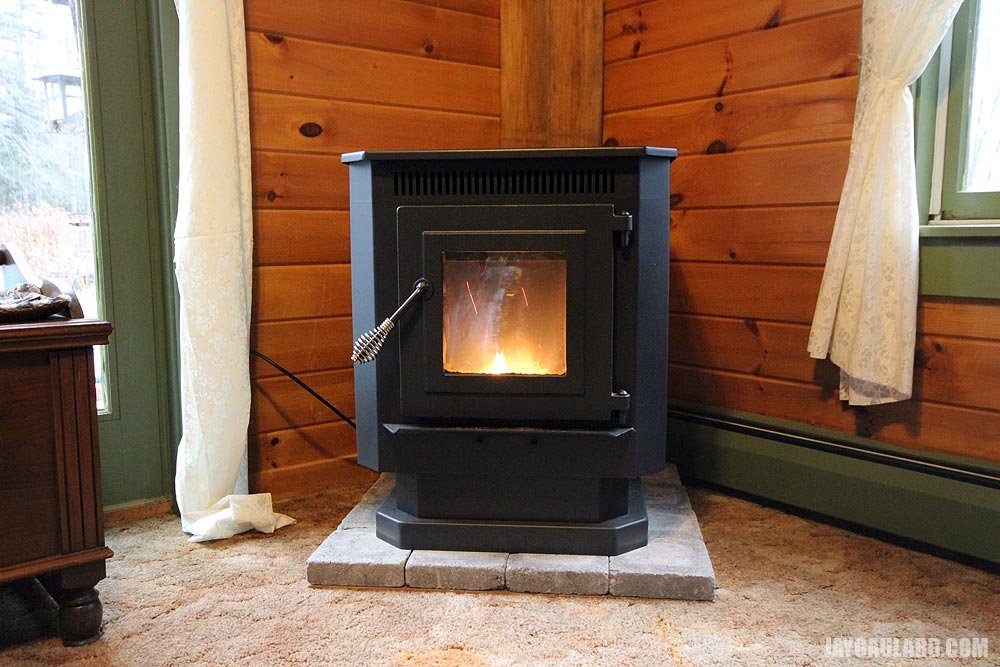
Last year, in the middle of winter and after the second delivery of heating oil, I made a vow to myself. I said that I would get either a wood burning stove or a pellet stove. I said that I would get it over the summer as to avoid the rush. Well, August rolled around and I happen to remember my vow. I really tried to avoid it because I just didn’t want to drop a few grand for a stove, but I kept thinking about how it would feel in the middle of January as I enjoy the warm flame.I had recently cut up about a cord of wood, so I was really trying to find a good woodstove. I found one at a local dealer and was about a day away from getting it delivered when I found out that I would need more chimney pipe than anticipated. I didn’t want the look of all that chimney pipe sticking out of my roof in the front of the house and there was no other suitable place to put the stove in the interior, due to all the clearances required by the local building code. I decided to purchase a Harman P38 Pellet Stove instead. The clearances are much tighter and the exhaust vent is much, much smaller, as I will show in a few photos below.
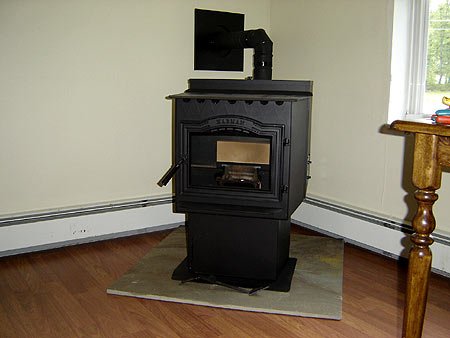
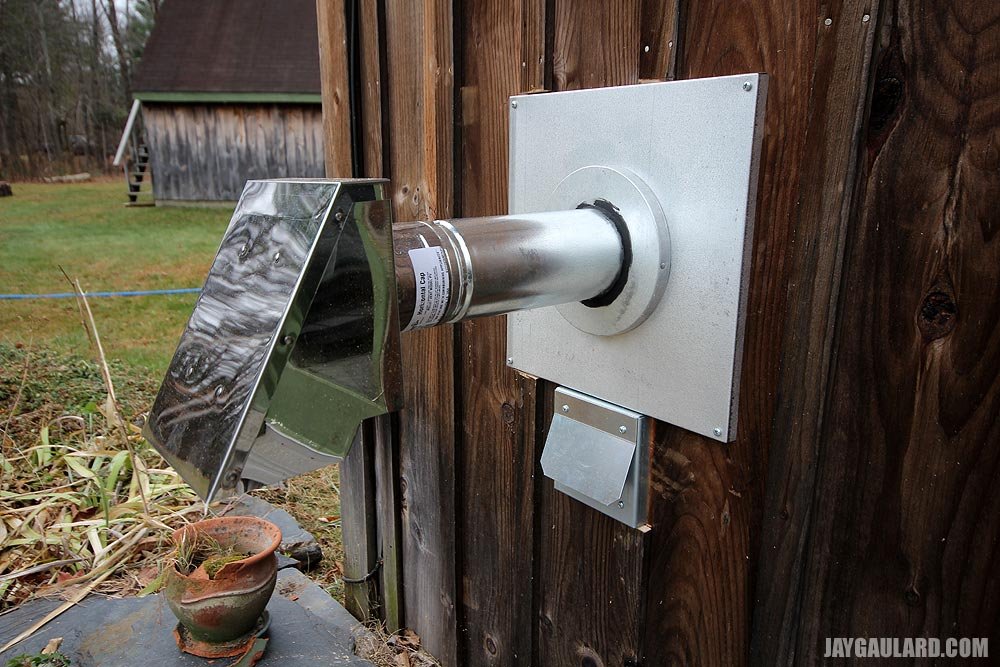
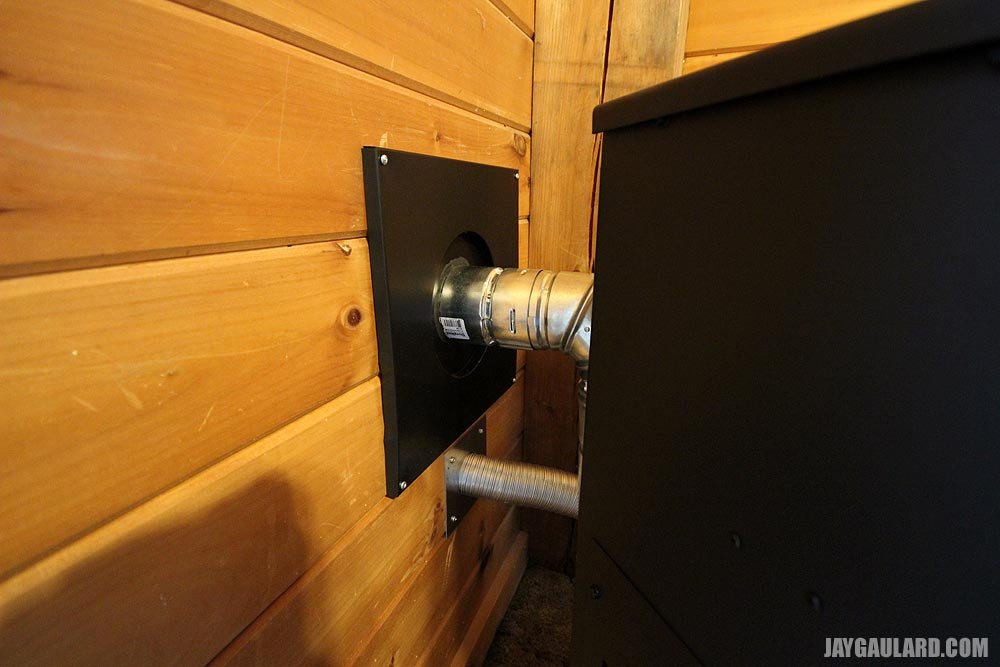
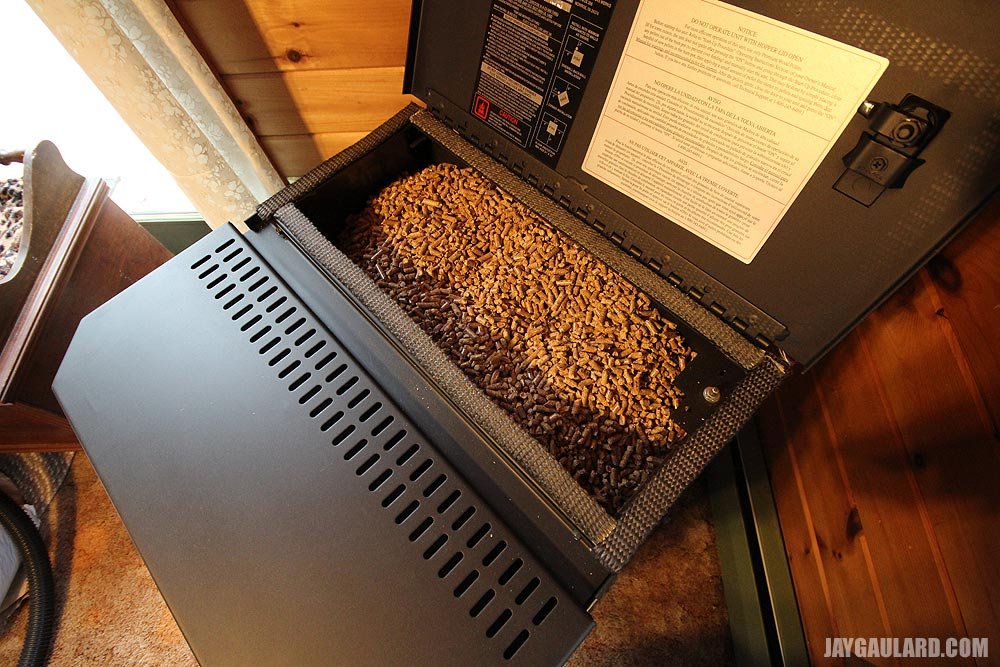
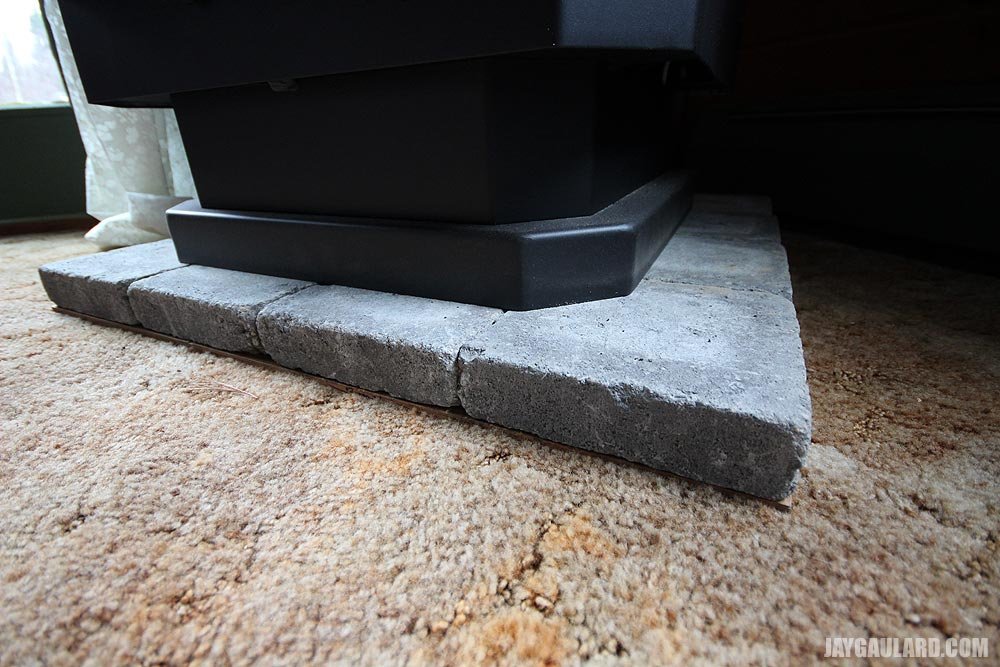
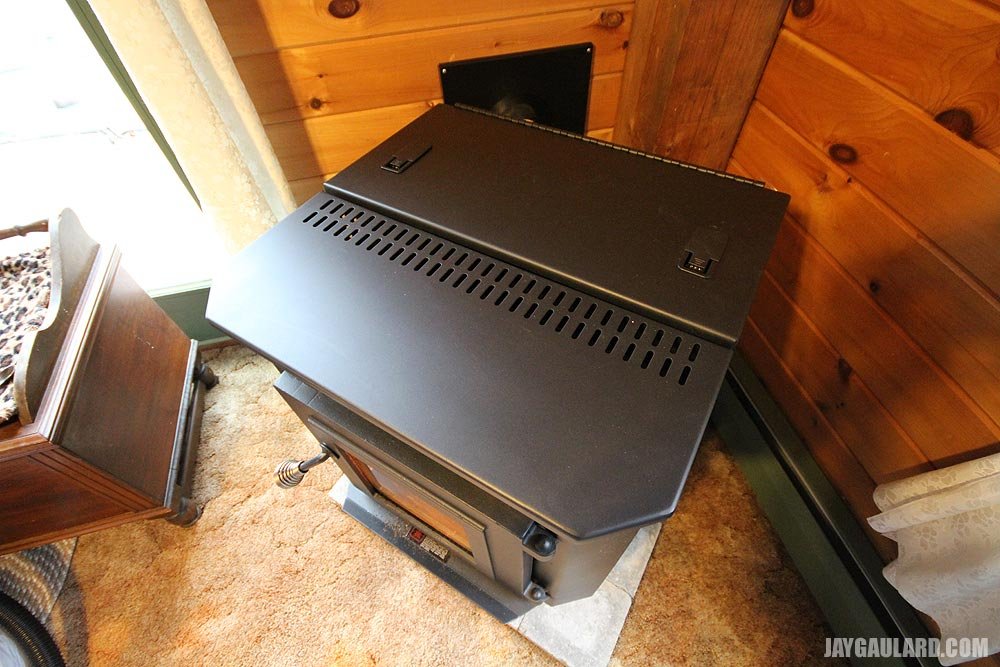
I had the stove delivered along with a ton of pellets so I wouldn’t have to worry about that for a while. I picked up a piece of Bluestone from a dealer up in northern Vermont. The piece is 36″x36″, which would cover the clearance I needed. It also saved about $200. I cut a 6″ hole in the wall behind the stove for the exhaust pipe and installed the wall thimble. I attached the Duravent pipe to the wall thimble and ran the pipe through to the outside. One note: I could have installed this stove much closer to the corner (2″), but since both walls of the corner were outside walls, I was forced to have a 12″ pipe clearance from the inside corner and an 11″ clearance from the outside corner. After the pipe was installed, I put the stainless steel turbo vent cap on the outside end of the pipe (photo below).
After everything was installed properly I started up the first fire. What an amazing machine! The stove gets to a certain temperature and the fans kick in to blow warm air out into the room. Also, the exhaust is barely visible and not all that hot. I had the building inspector come over a few days later to give it a passing grade.
The stove manufacturer calls for an outside air vent if you have a smaller and especially well insulated home. We can actually feel the suction when we close the doors in the house, and being only 1150 square feet, I felt that an outside air vent would be a good idea. This takes the air from outside, burns it and sends it out the exhaust pipe, without using any air from inside the house. The kit for this is about $100. $100 I didn’t want to spend, plus, I enjoy making things myself.
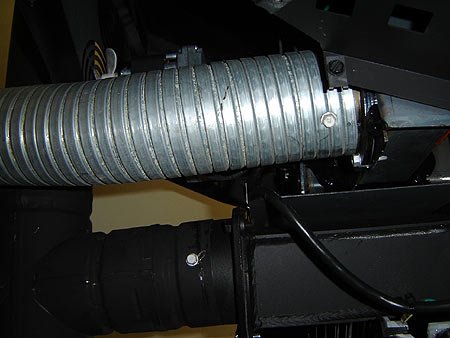
I decided that a piece of automotive exhaust flex pipe with a 2 3/4 inside diameter pipe would fit perfectly on the intake adapter.
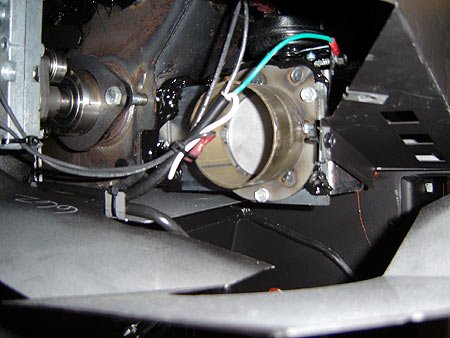
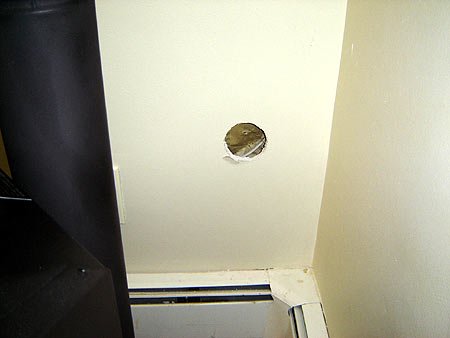
I cut a hole in the sheetrock so the pipe would just fit through. I then cut a similar hole outside through the vinyl siding and plywood.
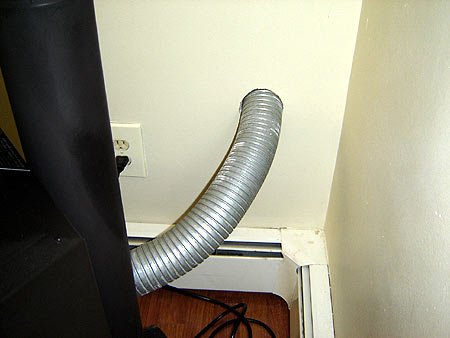
Then, I secured the flex pipe to the intake adapter using a sheet metal screw.
After that was set, I went outside the cut off the excess pipe and to attach the custom cover I purchased (dryer vent cover). From the photos below, you can see the exhaust vent (top) as well as the intake vent (bottom). All I have to do now is caulk the sides of the intake vent on the outside and paint and caulk the pipe on the inside and I will be ready for nice cold winter air to be pulled into the stove for clean, efficient burning.
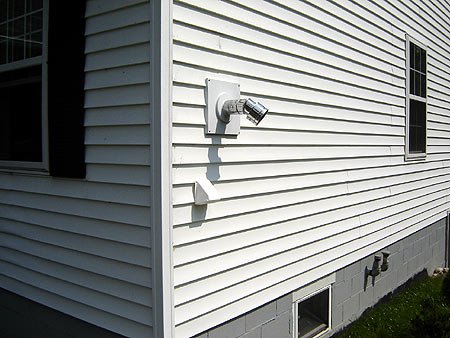
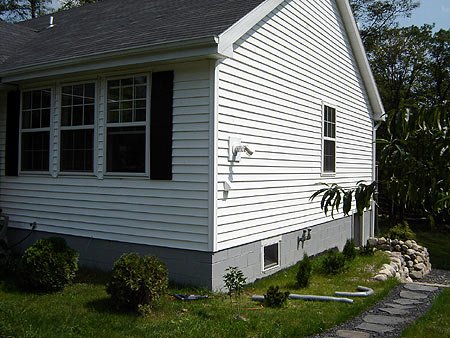
One last note, you can see that I planted a few Arborvitae and a nice little Lilac bush in front and on the side of the vents. In a few years, they will grow large enough to cover the corner of the house and the vent covers.
Comments for the Harman P38 Pellet Stove Installation
I wrote this post a few years ago and received tons of comments. I'll list them below. If you have your own comment or question, please share that too!Paul Freeman: Hi,
I’m installing a Harman Pellet stove and see that the manual says I need 5″ vent clearance from corners. But I assume this is for interior walls.
I did see the reference to the 11 and 12 inch clearance but was confused by the 5″ reference.
Guess the 11 and 12 inch clearence is the way to go for uotside wall?
Paul
Phoenix1: First of all…good for you! You are going to love your new stove.
I just took a look at my instructions again. For my stove, the clearance from an outside corner is 11″ and an inside corner is 12″. Remember that all stove instructions are different and the inspector goes by what your manual says, so don’t take these numbers as a rule…yours may be different. If you have any questions, call the inspector and ask them to go over it with you. I actually sat down with the guy.
I measured from the corners to the center of the pipe. I also gave a little extra distance just to be sure.
Good luck and let me know how it goes.
Paul Freeman: Hi,
Installation started yesterday. Holes cut, dry fit of all pieces. Plan to finish today.
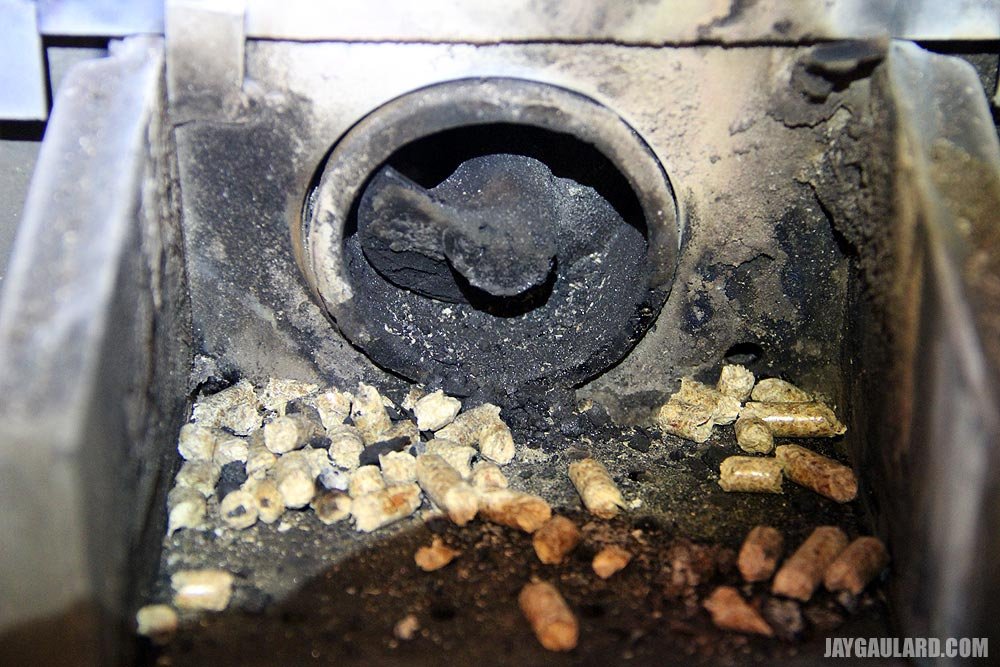
One question — I have one part that is not described in the manual or on Harman’s site. It’s called a FLAME GUIDE and has a part number 3-00-08534 and is listed on the enclosed packing list. It looks like it fits above the multi hole flame panel. It also has a round notch at the back which looks like it belongs back at the auger feed.
It’s 6 5/8″ wide 1/2″ thick and tapers back to 4″ and is 3 1/2″ deep. Sort of a trapazoid shape. I don’t remember seeing it in the dealer’s show model and they are closed today so I’ll have to wait until tomorrow to check with them.
Does your P38 have this part? I bet it’s common to the Harman line.
By the way my stove is the Harman Accentra.
Paul
Phoenix1: Yes, I have that part in my stove…if you notice, it is shaped similarly to the burn pot. The burn pot has the same trapazoid shape, if you look closely. This part had two grooves, one on either side. The grooves face down and the part fits above the burn pot to guide the flame away from the back wall. Fit the side walls of the burn pot into the grooves. The smaller tapered side of the piece goes towards the back of the stove while the larger tapered side of the piece faces you at the front. It just sits there and rests on top of the walls of the burn pot. Very simple install. Let me know if this helps.
PS – if you look really closely…right behind the top part of the flame, you will see the part you are talking about.
Paul Freeman: Found the spot! It fits perfect — It was late yesterday. Guess my eyes were closed!
Now to cut the outside wall thimble hole. Will wait til it warms up a bit — 31 degrees outside this morning.
The 60″ room sensor that plugs into the back of the stove (with supplied crimp connectors) has two wires — red and black which I assume are neg. and pos.
But on the back of the stove there is no indication which socket is for red and which is for black. Or maybe it does not matter. Manual electrical diagram does not indicate red or black.
And then to the draft test this week.
Phoenix1: Hi Paul,
I am not sure about the wiring in the back. Mine came with a few crimp connectors, but I have been using it without. Hmmm, makes me wonder. I will have to look into that.
One word of advice. If you have a few bends of exhaust pipe on the interior of your home, you might want to pick up a tube of high-temp silicone. The exhaust pipes claim to be leak free, but you can still smell the exhaust when the stove is running. You may need to seal up each joint, like I just finished today.
Paul Freeman: OK on the high-temp silicone caulking. I have that.
I made a dry fit on all piping today. Everything fits perfect. Got a little behind, though. Cutting the outside wall thimble hole took some time. Had to cut carefully through white cedar shingles without cracking them. Made out OK.
Phoenix1: I am looking forward to some final photos. I will do a post about it if you want.
Paul Freeman: Busy this week. Plan to finish installation this weekend. OK about the photos.
Zeta: Nice clean install. We have a St Croix Prescott that we installed ourselves in november 05. Ours is on the hearth in the living room so we installed a ss flex pipe liner right up the chimney topped with a ss cap secured to the top of the flue pipe. This stove rocks! 30F outside and we kick this thing on low, 1300 sq ft home stays 75 in immediate area, 70 in adjacent rooms. Enjoy your stove!
Phoenix1: We have a vaulted ceiling in our living room so we keep a floor fan on low blowing towards the ceiling. This keeps a constant temperature throughout the house.
Rich T: I bought a lopi pellet stove from a friend and it looks like the vent pipe he gave me is 4-1/2 inches in dia. ( it uses a 3 to whatever adaptor)Seems like it’s double walled and galvanized on the outside. I want to vent it directly into my existing wood burner masonary chimney. The vertical pipe is too long, it’s at least 36 and I need 32 or 33. If I angle the vertical pipe it fits, is this recommended?? If not, can you cut the pipe?? is it ok to run the pipe directly into the masonary chimney horizontally?
Thanks, Rich
Phoenix1: Before I forget, I recently saw that Home Depot has all types of pellet stove pipes for half the price of the small shops. Same brand too…so check it out.
Regarding your question…I don’t think anyone would have a problem with angling the pipe, but to be sure, ask your local building inspector. If you do this, make sure you seal the joints real good, because they leak and stinks up the place. Also, I probaly would not cut the double walled pipe. The whole reason it is double walled is because the air between the two walls asts as an insulator, similar to double panes windows. If you cut the pipe, there may be a negative effect. But then again, it may not. You can probably call any local dealer for an answer to that question or to find a custom length pipe.
J Brancato: With respect to the first photo in the blog, I am curious why the exhaust pipe makes a 90 degree bend then vertical before going out. I am wondering why you didn’t go straight out through the wall. Also, I am in process of installing a pellet stove and right where the exhaust vent goes, is a stud. Any thoughts on how to deal with it.
Phoenix1: Good question…the answer is because the directions (and code, which following the manufacturer’s directions) called for a 3 foot vertical section of the exhaust pipe. Also, even if there were no need for the vertical piece, I still wouldn’t be able to go straight out…the stove faces away from a corner. There would’ve been an angle somewhere.
To answer your other question, you are going to need to put a few angles in your exhaust or move the stove over a few inches.
John D: have installed a harman accentra and i sealed the exhaust (direct vent) to the max. no smoke smell but after about 2 months of runing i am getting a sawdust smell while stove is running and the dust level in our home has increased 100%. any ideas why the sawdust smell (similar to a dull blade cutting thru wood)? have tried 3 different premium pellets with the same result.
Ruth Anne: What happened to John D 2/28/07 the man with the sawdust
smell and dust?
Rabby: Very informative blog, thanks. Winter is now approaching and I am thinking of installing a pellet stove myself. Thanks again.
Justin: just bought a p38 and a harman advanced ,i was hoping to go straight out of the house with the vent pipe..do these stoves need to vent ??? it wasnt to clear in the owners manuals..any help out there..thanks
Phoenix1: The instructions that I received with the stove said to either go up about 3 feet with a vertical pipe inside the house or outside the house. So you have 2 choices…go straight out the house and then up 3 feet or go up 3 feet inside the house and then straight through the wall. This will give you the proper venting in case the power goes out.
Justin: i know they have blowers. they dealer told me i could go straight out. but you're right, better be safe then sorry.thanks
Phoenix1: It really doesn’t matter what the dealer tells you. When you have the stove installation inspected by the code enforcement officer of your town, they will inspect based on the manufacturer’s instructions.
D. Hooker: I find this comment amusing.
“” advises to shop at Home Depot to save money on vent pipe but later says to go see the “local dealer” for advice. If you know exactly what you want and what you are doing — great. Unfortunately, most people do not. If you can find a big box employee who is willing to give you more than a moment of time, it is unlikely they will be able to provide expert advice on sales or install of a pellet stove.
From my experience, you might (and might not) save a few bucks on materials shopping at the Depot. On the other hand, you could end up costing yourself a lot of grief and extra time due to inadequate materials and hidden pitfalls you were not expecting. You may also end up having to re-do the job later with proper advice. If the customer purchases pipe from the Depot, why would the “small stove shop” want to help?? Save yourself the headache. Go to the specialty fireplace shop first. They have the knowledge and experience to help you do it right the first time.
Phoenix1: Thank you for the comment. I find yours amusing as well.
You may be right, the local dealer may offer some advice that you can’t get elsewhere. Unfortunately, in my case, the only advice I was offered from a local dealer, when I wanted to get into details of installation, was the price for them to do the install. The local dealer wanted $600, I think.
I hear what you are saying, but after I spent all that money at a local dealer on the stove, pipe and pellets, I was a little agitated to see the same brand pipe at Home Depot for half the price. I think I was a little ripped off. Local dealers are great, but they have to show a little love with their prices, especially with extra parts, such as pipes and such.
One final word…I visited three “small stove shops” before I settled on one. The first one, I felt uneasy about, so I asked the building inspector about them. The building inspector told me to stay away at all costs because they have had many problems with them in the past. The advice the dealer gave is not near what code calls for. They just wanted to make the sale.
While you can find good product at both local dealers and big box stores, you should do your homework before dealing with either.
D. Hooker: Fair comment.
It may be that you just ended up dealing with a retailer that was over-pricing & overcharging. That is why it is so important to get quotes and to compare prices. As with any major home improvement project, my advice is get three quotes — preferably from contractors you already know or trust. Referrals from friends and neighbours are also a great way of finding good people.
Just know that there are stove & fireplace shops out there that can & will give you much more for your money providing you support them with your business. Keep in mind also, that the end price is just part of the equation. Quality & value often end up going hand-in-hand.
I work in this business from the distribtuion end now, but worked in retail & contracting many years ago. What often used to drive me nuts was customers who bought all of their materials from the big box or hardware store, then came to me for advice on how to put it in. Why would I want to do that — for goodwill? Pretty hard to pay your bills in this manner. Shouldn’t the party who sold the products take the responsibility for ensuring the homwowner has proper advice and support??
Contractors make considerable investments in training and tools to do the job right the first time. They also have the knowledge & experience. None of that matters though if they cannot make ends meet or earn a living. I think that is why some contractors are reluctant to share information or provide instruction to the do-it-yourselfer. Another issue that has really come into play too, is liability. If something goes wrong with the do-it-yourself install, who is to blame — the homeowner, or the helpful contractor that provided detailed install instructions?? In our litigous society — guess who?
Anyway, thanks for your dialogue on this topic.
P. Davis: I strongly agree that you should support your local stove shop whenever possible (and in most cases, other local businesses as well). You will get far more support and assistance from the little guy than you ever will from the big box store. And you’ll find that they usually know alot more about the subject. I bought my Harmon (also a P-38+) at StoveKeepers in Amherst, N.H. I paid a fair price for the stove, and if I could have saved $150, I’m not that concerned. I’ll consider the knowledgable advice and friendly service of my stove shop well worth it.
Julie: We have a Harmon on order but are not clear on the specs. Can you give us some information on this. The stove is going in a room with windows all around. It will sit in one of the corners. The sills are 18″ from the floor. Not much room from the window to the corner. We don’t want to go through the roof but a lot of the pictures I see are through the roof. Is this the best and safest way to set up? Appreciate any help. Thanks; Julie C
Phoenix1: You would have to look in the owner’s manual for your particular model.
The building inspector usually goes by what it says in the manual. You may need to be creative with your exhaust vent while staying legal.
Also, be sure to call your home insurance company after you are done with the install to let them know you installed the stove.
Jackie: Those are nice stoves. Couple things that I would like to mention is that you may want to rethink the thing about the shrubs growing up and blocking the exhaust vent. The install manuals have clearance requirements for combustibles on the exhaust pipe exit. If the shrubs grow up and cover the exhaust then you are not within spec and more importantly can be creating a potential hazard. Also, I’ve seen some pics of homes that eventually get a soot buildup on the exterior of the house with this type of installation.
For anyone who has installation or stove operation questions, the above linked forum is a great place to start. I have no affiliation with the place other than being a member there for the past two years.
Phoenix1: Yes, I hear what you are saying regarding this issue. The above installation met all guidelines presented in the stove’s manual. Also, I have been running this stove for one and a half seasons now and have no soot on the side of the house. As far as I can tell, this is the most non-invasive setup possible.
Also, the photo may be a bit deceiving…the shrub is a good distance away from the exhaust vent, yet close enough to cover up the ugliness of it.
PS – We have the entire house pressure washed each summer to keep the siding clean.
John: I am wondering about how you installed your wall thimble, I am stuck with my install. What brand pipe did you use, my problem is how do you make the install look clean with using vinyl siding? Any help would be helpful.
Phoenix1: Are you having trouble with the installation itself or just making it look good? I painted mine white (from the metal look) and used caulk to fill in any openings from the vinyl siding. It isn’t perfect, but the caulk does help by blocking the wind and rain. Otherwise, with the regular install, trace your circle and start cutting.
Peggy: Excellent info and photos. We are planning to install a Harman stove (haven’t decided yet between the P61A or the XXV) but it will be very similar to your installation. We originally planned to go straight out the wall, but our electric circuit will be in the way. We’re now thinking we’ll go up and out like yours. Do you happen to know if there are decorative plates available for the inside, rather than the big black square? Also, my husband is currently agonizing over how to install the exterior wall thimble. Did you cut your vinyl siding, or does the plate just sit on top?
Phoenix1: One thing I wish I had on this stove is the auto light feature. Next time for sure. Just make sure you get that.
This pipe layout was the most unobtrusive one I could come up with. Like you, I care what things look like. When I was purchasing this stove, I asked questions about making the piping look better and people just gave me blank stares. We live kind of “out there” so they really have no clue.
I am sure there are things you can do to spruce up the inside so you don’t get the industrial look. Also, the inside pipe doesn’t need to go up the full 3 feet. You can hide the inside pipe by going up 1 foot and then another 2 feet on the outside if the area is hidden. That way, the thimble (black square) is hidden by the stove on the inside.
The thimble is about a 10 inch circle attached to the square. Trace the circle on the inside of the wall and outside on the vinyl siding and cut. Just make sure you are in between beams and wires. After I pushed the thimble through the wall, I used caulk (same color as the siding) to fill in all those big gaps in the vinyl siding. If you do it right, it will look pretty good. Then, plant a tree about 10 feet away to hide the exhaust pipe.
Peggy: Yes, both models we’re considering have the auto light.
If I understand correctly, the circle part of the thimble goes through the wall (cuts through the siding) and the square piece sits on top of the siding? Ours will be on the back of the house, so not really worried about hiding it, just want it to look neat.
Phoenix1: Yes, you are right. Do a google image search for “pellet stove thimble” and look at the first result. That’s a thimble. Is pretty simple.
Also, if the outside is out of view, then you want the majority of piping on the outside. A 1 foot rise on the inside is fine as long as the total rise is 3 feet. Just make sure you follow the manual.
Charles: If the fuel prices stay where they are and the wood pellet mills up production, wood pellet stoves will become much higher in demand than they already are.
Wait until states like New York, Pennsylvania, Massachusetts and New Hampshire catch on, then were really going to see a burst in the wood pellet stove industry just like the outdoor wood furnace industry. In that respect I mean nobody will be able to get a unit for 6-12 weeks. Companies like Harman are already finding it hard to keep up production.
Joanne: Thank god someone posted information along with pictures on their pellet stove. I purchased 2 harman stoves early summer at a great price. The install was free, since I purchased at an off season. We are getting ready for the installation on 1 stove, I just want to know if everyone is installing their stove in the corner because they have to or because that is a better place for them. I can do either or, my wall is about 17 feet long, I dont know if it’ll look stupid on such a large space. Do you think adding other furniture around it, with enough clearance would dress it up? This is my formal living room, I will have to move my couch over to another wall in front of 2 windows, my home is a colonial style and the wall that the stove will go on is on the side of the house. Does anyone have suggestions? Thank you all for the information!
Matt: Joanne, It doesn't matter where you put your stoves, but what you have to keep in mind is that if you direct vent your stove with no outside air you have to be 4 feet for a operable window or door. if you us outside air which usually cost about $100.00 more for the install you can be 18″ for a openable door or window…
Rob: Just fired up my new Harman Accentra-2 pellet stove. There’s a “chemically/burning” smell coming from the stove. I’ve got the recommended hard pellets being burned. No smoke; and the stove was professionally installed by the dealer. Should I just assume the smell is associated with it being a brand new stove–and that the smell will go away soon?
Phoenix1: Funny you mention that. I am having the same issue with our new St. Croix (we moved into a new house). I thought the smell was coming from the pipes in the back, so I sealed them with high temp silicone. That didn’t reduce the smell at all, but I did stick my nose towards the back of the stove when it was running and smelled nothing.
The smell is coming from the air that goes through the blower. I think it is getting less and less as the machine runs. It is most likely burning some paint off or something.
You can try smelling the seams of your exhaust pipe and if there is any leaking, you will know it. Then, if there is, go grab some high temp silicone.
Jackie: Rob – all stoves require a “burn in” for the stove paint to cure. Usually it’s best to burn on a higher setting for the first burn so the paint cures the quickest. During this time, you will smell the paint curing, sometimes it’s subtle sometimes rather strong. I’d recommend opening the windows and letting the stove burn on a high setting for 3 or 4 hours.
Some dealers will offer to do a pre-burn for the customer if the dealer will be installing the stove. Newbies should ask about this if they don’t want to deal with doing the burn in.
Larry Mandeville: Rob,
All new stoves have that smell,until it gets
used for a little while.its the black paint
being seasoned to the heat,Best if you can
crank up stove on a nice day and open doors/windows.It still will smell a little bit
for a few weeks until fully broken in.
see ya—Larry
Pellet Stoves Ireland: You supply lots of great information in here and if any of your readers are in Ireland, we can help them out on the ground with their wood pellet stoves.
We can provide Free Site Surveys and professional installations at Kedco.
Tony: Good article, very on the money, wish I’d read before installing my own multi fuel stove.
Joe: first off excellent write up. what was used to cut through the vinyl siding?
thank you.
Pellet Mill: Heating with pellets – not only nature’s sake!
One of the advantages of heating with pellets is certainly the idea of environmental,Actually, the combustion of wood pellets carbon dioxide (CO2) is released, each tree has absorbed during its growth. Exactly this tree would not be further processed into fuel, it would release during his rotting as much carbon dioxide. For this reason, modern pellet work CO2-neutral and thus contribute actively to climate protection.
Brenda: Hi — we just got a P68 and installed and went to do our first fire but there was an issue. I know this is a few years old, but would you be willing to answer a question or two. Please email me if you would. Thank you.
Dan Russell: I had my p38 for going on its 4th season. I gave it the first season to burn in but I am still getting that “smoke” smell. I tried putting some of that stove take around all the joints in the pipe but that doesn’t help. I have caulked “high temp” around the inside and outside where the pipe comes in the house. The smoke smell is still there, I even went from a small vent outside to a tall one having the exhaust outlet higher up. Can anyone help me, my daughter in law got a headache over the holidays and said it smelled. I checked the rope around the main and bottom openings and they are good.
Thanks,
Dan
Davis Pipe Cleanout: I won’t be able to do what you did. I’m so bad at following instructions. But you are really one of those people who knows what to do with tools. Me, I’m just one of those who can easily dial a phone and talk to someone to come out and install the stove for me. LOL.
Robby: great blog….my question is to the first pic on top page….harman p38 in the corner..I have this stove and also going to install just the same way….do you have a tee from back of stove? then a 3′ pipe or a 2′ & 1′ piece to the 90…..can you send me pics?….thanks robby…………

