EmeraldHike
Member
- Joined
- May 10, 2021
- Messages
- 133
- Reaction Score
- 0
- Points
- 21
- #1
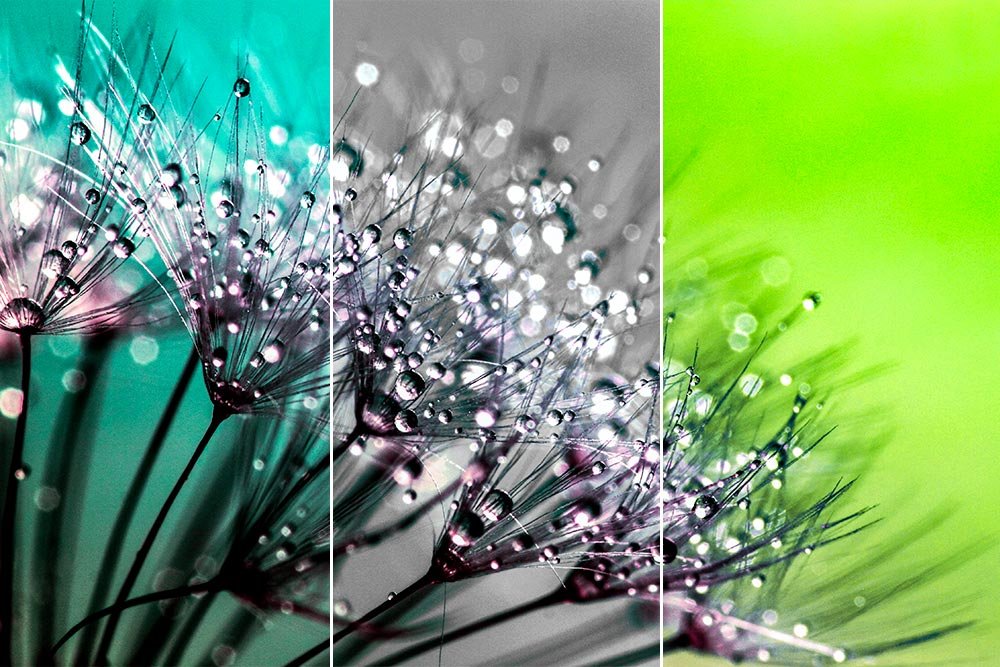
The key with working in Adobe Photoshop is to achieve your goals with the utmost accuracy, while maintaining a high degree of simplicity. Any time you can accomplish this is a good day. And if you can do it quickly, even better. The issue most of us have is that we oftentimes don’t know how to use, or aren’t familiar with, many of the time and headache saving tools and features Photoshop has to offer. In most cases though, becoming familiar with how to harness the power of Photoshop is easier than we think.
In today’s post, I’m going to walk through a project where I’ll change the background color of a photo while using nothing more than a few relatively basic tools. I’ll show you what the original photo looks like and then demonstrate exactly how to go about making the changes I’m after. I’ll even throw in a few links that you can follow that will let you study up on the more intricate details of the tools involved.
Original Photo
Below is the original photo of the water droplets on the flowers. I don’t only want you to look at the color of the background – I also want you to notice the edges of the stems in the rear part of the photo. They’re quite blurry. And not only are the stems blurry, but the actual rear most flowers are blurry as well. If I attempted to take the traditional selection route, I’d have a tough time because of that. In this case, the Quick Selection Tool and Refine Edge feature wouldn’t be the best methods to take advantage of. Luckily, there’s something else that can help us with this “color mixed with object” blur issue. It’s called Color Range.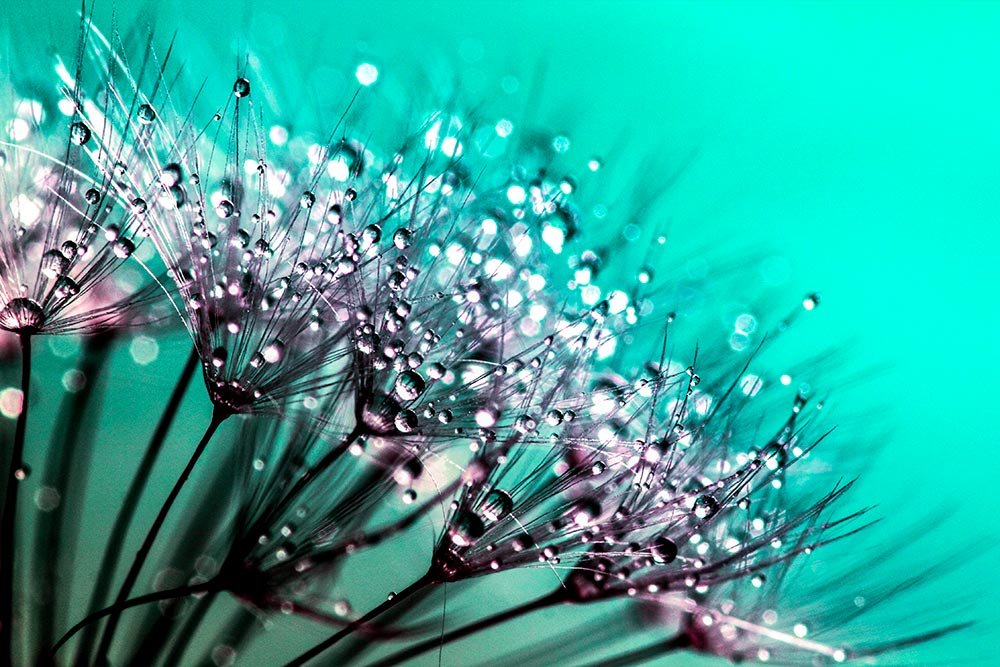
By the way, if you don’t recognize the Quick Selection Tool or the Refine Edge feature, please take a look at this post where I explain everything:
Selecting Objects & Refining Edges in Adobe Photoshop
Creating an Adjustment Layer
The first task I’m going to take care of is to create an adjustment layer. I’ll choose the Hue/Saturation adjustment layer from the Adjustments panel that’s directly above the Layers panel. The reason I’m going with Hue/Saturation is because that will give me the ability to change the color of the background.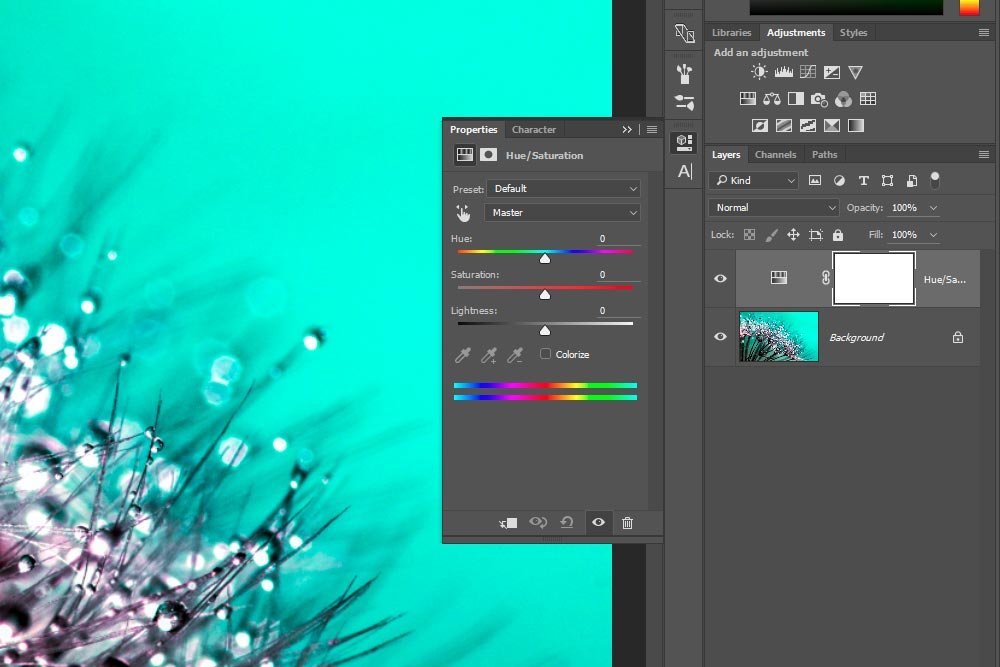
If you’ll notice the mask thumbnail in the Layers panel in the above screenshot, you’ll see that it’s completely white. This means that any adjustment I make with this new layer will affect the entire photo. Nothing will be held back. This is problematic because I’m not interested in altering the color of anything but the background of the photo. If I changed the color of the background and the color of the droplets and flowers changed as well, that wouldn’t be good.
To complete this project the way I want to complete it, I’ll need to follow an order of operations.
Adjusting the Hue of the Entire Photo
First, I’m going to push the Hue slider in the Properties panel of this adjustment layer to the left until I’m happy with the color of the photo’s background. I know that other areas of the photo will change color as well, but I’m not concerned with that right now.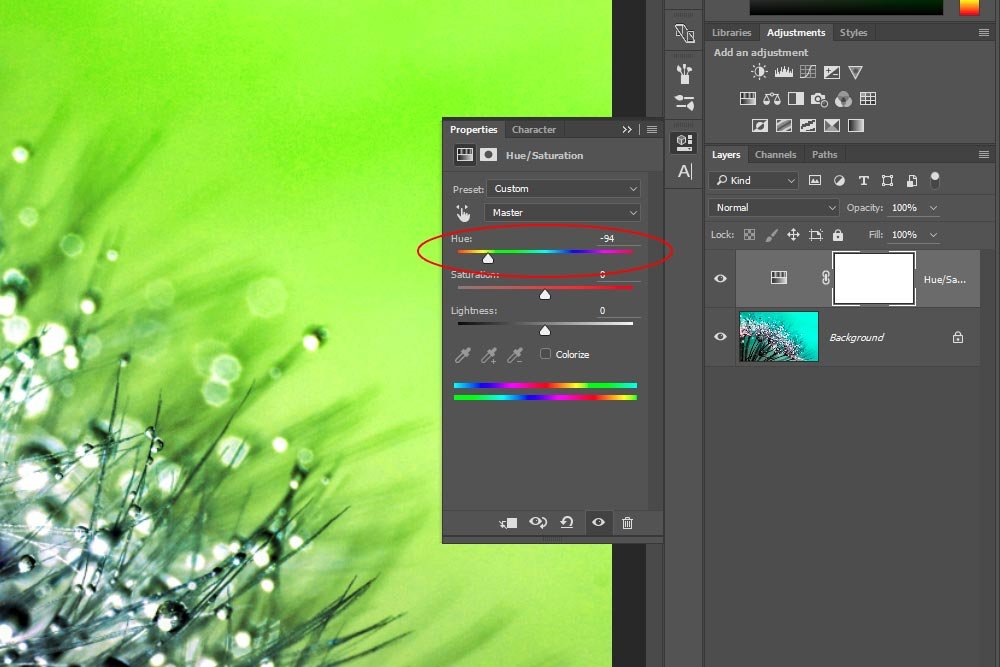
Notice how not only the background turned lime green, but how the highlights of the stems, water droplets and flowers changed as well. Now it’s time to bring them back to their original state.
Selecting via Color Range
This is a really neat feature that can help out a lot. In order for me to isolate the background from everything else in the photo, I’d like to select the background by color range. I talked about color range in a previous post, so if you’d like to take a look at that to get up to speed, please feel free.Changing Colors with Color Range Selection in Adobe Photoshop
In order to access the Color Range feature, I’ll click the Mask icon in the Properties panel of the Hue/Saturation adjustment layer.
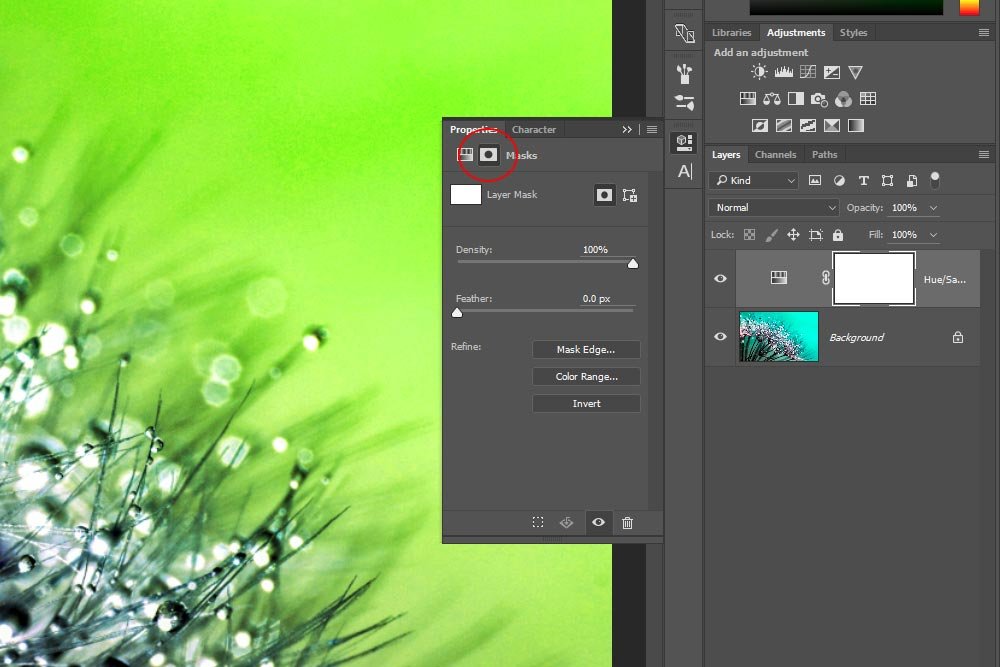
Once I do that, I can click the Color Range button in the Masks area of the Properties panel. This will make the Color Range dialog box appear.
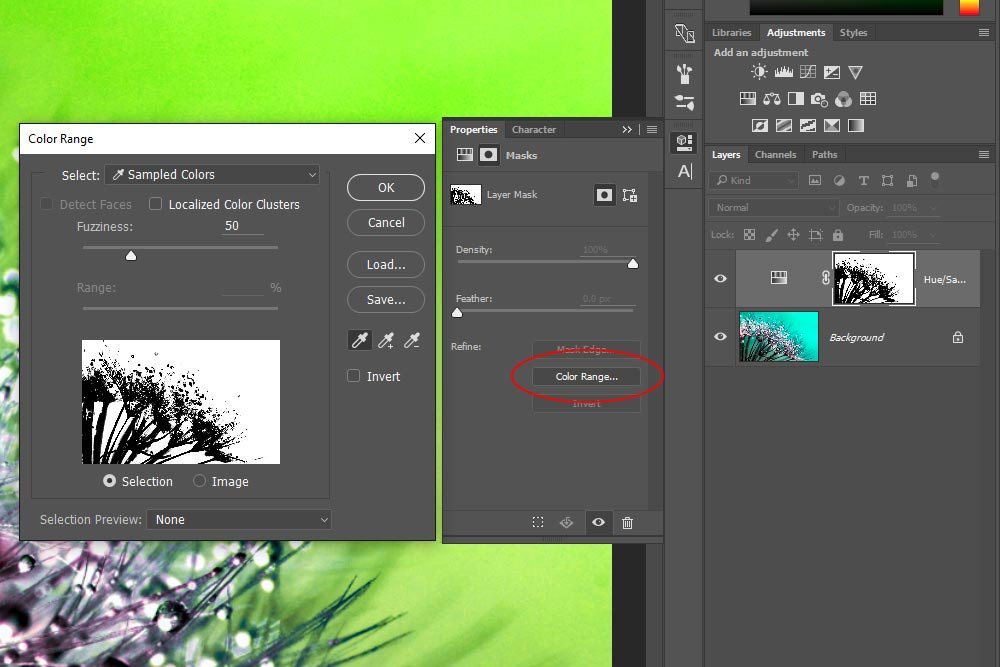
As you can see, a selection has already been made. I’m not sure if that’s what I want, so I’ll go ahead and make my own selection. I’ll keep the Sampled Colors option from the drop-down menu selected, I’ll uncheck the box for Localized Color Clusters and I’ll make my first selection in the upper right area of the photo with the dropper tool because that area is the largest and most uniform. Then, I’ll click on the Add to Sample dropper tool (center one with the little + sign) from the droppers under the Save button and continue clicking in all the green areas until I’m happy with the changes that have been made.
If I look at the mask, I can see that there are some distinct white areas which will be visible and some black areas that won’t be affected by the color change.
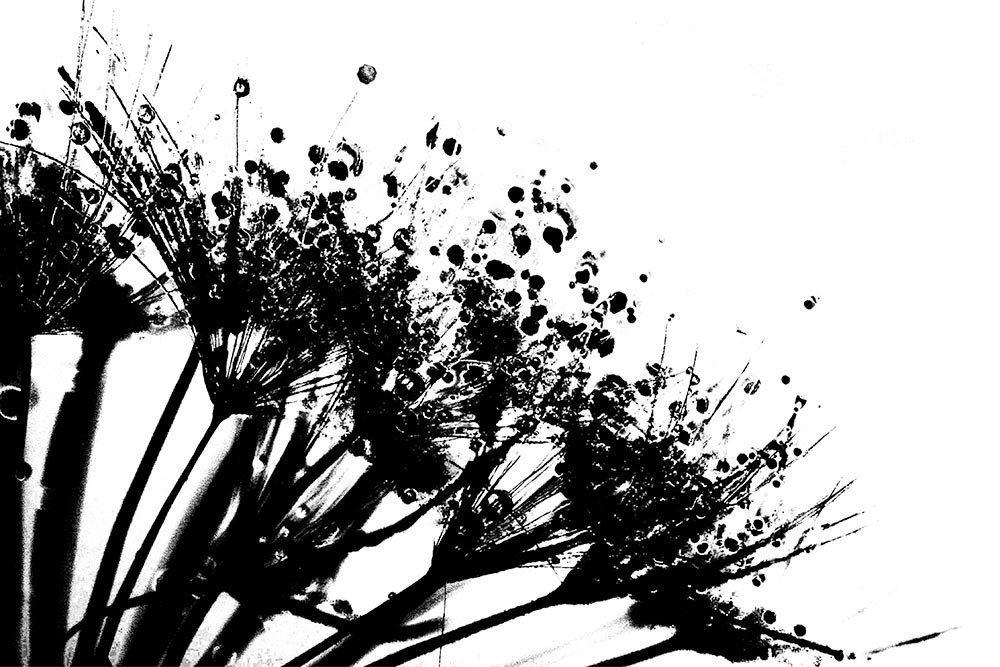
If you look at the above layer mask closely, you’ll see that the edges aren’t perfectly contrasted. That’s good and that’s the power behind selecting and masking via the Color Range feature.
Of course, I can stay inside this Property panel’s Mask area and play with the Density and Feather sliders to adjust the look, but I think I’m happy with the way things turned out.
The Final Image
Below is the final image. Please notice how the color of the background has been changed, while the highlights and hues of the plant objects have remained the same. Also notice how the gradients of all the colors are smooth – something that’s challenging to achieve using other methods.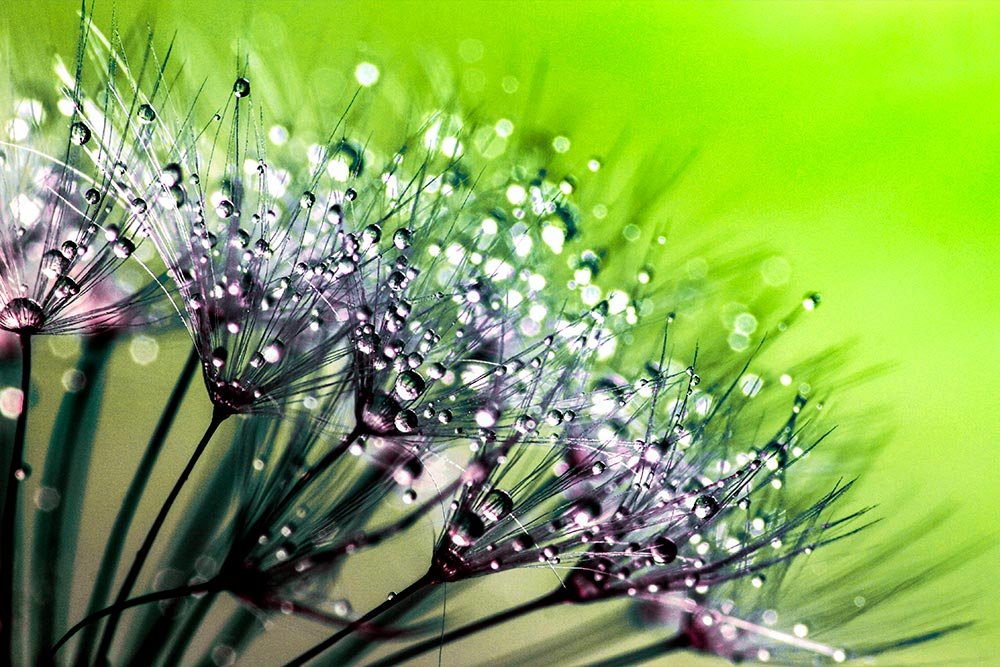
Bonus Tip
I’m not sure if you remember, but I already told you (in another post) that it’s possible to click and drag a mask from one adjustment layer to another. Basically, adjustment layers in Photoshop consist of two parts; the adjustment and a layer mask. While it’s possible to simply add an adjustment only to an image, it’s much more fun to set up a mask and then drag that mask around to different adjustment layers to see what happens. Let me show you what I’m talking about.By the way, the post I was referring to above, where I mentioned that you can drag a mask to another layer can be found here. If you visit that post, head down to the Moving the Mask section.
Anyway, we already know that we have a background layer, an adjustment layer and a mask (combined) in the project I’m working on. What I’d like to do is add another adjustment layer and delete the layer mask it comes with. I’ll go ahead with Black & White.
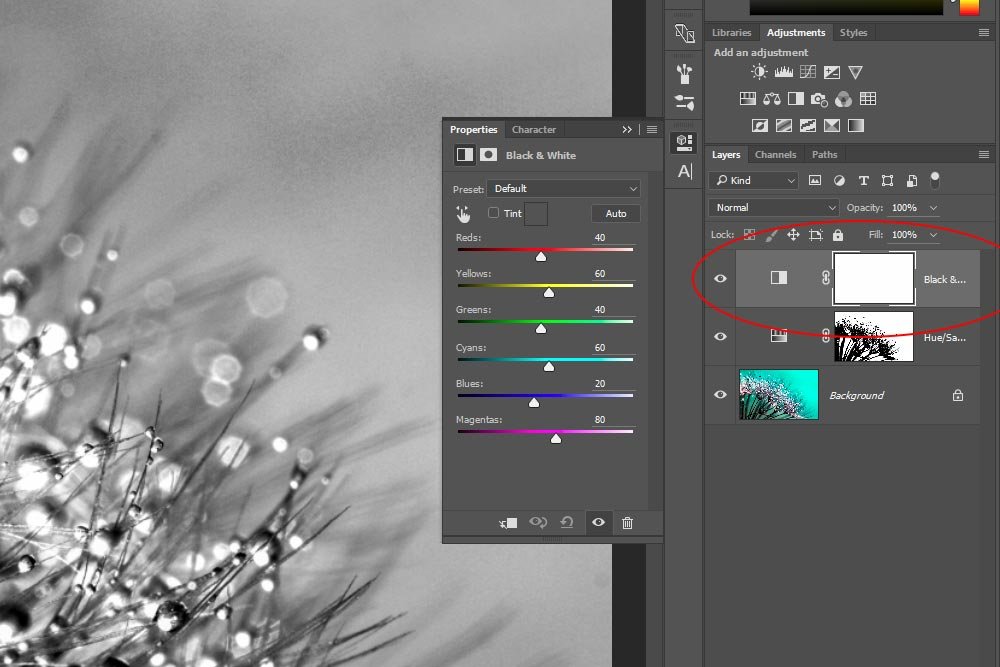
Currently, this new layer turns the entire image black and white. This is because the mask that’s attached to the layer is solid white, which reveals all of the adjustment. To hide some of the black and white, we can use the mask I already created – the one that currently resides in the first adjustment layer I created.
To accomplish this, I’ll click on the mask that’s sitting in the Black & White adjustment layer and drag it down to the trash can. Once I do this, I’ll see a small message that asks if I really want to do this. I’ll click Delete in the message box.
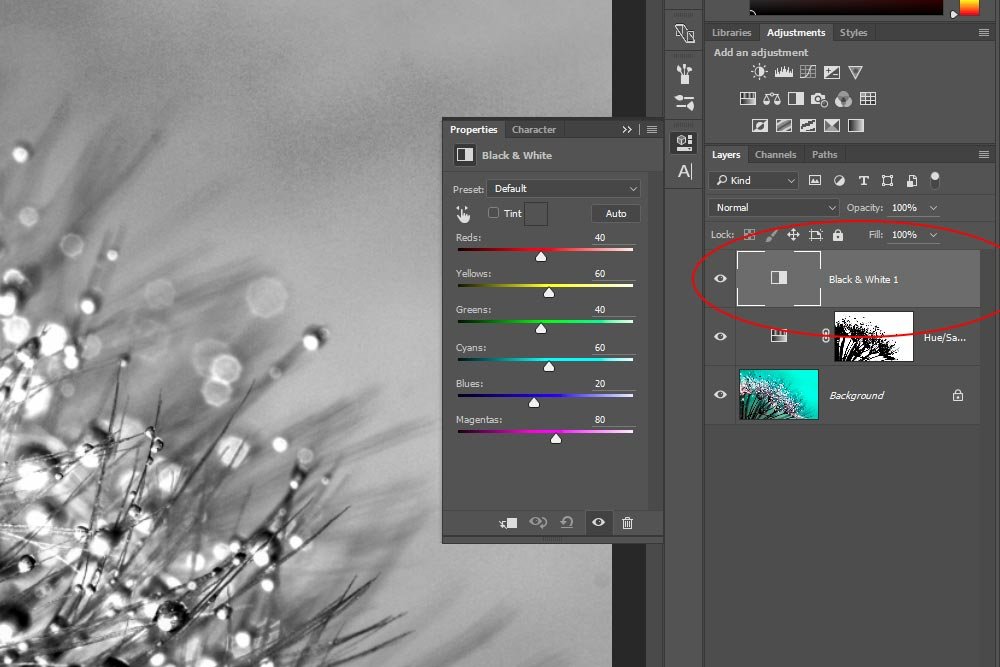
Now, all I need to do is click and drag the mask that’s sitting in the Hue/Saturation adjustment layer up to the Black & White adjustment layer and I’m all set.
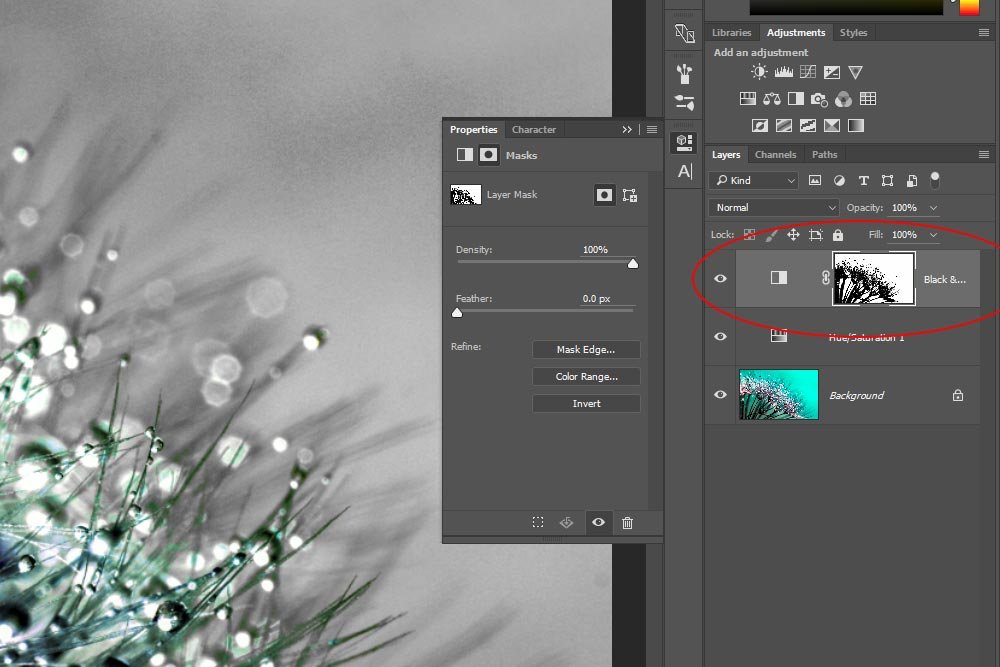
If you look at the layers and masks in the above screenshots closely, you’ll see that I switched things around. Now, we end up with another final photo that looks like this:
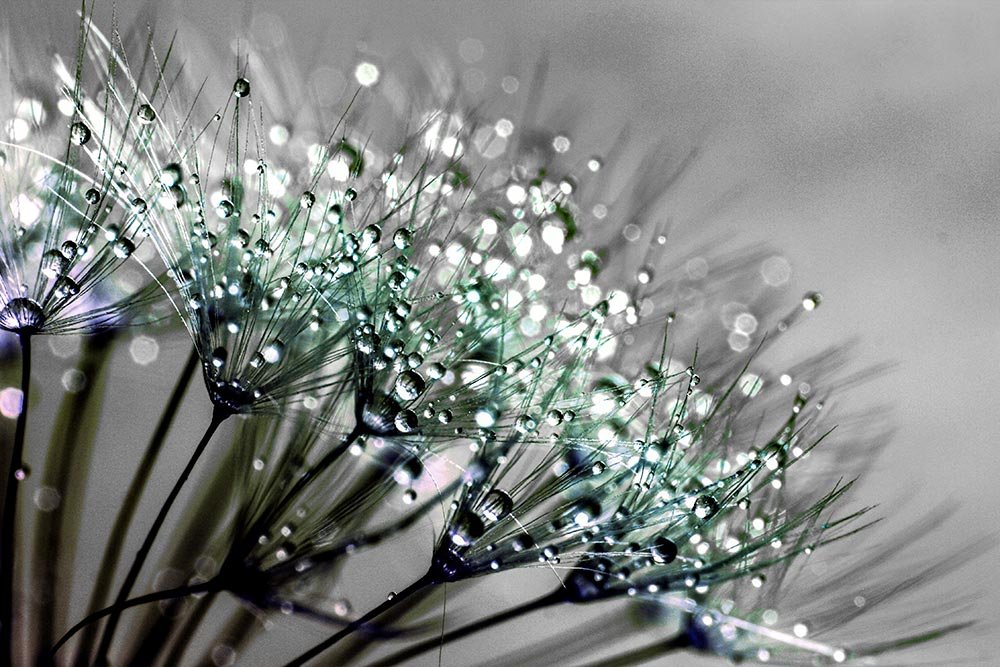
I’d say that’s fairly awesome.
