Newman
Member
- Joined
- May 11, 2021
- Messages
- 106
- Reaction Score
- 0
- Points
- 23
- #1
While doing a fair amount of heavy hauling, I seemed to have bent the axle of my brand new Polar HD1500 ATV trailer. This was extremely disappointing because I paid a lot of money for this trailer. I think it cost me around $425 with tax from Home Depot. I expected more from it, to be honest. Anyway, since I’m not one to pout about such things, I began thinking of a way to bend the axle back so it was once again straight. I discussed the problem with a few of my friends and we settled upon using some sort of rigid beam to attach the axle to and then using a car jack to bend the axle back. The only problem was, I didn’t think I had a beam that was rigid enough for something like this. I thought about using some sort of lumber, but then imagined that snapping in half mid-way though my jacking.
A few days ago, I remembered that I had an unused eight foot lally column sitting in my basement. If you aren’t aware, lally columns are very heavy duty and are very strong. They’re actually filled with concrete. One of them would be perfect for what I wanted to accomplish.
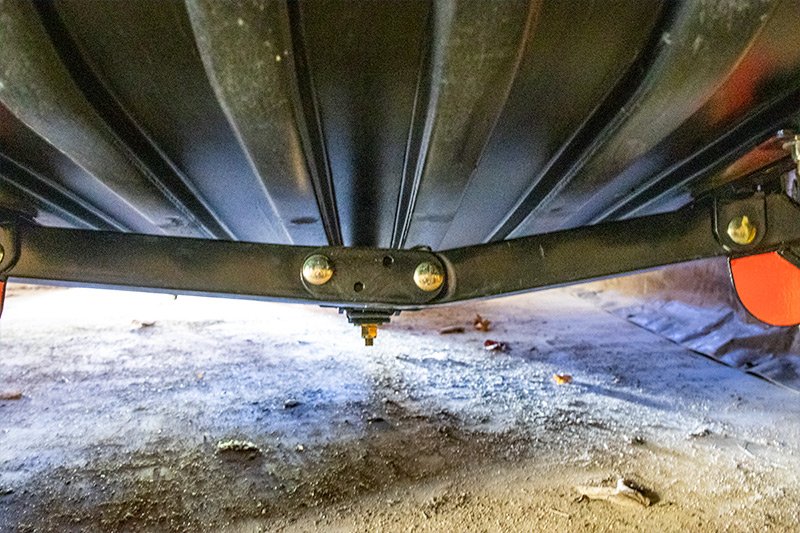
In the above image, you can see how the steel is wrinkled right above the bend. That means the axle is made from wicked thin metal. The bend is also situated where the holes in the axle are. That indicates two weak points.
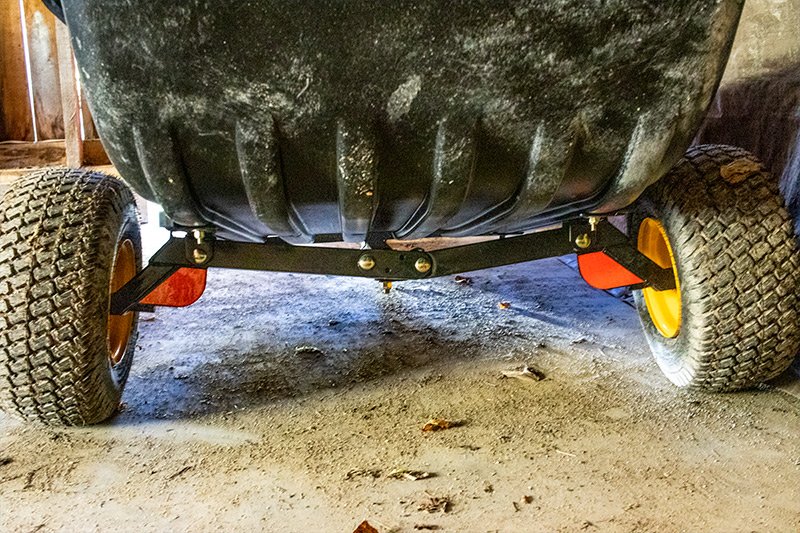
In this photo, you can see how flared out the wheel are. I began noticing this later in the day. And as I mentioned above, the hitch bar also had a slight bend in it as well. I fixed that too, but I didn’t take any photos of that.
Okay, down below I’ve got a few photos of the same exact thing, but from different angles. Our idea worked and I returned the axle to its original straightness. So, in case you’re dealing with a similar issue, you can straighten these things back to their original form. You’ll need to reinforce the steel tubing after that, but at least you can make them straight again.
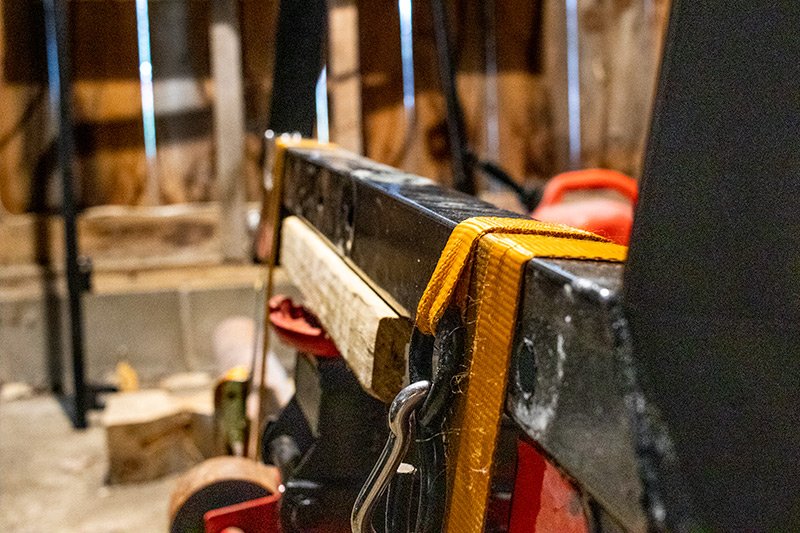
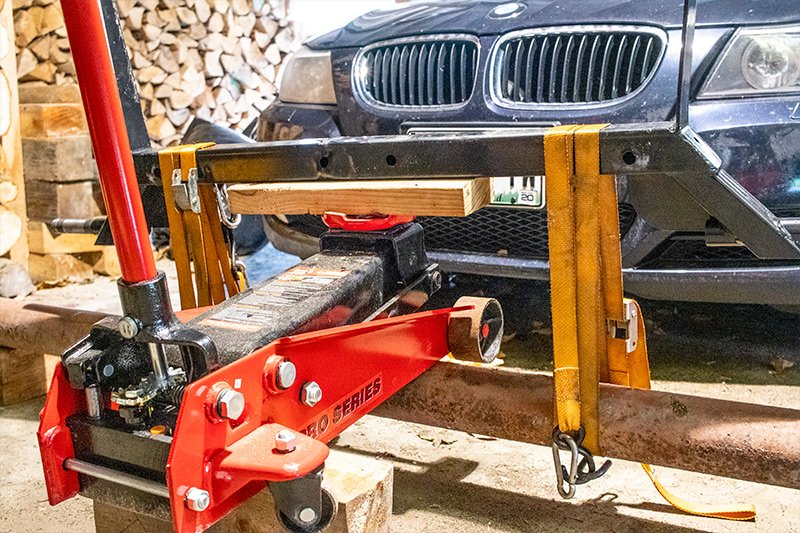
Check out the photos. This first one is probably the most clear. As you can see, the lally column is on the bottom and the axle is on top. I put the car floor jack in between and used a piece of 2×4 lumber to protect the metal. I didn’t want to make things worse.
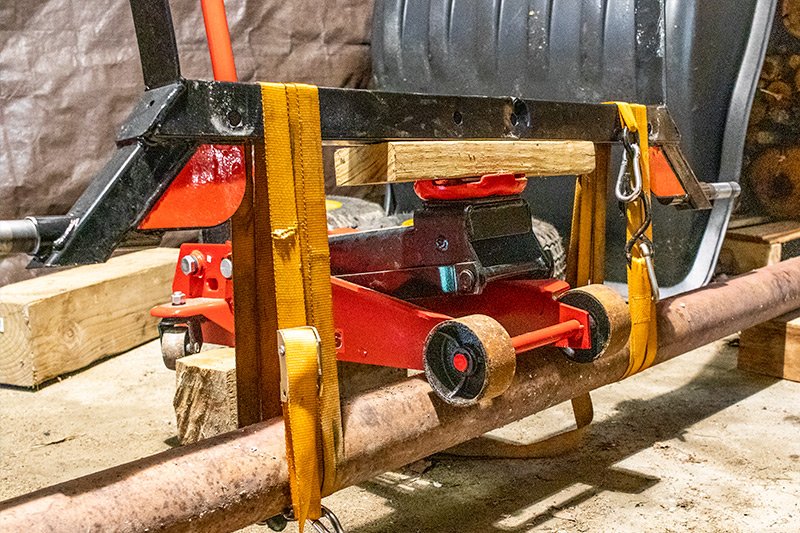
You can also see how I wrapped nylon tie-downs around the axle and the lally column multiple times to secure the axle in place. You should have seen me bouncing on the car jack. While it was easy going to start off with, as the tension mounted, the lally column began lifting from the floor. I had to step on that with one foot and then try to push the jack handle in a very awkward position.
Here’s another view.
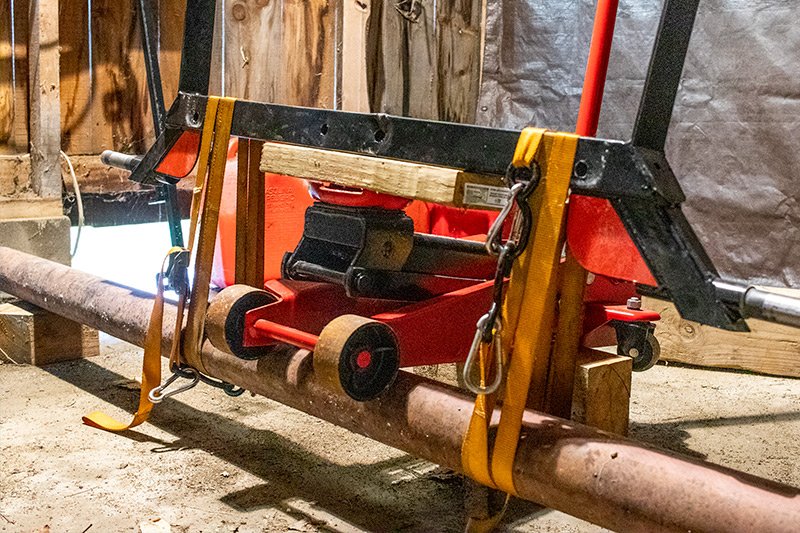
Here are two more angles.
As you can see, the axle is still a little beat up. Tomorrow I’ll be heading out to pick up two pieces of 2″x2″ tube steel (or c-channel) that’s 1/4″ thick. The first piece will be two feet long and I’ll bolt that to the bottom of the axle. The other piece will be four feet long and I’ll bolt that to the hitch bar to keep that straight in the future. I may go with 3/16″ if I feel that will be sufficient. I’ll need to take a look at the steel.
Also, the reason I’ll be using bolts as opposed to welding is because I’m concerned that something will bend in the future. If I weld the new tubing to the existing tubing and something bends, I won’t be able to remove the tubing to use on a new piece. This way, I can simply unbolt it. Trust me, I’ll be adding to this post below about all of this. You’ll see some beefy framing for this trailer. It’s at times like these I do wish I owned a blow torch and a welder though. Perhaps some day.
I have a decent amount of very good tools and I’m grateful to own them. They have helped me out on so many different occasions during so many different projects. There have been, however, times when I wish I owned even more tools. While I love using the tools I do have, they oftentimes aren’t equipped for the jobs I find myself getting involved in. This trailer axle support beam attachment is one such project. For this one, I sure could have used a drill press. I’ve got an awesome Dewalt hammer drill that I use for larger projects, but hand-holding a drill while stepping on two square tubes to keep them steady on the ground isn’t exactly a fertile environment for straight drilling. I thought I was drilling straight, but…well, you’ll see in the photos below.
Don’t get me wrong though, the tube I added to this axle is going to make it about 100 times stronger. I just wish I did a nicer job with the drilling. I hate knowing that there are crooked holes in something I worked on.
To acquire the square tubing I would need for this project, I visited an incredible nearby welding and steel fabrication business. It’s a steel fabricator’s playground. It’s a dream come true. I remember using my father’s welder when I was a kid to make all sorts of things and boy, I sure could have used a place like this. And a little bit of money, but we won’t talk about that. From this establishment, I purchased what they refer to as a “drop.” That’s a piece of steel that’s left over from another project. They have a bunch of this stuff and it’s handy because it saves time and money because the business doesn’t need to make any cuts to specific lengths. I did that myself and saved $5 per cut. I happen to have a tool for that.
I bought a six and a half foot long piece of steel tubing that’s two inches by two inches and one quarter inch thick. That’s a 6.5′ x 2″ x 2″ x 1/4″. It’s some pretty thick walled tubing. Take a look.
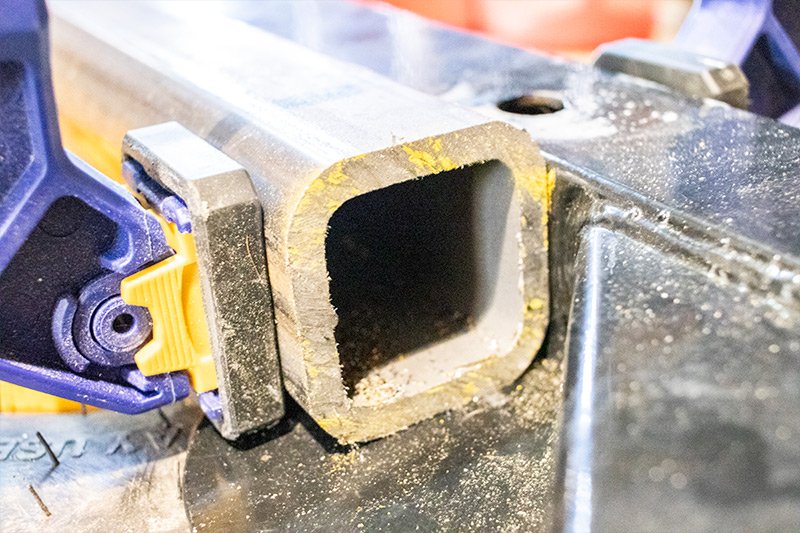
Here’s a bit of knowledge for you. Did you know that the thicker the walls of the tubing, the more rounded the outside corners? Yes, they can square off the corners of thin walled tubing a lot more than they can with the thicker walled stuff. Since this is 1/4″ thick the corners are pretty rounded.
For the axle, I cut a piece from the entire tube that measured about two and a half feet. Then, I sat it next to the axle to see how it fit.
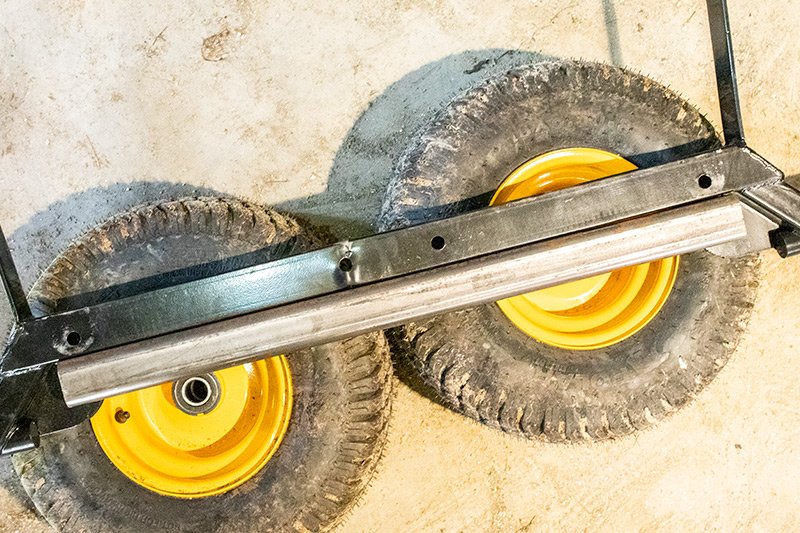
I’ll use the remaining four feet for the hitch bar, but that will come later on, after I fix this drilling issue.
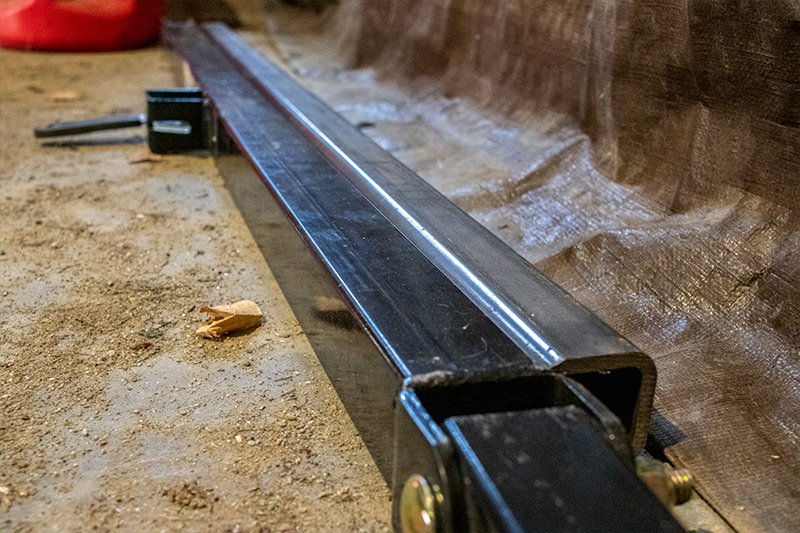
By the way, this piece of steel weighed in at 33 pounds and it cost around $42, just in case you’re interested in how much steel weighs and costs.
Since the trailer axle has two plates that were welded on it, I sat this additional square tubing on top of the plates, which made it off-center a bit. I didn’t mind that because those plates at least gave the tubing something to rest upon.
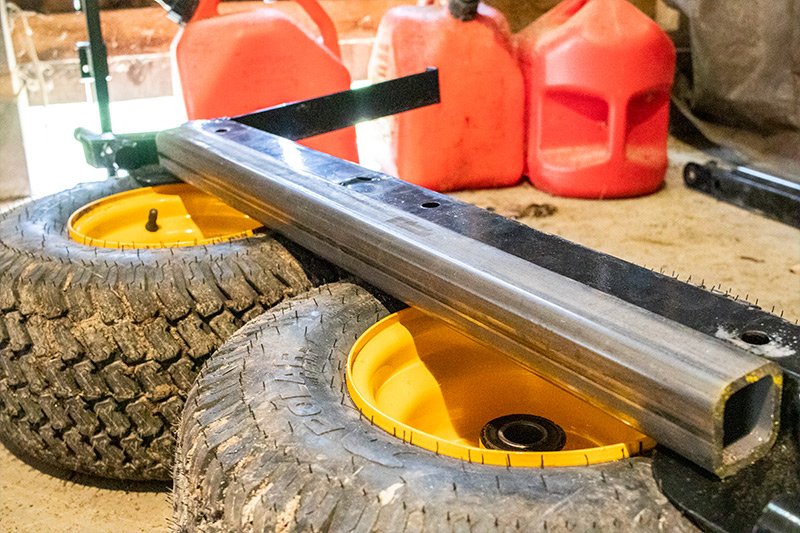
Once I was sure everything was aligned, I used my clamps to make sure the pieces stayed secure.
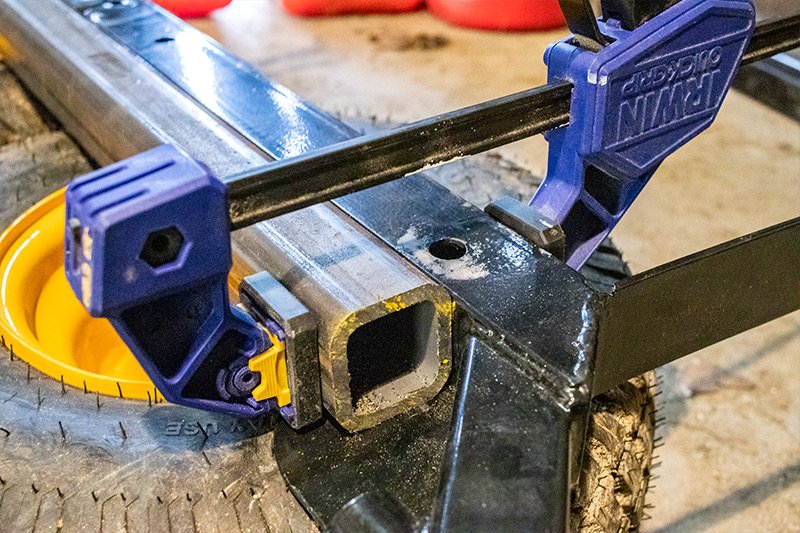
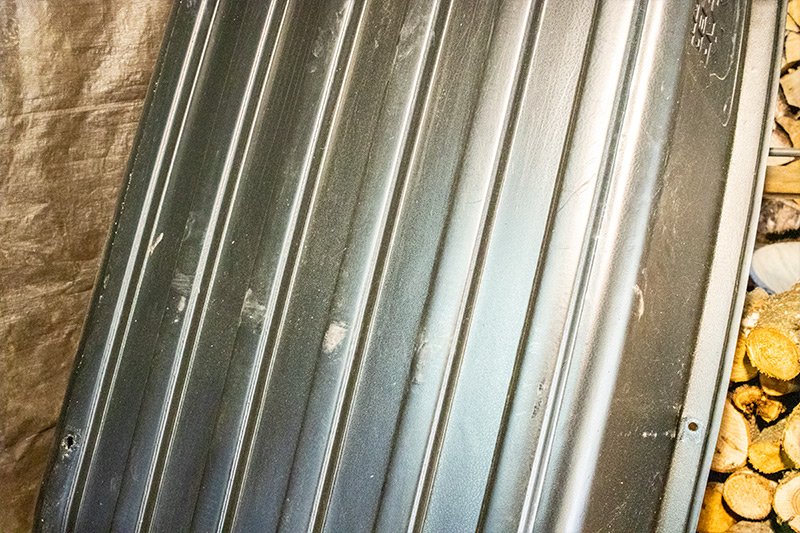
After that, I marked the tubing. I planned on drilling four holes that sat in between the ridges of the plastic tub. Since some of the ridges were high and others were low, I thought it would be a good idea to place the bolt heads in the high ones so they didn’t touch anything and eventually wear the plastic away and form a hole.
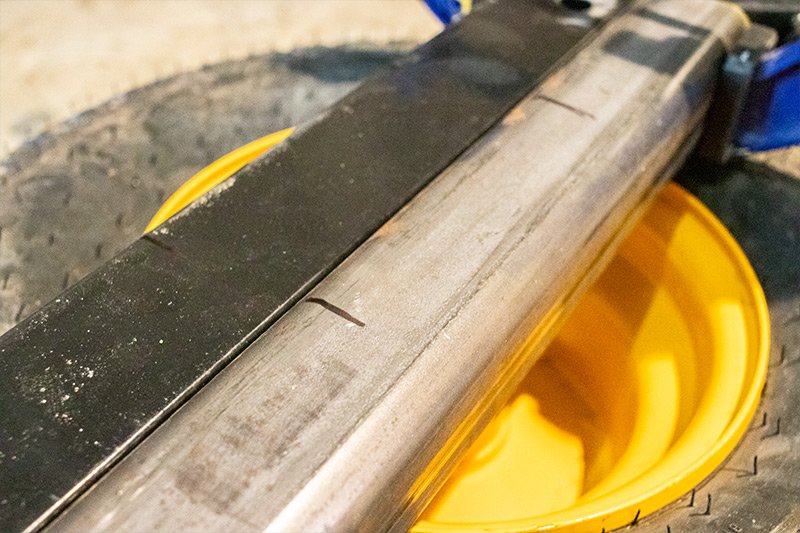
And then my friends, I drilled. I began with small holes and went all the way up to half inch.
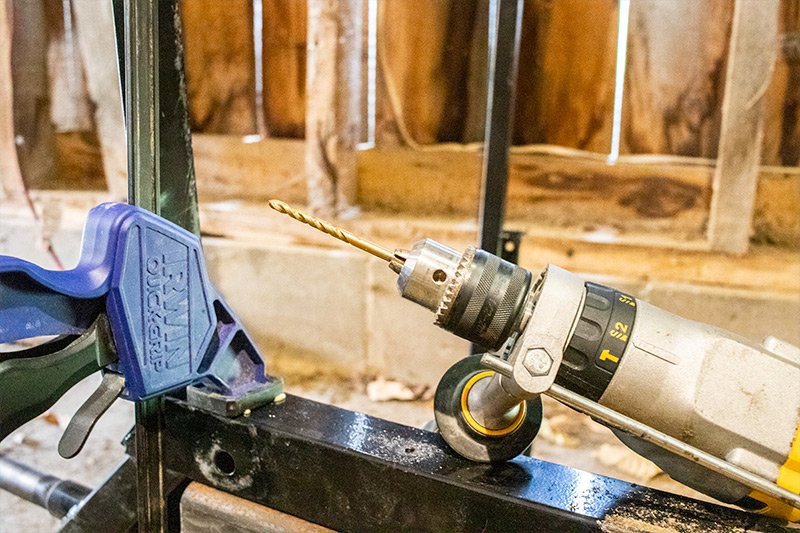
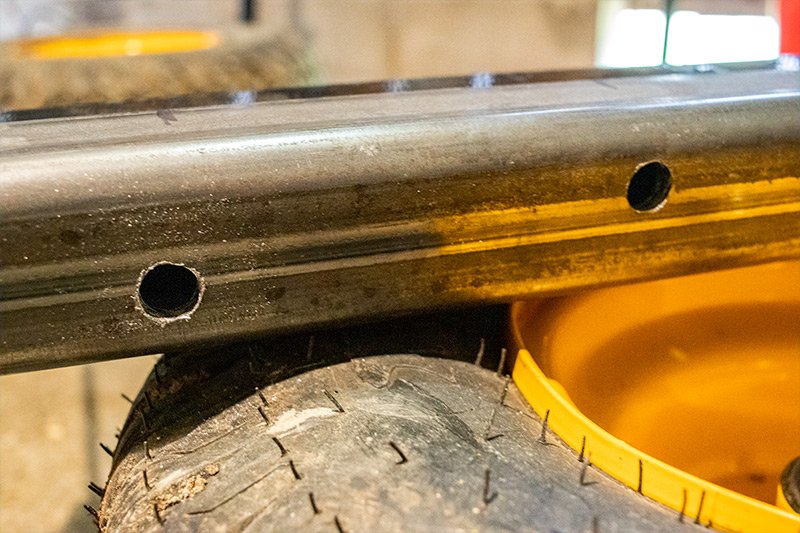
Things started off quite pleasantly, but turned ugly as I continued on. The smaller drill bits flew right through the steel. It wasn’t until the larger 1/2″ bit that I had to use some muscle to get the job done. If you aren’t aware, when drilling in steel, you need to use oil, a lot of pressure on the bit and a slow drilling speed. Did I follow this advice? No, and I wore out my 1/2″ bit in the process. I almost couldn’t finish the job because of that. My speed was too fast, which heated up and dulled the bit as a result. And I didn’t use any oil. This is why I say that I’d like a drill press. So I can slow down and focus when I work on these types of projects. Because I had to keep the pipes steady on one of the trailer tires while holding them with my foot, I just wanted to finish things up fast. I wasn’t thinking and suffered because of it. Remember, oil, pressure and a slow speed when drilling.
Oh well. The holes are there, but they sort of follow different directions. I began even on top, in a straight line, but as I drilled through four walls of two tubes, I got lost somewhere.
Anyway, my grade 8 bolts arrived today. I bought these for a lot less online than I would have in person at the hardware store. The local place wanted about three times as much. I bought 1/2″ bolts that are five inches long. I also got some washers and nuts. Strong stuff. Also, I was able to buy in bulk, so it was cheaper. I got 25 bolts, 50 washers and 50 nuts.
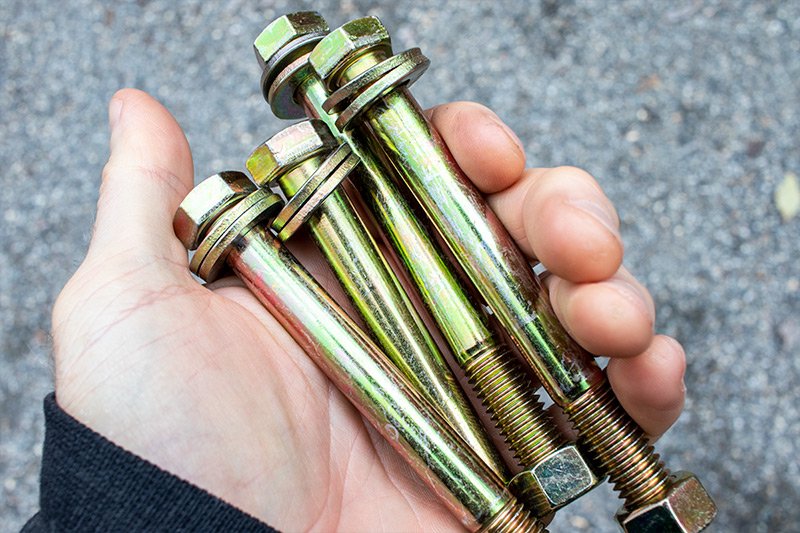
I was excited to slide the bolts into their new homes.
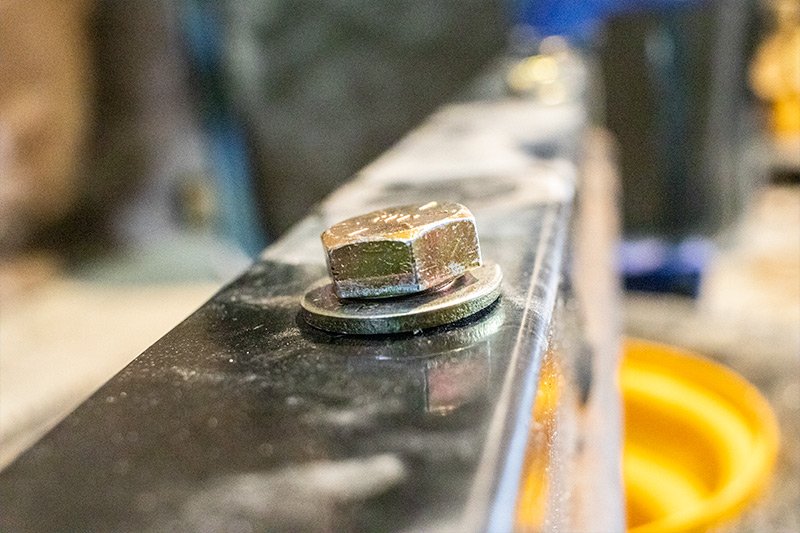
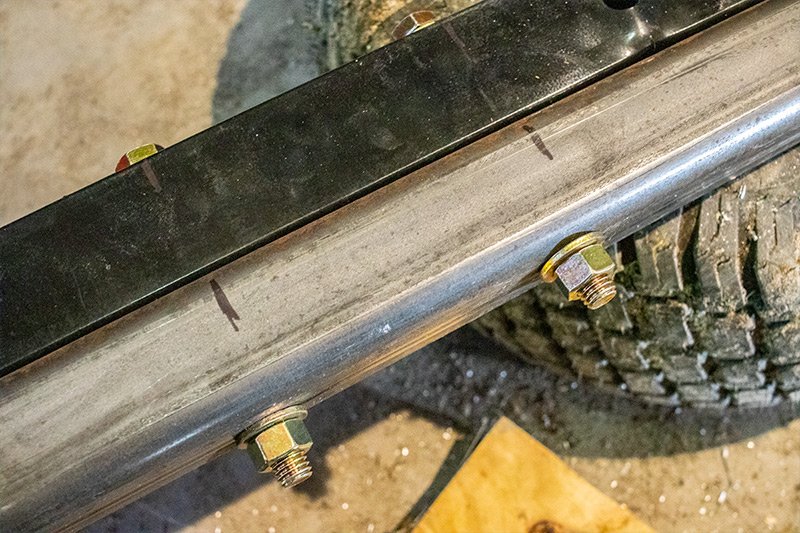
I haven’t tightened the nuts up yet, but I’ll do that in a few minutes. I am going to add some thread lock so they don’t come loose while I’m using the trailer. I also need to put the trailer back together so I can get back to work.
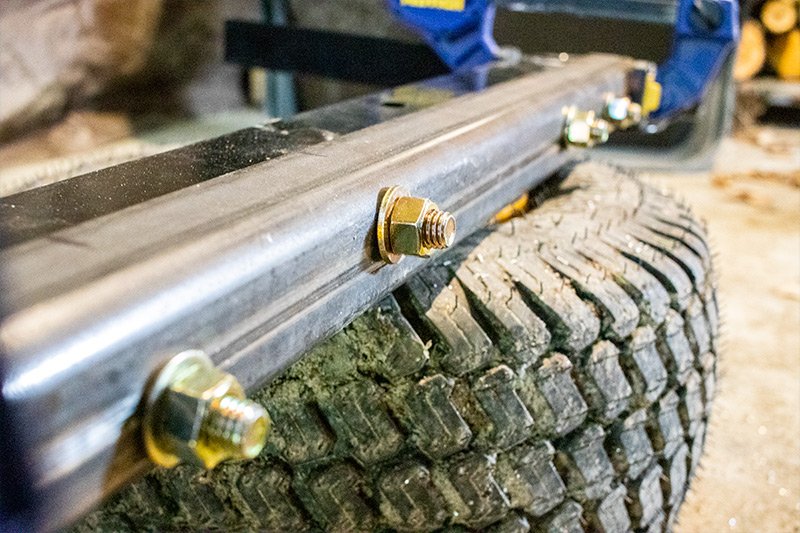
I’m not going to reinforce the hitch tube until I sharpen my drill bits and get a drill press. The presses are very inexpensive these days at Home Depot, so that won’t take long to buy. Until then, I’ll see you while I’m wheeling around on my trailer. Have a great day and thanks for reading!
A few days ago, I remembered that I had an unused eight foot lally column sitting in my basement. If you aren’t aware, lally columns are very heavy duty and are very strong. They’re actually filled with concrete. One of them would be perfect for what I wanted to accomplish.
How to Straighten a Bent Polar HD1500 ATV Trailer Axle
Let me show you the trailer axle before I go any further. As you can see in the photos below, the axle is bent and the wheels are flared outward.
In the above image, you can see how the steel is wrinkled right above the bend. That means the axle is made from wicked thin metal. The bend is also situated where the holes in the axle are. That indicates two weak points.

In this photo, you can see how flared out the wheel are. I began noticing this later in the day. And as I mentioned above, the hitch bar also had a slight bend in it as well. I fixed that too, but I didn’t take any photos of that.
Okay, down below I’ve got a few photos of the same exact thing, but from different angles. Our idea worked and I returned the axle to its original straightness. So, in case you’re dealing with a similar issue, you can straighten these things back to their original form. You’ll need to reinforce the steel tubing after that, but at least you can make them straight again.
Check out the photos. This first one is probably the most clear. As you can see, the lally column is on the bottom and the axle is on top. I put the car floor jack in between and used a piece of 2×4 lumber to protect the metal. I didn’t want to make things worse.

You can also see how I wrapped nylon tie-downs around the axle and the lally column multiple times to secure the axle in place. You should have seen me bouncing on the car jack. While it was easy going to start off with, as the tension mounted, the lally column began lifting from the floor. I had to step on that with one foot and then try to push the jack handle in a very awkward position.
Here’s another view.

Here are two more angles.


As you can see, the axle is still a little beat up. Tomorrow I’ll be heading out to pick up two pieces of 2″x2″ tube steel (or c-channel) that’s 1/4″ thick. The first piece will be two feet long and I’ll bolt that to the bottom of the axle. The other piece will be four feet long and I’ll bolt that to the hitch bar to keep that straight in the future. I may go with 3/16″ if I feel that will be sufficient. I’ll need to take a look at the steel.
Also, the reason I’ll be using bolts as opposed to welding is because I’m concerned that something will bend in the future. If I weld the new tubing to the existing tubing and something bends, I won’t be able to remove the tubing to use on a new piece. This way, I can simply unbolt it. Trust me, I’ll be adding to this post below about all of this. You’ll see some beefy framing for this trailer. It’s at times like these I do wish I owned a blow torch and a welder though. Perhaps some day.
Bolting Square Tubing to an Existing Trailer Axle
Part 2 of this saga.I have a decent amount of very good tools and I’m grateful to own them. They have helped me out on so many different occasions during so many different projects. There have been, however, times when I wish I owned even more tools. While I love using the tools I do have, they oftentimes aren’t equipped for the jobs I find myself getting involved in. This trailer axle support beam attachment is one such project. For this one, I sure could have used a drill press. I’ve got an awesome Dewalt hammer drill that I use for larger projects, but hand-holding a drill while stepping on two square tubes to keep them steady on the ground isn’t exactly a fertile environment for straight drilling. I thought I was drilling straight, but…well, you’ll see in the photos below.
Don’t get me wrong though, the tube I added to this axle is going to make it about 100 times stronger. I just wish I did a nicer job with the drilling. I hate knowing that there are crooked holes in something I worked on.
To acquire the square tubing I would need for this project, I visited an incredible nearby welding and steel fabrication business. It’s a steel fabricator’s playground. It’s a dream come true. I remember using my father’s welder when I was a kid to make all sorts of things and boy, I sure could have used a place like this. And a little bit of money, but we won’t talk about that. From this establishment, I purchased what they refer to as a “drop.” That’s a piece of steel that’s left over from another project. They have a bunch of this stuff and it’s handy because it saves time and money because the business doesn’t need to make any cuts to specific lengths. I did that myself and saved $5 per cut. I happen to have a tool for that.
I bought a six and a half foot long piece of steel tubing that’s two inches by two inches and one quarter inch thick. That’s a 6.5′ x 2″ x 2″ x 1/4″. It’s some pretty thick walled tubing. Take a look.

Here’s a bit of knowledge for you. Did you know that the thicker the walls of the tubing, the more rounded the outside corners? Yes, they can square off the corners of thin walled tubing a lot more than they can with the thicker walled stuff. Since this is 1/4″ thick the corners are pretty rounded.
For the axle, I cut a piece from the entire tube that measured about two and a half feet. Then, I sat it next to the axle to see how it fit.

I’ll use the remaining four feet for the hitch bar, but that will come later on, after I fix this drilling issue.

By the way, this piece of steel weighed in at 33 pounds and it cost around $42, just in case you’re interested in how much steel weighs and costs.
Since the trailer axle has two plates that were welded on it, I sat this additional square tubing on top of the plates, which made it off-center a bit. I didn’t mind that because those plates at least gave the tubing something to rest upon.

Once I was sure everything was aligned, I used my clamps to make sure the pieces stayed secure.

After that, I marked the tubing. I planned on drilling four holes that sat in between the ridges of the plastic tub. Since some of the ridges were high and others were low, I thought it would be a good idea to place the bolt heads in the high ones so they didn’t touch anything and eventually wear the plastic away and form a hole.


And then my friends, I drilled. I began with small holes and went all the way up to half inch.


Things started off quite pleasantly, but turned ugly as I continued on. The smaller drill bits flew right through the steel. It wasn’t until the larger 1/2″ bit that I had to use some muscle to get the job done. If you aren’t aware, when drilling in steel, you need to use oil, a lot of pressure on the bit and a slow drilling speed. Did I follow this advice? No, and I wore out my 1/2″ bit in the process. I almost couldn’t finish the job because of that. My speed was too fast, which heated up and dulled the bit as a result. And I didn’t use any oil. This is why I say that I’d like a drill press. So I can slow down and focus when I work on these types of projects. Because I had to keep the pipes steady on one of the trailer tires while holding them with my foot, I just wanted to finish things up fast. I wasn’t thinking and suffered because of it. Remember, oil, pressure and a slow speed when drilling.
Oh well. The holes are there, but they sort of follow different directions. I began even on top, in a straight line, but as I drilled through four walls of two tubes, I got lost somewhere.
Anyway, my grade 8 bolts arrived today. I bought these for a lot less online than I would have in person at the hardware store. The local place wanted about three times as much. I bought 1/2″ bolts that are five inches long. I also got some washers and nuts. Strong stuff. Also, I was able to buy in bulk, so it was cheaper. I got 25 bolts, 50 washers and 50 nuts.

I was excited to slide the bolts into their new homes.


I haven’t tightened the nuts up yet, but I’ll do that in a few minutes. I am going to add some thread lock so they don’t come loose while I’m using the trailer. I also need to put the trailer back together so I can get back to work.

I’m not going to reinforce the hitch tube until I sharpen my drill bits and get a drill press. The presses are very inexpensive these days at Home Depot, so that won’t take long to buy. Until then, I’ll see you while I’m wheeling around on my trailer. Have a great day and thanks for reading!
