CaptainDan
Member
- Joined
- May 9, 2021
- Messages
- 113
- Reaction Score
- 0
- Points
- 16
- #1
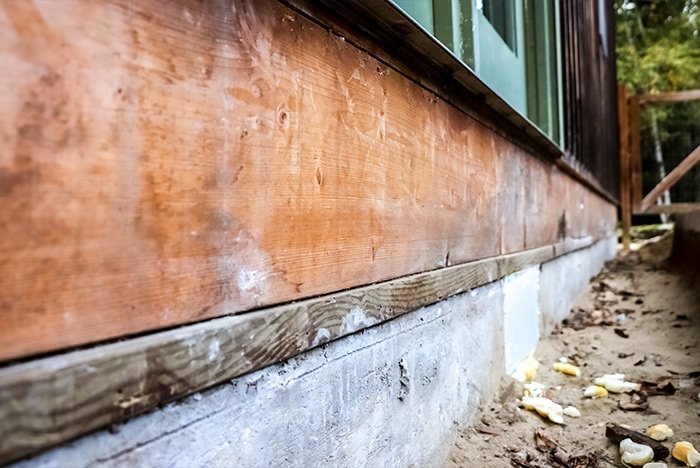
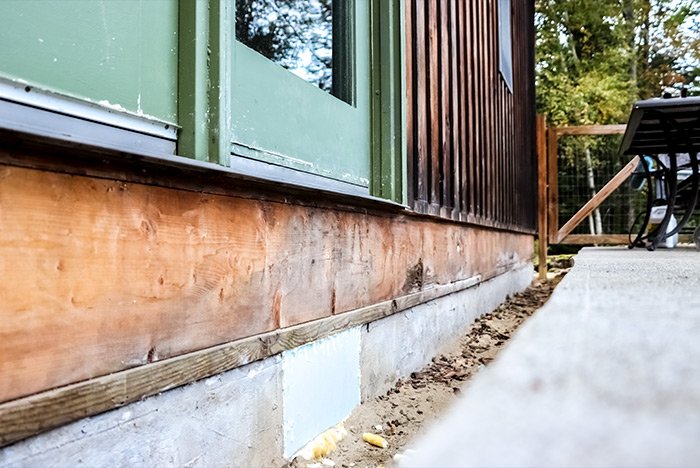
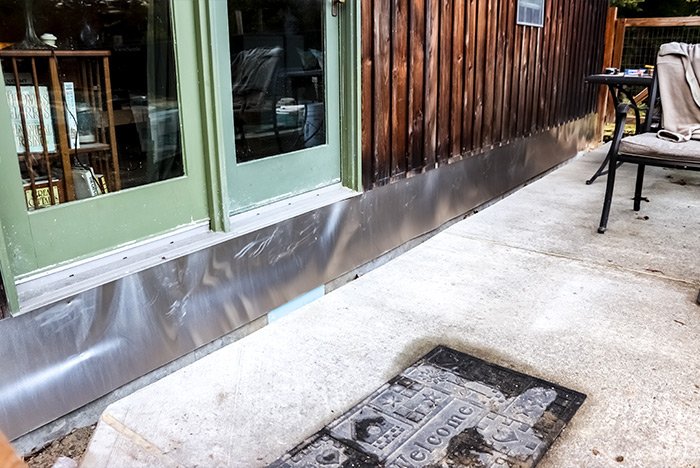
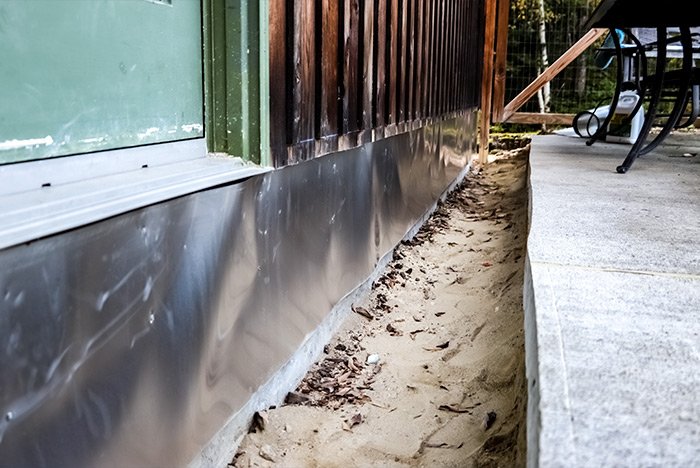
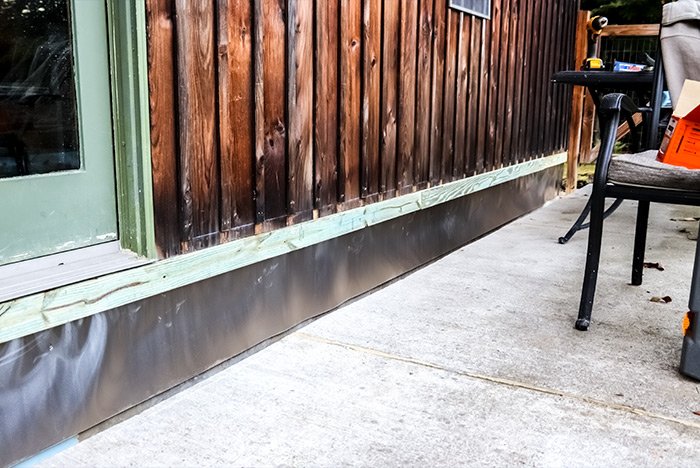
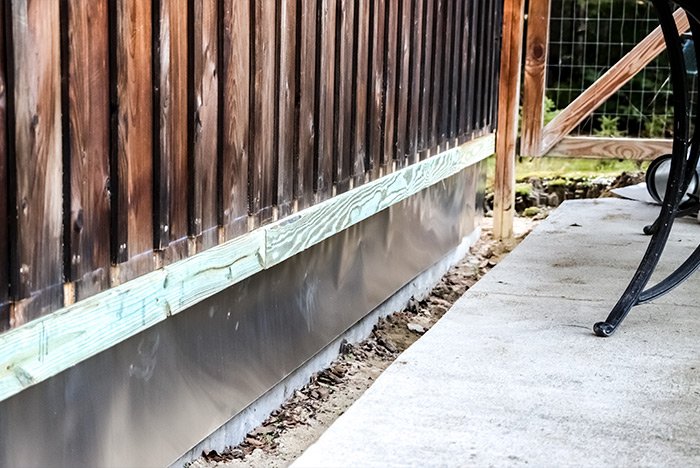
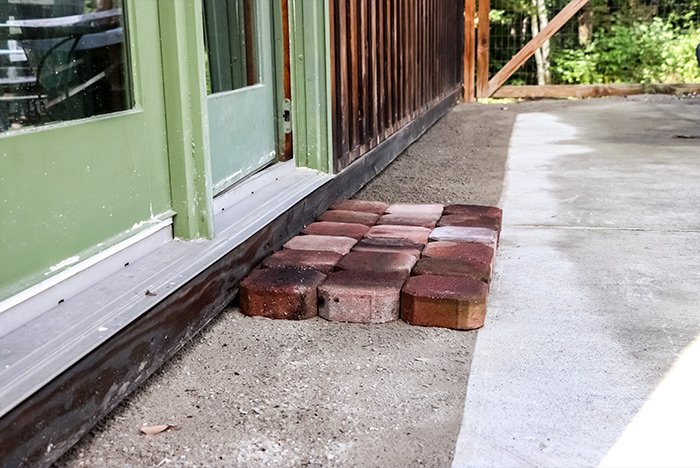
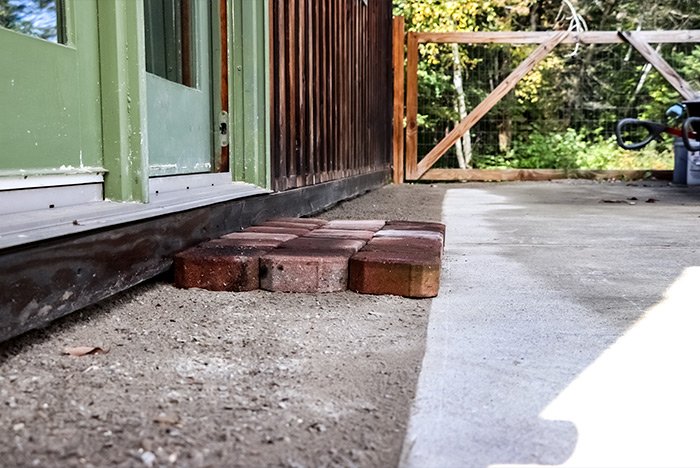
These two posts cover my efforts to remove the dirt that was placed up against the side of my house (the wood siding and the band joist), inspecting the band joist, and adding protection to the joist itself. Then, I replaced the removed material with stone dust so the area was usable once more. It was an interesting project.
A few days ago, I was down in the basement doing who knows what. I was crawling around on my knees, because the basement is only about 3-4 feet tall. I think I was making sure everything was okay when I noticed that we didn’t have just one cement block opening in the foundation of the house, but two. When we first moved into this house, all I saw was the one opening that the dryer vent pipe used to let the warm air escape to the outside world. To my surprise, the far side wall had an opening as well. This discovery was actually very heartening and I’ll tell you why.
The house we live in has a little water problem down in the basement. When the house was built, the builders dug out an area to place the foundation. That area is only a few feet deep. The thing is, when they dug the trench and set up all the concrete, they never back-filled the area they dug, so the basement’s center area has dirt that’s higher than that around the edges.
The problem is, in the spring time, the outer area of the crawl space fills with about a foot of water. This is because of the high water table in our area. When we first moved in, I covered the dirt floor of the basement with a huge piece of plastic to stop some of the moisture from getting into the air, but as I’m sure you can imagine, that did very little while floating in all that water. I decided a long time ago, the only cure to this little problem would be to fill the basement in with something like gravel or dirt. I figured that if I could raise the basement floor up a foot or two, the top of the water table would stay underground and after that, I could line the walls and floor with plastic and create what’s called an encapsulation. I would encapsulate the entire crawl space area and any water issue we once had would be a thing of the past.
The only problem is, or was, that I had just one small opening to shovel sand into the basement. The reason for my joy regarding that second opening was that I now had two openings. That would somehow make things slightly easier. Moving 20 yards of sand from the driveway into the basement would still be an excruciating experience, but it would be marginally more simple when it came time for me to crawl downstairs to move all that dirt around, while hunched over like a troll. Instead of moving the dirt from one area, I’d have the luxury of moving it from two. Either way I look at this project, I know it’s going to be awful, but I enjoy putting a positive spin on it. After all, I did dig out an entire basement back in my heyday.
I was facing an issue though. That second opening into the basement was covered up by the concrete patio that surrounds our pool. This, in and of itself, is a huge problem because that concrete butted right up against the wood siding on the house, which was rotting out because of the moisture being transferred to it. It was a bad situation that I waited almost five years to address. But, as I said, the cooler air has inspired me to get back to work and just a few days ago, I fixed the problem. To see how the cement touched the siding, take a look at this post.
I knew I had to cut the concrete to keep things looking professional. I didn’t want to go busting through it with a sledge hammer because then I’d be buying a new patio when I was finished. If I could cut it, I could get rid of the waste and then simply dig out any soil that was touching the wood siding of the house.
I called a tool rental company down in town and asked if they had a concrete cutting saw. They did, so I drove down to pick it up ($50 rental for half-day). I knew I should have taken photos of all this, but I forgot because I was so excited about getting things done. The saw looks like a chainsaw with a huge round blade attached to it. It’s really a marvel because it cuts through concrete like butter. The entire job only took me about 20 minutes to complete and after that, I was ready to do some digging.
Here’s a photo of the concrete that I cut.
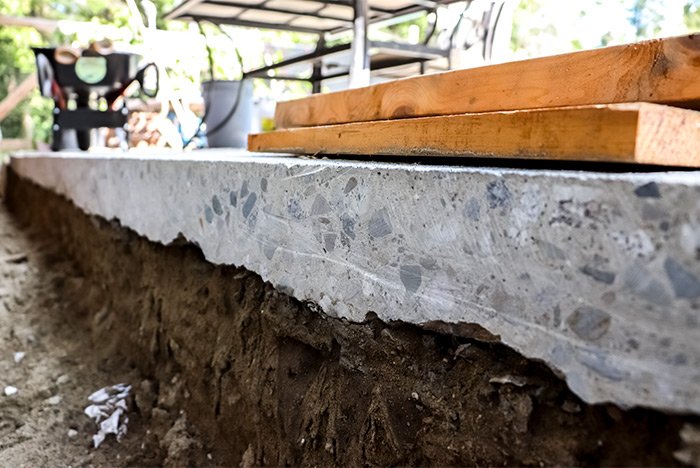
And here’s the trench I had to dig to get the sand that was under the concrete away from the house. Yes, it was all pure sand under there. No dirt, which was nice.
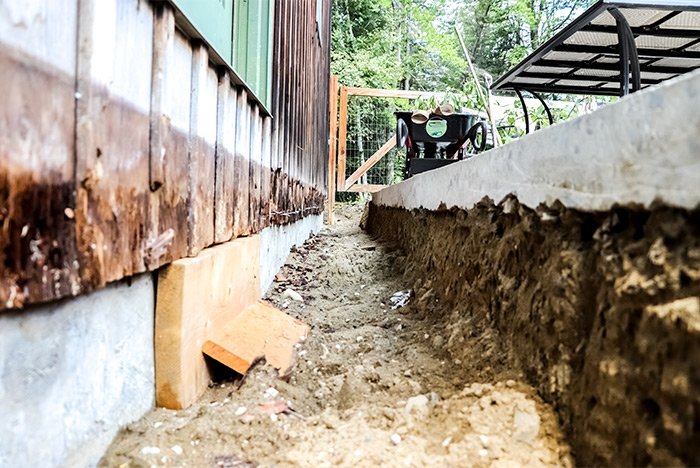
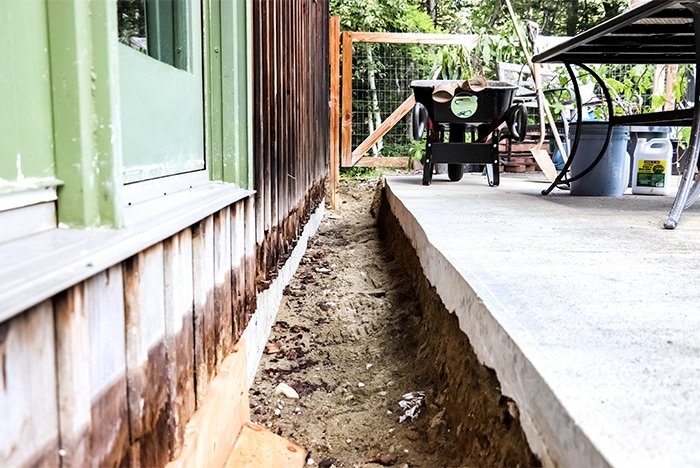
That digging look longer than I anticipated. It was exhausting in itself. Much more difficult than I anticipated.
Here’s a photo of the wood siding that was rotting away under the concrete. Let this be a lesson to you. Never let dirt or concrete touch your house siding. It’s not a good situation. Now I have to inspect the band joist to see if that’s rotted too. If it is, I’ll replace it. I’m good like that. There’s nothing I enjoy more than jacking up a house. Luckily, I’ve done that before too.
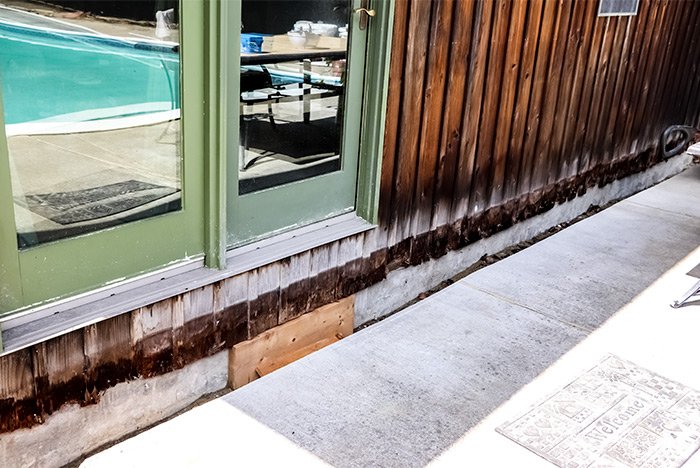
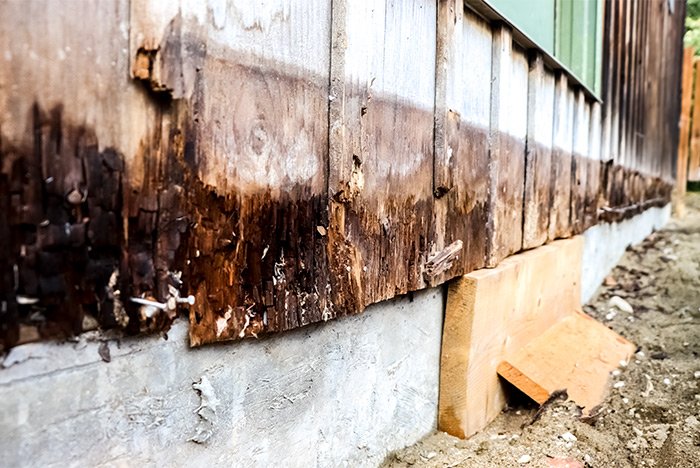
The real reason I did all this work was to get to that opening I mentioned above. Check it out. It’s one cement block’s worth.
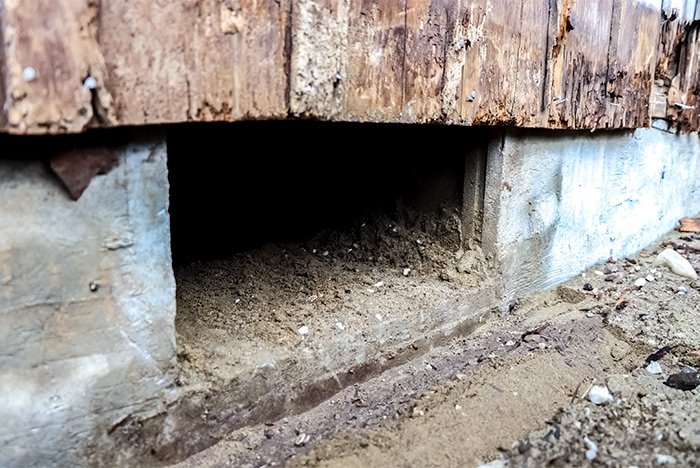
The great thing about this house is that the cement blocks that were used for the foundation are 12 inches wide and they’re filled with concrete, so the entire foundation is really solid. The bad part about that is that I have to shove sand past 12 inches, instead of something much less substantial. Oh well. It’s a trade-off, I suppose.
After I was finished bashing apart the concrete that I cut, I pushed those pieces into the basement. Then, after digging up all that sand, I pushed that into the basement too. I consider that the beginning of my filling the area inside. I also called a local sand and gravel place and ordered ten yards of what they call “bank run sand.” That’s sand that’s been dug up, but not screened, so there may be some rocks in it. As long as I can shovel it into a wheelbarrow, that’s fine. It was cheap at $11 per yard and with free delivery, the entire ten yards cost just $116.05. I estimate that I’ll need 20 yards, which might just do me in. We’ll have to see about that.
In my next post on this topic, I’ll head down into the basement to show you my progress. I have a feeling that you’re just as excited about all of this as I am, so I’ll try to help out any way I can. Thanks for reading!
Cutting Some Concrete
I believe the job of filling the basement crawlspace in with dirt has officially begun. The hot and humid air has left the building and in its place is much cooler air that’s conducive to hard labor. My body reacts well to cool air. I can think better, fight better and actually get things done. I trust my body because when it’s time, it has a tendency to pick itself up and just do things. The guilt of sitting around dissipates and chores get checked off my to-do list.A few days ago, I was down in the basement doing who knows what. I was crawling around on my knees, because the basement is only about 3-4 feet tall. I think I was making sure everything was okay when I noticed that we didn’t have just one cement block opening in the foundation of the house, but two. When we first moved into this house, all I saw was the one opening that the dryer vent pipe used to let the warm air escape to the outside world. To my surprise, the far side wall had an opening as well. This discovery was actually very heartening and I’ll tell you why.
The house we live in has a little water problem down in the basement. When the house was built, the builders dug out an area to place the foundation. That area is only a few feet deep. The thing is, when they dug the trench and set up all the concrete, they never back-filled the area they dug, so the basement’s center area has dirt that’s higher than that around the edges.
The problem is, in the spring time, the outer area of the crawl space fills with about a foot of water. This is because of the high water table in our area. When we first moved in, I covered the dirt floor of the basement with a huge piece of plastic to stop some of the moisture from getting into the air, but as I’m sure you can imagine, that did very little while floating in all that water. I decided a long time ago, the only cure to this little problem would be to fill the basement in with something like gravel or dirt. I figured that if I could raise the basement floor up a foot or two, the top of the water table would stay underground and after that, I could line the walls and floor with plastic and create what’s called an encapsulation. I would encapsulate the entire crawl space area and any water issue we once had would be a thing of the past.
The only problem is, or was, that I had just one small opening to shovel sand into the basement. The reason for my joy regarding that second opening was that I now had two openings. That would somehow make things slightly easier. Moving 20 yards of sand from the driveway into the basement would still be an excruciating experience, but it would be marginally more simple when it came time for me to crawl downstairs to move all that dirt around, while hunched over like a troll. Instead of moving the dirt from one area, I’d have the luxury of moving it from two. Either way I look at this project, I know it’s going to be awful, but I enjoy putting a positive spin on it. After all, I did dig out an entire basement back in my heyday.
I was facing an issue though. That second opening into the basement was covered up by the concrete patio that surrounds our pool. This, in and of itself, is a huge problem because that concrete butted right up against the wood siding on the house, which was rotting out because of the moisture being transferred to it. It was a bad situation that I waited almost five years to address. But, as I said, the cooler air has inspired me to get back to work and just a few days ago, I fixed the problem. To see how the cement touched the siding, take a look at this post.
I knew I had to cut the concrete to keep things looking professional. I didn’t want to go busting through it with a sledge hammer because then I’d be buying a new patio when I was finished. If I could cut it, I could get rid of the waste and then simply dig out any soil that was touching the wood siding of the house.
I called a tool rental company down in town and asked if they had a concrete cutting saw. They did, so I drove down to pick it up ($50 rental for half-day). I knew I should have taken photos of all this, but I forgot because I was so excited about getting things done. The saw looks like a chainsaw with a huge round blade attached to it. It’s really a marvel because it cuts through concrete like butter. The entire job only took me about 20 minutes to complete and after that, I was ready to do some digging.
Here’s a photo of the concrete that I cut.

And here’s the trench I had to dig to get the sand that was under the concrete away from the house. Yes, it was all pure sand under there. No dirt, which was nice.


That digging look longer than I anticipated. It was exhausting in itself. Much more difficult than I anticipated.
Here’s a photo of the wood siding that was rotting away under the concrete. Let this be a lesson to you. Never let dirt or concrete touch your house siding. It’s not a good situation. Now I have to inspect the band joist to see if that’s rotted too. If it is, I’ll replace it. I’m good like that. There’s nothing I enjoy more than jacking up a house. Luckily, I’ve done that before too.


The real reason I did all this work was to get to that opening I mentioned above. Check it out. It’s one cement block’s worth.

The great thing about this house is that the cement blocks that were used for the foundation are 12 inches wide and they’re filled with concrete, so the entire foundation is really solid. The bad part about that is that I have to shove sand past 12 inches, instead of something much less substantial. Oh well. It’s a trade-off, I suppose.
After I was finished bashing apart the concrete that I cut, I pushed those pieces into the basement. Then, after digging up all that sand, I pushed that into the basement too. I consider that the beginning of my filling the area inside. I also called a local sand and gravel place and ordered ten yards of what they call “bank run sand.” That’s sand that’s been dug up, but not screened, so there may be some rocks in it. As long as I can shovel it into a wheelbarrow, that’s fine. It was cheap at $11 per yard and with free delivery, the entire ten yards cost just $116.05. I estimate that I’ll need 20 yards, which might just do me in. We’ll have to see about that.
In my next post on this topic, I’ll head down into the basement to show you my progress. I have a feeling that you’re just as excited about all of this as I am, so I’ll try to help out any way I can. Thanks for reading!

