EmeraldHike
Member
- Joined
- May 10, 2021
- Messages
- 133
- Reaction Score
- 0
- Points
- 21
- #1
A few weeks back, I had a project to finish up in my downstairs bathroom. Apparently, the upstairs toilet, which is directly above the downstairs toilet, was dipping (not dripping, dipping). For whatever reason, it felt like the floor under the toilet upstairs sat ever so slightly lower than the rest of the floor in the bathroom. I couldn’t stand it, so I fixed it. All it took was a few 2x6s and some joist hangars in the ceiling of the downstairs bathroom to make an annoying situation less annoying.
I had some extra wood from this project, so I figured that I would head outside to make some sawhorses. I’ve been meaning to make these things for years, but never got around to it. But, like I said – I had some extra lumber (a 2×6), so the time was ripe.
These sawhorses aren’t perfect for all situations, but they are really good for people like me who intend to keep them in one location, such as a garage or a shop. They are bulky, difficult to handle and are heavier than those fancy aluminum Dewalt sawhorses you can find at the big box stores. They also take some room to store. But, if you are like me and want to own something you made by hand and have a sort of pride in when the time comes around to using them, these are perfect. And probably pretty strong – I don’t know, I haven’t put them to the test yet.
Are you ready to check out one of my sawhorses? Okay, here goes:
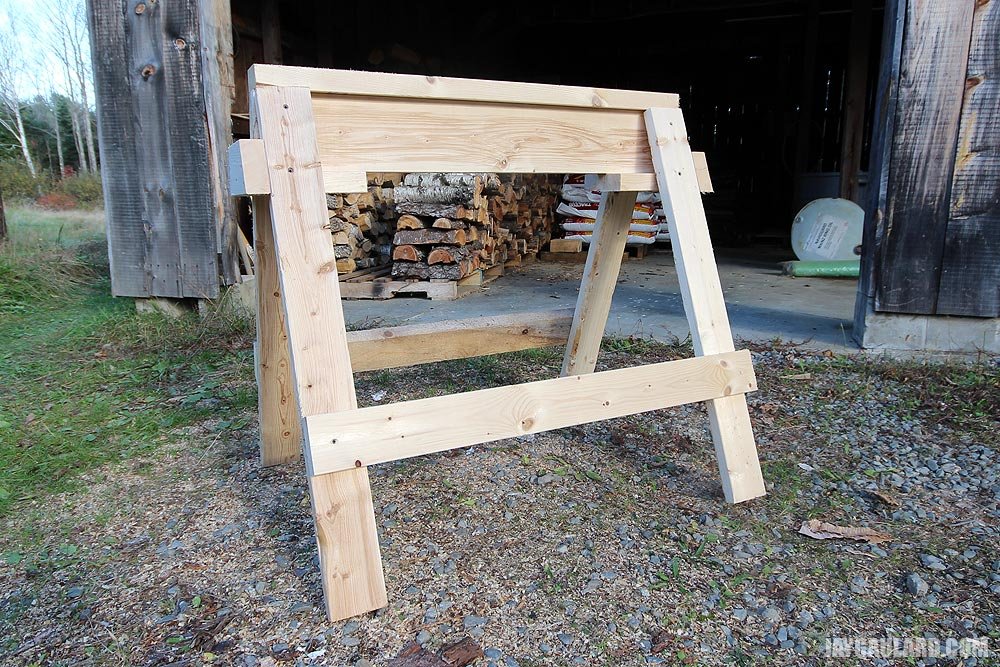
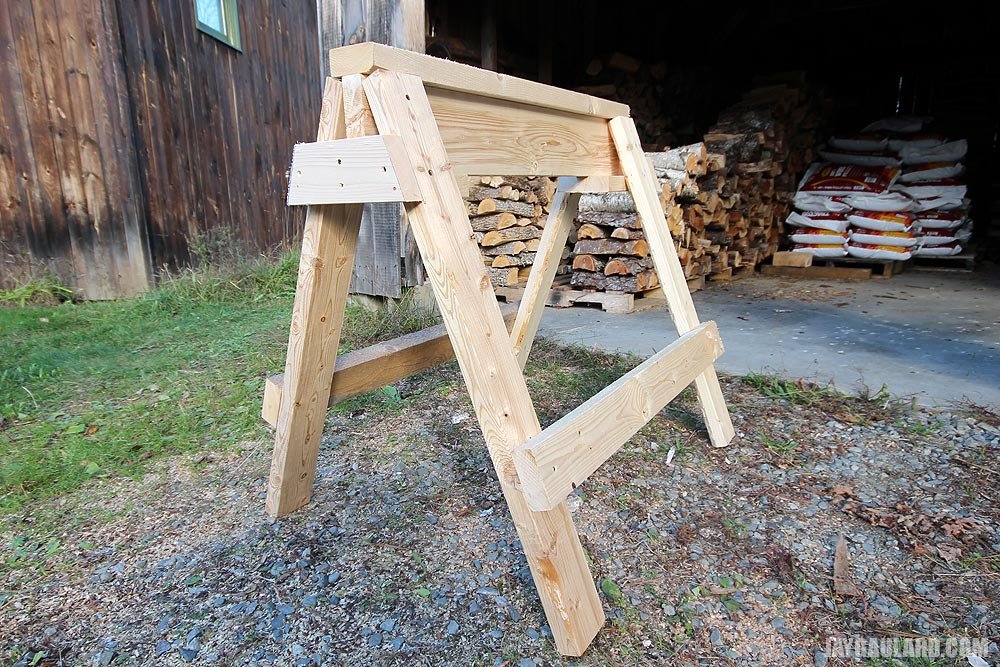
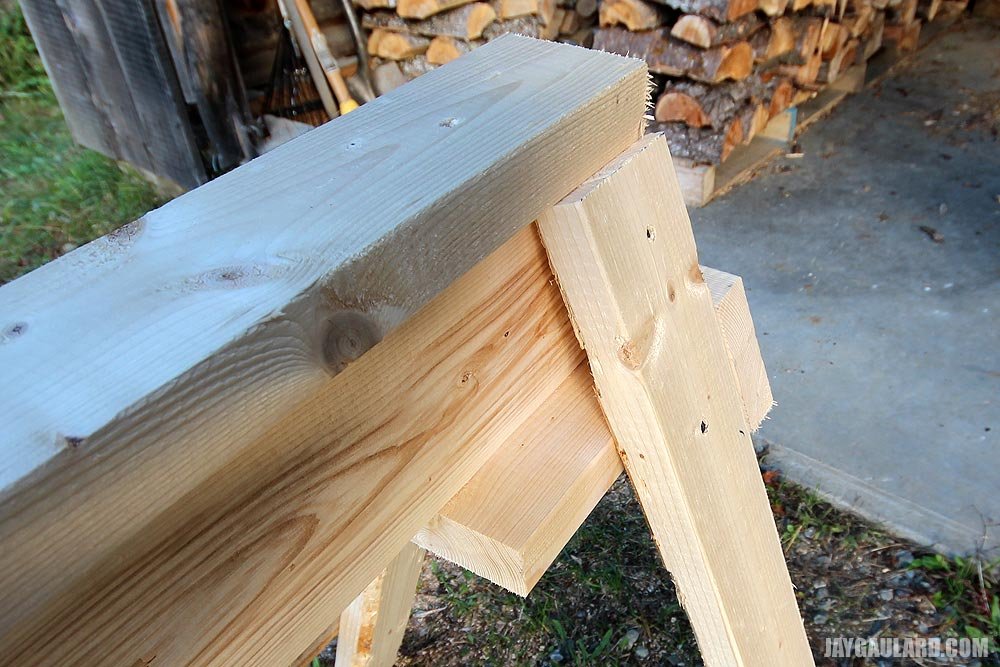
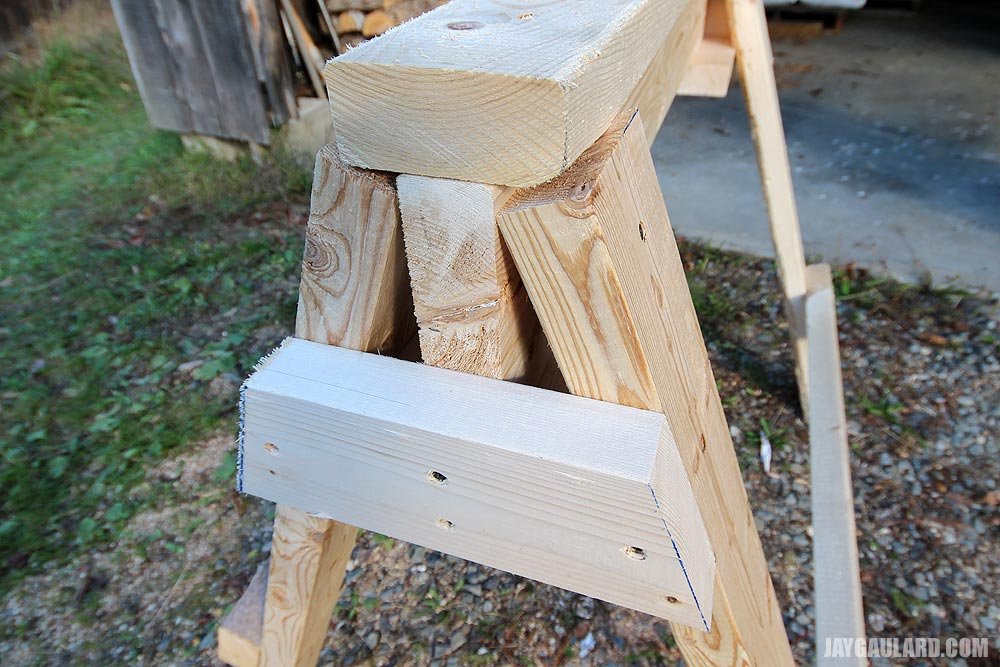
As you can see, I made the cross member out of the extra 2×6 I told you about. I then used 2x4s for most of the remaining parts. For the bottom of the cross member, I used two 7″ cuts of 2×6 as can be seen here:
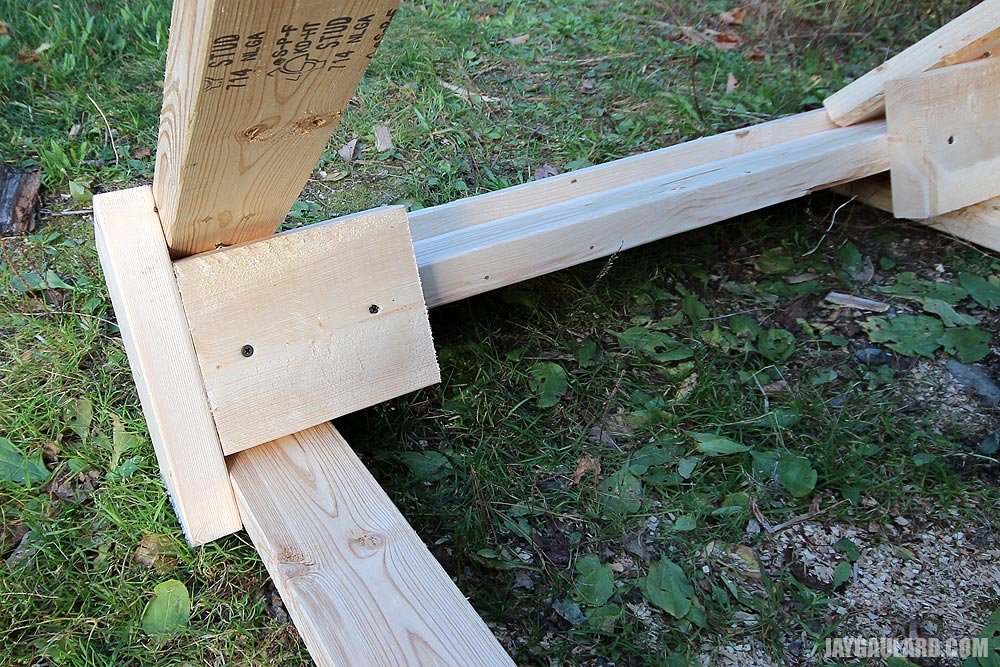
Here’s a picture of a side of the sawhorse. I attached a small 2×4 to hold the legs sturdy. I suppose I could have moved the piece down further, but I wanted to put a screw into each leg, the 2×6 cross member, as well as the small 2×6 spacer piece that’s hidden in this picture.
I figure I’ll give you a fast breakdown of the measurements and materials I used, just in case you like what you see. It took me a while to get past all the pictures of the world’s fanciest sawhorses and to gather enough information to get the project done. Here is what these sawhorses consist of. And these materials are good for two horses:
(2) 2x4s @ 36″ for top section of cross member
(2) 2x6s @ 36″ for center section of cross member
(4) 2x4s @ 36″ for cross leg braces – these are positioned 22″ down from top of leg
(8) 2x4s @ 34″ for legs
(4) 2x6s @ 7″ for leg spacers to be attached to bottom of cross member 2×6
(4) 2x4s @ 12″ to be cut diagonally as leg space braces
I think that’s it. To make these, all you really need to do is cut the materials from the material list above and put each sawhorse together. The only time you would even need to use a ruler is to measure the 22″ down from the top of each leg to place the leg braces in the proper position.
Please let me know what you think of these. I really like them.
I had some extra wood from this project, so I figured that I would head outside to make some sawhorses. I’ve been meaning to make these things for years, but never got around to it. But, like I said – I had some extra lumber (a 2×6), so the time was ripe.
These sawhorses aren’t perfect for all situations, but they are really good for people like me who intend to keep them in one location, such as a garage or a shop. They are bulky, difficult to handle and are heavier than those fancy aluminum Dewalt sawhorses you can find at the big box stores. They also take some room to store. But, if you are like me and want to own something you made by hand and have a sort of pride in when the time comes around to using them, these are perfect. And probably pretty strong – I don’t know, I haven’t put them to the test yet.
Are you ready to check out one of my sawhorses? Okay, here goes:


As you can see, I made the cross member out of the extra 2×6 I told you about. I then used 2x4s for most of the remaining parts. For the bottom of the cross member, I used two 7″ cuts of 2×6 as can be seen here:


Here’s a picture of a side of the sawhorse. I attached a small 2×4 to hold the legs sturdy. I suppose I could have moved the piece down further, but I wanted to put a screw into each leg, the 2×6 cross member, as well as the small 2×6 spacer piece that’s hidden in this picture.

I figure I’ll give you a fast breakdown of the measurements and materials I used, just in case you like what you see. It took me a while to get past all the pictures of the world’s fanciest sawhorses and to gather enough information to get the project done. Here is what these sawhorses consist of. And these materials are good for two horses:
(2) 2x4s @ 36″ for top section of cross member
(2) 2x6s @ 36″ for center section of cross member
(4) 2x4s @ 36″ for cross leg braces – these are positioned 22″ down from top of leg
(8) 2x4s @ 34″ for legs
(4) 2x6s @ 7″ for leg spacers to be attached to bottom of cross member 2×6
(4) 2x4s @ 12″ to be cut diagonally as leg space braces
I think that’s it. To make these, all you really need to do is cut the materials from the material list above and put each sawhorse together. The only time you would even need to use a ruler is to measure the 22″ down from the top of each leg to place the leg braces in the proper position.
Please let me know what you think of these. I really like them.
