WendyMay
Member
- Joined
- May 11, 2021
- Messages
- 142
- Reaction Score
- 0
- Points
- 21
- #1
I am so excited today. I’ve been talking about having some sort of new heater installed in the house for the longest time and I finally bit the bullet and tackled the project. I almost didn’t do it, but about a month ago, I was at a friend’s house and he showed me his beautiful heat pump. I got all jazzed after seeing that. If you’re not familiar, these heat pump contraptions perform both heating and cooling and they’re allegedly very efficient. And there’s some sort of new technology that allows them to work up here in Maine all the way down to temperatures of -15 degrees. After looking at that setup for a little while though, I decided against it. I didn’t want to have to go through the trouble of having some higher amperage wiring installed and I really didn’t like the high-ish price of the unit (plus install) of about $3300. It wasn’t terrible, but the thing is, heat pumps use electricity and I’m not a fan of using electricity, even if the overall cost is less than some other heat source. I grew up having a healthy respect for what electricity costs and I just can’t seem to get over that. I’ll admit, my entire avoidance is completely irrational. I know that.
So, what did we get? A Rinnai EX38CTP Direct Vent Propane Wall Furnace. It’s so cool. I’ve been wanting one of these things for the longest time. I’ve read about them online and I’ve watched what videos are available, which really isn’t a lot. I’ve also heard tremendous things about this company and the technology they use.
I was going to initially purchase a unit online and install it myself, but then I thought better of it. First of all, what the heck do I know about propane? Nothing. I could surely have installed the unit myself, but I’m not sure we would have slept well at night at all. The idea of propane leaking out of either the tank or one of the lines doesn’t appeal to me. And since the installation cost was only a few hundred dollars and since the propane company I used is an authorized dealer, which got a pretty good price on the unit, I was happy to have them take care of everything. I did feel a bit guilty watching the guy do all the work, but I guess that’s what you have to do in situations like this.
Okay, so here are the reasons I decided on this wall unit. First of all, it’s vented outside. I bought gas logs for our fireplace when we lived back in Connecticut and they were terrible. The propane vented inside the house and I felt sick every time I fired them up. I’ll never do that again. This Rinnai unit vents outside and the combustion is sealed inside the unit. It also doesn’t use a pilot light. To ignite the flame, the unit uses electronics. It’s pretty slim and doesn’t take up a lot of room either. While it’s larger than we thought it would be, I did get the largest model available and it’s still smaller than some other alternatives.
As I mentioned above, this brand uses a lot of electronics and their claim to fame is that their thermostat detects temperature changes of a half a degree. That’s not too important to me, but I’ll take it if it’s included. We had a 100 gallon propane installed at the side of the house and the propane company ran the line from the tank, through the wall and to the wall unit. Everything was done perfectly, all the way up to the little bead of caulk the installer applied around the exhaust ring and the propane feed line on the outside of the house. It’s those details I love. But what I really love is that this is an independent heater unit that’s not connected to anything else in the house. If we wanted to, we could have more units installed in other rooms, but between our pellet stove, wood stove and now this propane furnace, I don’t think that will be necessary.
The real reason I’m psyched about this thing is that we won’t be freezing when we wake up in the morning anymore during those really cold nights over the winter. Our pellet stove is, well, let’s just say, less than stellar, so we turn it off at night. Also, the wood stove has issues with transferring its heat from one room to another overnight, so this propane furnace should fill the gaps quite nicely. As I was telling the installer, I haven’t owned something with a thermostat since moving to Maine and I’m going to be completely spoiled. I’m not going to know what to do with myself.
The entire job, with the until included came up to $2280. I also had to fill the propane tank for about $260. I have no idea how long a tank of propane will last, but it should be pretty good if we rely mostly on the pellet stove and the wood stove for the majority of our heating. I’m planning on using the propane unit just to keep things warm at night and to warm them up in the morning, if need be.
Let’s get to some very nice photos I took during the process.
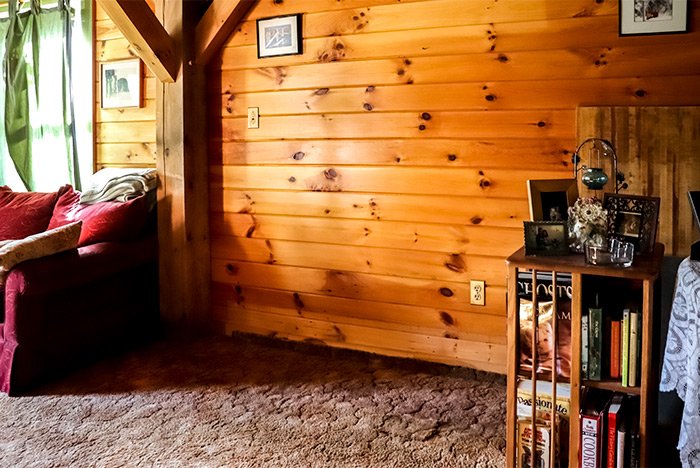
I took this photo of the wall before any of the action occurred. It’s a central location in the downstairs living room.
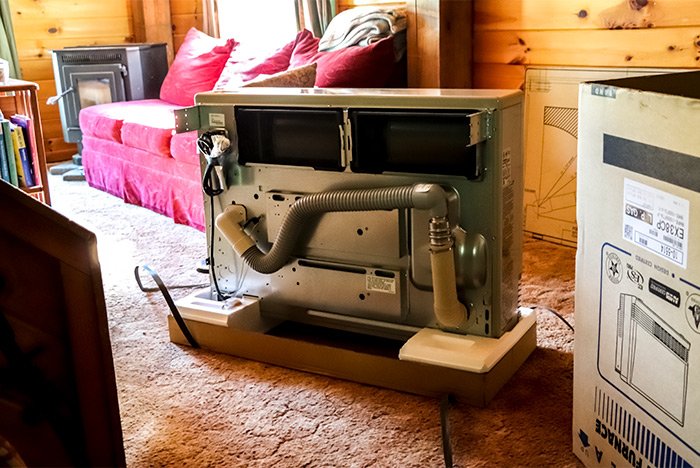
This is the back of the Rinnai furnace. I took this right after we unboxed it. I think the installer was outside working on the tank and propane lines. That tube looking thing is the intake tube and the exhaust tube connected together. They came apart later on.
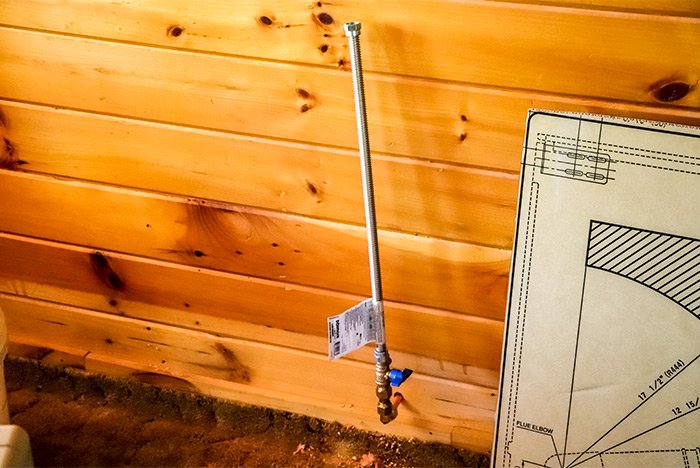
This is the entire interior propane feed line.
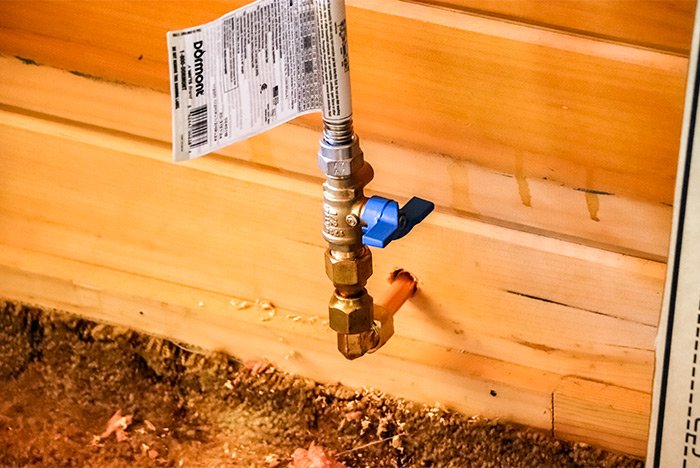
And this is a more up close view of the shut-off valve for the propane.
The only things this furnace requires for installation is a three inch hole for the intake/exhaust and a one inch hole for the propane feed. Here’s a picture of the exhaust hole after it was drilled.
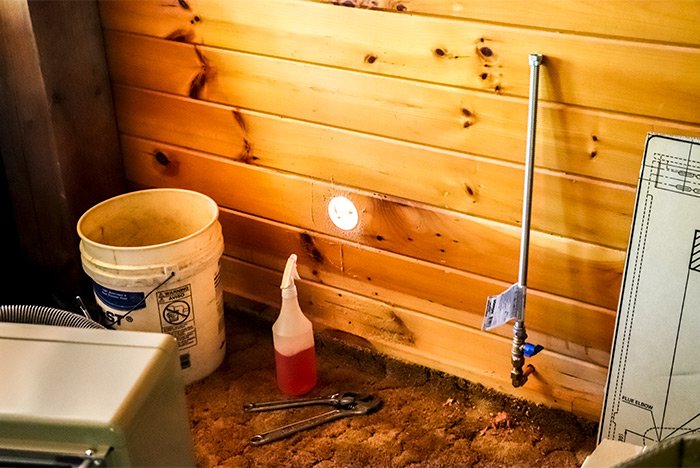
This is a more up close view of the intake/exhaust hole that leads outside.
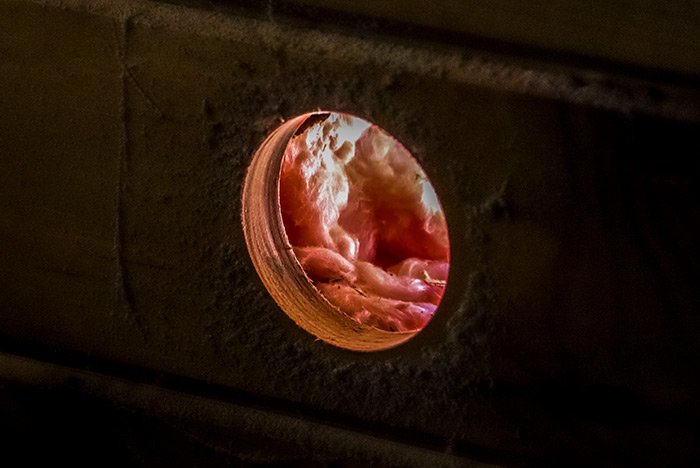
I’m not sure if this is a sleeve or a collar or what, but this is what goes in the hole for the intake/exhaust.
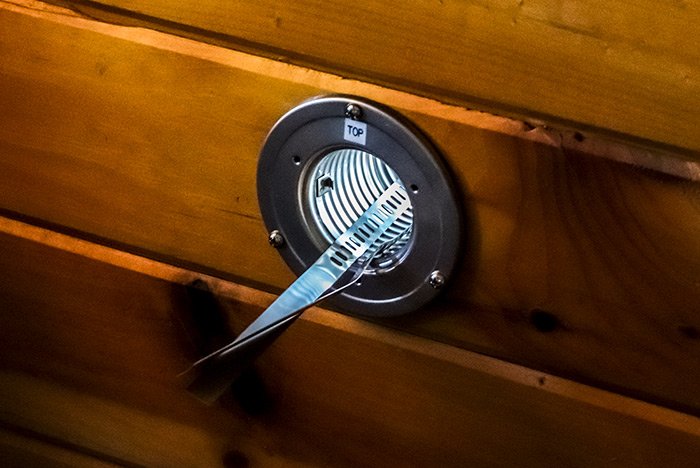
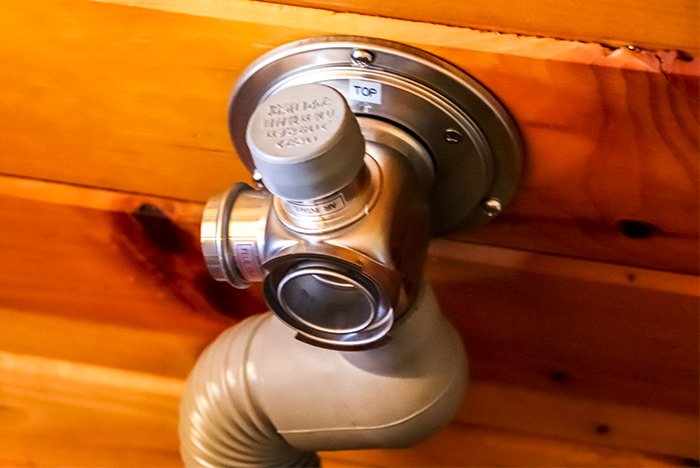
Next, we have the coupling connector thing that gets connected to the intake and exhaust tube that runs through the wall.
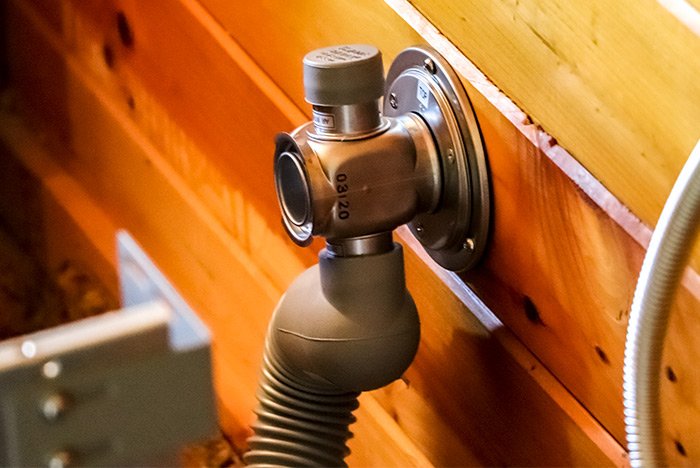
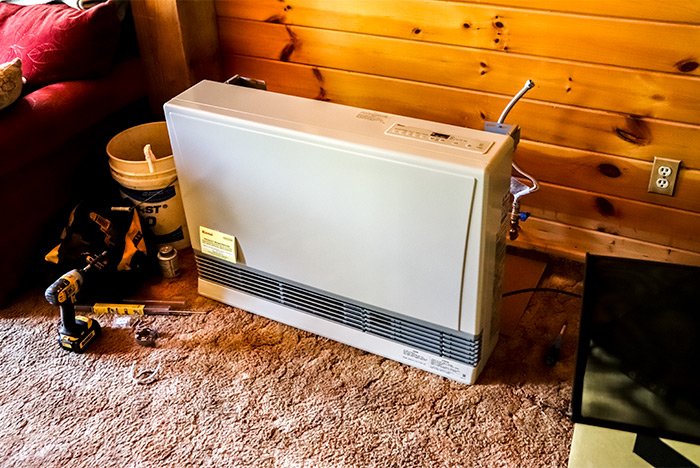
Here’s the unit, getting ready to be connected to the piping and propane.
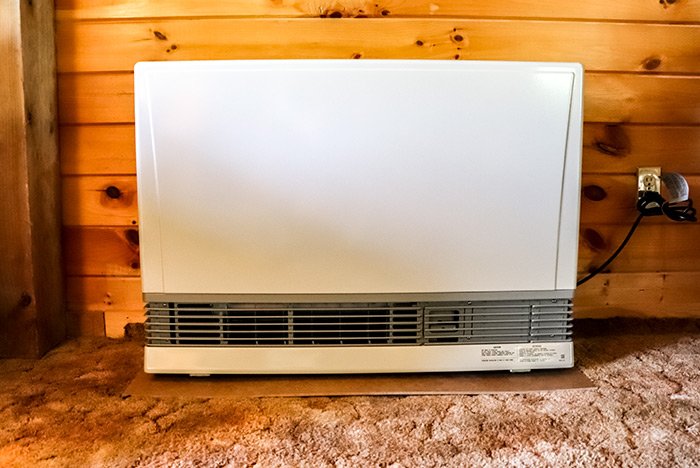
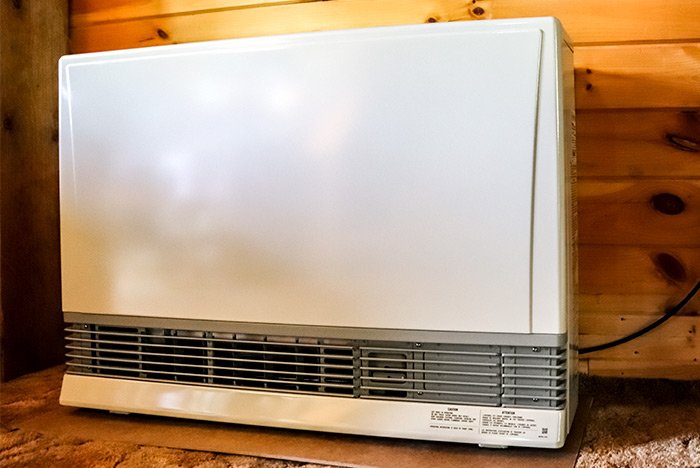
Finally, we have the installed furnace. I think it looks pretty good. I got the beige instead of the white because I thought the beige would blend somewhat better with the rest of the house. Also, notice how it plugs right into a regular wall outlet. It doesn’t use that much electricity at all. Basically, it just needs power for the electronics and for the fan to blow the heat around.
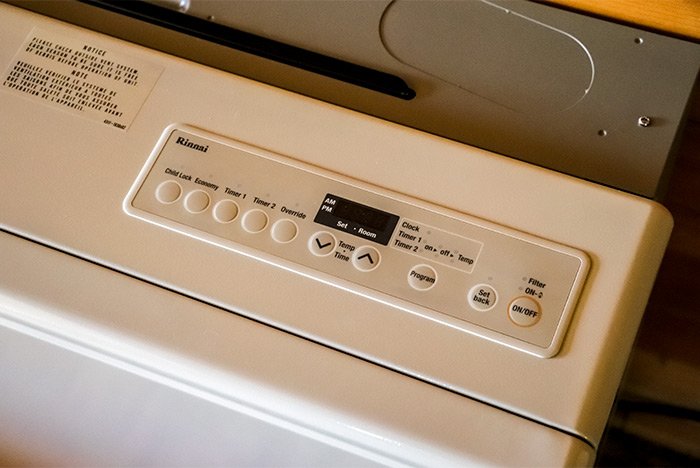
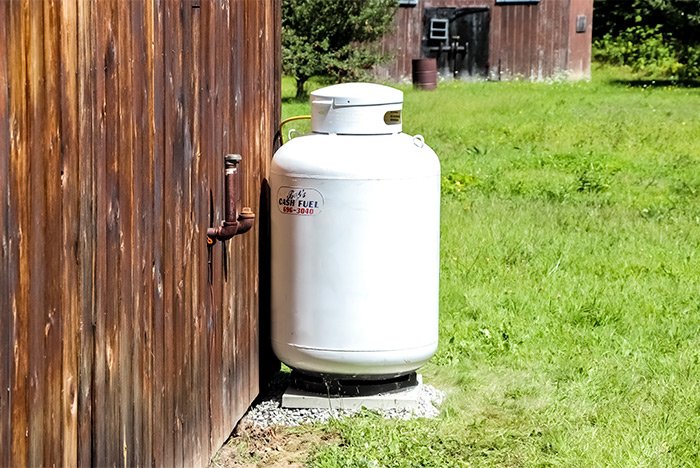
Okay, enough of that. Let’s take a look at what’s outside. I’ll start off with the propane tank. We placed it at the corner of the house so it’s easy for me to snowblow a path to it in the winter.
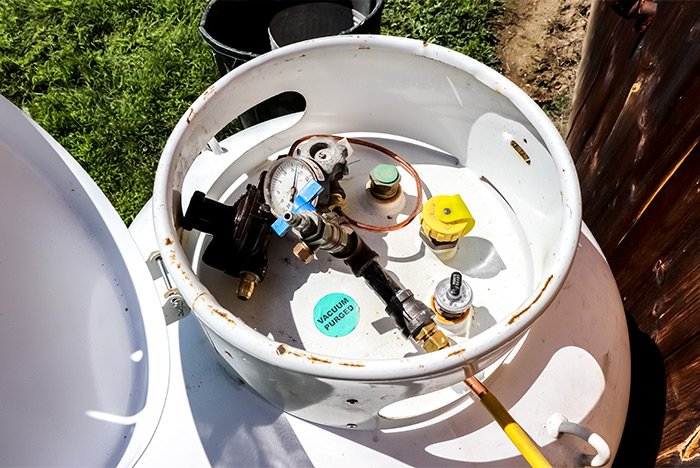
This is the interior of the propane tank, where the gauge and the regulator are housed.
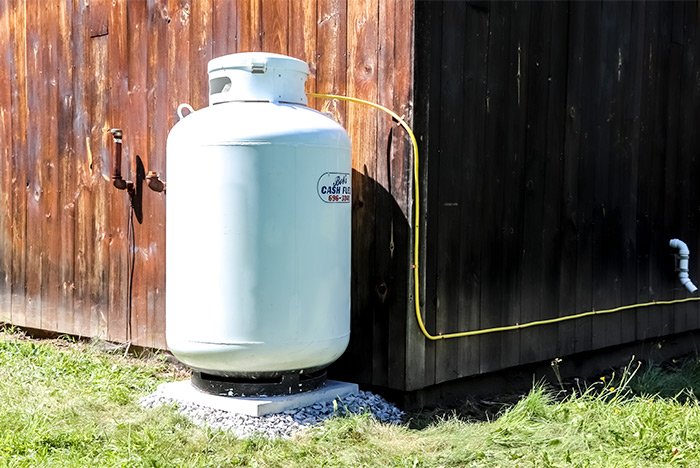
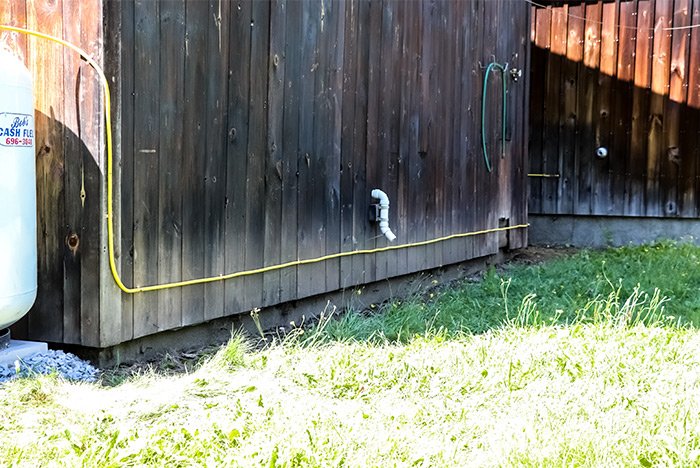
This is the back of the house. You can see the yellow propane line running across the bottom of the siding. It’s not too pretty, but maybe I’ll fix that one day somehow.
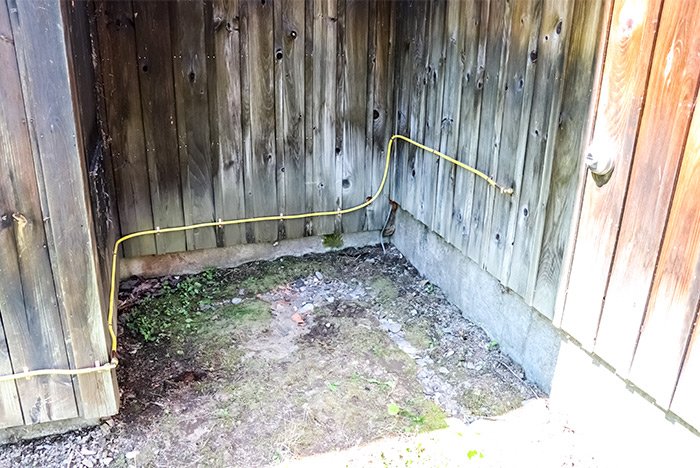
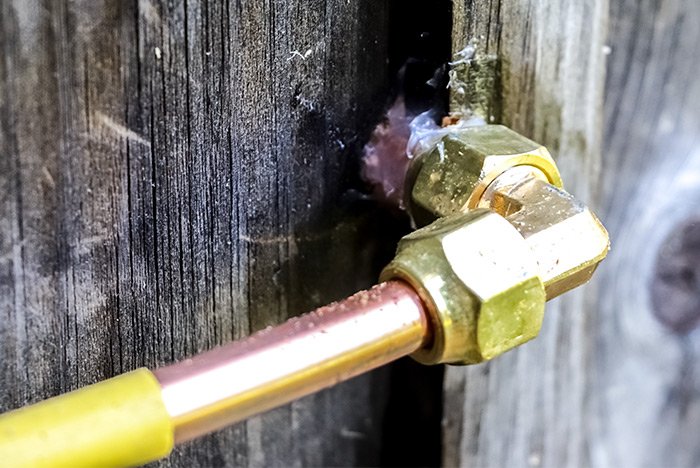
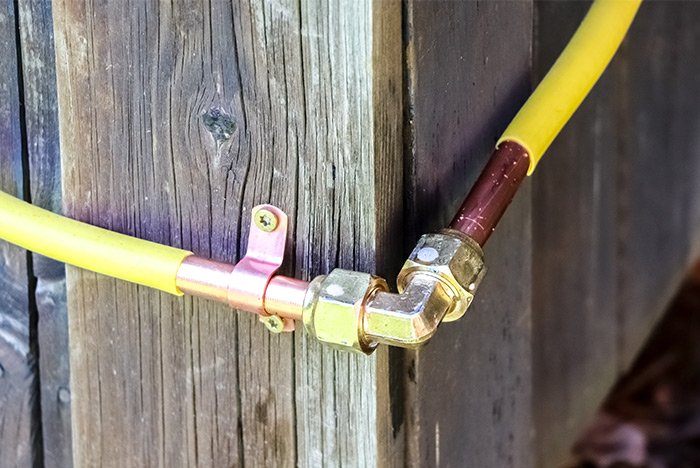
Finally, we have a few propane connections (elbows) and the direct vent exhaust port.
We fired the furnace up and it worked great. Heat poured out of it and it didn’t make much noise at all. I’m excited to see how it performs over the winter. I’ll give you an update then. Thanks for reading!
COMMENT: Can you install it on an interior wall and where is the air intake for the flame?
COMMENT: I'm fairly certain you can't install this unit on an interior wall. That's because it needs an intake air feed as well as an outdoor exhaust. Also, to answer your second question: I think the fresh air intake and the exhaust use the same tube that goes through the wall. It's a two-part tube.
COMMENT: Hi there. I was just going over your installation of your Rinnai EX38CTP wall furnace. I was wondering if you can tell me what the length of the Flexible Gas Line is that was installed after the Gas Valve that leads up to the unit. It looks like it could be around 18″, but if you could confirm the size I would appreciate it.
COMMENT: Unfortunately, I have no idea how long that gas line is. I had this installed, so I didn’t pay all that much attention to the details. Whatever it was, it most likely came with the unit, so you might want to check the parts list for that. Thanks!
COMMENT: Well I'm looking at the listings page at HomeDepot.com for gas lines and I'm seeing the shortest one is 18 inches and then they go up to 24, 48, 60, and all the way to 72 inches. I got bored after that, so I stopped looking. Personally, I would go with a 24 inch hose. If you measured the four boards on your wall and they equal 21 inches and the hose is a bit longer than them, it can't be 18 inches. Go with 24.
So, what did we get? A Rinnai EX38CTP Direct Vent Propane Wall Furnace. It’s so cool. I’ve been wanting one of these things for the longest time. I’ve read about them online and I’ve watched what videos are available, which really isn’t a lot. I’ve also heard tremendous things about this company and the technology they use.
I was going to initially purchase a unit online and install it myself, but then I thought better of it. First of all, what the heck do I know about propane? Nothing. I could surely have installed the unit myself, but I’m not sure we would have slept well at night at all. The idea of propane leaking out of either the tank or one of the lines doesn’t appeal to me. And since the installation cost was only a few hundred dollars and since the propane company I used is an authorized dealer, which got a pretty good price on the unit, I was happy to have them take care of everything. I did feel a bit guilty watching the guy do all the work, but I guess that’s what you have to do in situations like this.
Okay, so here are the reasons I decided on this wall unit. First of all, it’s vented outside. I bought gas logs for our fireplace when we lived back in Connecticut and they were terrible. The propane vented inside the house and I felt sick every time I fired them up. I’ll never do that again. This Rinnai unit vents outside and the combustion is sealed inside the unit. It also doesn’t use a pilot light. To ignite the flame, the unit uses electronics. It’s pretty slim and doesn’t take up a lot of room either. While it’s larger than we thought it would be, I did get the largest model available and it’s still smaller than some other alternatives.
As I mentioned above, this brand uses a lot of electronics and their claim to fame is that their thermostat detects temperature changes of a half a degree. That’s not too important to me, but I’ll take it if it’s included. We had a 100 gallon propane installed at the side of the house and the propane company ran the line from the tank, through the wall and to the wall unit. Everything was done perfectly, all the way up to the little bead of caulk the installer applied around the exhaust ring and the propane feed line on the outside of the house. It’s those details I love. But what I really love is that this is an independent heater unit that’s not connected to anything else in the house. If we wanted to, we could have more units installed in other rooms, but between our pellet stove, wood stove and now this propane furnace, I don’t think that will be necessary.
The real reason I’m psyched about this thing is that we won’t be freezing when we wake up in the morning anymore during those really cold nights over the winter. Our pellet stove is, well, let’s just say, less than stellar, so we turn it off at night. Also, the wood stove has issues with transferring its heat from one room to another overnight, so this propane furnace should fill the gaps quite nicely. As I was telling the installer, I haven’t owned something with a thermostat since moving to Maine and I’m going to be completely spoiled. I’m not going to know what to do with myself.
The entire job, with the until included came up to $2280. I also had to fill the propane tank for about $260. I have no idea how long a tank of propane will last, but it should be pretty good if we rely mostly on the pellet stove and the wood stove for the majority of our heating. I’m planning on using the propane unit just to keep things warm at night and to warm them up in the morning, if need be.
Let’s get to some very nice photos I took during the process.
I took this photo of the wall before any of the action occurred. It’s a central location in the downstairs living room.

This is the back of the Rinnai furnace. I took this right after we unboxed it. I think the installer was outside working on the tank and propane lines. That tube looking thing is the intake tube and the exhaust tube connected together. They came apart later on.

This is the entire interior propane feed line.

And this is a more up close view of the shut-off valve for the propane.

The only things this furnace requires for installation is a three inch hole for the intake/exhaust and a one inch hole for the propane feed. Here’s a picture of the exhaust hole after it was drilled.

This is a more up close view of the intake/exhaust hole that leads outside.

I’m not sure if this is a sleeve or a collar or what, but this is what goes in the hole for the intake/exhaust.

Next, we have the coupling connector thing that gets connected to the intake and exhaust tube that runs through the wall.


Here’s the unit, getting ready to be connected to the piping and propane.

Finally, we have the installed furnace. I think it looks pretty good. I got the beige instead of the white because I thought the beige would blend somewhat better with the rest of the house. Also, notice how it plugs right into a regular wall outlet. It doesn’t use that much electricity at all. Basically, it just needs power for the electronics and for the fan to blow the heat around.


Okay, enough of that. Let’s take a look at what’s outside. I’ll start off with the propane tank. We placed it at the corner of the house so it’s easy for me to snowblow a path to it in the winter.


This is the interior of the propane tank, where the gauge and the regulator are housed.

This is the back of the house. You can see the yellow propane line running across the bottom of the siding. It’s not too pretty, but maybe I’ll fix that one day somehow.


Finally, we have a few propane connections (elbows) and the direct vent exhaust port.


We fired the furnace up and it worked great. Heat poured out of it and it didn’t make much noise at all. I’m excited to see how it performs over the winter. I’ll give you an update then. Thanks for reading!

COMMENT: Can you install it on an interior wall and where is the air intake for the flame?
COMMENT: I'm fairly certain you can't install this unit on an interior wall. That's because it needs an intake air feed as well as an outdoor exhaust. Also, to answer your second question: I think the fresh air intake and the exhaust use the same tube that goes through the wall. It's a two-part tube.
COMMENT: Hi there. I was just going over your installation of your Rinnai EX38CTP wall furnace. I was wondering if you can tell me what the length of the Flexible Gas Line is that was installed after the Gas Valve that leads up to the unit. It looks like it could be around 18″, but if you could confirm the size I would appreciate it.
COMMENT: Unfortunately, I have no idea how long that gas line is. I had this installed, so I didn’t pay all that much attention to the details. Whatever it was, it most likely came with the unit, so you might want to check the parts list for that. Thanks!
COMMENT: Well I'm looking at the listings page at HomeDepot.com for gas lines and I'm seeing the shortest one is 18 inches and then they go up to 24, 48, 60, and all the way to 72 inches. I got bored after that, so I stopped looking. Personally, I would go with a 24 inch hose. If you measured the four boards on your wall and they equal 21 inches and the hose is a bit longer than them, it can't be 18 inches. Go with 24.
