Search

How to Build a Screened in Porch (Step-by-Step)

  • Thread starter Newman
  • Start date
Newman

Newman

Member
Joined
May 11, 2021
Messages
106
Reaction Score
0
Points
23
  • #1
A while back, I tore down my ugly old porch that was behind my house and had a carpenter build me a new one. He did the footings, deck part, walls, and the roof, while I finished up with the screen, the door (including framing), and the trim. I also ran some electrical and installed lighting. It was a big job and depending on how handy and patient you are (and how much time you have), you may be able to tackle something like this yourself. You know, sort of like a really big DIY project. In the following posts, I move through the entire process of building the porch, step by step. Take a look at the steps and then ask if you've got any questions. I'd be happy to help.
 
Newman

Newman

Member
Joined
May 11, 2021
Messages
106
Reaction Score
0
Points
23
  • #2

Building a Screened in Porch​

Well, well, well. I think we’re going to do it. All that’s left with the house is to re-do the bathroom, kitchen and the back porch. Yeah, just the bathroom, kitchen and back porch….ya know, those cheap and easy projects.

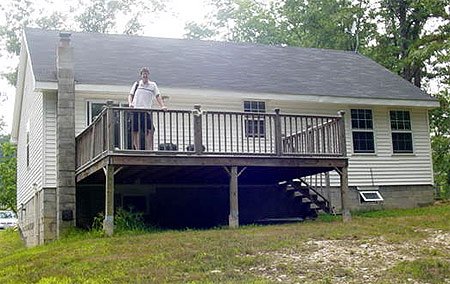
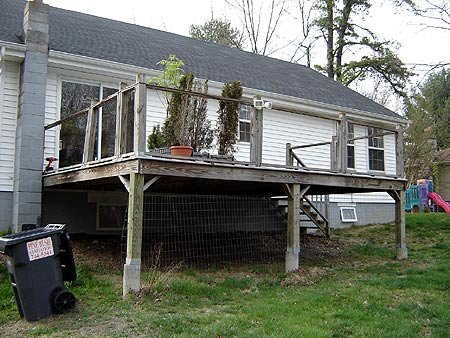
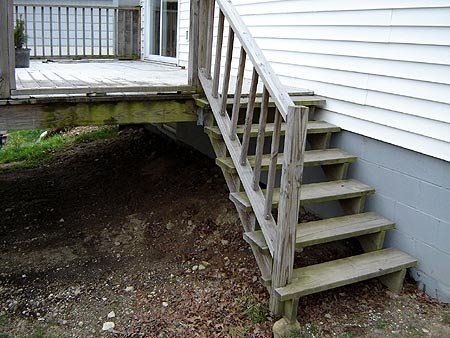
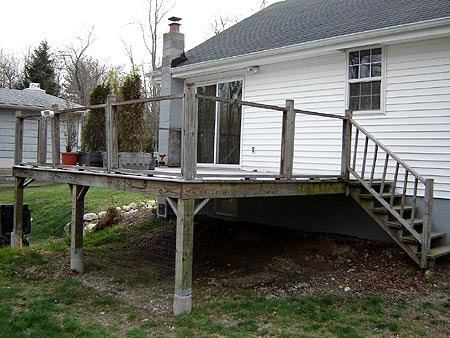
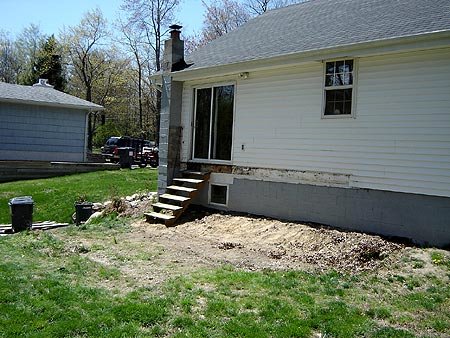
We are going tackle the back porch first. The one we have is in pretty bad shape. It’s made with that Trex stuff…only, I don’t think it is Trex. It may be some knockoff, who knows. All I know is it’s gray and very washed out looking. Also, the porch may be a little crooked, which drives me absolutely mad. The railings are hanging on by a thread due to poor workmanship and the top of the porch collects water. The whole thing just looks really bad. Are those enough reason to get this thing done? (Oh yeah, the bugs out here are TERRIBLE! The current porch is pretty useless as is.)

back_porch.jpg

As you may already know, I made our front porch. I am a pretty handy fella, but I just don’t want to do this one. The first reason is that this one will be screened in…meaning there will be a roof. I am really not in the mood to attempt to build that by myself. Also, I want it done quickly, so no messing around. It would take me about two years to get home all the lumber strapped to the top of my car again. I like to do projects little by little.

I am going to use a contractor that is a friend of my neighbor. He seems like he would do a good job of coming in a putting this thing up quickly. The porch will be 16′ out the back of the house and 20′ wide. There will be 6 sonotube footings, 12″ wide. There will be 2 main girders holding up 2×10″ joists. Everything will be pressure treated. For the floor, he will put down 6×1 5/8″ boards with a 4×4″ every 4′ to hold up the roof. The main beam holding up the roof will be a 4×6″. The roof will have to be built into the current roof, which is the tricky part…to me. I am sure it will take no time for these guys. Also, they are going to put in a set of 4’wide stairs about 4′ out from the house. Currently, the stairs are slapped right up against the house and very loose.

I asked that they don’t complete the railings and the screening. I want to do them. Those are things that I can take my time on. Also, I am going to tear down the current deck. My neighbor, Tim wants to burn it. I have to keep him away because it is pressure treated and I can use the wood for another project. Tim is disappointed, but still willing to help me.

I picked up the building permit from the buidling inspector yesterday morning and have to fill it in and drop it off so the contractor can draw his diagram.

Now, of course, you are going to see lots of pictures of this. I hope you are as excited as we are!
 
Newman

Newman

Member
Joined
May 11, 2021
Messages
106
Reaction Score
0
Points
23
  • #3

Back Porch Demolition​

The way I operate is like this; I usually just putz (that’s Laura’s word) around and kind of start tinkering with something. My tinkering turns into light work and the light work turns into hard labor. That’s how I built most of the things around this house. I never have a plan…well, not a real one anyway.

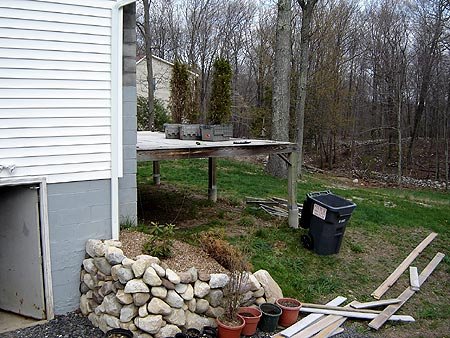
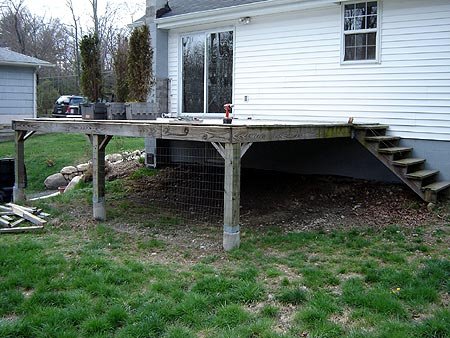
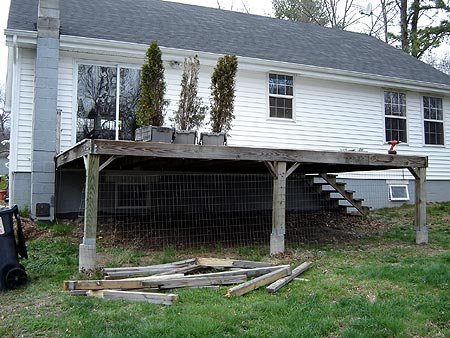
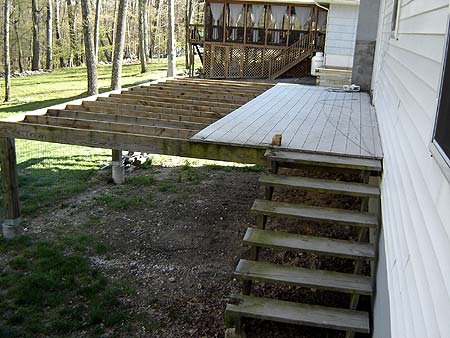
Yesterday, I got home and realized it was very nice weather outside. I grabbed a huge screwdriver, hammer and a cordless drill. I walked out on the back porch and started taking it apart. Before the end of May, I need to take the whole thing apart and dig out the old footings. The current ones are 8″ and the new ones are going to be 12″. Also, we are going to double up on the number of footings to take out any bounce. I hate bounce.

Here are some pictures of what I did yesterday. I took apart the railings. This weekend I will finish that up so all there will be left is the flat floor.

back-porch-demolition.jpg old-porch-stairs.jpg removing-porch-railings.jpg

Anything I take apart, I stack neatly down below. I also take all the screws out and save them in a bucket. I am going to make a real effort to save a rainforest with this project and re-use any material I can. All the lumber to construct this porch will be new, but with building the little stuff, I think I can get away with re-using some of what I have.
 
Newman

Newman

Member
Joined
May 11, 2021
Messages
106
Reaction Score
0
Points
23
  • #4

Am I Building a Porch or a Deck?​

Which is it? I think maybe a porch is in the front of the house and perhaps a deck is in the back? Maybe. I’m not sure. If you know, fill me in.

Anyway, I am so glad to be here to fill your lives with porch stories. I mean, c’mon, you know you read these things…haha. I just love the way I get on a topic and drag it out over months. Just wait until next year when I run out of stuff to write about and I start repeating myself.

Sooo…I did a little more work today. I had a few goals. I had to dig out three bushes and put them in pots. I planted them along the side of the deck last year before I got this bright idea of re-doing the thing. I transplanted a Lilac and two Burning Bushes…or Burning Bush…whatever. I also wanted to get all the railing parts disassembled so there was nothing more than a floor. I did that. Here, take a look.

porch-deck.jpg removed-porch-railings.jpg taking-apart-old-porch.jpg

So now you know what I have done so far. I also took up two floor boards. The Trex lookalike stuff. I have to say, I hate it. The bottomside is like a tan color and the top is completely gray and washed out. It’s only 6 years old, so that’s not good. I wonder if there was some sort of a sealer these people should’ve put on. Also, do you want to know how I got it into two foot lengths to put in the garbage can? I was going to pull out my brand new Milwaukee Circular Saw, (ooh so sweet) and cut the boards up when I got a bright idea…I went into the basement and grabbed the ax I bought but never used. I placed the boards flat on the ground and just chopped them. One chop for each two foot piece and I had the whole pile in the trash in ten minutes. Garbage.

So, by this point, you are probably wondering what the heck I am doing with trees on the porch. Well, when I noticed that the deer were eating them, I has to dig them up and put them in pots. It does sound a little weird, but I don’t have the heart to watch something be eaten by those beasts. Arborvitae is like candy to them.

Till next time!
 
Newman

Newman

Member
Joined
May 11, 2021
Messages
106
Reaction Score
0
Points
23
  • #5

Back Porch Disassembly​

It’s getting there.

Today, I took out all the screws holding the decking down. Many of the screws broke, so the boards are still somewhat held down. When I am ready to take them off, I just peel them up one by one and they “pop.” I am trying to do this slowly because the guys are scheduled to be here at the end of May. I don’t want to have it taken down too soon, but I do need to dig out those three footings. I have no idea what to expect with that. I kicked one today and it had some play in there, so hopefully it won’t be too hard to dig them out.

removing-deck-floor.jpg

I think I will get the whole thing down this weekend. I need to pile the decking up to get rid of it, burn some wood and stack the wood I am going to keep. There are many good 2x8s that I would like to use for the base of the railings, so I need to keep them in good shape.
 
Newman

Newman

Member
Joined
May 11, 2021
Messages
106
Reaction Score
0
Points
23
  • #6

How to Remove a Porch Footing​

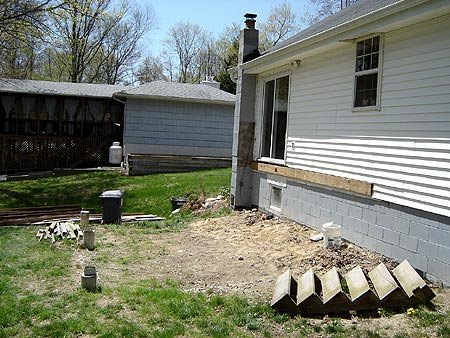
Well, it’s done. The porch demolition is complete. Now I just have to clean up all the building material. I have decking (floor) that I am throwing away and wood that I am burning and some that I am keeping.

I got up nice and early this morning to do some work on my sites and then tackle the porch project. I took off all the decking, removed all the joists and beams and removed the footings. I was kind of concerned about how the heck I was going to get the footings out. Here, take a look at these pics.

removed-deck-floor.jpg

This picture was taken about a half-hour into it this morning. I took the rest of the floor apart and some of the joists.

removed-deck.jpg

Ahh, finally getting somewhere…along with a little sunburn.

fulcrum-footing-removal.jpg

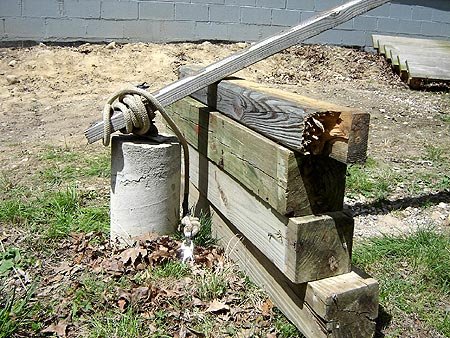
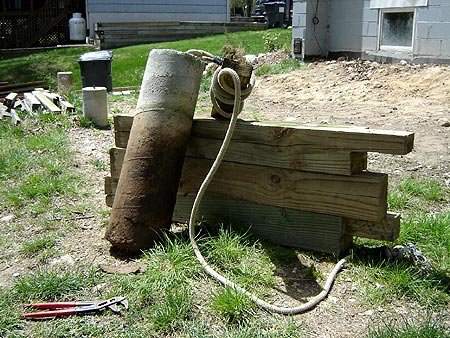
So how do you remove a footing? Well, if you are lucky like me and have some that aren’t built to code, you make a lever. Since the bolt was still sticking out of the top of the concrete footing, I just used a big washer, a nut, some strong rope and some junk wood and got a little creative.

removed-porch-footing.jpg

What I thought would be the worst part of the job took about twenty minutes to complete.

porch-demolition.jpg

There, done. I have to clean up the mess and then get some of that waterproof Tyvek stuff to seal up that one exposed area. Also, I have to screw the stairs to the back of the house so we can continue to let the dog out. We really don’t feel like going for a walk at 6:30AM.
 
Newman

Newman

Member
Joined
May 11, 2021
Messages
106
Reaction Score
0
Points
23
  • #7

Lumber Delivery​

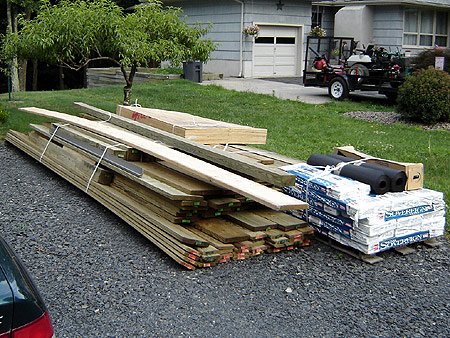
The long awaited lumber is in our driveway.

There have been some delays with getting the screened in porch built. I won’t go into them here, but they just happen, I suppose. Anyway, Monday morning is supposed to be the start date for the framing. I can’t wait to see something happening.

Right now, we still have the old porch staircase propped up against the back of the house, under the sliding glass door, to let the dog out. That is a real pain. I haven’t quite figured out how we are going to let the dog out with the new porch, but I am sure it will be fine.

Here, take a look at the pile of lumber and supplies…

porch-lumber.jpg

I brought some stuff, like nails, joist hangers, etc…down in the basement to keep dry and away from punk thieves.
 
Newman

Newman

Member
Joined
May 11, 2021
Messages
106
Reaction Score
0
Points
23
  • #8

Deck Footings Installed​

Today was a good day for the installation of the porch footings. In the last porch post I wrote, I mentioned that we were having some issues with rocks and needed to get a machine in here. Well, today was the day.

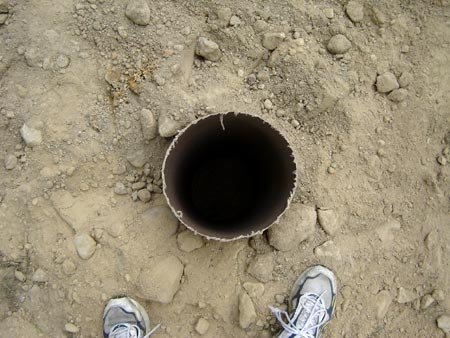
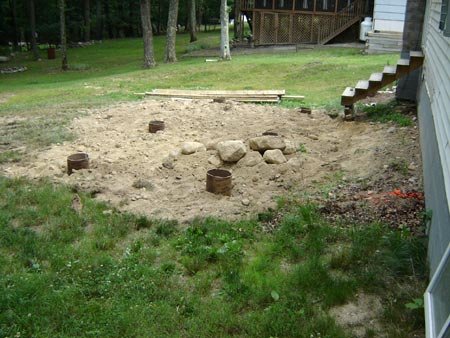
When I left this morning, the guys were waiting for the machine and operator to arrive. Darren gave me a call around noon and told me that the footings were in. They had some issues with lots of rocks and a stump that someone buried. Also, there was an unexpected pipe next to the septic pipe that was hit and needed replacement. You just never know what you are going to find when someone sells you a house with no instructions. You tend to figure these things out along the way.

12-inch-porch-footing.jpg porch-footings.jpg

We had six, 12 inch footings installed at 42 inches deep. They really don’t look like much in the photos above, just sticking a bit out of the dirt, but looking down the tube, you can see that they are pretty damn deep. Too deep if you ask me. The ones I pulled out were about 1 1/2 feet deep and were fine. Also, think about all those people out there who just lay a brick on top of dirt. Oh man.

The inspector came out today for the first inspection and left his card that said, “OK” on the back steps. Yeah…the steps. I can’t wait to burn those suckers.

Anyway, Friday morning, the guys are going to come back and pour the concrete in the tubes. Then, they will return the next Friday, after we are back from our little vacation. That’s when the fun starts…the lumber. Also, I have to write out more checks.
 
Newman

Newman

Member
Joined
May 11, 2021
Messages
106
Reaction Score
0
Points
23
  • #9

The Deck Has Been Built​

I was a little nervous this morning leaving people at the house to work when I wasn’t there. I have a problem with fearing the worst. Maybe I should work for the CIA or something. I’m sure they have room for some more paranoid people.

Anyway, I left and worked the day just fine. I wanted to come home to something I could inspect. I did. I knew at least the bottom (the deck part) would be built on our new screened in porch.

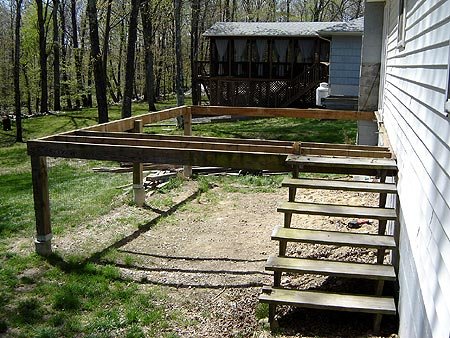
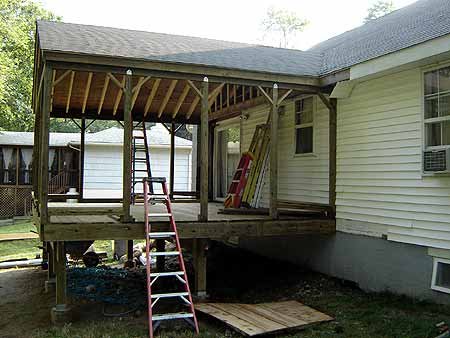
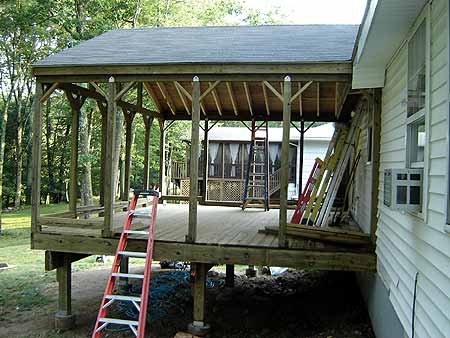
I pulled in the driveway and immediately walked around to the side of the house to see a nice straight and level deck built upon six 6″x6″ posts. I got level with the surface of the deck and saw that it was perfectly straight, with no waves whatsoever. Wow. I can be pretty handy at times, but I am sure I could not have pulled that off in any fashion.

Here, take a look at some screened in porch photos (well, almost)…
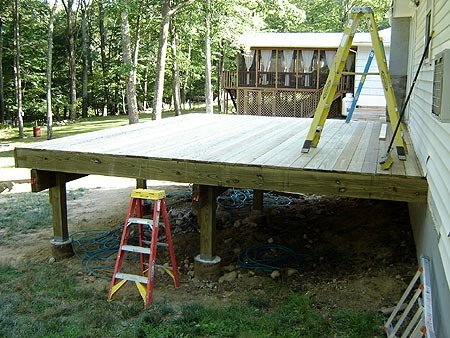
deck-bottom-1.jpg

This is the “deck” part of the porch. I have come to the conclusion that the deck is the bottom part and the porch is the whole thing with the roof. I may be wrong, so please correct me if I am. The dimensions of this new screened in porch will be 16′ out from the house and 20′ wide. I think it is actually 19’6″ wide. That’s fine with me. It is still bigger than the last one.
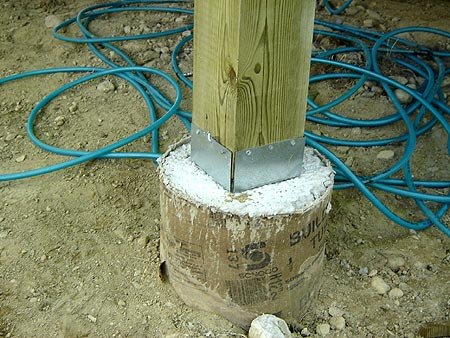
deck-bottom-2.jpg

This is a picture of the 12″ concrete footer. There are six of these, so this thing is plenty strong. They are 42″ deep. That’s code for our area. The last deck only had three 8″ footers and measured 14′ out from the house and about 18′ wide. Those footers were only about 1 1/2′ deep. Inspection? What inspection? Paul and I were talking about snow on the roof this morning. I don’t see the weight of the snow to be a problem with this type of strength.
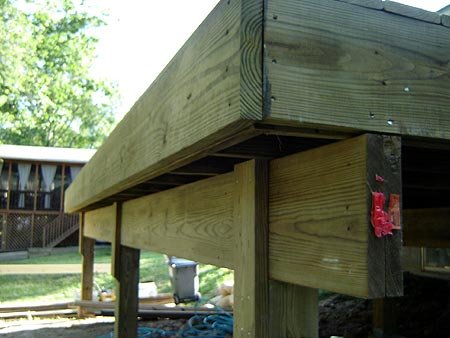
deck-bottom-3.jpg

I thought I would grab a shot of the edge of the deck here. This is the opposite end of what’s attached to the house. I like the idea of overhanging each edge about a foot. The first three footers measure 8′ out from the house, on center. The second set of footers measure 15′ out from the house, on center, which gives a nice overhang. As you can see (well almost), there are two sets of double 2″x12″ beams. I guess you would call these girders? Anyway, there are two 2″x12″ girders…one set at the first set of the footers and the other set at the second. They notched out the 6″x6″s and used a 2″x6″ to hold the girder in. I like that idea.
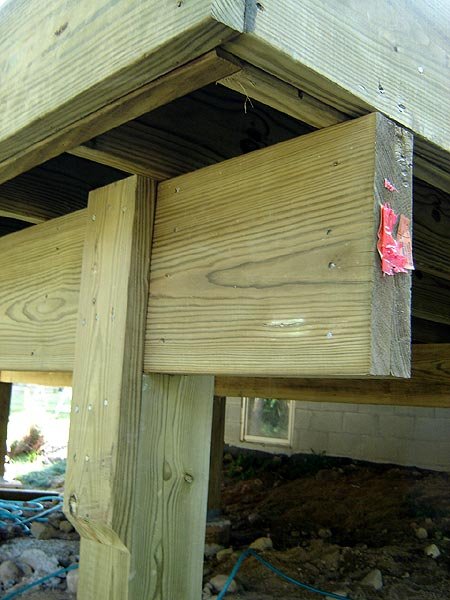
deck-bottom-4.jpg

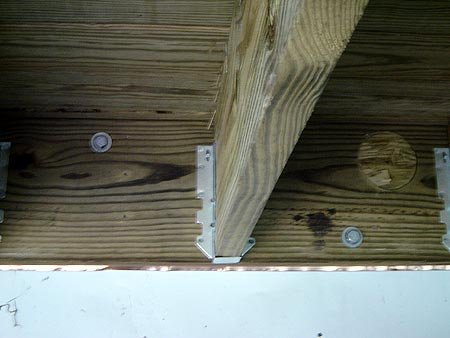
Here is a better shot of what I am talking about. You can see the joists in there resting and nailed on top of the girder.
deck-bottom-5.jpg

OK, now for up against the house. I was telling Paul this morning that, when purchasing the house, the inspector told me that the deck wasn’t securely bolted (enough) to the house. Because of that, I went out and picked up some nuts, washers and bolts and did the job myself. I suppose the building code has gotten a bit more strict since the time they built the first deck, because there is a lag bolt in between each and every joist this time around. Also, there is nice copper flashing nailed to the house before the 2″x10″ was nailed to it. The round semi-cut out portion you see to the right is the dryer outlet hole. Also, nice joist hangers were used to secure the joists to the header.

Maybe they are called headers, not girders.
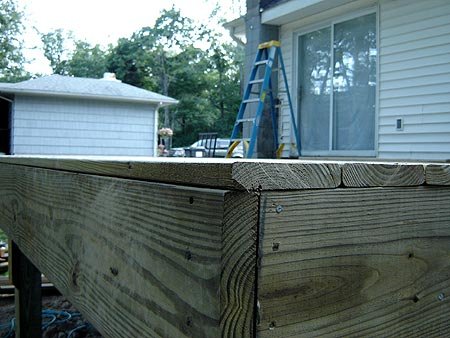
deck-bottom-6.jpg

I just took this picture to show you how level the top of the deck is…with no waves. I could’ve gone surfing on the old deck, it was so wavy. I like this one better.

They already took the almost 40′ gutter off the back of the house, so I am thinking tomorrow will bring the roof section. I am hoping, anyway. Oh don’t worry, there will be more pictures.
 
Newman

Newman

Member
Joined
May 11, 2021
Messages
106
Reaction Score
0
Points
23
  • #10

Framing in the Porch​

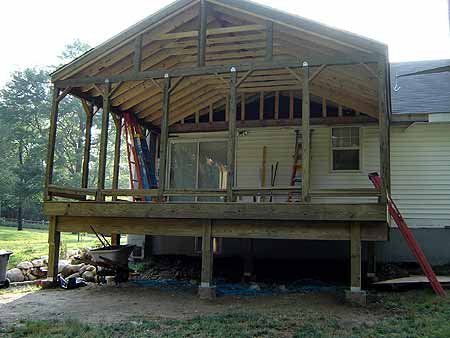
I came home today to see a good chunk of the upper part of the screened in porch framed in. Please, stop writing…just show the damn pictures. Ok, ok…I will. Right after I write a few things first.
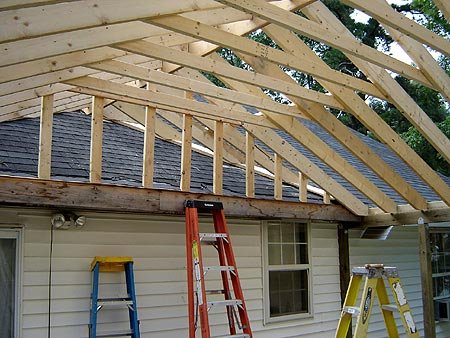
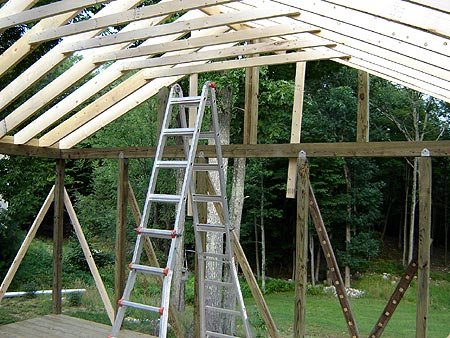
The guys are using 4″x4″s as the vertical beams to hold up the roof. They are located after 4 feet on center. This is good because it will be easy for me to attach the 4 foot wide screen and trim.

Darren said that tomorrow they are going to finish framing the roof and pour the concrete pad for the bottom of the steps. Also, he is going to give me a price on the railings and if I agree, they can get them done. They will also do a few odds and ends, along with placing the plywood on the roof joists. Then, Thursday, they are going to tar paper and shingle the roof and finish up.

Okay, here are the photos…

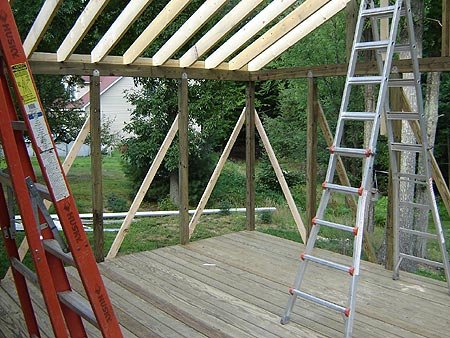
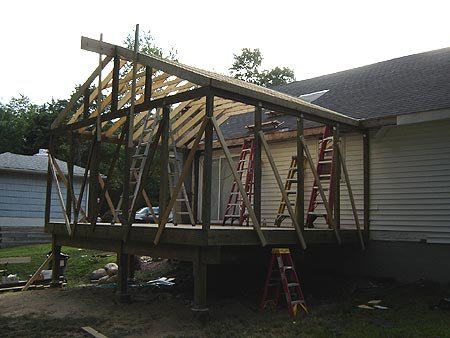
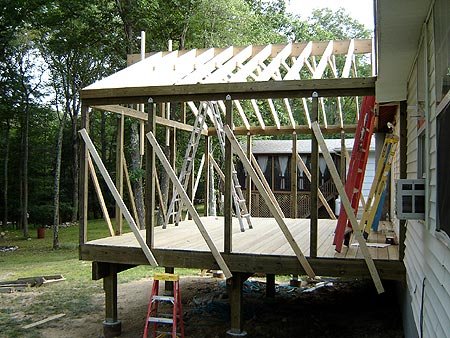
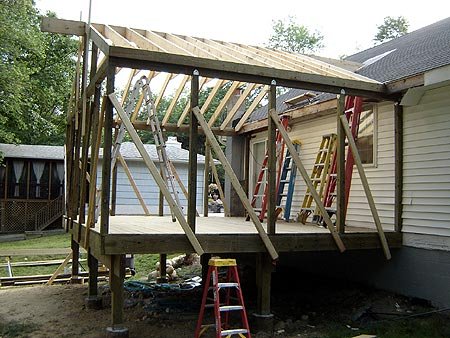
4x4-porch-wall-construction.jpg porch-frame-construction.jpg porch-framing.jpg porch-framing-roof-walls.jpg porch-roof-trusses.jpg
 
Newman

Newman

Member
Joined
May 11, 2021
Messages
106
Reaction Score
0
Points
23
  • #11

Finished Framing the Roof​

I came home today to a little surprise…the guys came over and did some work. I am not sure who made it, but the roof framing was finished. Also, the boards holding the walls steady were taken down. I think the roof keeps the walls sturdy.

This morning, I agreed to the price they gave me for the railings. I know I can do them quite easily, but I have other things on my mind. I need to do a bunch of things on my sites as well as call the gutter guy to fix up the gutters after the porch is done. I need to order 10 yards of mulch and spread it around the back yard. I also need to fix up the siding and plant some bushes and shrubs. Lastly, I think, I need to order about 8 yards of crushed shale and spread it out under the porch. Then, really lastly, I need to install lattice around the perimeter of the porch, so the dog doesn’t get all caught up down there.

Well, here are some photos of today’s work…

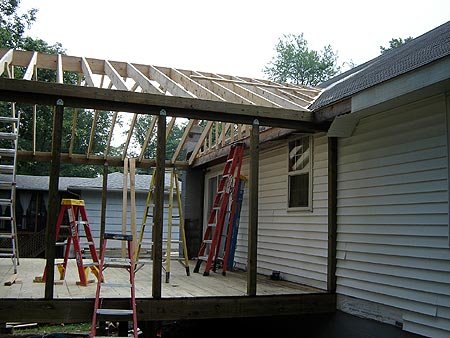
porch-roof-construction.jpg porch-roof-lumber.jpg porch-roof-truss-construction.jpg
 
Newman

Newman

Member
Joined
May 11, 2021
Messages
106
Reaction Score
0
Points
23
  • #12

Shingling the Roof​

When I left for work this morning, I noticed a few extra trucks parked along the road. Laura and I just looked at one another. There were quite a few people here today. Three of them were the regulars and the four additional ones were the roofers. Yeah, that’s right…we had roofers over.

Completed today was the plywood on the roof, the tar paper, the water block stuff for the joins between the new porch roof and the existing roof, the concrete pad for the bottom of the stairs and the beginnings of the railings. There was a huge thunderstorm today, so they had to leave a little early. What is with that? All summer long, it doesn’t rain…the minute I try to get something done that’s weather dependent…thunder storms.

Whatever…here are the photos for today. I think they will be done tomorrow. That’s not bad for this semi-large project.

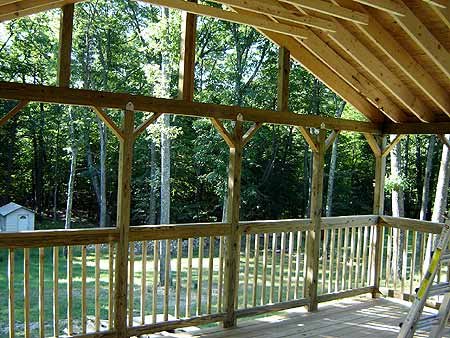
inside-porch-roof.jpg

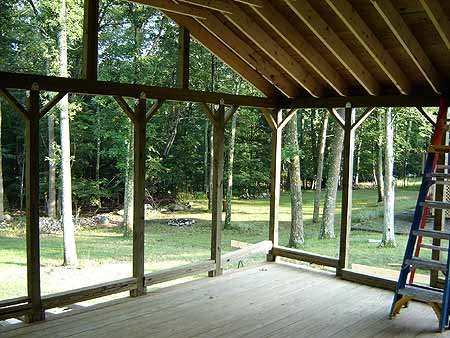
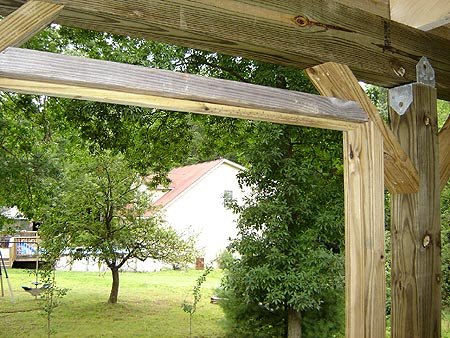
I like this view. If you walk out the sliding glass door and look to the right towards Tim’s crib, it would look like this. I just can’t believe how nicely this is coming out. As you can see, they also put up little angle pieces for strength. That was one of the things I kept mentioning that was important to me.

hipping-porch-roof.jpg shingled-porch-roof.jpg

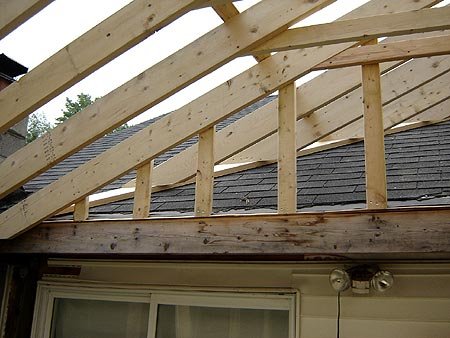
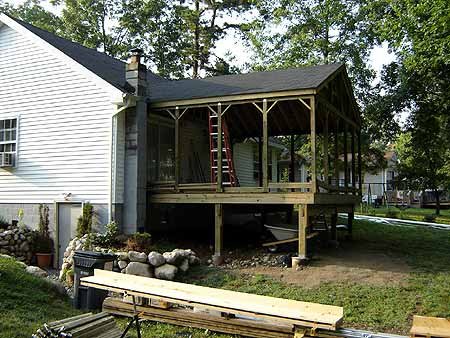
The roofers did a really nice job feathering the new shingles in to the existing ones. Also, the plywood on the ground has the concrete pad for the stairs under it.
porch-roof-shingling-construction.jpg

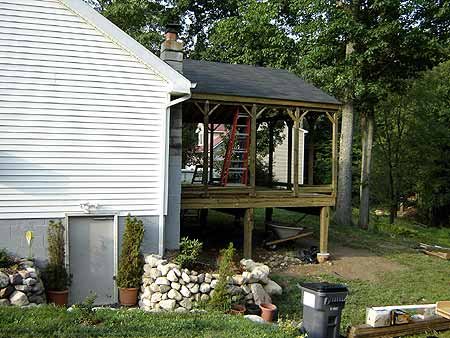
Here is a view from the back. This is good, because the old deck was absolutely miserable to look at from this angle.

finished-porch-roof.jpg porch-roof-view.jpg
 
Newman

Newman

Member
Joined
May 11, 2021
Messages
106
Reaction Score
0
Points
23
  • #13

The Porch Construction is Done​

Friday was the day the fellas left. I got home to an empty driveway. I actually felt a little lonely. I was getting quite used to all the action with building the porch and all. Oh well…I am sure I can think of another project to do. This is what rich people in Westchester do. (All I need now is to be rich) They are at home all day with their six nannies and one kid, so they think of projects to get workers over their houses. We saw this a lot when we used to cut down trees in that area. You think I’m joking…
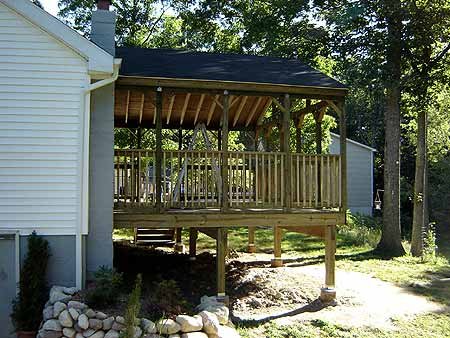
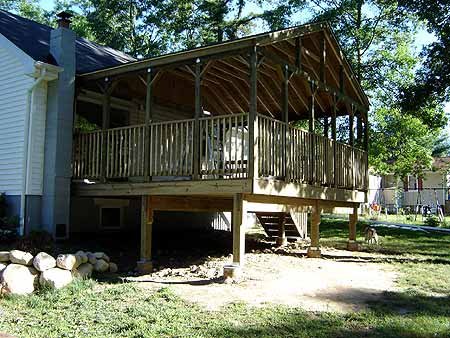
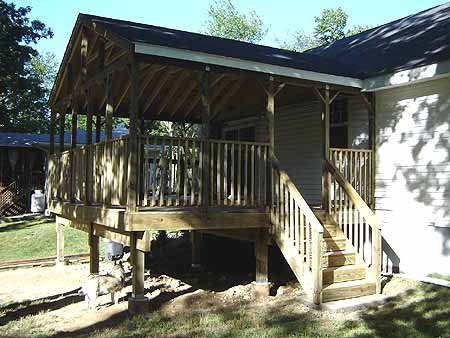
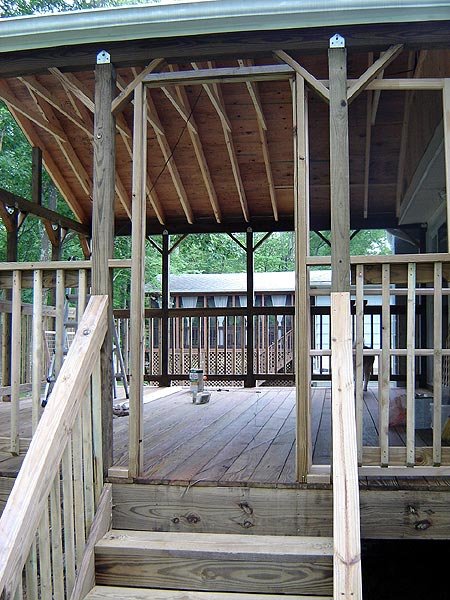
Anyway, the roof is on and shingled, the railings are up and the stairs are in. Even the concrete pad at the bottom of the stairs is poured. As per our agreement, they left some stuff for me to do. I had (have) to patch up the siding, put the gutters back up, fix up the inside peak, seal the wood, put up some flashing for behind the gutters and a bunch of other stuff. I already fixed all the siding, did the flashing, put some boards under the deck to keep the dog from getting all tangled up and put up one side of the gutters. I actually did a nice job. I still have to do a bunch more, but it’s getting there.

Here are some photos…

porch-railing-installation.jpg porch-railings.jpg porch-railings-steps.jpg screened-porch-railings.jpg

To help me with all the stuff, I bought a sweet ass ladder. It’s one of those Gorilla Ladders that transforms from a step ladder into a 19’6″ straight ladder. This has been a huge help because outside, I need almost the full length, but inside, that would never fit. I flip it around to make it either a short or tall step ladder. Those things really are a good idea.

Oh yeah…duh…I also have to put up the screening and the screen door.
 
Newman

Newman

Member
Joined
May 11, 2021
Messages
106
Reaction Score
0
Points
23
  • #14

How to Frame Out a Screen Door​

Yesterday, Paul and I went over to the Home Depot to pick up a few things. I had a list in my pocket. I wanted to get a few sheets of lattice, a screen door, trim for the screen door frame and some hinges and stuff. I also wanted to pick up the rolls of screening that I am going to use for the porch when I am all done sealing the wood. Home Depot didn’t have the screening. I bet Lowe’s does.

As I am only one man and only have a limited amount of time, I tackled just the screen door framing last night after work. Well, I did a little more sealing, but that didn’t take up too much time. The screen door frame is what this is all about.

If you know anything about hanging a door, you know it sucks for someone who has no clue how to do it. That’s where I come in. I just wung it. “Wung” is the past tense of “winged,” in case you care. I had a nice pressure treated 2″x4″ and all the stuff I would need, so I was in pretty good shape. Most importantly, I had my Dewalt Miter Saw for cutting the angles. That is a very handy tool to have. I am just glad that I bought the good one.

framing-screen-door.jpg

As you can see from the photo above, I was able to keep the angled 2″x4″s above the door frame. I liked that idea, because it keeps the look of the porch, instead of just slapping up some wood to make it work. I have discovered that, in life, the details matter.

Basically, I measured and cut the vertical 2″x4″s and screwed them in place. The way I got them aligned with the door is to have the door standing in position, next to the wood. I used a level too. I had to keep adjusting and adjusting. I cut the top piece and then added the trim pieces. The spring loaded hinges weren’t as spring loaded as I thought they would be. I am going to have to buy something else in addition. In the photo above, the door is open so the dog can go in and out.

Here is another photo of my handywork…

screened-porch-door-framing.jpg

The top piece was “recycled” from the old porch. I have a pile of that wood sitting to the side.
 
Newman

Newman

Member
Joined
May 11, 2021
Messages
106
Reaction Score
0
Points
23
  • #15

Installing Porch Screening & Weatherproofing Wood​

I really wasn’t looking forward to either of these tasks…that is sealing and screening in the porch. Sealing just sucks. I used a paint brush for the front porch and vowed that I would never do that again. Now, I use a wide brush with a broom stick screwed in to it. Also, I tried an electric sprayer for the railings, but ended up waterproofing my rhododendron. That thing made a mess. I returned it and picked up a two gallon canister sprayer…you know, the type people use for insect spraying. It’s in the insect control aisle of Home Depot, just in case you care. So, after a week and about six gallons of sealer, the porch is sealed…for a few years anyway.

Screening…ahh, screening. I bought 150′ worth of fiberglass porch screening yesterday from Home Depot. I kept going back and forth in my mind trying to decide if I wanted to use those screening kits or just use the staple gun. I ended up just using the gun. I started this morning and finished the whole thing by mid-afternoon. I sweat my ass off. I think it looks pretty good for being my first screening job. There are no wrinkles or sags. Actually, you could probably bounce a quarter off of them, they are so tight. I have a system…that I learned about half way through.

Here are some photos…

screened-porch-light.jpg

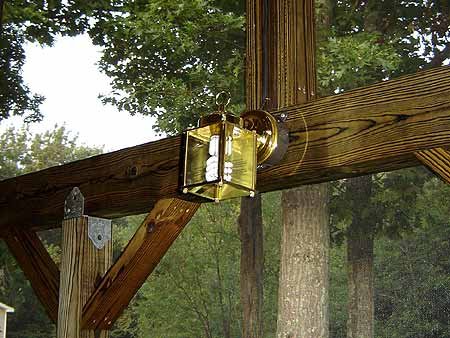
I bought two brass lights and installed them yesterday. These were pretty cheap at about $12 each.

installing-screen-over-porch-railing.jpg

This is a good shot of the almost finished screening. I mean, the screening is done, I just have to make sure all the staples are hammered in and I have to put up the trim boards. I am going to use mostly pressure treated 4″x1″s.

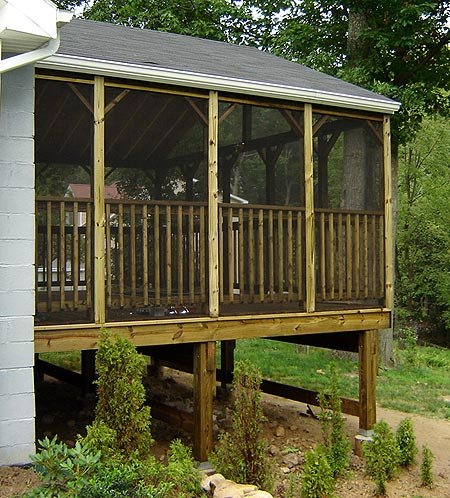
porch-screened-in.jpg

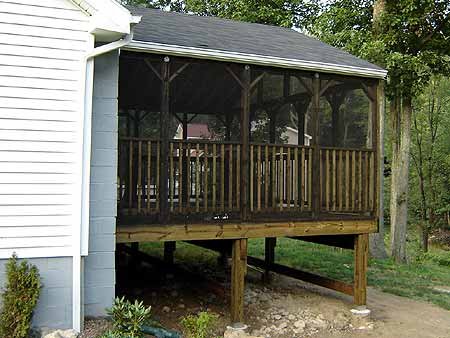
This is the rear view. You can see that I added the gutter and the boards down below. This is a reminder for the dog not to get all tangled up around the posts. She likes to do that.

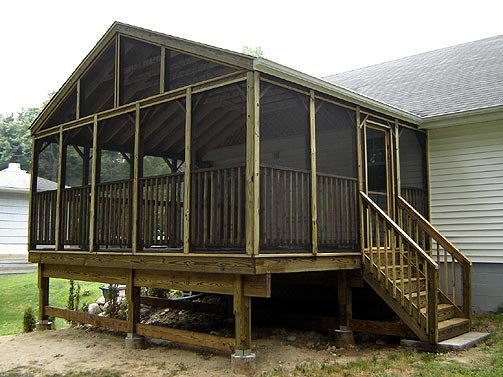
porch-gutter-installation.jpg

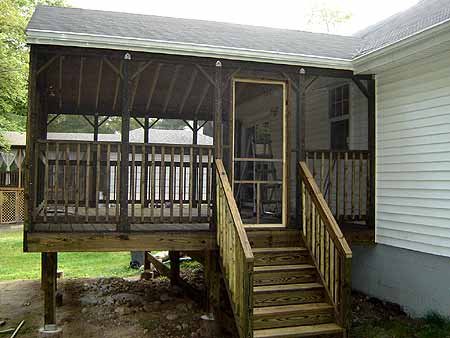
Here is the screen door actually closed, along with the stairs that lead down to a concrete pad. Also, you can see that I took the 37′ gutter and cut it to fit the corner.

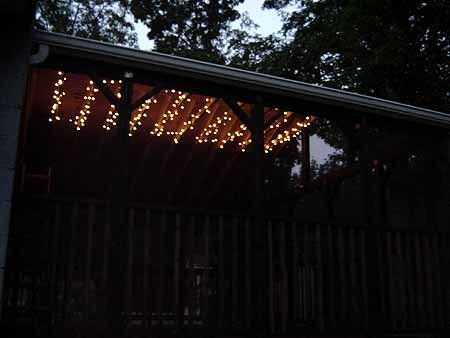
porch-interior-string-lights.jpg

I just did this about an hour ago. I took the three sets of Christmas lights we had stored in the basement and wrapped them around the wood in the ceiling inside. This looks really cool, but just temporary until we get the real string lights.
 
Newman

Newman

Member
Joined
May 11, 2021
Messages
106
Reaction Score
0
Points
23
  • #16

Adding Exterior Trim​

Yesterday, I screened the porch and today, I went out to Lowes and bought all the trim. I chose Lowes, because I looked at Home Depot’s trim and a lot of it was all warped and twisted. I wasn’t in the mood to search through that big pile all day.

I needed 16 pieces of 1″x4″s and 25 pieces of 1″x2″s. I also bought a nice box of 2″ decking screws. The verbiage on the box promised me that there is a special protective coating that won’t allow the screw to rust. Also, each screw has a special head that allows the screw to be removed easily. That is an important consideration when applying trim to a screened in porch. If the screen ever rips, each piece of trim must be able to be removed easily. Well, I guess it is objective to say, “must.” I would like it to be that way on this porch, because I like to do things a certain way. On your porch, please feel free to tear off your trim with a crowbar.

screened-porch-trim-molding.jpg

Okay, so here is what I did…I measured and cut each peice of wood. I used the 1″x4″s vertically and the 1″x2″s horizontally. I drilled holes in each piece of wood for the number of screws I was going to use for that piece. I had a little pan of wood sealer and a little roller nearby. When I had the wood cut and drilled, I would seal each piece before screwing it to the porch. This way, I seal the back of each piece as well. It was a little messy having oily hands and all, but it came out well. I am always shocked at the nice work I can do when I just take my time.

After I was done with that one side (actually, the only side I did today), I planted all the half-deer-eaten arborvitae I pulled out of the ground in the Spring. I had eleven of them. I replanted them on the side of the porch you can see above. I think they can take off again, if I keep the deer spray on them. My buddy told me that they never come back after being eaten. Strange, because they are coming back. I can see new growth. Bastard.

Anyway, the nice thing about this weekend in the Northeast was the opportunity to take multiple showers. It seems like every time I would come in the house, I would take a shower and change my clothes. I sweat so much, my pants were actually wet. Ahhh…humidity.
 
Newman

Newman

Member
Joined
May 11, 2021
Messages
106
Reaction Score
0
Points
23
  • #17

Screened Porch Installation Project is Complete​

I took the day off to finish up the trim on the screened in porch. This was pretty much the last thing I had to do before we start populating it with furniture. Good thing it was supposed to be 1,000,000 degrees out today. Hmmm, let’s add 3,700% humidity to that, ok?

I got started at about 8AM. I know this because I gave the wife a kiss goodbye and walked around to the back of the house. Basically, the trim story is the same as the last trim story, only this time there was some height and angle cuts to compete with. I accepted the challenge and conquered the…the…porch. I guess?

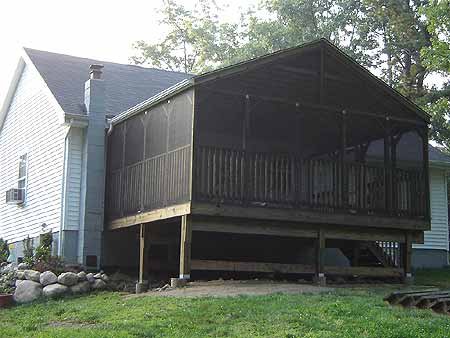
screened-in-porch-complete.jpg

Now, let me just tell you that this whole porch project is not for the average home owner. I just did the finishing up of it, but it was still quite challenging. What’s my secret? Well, I’m a super home owner, that’s all. Ok, here is what I do. Say I had to put some trim on the side of the porch, like I did today. 1) Have no plan. 2) Set up ladder and climb it. 3) Look around. 4) Climb down ladder and scratch head. 5) Get all the stuff you are going to need and get it done.

See? It’s that easy. All I need now is a toolbelt.
 
Newman

Newman

Member
Joined
May 11, 2021
Messages
106
Reaction Score
0
Points
23
  • #18

A Porch Update​

I just wanted to share with you the creatures who are really enjoying the new porch more than anyone else, especially since it is getting a little chilly in the morning. Please allow me to introduce to you, Simon (the orange cat), Michael (the black and white tuxedo cat) and Flipperhumanbodyman (the all black cat).

cats-on-porch.jpg

Now, here is Simon the fat cat enjoying partial sunlight.

simon-on-porch.jpg

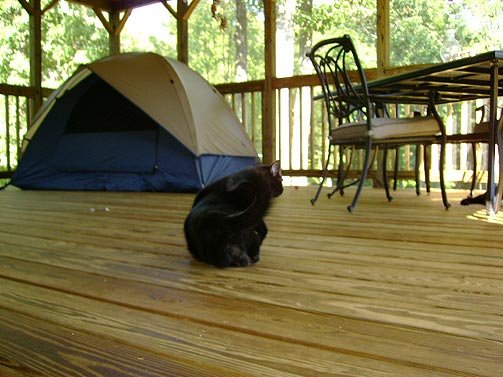
Lastly, this is the tent that Rob gave me for my thirtieth birthday. Luckily, Laura got Flipperhumanbodyman laying down right in the middle of the shot. Picture hog.

tent-on-porch.jpg

By the way, my lady is to be credited with these beautiful shots. It comes naturally for her.
 
Top