Search

Everything to Know About Bushcraft & Camping

  • Thread starter JGaulard
  • Start date
JGaulard

JGaulard

Administrator
Staff member
Site Supporter
Sr. Site Supporter
Power User
Joined
May 5, 2021
Messages
319
Reaction Score
2
Points
18
  • #1

What is Bushcraft?​

I’m new to this game, so I’m still trying to figure it all out. Luckily, I’m quite astute when it comes to activities like this. I pick up on things extremely quickly.

I’ve heard of the term bushcraft for years. I’m not sure I’ve ever given it much thought before. I’ve always been a straight up camper and surviving in the woods hasn’t appealed to me all that much. It wasn’t until recently that I became interested in the actual survival part. You see, I went winter camping for the very first time and that adventure shed an entirely new light on things. Now, I can’t stop thinking about this stuff. And of course, I’d like to know what the word bushcraft means. It seems to be at the center of everything.

To start off, I think I’ll tackle the actual word itself. I’ll pretend that I’m talking to someone who has absolutely no idea of what’s going on. They’ve never gone camping or walking in the woods before. They’ve never even gone on vacation away from civilization. It’s to this person that I would say that the word bushcraft is both a noun and a verb. It’s not like the words camping or hiking. Bushcraft can be described as a noun in this way; it’s an activity in which someone or someones shows an interest in being with nature and learning how to make do the best they can, as self sufficiently as possible. Anyone can go borrow a camper and sleep in the woods. Not everyone can create the perfect campsite in the wilderness; one that will afford them the opportunity to lie under the stars safely and securely.

I saw a quote today that was written by a father of two girls. The family visited Maine and stayed in the Grand Falls Hut that’s operated by Maine Huts & Trails. Even though they weren’t exactly roughing it as much as hard core bushcrafters would, the quote was reminiscent of something a budding outdoorsman would say.

“My goal for the trip had been for our girls to lose themselves in the woods, to scale rocks and imagine mountains, to ford streams and envision raging rivers, to make believe deep in nature.”

Pretty cool, right? If you’ve got that as a goal for your daughters, you’re a good father. I can tell you that right now.

Bushcraft is about getting to know nature. It’s about forgetting the indoors. It’s about making your own way. Respecting your gear. Finding new gear that will suit you well. Gear that fits your own needs. It’s about comfort and survivability in the elements. It’s about being different from all those who choose to ignore the forest, avoid the woods and stay away from the out of doors.

schrade-snife.jpg

As a verb, bushcraft is the art of doing all these things. It’s not thinking of them, it’s actually doing them. It’s the act of standing up and walking to the quiet and peace and choosing a location in which to live for the next minute, hour, day or week. It’s the roughness of it. The challenge. It gives you the feeling in your stomach of nervousness, excitement and dread, all in one sitting.

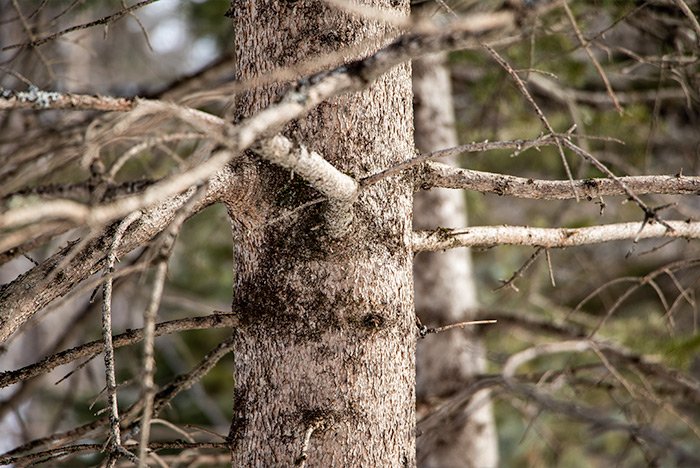
When you look at a tree, what do you see?

pine-tree-branches.jpg

Here’s what a bushcrafter might see. Branches to tie things to. To whittle and carve. To make into something. Logs to cut for firewood. Is it dry? Is it dead? Can I burn it? Can I use part of the tree as a shelter? As a fence? As a weapon? There are so many ways that someone who is into nature thinks differently than someone who isn’t.

So, what do bushcrafters need to know? If you’re reading this right now and if you’ve never gotten into any of this, I’ll give you a very brief overview of what’s most important when in the woods.

First, you need to know how to use the proper knife for so many things. The knife is one of the most important pieces of equipment for surviving outdoors. You also need to know how to make a fire and how to keep it going. You need to know how to transport fire from one location to another. Having knowledge of knots is critical. When outdoors, you’ll use rope all the time. You need to know how to strengthen it, use it for shelter and how to use it as a weapon, if need be. Hunting, trapping and fishing are categories unto themselves. This area is huge, but you’ll need to know about all of it. If you like food, you’ll find this topic invaluable.

Beyond what I’ve already mentioned, you’ll find that making shelter is one of the most rewarding aspects of spending time in nature. When your shelter is right, you’re right. Whether it be a tarp, tent or cabin, each has their own benefits and qualities. Tracking and recognition are important as well. Learning the habits of animals can help lead you to water sources and sources of food. It can also aide with hunting. Finally, we have foraging. If you’ve ever seen a wild bush with berries on it, you’ve likely wondered if those berries were edible. You should learn about plants and bushes in the wild. Your life may depend on it.

Simply put, beyond all the theoretical stuff, bushcraft is simply the art of using the nature around you to have the best experience possible. The more you know, the less you’ll be reliant on gear and modern amenities. Nature is chock full of resources that are waiting to be tapped into. Learn about them and take advantage of them. Plants, animals, topography, trees, shrubs – it’s all there for you. Educate yourself and when you do, you’ll face down many more life issues than you ever have before and you’ll become more self sufficient and confident. You’ll learn how to survive in the wilderness and you’ll create a mindset to face challenges head on as opposed to turning away from them. You’ll create a new you.

What are your thoughts on bushcraft? Are you involved in this hobby, sport or whatever you’d like to call it? If you are or you aren’t, please share your thoughts in the comment section below. Thanks for reading!
 
JGaulard

JGaulard

Administrator
Staff member
Site Supporter
Sr. Site Supporter
Power User
Joined
May 5, 2021
Messages
319
Reaction Score
2
Points
18
  • #2

Looking For the Best Bushcraft Book to Learn From​

I am very new to bushcraft, although I have a long history of being active in the outdoors. I live in Maine, which, if you aren’t aware, is one of the most outdoorsy states in the entire U.S. People around here practically live outside. Needless to say, I need to get up to snuff. I’m actively searching for the best bushcraft “bible” I can find. I’ve seen some titles on Amazon.com that appear to be fairly decent. These are:

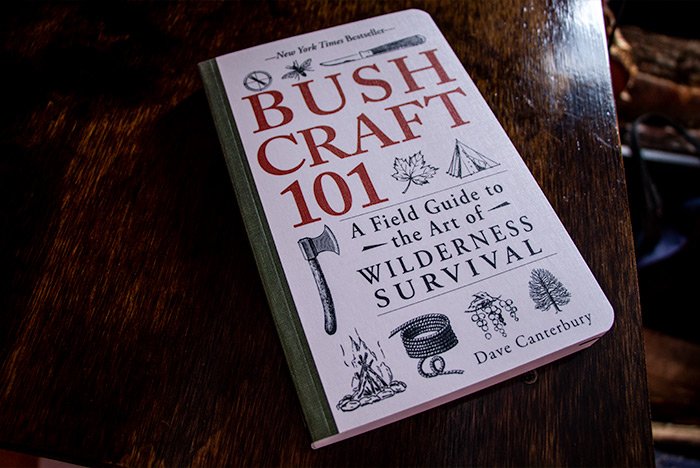
– Bushcraft 101: A Field Guide to the Art of Wilderness Survival by Dave Canterbury
– Advanced Bushcraft: An Expert Field Guide to the Art of Wilderness Survival by Dave Canterbury
– The Ultimate Bushcraft Survival Manual by Tim MacWelch
– Bushcraft: Outdoor Skills and Wilderness Survival by Mors Kochanski
– SAS Survival Handbook, Third Edition: The Ultimate Guide to Surviving Anywhere by John ‘Lofty’ Wiseman

Basically, I’d like to know which one of these books is the best for a beginner. They’re all rated very highly. I know the second one says that it’s advanced, but I’ve heard that it’s actually not too bad for someone like me. Also, if there is a book that’s not on this list that you like, please let me know.

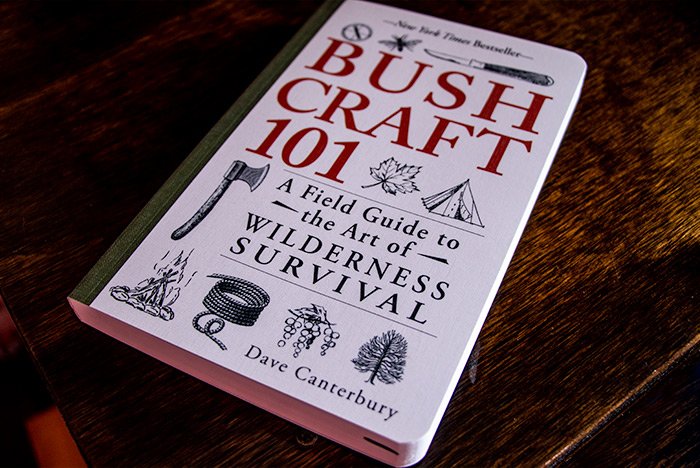
I recently ordered and received Bushcraft 101 by Dave Canterbury and it looks decent. I haven’t gotten into it yet, but I honestly thought it would be somewhat larger. It’s more like a handbook. Not knowing the size of something is a risk we take when ordering books online. I’m sure I’ll learn a lot from it, but unfortunately, I don’t think it’s the bible I’m looking for.

Any advice and a point in the right direction would be great. Thanks!

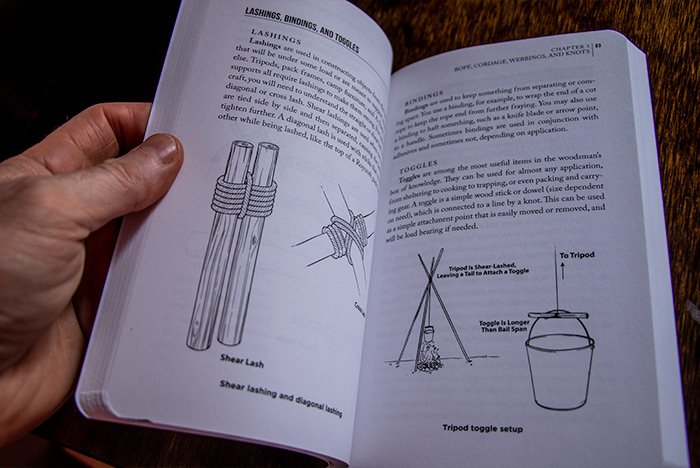
Here are a few photos of the Bushcraft 101 book I received. I bought it used and it’s in great shape.

bushcraft-101-dave-canterbury.jpg lashings-bingings-toggles.jpg
 
JGaulard

JGaulard

Administrator
Staff member
Site Supporter
Sr. Site Supporter
Power User
Joined
May 5, 2021
Messages
319
Reaction Score
2
Points
18
  • #3

Winter Camping in a Chilly 4° Fahrenheit​

I’ve got this friend who is totally into camping. He’s gone winter camping on our property earlier this season and recently showed interest in doing so again. The last time he camped, he did it alone. The temperature dropped to five degrees Fahrenheit overnight and I had no interest in joining him. I didn’t even have the gear that would keep me alive, so he did it alone. Brave man my friend is. He slept in a hammock and, in the morning, he told me that he froze his ass off. I’m not even going to tell you about the coyotes.

This friend of mine, Ian, recently purchased a tent that he felt would help him brave the elements a little more than the hammock did. The tent is the reason he wanted to camp again – to test it out. I invited Ian to camp in our back woods and he let me know that he’d be doing it this past weekend. This is where the story gets strange. About an hour after he let me know he’d be camping here, I found myself on Amazon purchasing two sleeping bags that were rated for -35 degrees as well as a tent. I have no idea why I decided to join him this time and to bring my lady along. These things just happen, I suppose.

Perhaps I thought it wouldn’t be too cold overnight, being March and all. I guess I thought the overnight temperature would hover around 20 degrees, which is like a heatwave in these parts during the winter. Well, they didn’t and it wasn’t. I’ll tell you about that below.

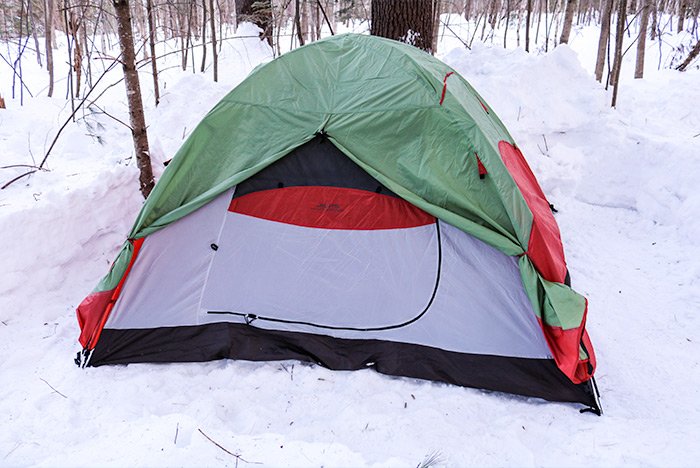
We camped this past Saturday. I had to haul all of my gear back into the woods. We found a nice spot about five acres away from our house, so if something went drastically wrong, we could all run back to save our behinds. My gear consisted of an ALPS Mountaineering Taurus tent, two huge Teton winter sleeping bags, an air mattress, a tarp, saw and a bunch of other stuff. I wanted to be ready and I wanted to be comfortable.

When Ian and I located our camping spot around noon on Saturday, we immediately began shoveling. He shoveled the snow from his tent spot and I shoveled the snow from ours. That took at least an hour and it was fairly brutal because of the depth of the snow. It’s almost three feet deep back in the woods and I shoveled over two feet from a spot that measured approximately 12 feet by ten feet. Luckily the tent I purchased is extremely simply to put up. It took all of three minutes.

alps-mountaineering-taurus-tent.jpg

After the tent was up, I inflated the air mattress and put down two moving blankets I recently purchased from Tractor Supply for only about $8. They were on sale and I thought they’d be perfect for this use. They were. I put the sleeping bags on top of the blankets and then added another blanket on top of the sleeping bags. I had never slept in 13 degree weather, so I over prepared. That’s what the weather forecast told me the temps were supposed to drop to. Thirteen degrees.

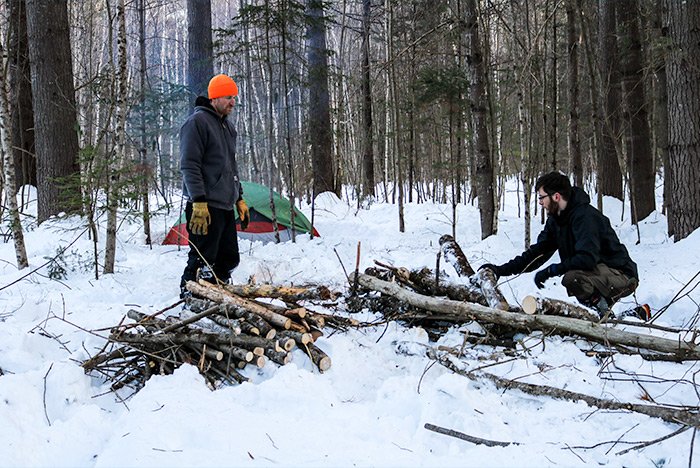
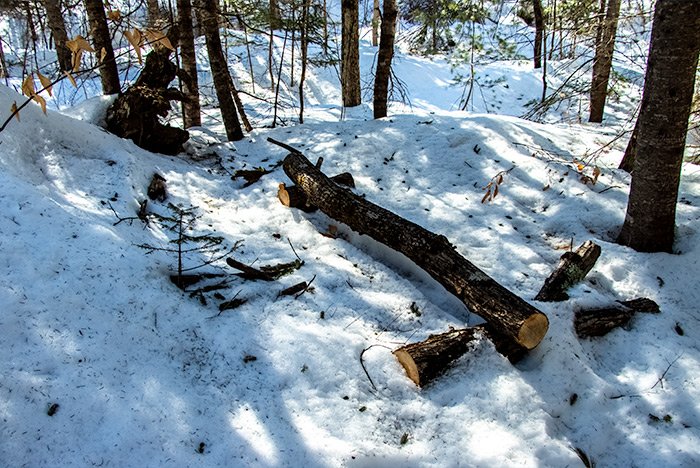
For most of the day, Ian and I cut down trees for our fire. I started the fire around four o’clock and we had it going until the next morning. Wood burns very fast outside, so we needed a lot of it. This is us processing a part of our stash.

winter-camping-snow.jpg

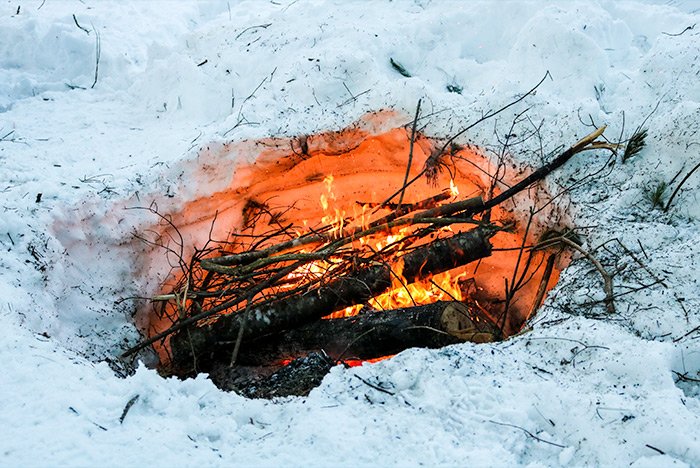
And this is the fire I got going. By morning, this hole in the snow was about eight feet wide and all the way to the ground.

camping-fire-pit-snow.jpg

We hung out by the fire for most of the evening and around midnight, we decided it was time to go to sleep. This is the part I wanted to tell you about. It’s the fun part to read.

Let me tell you something. If we had decided not to sleep outside and if we had simply walked back to the house, the entire night wouldn’t have been memorable at all. We would have just hung out in the woods for a while and then left. We were toasty from the fire and things were fine. The fact of the matter is though, we didn’t go back into the house and we did sleep in the tents and I can tell you, it was memorable. I have never done anything like this before in my life.

It was like slow motion. We left the campfire and walked over to the tent. The minute I reached the door and unzippered it, I knew we were in for an adventure. First off, I had no idea where to put my boots. Any warmth I had accumulated from the fire was gone. I was totally freezing and there was no room in the tent for our footwear. My lady took her boots off, stepped in the snow and crawled into the tent and then I did the same. After that, we took off our jackets and gloves and tried to get into the sleeping bags. By this point, we were half frozen. I was utterly shocked by how fast this happened. The time that passed from being comfortably warm to being half frozen was only about two minutes. Apparently, the weatherman was incorrect in his forecast because the temperature fell to four degrees and I’m willing to say it fell even farther than that. I can only describe the feeling as a bone chilling bitter cold. The word “bitter” is all encompassing here. Our hands were cold to the core and again, it only took about two minutes for that to happen. I have no idea why it occurred so fast.

Anyway, both of us wore our thermals, pants, sweaters and big warm hats to bed. Once I got in my sleeping bag, I was fine. As for my lady, she told me that she was less than warm and that she shivered a few times. When we woke up in the morning, I felt as snug as a bug in a rug. She said she was cool overnight, but that the sleeping bags performed well. I think the reason that I did so well was because I had myself completely encapsulated in my sleeping bag and she didn’t. She had her head sticking out somewhat. I can tell you that if you have even the slightest air gap in the bag, all the outside cold air will rush right in. The cinch feature of these sleeping bags truly needs to be taken advantage of.

Also, I learned that when winter camping, you absolutely need to wear a winter hat all night long. Better yet, wear a balaclava. There is no way you’ll make it if you don’t. Your head gives off so much heat that you’ll likely feel extremely cold if you leave your head bare.

When we woke up in the morning, I found a layer of frost inside the tent from our breathing. Any moisture that came from our lungs condensed and froze to the walls and ceiling. It was crazy. I could scrape it with my fingernails. We made it though and I was extremely proud of the three of us for persevering. Even though it got very cold, we all stuck to it and stayed out there and that’s an adventure in itself. I am so glad we did this.

In the morning, we woke up and I broke down the camp. I hauled it back to the house and then we enjoyed a huge skillet breakfast. That was fun. We were exhausted from not getting much sleep and we all napped later on that day.

If I were to do this again, I would change a few things. Things primarily inside the tent. Next time, I wouldn’t use a queen size mattress and instead, I’d go with two twins. I’d put each one up against opposing sides so there’s a clear area in the middle. That way, we could take our boots off inside of the tent instead of outside. Also, I wouldn’t feel like I was going to roll off the mattress all night long. Queen size mattresses aren’t exactly queen sized. Also, I would probably set a tarp up to cover the tent on the outside. I heard that this can keep things somewhat warmer. I’d also use my little propane heater to warm the tent and sleeping bags up before we got inside because warm sleeping bags makes everything better. Just a few ideas.

Have you ever gone winter camping before? What are your experiences? I would love to read about them. Thanks for reading!

Visiting Our Winter Camping Spot in Maine​

Part 2

As I’ve mentioned above, my lady, my friend and I went cold weather camping overnight here in Maine a few weeks ago. There was about two and a half feet of snow on the ground and we had to do tons of shoveling in order to set up our tents. We also had to cut down a few small Ash trees to use as firewood. We had a great time that night, but it was very cold. I’ve never slept in that kind of cold before, but I, well, we survived. Yes, we all made it and we were very proud of ourselves in the morning. I think our -35° sleeping bags had something to do with our success.

My lady and I went back into the woods again yesterday to visit our camp site. Some of the snow has melted off and I wanted to see what the area looked like. I sort of missed it. It’s not like it’s too far away from our house or anything, so it wasn’t a long walk. We also wanted to hang a new deer feeder that we recently purchased back in the woods. We bought that from Tractor Supply along with a 50 pound bag of feed from a local hardware store and we wanted to get that set up for some future photography. Our goal is to hide in the woods while the deer are eating so we can photograph them.

In this post, I simply want to share a few photos of our short hike to the back of our property. We own 15+ acres here in Maine and it’s stunningly gorgeous. I love all the different species of trees and most of all, the abundance of and variety of pines. The topography is nice too. There’s a bit for everyone here on our land. Plus, it’s great for camping.

Okay, here are a few photos. I’ll try to tell you what you’re looking at before each one, since they’ll likely all look the same.

This is the beginning of the hike. It’s right past our back yard and it leads into the woods. This area is full of sugar maple trees. I have tapped them in previous years for syrup.

maple-forest.jpg

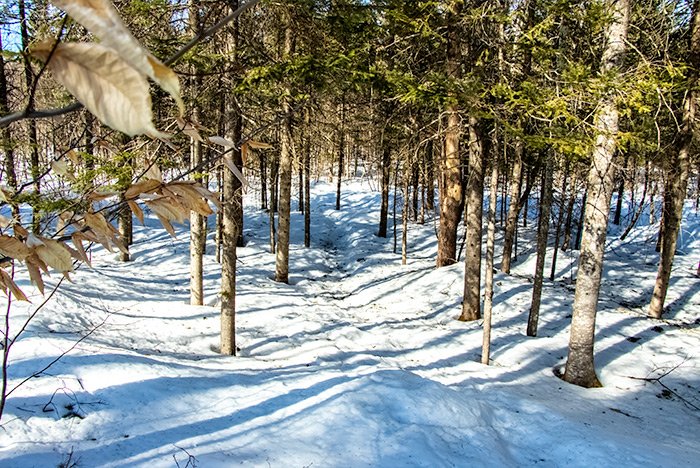
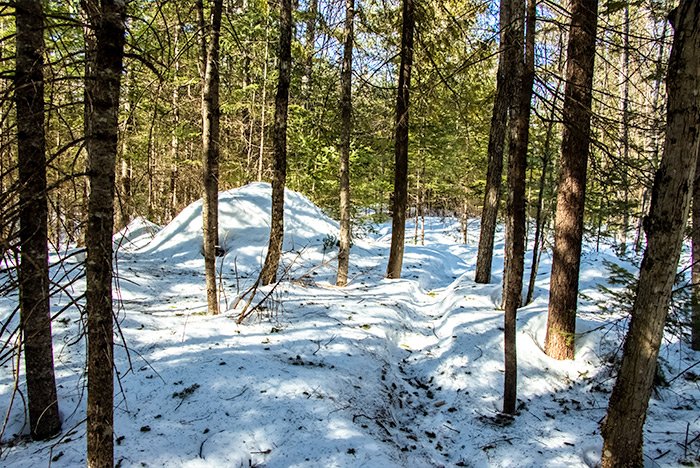
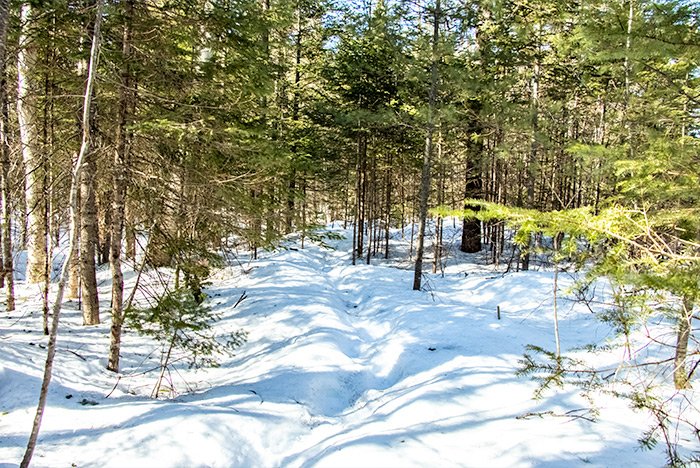
This is the beginning of where I recently began cutting the trail that leads back into the woods. Since the closing for the land I purchased was in December, there was snow already on the ground. Some of the stumps from the small trees I cut down are becoming visible. Some of the land is actually swampy in this area, so I’m interested to see just how swampy it is come spring.

trail-into-woods.jpg

We call this area “Big Rock” because it contains a large boulder that tells us the trail splits off in two. If we hike to the left, we go to the northern corner of the property which is elevated somewhat and if we hike to the right, we go towards our camp areas to the west. The big rock is covered with snow, but you can still see it.

big-rock-woods.jpg

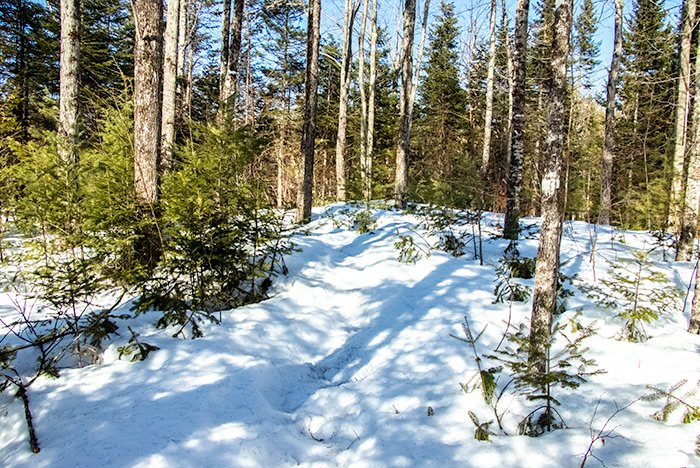
This next shot is of a snow trail I made that leads to the area our friend used as his camp site. This area was completely thick with small pines before I cleared it.

snow-trail.jpg

And this is his camping area. While we were setting him up, we made a nice bench out of a Maple tree for him to sit on.

camping-bench.jpg

His fire pit is to the left of the bench, but you can’t see that now because of all the snow.

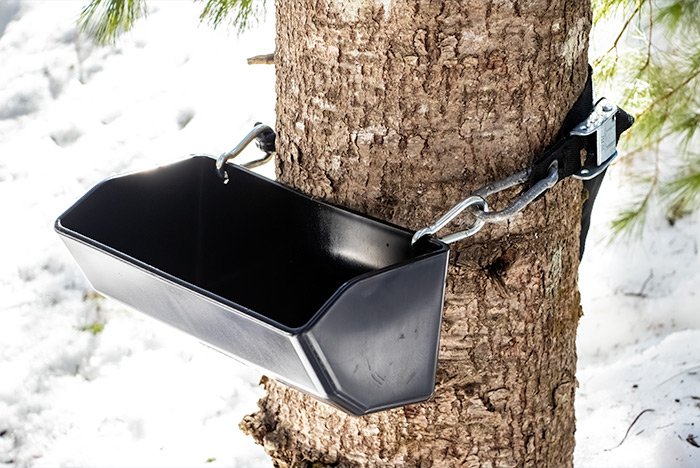
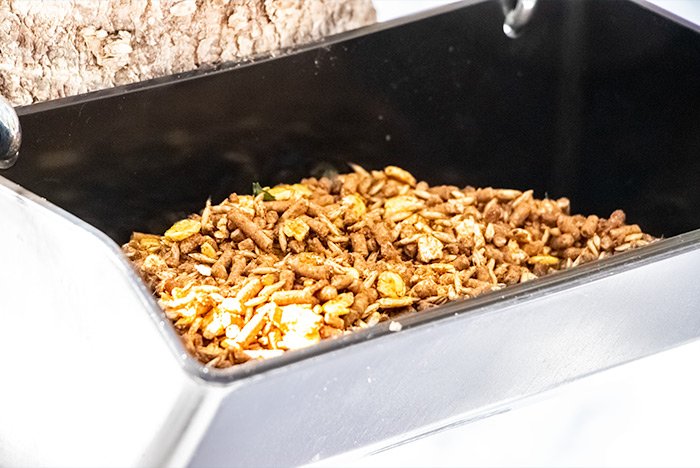
These next two shots are of the deer feeding trough that we hung from a pine tree as well as the deer feed we purchased to go in the feeder. So far, we haven’t had any deer visit it, but we’re heading back there in about an hour to check on it today.

deer-feeder-trough.jpg deer-feed.jpg

We set this feeder up right past the small camp site I just showed you. We did this because the area is somewhat of a valley and we thought the deer would feel safe there. We also saw deer tracks in the area. Hopefully they’ll smell the feed soon. It stinks pretty bad.

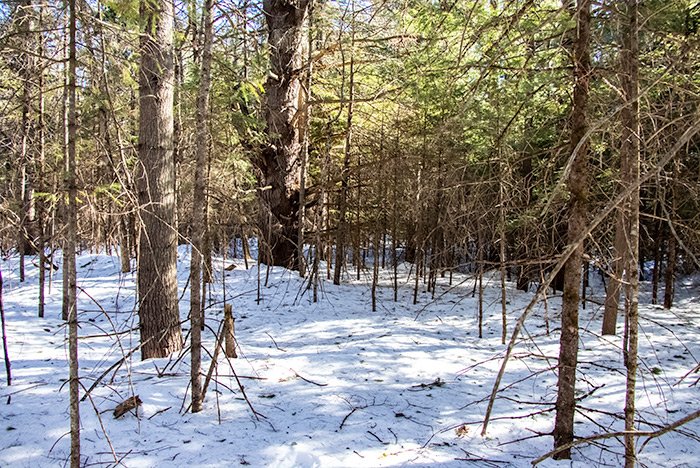
This area was my first choice for a camp site. We decided to head further down the hill though because the eventual camp site was more open and we’d have to cut down fewer trees to make space.

alternate-campsite.jpg

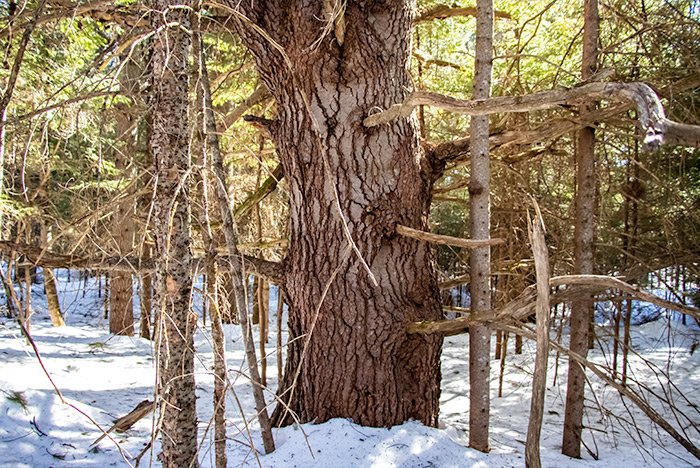
I did like this area though because it was almost directly underneath an enormous White Pine tree. It was huge.

huge-white-pine-tree-trunk.jpg

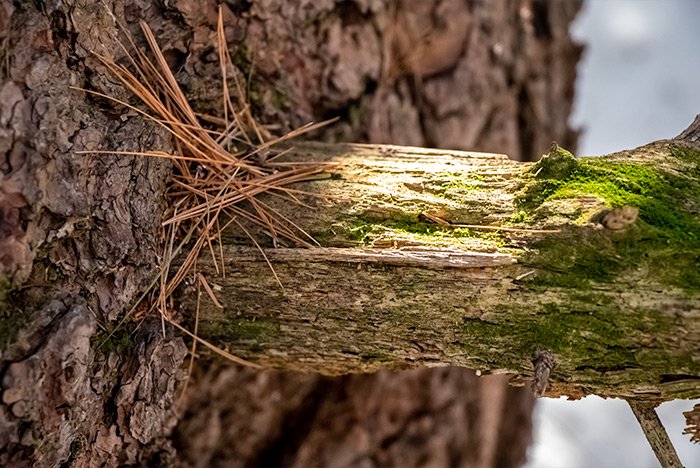
Don’t even ask about these next two photos. I’m on a hunt for fatwood and I haven’t been having much luck finding any. I will soon though because these woods are full of downed and rotting Spruce and other pines trees.

This is the dead White Pine branch I was about to chop with my new hatchet.

dead-white-pine-branch.jpg

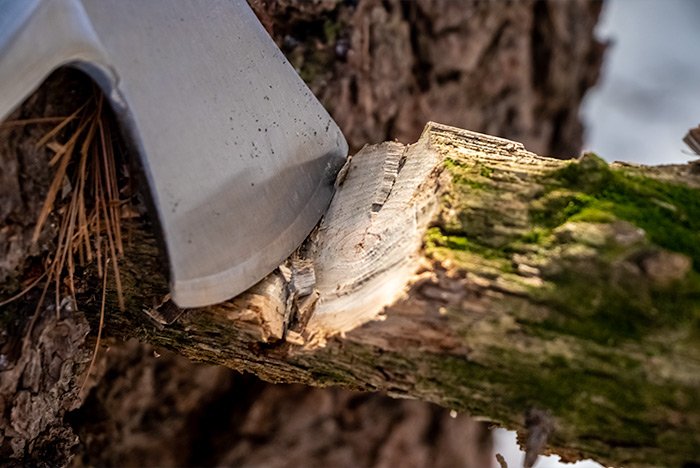
And here’s a photo of the branch half chopped away. You can see how dry it is in the center of it. No fatwood here.

hunt-for-fatwood-white-pine-branch.jpg

I think I’ll leave the rest of the photos off this page. I took a nice long video of the walk around the campsite and then all the way back to our house. I’ll post that below, so if you’d like to check it out, please do so.


Trust me, there will be many more photos and videos of this piece of property. Just wait until I show you the brook that runs along it. You’re going to love it.
 
JGaulard

JGaulard

Administrator
Staff member
Site Supporter
Sr. Site Supporter
Power User
Joined
May 5, 2021
Messages
319
Reaction Score
2
Points
18
  • #4

What to Wear to Sleep While Winter Camping + Check List​

If you’ve never gone winter camping before and if the temperature is below 0 Fahrenheit, you’ll likely be in for a shock. If you’ve never felt that kind of cold for an extended period of time before, you’re definitely going to be in for a shock. I’m not sure there’s anything that can prepare you for it besides actually getting used to the cold. And even when you do, it’s still painful to deal with and to contend with.

A few weeks ago, I went camping in Maine and the temps were near zero. I knew it was going to be cold, so I prepared very well. As I sit here and write though, I keep going back to the experience in my mind and I wonder if there was anything I could have done differently to make things easier. Not that anything was terribly difficult, but things could have been more comfortable. Live and learn, I suppose. For the first time, I did well, but it will be much better the second time and the third after that.

In today’s post, I’d like to discuss a few things. First, I’ll talk about the cold weather sleeping bag I purchased for this trip and then I’ll discuss what anyone in the same position would likely need to wear to sleep in frigid cold temperatures. It’s not as easy as you’d think. Finally, I’ll give you a rundown of the list I made for this camping adventure. Call is a brief camping check list if you wish.

Okay, to start off with, I’ll tell you that before the trip, I went on to Amazon.com and looked for the warmest sleeping bag I could find. Since I was going backpacking at all and since our camp site was only about five acres away from my house, I didn’t care in the least about the weight or the size of the bag. I wanted bulk and warmth and that’s all I wanted. If I was going to lie on my back for six hours in temperatures that were hovering near zero, I didn’t need to be shivering.

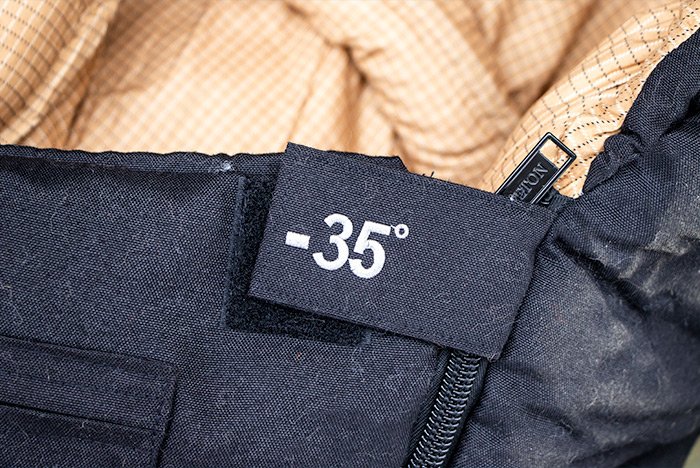
The bag I found is called the TETON Sports 1027L Deer Hunter Sleeping Bag and it’s the -35 degree version. There are two versions of this bag; the -35 degree one and the 0 degree one. When purchasing these sleeping bags, you need to be careful because the temperature ratings are somewhat misleading. The rating they give on the web page is the survival temperature rating. Add 30 degrees to that and you’ll have the comfort temperature rating. Don’t confuse the two and don’t think you’re going to get away with a higher temp rated bag in very cold weather. You won’t.

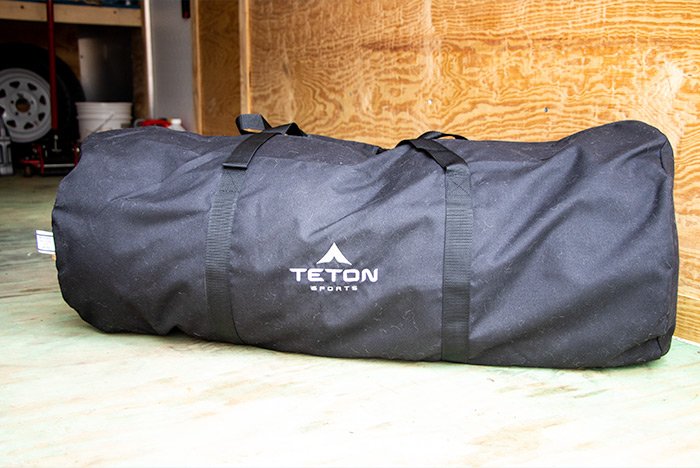
Here are some photos of the TETON cold weather sleeping bag. To start off with, I think I’ll show you the big sack it comes in. This is so helpful to carry.

teton-sports-deer-hunter-bag.jpg teton-sports-logo.jpg teton-sports-sleeping-bag.jpg teton-sports-35-degree-sleeping-bag.jpg

It’s a huge sleeping bag and it weighs 17.5 pounds. That’s seventeen point five pounds, not one hundred and seventy five.

Next, I’ll show you the top portion of the bag and the temperature rating that’s sown into it. The inside of this thing is extremely soft and the sleeping bag kept me extraordinarily warm the entire night. I was very impressed.

The material the outer is made of is tough and durable too. It’s canvas, just like Carhartt pants. That’s part of the reason I chose this product.

Next, I’ll talk about what to where to sleep while winter camping. There’s one rule when it comes to this; if you’re still cold in your bag, get out and put more clothes on. Before this little adventure of mine, I was under the impression that I was going to wear only thermals to sleep. Boy was I wrong. I ended up wearing, on the bottom, big thick socks, thermals and my Carhartt pants and then on the top, I wore a t-shirt, a thermal and a wool sweater with a winter hat on my head. The hat was key. Without that hat, I don’t think I would have made it. I took it off for just a second and it felt like all the heat was being sucked out of my body. Next time, I’ll wear a balaclava. And a hat on top of that.

At first, I didn’t have any socks on because the boots I wore don’t require them. They’re rated for -145 degrees or something crazy like that. The boots end up pulling the socks off my feet anyway. After I got in my bag though, I found that my toes were somewhat chilly, so I decided to put the socks on and that helped out a lot. The moral of this story is, if you try wearing one thing and find that you’re still cold inside of your sleeping bag, put more clothes on. Put your jacket and your gloves on if you have to. That’s just the way it is.

For this final section, I think I’ll quickly run through my winter camping check list. I don’t know whose benefit I’m doing this for more, yours or mine. I’d like to look back on this list in the future when I need it. Okay, here it is.

– 1 10’x10′ heavy duty tarp to place under the tent
– Rope for a clothesline
– Shovel to dig the snow from tent area
– Air mattress to sleep on
– Sleeping bags
– Gun for protection
– Tent to sleep in
– Flashlight
– Lighter to start fire
– LED lamps for lighting
– Balaclavas to wear
– Saws to cut firewood
– Propane heater for inside tent (I didn’t bring this)
– Knife for multiple uses
– Paracord for multiple uses
– Duffle bag to carry gear in
– Toilet paper
– Warm socks
– Water (didn’t do much good because it froze overnight)
– Warm clothes and extra socks and hats

I didn’t write down everything because I know I stuck more stuff in my bag, but this is the bulk of it. I’ll write more as it comes to mind. For the next time, I’ll probably bring another tarp out there to hang over the tent. I’d also like to pick up some additional paracord because you can never have too much of that stuff. And finally, I’m going to swap out the queen sized air mattress for two twin mattresses. The queen is too small for two people in these sleeping bags.

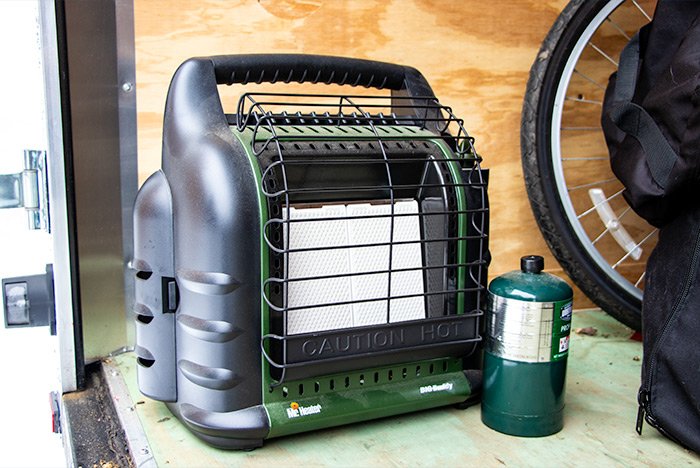
Oh yeah, here’s a photo of my Mr. Heater Big Buddy propane heater that I didn’t bring. I think I will next time.

mr-heater-big-buddy.jpg

Do you have any stories about winter camping? What did you bring on your trip? I’d love to know, so be sure to share in the comment section down below. Thanks for reading!
 
JGaulard

JGaulard

Administrator
Staff member
Site Supporter
Sr. Site Supporter
Power User
Joined
May 5, 2021
Messages
319
Reaction Score
2
Points
18
  • #5

Bushcraft 101 by Dave Canterbury​

I received my copy of Dave Canterbury’s book entitled, Bushcraft 101 in the mail yesterday and I am quite excited to jump into it. I’d like to read it as fast as possible because the spring weather is right around the corner. Notice how I didn’t say “spring” is right around the corner? It’s here now, but it snowed last night and this morning. I suppose this is spring in Maine. We’re bound to get one or two last snow blasts before this winter lets go. The same thing happens year after year.

bushcraft-101-dave-caterbury.jpg

I already read through the first chapter, which I’ll discuss below. I’ll also be writing posts that talk about all of the subsequent chapters on this website. I can’t wait to turn this thing into a powerhouse of knowledge. After all, Dave mentioned that he learned from others before him and he shared that knowledge with us via his book. Now, it’s my turn to learn from him and share with you. It’ll be a lot of fun.

Okay, so what I’ve just learned is that I didn’t read chapter one. I read the introduction, so that’s what I’ll discuss now.

Do you remember that post I wrote where I attempted to describe what bushcraft is? In that post, I gave a rather long winded explanation of how I see things. To me, bushcraft isn’t only the act of doing something, it’s the fact that it means something. There were a few lines in Dave’s book that leads me to believe that he agrees.

First, let me tell you how Dave described bushcraft. He says it’s, “a term for wilderness skills and is the practice of surviving and thriving in the natural world.” He then goes on to say that certain skills need to be learned in order to actually enjoy yourself and that bushcraft is a hobby more than anything else. After all, most of those who choose to engage in this sort of thing have someplace to live, but choose to test themselves against nature. Read my post on winter camping for more of that. He even goes on to describe how becoming proficient at bushcraft may help in certain survival situations. We’ve all seen one reality show or another or a story on the news where someone or a group of people needed to fend off the elements. It’s generally the person who has a knowledge of survival who does the best.

My favorite part of the entire introduction had to do with the feeling being outdoors gives those who choose to partake in it. Simply put, learning bushcraft is a way for us to enjoy the outdoors. So many of us are trapped in classrooms or offices and as my good friend conveyed to me not so long ago, that’s simply not natural. As humans, many of us have a strong desire to connect with what’s outside our homes and places of employment. Camping, hiking, bushcraft and many more activities allow us to sit back and revel in what’s right beneath our feet.

Here’s the best line of the book so far: “It is my belief that by understanding natural resources and learning about the items that make the difference between comfort and misery, you can attain an almost euphoric experience when spending time on the trail or in the bush.”

Do you want to know something strange? He’s right. The feeling you can experience when you “figure it out” is euphoric. It’s liberating and it’s confidence building to say the least. I’m excited to get more into this. This book has got a lot to teach.

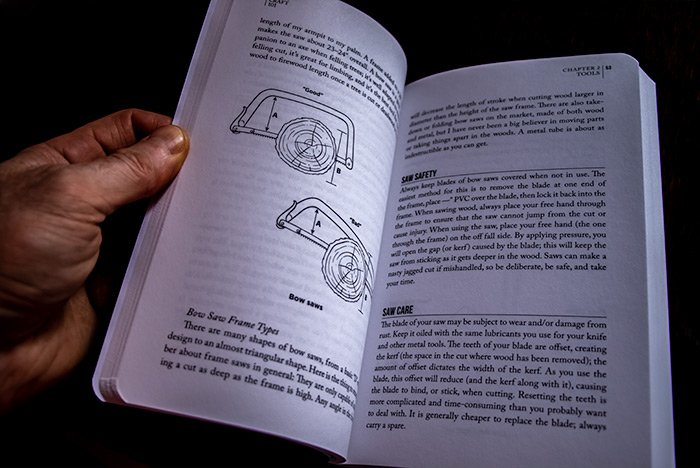
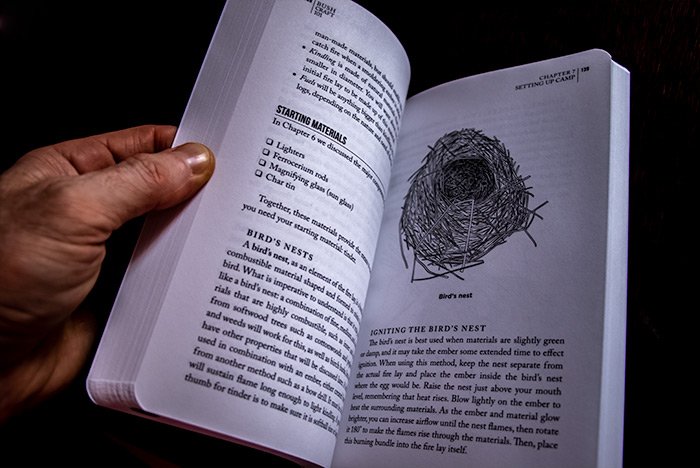
cutting-wood-bow-saw.jpg fire-starting-materials.jpg truckers-hitch-knot.jpg

Remember though, I’m always looking for the best book on bushcraft, so if you know of any, please let me know. Thanks!
 
JGaulard

JGaulard

Administrator
Staff member
Site Supporter
Sr. Site Supporter
Power User
Joined
May 5, 2021
Messages
319
Reaction Score
2
Points
18
  • #6

What Are the Best Wool Socks to Buy For Winter Sports?​

Question: I do tons of snowshoeing and, at times, my feet have gotten cold. I’ve upgraded my boots, but they still get cold. I’ve been looking into different brands of wool socks and think that’s the way to go, but socks are so weird to buy. Some of them are very expensive and others are too thin and are just strange. I think they’re from China or something. I can’t seem to figure it out. So if you have any advice, I’d appreciate it. Also, I’m interested in doing some cold weather camping and after reading a few blog posts, I’m even more determined to get some of these socks. I don’t want my feet to freeze off.

Answer: You’re totally on the right track. I think about this stuff all the time. I actually bought some wool socks for myself and my lady last Christmas from Amazon.com and while hers were fairly thick, you can almost see through mine. They’re still warm, but lesson learned. Shopping online can be tricky.

When I went winter camping, I brought a few pairs of those really thick gray socks that everyone has. You know the type. Some of them have the red band around the tops and some have the green. I’m not sure if they’re hunting or hiking socks or what, but I do know that they’ve been around forever. They were okay and the did the job, but I would have been confident with higher quality gear.

After all these years of looking at socks, I’ve definitely settled on wool. It’s the only way to go. Wool rocks. And after looking at wool, I think I’ve settled on Red Head Brand at Cabela’s. You should visit their web page. Right now, they’re $11.99 per pair and I think they’re made in North Carolina, if memory serves. From what I’ve learned, this is a very good brand and these socks are even guaranteed for life. If they wear out, you can return them for a new pair. That’s pretty good. What’s most important though is the thickness of the wool and I think these socks are plenty thick. I’ve seen a video of them being made and I could tell that they’re high quality. I hope this helps.

By the way, here is a video for you:


For the life of me, I can’t find the video from the factory where the socks were being made. If I do locate it, I’ll post it here.
 
JGaulard

JGaulard

Administrator
Staff member
Site Supporter
Sr. Site Supporter
Power User
Joined
May 5, 2021
Messages
319
Reaction Score
2
Points
18
  • #7

Schrade SCHF9 Survival Knife​

For the next three or four posts, I’m going to be showing off some of the gear I’ve recently purchased as well as some gear I picked up through the years. I don’t have a lot, as I’m just starting out with bushcraft and camping, but I’m getting there. So far, I have a survival knife, hatchet and a ferro rod. I also have a few other things, such as rope, paracord, some books and things like that, but I’ll get to all of that later on. For today and probably tomorrow, I want to show you what the three items I just mentioned look like.

So here’s the thing; I have no idea if what I own is “good” or not. New products seem to come out every day and each one is markedly cooler than the last. I would love to have a hatchet whose steel was forged on some island off an exotic coast with a wood handle what was whittled by a monk in Bangladesh, but alas, I purchased one that was made in Illinois. It’s good though, I know that.

In this post, I want to show off a pretty huge knife I bought about five years ago. I had just moved to Maine and I knew I needed something to use to protect myself while out hiking in the woods. I didn’t quite know what I was going to do with a big knife, but it was better than nothing. At the time, I had no interest in camping or anything like that. Definitely not bushcraft.

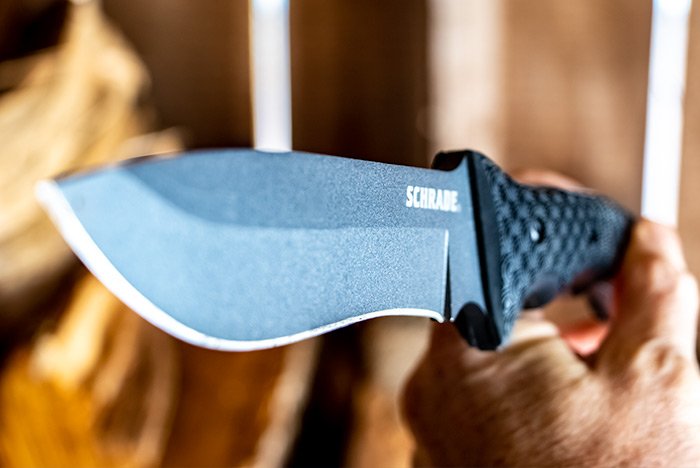
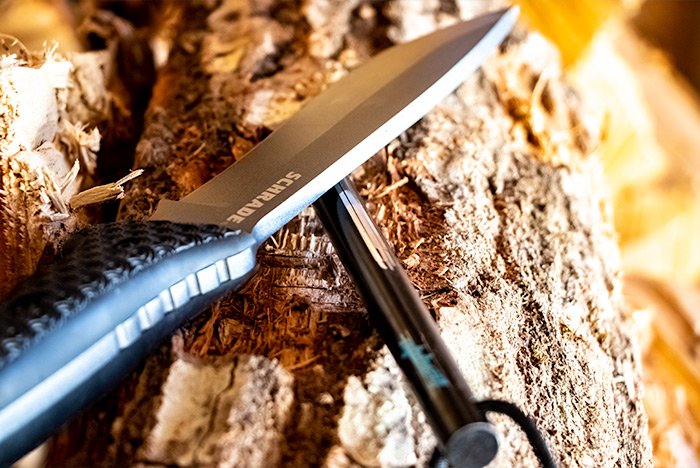
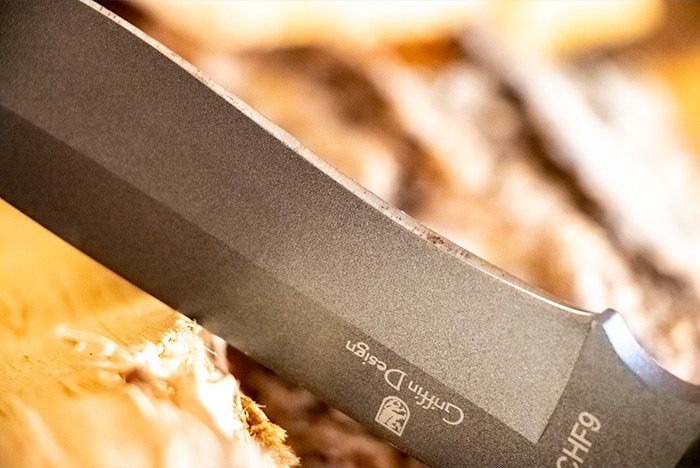
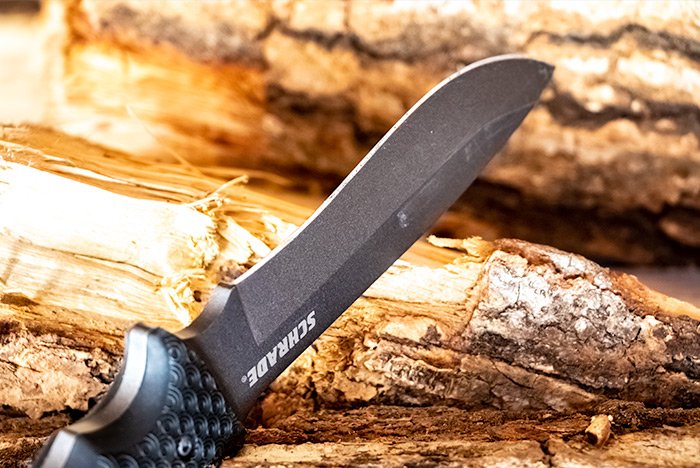
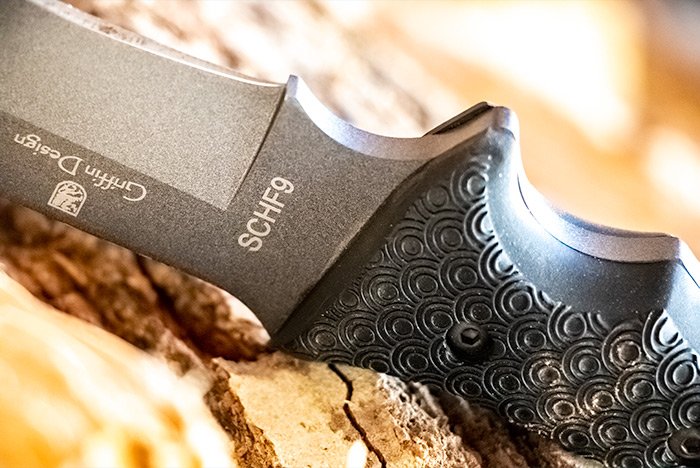
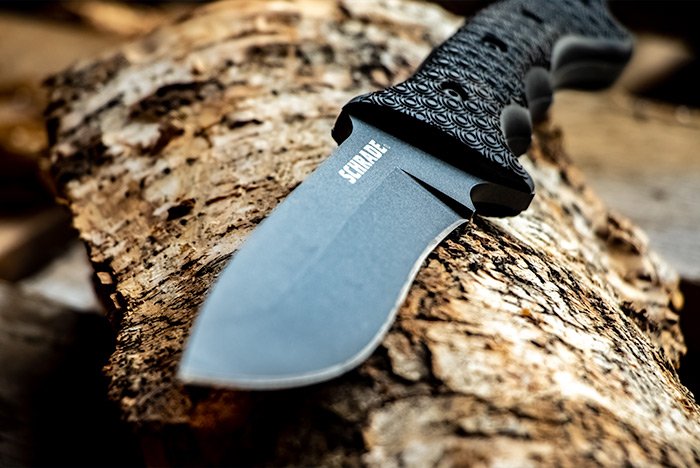
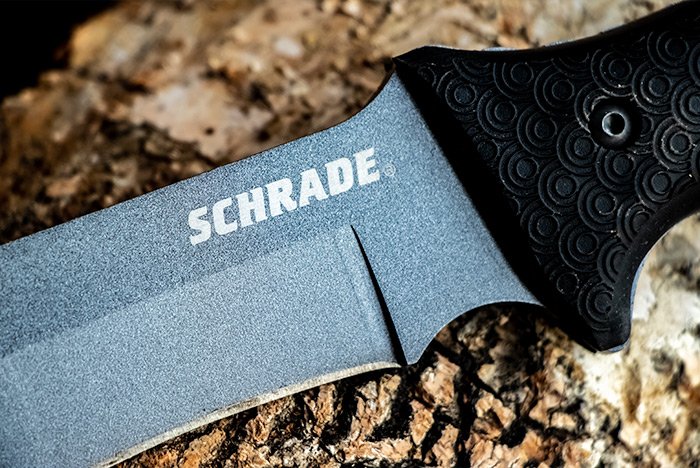
I searched through Amazon.com for a few minutes, landed on this knife’s page, read some favorable reviews and then bought it. It was sort of a no-brainer. Now that I have it, I really like it. I think I need to sharpen the blade a bit to get it to that razor sharp point I want to feel, but as it stands, it’s a great knife. For formality’s sake, it’s called the Schrade SCHF9 Survival Knife. Check out this photo. I just did a little shoot in my garage. I pride myself on my photography, especially when it comes to survival knives.

schrade-schf9-survival-knife.jpg

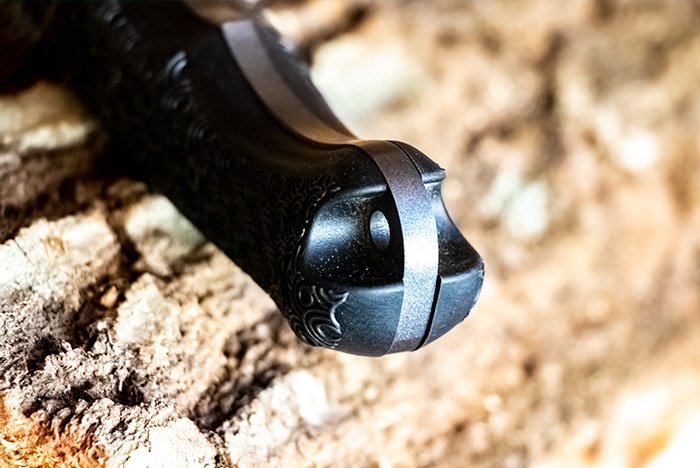
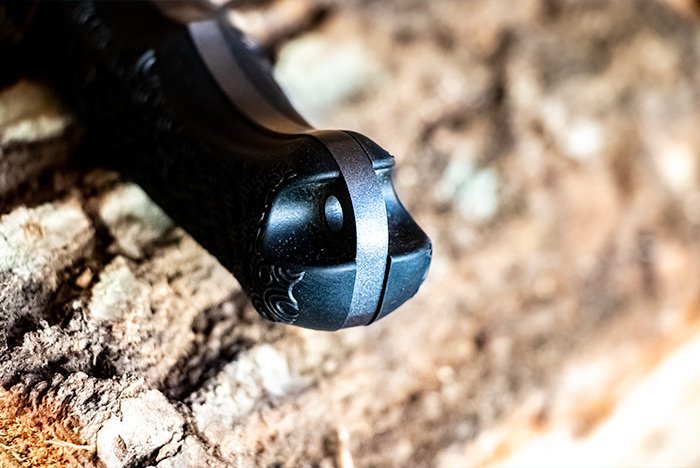
Now that I’m getting into bushcraft and camping a lot more, I’m finding that I got lucky when I bought this knife. If memory serves, one of the primary reasons I picked out this one in particular was because it consisted of one piece of steel, all the way from the tip of the blade to the butt of the handle. So if I wanted to hammer this knife into or through something for one reason or another, I wouldn’t break the handle off. No matter what they say, if your knife isn’t steel all the way through, it’s going to break under abuse. Here’s a photo of the butt end of the knife. You can see the steel sandwiched between the thermoplastic elastomer handle.

survival-knife-butt-end.jpg

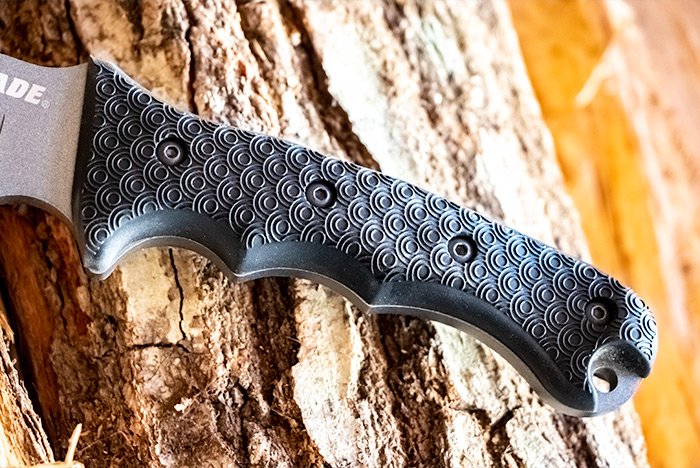
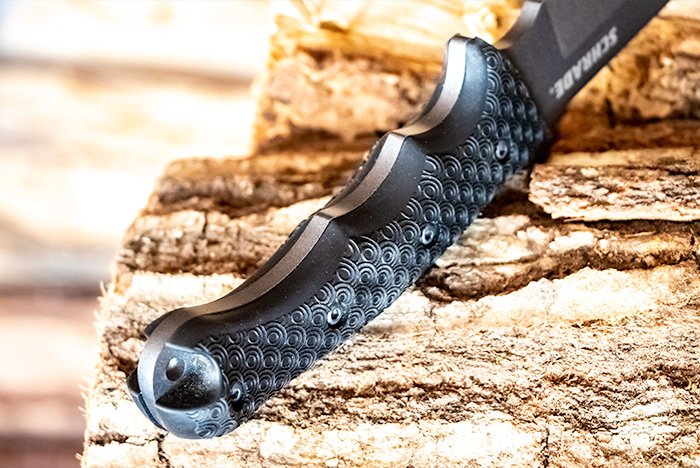
Here are two more photos of this thermoplastic handle. I’m not quite sure what “thermoplastic” is, but the handle seems plenty strong. It’s solid. Here’s a photo that shows the texture of the handle.

schrade-knife-thermoplastic-handle.jpg

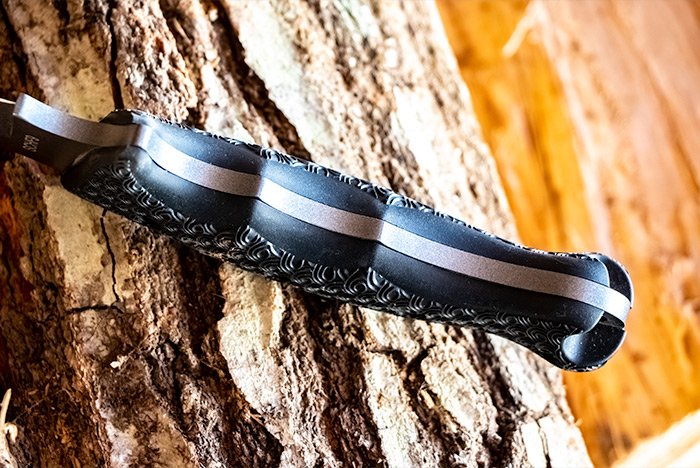
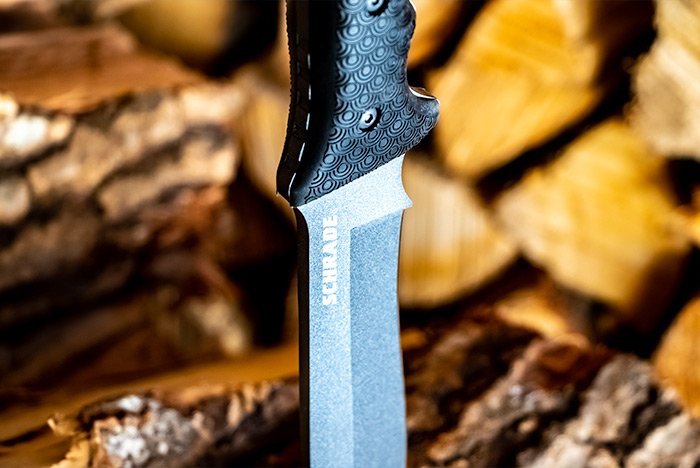
And here’s a photo showing that steel running the entire length of the knife. I believe they call this “full tang” design.

schrade-knife-handle.jpg

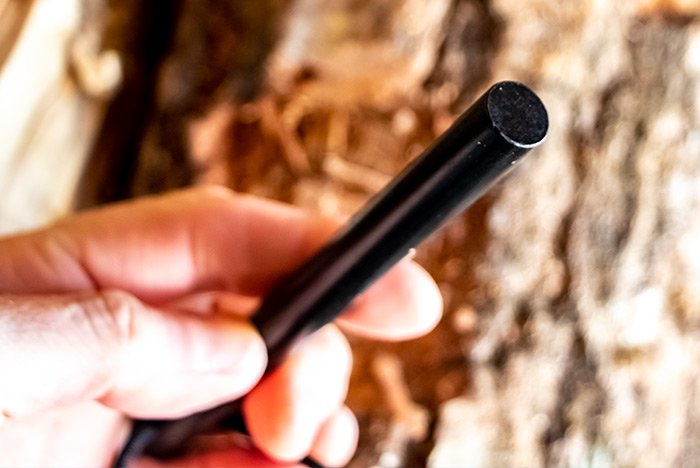
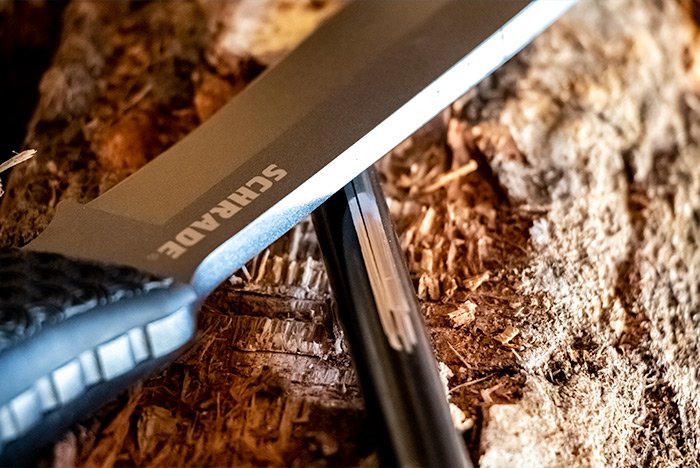
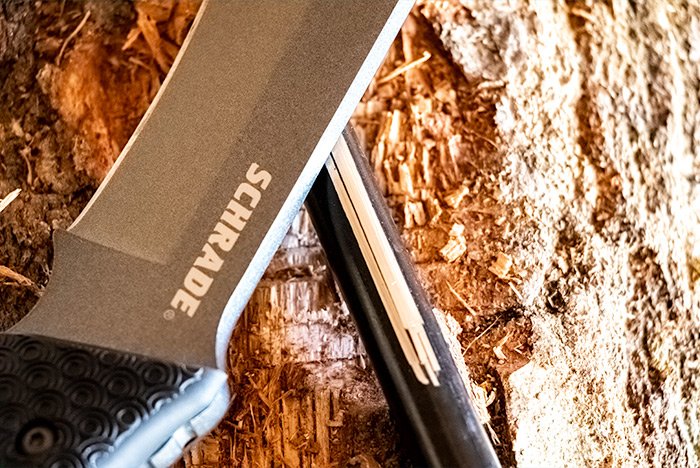
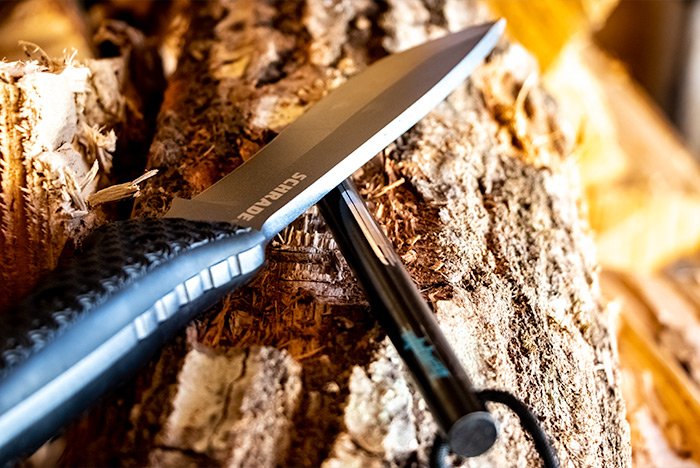
The last time I went camping, my friend brought along his ferro rod to start the fire. I was mesmerized by this little piece of equipment, so I started looking around for my own. I eventually purchased one that I’ll discuss in a later post, but what I’d like to mention here is how the “bushcraft” knife I accidentally bought five years ago works perfectly with ferro rods. Because of its high carbon construction, the back of the blade is great for running straight down a ferro rod to obtain those coveted sparks. I tried my knife with my new ferro rod and boy did it do a good job. So I got lucky in this department. The first few times I ran the spine of the knife along the ferro rod, nothing happened. This is because I was scraping the paint off the surface. The third and fourth times though, sparks all over the place. In the image below, you can see where I scraped the paint off the rod.

schrade-survival-knife-ferro-rod.jpg

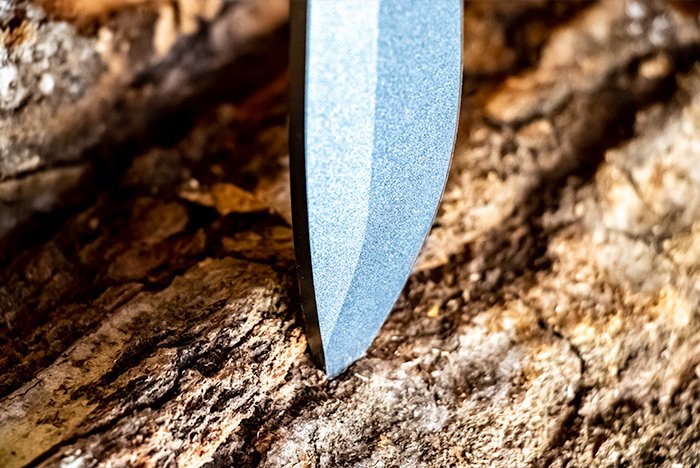
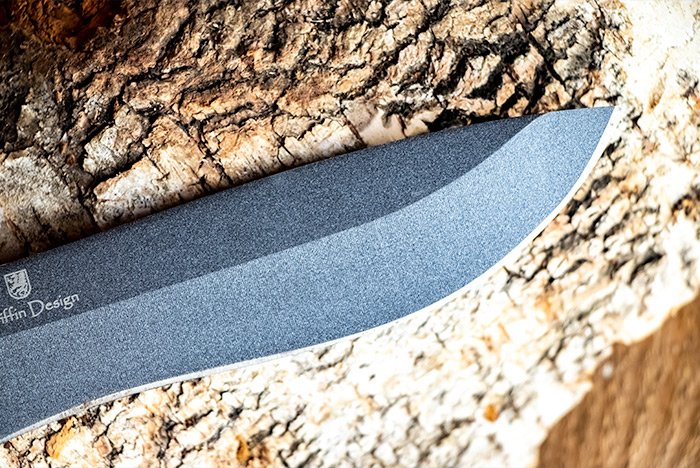
Because the knife is 12.1 inches long, the blade is substantial. It measures in at 6.4 inches, so it’s just longer than half of the entire knife. I remember when I first bought this knife, I ran it straight through a piece of paper. It was extremely sharp and I was very happy about that. I’m sure it’s dulled through the years, so I’ll need to sharpen it up a bit. Take a look at the blade.

survival-knife-blade.jpg

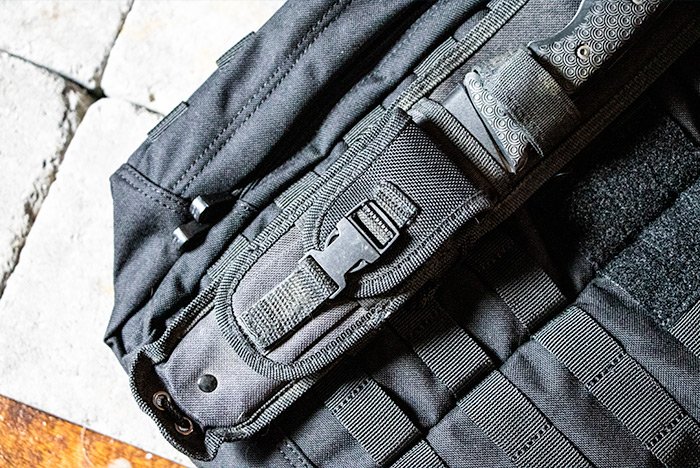
And finally, this knife came with a very decent sheath. There’s a spot to slide a belt through and it’s got some cords down near the bottom of it so you can tie them around your leg. This way, the sheath won’t bounce around as you’re walking or running. Or fighting a bear. A handy storage pouch is included in this sheath as well.

Overall, I’m happy with this purchase. For just under $40, I think it was a deal. Back when I bought it, I never thought I’d actually be using it, but now that I have it, I’m glad I do.

Do you own a survival knife? If so, what do you have? I’d love to know. There are many varieties of knives available and if I could, I’d buy them all. A man can never have too many knives.
 
JGaulard

JGaulard

Administrator
Staff member
Site Supporter
Sr. Site Supporter
Power User
Joined
May 5, 2021
Messages
319
Reaction Score
2
Points
18
  • #8

What Makes a Good Survival Knife?​

I just finished writing another post (above) about my knife. You should check it out. I talk about why I first bought it and about some of its finer points. I also posted a few of my better pictures of the knife. I guess I’m writing this post here in the forum because I’d like some advice on it. My questions are: Is my Schrade SCHF9 survival knife any good? It seems fine, but does it live up to today’s standards? Also, what makes a good survival knife anyway? Is it the steel used in its construction? The blade edge? The strength of the knife overall? From my point of view, having a butter knife in a survival situation is better than having no knife at all, so I really should be happy with what I have. The things is, I keep seeing all the exotic and beautiful knives out there on the internet and they just seem so awesome. Are the ones with the wooden handles that cost tons of money better than the ones with the hard plastic handles? Or is that just a matter of taste? I would love to get some perspective on all of this. I sometimes get the feeling that there are some strong opinions on this subject. By the way, I believe I purchased this knife back in 2013.

I’m going to include a few of my leftover photos of my Schrade survival knife for you to take a look at. Enjoy!

schrade-schf9-survival-knife-001.jpg schrade-schf9-survival-knife-002.jpg schrade-schf9-survival-knife-003.jpg schrade-schf9-survival-knife-004.jpg schrade-schf9-survival-knife-005.jpg schrade-schf9-survival-knife-006.jpg schrade-schf9-survival-knife-007.jpg schrade-schf9-survival-knife-008.jpg schrade-schf9-survival-knife-009.jpg schrade-schf9-survival-knife-010.jpg
 
JGaulard

JGaulard

Administrator
Staff member
Site Supporter
Sr. Site Supporter
Power User
Joined
May 5, 2021
Messages
319
Reaction Score
2
Points
18
  • #9

Estwing 14″ Camping Hatchet​

Back a few weeks ago, when I was cold weather camping with my friend Ian, I noticed that he was using his hatchet for a number of different tasks. He chopped down a few small trees and he used the hatchet to chip away two small divots in pieces of wood so his bench would fit together nicely without the top log rolling around. I thought my friend’s usage of this tool was pretty clever. I’ll admit that I never much had a use for a hatchet, but after seeing him use his, I thought one might be handy in my world.

When I go outside into the woods, I generally bring either a lopper or a bow saw to cut down small trees when cutting trails. Since I haven’t gone camping in ages, I haven’t had much use for a hatchet. Now that I’m getting more into camping though, I know I’ll need one. While I can easily use my bow saw to cut down trees and saw them up for firewood, a hatchet will help immensely when it comes time to split wood and to harvest some shavings for starting a fire. Fatwood is all the rage and I’ll get to that in later posts. For now, I’d like to show off the small hatchet I picked up on Amazon.com.

Okay, the proper name for this hatchet is the Estwing Sportsman’s Axe – 14″ Camping Hatchet. Now, I had to look up what the difference between an axe and a hatchet is and I discovered that the name of this tool is a bit misleading. A hatchet is a small tool that’s used with one hand and an axe is a much larger tool that’s used with two hands. So this would be just a hatchet, not an axe. I’m sure some sizes are right at the cusp of being used with either one or two hands, and those tools can be called whatever you’d like.

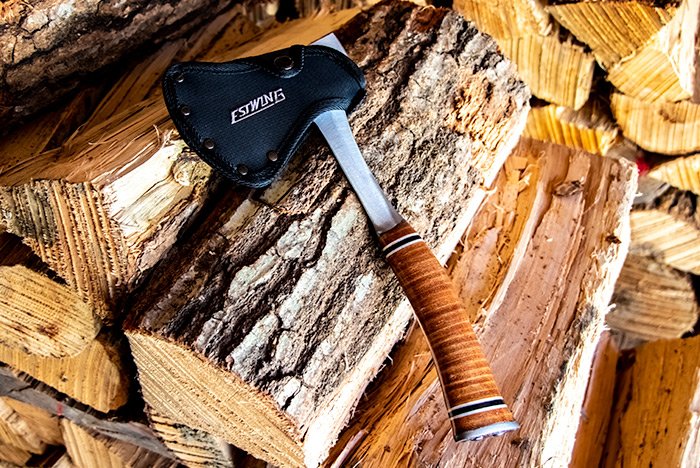
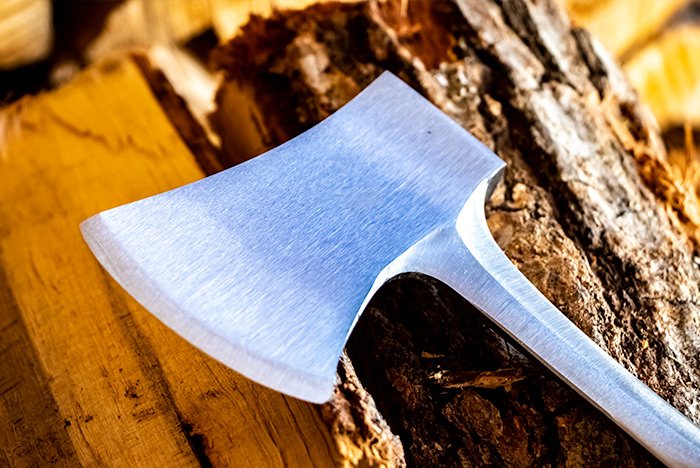
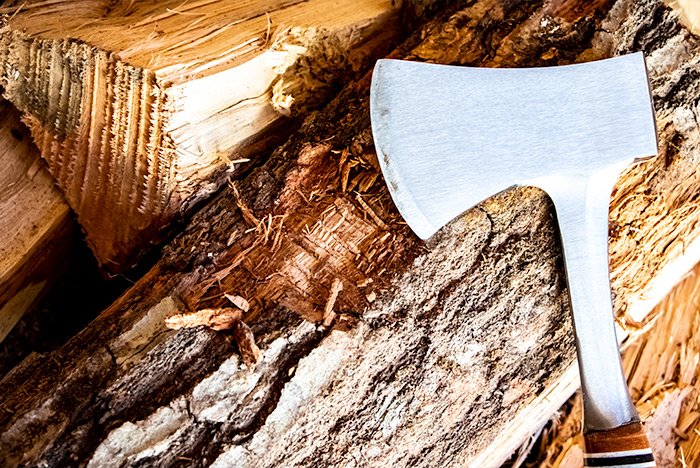
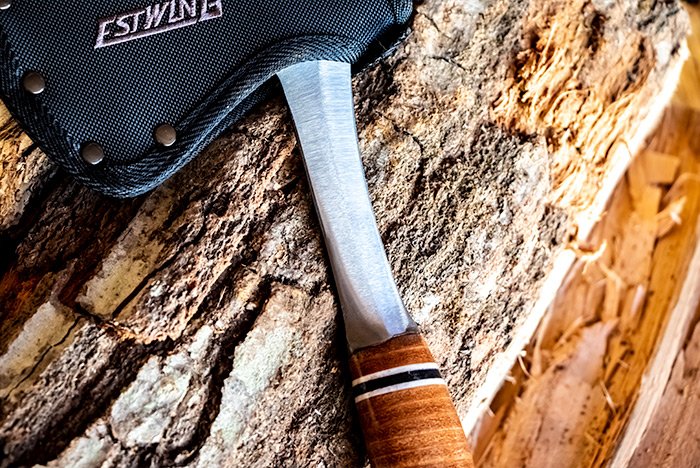
Here’s a photo of my new toy. I hope you like the way I have it all set up on a pile of firewood. I thought it’d be very rugged looking this way.

estwing-camping-hatchet.jpg

This has definitely got to be one of the most popular camping hatchets out there. I see it all over the place. It’s made right here in the U.S. and I think the steel is poured in Wisconsin. I don’t know why I say that because the headquarters is in Illinois. I think I saw the name Wisconsin out there somewhere though.

Let’s take a look at a few more photos.

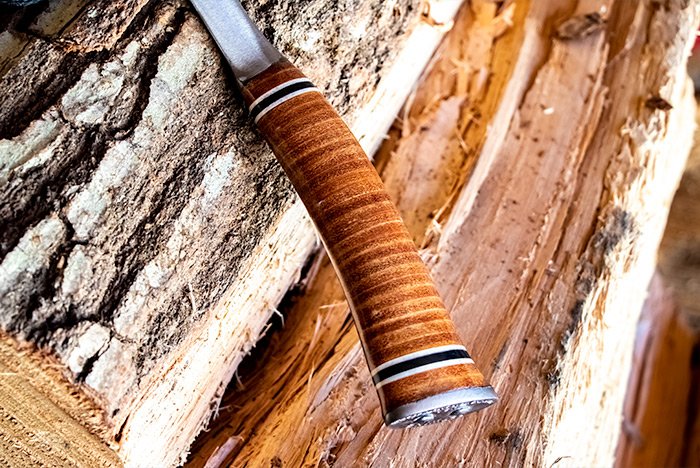
estwing-hatchet-leather-handle.jpg

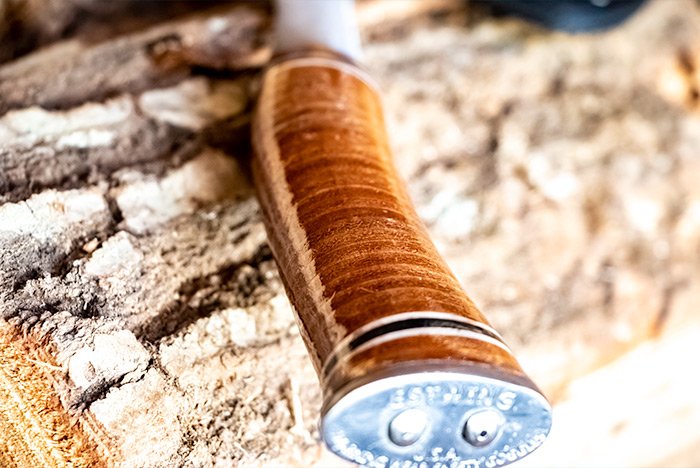
I’ve seen a lot of talk out there about this leather handle. Some folks say that the polyurethane that’s used to coat it flakes or wears and then if the leather gets wet, it can rot. Some people who have purchased this hatchet actually sand away the poly with 100 grit sandpaper and then apply Fiebing’s Neatsfoot Oil to the leather, so it repels water. While it takes many, many coats of this oil to completely soak the leather, it’s supposed to be the best thing you can do for these tools. Perhaps I’ll do that one day.

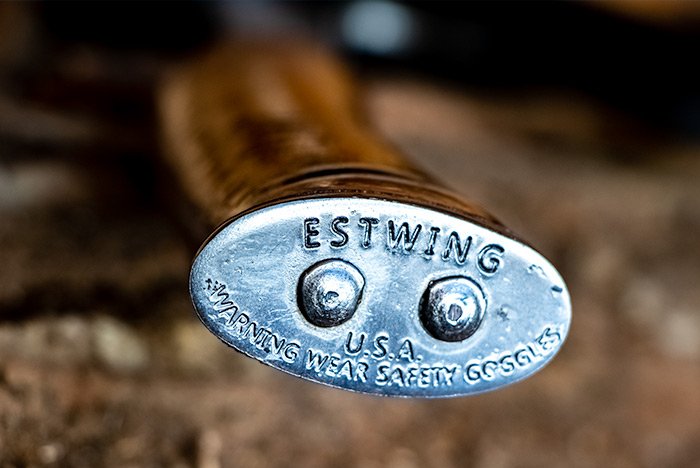
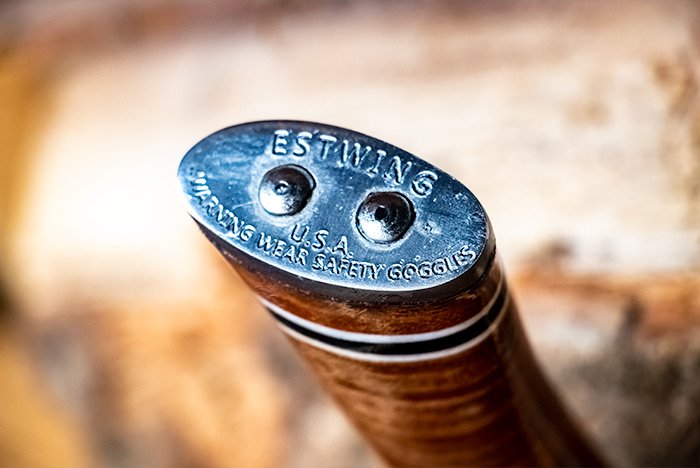
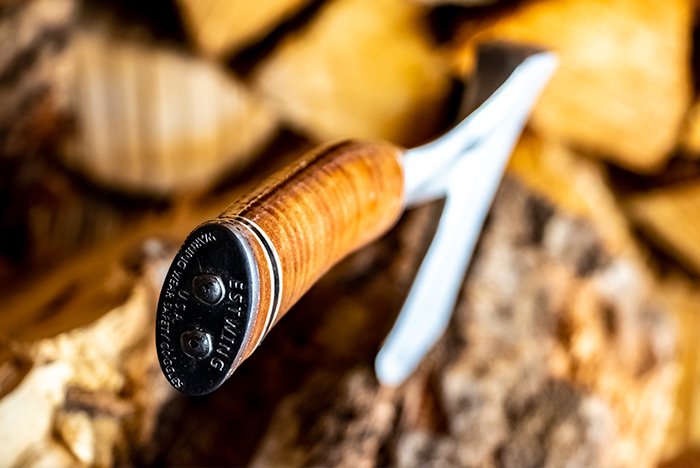
This next photo is a shot of the bottom of the hatchet. I watched a video of this tool being made and it’s so cool how the manufacturer adds the leather rings around the shaft and then presses on this bottom plate and rivets it in place.

estwing-name-bottom-hatchet.jpg

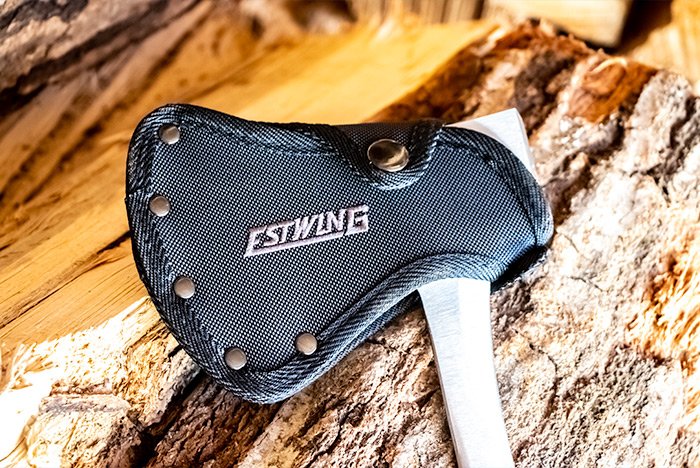
I like the ballistic nylon sheath very much on this tool. It unsnaps and then you slide the sheath down the handle to the bottom of the hatchet for removal. I’ve seen this same tool come with a leather sheath, but I don’t like the look of them very much. I like the black nylon a lot more.

hatchet-protective-cover.jpg

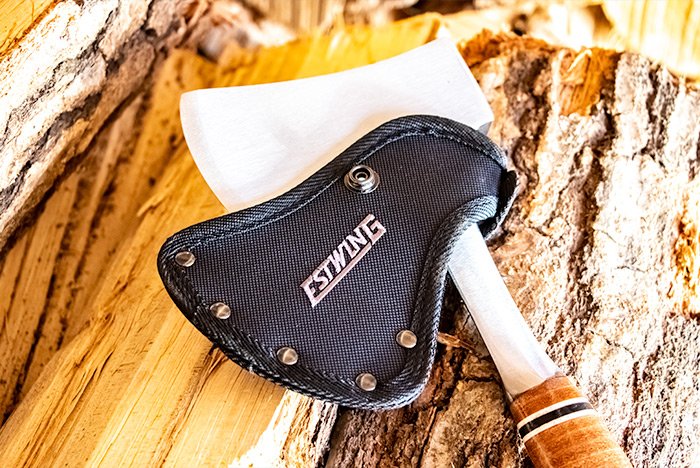
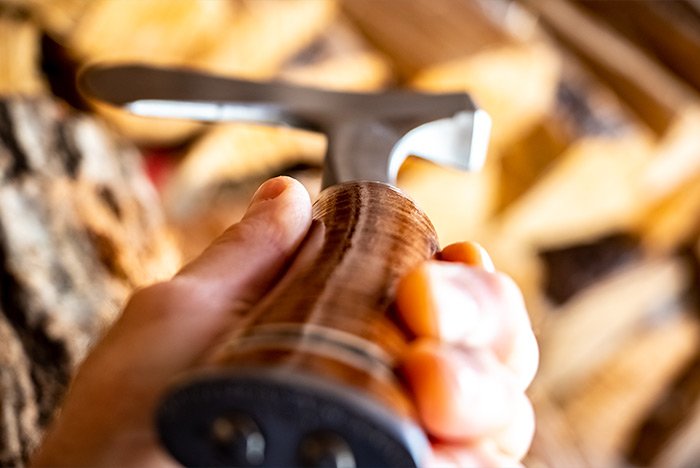
See? This is what I’m referring to. The sheath slides down the handle.

removing-sheath.jpg

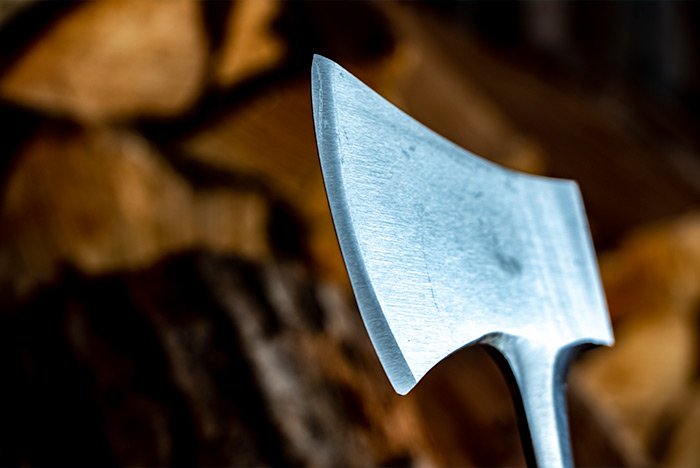
This is the head of the hatchet. As you can see, this is a one piece tool. It’s all steel, unlike some others that have only a steel head and then a wooden handle. I think these are pretty strong.

hatchet-head.jpg

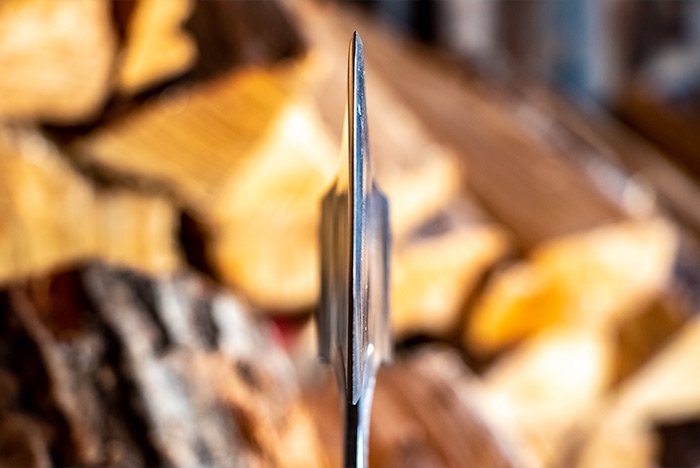
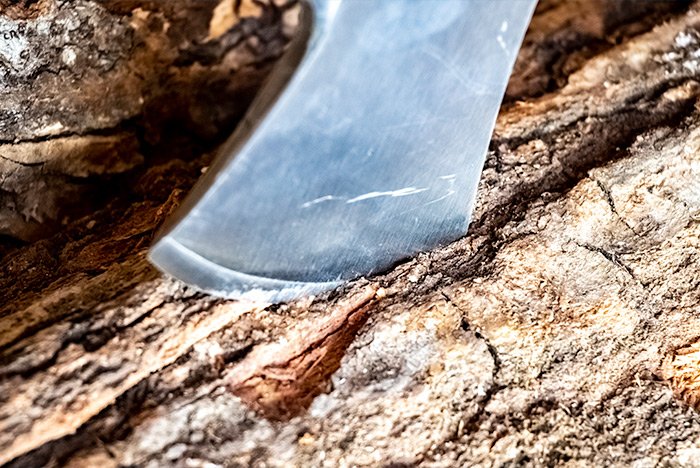
I thought this photo was pretty cool. I got the blade straight on. I figured I better take lots of photos now while it’s brand new. It’s going to get dirty very quickly.

hatchet-blade.jpg

Well, there it is, an introduction to my new Estwing camping hatchet. I think this will last a good long time and I’m excited to start using it outdoors. I’ll also be showing more photos of it in the outdoor gear forums on the discussion board, so be sure to check them out. Thanks for reading!
 
JGaulard

JGaulard

Administrator
Staff member
Site Supporter
Sr. Site Supporter
Power User
Joined
May 5, 2021
Messages
319
Reaction Score
2
Points
18
  • #10

Bayite Large 6″ Ferro Rod​

Here’s another winter camping story for you. A few weeks ago, when my buddy camped out on my land, the temperature dropped to 5° Fahrenheit. I helped him set up camp, but after that I went back inside to sleep. He was on a mission to test out his new cold weather camping gear (hammock) and I wasn’t about to get in the way. Plus, I didn’t have any cold weather gear myself, so I wouldn’t have been able to stay with him anyway. Again though, I didn’t want to get in his way. I knew he was trying to see if he could make it alone.

One thing I did do though was help him gather firewood. I know all about that and I’m pretty good at dealing with preparing for and maintaining camp fires, if I don’t say so myself. When it came time to light it up though, I didn’t know if he was going to use some newspaper and a lighter or if he was going to go the bushcraft route. He went the bushcraft route. He pulled out his ferro (ferrocerium) rod and striker and after not too long, he got a small fire lit. I watched the entire time and I thought the ferro rod idea was pretty good. Especially for survival situations.

As for material to start the fire, I think my friend used birch bark and small dry pine twigs. Once the flame got larger, he started adding bigger pieces of wood. Pine, maple, whatever we could find. We had a good time dealing with that fire until I went into the house to sleep. The camping area was only about five acres back in the woods, so it wasn’t too far of a walk.

Seeing him use the ferro rod led me to the conclusion that I needed one myself. Since I didn’t exactly know what I was looking for, I decided to find a decent looking one on Amazon.com and just buy it. I did know that I wanted a large one though and that’s why I bought this six inch model.

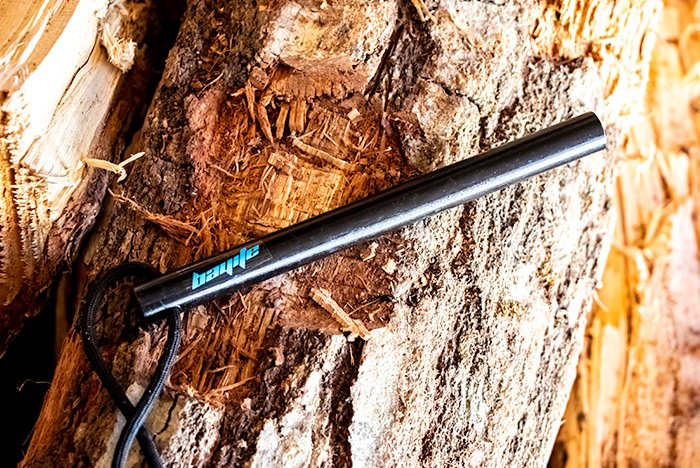
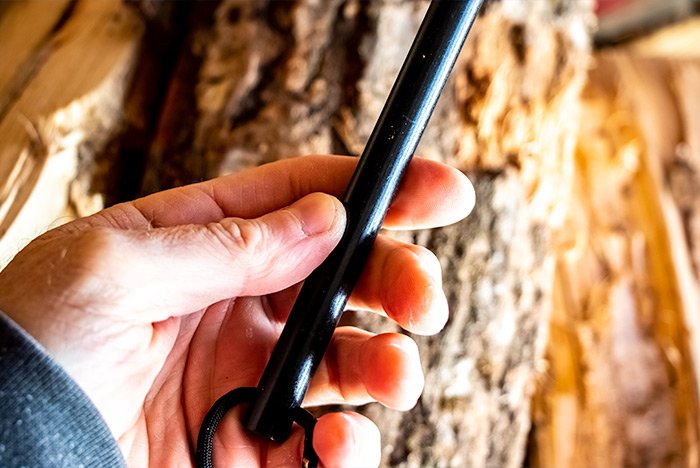
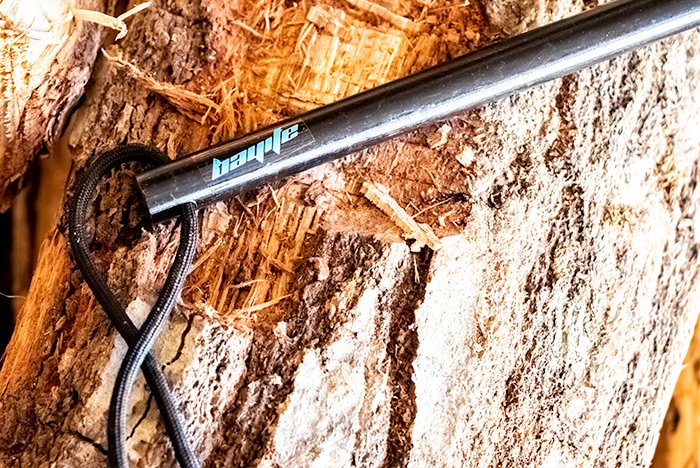
The ferro rod I purchased was made by Bayite and it’s six inches long and a half inch thick. Take a look.

bayite-ferro-rod.jpg holding-ferro-rod.jpg huge-large-ferro-rod.jpg

Since I had never used a ferro rod to start a fire before, I didn’t know what to expect. But since I own a nice Schrade survival knife that’s constructed with a high-carbon steel blade, it didn’t take long to find out what would happen. I held the ferro rod firmly in my hand and slide the back of the knife down it a few times. The first two times, nothing happened because the knife merely scraped the paint off the rod, but the third time I struck the rod, sparks flew all over the place. I was very pleased with this and decided to stop before I burned something down. In the photo below, you can see where I scraped the paint off the rod with my knife. Knives with high-carbon steel blades are awesome to use with ferro rods.

schrade-knife-bayite-ferro-rod.jpg

Before I tried the rod out, I tied some paracord to it. The rod came with a small hole drilled in its end. I just threaded the paracord through the hole and tied a Two-Stranded Overhand Knot to secure it. It’s a very tight knot, so I don’t think it’s coming out.

Overall, I like this ferro rod a lot. I don’t think I would ever buy one of the small models that are sold all over the place. This big one isn’t very heavy and it’s a lot easier to handle than the small ones. It’ll also last a lot longer. Let me know what you think. Thanks for reading!
 
JGaulard

JGaulard

Administrator
Staff member
Site Supporter
Sr. Site Supporter
Power User
Joined
May 5, 2021
Messages
319
Reaction Score
2
Points
18
  • #11

Bushcraft: The Five Cs of Survivability​

If you were to ask me what I need to store in my pack before heading out into the wild, I’d probably get a few things right. I know I’d need a knife and something to start a fire with. And I know I’d need a tarp or a tent, but from that point on, I’d have to really think about things. I’d have to go over exactly what I’d do after I showed up to my camping spot in my mind and as I went through my actions, I’d likely recall the supplies I’d need. This probably isn’t the most efficient method for packing gear, especially after it’s been done a few times previously. You’d think I’d remember more. Knowing myself, this is a perfect way to forget a great many thing.

I guess creating and using a bushcraft gear list would be a better idea. I mean, all I’d have to do then is refer to the list and I’d know what to bring. I do love my lists.

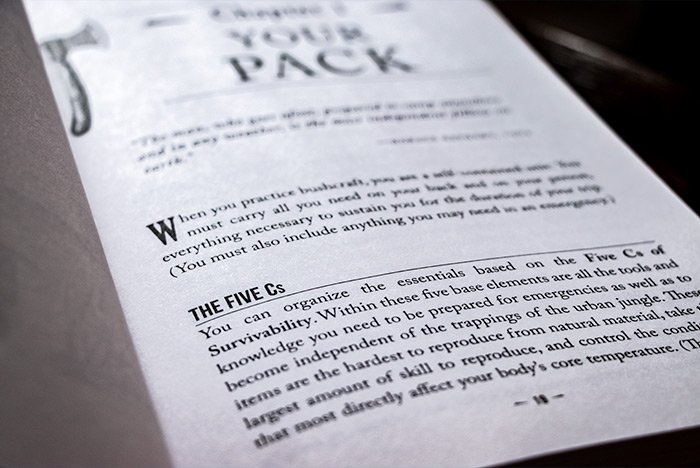
I’m reading through the first chapter in Dave Canterbury’s book entitled Bushcraft 101 and I wanted to report back that I’m enjoying it very much. I’d like to discuss one of the very first topics Dave mentions in the book and that topic has to do with what he refers to as The Five Cs of Survivability. I was so happy to see something like this included in the book because I tend to gravitate towards grouping of things. I think I remember back in college, one of my Psychology professors taught my class about how the human mind groups things and that’s how it remembers more efficiently. Ever since I learned about that, I haven’t been able to shake the idea. Telephone numbers, zip codes, the five Cs of survivability…you know, the normal, every day stuff.

five-cs-survivability.jpg

First off, I’d like to say that it’s a great idea to group a concept as important as this into a fun and memorable thing. That’s going to help a lot of people out, especially if they’re in a rush or on the run. We don’t always have access to a list and sometimes it’s just better to have broad ideas to recall in an instant.

Secondly, I’d like to go over exactly what these five Cs are. I’ll list them below and offer a short example of what might be included in each category.

The five Cs of survivability are cutting tools, cover elements, combustion devices, containers and cordages. As you can see, the items that one might place inside each group would cover almost any circumstance in the wild. This is why I like this grouping thing so much. You can add what you’d like and leave behind what you don’t, as long as you include the basics. Let’s go over what someone might include in each section.

Cutting Tools: Full tang survival knife (6″ high-carbon), Hand axe (hatchet), Multi-tool, Pocket knife.

Cover Elements: Tent, Tarp, Trash bag, Emergency space blanket, Wool blanket, Sleeping bag.

Combustion Devices: Waterproof matches, Lighter, Ferrocerium rod, Mini inferno, Fatwood.

Containers: Water container, Canteen, Cup.

Cordages: Rope, Paracord, Bank line (Mariners net line).

As you can see, I gave some whimsical examples above. I’ll be sure to cover each section of this grouping in subsequent posts in great detail. I’d love to talk about the best pieces of gear to be used for different circumstances. For now though, I hope you get the general idea of what may be necessary while venturing out into the woods.

Well, that covers it for The Five Cs of Survivability. If you have something to add, please do down below in the comment section. Thanks!
 
JGaulard

JGaulard

Administrator
Staff member
Site Supporter
Sr. Site Supporter
Power User
Joined
May 5, 2021
Messages
319
Reaction Score
2
Points
18
  • #12

What is a Tumpline?​

Question: Every time I read something, I feel like I’m back at square one. I had no idea there was going to be this much to know when it came to bushcraft, hiking and camping. I’ve already learned a lot though, so I’m pretty psyched about that.

Has anyone ever heard of a “tumpline”? I know it’s a strange word and it’s not one I’ve ever heard before, so I’m wondering if anyone here has experience with these things. I know they are some sort of a rope, but I’m not quite sure how they’re used with a backpack. Also, I do a lot of hiking. Should I be looking into getting a tumpline? I guess I should learn what they do before I consider buying one, eh?

Answer: Awesome question and yes, if you do a lot of hiking and if you carry a lot of weight, you should definitely look into picking yourself up a tumpline. You can either purchase one or make one yourself. You’re probably better off making one yourself because tumplines aren’t the most popular pieces of gear to find out there. They’re actually kind of tough to find. I was just on Patagonia’s website where they have/had a tumpline for sale for $19, but it’s not available anymore. You can make yours from organic material or even paracord. If you’re decent at weaving, you can craft one that’s very comfortable.

Basically, a tumpline is a rope or strap that you can either tie into a bedroll or attach to your rucksack/backpack on either side. Think of it as a long belt. You can attached it or tie it around any piece of luggage, really. Then, once attached, you would place the strap on your head and use your head to hold most of the weight of your cargo as opposed to using your back. If you’ve ever had your pack straps dig into your shoulders, you may see the value of this. From what I’ve experienced and from what I hear, the weight of your pack is distributed very effectively through your spine as opposed to just your shoulders, making the weight of what you’re hauling feel noticeably lighter. People all over the world use tumplines for all sorts of things. You just need to use your head about it. Haha. That was a joke.

If you search in Youtube, you’ll see a bunch of videos on this piece of gear. I want to tell you though that not everyone uses the tumpline over their head every single time. Sometimes, people wear it around both shoulders to distribute the weight of their cargo through the arms and shoulders and sometimes they wear the strap over just one shoulder, like they’re carrying a regular bag. It’s up to you how to use yours. I’d say they are very beneficial.

Answer: Tumplines are popular when canoeing and portaging. They help tremendously with the weight of all the gear that folks bring on the canoe. They’re also popular and are used with pack frames and baskets. Trappers use tumplines all the time because their gear is heavy. As said above, this handy strap spreads the weight out through the spine instead of just the shoulders.

Are Bushcraft Pack Baskets Really Necessary?​

Question: Yes, here’s another one of my beginner questions. I’d like to thank all of you for your patience. You’ve given me a lot to think about with the help you’ve given to me previously, so I appreciate it.

This question has to do with pack baskets. I am at somewhat of a loss as to what people do with them and why they’re even necessary, with pack frames and backpacks being what they are. What exactly are pack baskets and why do people who enjoy bushcraft use them? Don’t they seem a little old-school to be out in the woods with? Aren’t there better options for gear storage? I think I might be suffering from my modern day era way of thinking, so that’s why I’m having difficulties wrapping my head around these products and ideas, so any help would be welcome. Thank you in advance. Again.

Answer: I know it seems strange to carry a basket on your back for those who haven’t ever done something like that, but I can tell you that pack baskets are worth their weight in gold. They also have a very long history, being dated back to nearly 900 B.C. I’ll give you some background and usage below.

Pack baskets have been and still are helpful to those who need to carry hunting and fishing supplies to the areas where they hunt and fish. It’s a great place to consolidate everything as opposed to having it hang out everywhere, possible losing pieces along the way. Baskets are also helpful for carrying back the game the hunter has killed as well as the fish the fisherman has caught. That’s not something they’d want to carry by hand.

Pack baskets can work by themselves, being attached to some rope and then hung over the shoulders or they can work in conjunction with a pack frame. Some outdoorsmen even place a basket inside of their rucksack in help it keep its shape. I was just watching a video last night where a hobbyist did just that. I’ll post the video below. In the video, the man said that his rucksack, although very high quality, oftentimes lost its rigidity and became annoying and cumbersome at the most inopportune of times. He was given a pack basket which held the bag open and he was able to fill that basket with all his gear. It fit perfectly and he was quite pleased with his setup.

Really, pack baskets are meant to protect a person from all of their pointy and sometimes sharp gear. Since they need this gear (traps, tools, axes, etc…) out in the field, the basket is used as somewhat of a bag or a container, yet has firm sides and a strong and durable exterior. They’re lightweight, so that’s not an issue and they also form right to the shape of a person’s back when filled to capacity. They’re also roomy, so I don’t see anyone using one and then not using one after the fact. They’re simply too convenient.

I’m not sure how much you’ve looking into this piece of equipment, but I can tell you that these things have traditionally been crafted from black ash or willow splints. In more modern times, they’re making them out of reed. These more rustic baskets are definitely geared towards the more “natural” outdoorsman who enjoys the “wooden” look. I like to go with ultra-modern myself and I like my gear made from strong nylon and fabrics like that. Even plastics are good with me. I’ve never been one to think the ash, willow or reed appearance was appealing. I hope this helps.

How Strong is 1050D Nylon?​

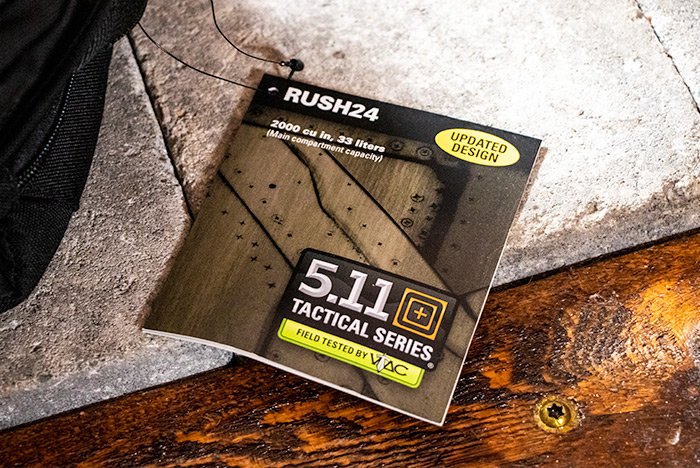
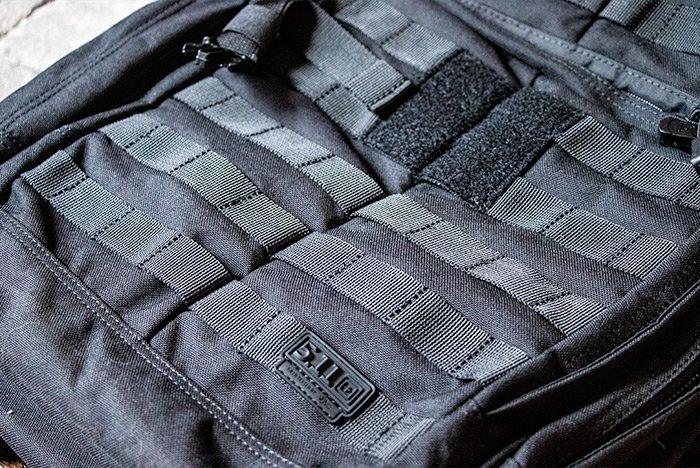
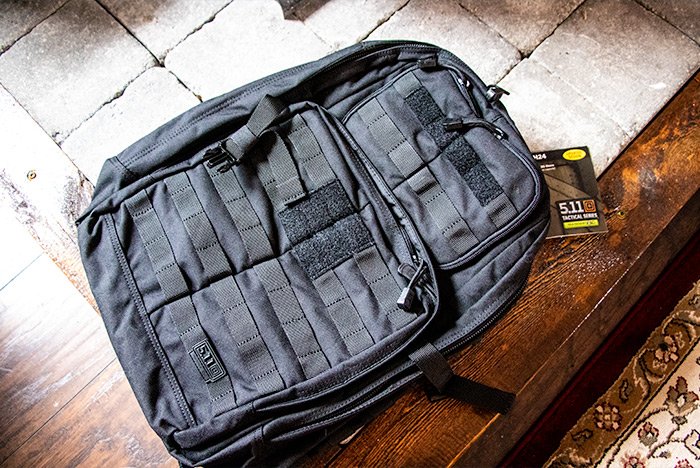
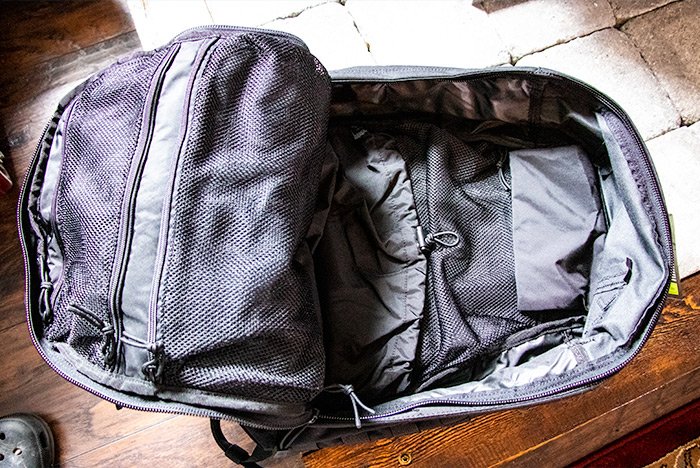
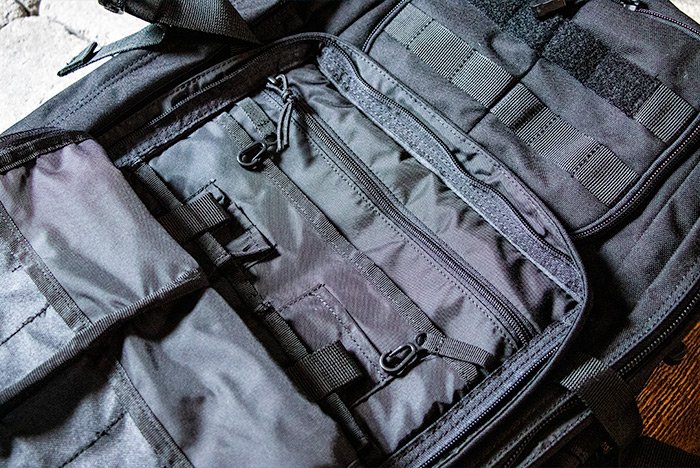
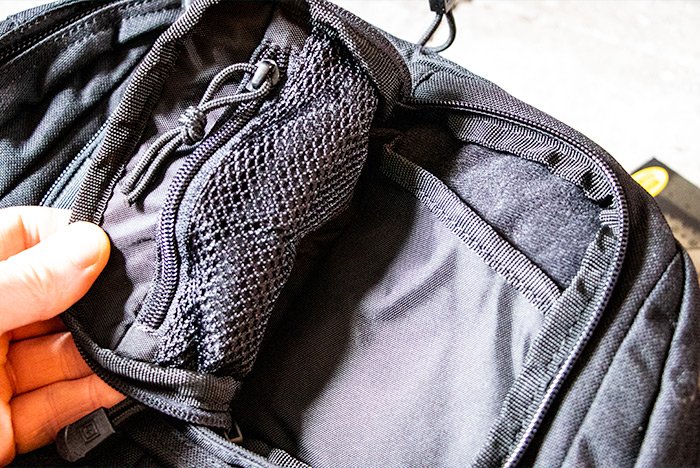
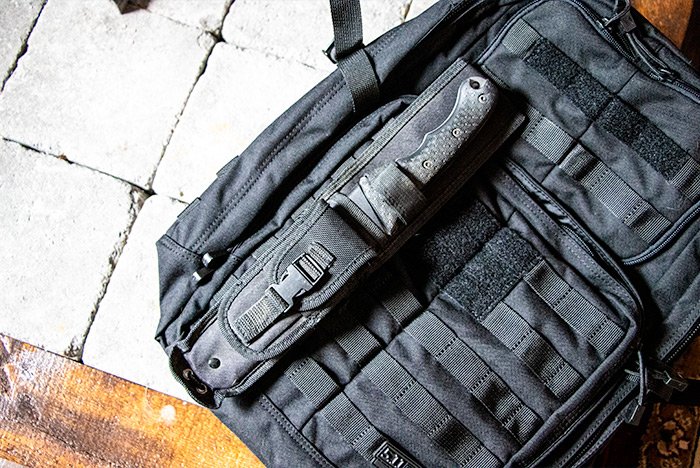
Question: I’m currently in the market for a camping and bushcraft rucksack and I’m somewhat overwhelmed by all the options available out there. So far, I’ve searched through all the rucksacks Cabela’s has for sale and I have no idea how many Amazon has for sale. That’s a rabbit hole if I ever saw one. Cabela’s didn’t offer that many, so I gave up on them and I’ve gone back over to Amazon. I have my eye on a very nice bag that costs around $129. It’s called the 5.11 RUSH24 Military Tactical Backpack and apparently everyone loves it. There’s one thing I’m wondering about though and that’s the material it’s made out of.

The specs say the material is Durable 1050D nylon. I looked that up and apparently, it’s also called MultiCam 1000D nylon or 1050D ballistic nylon, which is a very cool name.

I used to have a pair of snowboarding snowpants that had the butt and knees made from Cordura, which I think is only 1000D. I loved that stuff as it was virtually indestructible. I would be thrilled if this rucksack is actually made out of a material that’s even better than Cordura. Does anyone know exactly how strong this ballistic nylon is? How is it for a rucksack? This alone would be the deciding factor for this bag.

Answer: The material the sack is made of is the most important thing. If you can afford the $129 for this bag, I’d say go for it. That’s a really good company. I’ve seen them around. 5.11 is awesome.

As for 1050D ballistic nylon, depending on its weave, you’re probably not going to get any better than that. The “D” in the name of the nylon indicates its weight, but many other factors come into play with nylon’s strength, such as its specific type of weave as well as its manufacturing process. It’s strong though and that’s nothing you should even be concerned about. If it says that it’s Durable 1050D from 5.11, take my word that it’s good stuff. You’ll be hard pressed to find something stronger.

Just to let you know, in general, there are a few different versions of 1050D ballistic nylon. A better strain is called “High Tenacity,” which holds up a lot better against heat. Different types of nylons are better for certain things too. For instance, 1000D Cordura nylon is better against wear (because of its soft, cotton-like consistency), but the 1050D ballistic is stronger overall. So it’s strength against abrasion resistance. We’re splitting hairs here though because if you liked the Cordura on your snowpants, you’re going to love the ballistic. I mean, the stuff was originally made for use in bulletproof vests. You aren’t going to damage it.

Do I Need a Jackknife?​

I guess I can answer that question myself. Yes, I (or you) probably do need a jackknife. If anyone does any camping or bushcraft, it’s best to have a jackknife (folding knife) in their pocket, on their belt of in their bag. The reason for this is its versatility. I own a large survival knife as well as a nice jackknife and I will tell you that I end up using the jackknife more than the survival knife. It’s great for smaller tasks and even everyday tasks that have nothing to do with the outdoors.

One thing I want to mention before I go on though – when searching for the perfect folding knife, make sure it’s got a strong open lock mechanism. I remember a time when I was a kid; I was holding my small, cheap folding knife, that I bought from a flea market, in my hand. It had no lock to hold it in the open position. When I went to stab something (just fooling around), the knife folded and cut my hand. That wasn’t fun. Hopefully these knifes aren’t even sold today without a way to automatically lock them open.

Anyway, when choosing a jackknife for use in the outdoors, be sure to set your primary focus on the blade itself. This will be for smaller, lighter uses obviously, but the blade should be versatile and strong. If you’re going to buy a Swiss Army knife, get one of the larger models, such as the Hercules. And if you’re leaning towards a Leatherman, the same hold true. The Surge is a good design. Both of these models are larger than the traditional multi-tool knives, which means their blades are larger too. These are somewhat expensive knives, but they’re very good and they’re rated highly among users and those familiar with them.

As I said, these knives are used for a bunch of things, so before purchasing, think about what you’ll be using yours for and then buy the one that matches those uses best. Blade size and knife weight vary somewhat, so if you’re going to be skinning, you’ll need something larger and stronger and if you’re going to be cleaning fish, you’ll need something smaller and more delicate.

Do you own a jackknife? If so, what do you have? What’s the brand and model? Do you like it? Please let me know. Thanks!
 
JGaulard

JGaulard

Administrator
Staff member
Site Supporter
Sr. Site Supporter
Power User
Joined
May 5, 2021
Messages
319
Reaction Score
2
Points
18
  • #13

Military Wool Mitten Inserts From Maine Military Supply​

My lady and I had to go to Bangor for the day a while back, so I decided to make a stop off at the local Maine Military Supply store that’s located right off of Interstate 395. It’s just south of Bangor; it’s on Rt. 1A in Holden. I’ve never been there before, but what I remember of a military surplus store near the town in which I grew up, these types of stores are rather awesome. I had a feeling I was going to want everything they had in stock.

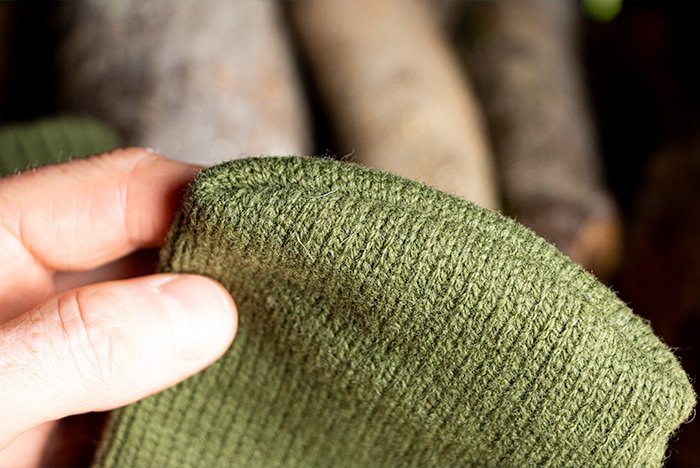
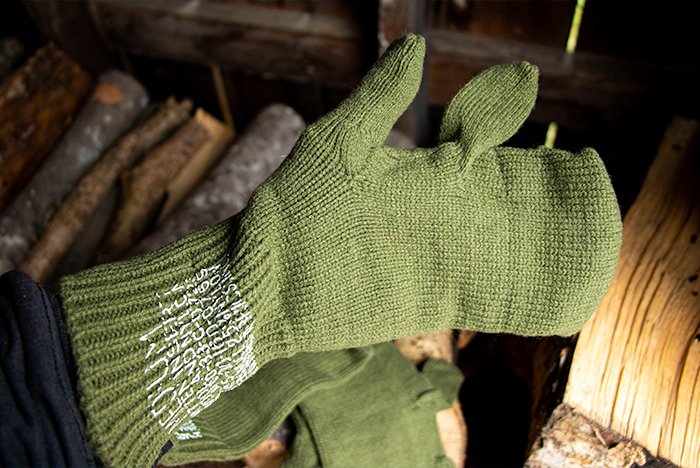
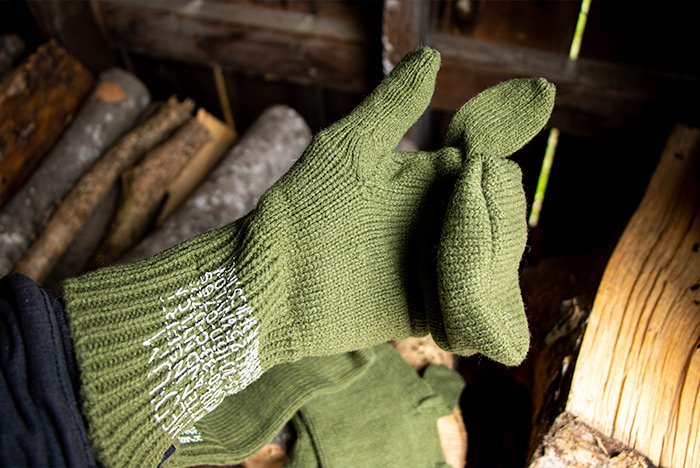
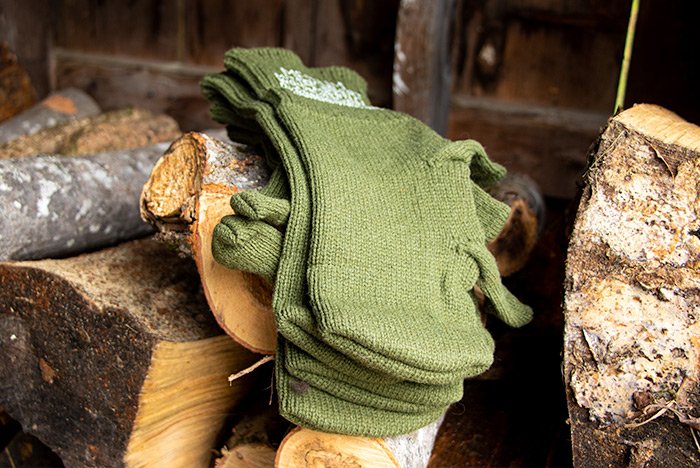
Okay, I’ll admit, I didn’t want everything they had in stock, but I did want most of it. I mean, ammo boxes, machetes, knives, firearms, camping gear – you name it, this place had it. The only issue I experienced was that I didn’t know how their prices where. I had no idea if a sleeping bag cost $100 more there or less there than elsewhere. Because of this, I played it safe. I bought only one thing. Well, two of the same thing. Military wool mitten inserts. The inserts cost only $2.99 per pair, so I figured I was somewhat safe from any wild price swings that I may have encountered after I got home and checked on things online. As it turns out, I got a deal. On Amazon, these same inserts cost $6.49 for a two-pack. After tax, I may have saved a few cents. Whatever – these inserts are so good and so cheap. I love them.

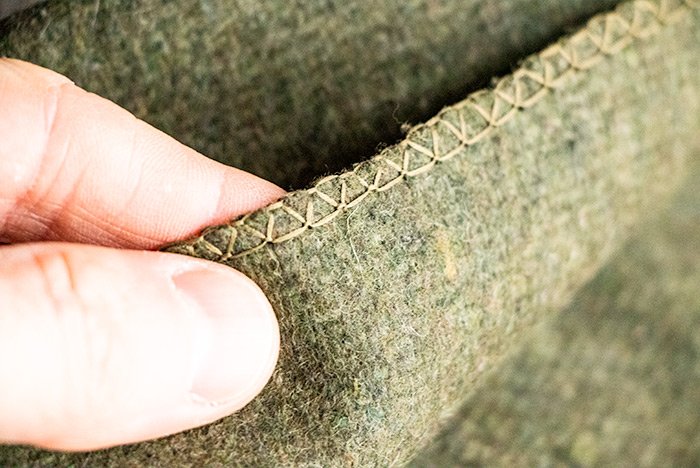
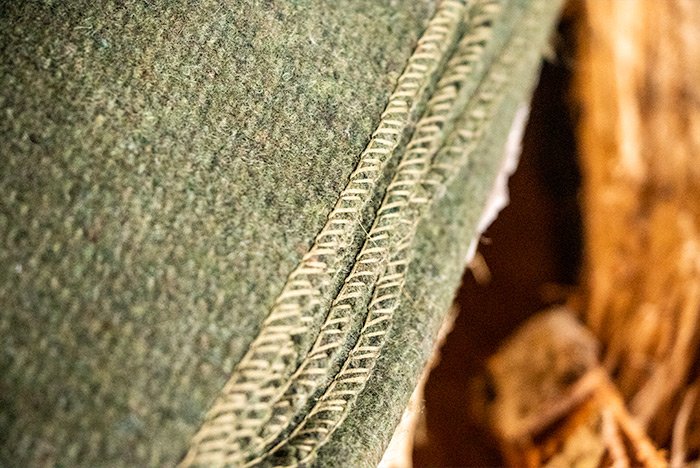
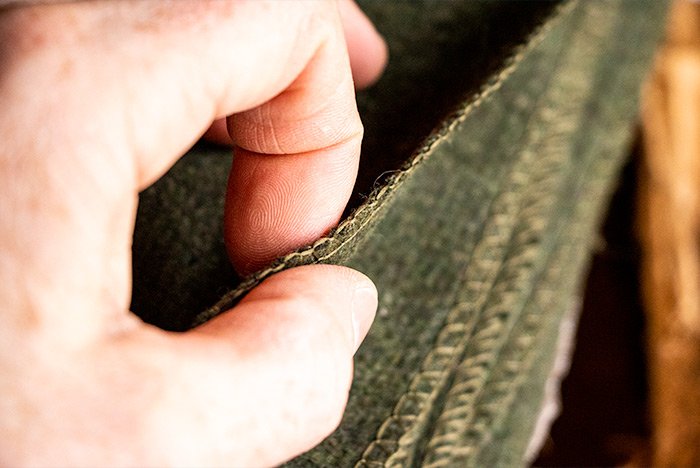
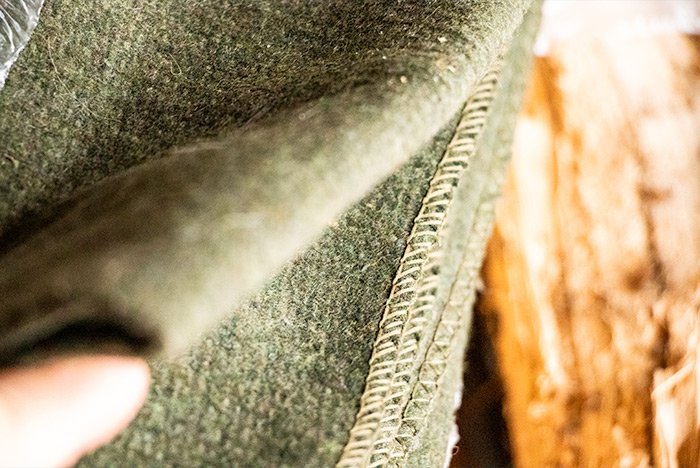
If you aren’t aware, wool liners are to be used in conjunction with those huge cold-weather military mittens you see all over the place. If you don’t know what I’m referring to, just search “military gloves” or “military mittens” on Google or Amazon. You’ll see a wide variety online. This type of mitten runs large so you can first put on some liners and then the gloves over them. It’s this multiple layer effect that works so well to keep the cold out. I’ve been doing something similar with another pair of mittens and fleece gloves I own with decent results. My current setup isn’t perfect, but it’s far better than anything I’ve tried in the past.

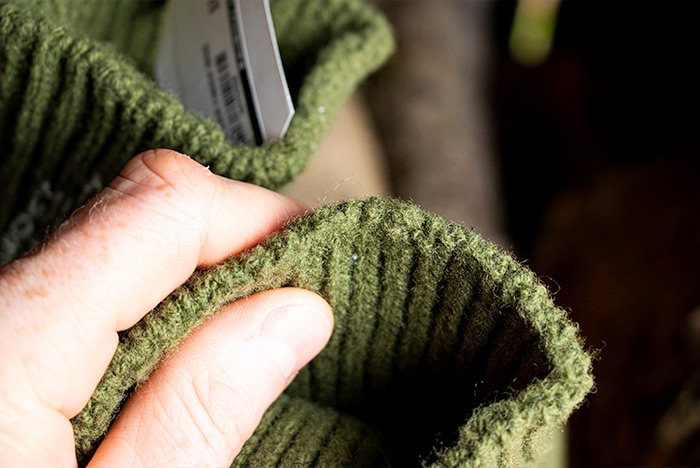
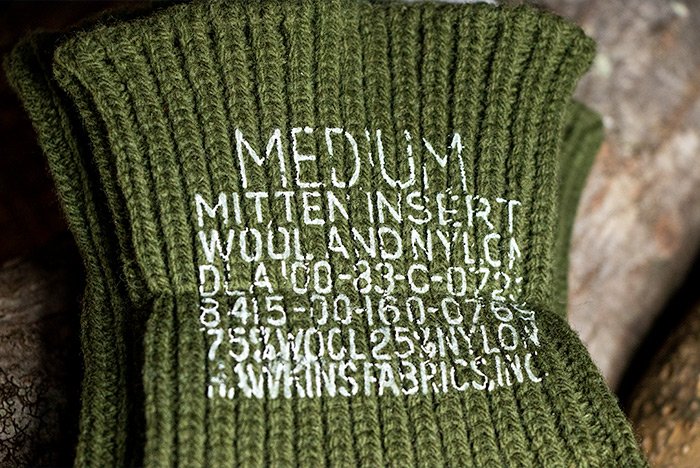
Take a look at these wool inserts. All of them seem to be medium sized and they’re made of 75% wool and 25% nylon. I’ve yet to purchase the glove that goes over these liners, but I’ll do that soon enough.

military-mitten-liner-thickness.jpg mitten-liner-stitching.jpg wilitary-mitten-liner.jpg wool-military-mitten.jpg wool-mitten-insert.jpg wool-mitten-insert-label.jpg
 
JGaulard

JGaulard

Administrator
Staff member
Site Supporter
Sr. Site Supporter
Power User
Joined
May 5, 2021
Messages
319
Reaction Score
2
Points
18
  • #14

Springtime Camping in Farmington, Maine​

I’ve long said that we need a campground in our town. Well, I guess we now have the closest thing to that and it happens to be right in my backyard. A friend and I cleared some more underbrush and trees a few days ago and we now have one of the most lovely camping spots I’ve ever seen. It’s directly next to a babbling brook. Yes, a babbling brook.

As we were searching for good spots to set up our tents over the weekend, my friend, Ian, suggested that we clear near the brook that runs along the rear of my land. I was thinking more along the lines of sleeping under the huge White Pines, but after taking a look at what he was referring to, I had to agree that his spot was far superior to the one I was considering. He sold me on the, “Just wait until you hear the water running by as you open your eyes in the morning.” Okay, okay. It’s those details I don’t think about all too often, but he was right. We now have the best spot ever.

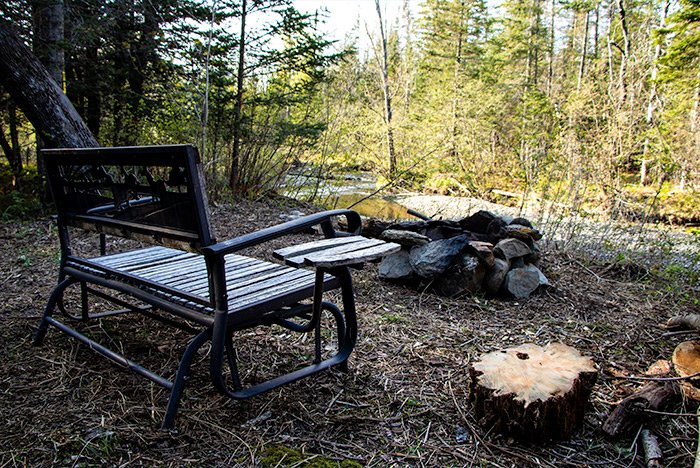
We camped out this past Saturday night into Sunday morning. We put together a decent size fire ring and I even hauled back a swinging bench that we had laying around. As for my tent, I used my trusted ALPS Mountaineering Taurus. As for everything else, I placed a nice thick tarp on the ground under the tent, laid down two moving blankets inside the tent, directly under my TETON Sports 1027L Deer Hunter Sleeping Bag. I was going to use a few wool blankets that I picked up a month or two ago, but those were unnecessary. My sleeping bag was all I needed. I have to tell you, I am so glad I picked up two of these bags. Whatever that material is on the inside, it’s so comfortable. I slept like a rock and they were worth every penny. By the way, the temperature was 45 overnight and I wan’t too hot in this sleeping bag. It’s legit in that it’s rated to -35 degrees, so I was concerned about being sweated out of it, but that didn’t happen. And believe me, I’ve tested it in the cold. It means business.

I’ll have to bring my camera along next time to take more photos, but the one above is partially of our camping area.

chair-camping-fire-pit.jpg

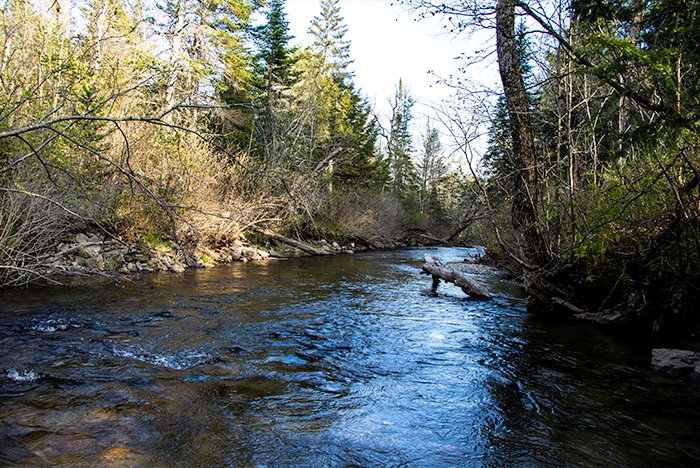
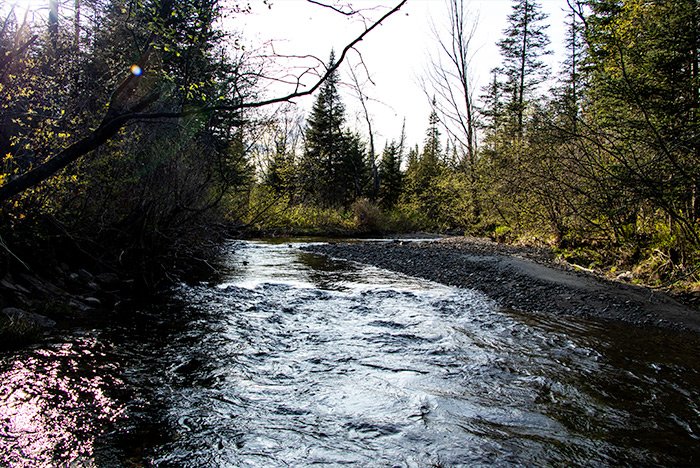
And here are two more, looking up and down the nearby brook.

looking-downstream.jpg looking-upstream.jpg

While those photos were just okay, I’d like to make it up to you by showing you a few videos I just took. I walked into the woods on through one trail, stopped at the camp site for a while and then left through a different trail. It’s all just so beautiful back there. I’m really thrilled with this property I purchased. Here are those videos.


JGaulard

JGaulard

Administrator
Staff member
Site Supporter
Sr. Site Supporter
Power User
Joined
May 5, 2021
Messages
319
Reaction Score
2
Points
18
  • #15

What Kind of Knife Do I Need for Bushcraft & Camping?​

Question: I’m looking to purchase my first “real” knife and I’m wondering if anyone has any advice for which one to buy. I know there are a few different types of blades with hundreds of different styles, so I’m a little lost. If you can, please let me know your opinions. Thank you.

Answer: I’ll start you off at the very beginning as I’m sure many others out there have varied opinions on this. Everyone has their favorites, so I’ll leave brand names out of this (until the end). If you check into some of the top bushcraft publications, you’ll find that this is a common topic. I’ll share what I’ve learned about the subject below.

There are a few very basic considerations you want to look at when choosing a knife. First is length. If you find that your knife isn’t large enough to split small pieces of wood, you need a bigger one. If you find that it’s too large to perform fine carving or whittling, you need a smaller one. I have a few knifes that have blades that run anywhere between four and six inches. I think I like the six inch one the best.

The second area of consideration is to choose what you’d like the blade to be constructed of. It’s become commonplace for outdoor enthusiasts to lean towards high-carbon steel with a sharp back corner. This is because high-carbon steel works exceptionally well with ferro rods. Also, the 90° angle on the back of the blade ensures those sparks are formed. Don’t go with pretty beveled edges and slick coatings on the blades. Those things will only get in your way when the time comes.

One of the most important areas of consideration when it comes to choosing belt knives is whether or not it’s of “full tang” construction. If you’ve ever seen a knife where the metal from the blade extends all the way to the end of the handle, you know you’re looking at full tang design. Knives get the crap kicked out of them and when you’re banging on the backside of it or on the handle when trying to split wood, the last thing you’ll need is for the handle to fall off. And I don’t care how good the manufacturer says the knife is, if it’s not full tang, don’t even think about buying it. This type costs more than the others, but it’s worth it.

The last thing you’ll need to think about is what type of edge your potential knife will have. There are four popular grinds; Scandinavian, Hollow, Convex and Full Flat. Each of these edges has their pros and cons. The Scandinavian and Full Flat have thinner edges that are great for carving and the like, but are somewhat brittle when they get beat on. The Hollow grind is the thinnest of all, which is perfect for skinning and processing meat, but it’ll chip easily and you definitely don’t want to be splitting wood with this type of edge. The Convex is the wood splitter of the group because of it’s thicker edge, but don’t try carving with it. Also, you need to think about sharpening your knife in the field. Some edges are easier than others to sharpen. Personally, I’d go with the Full Flat edge because it sits somewhere in the middle and it’s pretty versatile.

I found a few links for you that discuss some very good knives. These are the favorites from a few years ago:

https://gearpatrol.com/2017/11/09/best-bushcraft-knives/

https://www.gearhungry.com/best-bushcraft-knives/

From what I can gather, these are the best bushcraft knives out there.

These knives where chosen by Gear Patrol:

– Spyderco Bushcraft

– Morakniv Bushcraft

– Helle Temagami

– Fallkniven F1


– L.T. Wright Bushcrafter HC

– CRKT Saker

– Ka-Bar Becker BK2 Campanion (I love this one)

– Esee Knives Model 3

– Benchmade 162 Bushcrafter

– Condor Tool & Knife Bushlore

And these were chosen by Gear Hungry:

– Ka-Bar Becker BK2 Companion Bushcraft Knife

– Morakniv Carbon Fixed Blade Bushcraft Knife

– Fallkniven F1 Bushcraft Knife

– Condor Walnut Handle Bushlore

– Benchmade – Bushcrafter 162

– Schrade SCHF36 Frontier Fixed Blade

– Morekniv Craftline Pro S

– Schrade SCHF9 Extreme Survival

– Buck Knives Selkirk

– Spyderco Bushcraft G-10 PlainEdge Knife

There’s also a lot more than goes into choosing the perfect knife, such as what type of material the handle is made of and whether or not the knife has a serrated edge. I encourage you to take a look at the sites I linked to here and then browse through each of the knives I listed. When you’re finished with that, I’m guessing you’ll be quite educated on the topic. Let me know what you pick as your favorite.

What Gear Do I Need For Bushcraft?​

Question: I’m a beginner and I have recently purchased a few bags to carry all sorts of stuff in. I have a very nice backpack and a haversack. The only problem is, I don’t have much actual gear yet. I do have a few lighters and a knife or two, but nothing like the pros own. I’m not there yet, which is why I’m asking this question. What’s your advice for filling my bag and sack? What do you bring when you venture out in the woods? What are your go-to items to keep on you at all times?

Answer: I have my own go-to gear when I head out, but really, everyone is different. One person may want to use a lighter for starting fires while another is determined to use only their ferro rod. Personally, I always keep a lighter on me. I use it all the time to melt the frayed ends of rope. That’s a must.

Also, there are all types of bushcraft folks around. Some like to camp in tents while others sleep in the nude under the stars. Let’s just say that there are “levels” of bushcraft.

I’ve got quite a few books on bushcraft, but Dave Canterbury’s Bushcraft 101 is one of the best when it comes to laying out typical gear someone might keep in their bags. I’ll list and describe some below.

To keep in your pockets, you’ll need a lighter, compass and jackknife. These are probably good items to keep on you most of your life. You never know when you’ll need any of these. Again, the lighter is perfect for melting the ends of paracord and the compass comes in extremely handy during most times during long hikes, camping trips or anything bushcraft. I love compasses. Finally, the jackknife is small enough to conceal and it’s handy enough for cutting paracord or for notching wood for one reason or another.

When it comes to your belt, Dave says to keep a sheath knife and a kuksa. A kuksa is a wooden cup. I personally don’t keep anything on my belt as I don’t like the feel of it. Those things would become uncomfortable for me, so I generally store everything in my rucksack.

As for a belt pouch, Dave says to keep a sun glass, ferro rod, another lighter, carving jack and some cordage, such as paracord or tarred mariner’s line. Again, I don’t have a belt pouch because I keep all my gear on my back and in my pockets. I do like the idea of a haversack though. That’s next.

In the haversack, store your watch coat (light waterproof jacket), kerchief, more cordage, work gloves and another ferro rod. To be honest, I don’t know why you would need two lighters and two ferro rods, but if Dave says to bring them, there must be a good reason for it. I like the idea of a kerchief or rag and I think it’s a decent idea to carry these things where they’re more accessible than in a backpack. I would keep all the items that I’ve previously listed in the haversack.

Okay, so here’s the big one. He’s got a lot of stuff listed here, so this may take a while. I’ll move fast and I won’t be as descriptive as Dave was. In your backpack, store a tarp, trash bags, wool blanket, axe (hatchet), cordage, bow saw, pot, skillet, candles, fatwood, lantern and some more items that I don’t think you’ll be interested in as a beginner. You can pick up his book if you would like to know the minute details, but I suspect you won’t be packing a pencil and paper or large needles in your bag. Or a knife repair kit. Some of this stuff is out there for the pros.

The nice part about this list is that it’s suitable for bushcraft, camping or even hiking. I would always keep paracord on me because I never know when I might need it. A lighter is a must and so is some sort of a knife, even if it’s not a big survival knife. I do like having a ferro rod as a backup and I’ll generally make sure my knife is made of high carbon material because I can use the two together. Blankets, tarps and cookware is all a given for camping, so that’s fine.

Overall, if I were you, I’d start working on this list. Instead of buying a “watch coat,” you may want to work on getting a waterproof anorak. Those are more stylish and more readily accessible. You can also use it for hiking and camping if you so desire.
 
JGaulard

JGaulard

Administrator
Staff member
Site Supporter
Sr. Site Supporter
Power User
Joined
May 5, 2021
Messages
319
Reaction Score
2
Points
18
  • #16

Pictures of the 5.11 RUSH24 Tactical Backpack​

I’ve actually been looking for a new backpack for some time. Regular backpacks are sort of small and since I always have tons of stuff to put in mine, I needed something that was a bit larger than was I had traditionally used. I gave an earnest search a few years back, but after that turned up nothing, I gave up. That is, until I realized the world of camping and bushcraft offered their own quite impressive lineup of gear. Apparently, it wasn’t that the backpack I was searching for didn’t exist, it was that I wasn’t searching in the right places.

511-rush24.jpg

If memory serves, I was browsing the internet in an effort to learn about MOLLE webbing. I had heard of it here and there and I wanted to know what it was. Well, just as luck would have it, I stumbled across a video where a man was explaining the finer points of MOLLE and he was demonstrating on the 5.11 RUSH24. I said, “That’s it! That’s the pack I want!” It was perfect. The material it’s made of is called “Ballistic Nylon” and it’s practically bullet proof. I fell in love with tough nylon years ago when I discovered that my snowboarding pants were made of Cordura. If you aren’t aware, Cordura is some tough stuff. It’s almost indestructible and if the bag I found was made from anything like that, I wanted it. That’s for sure. Not to mention that the bag also had all the zippers and compartments that any great camping bag should have. There’s no shortage of compartments in this thing.

511-tactical-logo.jpg

Okay, let’s take a look at some photos of this backpack. It holds 37 liters worth of anything you want, which, in my opinion, is the perfect size for a summer hiking or camping bag. For the winter, I plan on picking up the RUSH72, which holds 72 liters. It’s a larger bag and that’s great for all that extra clothing and gear that I’ll need for any winter camping adventure.


I’ll start out by showing you some of the MOLLE webbing I was referring to earlier. This is basically a strap system that’s sown to the outside of the bag that allows you to affix accessories to it. On this particular bag, there’s MOLLE on the back as well as the sides, so it’s very flexible in the way it can be set up. This is the back of the bag. Or the front; however you look at it.

molle-webbing-backpack.jpg

If you’d like the longer version of what MOLLE is and how it works, you can check out this video:


511-tactical-backpack.jpg

And this is after I opened the largest section. You can see all that room in there. There are two mesh pockets as well as a full nylon laptop pocket.

inside-backpack.jpg

Next up is the inside of the front pouch. Again, this rucksack has got a lot of pockets and a decent amount of room to store lots of gear.

inside-front-pouch.jpg

Above is the front lower pouch and this next one is of the front upper pouch. There are two upper ones and they’re both smaller than the lower one.

inside-front-upper-pouch.jpg

Since this is a brand new bag, I was very eager to attach something to the MOLLE webbing. The only item I had that might attach was my survival knife. On the back of this knife’s sheath are some straps and a velcro belt flap. I managed to sneak the strap under the webbing and snap things back up. It worked well, with only one issue.

survival-knife-backpack.jpg

While the bottom of the sheath is very secure on the webbing, the top isn’t secure at all. It flaps around, so I think I’ll need to use some paracord to secure that part to the webbing as well. Once that’s completed, I’ll permanently have my knife affixed to the bag. I may even attach the knife to the side of the bag because that’s a taller area. The bag pouch seems a bit short for something so large.

survival-knife-molle-webbing.jpg

Okay, that’s about it. I wanted to show you my new backpack and I’ve done just that. If you’d like to add any information about this bag or if you’ve got any questions about it, please contribute in the comment section down below. Thanks for reading!
 
JGaulard

JGaulard

Administrator
Staff member
Site Supporter
Sr. Site Supporter
Power User
Joined
May 5, 2021
Messages
319
Reaction Score
2
Points
18
  • #17

What’s the Best Haversack Out There?​

Question: To me, haversacks are the best containers in which to carry gear when I go out for short periods of time. I love the look of them and I love the feel of them. They’re very practical and I like the fact that they stay out of my way when I’m hiking and working on stuff while I’m out in the woods. These side bags are indispensable.

For those of you who have never heard of, seen or used a haversack, let me tell you what they are. They’re small-ish bags (12″ square up to 24″ square) that are kept down near the hip. They use a strap that’s draped over the opposing shoulder, so it sort of looks like a side bag. Actually, it would most closely resemble a purse that a woman wears when she’s in an unsafe environment. When a woman is generally someplace she trusts, she’ll hang the strap over the near shoulder to the purse itself is positioned directly below. If she’s in an area where she feels someone might try to steal her purse, she’ll place the strap over the other (far) shoulder, so if someone grabs the purse, they won’t be able to get it. Haversacks also remind me of messenger bags, so they appeal to a fair amount of people.

Haversacks have been around for hundreds of years and they’re awesome because the more modern ones are like small rucksacks. They’re got pockets and zippers in them and they can organize everything you’d likely take with you for a short stint in the outdoors. They’re made of leather, canvas and even nylon. They’re generally water resistant and they oftentimes have sleeves on the outside so you can hang hand tools from them. Very handy.

My question for today is, what’s your favorite haversack? There are many very high quality ones on the market today and I’m looking for feedback on the favorites. I’ve currently got my eye on the following brands: Pathfinder, Duluth, Woodcraft, Campcraft, The Hidden Woodsmen, Raging River Trading and a few others. I’m leaning towards the Duluth because it seems to be the best. I know they are all good, but the Duluth just seems to be a bit higher end. I love gear and I want this thing to last me for the rest of my life. I don’t mind spending a little more.

So what’s your favorite haversack? What’s the best out there? Is there some sort of consensus on this? Is there the “one” everyone wants? Thanks.

Answer: I don’t use a haversack because I always use my 5.11 Rush12, but I’ve seen tons of videos on them. Here are a few that talk about some of the brands you mentioned.


How Does Bushcraft Compare to Camping?​

This question has been on my mind for some time now. What I’m starting to notice out there on the internet is a ton of overlap when it comes to bushcraft, backpacking, camping and hiking. Even just hanging out in the woods with a hatchet in hand can be considered…I guess…bushcraft. I know what bushcraft is. It’s the art of learning about and practicing wilderness survival skills. The issue I’m confronting is the determination of how pure the word “survival” is.

In the most unadulterated sense of the term, bushcraft should be about someone being dropped off in the forest, pretty much naked. From there, they have to figure it out. If they’re proficient with their survival skills, within a week, they’ll likely have a functional shelter, a food and water source and a steady fire. They’ll also most likely have some creature comforts built into their camp, like a chair of some sort and perhaps some trails cut so it’s easier to walk around. As we lean towards the more impure sense of the word, we find ourselves out the woods with a $200 rucksack, a $150 survival knife, ferro rods, tarps, tents, hiking boots and all the rest. To me, that’s more along the lines of camping. Bushcraft is much more survival oriented and with that world, there should be a lot less orange, bright green and black nylon floating around. Even paracord and bank line should be reserved for someone who considers themselves a “camper,” I suppose.

I think I’m simply trying to get a definition here. Personally, I’m fine with borrowing pieces from each discipline. I don’t need to be a hardened bushcrafter. I enjoy sleeping in a tent on a bedroll and I like nice backpacks. I also love all my gear and one of my favorite things to do is to shop for it. I would even like to purchase a sweet camper one day. It’s the outdoors I love and however I can figure out to spend more time in it is fine with me. I guess I just don’t know what to call myself. Do I even need a label?

I can’t remember when I first heard the word “bushcraft,” but it wasn’t that long ago. It was most likely introduced to me on TV. Some survival show, I’m sure. From there on, bushcraft has become wildly popular on the internet and in the outdoors and I have to tell you, I love it. I love the fact that more and more people are getting outside to enjoy nature. All that means is that there will be a greater number of people on earth who are self-sufficient and who respect and would like to protect the outdoors as much as they can. Before bushcraft though, those same people were considered and called “campers.” The problem is, camping can swing wildly in both directions. Some campers own just one old canvas tent from their Boy Scout days and a ferro rod and others own a $300,000 35 foot RV. Oh yeah, and a propane grill. Are both considered campers? I think so, but one definitely leans more towards the bushcraft side and the other definitely leans more towards the rolling house side. But hey, to each their own.

I am probably just trying to get comfortable in my own skin. Much of what I read on the internet and in forums like this one is about bushcrafting. I’ll admit that I feel some guilt after reading through a bunch of content that talks about survival and then I go shopping for the latest hatchet, cordage or canvas whatever. It’s fine though because I have yet to bump into anyone who is judgemental about the whole thing. I’m sure they’re out there, but at least I haven’t met them.

So, what do you think about the comparison between bushcraft and camping? Are they one and the same? Are they completely different? Is there any overlap? I’m curious about your perspective.

What are Pack Frames Used For?​

Question: I am so confused about pack frames. I’ve been watching video after video on Youtube in an effort to discern what these things are used for. I’m still not quite sure. I know that backpacks and rucksacks are used with bushcraft and camping, but why does someone need anything beyond that? Are pack frames used when someone doesn’t have a backpack? So if they roll their gear up in their blanket or tarp, they can attach it straight to the pack frame? I’ve seen a video where someone attached their actual rucksack to their pack frame, but in this case, I’m not sure why they did that. If they already had the backpack, why do they need the frame as well?

The only purposes I can see for a frame is to carry firewood and a hunting kill. Please educate me here because I’m trying to get a handle on all the gear that’s necessary for a productive hike, camping trip and bushcraft adventure into the woods. Thank you in advance!

Answer: You are almost there. Yes, many folks use pack frames or just frames for collecting firewood and hauling their load back to camp. Using a frame makes this chore exponentially more efficient. Hunters also use frames to haul their kill back to their truck or vehicle. They’re actually used for all sorts of things. The ALICE pack, for example, is used in conjunction with a frame. That’s just how it was built. I own the Sandpiper Pack Mule frame and I do all sorts of things with it. If I’m going to hike to camp, I attach my backpack to it and bring it along to use with firewood collection as well as a seat. Yes, a seat folds out of it and I sit on that thing for hours. It’s actually quite comfortable.

Answer: Dave Canterbury talks about using a pack frame for hunting as well as to carry gear along with a bedroll. Frames aren’t nearly as popular these days with some types of outdoors people as they were in the past because of alternatives, but they are still very versatile and of good use. Dave likes the Roycroft frame, frames from Cabela’s and Bull Pac. He really likes the Bull Pac frame. Apparently, it’s extremely durable and it also has a lifetime warranty.

The thing is, you can carry tons of weight with these frames, so if you’re out in the woods or someplace else that requires you to carry heavy items, you can do it much easier on your back with a frame. Just imagine trying to carry something without one. I’ll leave a video in this post for you to look at, but I’ll tell you that in it, you can see people using frames to carry leaf blowers, packs of roofing shingles, hunting kills, deer and moose sheds, lots of camping gear and machinery. They’re pretty great. Don’t forget about archery gear and guns for hunting.

What is MOLLE on Rucksacks?​

Question: As you know, I’m looking to purchase my first rucksack and I think I’ve decided on what I want. I’m going to start out with the 5.11 Rush24 and then I’ll move onto the Rush72 when winter rolls around. I know these are more expensive than what I was initially looking for, but I just can’t get over how great the material is they’re made of. It’s the Durable 1050D nylon that sold me. And yes, you read that correctly. I’m going to start off with the smaller bag and then buy the larger one for winter camping. I’ll obviously need more room in the winter for all my clothing.

I keep seeing the word “MOLLE” when looking at rucksacks. In the beginning, I was like, “What is this stuff?” But now, I think I know what it is, but I want to make sure. It is what you attach things to? They call it webbing. It doesn’t look like webbing. Can anyone help? Also, is it important to have MOLLE on a bag?

Answer: MOLLE is a very simple concept. It’s simply nylon straps that are sown to a rucksack or backpack that you can attach accessories to. You can clip to the loops that MOLLE creates or you can purchase accessory pouches from many different vendors and then attach these pouches to the outside of your pack, in conjunction with the nylon straps. With this system, you can store flashlights, canteens, knives, etc… on the outside of your bag as opposed to the inside, which would use up valuable storage space. It’s really a great idea and it’s very secure. To answer your question, yes, it is important to buy a bag that utilizes the MOLLE system. I wouldn’t buy anything without it. Also, great choice for rucksacks. Those 5.11 bags are very high quality.

Answer: Here’s a video for you to watch that will explain what MOLLE is. It’s from the same company that makes the bag you want. Also, I just took a look on Amazon and there are tons of MOLLE accessory pouches. You’re going to like your rucksack.

What’s the Best Brand Rucksack to Buy?​

Question: Hi there. I’m currently in the market for my very first rucksack, or backpack. Whatever you want to call them. I’m getting into bushcraft and camping and I know I’ll need a nice bag in which to carry all of my stuff. The problem I’m finding out there is that there are about a zillion different brands and I’m not sure if there is a specific “type” of bag I need for my uses. I’m getting confused. I’ve been advised to look for bags that don’t have tons of pockets in the inside because if it’s more of a bucket style, I’ll be able to line the sack with a plastic bag or something like that to keep my gear in and then when I make it to camp, I can remove that bag and use the sack to collect firewood, fatwood or whatever. I think that’s good advice, but the thing is, I seem to have a small addiction to lots of pockets and compartments. I’ll have to get over that.

I’ve been doing some reading on rucksacks and here’s what I’ve found to be most important. Overall durability matters. This was pretty much a no-brainer. I already knew this. I love canvas, but I also really like black nylon, so that’s going to be a toss-up. As long as the nylon is strong enough for the abuse the bag is surely going to face. All the zippers, buckles, mesh and straps have to be heavy duty because I’m not messing with light-duty stuff out in the wild. The exterior also needs to be somewhat water resistant. I don’t expect the entire thing to stay dry if I throw it in a lake, but it would be nice if the contents I was carrying didn’t get wet in the rain.

Are military surplus rucksacks any good? Does anyone have any experience with them? How do they actually look in person? I’ve never been inside one of those military surplus stores, so I’m at a loss here. I can imagine that most of those bags are made of canvas. I hear they’re very good though.

What about size? Is 35 liter a good size? I’ve read that 35 liter is perfect for a lot of people and that 40 liter is too big for some. I weigh about 135 pounds and I really don’t want to be carrying something huge on my back.

Okay, so here’s the big question. What about price? What’s not enough money to spend on a rucksack and what’s too much? I hear that Duluth brand bushcraft rucksacks are among the best available, but I just visited both their bushcraft sack page and their Amazon.com page that sells the same pack and the price is the same at $495. I can tell you this right now. I am not spending that kind of cash on a backpack. That’s crazy. I am looking at a very nice mPac military style tactical backpack right now and it only costs $32.99. It looks good to me, although, it has lots of pockets and compartments, which I was advised against. It’s rated highly though.

Other types and brands of rucksacks I’ve heard are good are Swedish Mountain Rucksacks, U.S. ALICE and USMC ILBE sacks. Has anyone heard of these or do you have experience with them? I’d love to know.

Right now, I’m undecided on the waist belt option. As I sit here and type, I’m telling myself that I won’t need that, but I have a strange feeling that one day I’ll be kicking myself for not getting it. I’d love for there to be an option to add a belt if I want. I’ll probably need to try out a bag in person to make this decision. I see a trip to Cabela’s in my future.

One last thing. I would like there to be the option of hanging clips and hooks off of the pack, if possible. I will probably be buying some D-rings to use and I wouldn’t mind some loops on the bag that I could clip to.

And that’s about it! I’ll add anything I forgot later. So please, if you have an opinion on rucksacks, please tell me. I’m ready to buy one and I can use all the help I can get. Thank you!

Answer: I’m somewhat of a rucksack junky. I don’t own many, but I do enjoy watching video reviews on them and then putting those I like in my Amazon cart. So far, these brands and packs are my favorites:

– RUPUMPACK Military Tactical Backpack (33L)
– Tactical Military 1050D Nylon Black Backpack Carrying Rucksack (50L)
– MEWAY 42L Military Tactical Backpack (42L)
– SunsionPro MTB-130 Military Tactical Assault Backpack (43L)
– WolfWarriorX Military Tactical Assault Backpack (39L to 64L)

I believe most of the rucksacks you’ll find on Amazon.com are knockoffs of real brands, but since 99% of them are made in China anyway, you probably won’t see a difference in quality. Also, each of the packs I just listed is compatible with the MOLLE system. I think this is what you were referring to when you said you wanted places to connect clips and hooks to. Look this up and I think you’ll be impressed. Best part is, I don’t think any pack above is more than $40.

Question: I looked at all of the options you suggested and they are pretty awesome. I may go with one of them if I can ever make a decision. I will tell you that I’ve recently discovered the 5.11 Rush24 and I think I’m liking what I see. I just asked a question on this forum about the type of nylon this bag is made of. Do you know about nylon?

Answer: I think you’ll really like either the RUSH24 or the RUSH72, depending on the size you’re looking for. Both are great.

What’s the Most Important Gear to Bring Camping?​

I’m wondering if my camping gear list is complete. I don’t do as much bushcraft as I do regular camping, but I do use the principles of the Five Cs of Survivability to help me remember what I need to bring along for my camping trips. I’d like to go through my short list here to see if anyone has anything to add. I’m always forgetting one thing or another, so any input would be appreciated. Also, if you’d like to share what you bring along with you on your own bushcraft or camping outings, I’d love to see that list as well.

I’ll use the Five Cs as a guide here.

Cutting Tools: My Schrade survival knife with a high-carbon steel blade. My Estwing hatchet. Usually some sort of smaller cutting blade, such as a pocket knife or a box cutter or something like that.

Coverage: I usually use my ALPS four man tent or my Coleman 8 person tent. I bring two tarps, one to go above the tent and one to go below it. I have two cold weather sleeping bags, four wool blankets and two twin air mattresses for sleeping. And pillows (sometimes). Sometimes I’ll bring along some moving blankets to go underneath the sleeping bags, if it’s super cold out.

Combustion: I’ll generally bring a lighter and waterproof matches as backup if my ferro rod doesn’t work out. I like to use the ferro rod for practice, but when I’m not in the mood, I’ll bring out my fatwood or newspaper and a lighter, just to get things going. This scenario is usually due to it being later in the day when I show up at the camp site.

Container: I have an aluminum drinking container that I use that’s not insulated as well as one that’s insulated. I’ve been known to bring along a gallon jug of water as well.

Cordage: I have more paracord that I know what to do with. I also bring along a 3/8 inch thick rope for other uses, such as a clothesline. I don’t use that one a lot though because it’s very bulky. I’m now looking into some bank line that I hear is the next greatest thing.

So how does that sound? Am I on the right path? Is there something glaring that I’m missing? I feel like I’m missing something, but I just can’t pin it down. Thanks!
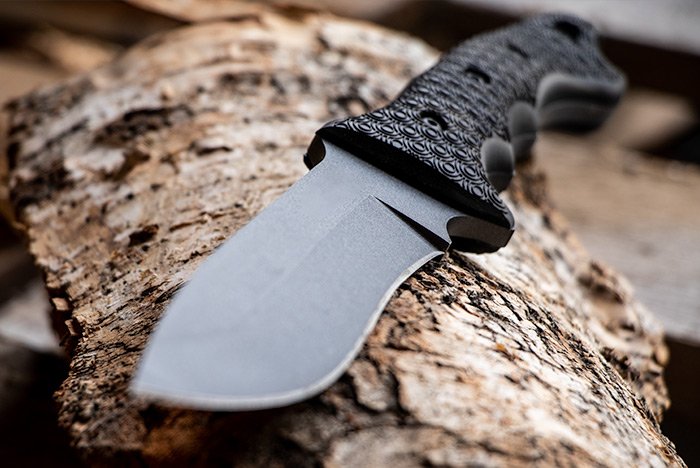
 
JGaulard

JGaulard

Administrator
Staff member
Site Supporter
Sr. Site Supporter
Power User
Joined
May 5, 2021
Messages
319
Reaction Score
2
Points
18
  • #18

What’s the Best Bushcraft & Camping Hatchet to Buy?​

I recently wrote a post where I introduced my new Estwing hatchet. In the post, I displayed a few photos of the tool and basically talked about some of its finer points. I bought the hatchet from Amazon.com for $35.43 and I thought it was a good deal. The thing is, I am seeing all sorts of really cool and exotic camping and bushcraft hatchets out there on the internet and I’m wondering if the one I purchased is any good. It seems good. It’s sharp and it cuts great. Is there a difference in the steel that’s used among hatchets? Is one steel harder than another? Does one keep an edge better? Do people have preferences when it comes to the comfort of the handle?

Or, are they all pretty good and everyone online is simply trying to outdo one another? I get the feeling that’s what’s going on here. I mean, as of this moment, my tool has 1,517 reviews and it’s got a 4.5 star rating on Amazon. That must mean something. For the price, it’s not bad.

Personally, I like the grip. I don’t particularly like the look of it, but it’s pretty comfortable in my hand and I don’t think it’s going to wear away or slide off any time soon. I’ve had axes and hatchets before with rubber grips and those have only given me problems. This grip is leather and it’s pressed and riveted on, so it’s solid. It also handles vibration and shock well.

I’m going to attach a few photos below so you can get a better idea of what I’m dealing with here. The edge is almost razor sharp right now, so it chops into branches and other wood very nicely. Let me know what you think.

By the way, this hatchet comes with a very nice nylon sheath that covers the blade. I like it a lot.

all-steel-hatchet-chopped-wood.jpg camping-hatchet-blade-in-wood.jpg estwing-camping-hatchet-leather-grip.jpg estwing-hatchet-butt.jpg estwing-hatchet-stuck-in-log.jpg forged-steel-hatchet-blade-edge.jpg holding-hatchet-leather-grip.jpg steel-estwing-hatchet-neck.jpg
 
JGaulard

JGaulard

Administrator
Staff member
Site Supporter
Sr. Site Supporter
Power User
Joined
May 5, 2021
Messages
319
Reaction Score
2
Points
18
  • #19

Which is the Best Ferro Rod to Buy?​

I just finished up writing a post about my new ferro (Ferrocerium) rod and I was looking to get some opinions on it. While this rod looks very nice and it was highly rated on Amazon.com, where I purchased it, I haven’t tested it in the field yet, so I’m still a bit curious about it. I got the six inch long by half inch thick model, which is exactly what I wanted. I didn’t want to have to mess around with one of those little rods and this one fits great in my hand.

So my questions are: Are all ferro rods equal? Meaning, are they all made out of the same material? Is some material better than others? Are there grades when it comes to Ferrocerium? The one I bought looks like it might be a generic because it’s just a plain black rod with a sticker that says Bayite on it. I have a funny feeling that this very same rod has a lot of different brand name stickers on it.

Do you have a ferro rod? If so, what size is it? Which brand is your favorite? If you were to buy another one today, what would you buy?

Here are some random photos of my new rod for you to take a look at.

bayite-ferrocerium-ferro-rod.jpg schrade-knife-ferro-rod.jpg survival-knife-ferro-rod.jpg
 
JGaulard

JGaulard

Administrator
Staff member
Site Supporter
Sr. Site Supporter
Power User
Joined
May 5, 2021
Messages
319
Reaction Score
2
Points
18
  • #20

Wool Bushcraft Blankets​

I received my two new blankets yesterday, so I thought posting pics of them on the blog would be interesting for all those who enjoy this type of thing. I honestly have no idea if these blankets are any good or not, so they’ll need some testing. I don’t think I’ve ever even used a wool blanket before in my life, but I’m very familiar with how warm wool keeps me when I’m wearing a sweater that’s made from it. Wool is awesome and there’s no substitute.

The blankets I bought are of the Ever Ready brand. They’re 80% wool, but I have no idea what else they’re made from. On the ad page, it said the rest is “synthetic material.” I’ll just have to go with that. These are fire retardant as well, which is nice. The only problem with that is the oil smell that comes along with it. I knew that was part of what I was buying before I bought them though, so I wasn’t shocked at this revelation.

As far as the size, these blankets measure in at 66″ x 90″ and they say they’re “similar” to those that are issued by the Army. So no, they’re not genuine Army issue. They just look and feel like it. At $24.99 each, I can’t complain too much.

Okay, I’m attaching the photos I took of one of the blankets below. Let me know what you think. Will these be able to handle a survival situation? A winter camping one? What’s the coldest temperature do you think these will keep me warm? I’m curious about all this.

amazon-wool-blanket-stitching.jpg best-camping-blanket.jpg bushcraft-blanket.jpg folded-wool-blanket.jpg survival-blanket.jpg

UPDATE: I wanted to add some to this post. I just received two wool blankets from Harbor Freight and I have to say that they appear to be pretty good. Not that I know what I’m actually looking at, but my first impression is that they seem like decent wool blankets. I’m not quite sure how to test something like this out, so I’ll have to get back to you after I bring these camping with me to let you know how warm they keep me.

I wrote another post that you can read about these Harbor Freight wool blankets, so please feel free to do that. Although I added many photos to that post, I’ll add a few here as well. The more, the better.

Just to recap: These Harbor Freight blankets are slightly thicker than the Ever Ready ones, but the Ever Ready blankets are larger and weigh more (4 pounds compared to 2.8 pounds). It seems as though they’re more dense as well, which may keep me warmer or cooler. I’m not sure yet. The stitching on both blankets seems okay. It’s not very tight or anything, so it may need some attention down the road. Both blankets smell like oil, but the green Ever Ready ones smell worse than the Harbor Freight ones. The Ever Ready ones are also fire retardant, while the Harbor Freight ones are not.

close-up-wool-blanket.jpg harbor-freight-ever-ready-wool-blankets.jpg wool-blanket-thickness.jpg wool-blanket-edge-seam.jpg
 
JGaulard

JGaulard

Administrator
Staff member
Site Supporter
Sr. Site Supporter
Power User
Joined
May 5, 2021
Messages
319
Reaction Score
2
Points
18
  • #21

How Do I Get Rid of the Smell in My Brand New Wool Blanket?​

Question: All I can say is that this thing stinks. I can’t believe how bad it smells. I bought a brand new wool blanket and it arrived a few days ago. I’ve had it resting on the couch in it’s plastic container and I’ve been sitting here smelling it ever since. It’s not even opened yet. I’ve read that people have washed theirs, hung them on the clothesline for weeks on end, used Febreze on them and a few other things. Random folks have had random results. Mine smells like a mix between gasoline, oil, kerosene and turpentine. I’ve heard that others have had theirs smell like moth balls. I don’t think mine smells like that at all. It actually smells like it was sitting in the back seat of some old Army Jeep for the last 75 years. And the Army Jeep had a gas leak. And the Jeep was upside down. And the gas was leaking on the blanket. What is this stuff anyway? Is it the fire retardant?

I really don’t want to wash this blanket. I’ve seen the mess wool makes of a washing machine and my opinion is that washing causes too much wool to be lost to the washer. I don’t want to give up that much product. Dry clean?

Any advice would be appreciated. Thanks!

Answer: I actually just purchased two more wool blankets myself and I managed to get the gas and oil smell out of them pretty nicely by hanging them on the clothesline for a few days. They smell fine now. The trick is to not get them wet after that because for some reason, the wetness brings out the stink again.

I’ve heard that the more these blankets are aired out, the more the smell dissipates. It also depends on what type of fire retardant the company used on your particular blanket. Some smells worse than others. Mine smelled pretty bad, but once the air got to it, within a month things smelled much better.

If nothing seems to work for you, you can bring the blanket to the dry cleaners. That’s supposed to really do the trick. I wonder though, if the odor really is the fire retardant, isn’t removing the smell also removing the retardant? That’s just me thinking out loud.

So yeah, those are your options. Your washing machine, which I don’t recommend. The dry cleaners, which I really don’t think you need. Or the sun and clothesline, which is the best route to take. Just make sure the blanket gets lots of sun on both sides and the inside. Flip it over after a day or two. It’s the sun that eliminates the chemical smell. Let me know what happens.

Are Harbor Freight Wool Blankets Any Good?​

I’ve been following a blog post on how to remove the oil smell from new wool blankets and it got me interested in purchasing one or two for myself. It seems like everyone in the bushcraft world is using these blankets nowadays.

Last night, I looked around on Amazon.com for a good blanket and saw many of them in the $50 price range. I saw a few military blankets for $24.99 that I’m interested in and also some that cost well over $100. I don’t know who is buying blankets for over $100. I have read about people spending more than $400 for alpaca wool or something like that, which is just crazy. I’ll stick to my cheap blankets thank you very much.

I was watching a video on Youtube last night when the guy who made the video mentioned that he picked up a few wool blankets from Harbor Freight for about $10 each. The size is 60″ x 80″ and he said that while they weren’t the best blankets in the world, they were cheap and very good for the price.

I just took a look at Harbor Freight’s website and found the blankets in question. They’re 80% wool, so that’s comparable with the ones I found on Amazon for around $25. I just bought two of the ones from Harbor Freight.

My question is, what can I expect when I receive them? I’m slightly nervous because of the low cost, but then again, if they end up turning out okay, I will have just hit a home run. This is like the little wool blanket secret no one knows about.

Have you ever purchased a Harbor Freight wool blanket? If so, what did you think about it?
 
JGaulard

JGaulard

Administrator
Staff member
Site Supporter
Sr. Site Supporter
Power User
Joined
May 5, 2021
Messages
319
Reaction Score
2
Points
18
  • #22

Ever Ready Wool Blanket For Bushcraft & Camping​

Well, I received my Ever Ready wool blankets yesterday and boy am I excited. I never thought I’d feel this way about blankets, but that’s probably because I have never been involved with camping, bushcraft and the outdoors like I am now. Spring is right around the corner and once the snow melts off completely, I’ll be spending a lot more time back on my land (video here). I’ve got tons of little nooks to camp out in and I’m enjoying my exploration. I know I’ve mentioned this somewhere on this blog already, but I’ll mention it again. I’ve only owned these ten additional acres for a few months now and for all of those months, the ground has been covered with snow. I’m looking forward to seeing what the actual earth looks like. I’m sure it needs a lot of cleaning up. I’ll have to find some people out there who want to camp so they can scavenge for wood.

Anyway, I ordered two Ever Ready First Aid Olive Drab Green Wool Blankets from Amazon.com earlier this week. I bought them for $24.99 each and received them in the mail yesterday. Once I had them, I opened them right up, only to be greeted by a wicked oil smell. I was actually expecting this because that seems to be one of things people mention the most when writing reviews. I didn’t mind though because I knew that with a little airing out, they’d be fine.

I wanted to write this post to introduce you to the blankets. Good photos of these things are very difficult to find, so I just went out into my garage to take some close-ups. I think I did a pretty good job. What I wanted to show the most in the photos was the thickness of the wood as well as how it’s woven. How dense it is, if you will.

Down below, I’ll run through the photos I took and I’ll try to explain what’s going on before or after each picture, the best I can.

This first photo is of the plastic wrap the wool blankets came in. I bought two and this was only one. The plastic is completely sealed.

sealed-wool-blanket-plastic.jpg

And this is the label sticker that was on the plastic wrap.

ever-ready-wool-blanket-label.jpg

Notice how the label says it’s only 80% wool. There’s some infighting out there in the bushcraft community about whether this is okay or not. Some say it’s imperative to have a 100% wool blanket and some say it’s not important because with the lower wool content, you’re able to wash the blankets more. I honestly bought these blankets because of the low price and I’m not planning on washing them ever. I guess I fall somewhere in the middle of this battle.

This is when I opened the plastic wrap a bit more and began peeling the blanket back. It’s fairly heavy at four pounds. It’s also 66″ x 90″ in case I didn’t mention that. In later photos, you’ll see that the wool itself is kind of thin, but at the weight it is, I think that the denseness makes up for that.

army-green-olive-wool-blanket.jpg

They say this blanket is Army issue, but I’m not sure that’s accurate. I also don’t know how to find out it it’s true either.

army-issued-wool-blanket.jpg

I believe I’m pinching a part of the blanket that’s four layers thick. For survival scenarios, the lighter the blanket, the better, as long as it keeps you warm enough. I hear that wool still keeps you warm when it’s wet. I don’t want to test that out.

survival-wool-blanket-thickness.jpg

Okay, let’s get into some of the stitching. From what I saw, the stitching of these Ever Ready Army wool blankets wasn’t anything special. I hope they hold up, but I would have much rather have seen something tighter and more reinforced. Here’s a close-up photo of what I’m talking about.

ever-ready-wool-blanket-stitching.jpg wool-blanket-edge-stictching.jpg

For my final photo, I’d like to show you how thick (or thin) these blankets are. I’m curious if a thin blanket like this will actually keep me warm when it’s freezing outside. The last time I went winter camping, the temperature dropped to 4° Fahrenheit. I don’t expect these to keep me warm in those kinds of temperatures, but to be able to add this to the mix of blankets would be nice.

army-wool-blanket-thickness.jpg

There you have it, a nice up-close view of the Ever Ready 80% wool blanket. Please let me know if you have any experience with this brand or another blanket like it. I’m curious about your opinion. Thanks for reading!
 
JGaulard

JGaulard

Administrator
Staff member
Site Supporter
Sr. Site Supporter
Power User
Joined
May 5, 2021
Messages
319
Reaction Score
2
Points
18
  • #23

How to Roll a Wool Blanket​

I’ve been reading through Dave Canterbury’s book called Bushcraft 101 and have made it to the section on how to roll a wool blanket up so you can keep all your stuff inside of it as well as carry it on your back. I’ve never actually thought of anyone doing this, but the idea definitely has merit. If you’re sleeping outdoors without a tent or if you don’t have a rucksack, you can easily roll all of your belongings inside of the wool blanket and then use some paracord to tie the blanket up and then loop it over your shoulders.

Okay, so there are a few different ways that you can do this and each has its own benefit. I’ll talk about some of them here. If you’re using a tarp, Dave advises that you place the tarp down on the ground and fold it into thirds, lengthwise. Place your first wool blanket on top of the tarp and fold that so it’s the same width as the tarp. Then, if you’re using a second wool blanket, do the same thing. At the end of all this, you’ll have a group of blankets and a tarp that measures somewhere about two foot by eight foot.

Sometimes people include the tarp on top of the blankets and roll it so it’s inside the wool. I’ve read that experienced bushcrafters advise always keeping the tarp on the outside in case it rains or things get wet somehow. The tarp will shield the wool and the contents within. If you’re not using a tarp, you don’t have much choice here, but keep this in mind.

Once you have the tarp and blankets laid out like this, place the items that you won’t be using while you’re hiking (dry socks, pants, fire kit, water bottle, hatchet, first aid kit, fatwood, rope, stakes, candles, etc…) right on top of the top blanket, towards the side you’ll begin rolling. Also, fold a 12 foot piece of rope in half and place that across the top portion of the blanket, so that can be rolled up as well. The folded side will create a loop that’s sticking out and the other side will be the two ends of the rope. Then, roll the tarp and blanket combination up so it squeezes all of the contained contents.

Once you have your bedroll, slide the to loose ends of the rope through the loop and tie them off. That will keep the roll tight, so it doesn’t come undone. Then, you can use some cordage to tie down the rest of the roll and to create sort of like back pack straps. I’ll include a video of a great way to tie this bedroll up so you can easily carry it down below.

An alternative method for rolling your gear up inside of this bedroll is to fold your largest blanket in thirds, but before you fold the last third in, place your gear down on the two layers you’ve already got. Then, fold the final third in so it lays on top of your gear. Then, roll everything up.

I think this is a fairly creative method for carrying not only your tarp and blankets, but your gear as well, right on your back. It’s as efficient as all heck and I’m going to have to give this a shot my next time out in the woods.

Here’s that video. Be sure to let me know what you think of this method as well as your own. Thanks!
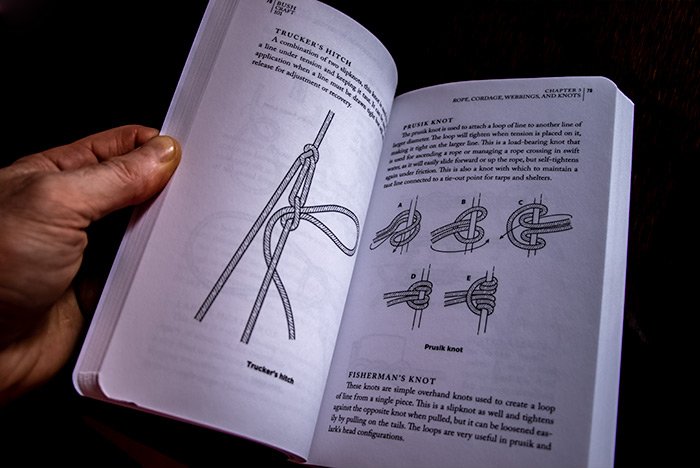
 
JGaulard

JGaulard

Administrator
Staff member
Site Supporter
Sr. Site Supporter
Power User
Joined
May 5, 2021
Messages
319
Reaction Score
2
Points
18
  • #24

The Verdict on the Harbor Freight Wool Blankets is In​

I received my two wool blankets from Harbor Freight yesterday in the mail. I really had no idea what to expect when ordering them because they were only $10.99 per piece. It was difficult to believe that they’d be any good, considering Iv’e seen other wool blankets selling for hundreds of dollars. As a matter of fact, I recently purchased two other Army style wool blankets for $24.99 each and I thought that was a steal. How good could the Harbor Freight blankets be? I mean, really. For such a low price, they couldn’t be very good at all. Or could they be?

I have this nagging feeling in my mind that is telling me that once upon a year, wool blankets that were used in the Army, for survival or for camping were as inexpensive at they could get. No one really thought of them very much and it wasn’t until the internet came along and popularized them did they start selling for an average of $50 each. I honestly don’t think they’re worth that much and I think the cost to make these blankets is pennies on the dollar. Something tells me we’re getting hoodwinked and that’s why I wanted to test out the cheapest wool blankets I could find. The Harbor Freight ones.

Okay, the blankets I purchased initially measure 66″ x 90″. These new blankets measure 60″ x 80″, so they’re somewhat smaller. The first blankets are also fire retardant and these aren’t. Those two things right there may explain the price difference. I’ll tell you though, the first ones stunk like oil and these do too, just not as bad. I’m hoping that if I hang them on the clothesline for a while, they’ll air out and that small will disappear. As I’ve said before, I’m not planning on washing any wool blanket ever because the washer will remove too much material. That’s the material I paid for, so I’d like it to stay where it is.

When I received the first wool blankets, I was struck by how thin they were. They’re four pound blankets though, so I chalked that up to them being dense. These new blankets weigh in at 2.8 pounds, so while they are somewhat thicker and more bulky in appearance, they’re less dense. I’m sure that will make a difference in their heat keeping abilities. Since I haven’t tested out either yet, I’ll have to get back to you on that.

Let’s take a look at some photos of these new Harbor Freight blankets. I can tell you that I was very impressed by them when I first opened the box they were shipped in. For only $10.99 each, even if I had to buy three of them to snuggle up in to stay warm, I still wouldn’t be spending a lot of money. Heck, I could buy 10 of these blankets and still not pay as much as I would for one of those more expensive ones. That’s actually not a bad idea. If I were to go camping with my truck somewhere or in a camper, I may just do that. You can never have too many wool blankets.

This first photo is of the Haul Master wool blanket tag. All the specs are given on it. The blanket is made out of 80% wool and a few other things.

haul-master-wool-blanket-tag.jpg

Here’s a photo of the wool blanket itself. On the website, it states the brand as being Western Safety, but in person and right on the blanket, it states the brand is Haul Master. Strange, but I’m sure all these blankets are the same thing.

harbor-freight-wool-blanket.jpg

This is a much more close up view of the fibers this blanket are made up of. Does it look like 80% wool? We’ll never know if it really is.

close-up-wool-blanket.jpg

And this is a view of the thickness of the blanket. Not bad, for what I’m used to.

wool-blanket-thickness.jpg

Now let’s take a look at the seams. The first photo is of the corner seam and the second photo is of the edge seams. Nothing to write home about here. The threading is satisfactory.

wool-blanket-corner-seam.jpg wool-blanket-edge-seam.jpg

As I was taking these photos, I placed the folded blanket on my knee. Here’s a shot of that. Sort of like a bird’s eye view.

folded-wool-blanket.jpg

And these final two shots are of the new Harbor Freight blankets sitting on top of the Ever Ready wool blankets.

harbor-freight-ever-ready-wool-blankets.jpg different-brands-wool-blankets.jpg

They look warm, don’t they? I can’t wait to try these out camping. I’m sure I’ll love them.

What are your experiences with wool blankets? Do you have a favorite type or brand? Have you ever tried alpaca wool? I hear that’s pretty awesome. Let me know. Thanks for reading!
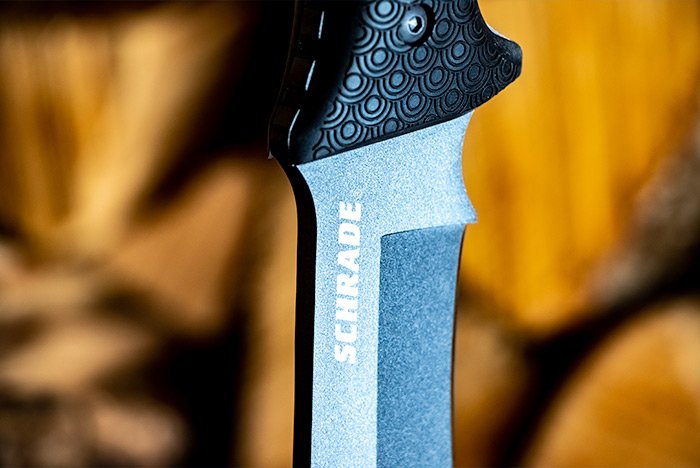
 
JGaulard

JGaulard

Administrator
Staff member
Site Supporter
Sr. Site Supporter
Power User
Joined
May 5, 2021
Messages
319
Reaction Score
2
Points
18
  • #25

Camping at Minus 40 Degrees​

I’m really getting into this whole Winter thing. At this point, I’d confidently say that I prefer it over Summer. For most of my life, I avoided Winter. It got in the way of me riding my bike down to the lake to go swimming. I mean, it did offer those occasional snow days from school, but other than that, it was just cold. And the fact that I never admitted that it was indeed Winter by dressing like a fool, just made things worse.

When you move to the North country, you don’t dress like a fool anymore. When Laura and I head outside, we wear things that will keep us snug and warm. People ask me nowadays if we’re cold up here. I tell them that we’re really not. It’s not like it used to be – with me running around in slippers wondering why my feet were freezing. Most of the time, I wear boots in the house. It’s only when I get ready for bed that I notice how I’m dressed. It only took a few weeks up here for me to realize that fashion was out the window.

You know we’ve had our share of ice here. We’ve been slipping and sliding all over the place. I’ve been to the store a few times and have seen these rubber things that you can slip over your shoes. They have spikes in them to keep you steady on the ice. I almost bought two pairs when I remembered that I can easily stud our own boots for much less than what the store was asking for their solution. Check out what I did.

baffin-boot-ice-studs.jpg

I studded Laura’s new Baffin boots. I also did mine, but I don’t have Baffins yet. I just have my mud boots. I’m saving up for the Baffins. And if you weren’t aware, these boots are rated to -145 degrees. That’s pretty damn cold. Here’s a view of their side.

female-baffin-boots.jpg

So how did I stud our boots? Well, all I did was pick up a few screws (80 to be exact) from the hardware store and screw them into the bottom of each boot. I got two sizes of screw – a half inch and a three eighths inch. And I made sure to get the hex head so it can grip into the ice. You should see us walk around now. No slipping at all. You can actually hear the screws scratching into the surface.

ice-studs-screws.jpg

This really isn’t the reason I wrote this post. I suppose I got side tracked a bit. What I really wanted to show you was a video of two guys who camped out in Minnesota at minus 40 degrees. Awesome video. You should watch it and get all sorts of inspired to try something like this yourself.

Minus 40ºF Hammock Backpack Trip in Ely, Minnesota

 
Top