LukeLewis
Member
- Joined
- May 7, 2021
- Messages
- 134
- Reaction Score
- 0
- Points
- 21
- #1
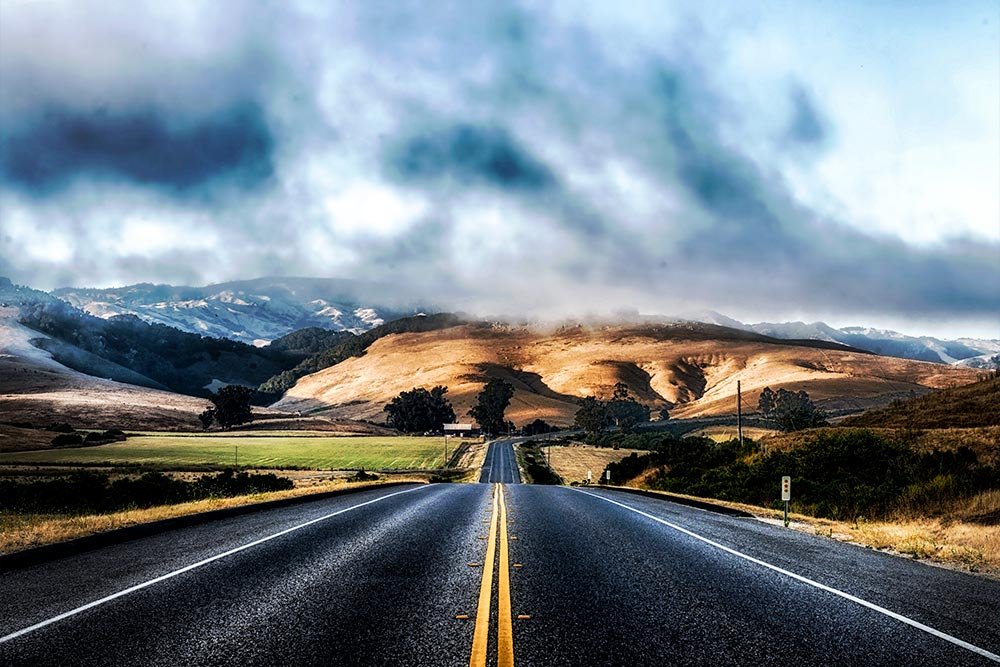
There are many reasons you might want to combine selections in Adobe Photoshop. I’ve already covered a few of them on this blog. Perhaps you would like to select an irregular shape and apply an adjustment layer to it or maybe you’d like to select an object in a photography to copy and paste it into another layer. Whatever the reason, learning and knowing how to combine and trim selections and selected areas is critically important to your Photoshop workflow. And once you become proficient at it, your value as an editor in Photoshop goes up.
In today’s post, I’m going to demonstrate how to make a selection, transform that selection, add to it (combine it with another one), trim away from it and then adjust it with an adjustment layer. While this sounds like a lot, it really isn’t. There are just some simple commands that need to be learned. Once you become familiar with them, what once may have seemed intimidating will be smooth sailing.
Making a Selection
In this tutorial, I’m going to make two selections and transform both of them. First, I’ll be selecting the closest part of the road, which will be sort of triangular and then, I’ll be selecting the further part of the road, which will be rectangular.I’ll start by using the Rectangular Marquee Tool. If you need a refresher on selection tools, please see this post:
Making Selections in Adobe Photoshop
I’ll try to accurately grab everything up to the edge of the closest part of the road.
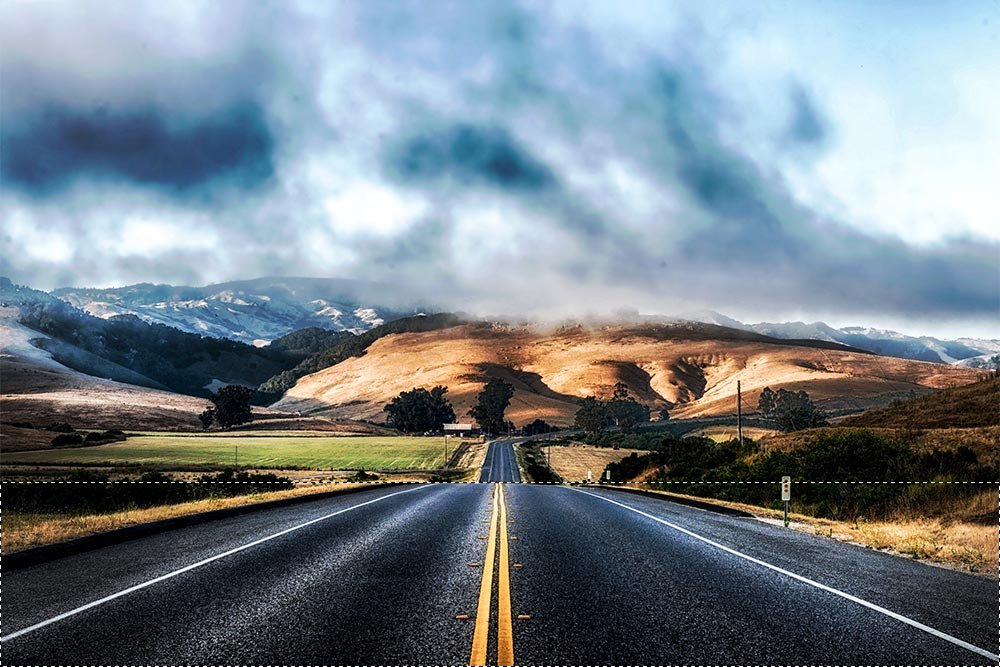
Now, as you can see, this tool didn’t exactly do a great job at staying in the lines. I suppose if I wanted to select the entire bottom part of the image, I’d consider this a success, but since I have a specific area in mind, I need to take a few more steps.
To transform a selection, I’ll head up to the Select > Transform Selection menu item and click.
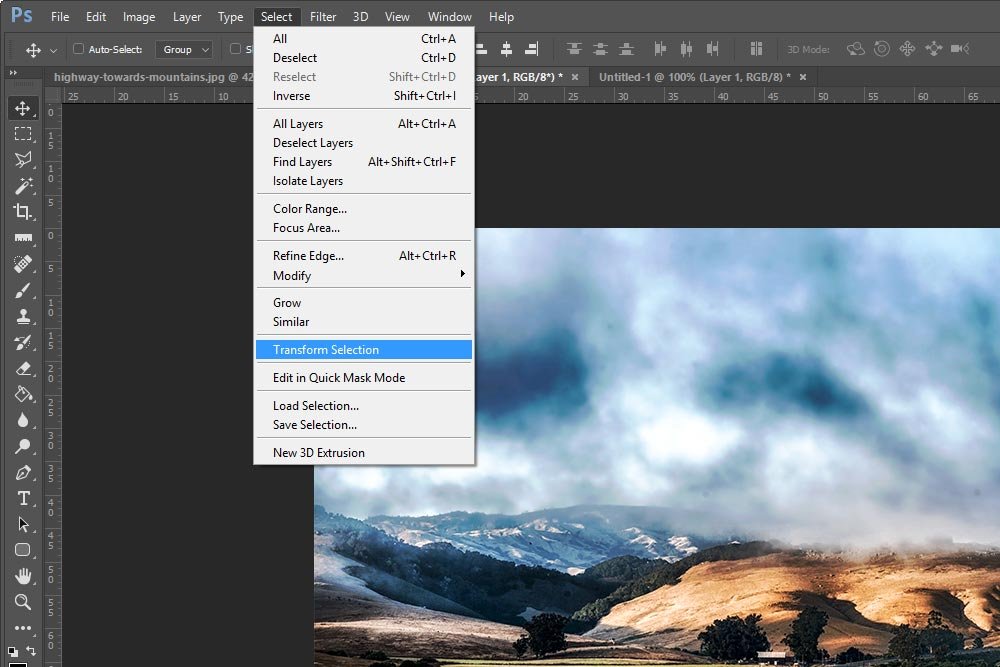
When I do that, I’ll see the familiar looking “transform” center point and handles applied to the marching ants and area.
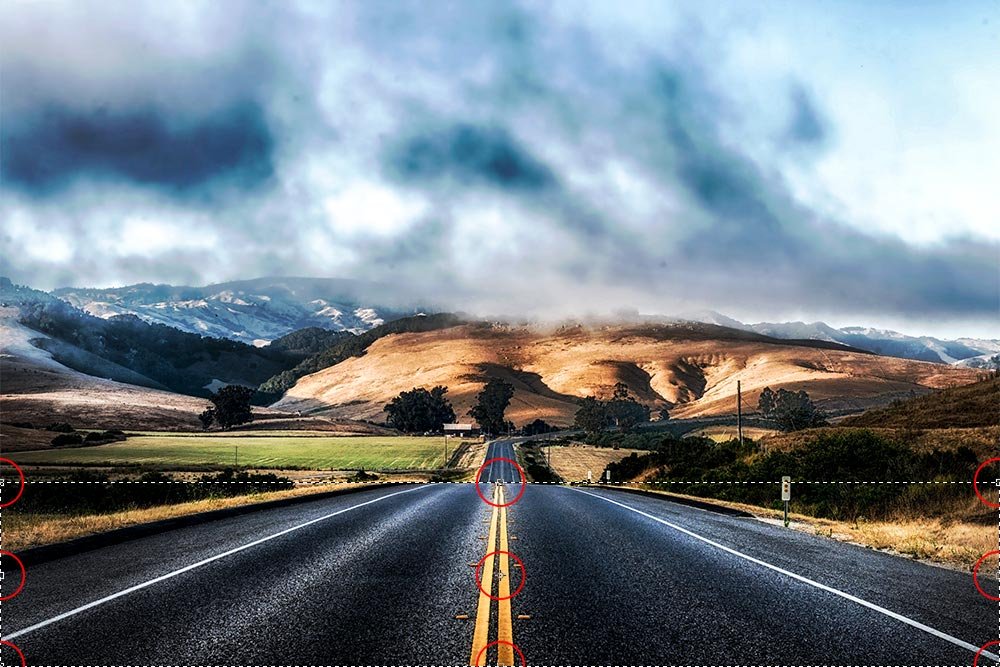
Now that I have the Transform tool activated, I can move over the to Edit > Transform > Distort menu item and click that.
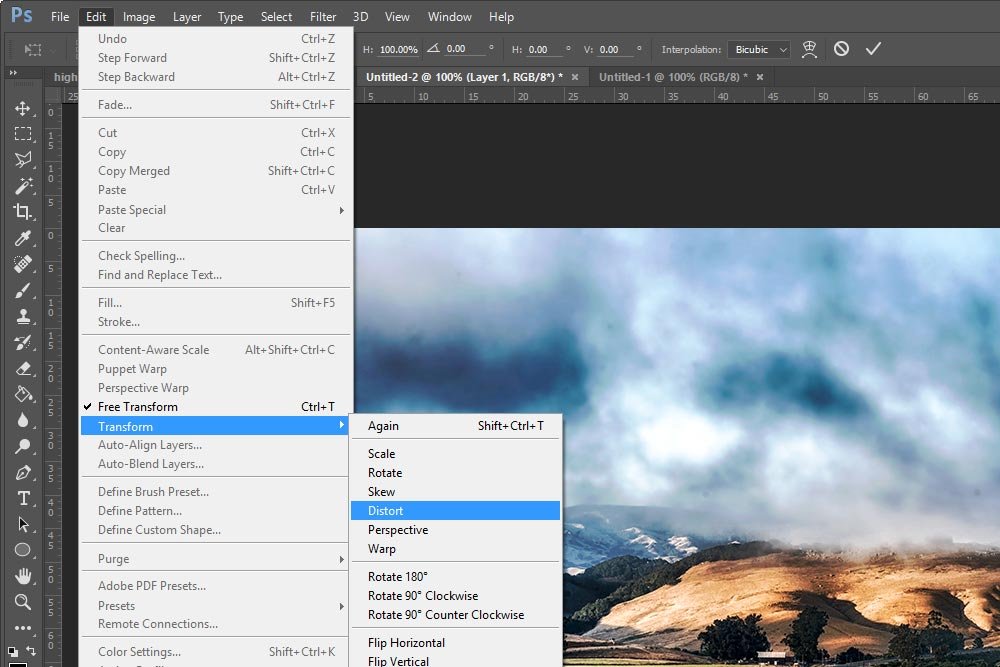
At this point, you may be wondering why I didn’t just go to the Edit menu in the first place. Well, if I had attempted to transform a selection with the Transform tool before activating the Select Transformation tool first, when I went to move the selected area, all the pixels that are contained inside it would move as well. Since I only want to move the marching ants (the dashed outline), I need to follow a certain process.
Now that I can distort the marching ants freely, I’ll move a few of the corners in an effort to follow the outline of the road.
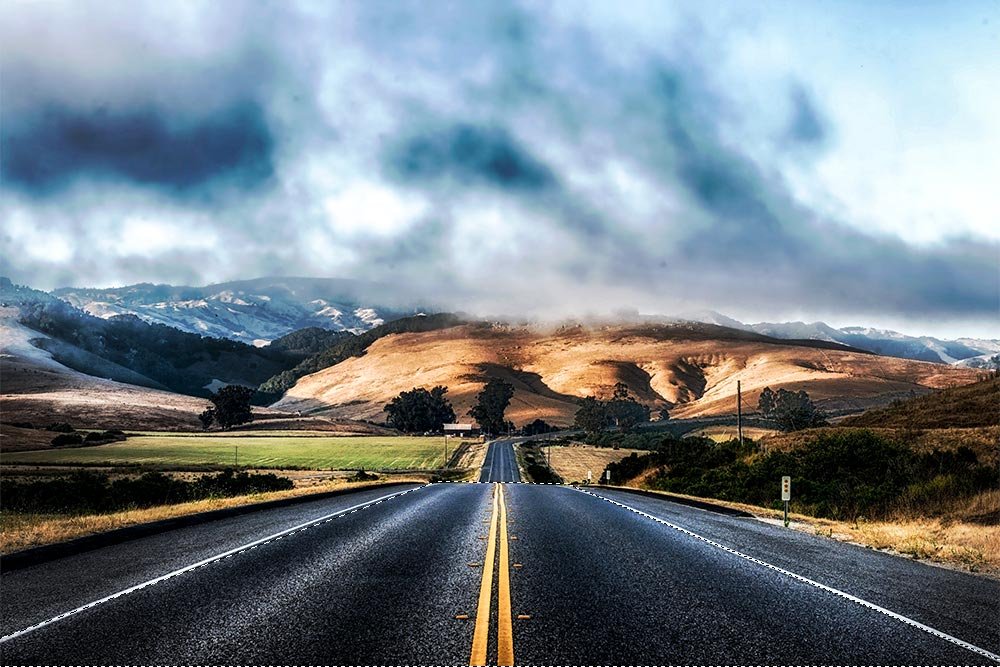
This looks pretty good. If you look at the marching ants now, you’ll see that they follow the lines on the road. To thoroughly capture the area, I had to drag the two bottom handles outside of the image area and into the workspace area of Photoshop.
Adding to a Selected Area
Now, I’d like to select the really far away part of the road. I want to add to the current selection. To do this, I’ll need to hold down the Shift key on my keyboard before trying to make any sort of selection. If I don’t hold down the shift key, when I start moving my mouse, the current selected area will become deselected. I don’t want that. I want to merge both areas together seamlessly.I’ll zoom in so I can see and then use the Rectangular Marquee Tool again, while holding down the Shift key.
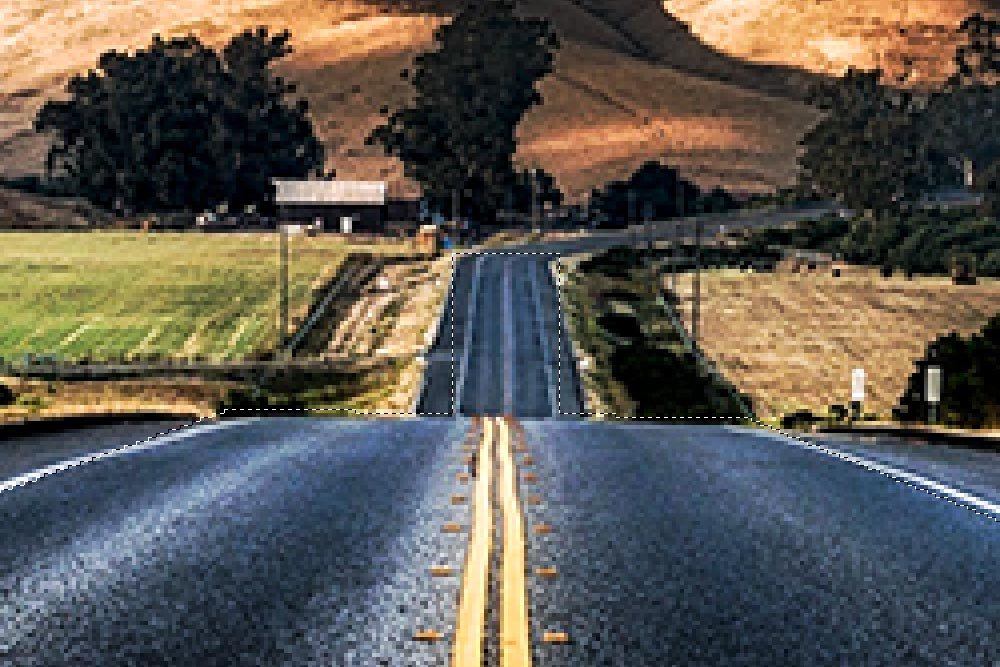
As you can see, the further part of the road is now selected as well. It’s not perfect, but I’ll handle that later on.
Trimming a Selected Area
I don’t need to do this for this image, and it’s difficult to capture in a screenshot anyway, so I’ll just tell you. Let’s say I overshot and my selected area was too large. Either that, or it was overlapping something that didn’t need to be selected. To deselect, or trim, an area, I’d simply use the Rectangular Marquee Tool (or any Marquee Tool for that matter, depending on what shape you need), hold down the Option (Mac) or Alt (Windows) key on my keyboard and intersect the already selected area. Let me give you an example on a blank canvas.Let’s say I use a few guides to make a nice centered circle on a white background with the Elliptical Marquee Tool.
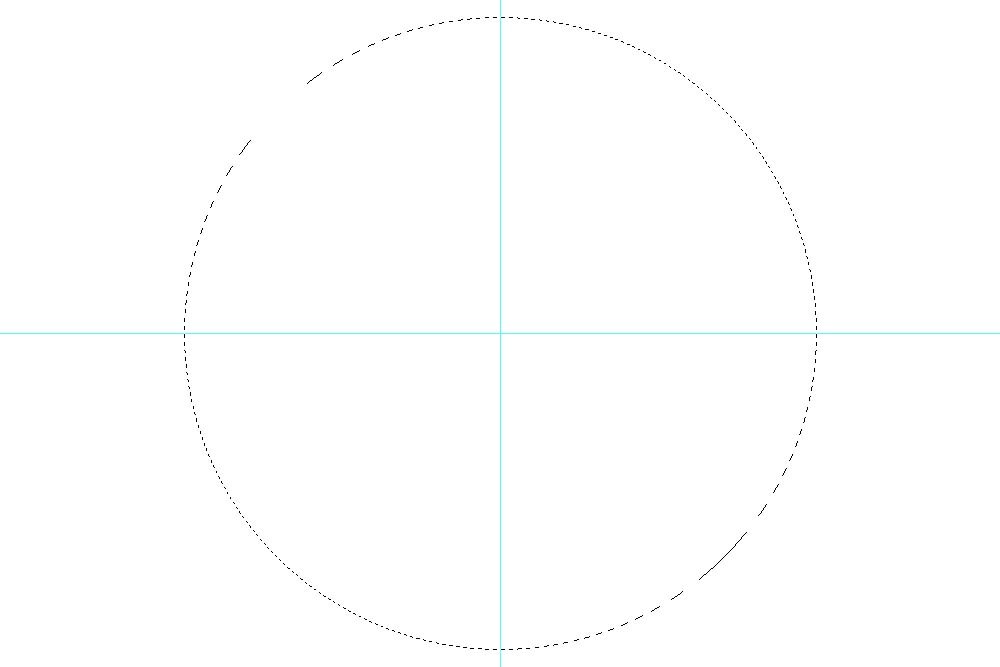
Now, let’s say I wanted to trim away part of the left side – maybe half of it in a strait line. To do this, I’d choose the Rectangular Marquee Tool, hold down the Alt key on my keyboard and draw a rectangle that overlaps the part of the circle I want to disappear. I’ll do that now.
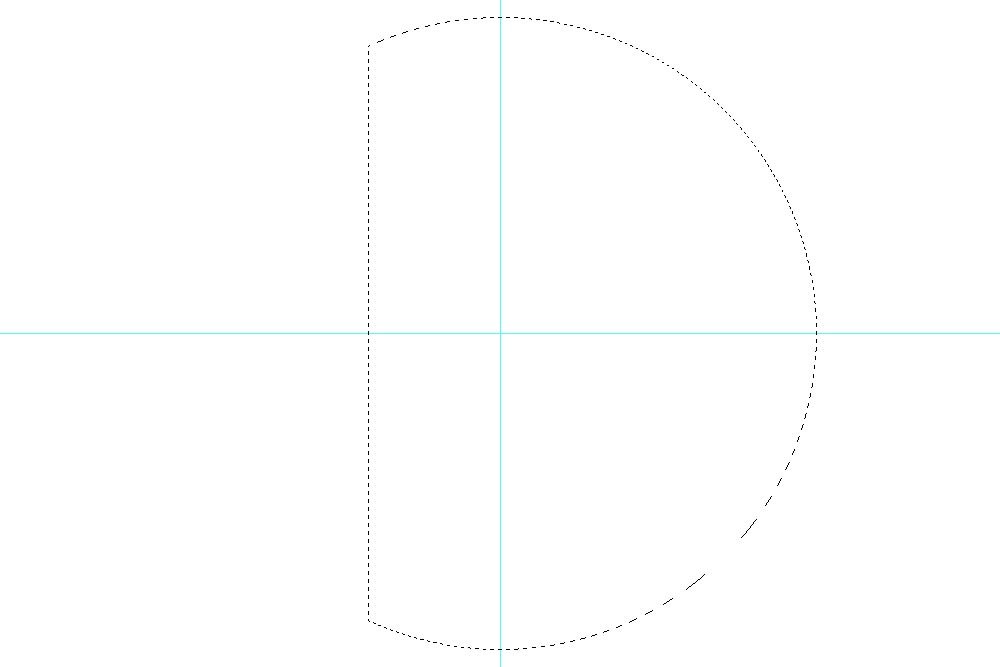
See? It’s that easy. I just press the Alt key, continue to hold it down while I’m drawing the rectangle and when I’m all finished and after I’ve let go of my mouse, I can depress the Alt key. Pretty neat.
Adjusting the Selected Area
Now that I have the area I want to adjust selected, I can go ahead and apply an adjustment layer to it. To do this, I’ll go to the Adjustments panel and click on the Brightness/Contrast icon. This will create the new adjustment layer and will pop open the Properties panel for that particular adjustment.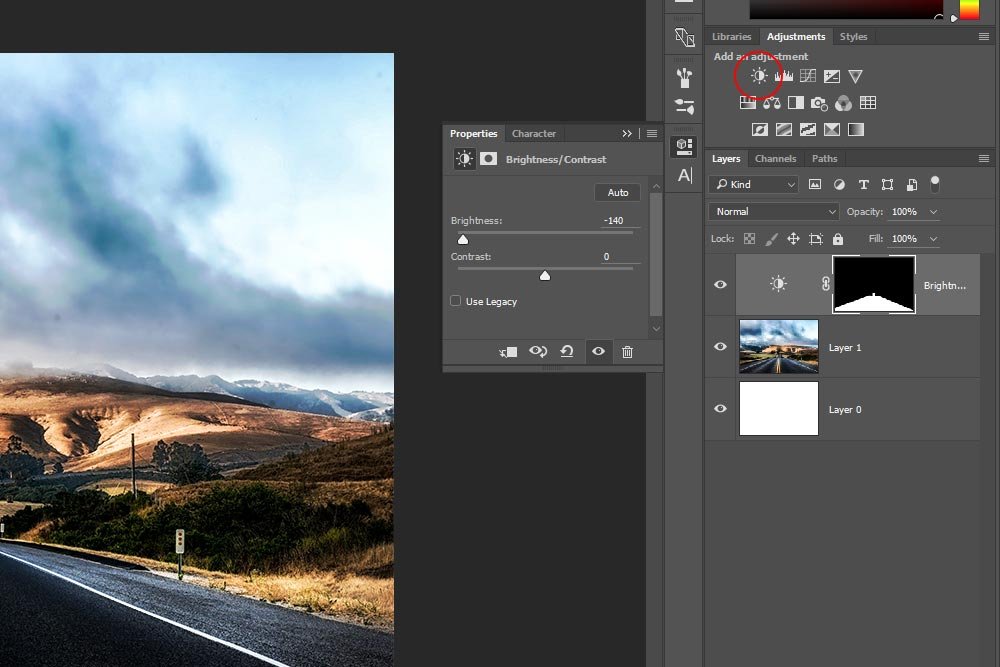
As you can see, I’ve already gone ahead and pushed the Brightness slider down to the left and left the Contrast slider alone. All I wanted to do was to darken the driving part of the roadway so it looks more like a carpet was rolled out.
Trimming the Mask
When I clicked the adjustment layer icon, beyond the things that occurred that I just mentioned above, a mask was created in the adjustment layer. If I hold down the Option (Mac) or the Alt (Windows) key on my keyboard and click once inside the mask in the Layers panel, it will overlay the entire image.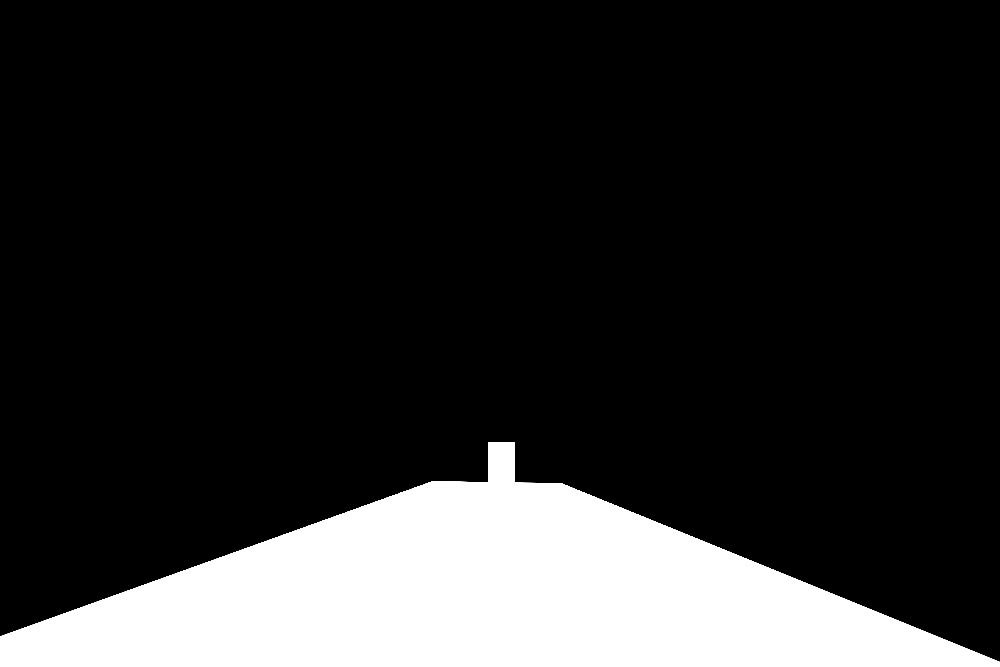
With this large view, I can see that the smaller rectangle is too rigid and doesn’t follow the road very well. I mentioned that I’d be following up on this earlier. Since this is a mask, to edit it, all I need to do is paint either black or white with the Brush Tool. If you need a refresher on layer masks, please take a look at this post:
What are Layer Masks in Adobe Photoshop?
To remove the large mask view, I’ll simply hold down the Alt key again and click the mask thumbnail in the Layers panel once more. With the image in view, I can paint the area I want to make invisible black.
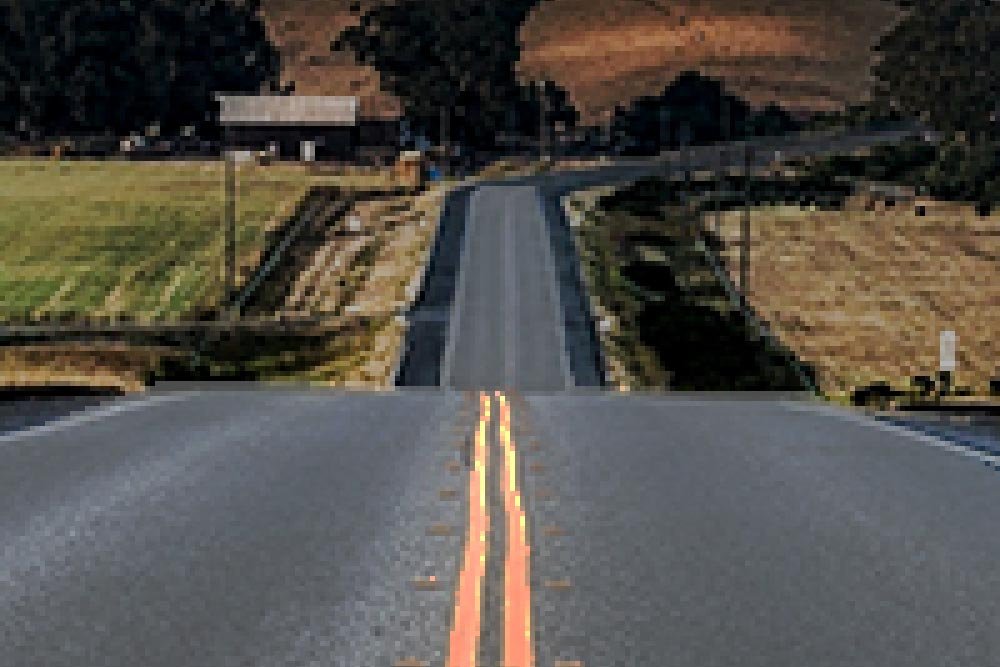
That’s better. To create the screenshot above, I made the enlarged image the background and then placed the mask as an overlay and reduced the opacity. This was just to show you that I trimmed away the square edges of the mask itself.
Feathering the Edges
Since I want to make the road seem darker, but realistic, I don’t want very defined edges. That would look fake. So, to soften them up, I’ll head back to the Properties panel for the adjustment layer and click the small Masks icon. Inside this new panel, I can push the Feather slider to the right somewhat just to soften up the mask’s edges.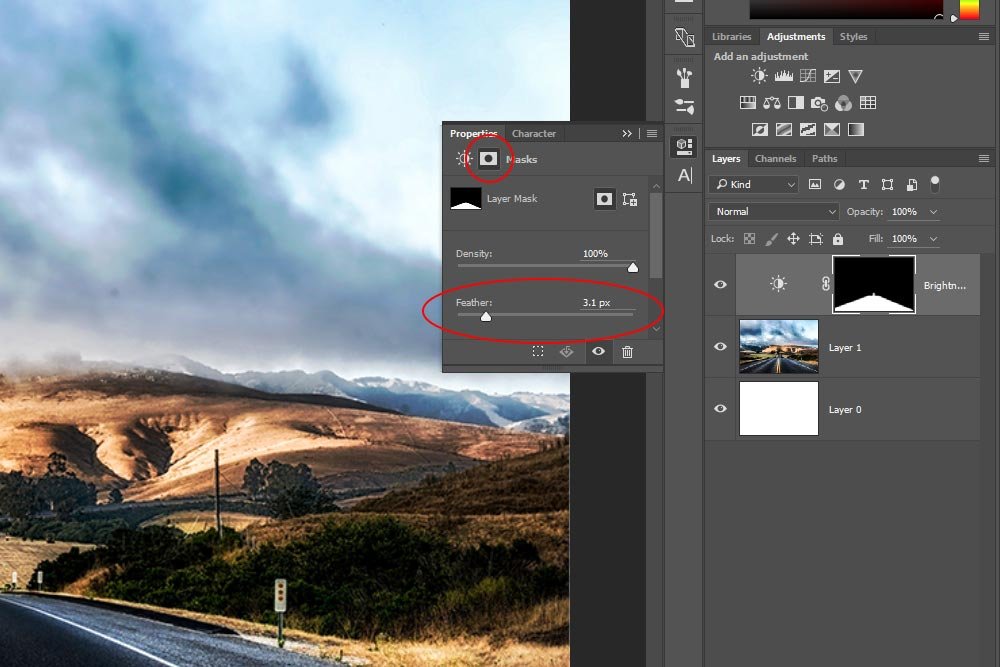
That looks great.
The Final Image
I know this was only an example to demonstrate how you can make a selection, add another selection to it so they are combined and then how you can remove an area of a selection, but it turned out to be a pretty cool image. Take a look: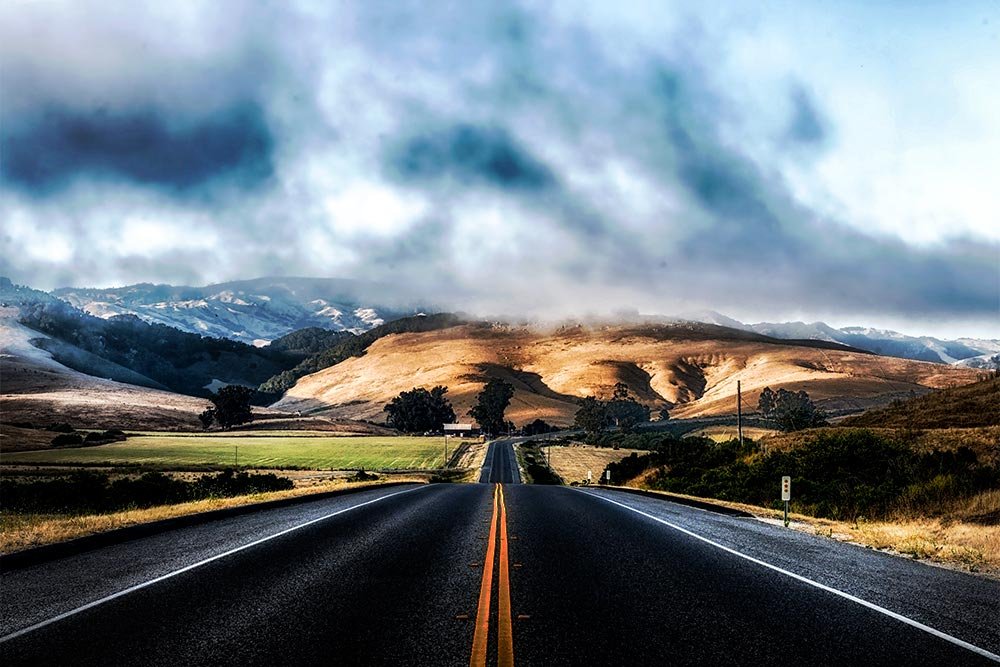
It just goes to show, with a bit of time and effort, you can really change how an image looks. Please ask in the comment section below if you have any questions. Thanks!
