EmeraldHike
Member
- Joined
- May 10, 2021
- Messages
- 133
- Reaction Score
- 0
- Points
- 21
- #1
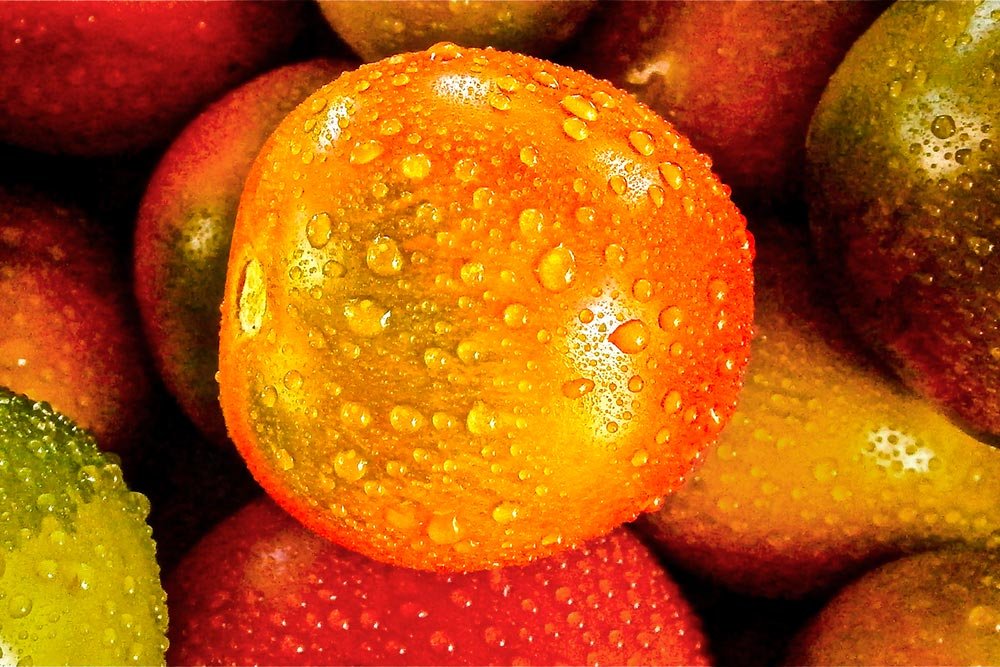
Instances frequently arise when you make a selection in Adobe Photoshop and apply an adjustment layer to it. After that, you’d like to make another adjustment layer and have that apply to the same selection as before. The thing is, making selections in Photoshop sometimes isn’t the easiest thing to do. They take time and if one is already made, it’s well worth taking advantage of. That’s why learning how to duplicate, or copy, masks between layers is so important.
When you create an adjustment layer, that layer can have a mask applied to it. These are what makes the adjustment layer so special. By making a selection and creating a mask for that selection, you have the ability to apply that same mask over and over again, to as many new adjustment layers as you wish. As you can imagine, this is a huge time and frustration saver. It also makes your image more accurate looking and consistent. By limiting your edits to one duplicated mask, you’ll ensure that its edges and area are always the same. Selections don’t always end up identically, so reducing those variations is important.
If you’re having trouble deciphering what I just wrote above, don’t worry about it. Just follow along below. I’ll explain and demonstrate exactly what’s going on. It’s actually a very simple concept.
In today’s post, I’m going to use an example image to work with. I’ll select an object in the image and then create an adjustment layer with a mask. Then, I’ll create another adjustment layer and teach you how to copy the mask from the first one into the second one. By doing this, we’ll be tapping into the power I described above.
Making a Selection
For this example, I’m going to select the piece of fruit that sits at the center of this image. I’ll use Quick Selection Tool to accomplish this. Currently, this is the 4th tool from the top in the left vertical toolbar.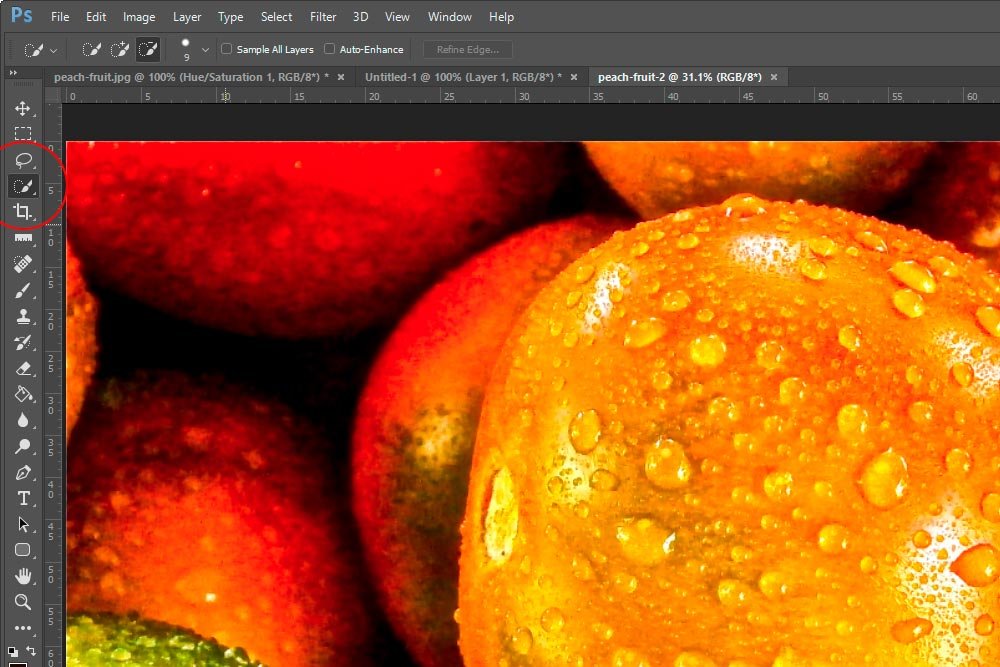
While I’m not going to go over all the specifics of making a selection in this post, I will lead you to one of my previous posts. In that one, I describe, in great detail, how to go about such a thing.
Selecting Objects & Refining Edges in Adobe Photoshop
I’ll make my selection and refine the edges so they look as good as possible.
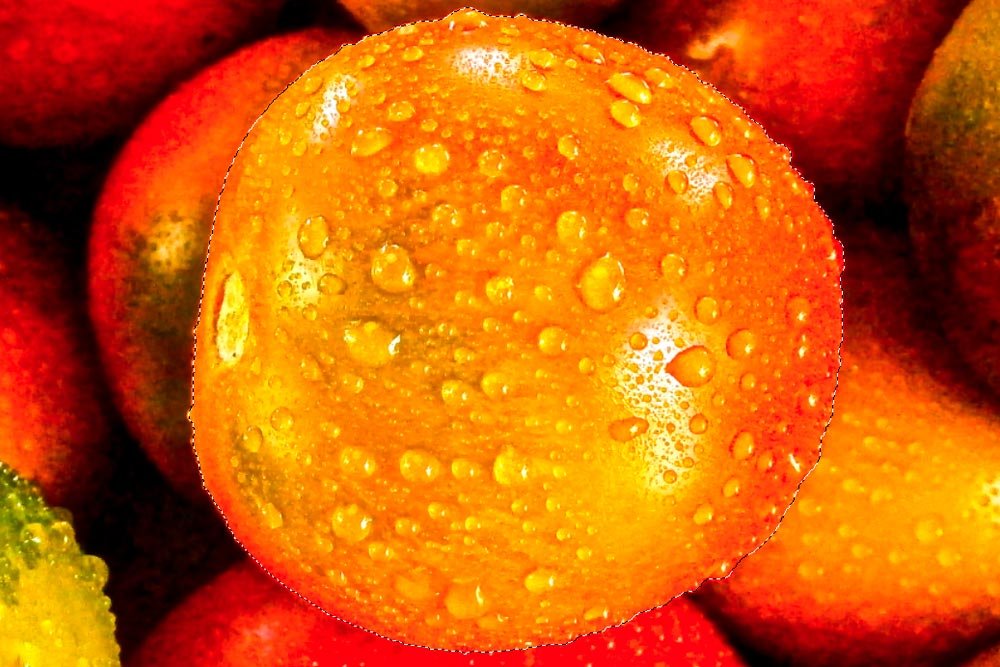
Notice the marching ants surrounding the center piece of fruit.
Applying an Adjustment Layer
Next, I’m going to apply an adjustment layer. I’ll go ahead and click the Hue/Saturation icon in the Adjustments panel.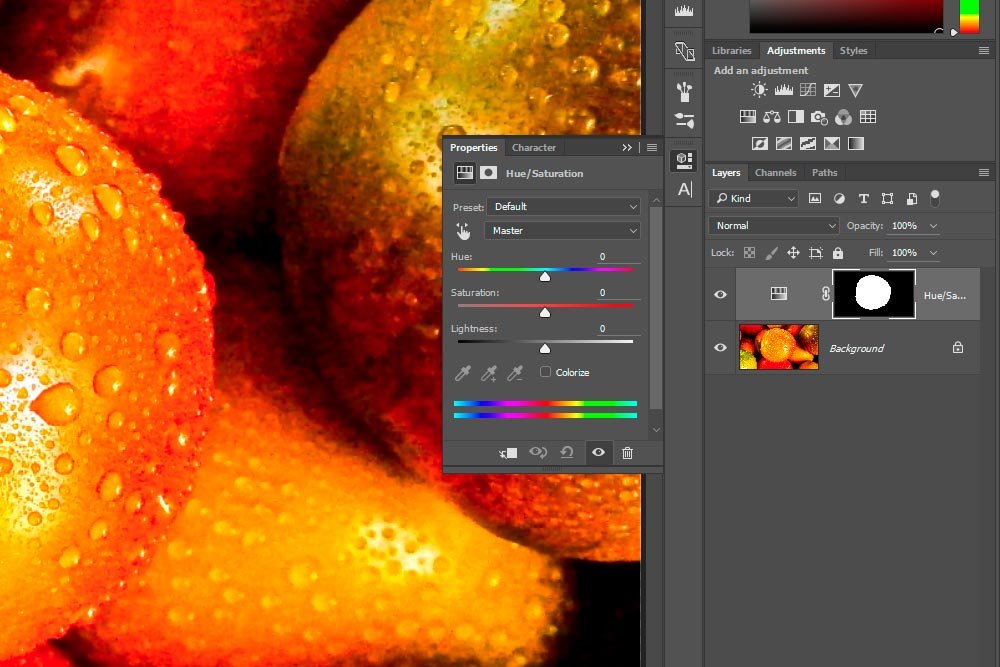
As you can see, an adjustment layer was created in the Layers panel.
Adjusting & Inverting
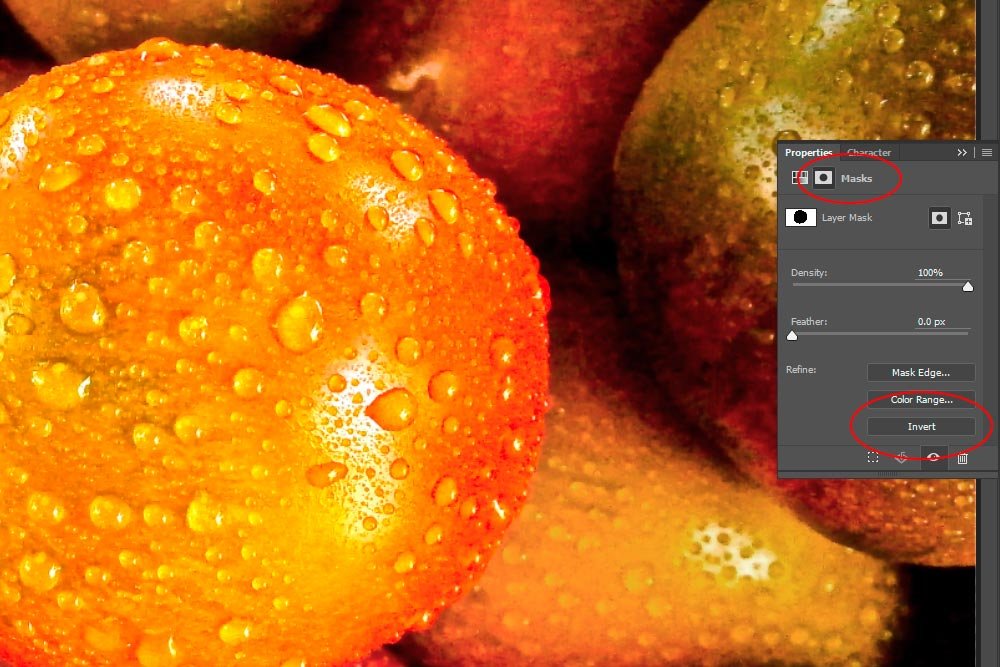
From here, I’m going to reduce the saturation of the selection. After that, since I don’t want the adjustment actually applied to the center piece of fruit, I’ll invert the mask.I’ll push the Saturation slider to the left to reduce the color of the selection.
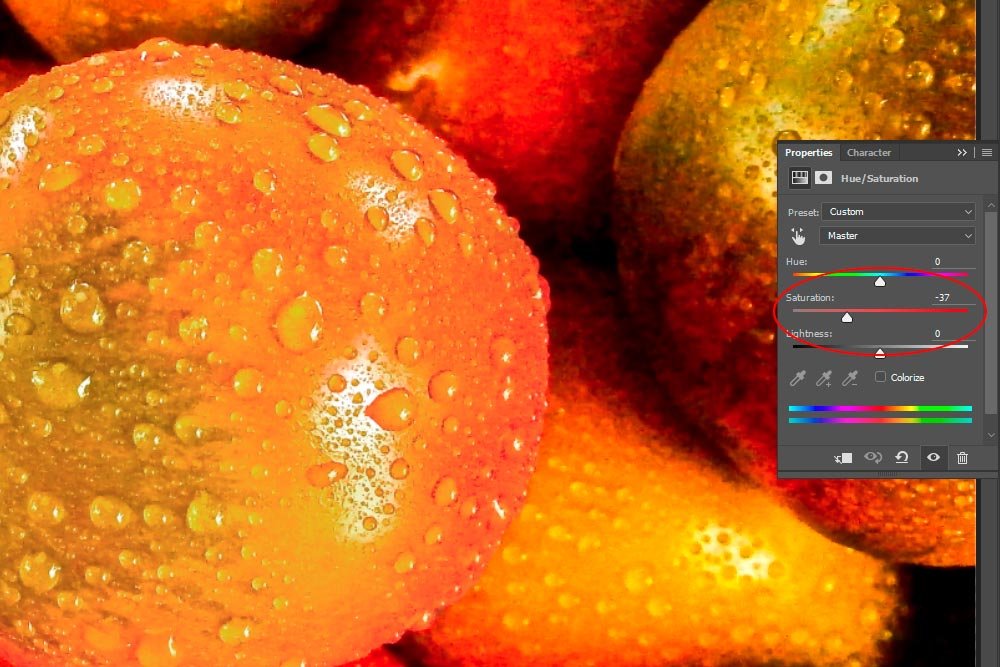
And then I’ll click the Masks icon in the same Properties panel and then click the Invert button. This will simply invert the mask, bringing the initial selection back to full color and reducing the remaining area of the image.
Creating a Selection From a Mask
So far, we’ve seen how to create a mask based on a selection. Wouldn’t it be cool to reverse that? Perhaps create a selection based on a mask? Guess what. We can. To do this, all I need to do is to click on the mask in the adjustment layer in the Layers panel and press the Command (Mac) or Ctrl (Windows) button on my keyboard. Then, click my left mouse key. That will once again make a selection based on the mask of my choosing. Wasn’t that easy?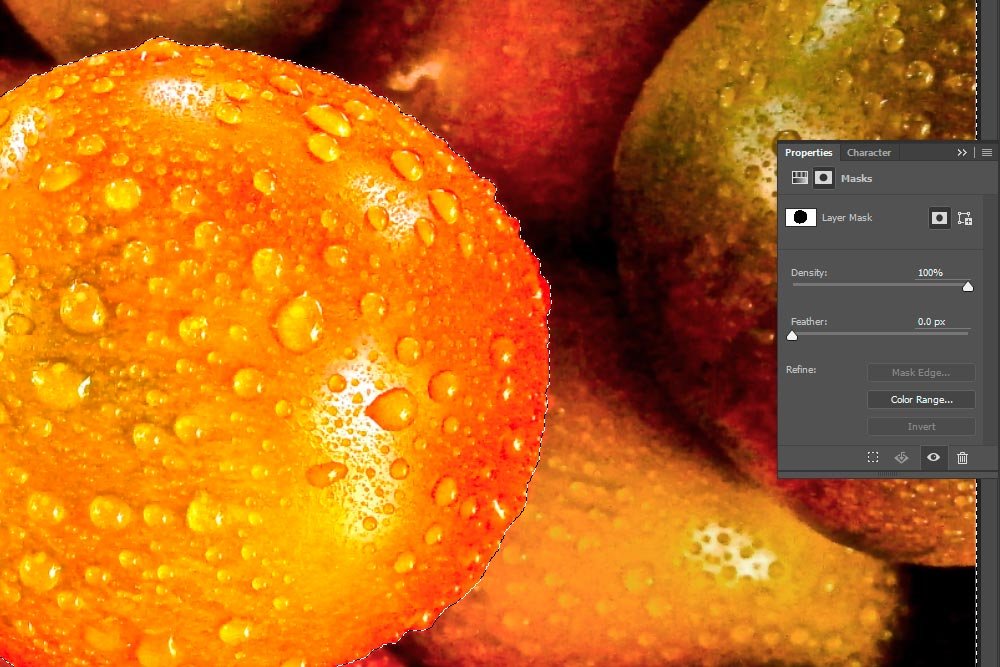
If you look at the above screenshot closely, you’ll see the marching ants surrounding the selection.
Now, if you recall, I inverted the original mask. Because of this, the selection I just created from it includes everything but the piece of fruit at the center of the image. Since this works for me, I’ll leave it alone.
Creating Another Adjustment Layer
Everything previous to this section was set up. Now we’re getting into the meat of the post.To apply this selection to another adjustment layer, all I need to do is click another icon in the Adjustments panel. This time, I’ll choose Brightness/Contrast. I’ll also push the Brightness slider to the left, to darken the background.
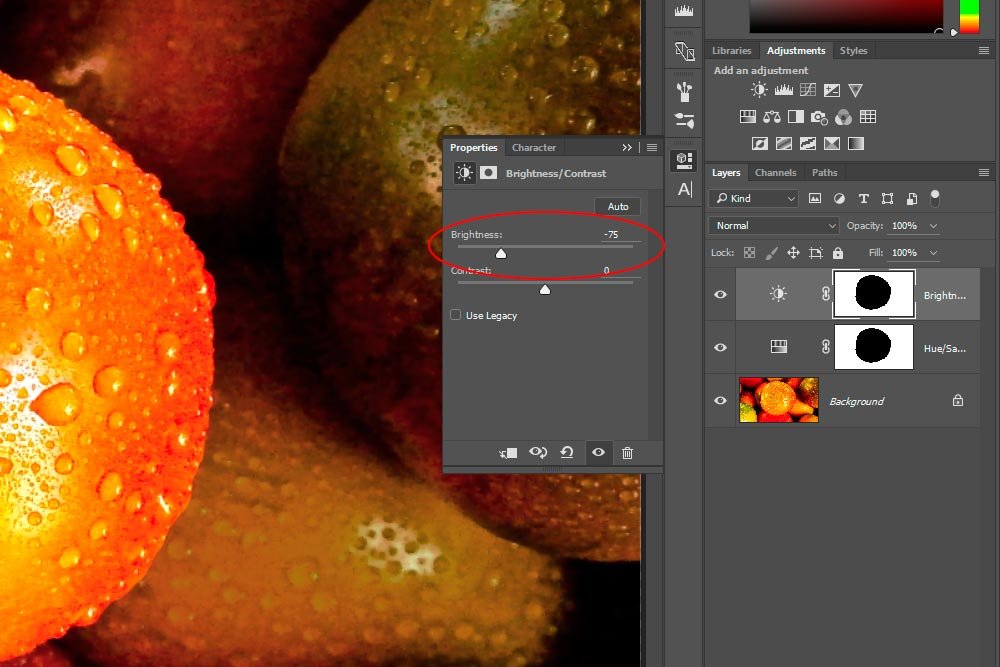
If you take a look at the above screenshot, you’ll see that there are now two adjustment layers that have the same mask applied to them. This saved me a lot of time recreating the selection. To be honest with you, selecting things in Photoshop isn’t one of my favorite pastimes. If I can avoid it, I will.
Copying a Mask From One Adjustment Layer to Another
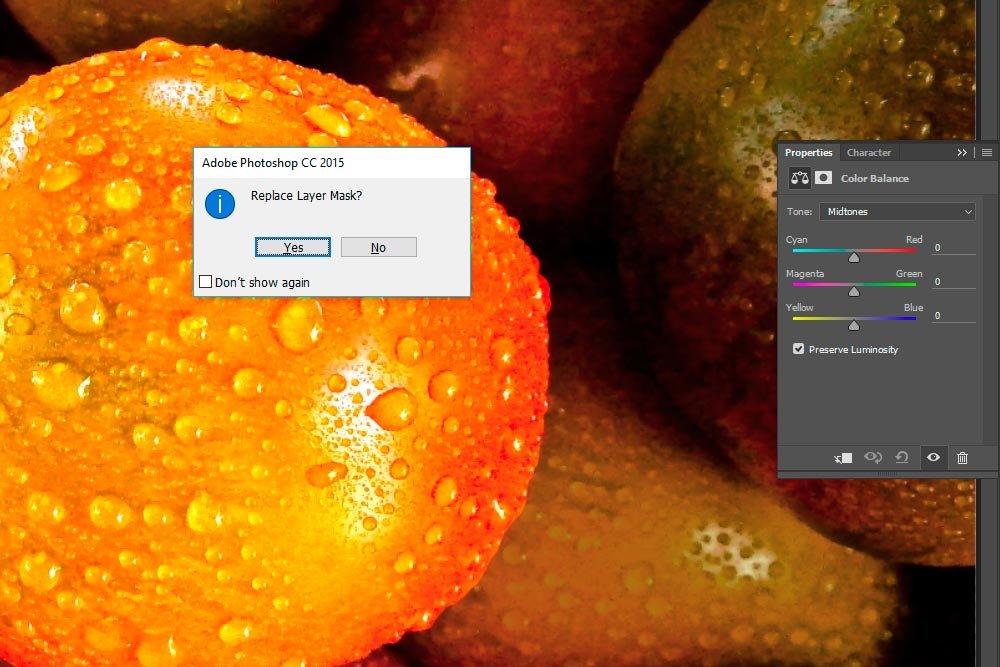
So far, I covered how to make a selection and create a mask from that selection. I even went over how to reverse that by making a selection from a mask. Now, I’d like to show you how to simply replace a mask in one adjustment layer with a mask from another. This is essentially copying a mask between layers.To accomplish this, all you need to do is to click on the first layer mask. Then, press the Option (Mac) or Alt (Windows) key on your keyboard and click and drag the first mask on top of the one you want to replace. After you do this, you’ll see a pop-up window appear that asks if you’d like to replace the layer mask. Click Yes and you’re finished. From there, you can edit this new adjustment layer as any other.
Well there you have it. A few different methods for working with selections and masks. If you have any questions, please feel free to ask them in the comment section below. Thanks!
