LukeLewis
Member
- Joined
- May 7, 2021
- Messages
- 134
- Reaction Score
- 0
- Points
- 21
- #1
Even though I use Adobe Photoshop almost every day of my life, I still find myself in awe of some of it’s capabilities. Those capabilities, combined with the creativity of its users, leave me speechless. One of the areas I’m most interest in and curious about is how to make things “disappear.” While there are many tools that help something like this happen, one of the more powerful is the Patch Tool.
What’s the Patch Tool? Well, let’s take a look at what Adobe has to say about it:
The Patch tool is used to remove unwanted image elements. The Content-Aware option in the Patch tool synthesizes nearby content for seamless blending with the surrounding content. The results are similar to Content-Aware Fill, but using this tool gives you the flexibility to choose the source area.
That pretty much sums it up. But, as usual, a definition just isn’t going to cut it here. In today’s post, I’m going to work through a small project where I’ll use the Patch Tool to remove a tree from a tree line. While this is one use for the tool, it’s also often used for removing things like imperfections in a photo, independent leaves from the ground or maybe even graffiti from a wall. There are all sorts of uses, but I’ll leave those up to you.
My goal is to remove the tree on the left side of the photo. Let’s pretend there’s a good reason for this. Obviously, it’s going to make the photo lopsided, but I suppose we’ll have to just live with that. After all, this is only for demonstration purposes.
To duplicate the background layer, I’ll drag it down to the bottom of the Layers panel and let it go on the Create New Layer icon. This is the result of that:
I also renamed both layers to Background and Removed Tree. I really need to get into this habit more because it’s very helpful as an organizational technique if I’m working with many layers.
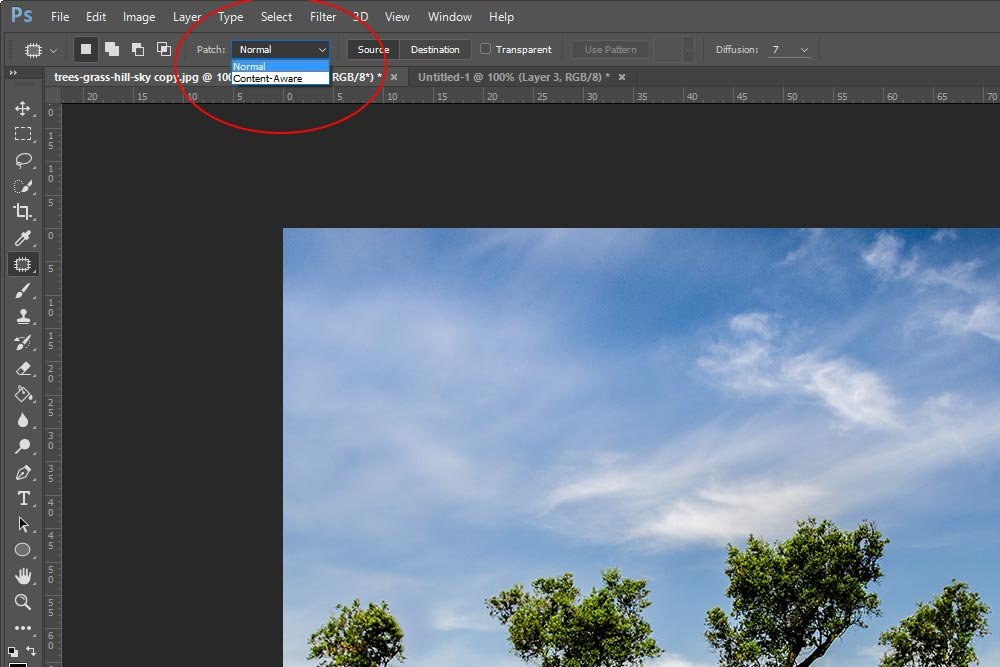
The essence of both of these modes is that they allow you to circle an object and move it until it becomes invisible. You can set the edge softness (blend) of the encapsulated area and set how you would like the fill to appear. For this project, I’ll use the Content-Aware mode because I like that one best.
Two additional settings that I’ll be taking advantage of under the Content-Aware mode are:
Structure: Offers values between 1 and 7. 1 resembles the patched area very loosely (will blend more) and 7 resembles the patched area much more tightly (won’t blend as much – will be more accurate to the original area).
Color: This setting affects the blend as well. You can choose a value between 0 and 10. 0 offers no color blend and 10 offers the most color blend.
I suggest experimenting with these settings for any photo you work on. Since I’m working with a very soft sky area, I would like as much blend as possible, so I’ll choose both 1 for Structure and 10 for Color.
The first area I’m going to select is the top part of the tree. I’m going to do this in sections because it’s much more easy to manage that way. Once I select the area, I’ll see the marching ants. The way to select something is to draw around it as if you had a pencil in your hand.
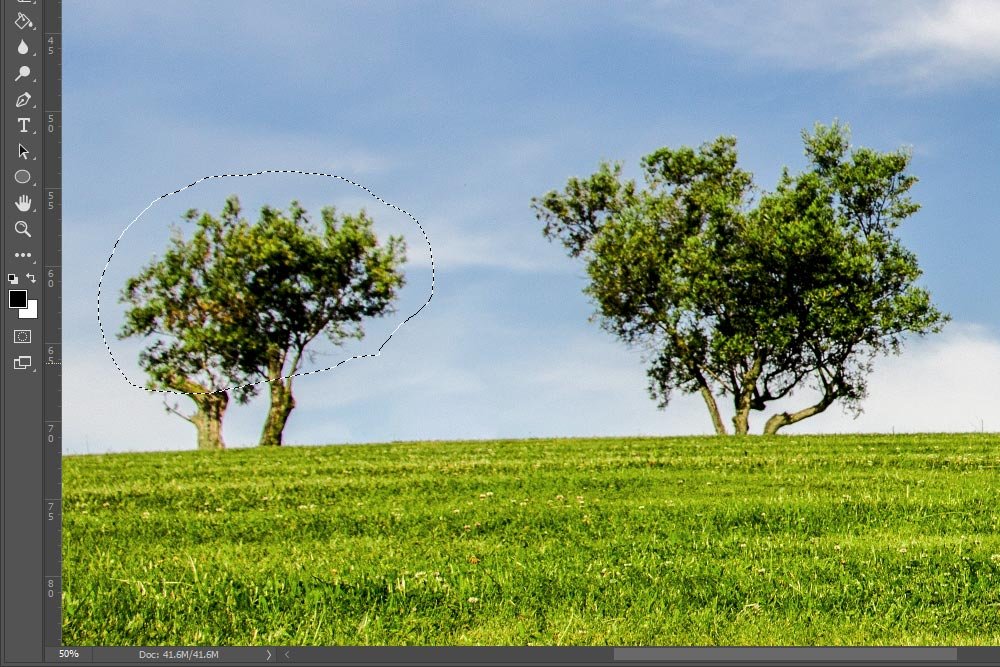
Once the object is selected, I can drag it to another spot in the photo that resembles what I’d like the original area to look like. Take a look at the screenshot below:
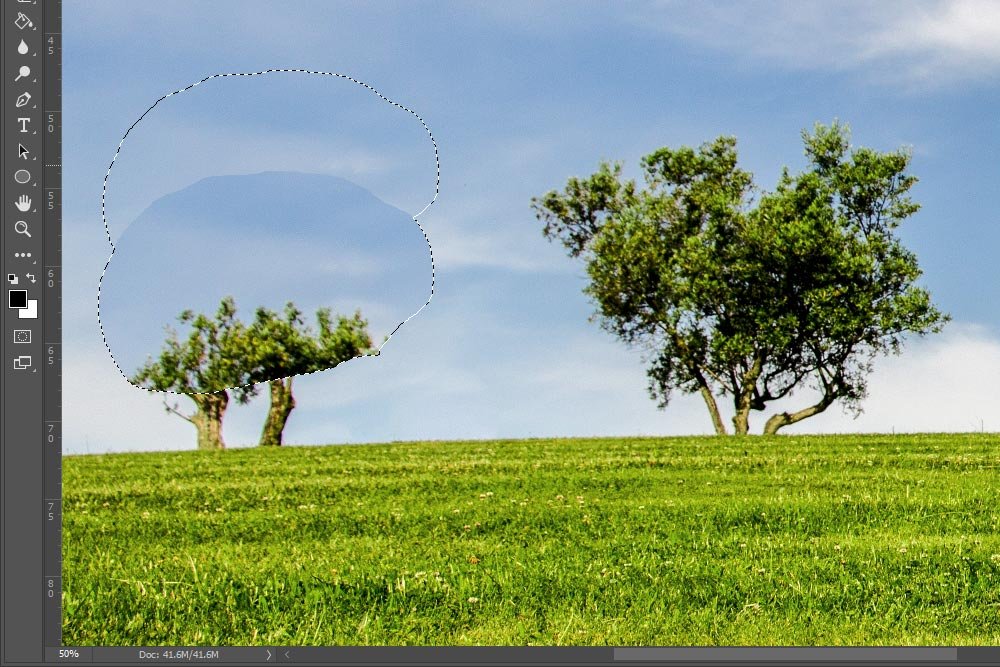
The best way for you to get used to what’s happening is to try it in your own photo. In the above screenshot, I’m still dragging. I haven’t let go of the mouse pointer yet.
In this next screenshot, I continued dragging into the sky and let go. Check out what the original area (where the tree was) now look like.
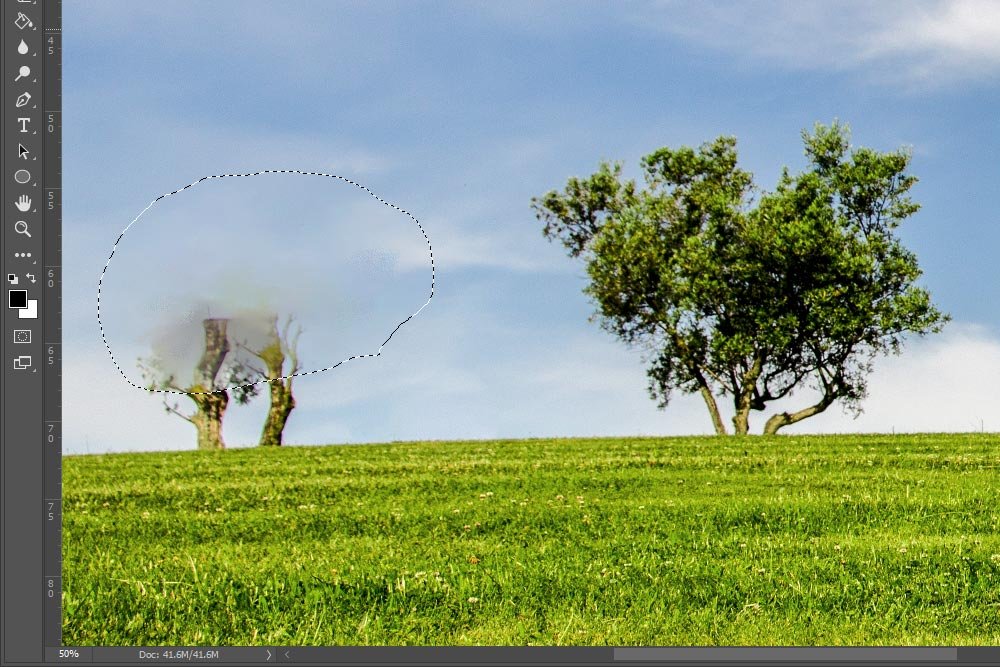
You can see how the leaves aren’t there anymore and how the top of the tree was replaced with the sky. Because of the Content-Aware setting and the blend options I used, the part of the tree that remains fades into the clouds. Next, I’ll do something similar to remove the bottom of the tree.
With this next selection, I switched to Normal mode because I’m dealing with more of a detailed area – the grass. If I stayed with the Content-Aware, the grass would end up blurry. That’s the beauty of this tool. You can flip back and fourth.
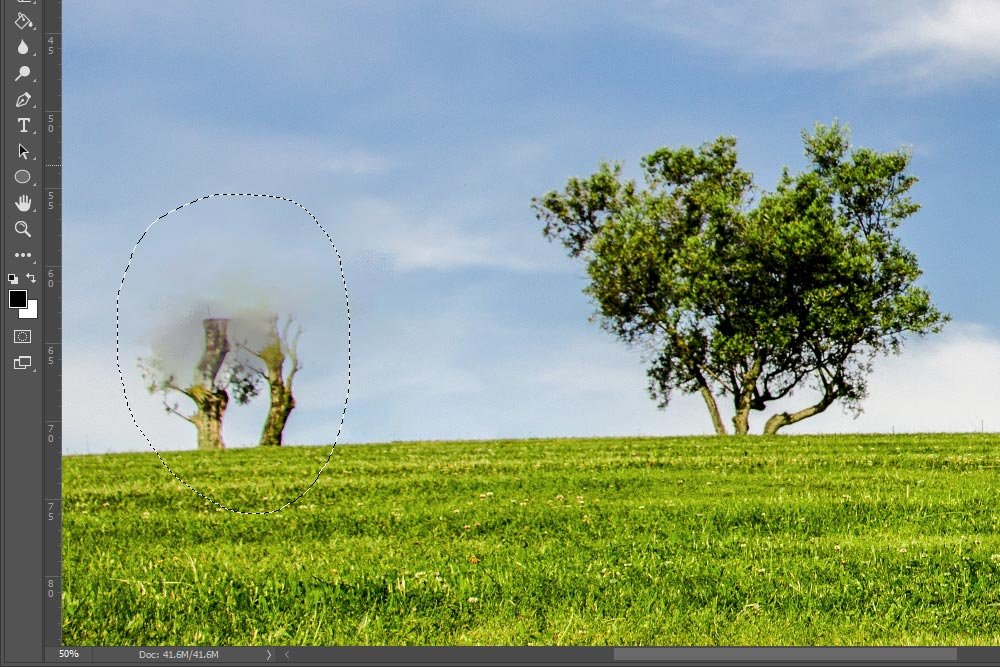
You can see that I grabbed some of the grass in this selection. That was intentional. I’m going to use that grass to align the selection. Next, I’ll drag the selection to the right and try to line up the grass horizon.
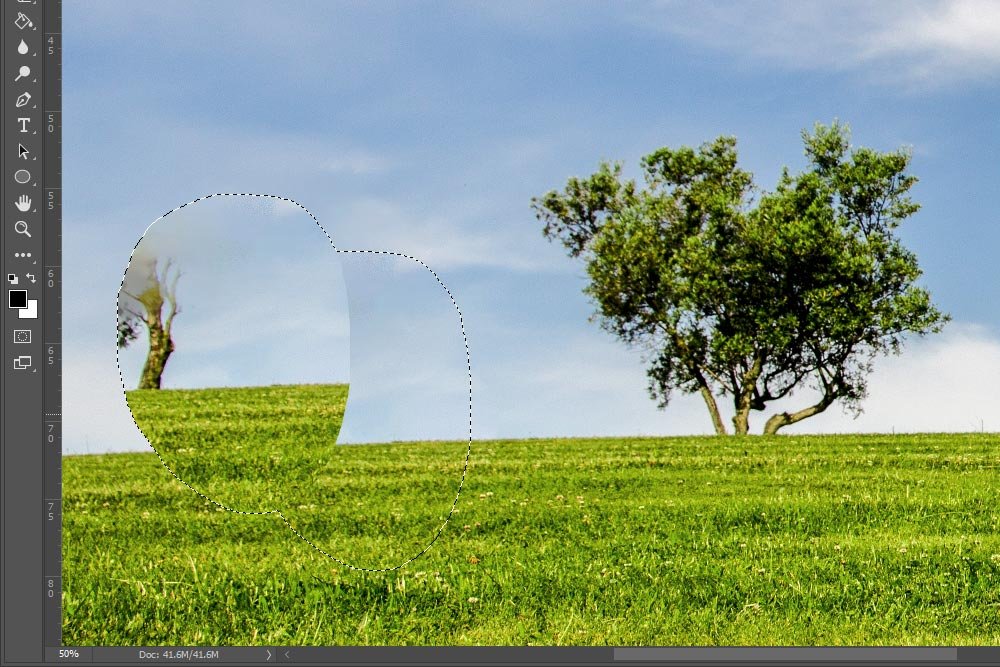
In the above screenshot, I made things very obvious for you, so you could see how I can move the selected object around and line it up with something else. Now, I’ll properly align the grass and let go of my mouse.
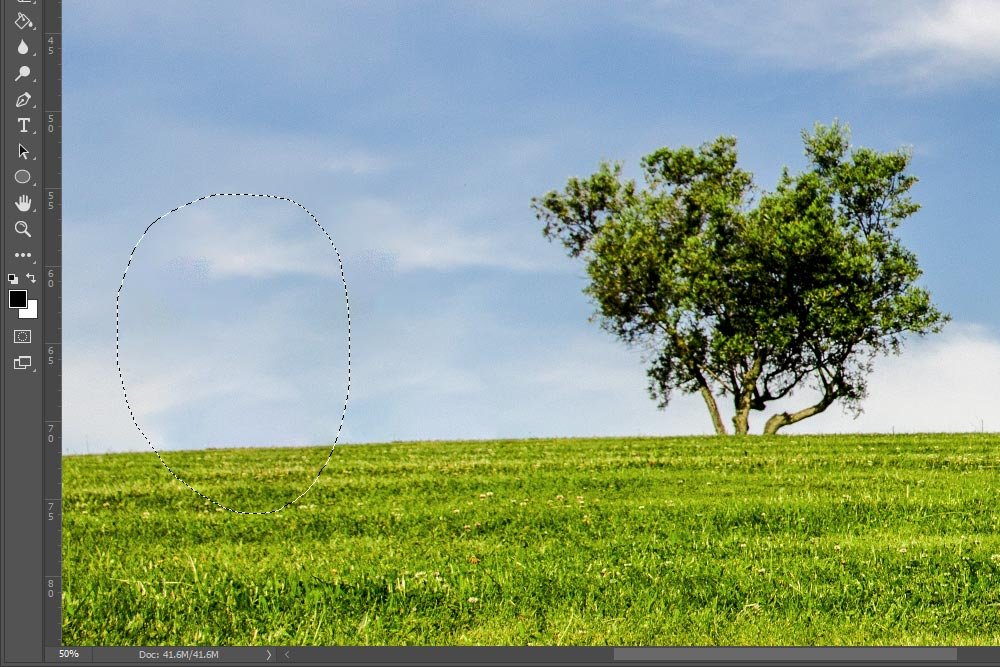
If I hit Ctrl+T (Windows) or Command+T (Mac) on my keyboard to free transform the object, I can twist it slightly counter-clockwise so the angle of the selected grass matches the angle of the existing grass even more.
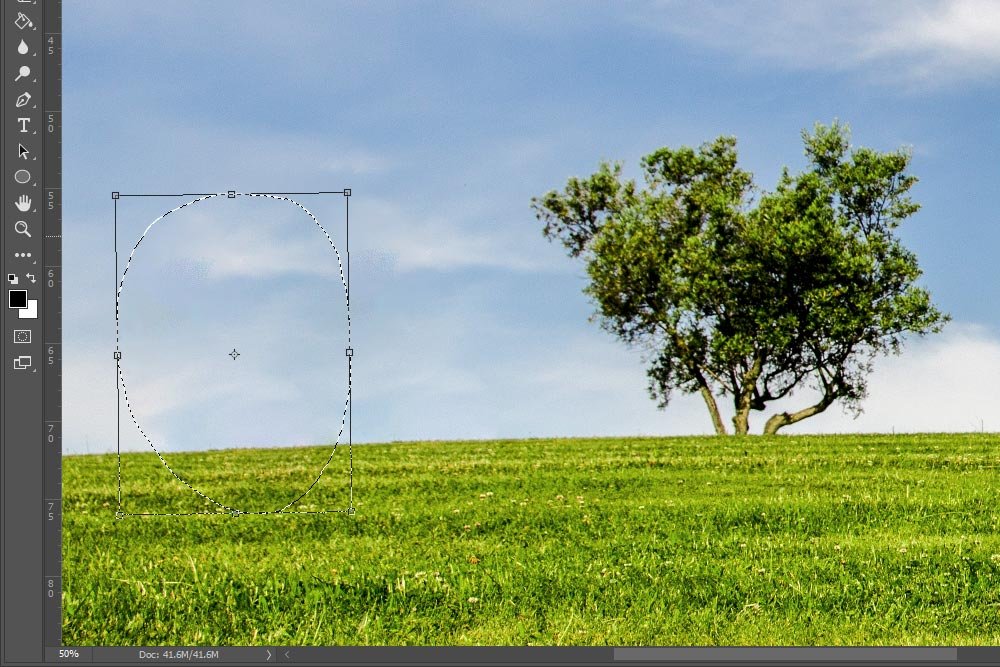
When finished, I can hit Enter on my keyboard to apply the transformation and then I can head up to the Select > Deselect menu item and click on it. That will deselect the object and remove the marching ants.
Here’s the final photo with the removed tree:
If someone were to view this photo, I’m willing to wager that they would never guess there was a tree in the spot where one used to be.
The more you practice with this tool, the better you’ll get. The trick is to use it under the right conditions. Don’t try to go crazy with it where it won’t work. It’s better to take advantage of it where you can get good results.
I hope I effectively introduced you to the Patch Tool in Adobe Photoshop. If you have any questions or comments, please leave them in the comment section below. Thanks!
What’s the Patch Tool? Well, let’s take a look at what Adobe has to say about it:
The Patch tool is used to remove unwanted image elements. The Content-Aware option in the Patch tool synthesizes nearby content for seamless blending with the surrounding content. The results are similar to Content-Aware Fill, but using this tool gives you the flexibility to choose the source area.
That pretty much sums it up. But, as usual, a definition just isn’t going to cut it here. In today’s post, I’m going to work through a small project where I’ll use the Patch Tool to remove a tree from a tree line. While this is one use for the tool, it’s also often used for removing things like imperfections in a photo, independent leaves from the ground or maybe even graffiti from a wall. There are all sorts of uses, but I’ll leave those up to you.
The Original Photo
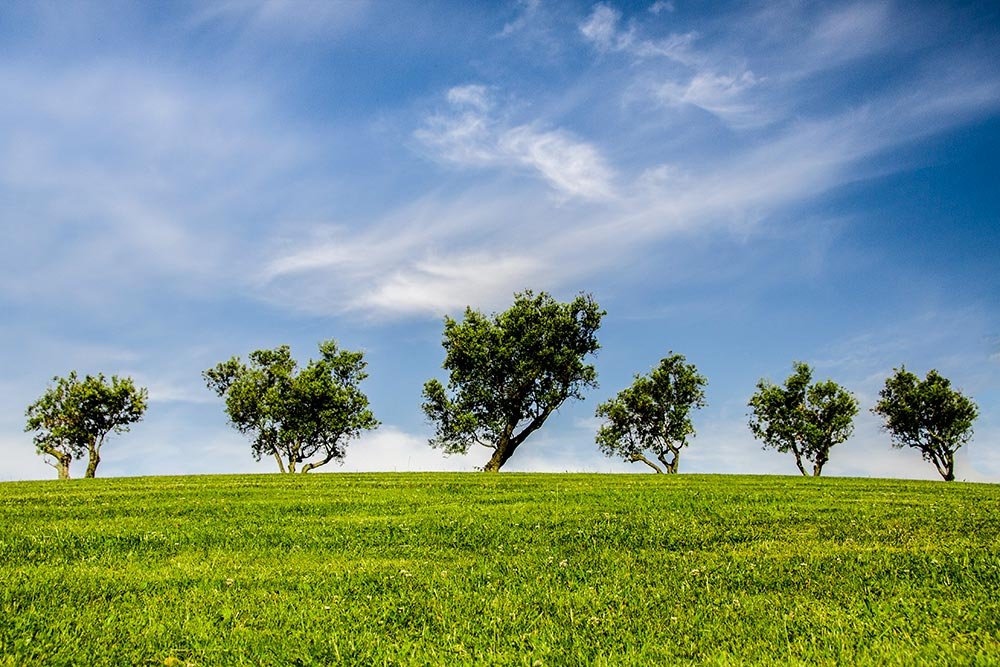
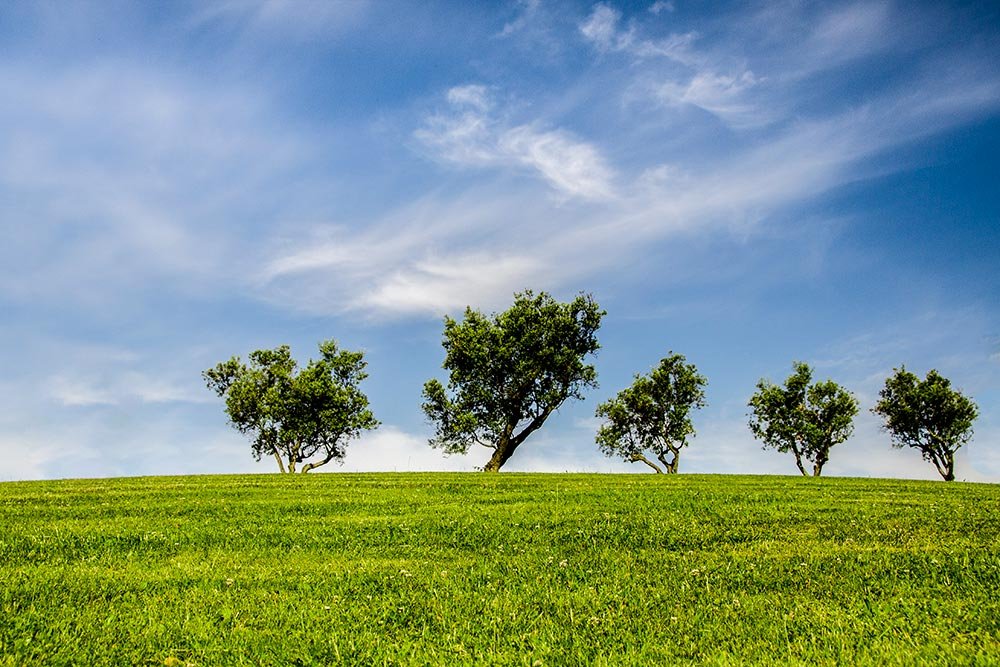
Below is the photo I’ll be using for this post. The reason I chose it is because the trees are distinct from one another. Removing objects becomes exponentially more difficult when they aren’t separate from other objects, so for a first post on the topic, I though this was appropriate.
My goal is to remove the tree on the left side of the photo. Let’s pretend there’s a good reason for this. Obviously, it’s going to make the photo lopsided, but I suppose we’ll have to just live with that. After all, this is only for demonstration purposes.
The Patch Tool
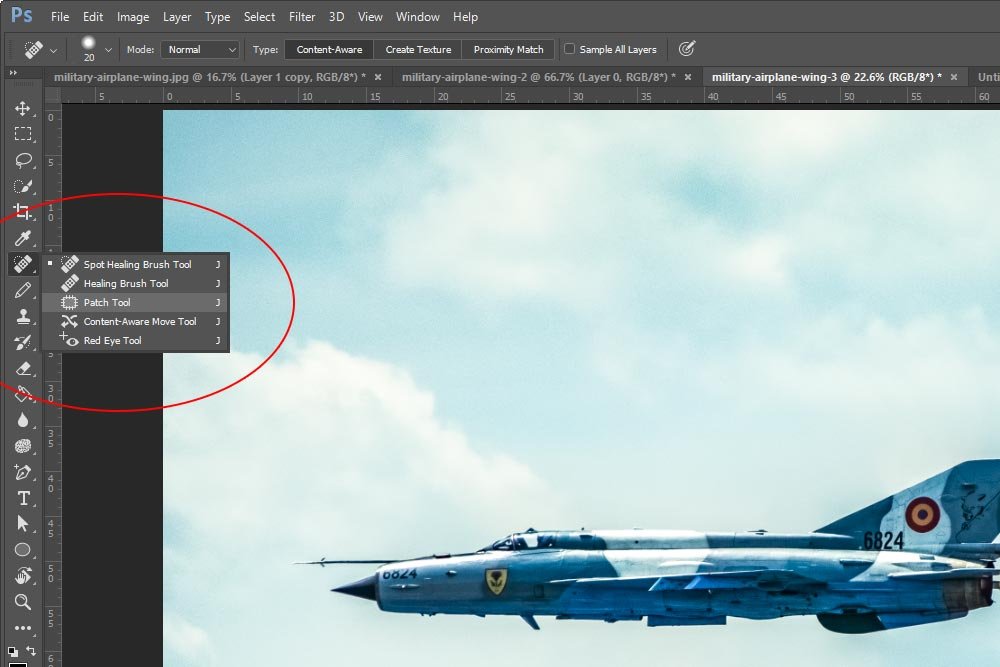
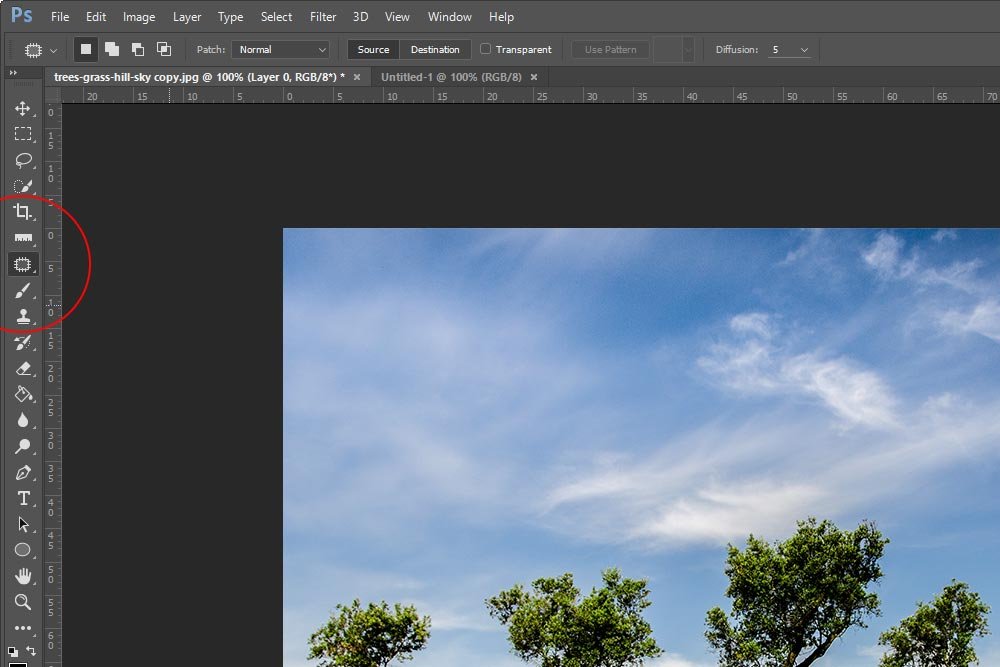
The Patch Tool can be accessed by pulling out (clicking and dragging) the Spot Healing Brush Tool in the left vertical toolbar. Once you choose the tool, you can simply press the J key on your keyboard to quickly access it again if you ever wander off to use another tool.
Copy Layer
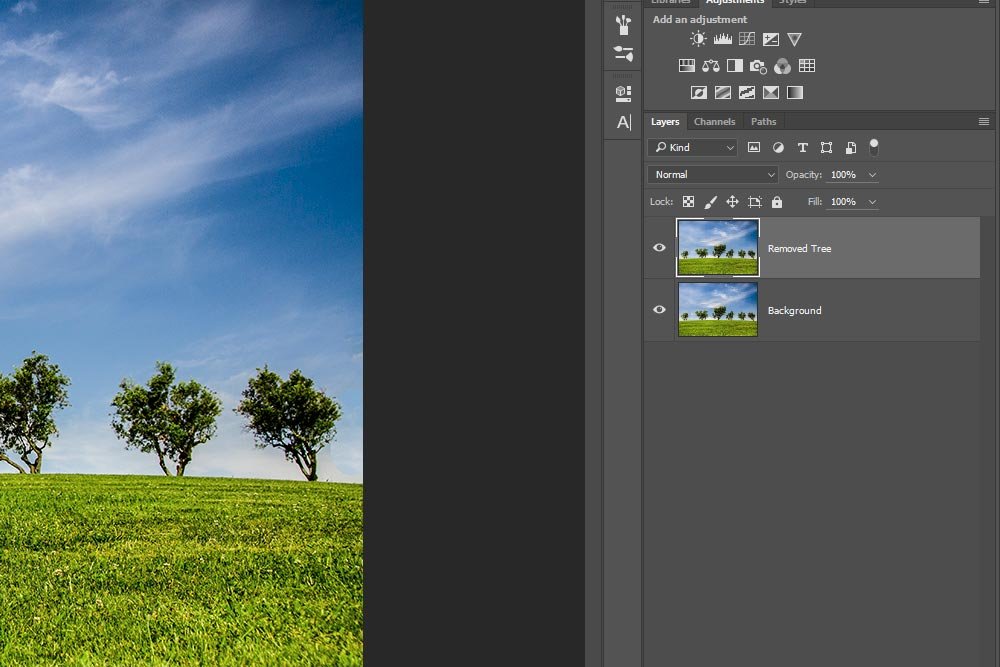
The first thing I’m going to do to start this project is copy my background layer, so I’ve got two layers. If I need the original for anything, it’ll be safely tucked away below the layers above it. I won’t touch the bottom layer. It’s just a safety. I’ll use the top layer as my working layer.To duplicate the background layer, I’ll drag it down to the bottom of the Layers panel and let it go on the Create New Layer icon. This is the result of that:

I also renamed both layers to Background and Removed Tree. I really need to get into this habit more because it’s very helpful as an organizational technique if I’m working with many layers.
Patch Tool Settings
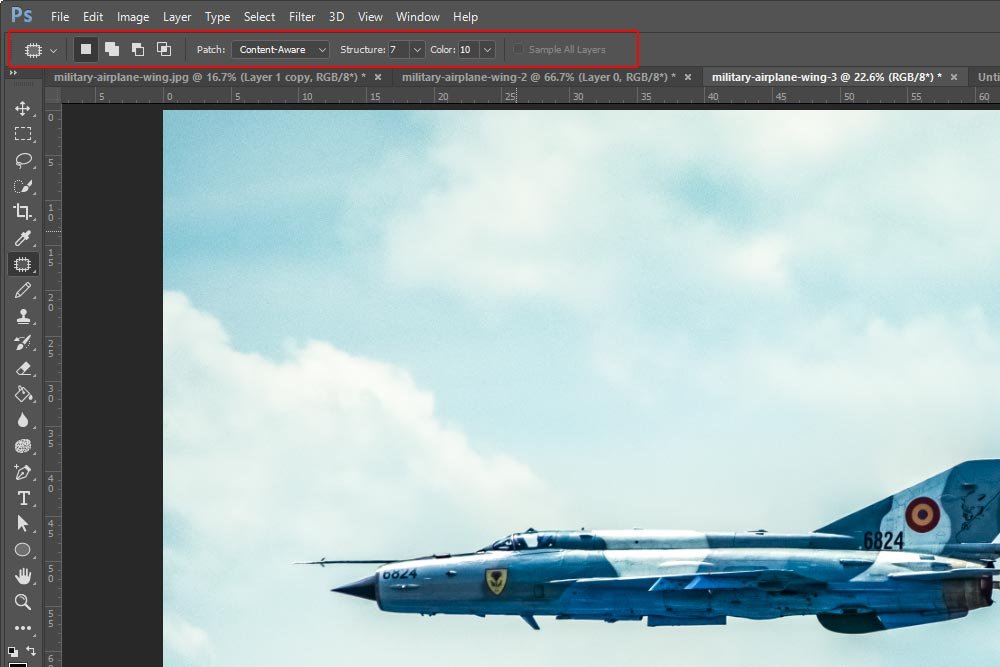
There are two settings that would work well with this project. I’ve tested both of them and I really can’t tell the difference between the results. The settings are Normal and Content-Aware and they can be found in the options bar at the top of Photoshop.
The essence of both of these modes is that they allow you to circle an object and move it until it becomes invisible. You can set the edge softness (blend) of the encapsulated area and set how you would like the fill to appear. For this project, I’ll use the Content-Aware mode because I like that one best.
Two additional settings that I’ll be taking advantage of under the Content-Aware mode are:
Structure: Offers values between 1 and 7. 1 resembles the patched area very loosely (will blend more) and 7 resembles the patched area much more tightly (won’t blend as much – will be more accurate to the original area).
Color: This setting affects the blend as well. You can choose a value between 0 and 10. 0 offers no color blend and 10 offers the most color blend.
I suggest experimenting with these settings for any photo you work on. Since I’m working with a very soft sky area, I would like as much blend as possible, so I’ll choose both 1 for Structure and 10 for Color.
Patching Over the Tree
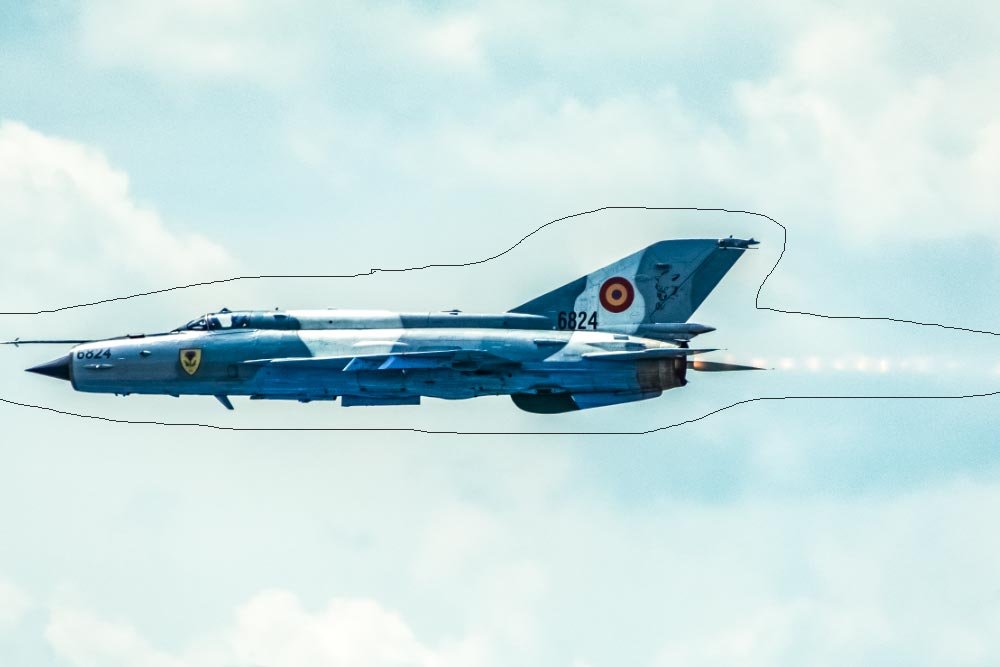
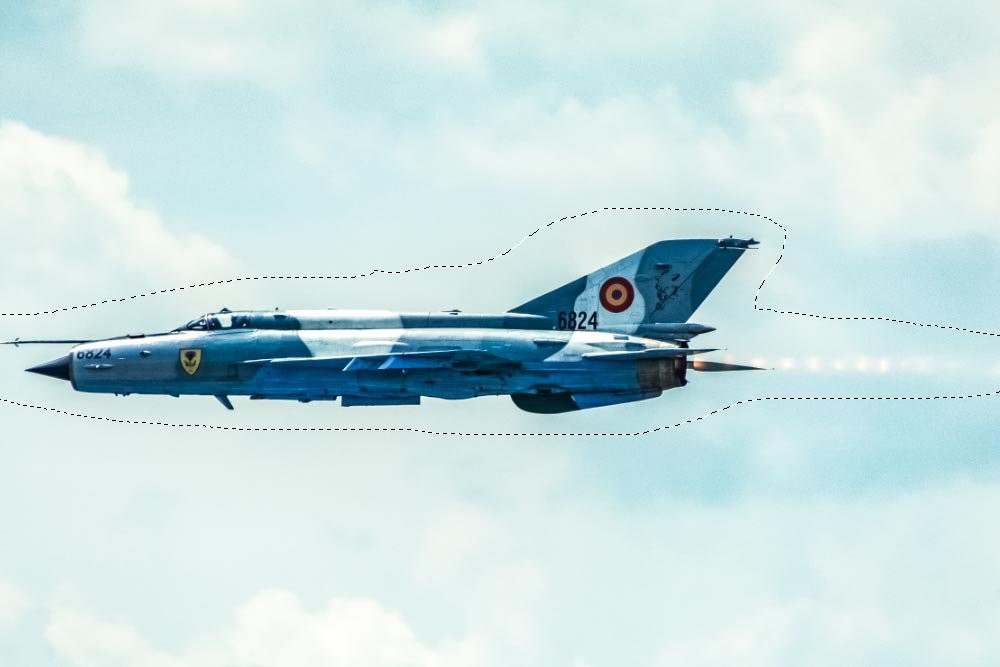
The first time you see how this tool is used will slightly confuse you. The basic way it works is this; you use the Patch Tool to surround, or lasso an area of a photo. For this project, I’ll lasso the top part of the tree first and then the bottom part of the tree after that. Once something is lassoed, you can drag it somewhere else in the photo and let go. In this photo, I want to replace the tree with the sky and the grass, as if the tree never existed. The area you drag the lassoed object to should be similar to the object’s background. I’ll show you below. It’ll make much more sense.The first area I’m going to select is the top part of the tree. I’m going to do this in sections because it’s much more easy to manage that way. Once I select the area, I’ll see the marching ants. The way to select something is to draw around it as if you had a pencil in your hand.

Once the object is selected, I can drag it to another spot in the photo that resembles what I’d like the original area to look like. Take a look at the screenshot below:

The best way for you to get used to what’s happening is to try it in your own photo. In the above screenshot, I’m still dragging. I haven’t let go of the mouse pointer yet.
In this next screenshot, I continued dragging into the sky and let go. Check out what the original area (where the tree was) now look like.

You can see how the leaves aren’t there anymore and how the top of the tree was replaced with the sky. Because of the Content-Aware setting and the blend options I used, the part of the tree that remains fades into the clouds. Next, I’ll do something similar to remove the bottom of the tree.
With this next selection, I switched to Normal mode because I’m dealing with more of a detailed area – the grass. If I stayed with the Content-Aware, the grass would end up blurry. That’s the beauty of this tool. You can flip back and fourth.

You can see that I grabbed some of the grass in this selection. That was intentional. I’m going to use that grass to align the selection. Next, I’ll drag the selection to the right and try to line up the grass horizon.

In the above screenshot, I made things very obvious for you, so you could see how I can move the selected object around and line it up with something else. Now, I’ll properly align the grass and let go of my mouse.

If I hit Ctrl+T (Windows) or Command+T (Mac) on my keyboard to free transform the object, I can twist it slightly counter-clockwise so the angle of the selected grass matches the angle of the existing grass even more.

When finished, I can hit Enter on my keyboard to apply the transformation and then I can head up to the Select > Deselect menu item and click on it. That will deselect the object and remove the marching ants.
Here’s the final photo with the removed tree:

If someone were to view this photo, I’m willing to wager that they would never guess there was a tree in the spot where one used to be.
The more you practice with this tool, the better you’ll get. The trick is to use it under the right conditions. Don’t try to go crazy with it where it won’t work. It’s better to take advantage of it where you can get good results.
I hope I effectively introduced you to the Patch Tool in Adobe Photoshop. If you have any questions or comments, please leave them in the comment section below. Thanks!


