15Katey
Member
- Joined
- May 10, 2021
- Messages
- 130
- Reaction Score
- 0
- Points
- 23
- #1
If you’re the average Adobe Photoshop user, you’ve probably never heard of erodible brush tips before. Heck, you probably hardly even use the Brush Tool. This tool is primarily reserved for those who like to draw and sketch. Well, if you’re into photography, I’m sure you use it for other things, such as lightening, darkening and erasing, but those uses are meant to adjust, not to draw.
In this post, I’m going to introduce you to a feature of the Brush Tool that you may live an entire life and never hear of. It’s called the Erodible Tip. If you’re into drawing, you definitely know what an erodible tip is. It’s when you use a piece of charcoal or a pencil and manually shape a tip to fit your preference. You may purchase the charcoal with a blunt, square tip and shape it into more of a point for a specific purpose. Or, you might purchase a pencil with a sharp tip, but shape it to be more blunt as you find necessary.
The cool part of all this is, Photoshop has the ability to actually erode the tip of a pencil or charcoal brush, just as you would in real life. And what’s even cooler is that once you shape the perfect tip, you can save it as a custom brush and use it over and over. You can set it so it continues to erode (wear away) or you can set it so it never uses up any material ever, thus continually keeping its shape. There’s a lot to think about here, so let’s get going.
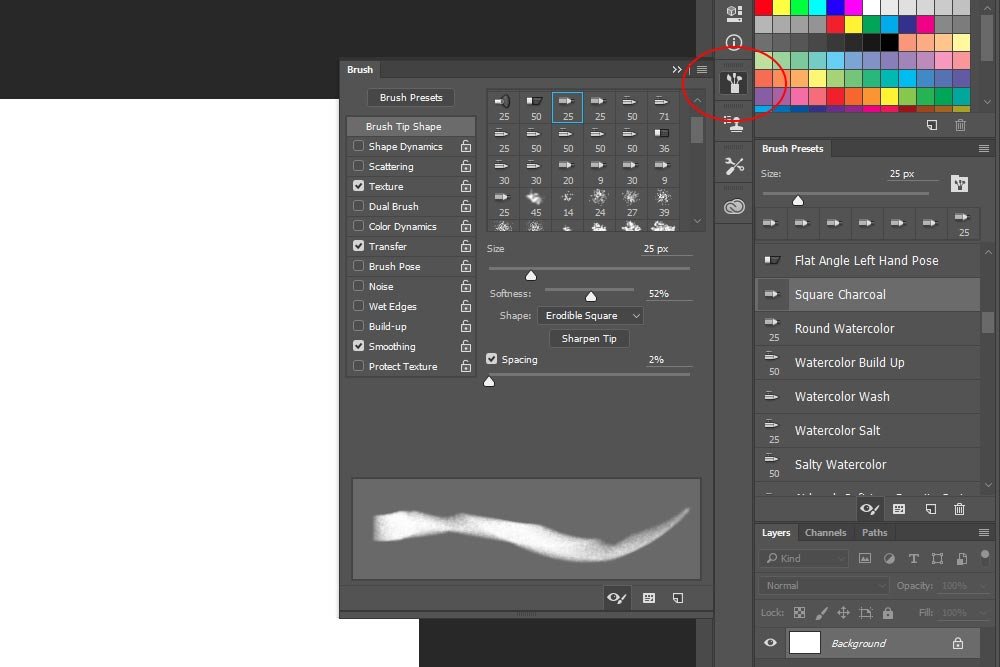
To open the Brush panel, you can either click the Brush icon in the right vertical toolbar like I did in the screenshot above or you can head up to the Window > Brush menu item and select it from there.
Setting #1 – Softness
If you look inside the Brush panel, under the Brush Tip Shape section (click on that in the left column of the Brush panel), you’ll see a few settings. Since I already chose the Square Charcoal brush earlier, I don’t need to do anything further in the top-most section. Also, the Size slider is straightforward enough. Left for a smaller tip and right for a larger tip. The setting I want to look at is called Softness.
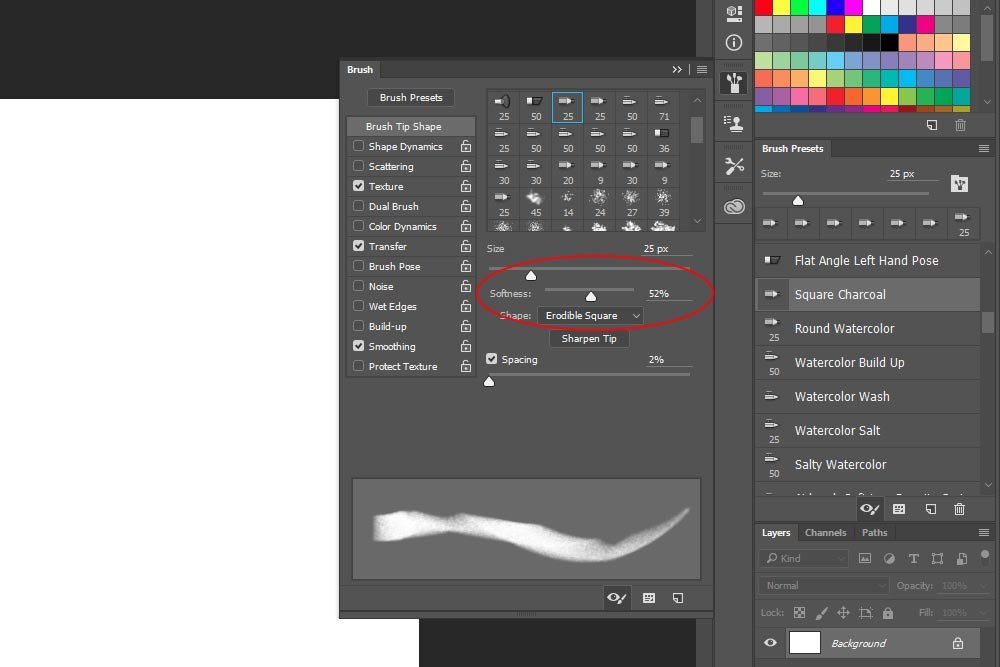
This may be the most important slider when it comes to erodible tips. If you push it all the way to the left, the brush will be as hard as possible and won’t erode at all. If you push it all the way to the right, it will erode at the maximum rate allowed by Photoshop. For this post, I’ll push it to the right until it hits 100%.
Setting #2 – Shape
If you’re drawing and would like to change the shape of the tip you’re using, you can easily do this by taking advantage of the Shape drop-down. As you can see in the next screenshot, there are a few different ones to choose from. These include Point, Round, Flat, Square, Triangle and Custom. I’ll talk about custom later in this post.

Setting #3 – Sharpen Tip
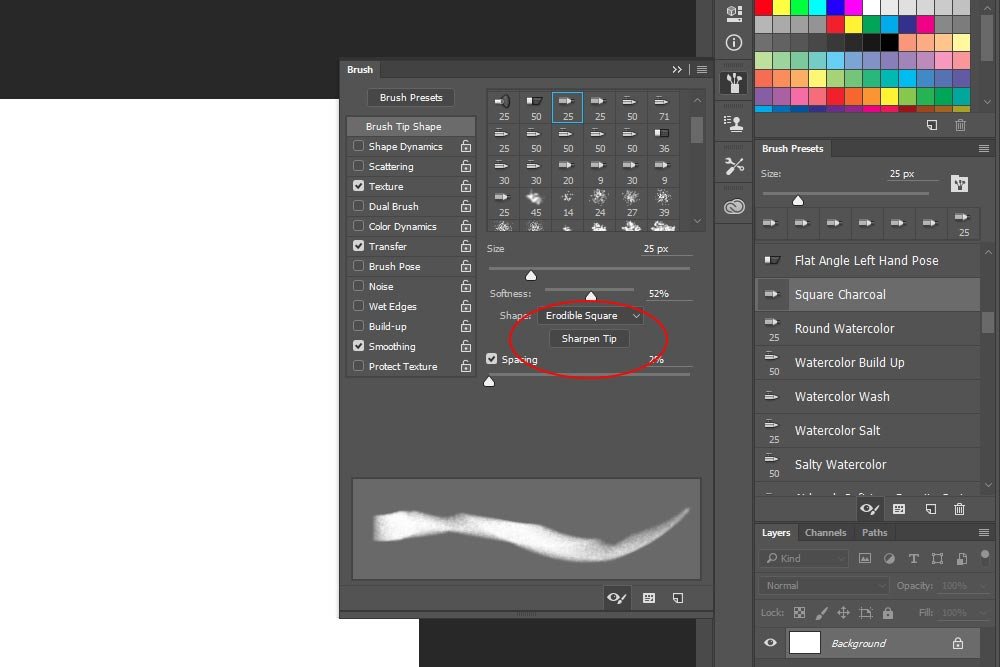
As you illustrate and the tip of your pencil or charcoal erodes, you may want to start over with a fresh one. To do this, simply click on the Sharpen Tip button inside the same section of the Brush panel. This will reset the tip and you’ll start anew.
Setting #4 – Tilt
One last thing before I go any further. In the same section as we were just adjusting the settings in, all the way at the bottom, there’s an icon that allows us to see a brush preview in the upper left area of the workspace. We’ll need that preview now. To turn it on, click the small icon that looks like an eye with a small paintbrush next to it. If you roll over this icon with your mouse and hover for a second or two, this should appear: Toggle the Live Tip Brush Preview.
Moving on – In the left column of the Brush panel, click the Brush Pose selection. This will bring you to a whole new area. What I’d like to focus on in this area is the second slider from the top. It’s called Tilt Y.
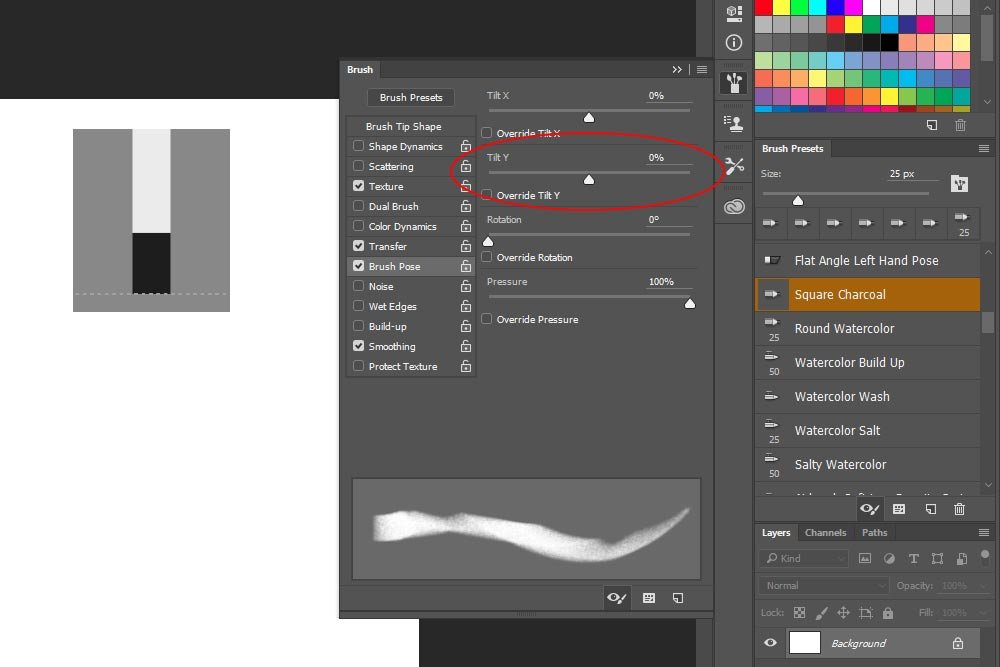
As you can see, I copied and pasted the brush preview into this screenshot. As it stands, there is no tilt on the Y axis. The charcoal is straight up and down. To witness the eroding tip, we’ll have to change the tilt. To make things as dramatic as possible, I’ll bring the tilt to the right until it reaches 100%. Now look at the slider and the brush preview.
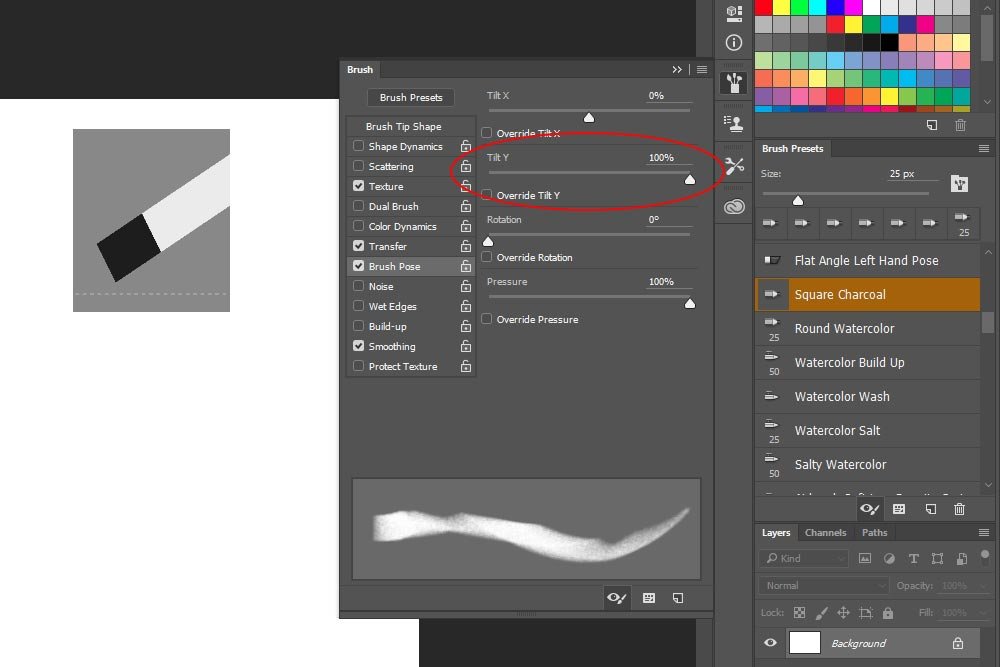
Ahh, now we can see some erosion.
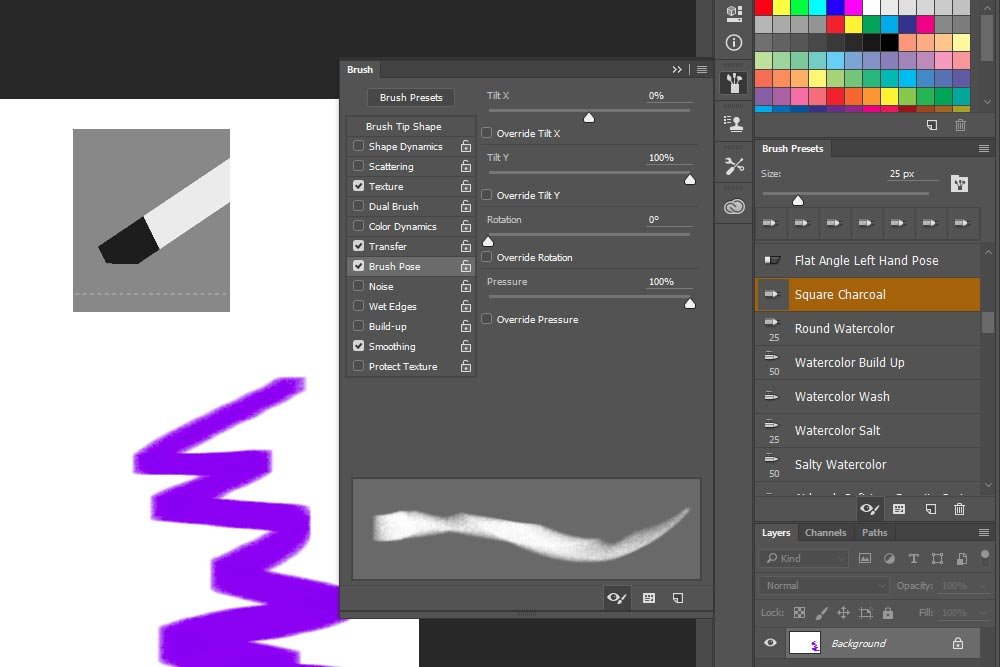
If you’ll notice the preview, the sharp edge of the tip was worn away from my use of the brush. Now, it sort of wore away a lot because I have the Softness slider pushed all the way to the right. If I didn’t have it so extremely soft, it wouldn’t have worn away nearly as much.
If I used the Rotation slider that’s included in the Brush Pose section of the Brush panel, I can rotate the brush, just as if it were in my hand. I could wear away all the sharp edges until the brush is just perfect for whatever it is I’m working on. The thing is, if I’m going to do all that work just to create the perfect tip, I’ll surely want to save it as a custom brush so I can use it again and again, without having to create it all over again. This is what I’ll cover next.
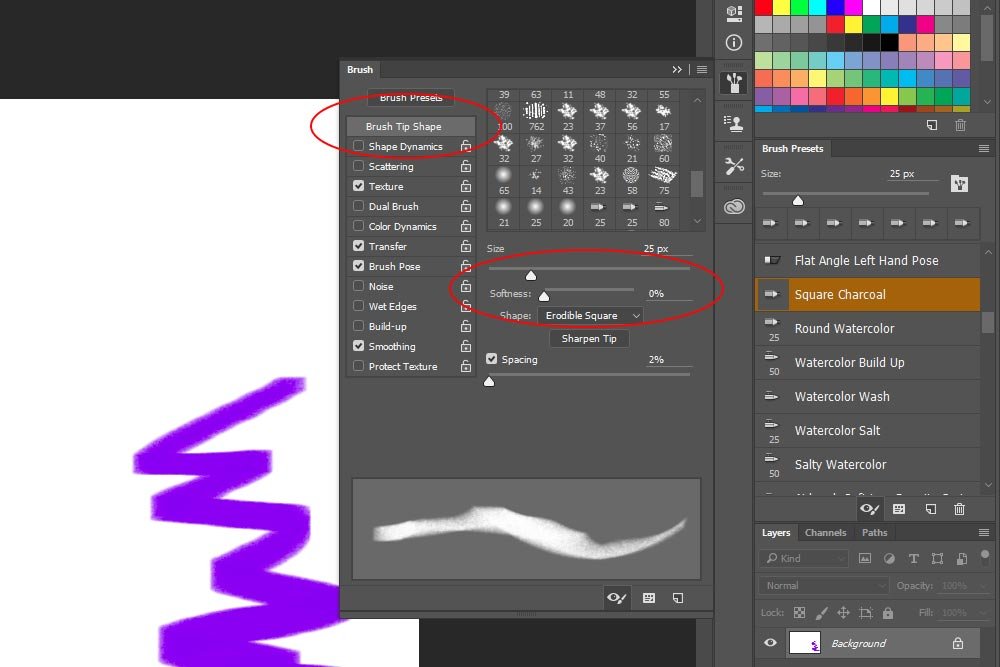
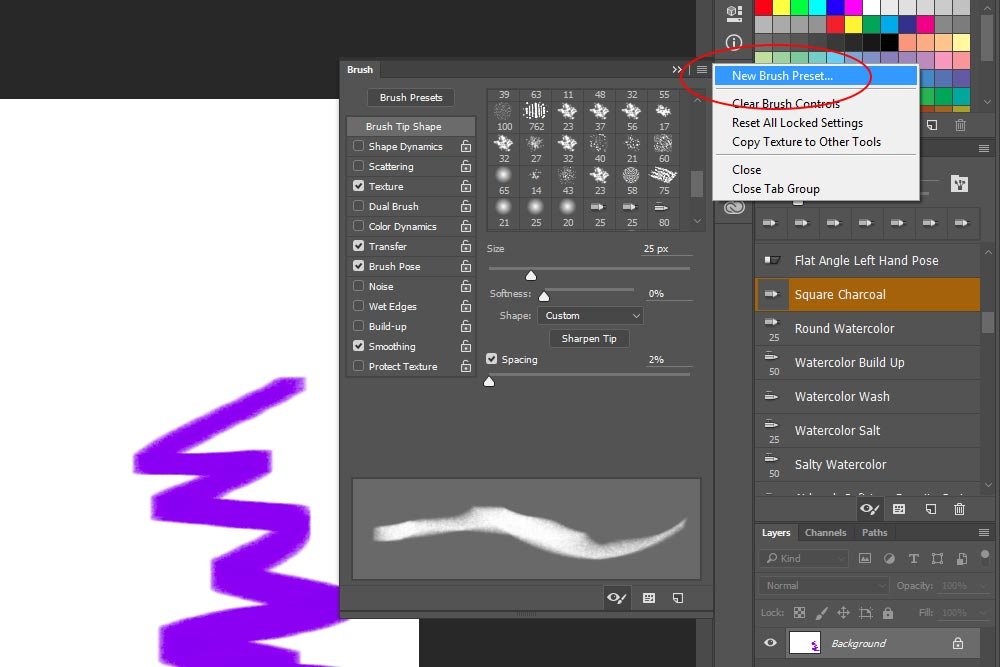
After that’s done, I’ll move down inside the same section and click on the Shape drop-down and choose Custom. Once I do that, I’ll head up to the small menu that’s situated in the upper right corner of the Brush panel. I’ll click on that menu and choose New Brush Preset.
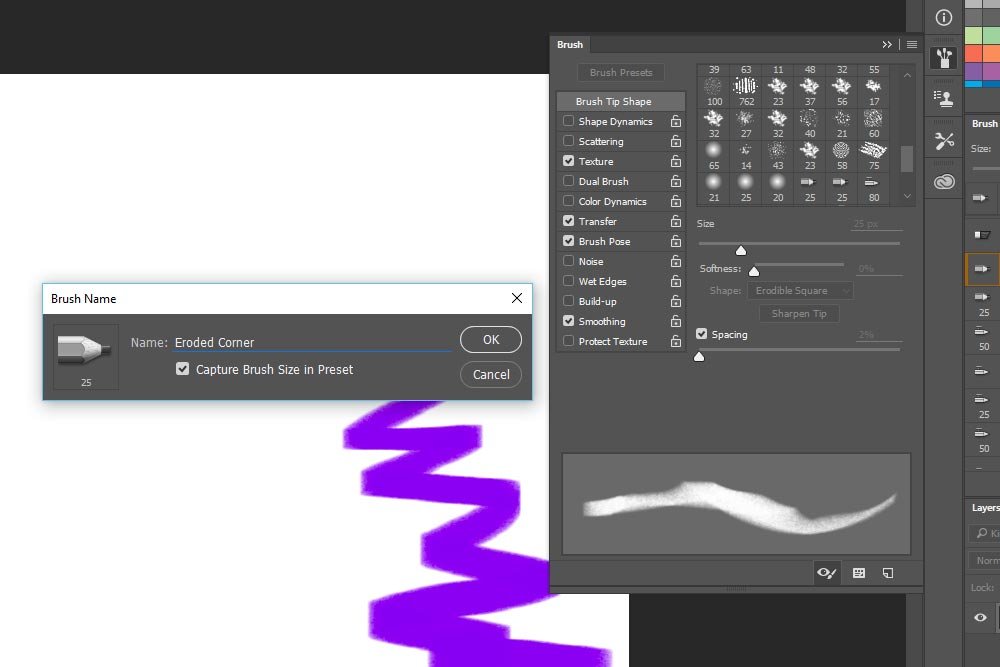
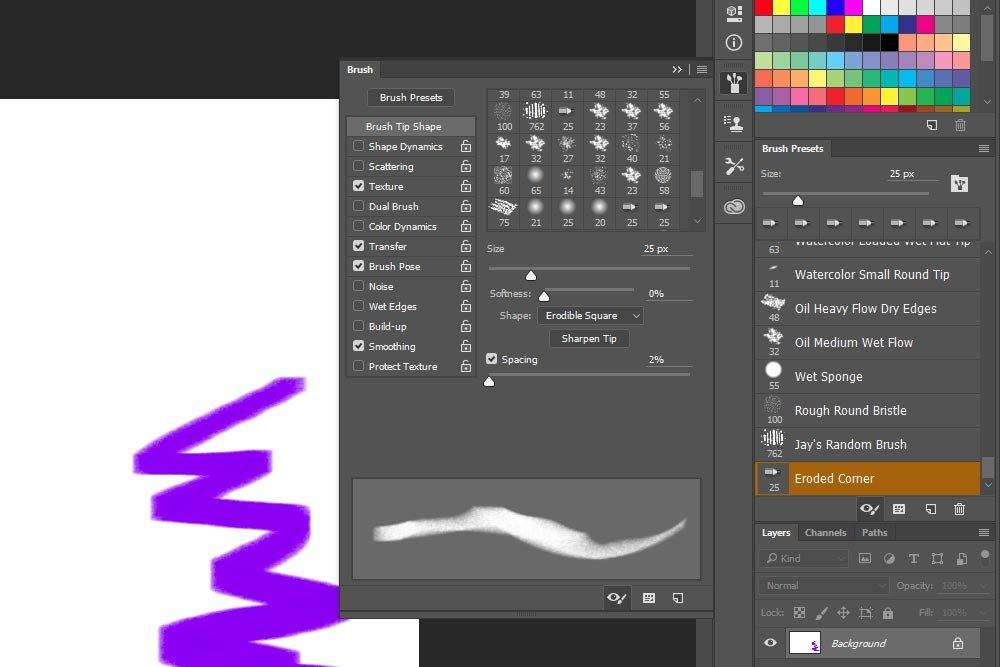
After I do that, the Brush Name dialog box will appear, where I’ll name the brush Eroded Corner and then I’ll click on the OK button to save the preset.
When that’s finished, the new brush preset will appear in the Brush Presets panel, where I can access it any time I want, which is very good.
I think I’ll stop there. I hope I’ve effectively introduced you to the erodible tips area of Adobe Photoshop. This area holds quite a bit of content, so feel free to fool around and experiment with it. If you’re an illustrator or a painter, you can do some serious work in this area. If you have any questions or comments, please leave them in the comment section below. Thanks!
In this post, I’m going to introduce you to a feature of the Brush Tool that you may live an entire life and never hear of. It’s called the Erodible Tip. If you’re into drawing, you definitely know what an erodible tip is. It’s when you use a piece of charcoal or a pencil and manually shape a tip to fit your preference. You may purchase the charcoal with a blunt, square tip and shape it into more of a point for a specific purpose. Or, you might purchase a pencil with a sharp tip, but shape it to be more blunt as you find necessary.
The cool part of all this is, Photoshop has the ability to actually erode the tip of a pencil or charcoal brush, just as you would in real life. And what’s even cooler is that once you shape the perfect tip, you can save it as a custom brush and use it over and over. You can set it so it continues to erode (wear away) or you can set it so it never uses up any material ever, thus continually keeping its shape. There’s a lot to think about here, so let’s get going.

Settings Up My Workspace
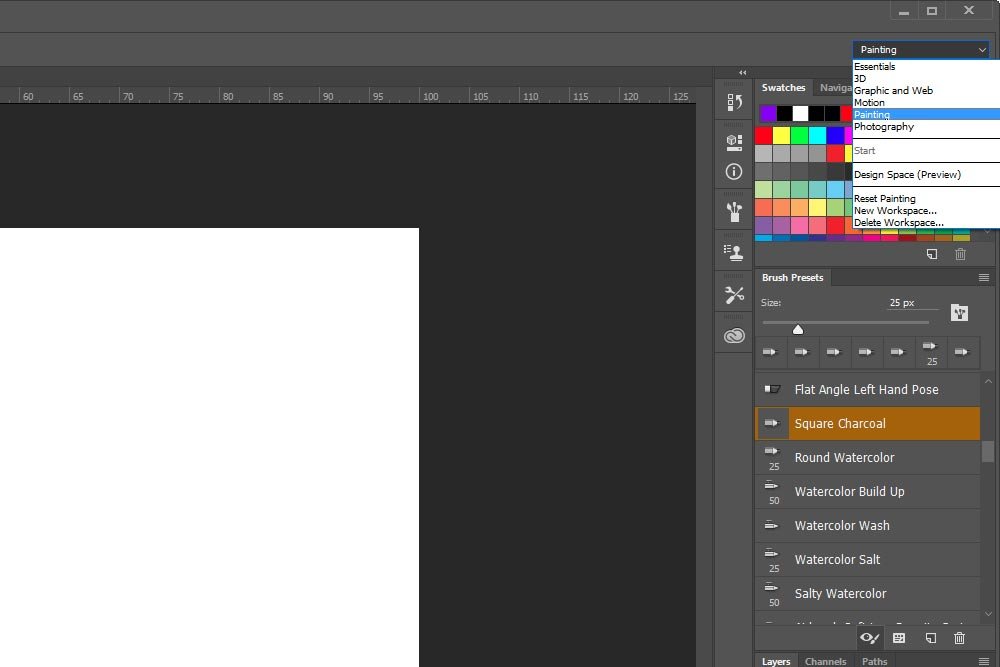
Before I do anything else, I’m going to switch my workspace from Essentials to Painting up in the top right pull-down menu. By doing this, I’ll be exposing a few panels that I’ll need for this post. It’s also a good idea to use the Painting workspace if you’re doing a lot of illustrating, as it makes that type of environment much more fluid.
Selecting the Brush Tool & the Brush Preset
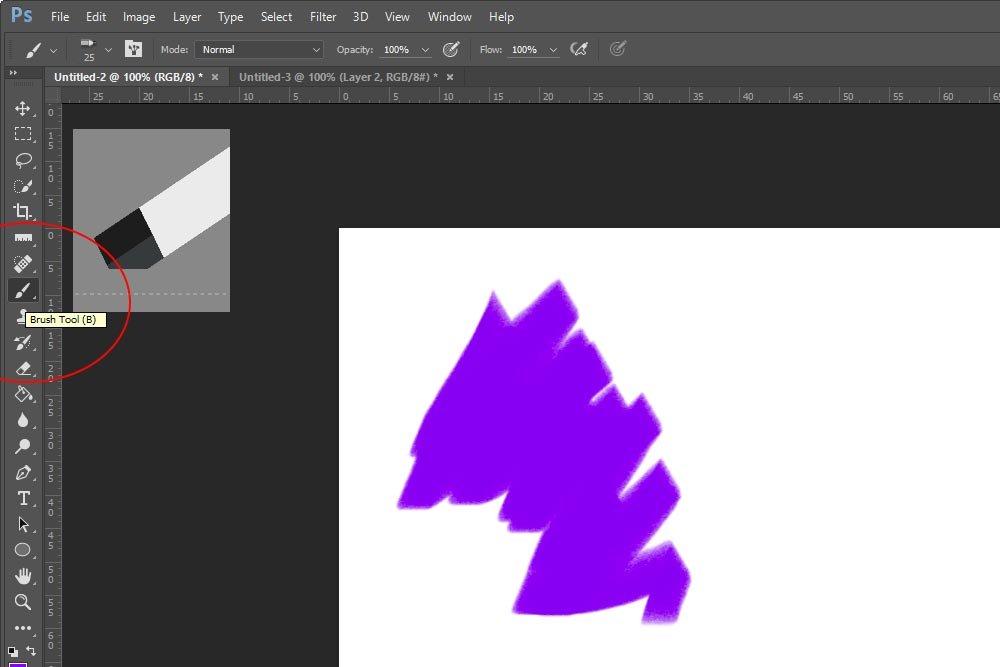
Next, I’m going to click on the Brush Tool in the left vertical toolbar and then select which erodible brush I’d like to use. For the purposes of this tutorial, I’ll go with the Square Charcoal. That’s a very clear and understandable brush to use, as it’s fairly easy to see up in the brush preview. By the way, you can see the Square Charcoal brush selection in the Brush Presets panel in the previous screenshot. Below is a screenshot of the Brush Tool in the vertical toolbar.
Opening & Setting the Brush Panel
Whenever you use a brush for illustrating or painting, it’s a good idea to open up the Brush panel. For this post, my primary goal is to introduce you to the world of erosion. I’m not going to get into precisely how to do things – what I will do is show you a setting or two that will hopefully make you say, “Wow, I didn’t know I could do that.”
To open the Brush panel, you can either click the Brush icon in the right vertical toolbar like I did in the screenshot above or you can head up to the Window > Brush menu item and select it from there.
Setting #1 – Softness
If you look inside the Brush panel, under the Brush Tip Shape section (click on that in the left column of the Brush panel), you’ll see a few settings. Since I already chose the Square Charcoal brush earlier, I don’t need to do anything further in the top-most section. Also, the Size slider is straightforward enough. Left for a smaller tip and right for a larger tip. The setting I want to look at is called Softness.

This may be the most important slider when it comes to erodible tips. If you push it all the way to the left, the brush will be as hard as possible and won’t erode at all. If you push it all the way to the right, it will erode at the maximum rate allowed by Photoshop. For this post, I’ll push it to the right until it hits 100%.
Setting #2 – Shape
If you’re drawing and would like to change the shape of the tip you’re using, you can easily do this by taking advantage of the Shape drop-down. As you can see in the next screenshot, there are a few different ones to choose from. These include Point, Round, Flat, Square, Triangle and Custom. I’ll talk about custom later in this post.

Setting #3 – Sharpen Tip
As you illustrate and the tip of your pencil or charcoal erodes, you may want to start over with a fresh one. To do this, simply click on the Sharpen Tip button inside the same section of the Brush panel. This will reset the tip and you’ll start anew.

Setting #4 – Tilt
One last thing before I go any further. In the same section as we were just adjusting the settings in, all the way at the bottom, there’s an icon that allows us to see a brush preview in the upper left area of the workspace. We’ll need that preview now. To turn it on, click the small icon that looks like an eye with a small paintbrush next to it. If you roll over this icon with your mouse and hover for a second or two, this should appear: Toggle the Live Tip Brush Preview.
Moving on – In the left column of the Brush panel, click the Brush Pose selection. This will bring you to a whole new area. What I’d like to focus on in this area is the second slider from the top. It’s called Tilt Y.

As you can see, I copied and pasted the brush preview into this screenshot. As it stands, there is no tilt on the Y axis. The charcoal is straight up and down. To witness the eroding tip, we’ll have to change the tilt. To make things as dramatic as possible, I’ll bring the tilt to the right until it reaches 100%. Now look at the slider and the brush preview.

Ahh, now we can see some erosion.
Drawing with the Brush
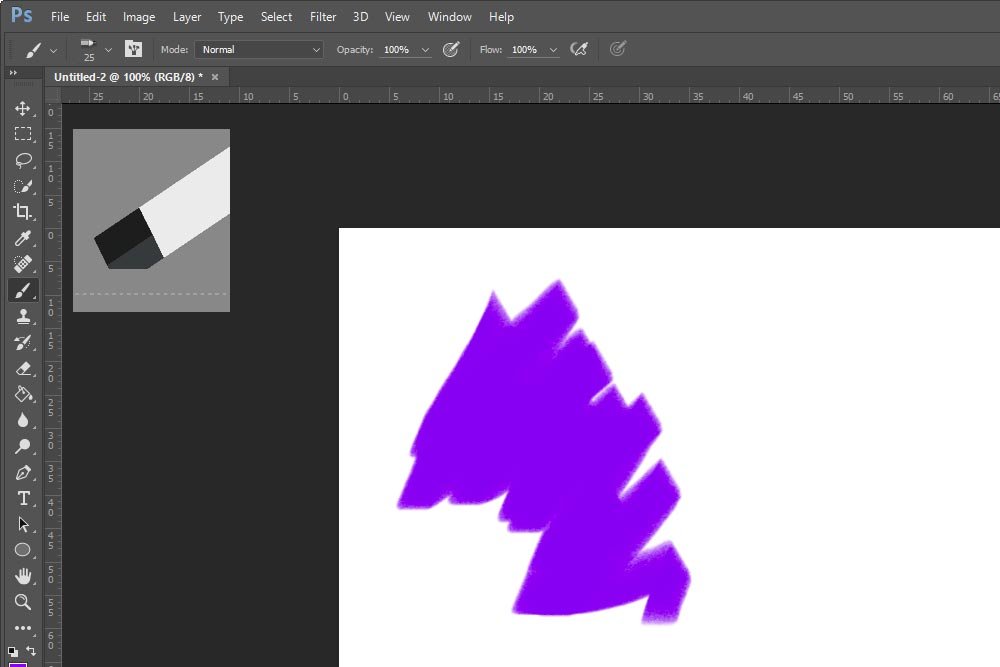
Now that I have all the settings adjusted to where I’d like them, I can use the brush for a quick scribble. All I want to do is show you how the tip can erode. To do this, I’ll merely draw a quick curved line. I’ll also copy and paste the brush preview into the next screenshot, so you can see the effect of my drawing on the tip.
If you’ll notice the preview, the sharp edge of the tip was worn away from my use of the brush. Now, it sort of wore away a lot because I have the Softness slider pushed all the way to the right. If I didn’t have it so extremely soft, it wouldn’t have worn away nearly as much.
If I used the Rotation slider that’s included in the Brush Pose section of the Brush panel, I can rotate the brush, just as if it were in my hand. I could wear away all the sharp edges until the brush is just perfect for whatever it is I’m working on. The thing is, if I’m going to do all that work just to create the perfect tip, I’ll surely want to save it as a custom brush so I can use it again and again, without having to create it all over again. This is what I’ll cover next.
Saving a Custom Erodible Brush Tip
To save a custom erodible brush tip, you need to follow a few steps that will make perfect sense as I explain them. We’ve already completed the first step by wearing the tip down to the point of perfection. Next, we’ll need to head back into the Brush Tip Shape section of the Brush panel and move the Softness slider all the way to the left, so it’s as hard as possible. If we kept the tip soft, we’d lose the tip shape the very first time we used the brush. Of course, if that’s what you want, you can adjust this slider to any position you see fit. For me, I’ll make the tip hard.
After that’s done, I’ll move down inside the same section and click on the Shape drop-down and choose Custom. Once I do that, I’ll head up to the small menu that’s situated in the upper right corner of the Brush panel. I’ll click on that menu and choose New Brush Preset.

After I do that, the Brush Name dialog box will appear, where I’ll name the brush Eroded Corner and then I’ll click on the OK button to save the preset.

When that’s finished, the new brush preset will appear in the Brush Presets panel, where I can access it any time I want, which is very good.

I think I’ll stop there. I hope I’ve effectively introduced you to the erodible tips area of Adobe Photoshop. This area holds quite a bit of content, so feel free to fool around and experiment with it. If you’re an illustrator or a painter, you can do some serious work in this area. If you have any questions or comments, please leave them in the comment section below. Thanks!
