KristinaW
Member
- Joined
- May 7, 2021
- Messages
- 127
- Reaction Score
- 0
- Points
- 18
- #1
I’ve been doing some thinking and have concluded that video is the future. While I absolutely love photography and will never give it up, I think it would only be prudent for me to immerse myself in video as much as possible. I’ve been taking and editing video for almost five years, so I almost know my way around. While not an expert, I have a lot to offer. But, like many of you, I also have a lot to learn.
In today’s post, I’d like to explore the Timeline panel in Adobe Photoshop. I’m not going to dive very deep – what I’d like to do is merely touch upon some of the more important aspects and controls. In the most basic sense, I’d like someone who knows nothing about editing video in Photoshop to walk away from this post saying, “Heck, I think I can do that.” That’s the goal.
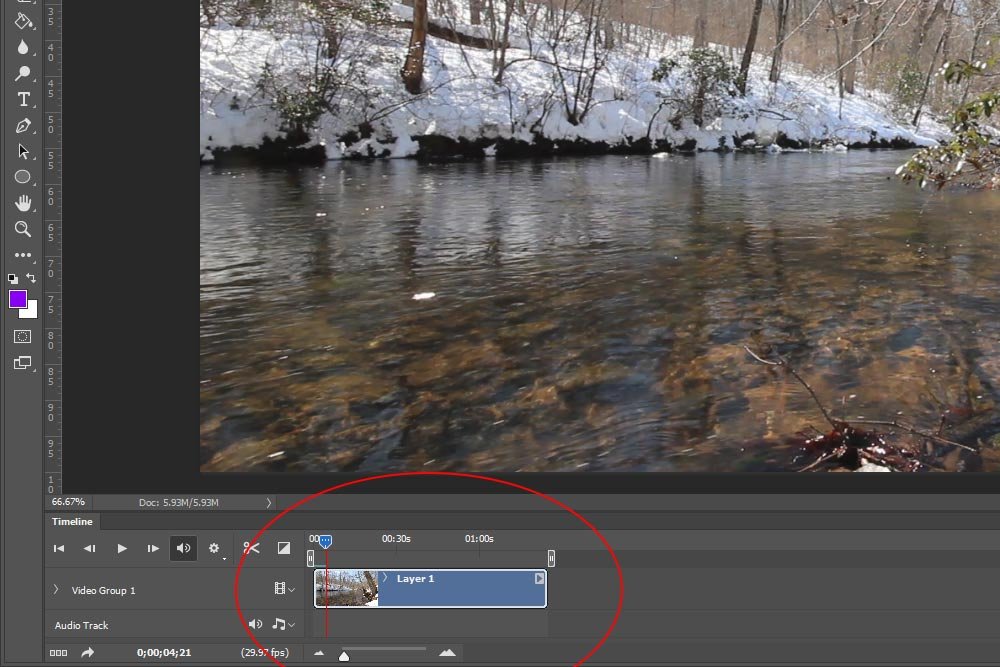
For most people in most cases, this isn’t enough to work with. Especially since the video I took was much longer than it appeared. If I click on the small arrow that’s located at the right side of the clip in the timeline, I can find out some important information.
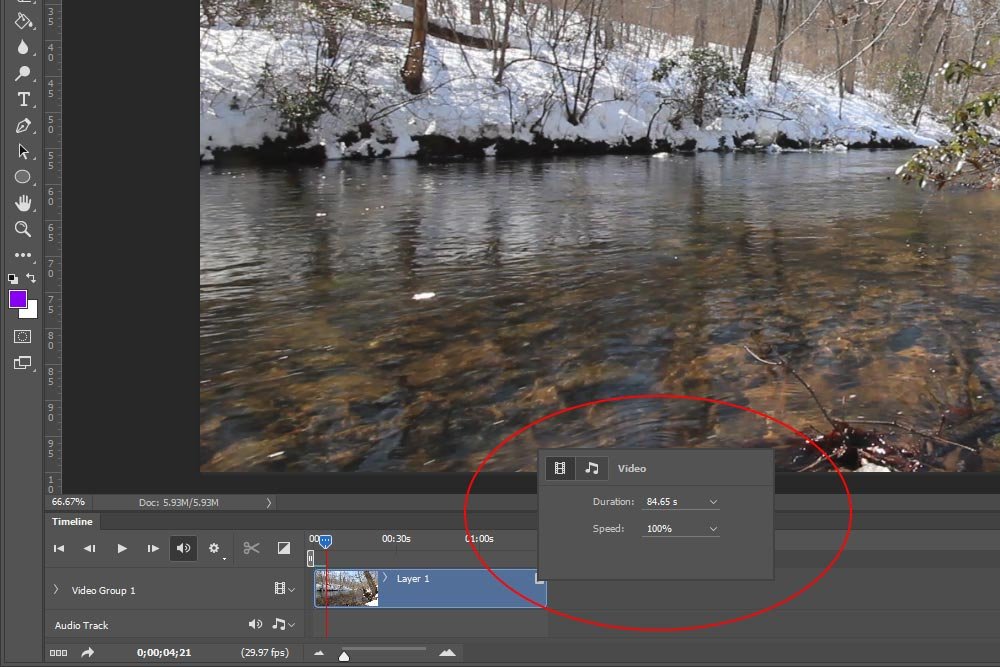
I now know the duration of this video is 84.65 seconds. If I were including this in a production that was oven an hour long, I’d surely keep it as small looking as possible. Since it’s the only one in my project, I’ll stretch it out so I have more space to think. To do this, I’ll click the Zoom in Timeline button or slide the Control Timeline Magnification slider.
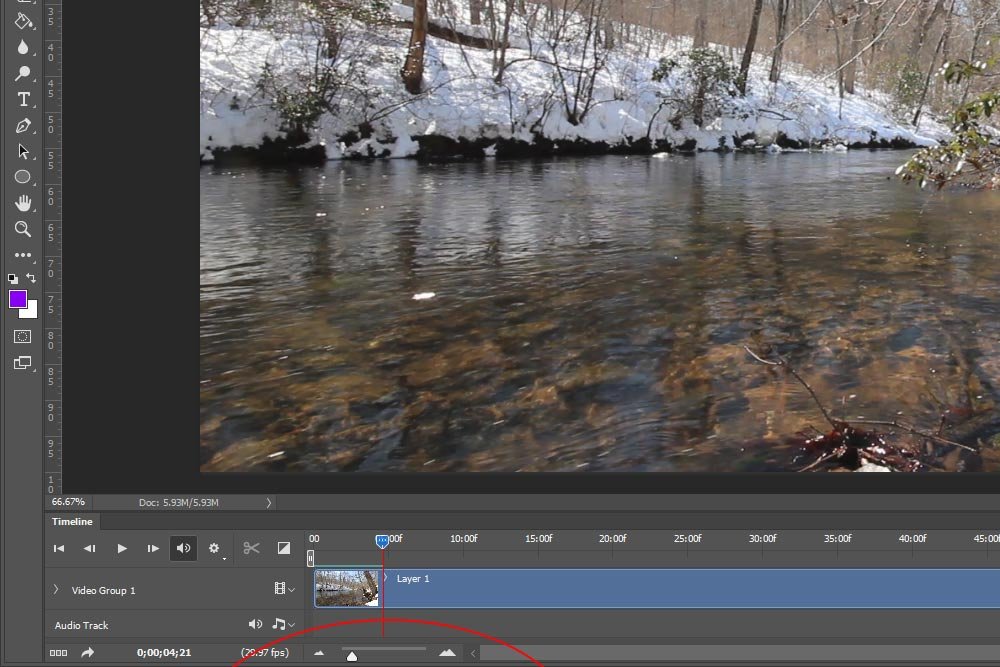
That’s better. Now, if you look at the small timing marks along the length of the timeline, you can see that they consist of 5 second increments as opposed to 30 second increments. This is a matter of preference as much as it is of necessity, so you’ll need to decide which magnification level is best for whatever it is you’re working on.
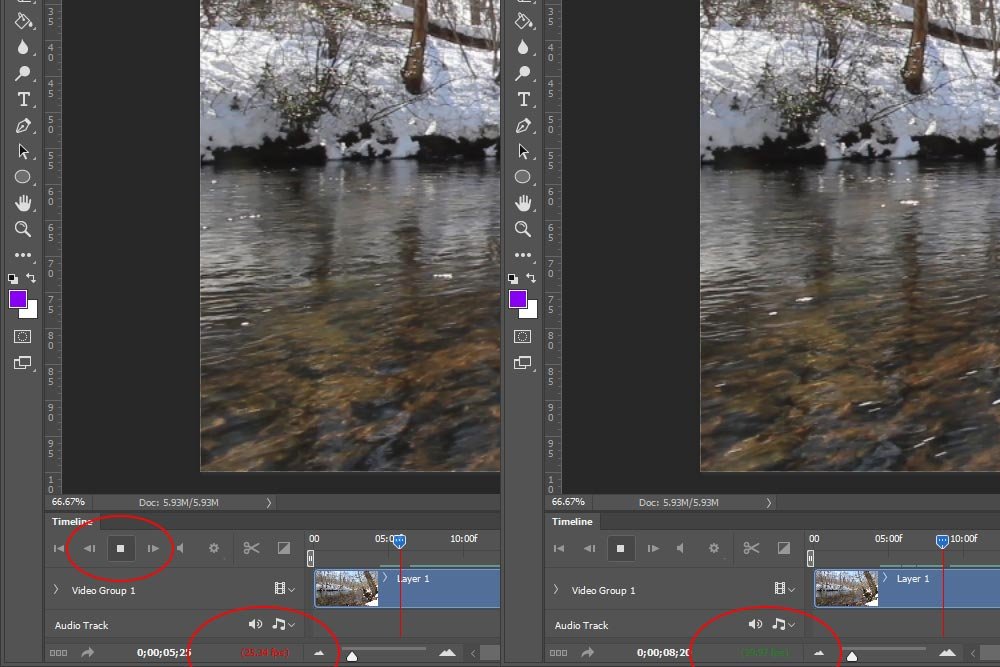
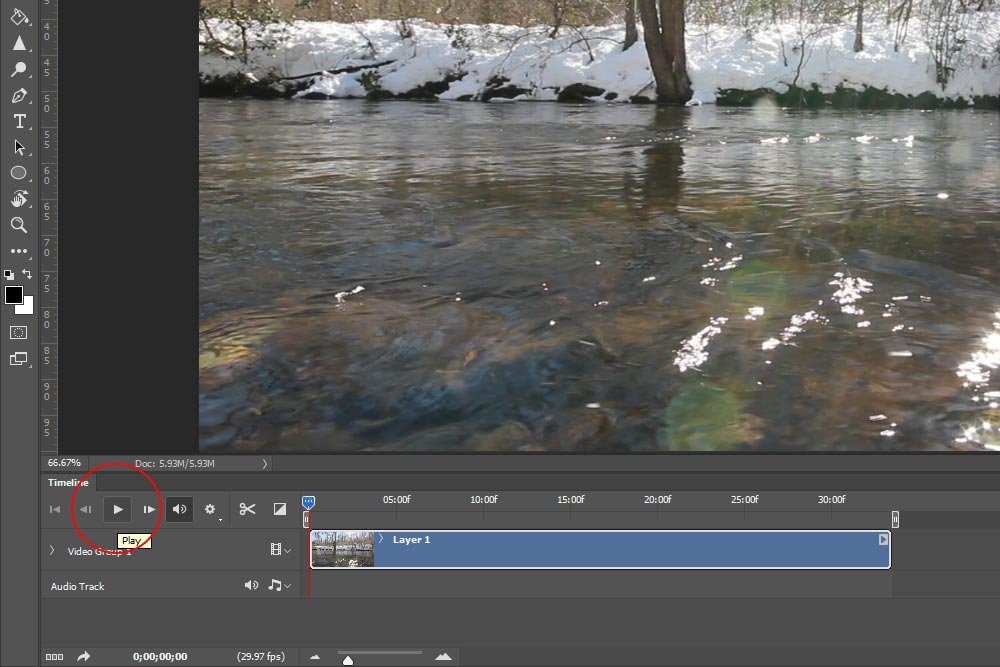
I circled the Play button in the left screenshot above. Since the video is playing, it’s showing the Stop button. When the video stops, that will switch back to Play.
Below that, I circled two areas. Actually, they are the same area in the Timeline panel and display the Frame Rate. When the video is being played back at the same frame rate the video was recorded with, the frame rate text will show as green. In the above screenshot, the green text states that the current playing frame rate is 29.97 fps (frames per second). That’s close enough to the 30 fps I used to record the video. On the left side, the red text is showing a slower frame rate of 25.34 fps. While playing the video back in the editor, it appears smooth. If the frame rate really dropped down and things become choppy, I’d definitely want to take a closer look at the resources in my computer because it may not be powerful enough to handle video editing. This is a very important factor to consider early on.
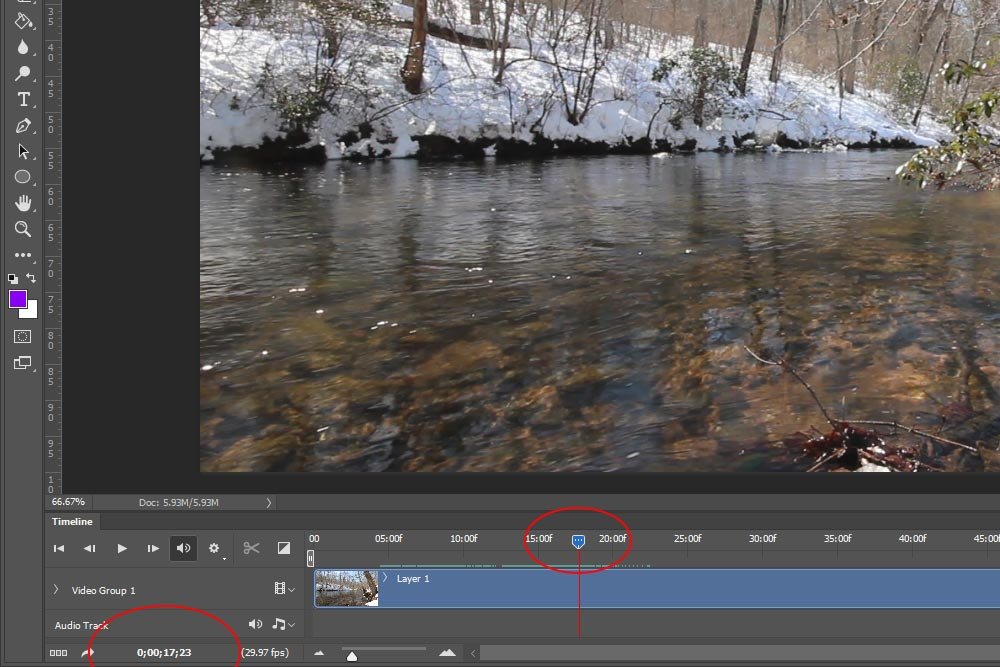
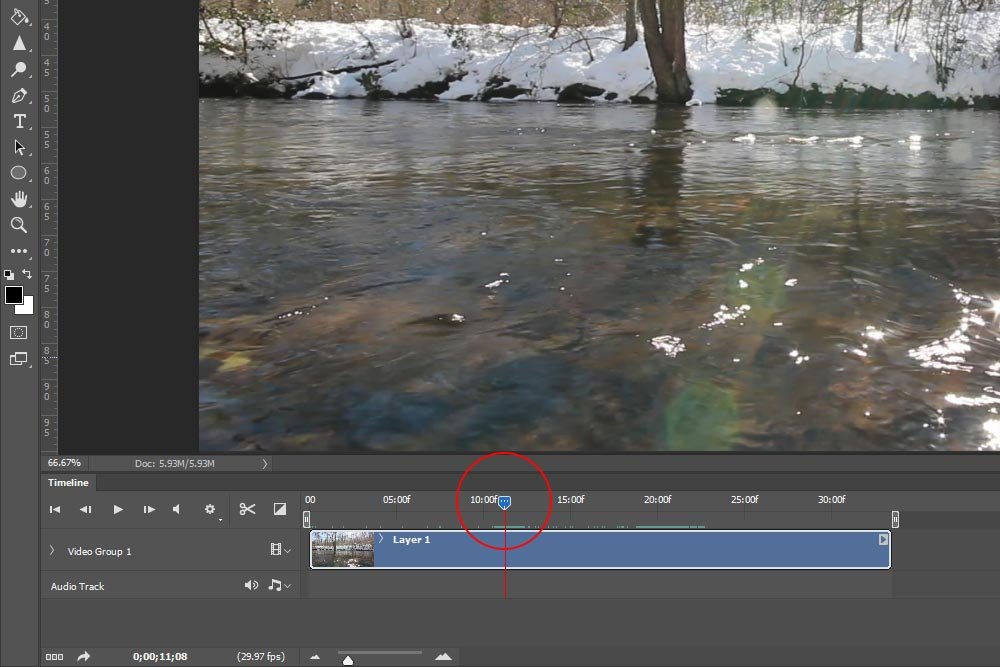
If you look at the above screenshot, you’ll see that I circled the playhead inside the timeline. It’s the indicator with the red line that travels down through the clip itself. I can drag that playhead to the left and the right to change which frame I’m currently looking at. Of course, the video above will correspond with where the playhead is located in the timeline.
This brings me to my next point – the current video frame. If I want to know precisely which frame I’m looking at, I can look inside the left-most red circle above. In my screenshot, the current frame is 0;00;17;23. That means I’m around the 17 second mark. So, when you’re working on editing a video with someone else and they ask you to take a look at the 17 second mark because there’s a ghost captured on film, you’ll now know how to get there.
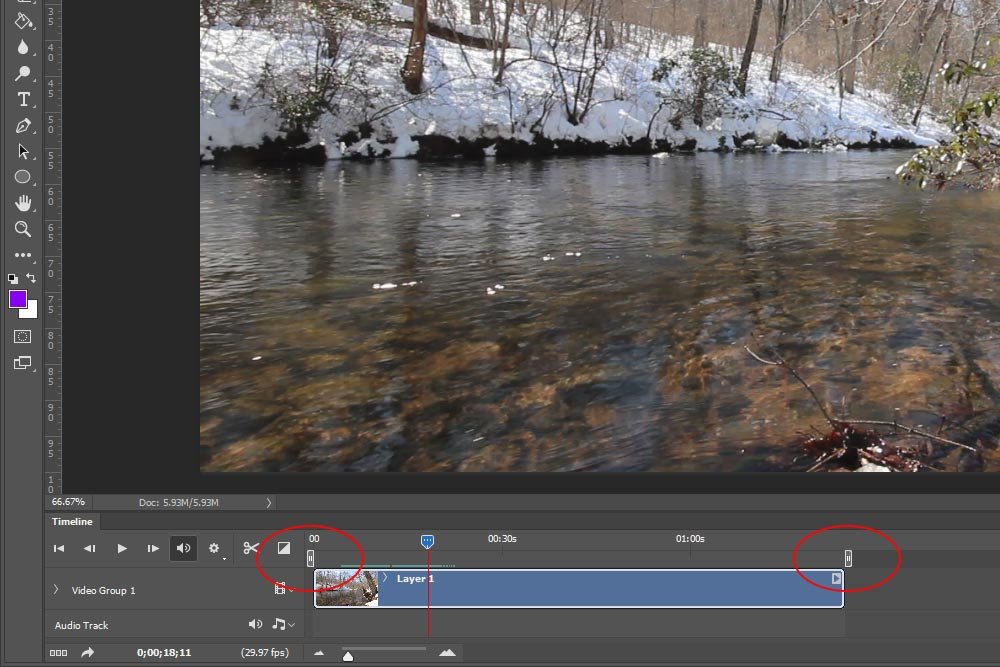
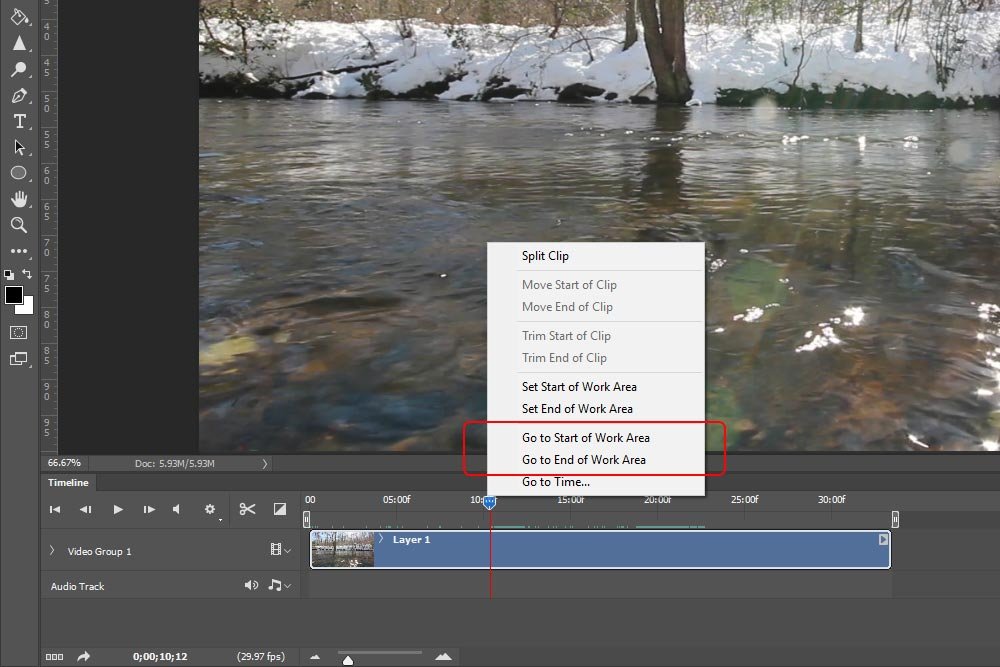
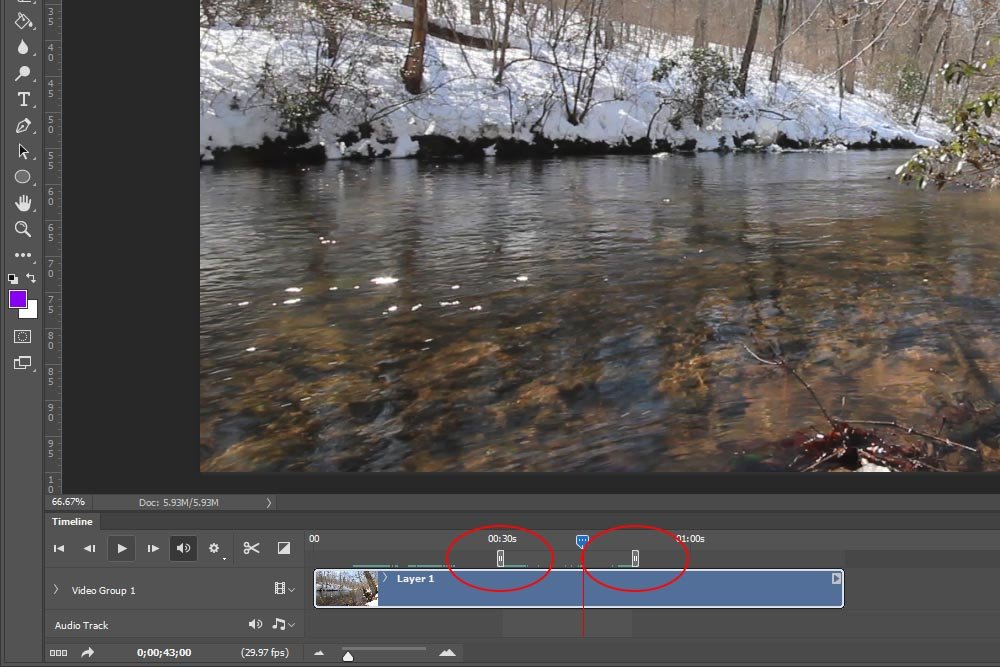
If you look at the above screenshot, you’ll see that I circled two areas along the timeline. These are the Work Area Bars. Currently, they are set at the beginning and at the end of the timeline. If I click and drag them, to different areas of the timeline, when I click on the Play button, the playhead will loop inside the Work Area Bars only. This is handy when you’re working on specific areas of video.
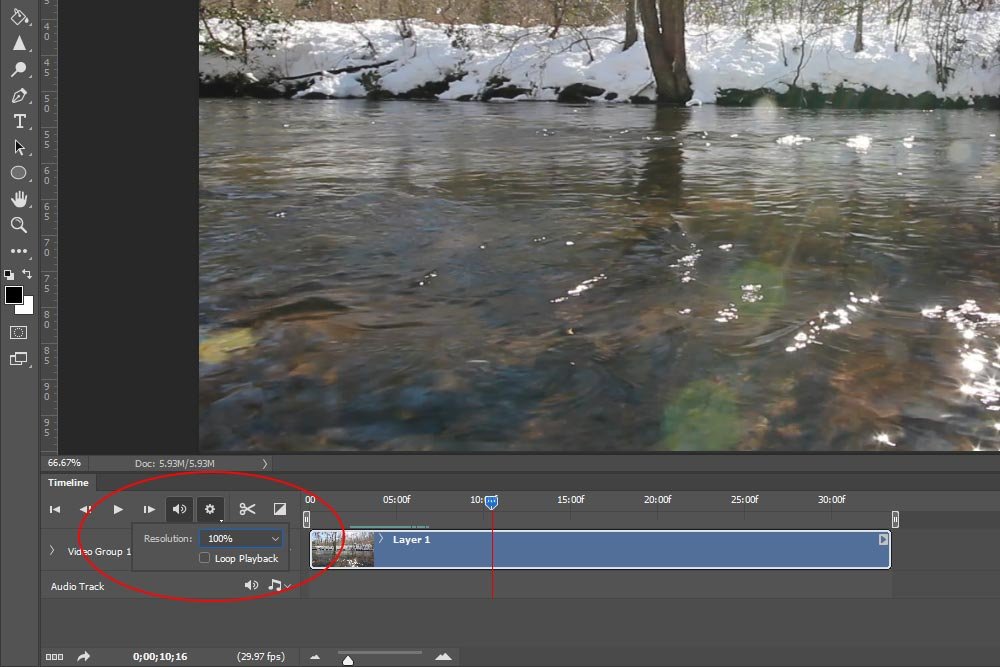
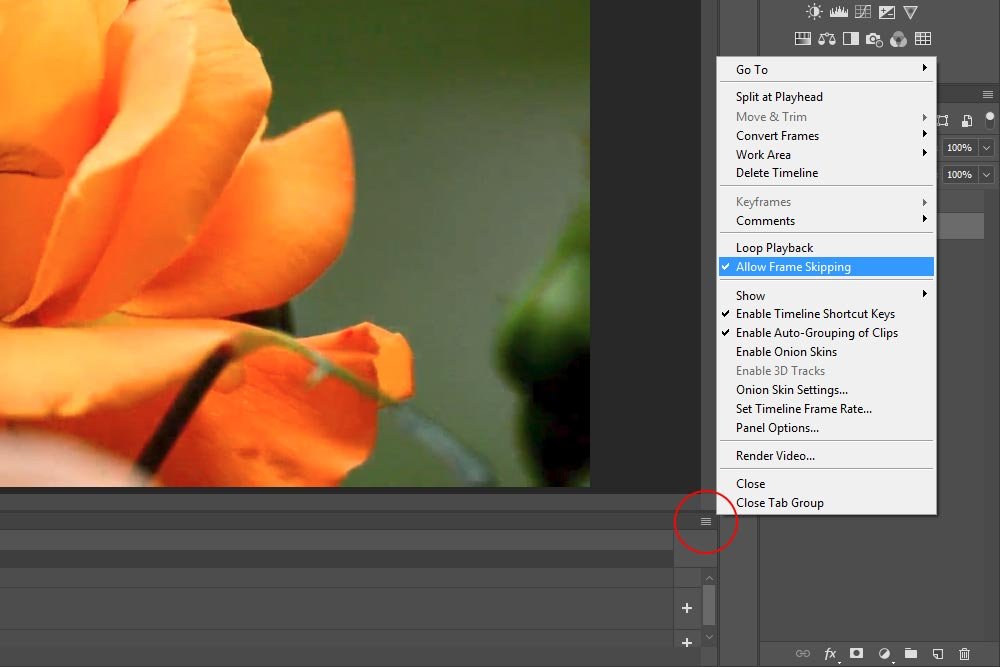
To allow frame skipping, click on the menu that’s located at the right side of the Timeline panel and select Allow Frame Skipping. That’s all you need to do.
That’s all I’m going to cover for this post. I hope I began to familiarize you with the Timeline panel in Adobe Photoshop. If you have any questions or comments, please leave them in the comment section below. Thanks!
In today’s post, I’d like to explore the Timeline panel in Adobe Photoshop. I’m not going to dive very deep – what I’d like to do is merely touch upon some of the more important aspects and controls. In the most basic sense, I’d like someone who knows nothing about editing video in Photoshop to walk away from this post saying, “Heck, I think I can do that.” That’s the goal.
The Timeline Magnification Level
When I fist opened one of my old video files from 2013 and after I switched my workspace layout to Motion as I mentioned in this post, the clip duration appeared rather short.
For most people in most cases, this isn’t enough to work with. Especially since the video I took was much longer than it appeared. If I click on the small arrow that’s located at the right side of the clip in the timeline, I can find out some important information.

I now know the duration of this video is 84.65 seconds. If I were including this in a production that was oven an hour long, I’d surely keep it as small looking as possible. Since it’s the only one in my project, I’ll stretch it out so I have more space to think. To do this, I’ll click the Zoom in Timeline button or slide the Control Timeline Magnification slider.

That’s better. Now, if you look at the small timing marks along the length of the timeline, you can see that they consist of 5 second increments as opposed to 30 second increments. This is a matter of preference as much as it is of necessity, so you’ll need to decide which magnification level is best for whatever it is you’re working on.
Real-Time Playback & Frame Rate
I’m going to press the Play button that’s located towards the left side of the Timeline panel. After the clip starts playing, I want to get an idea of how my system handles the video, so I’ll keep a close eye on the Frame Rate.
I circled the Play button in the left screenshot above. Since the video is playing, it’s showing the Stop button. When the video stops, that will switch back to Play.
Below that, I circled two areas. Actually, they are the same area in the Timeline panel and display the Frame Rate. When the video is being played back at the same frame rate the video was recorded with, the frame rate text will show as green. In the above screenshot, the green text states that the current playing frame rate is 29.97 fps (frames per second). That’s close enough to the 30 fps I used to record the video. On the left side, the red text is showing a slower frame rate of 25.34 fps. While playing the video back in the editor, it appears smooth. If the frame rate really dropped down and things become choppy, I’d definitely want to take a closer look at the resources in my computer because it may not be powerful enough to handle video editing. This is a very important factor to consider early on.
Playhead & Current Frame
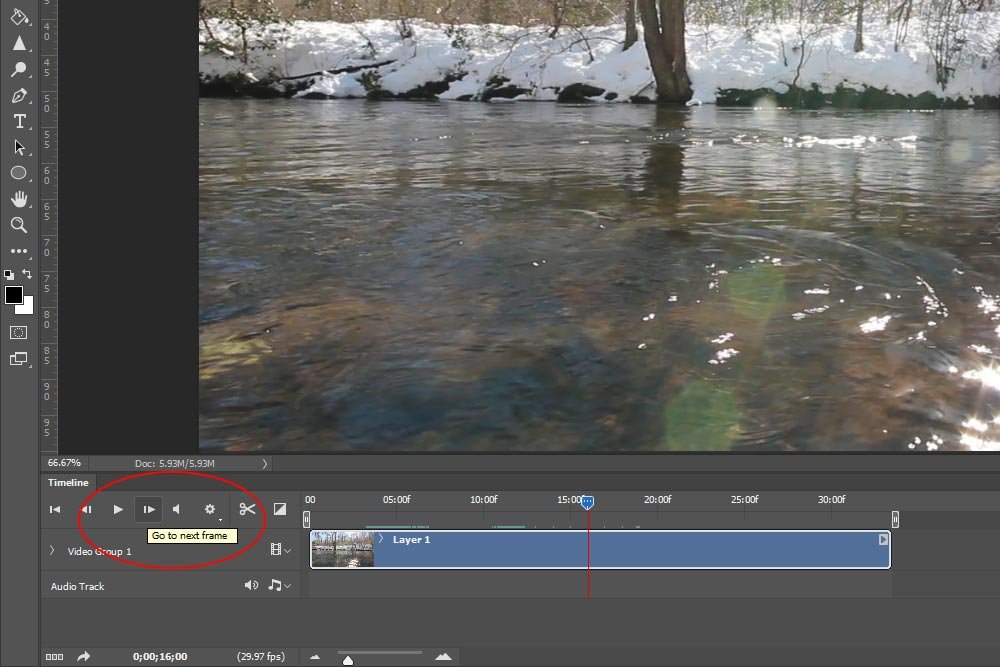
When editing video, you’ll find yourself dragging the playhead around about once every two seconds. It’s an extremely popular task. I only felt it responsible to show you where the playhead can be found.
If you look at the above screenshot, you’ll see that I circled the playhead inside the timeline. It’s the indicator with the red line that travels down through the clip itself. I can drag that playhead to the left and the right to change which frame I’m currently looking at. Of course, the video above will correspond with where the playhead is located in the timeline.
This brings me to my next point – the current video frame. If I want to know precisely which frame I’m looking at, I can look inside the left-most red circle above. In my screenshot, the current frame is 0;00;17;23. That means I’m around the 17 second mark. So, when you’re working on editing a video with someone else and they ask you to take a look at the 17 second mark because there’s a ghost captured on film, you’ll now know how to get there.
Work Area Bars
Let’s say that I had my camera running during my video for over an hour in an attempt to capture a river creature. The creature is elusive, so I had to hide behind a tree and let the camera do its work. Let’s now say that the creature appeared for only a few seconds of the video and the rest of the time, all I got was the water running downstream. To view and edit only the specific time the creature was on video, I can move something called the Work Area Bars.
If you look at the above screenshot, you’ll see that I circled two areas along the timeline. These are the Work Area Bars. Currently, they are set at the beginning and at the end of the timeline. If I click and drag them, to different areas of the timeline, when I click on the Play button, the playhead will loop inside the Work Area Bars only. This is handy when you’re working on specific areas of video.

Allow Frame Skipping
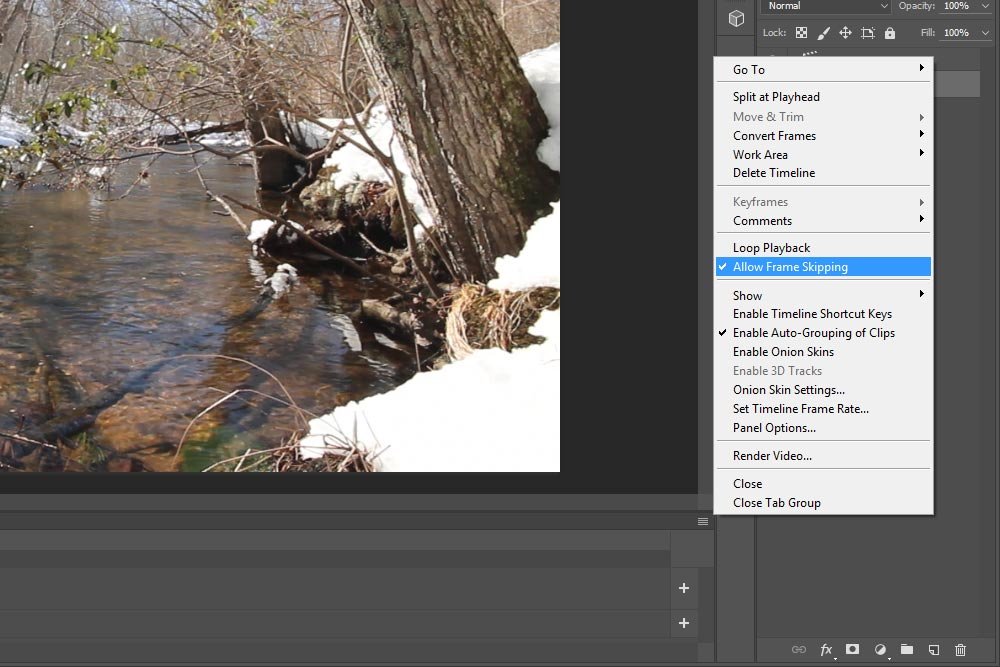
I’m going to be honest here. In my “newer” computer, I have 8GB of RAM. As I play my video back inside of Photoshop, there’s some lag. The playhead stops intermittently, which makes for a rather horrible editing experience. Before I head out to purchase some additional RAM (which I’m going to do), I can allow frame skipping during playback. All this means is that instead of forcing Photoshop to play back each and every frame, which can slow things down, you’re giving it permission to skip some frames. This will loosen up the playback and make it appear smooth. This isn’t a big deal in a video like mine because the entire minute and a half is just water running. You’ll have to be the judge of whether or not the feature works for you.To allow frame skipping, click on the menu that’s located at the right side of the Timeline panel and select Allow Frame Skipping. That’s all you need to do.

Muting Audio
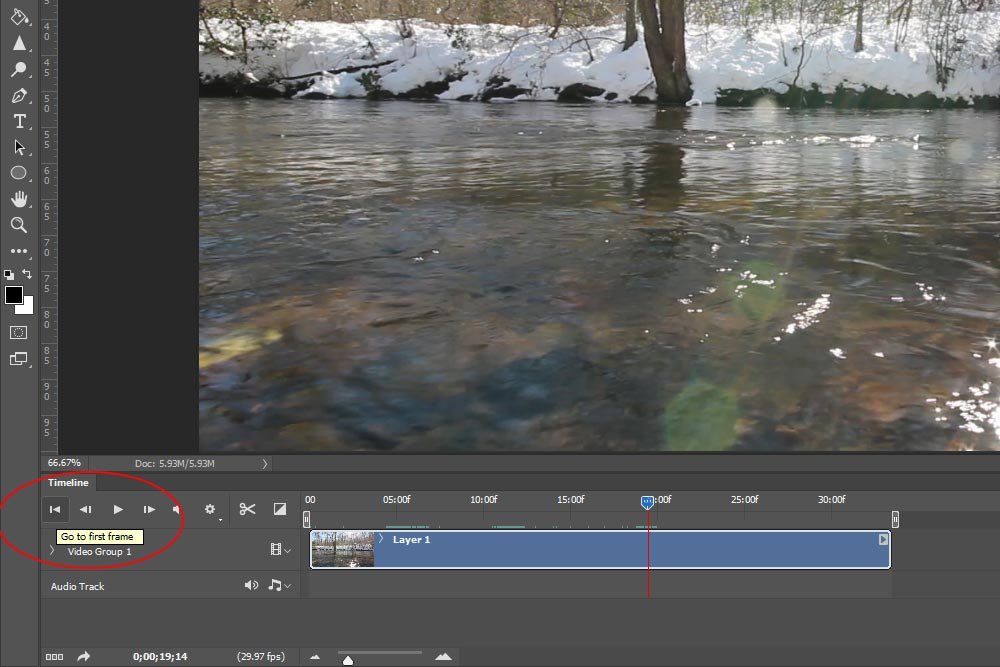
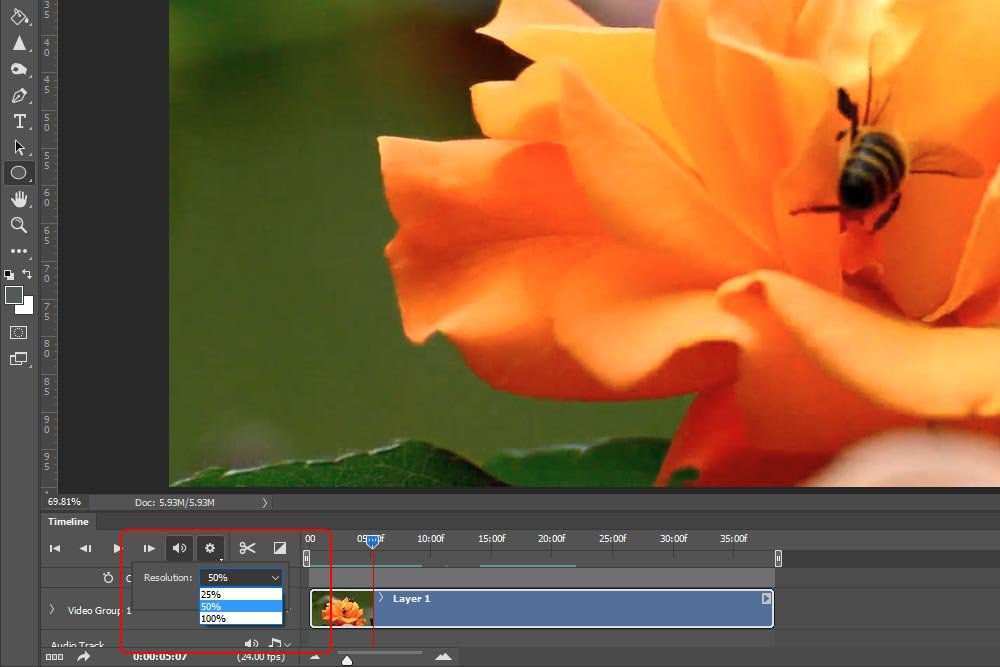
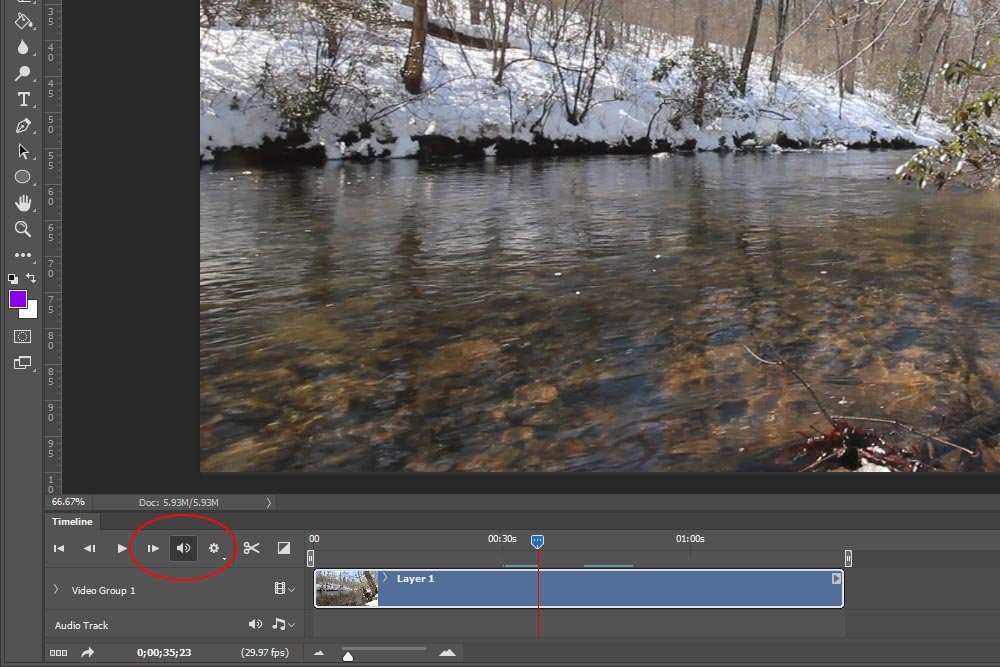
When I recorded my video, I used an external microphone on my Canon Rebel T3i. Due to this, I captured some really crisp sound. The thing is, even through the sound is good, I might not want to hear it during my entire editing process. So, I may mute the audio while editing. To do this, I’ll simply click the Mute Audio Playback button in the Timeline panel.
That’s all I’m going to cover for this post. I hope I began to familiarize you with the Timeline panel in Adobe Photoshop. If you have any questions or comments, please leave them in the comment section below. Thanks!

