LukeLewis
Member
- Joined
- May 7, 2021
- Messages
- 134
- Reaction Score
- 0
- Points
- 21
- #1
If you’re an Adobe Lightroom user, the Spot Removal tool is one of your primary “go-to” tools. It may even be more than that. Perhaps it’s your number one “go-to” tool. Whatever the case, you surely need to know how to use it. Remove a speck here or a blemish there – it’s definitely a helpful feature that can turn an average photo into a spectacular one. There are, however, a few things you need to be aware of.
As I’ve said a zillion times, Adobe Camera Raw is Lightroom’s twin. So, if you know how to use this tool over there, you can quickly pick it up over here. There are a few minor interface differences that stand in your way. By the way, if you want to check out the similar post I wrote about Camera Raw, please click through to them via the links below.
How to Remove Face Blemishes in Adobe Camera Raw
Heal & Clone with Spot Removal in Adobe Camera Raw
In today’s post, I’ll walk through the process of removing a spot in a photograph using Adobe Lightroom. Depending on the photo I choose to use as a demo, this “spot” can be a freckle, blemish or some other artifact that someone like you would want to disappear. Let’s see how things go.

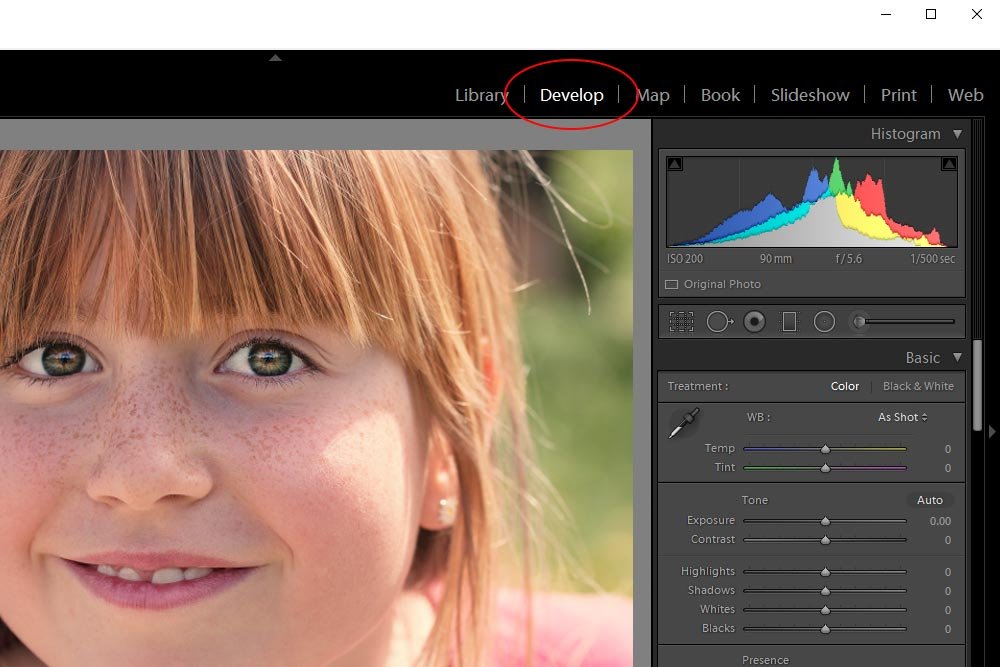
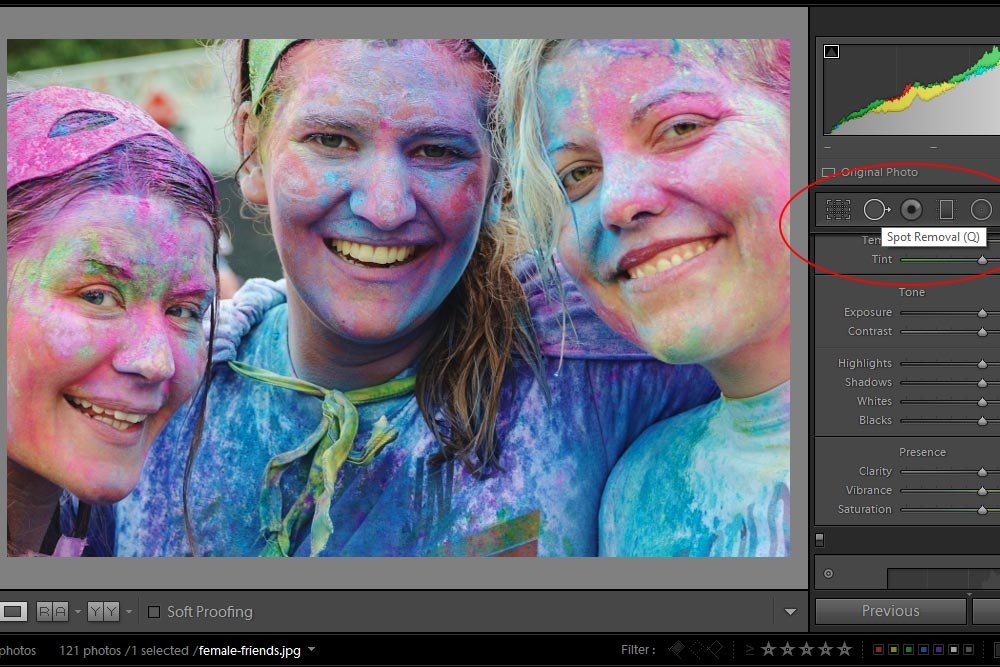
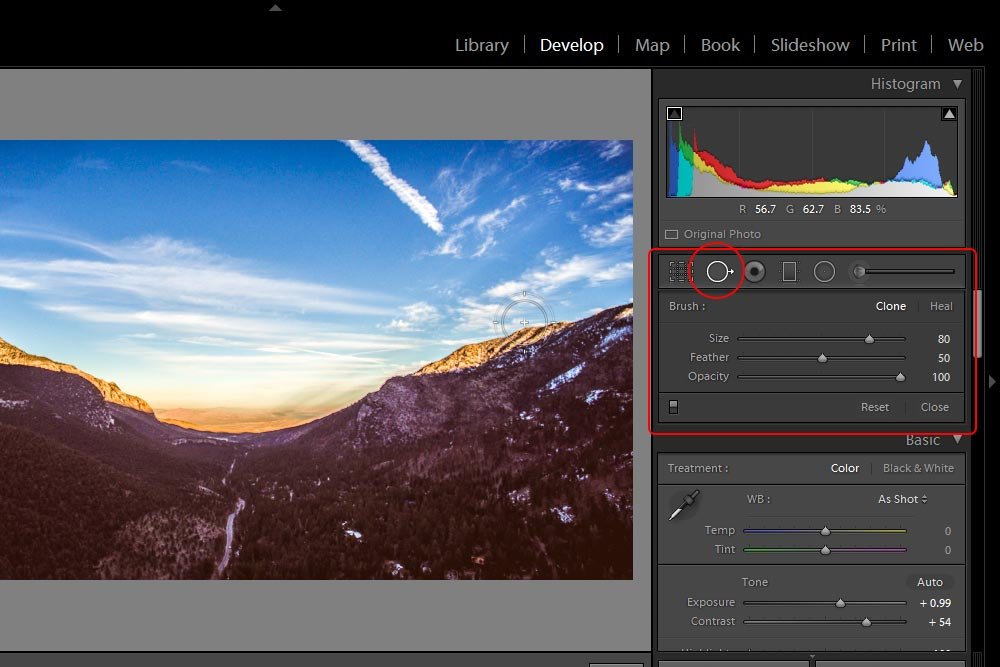
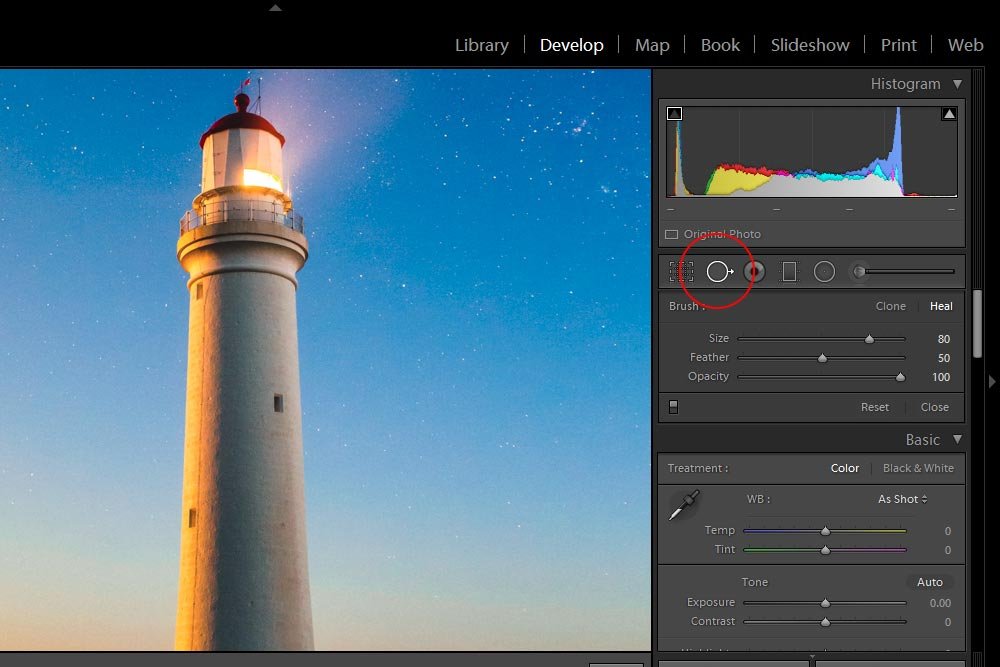
Once in that module, you can either press the Q key on your keyboard as a shortcut or you can simply click on the Spot Removal tool icon in the toolbar in the right column.
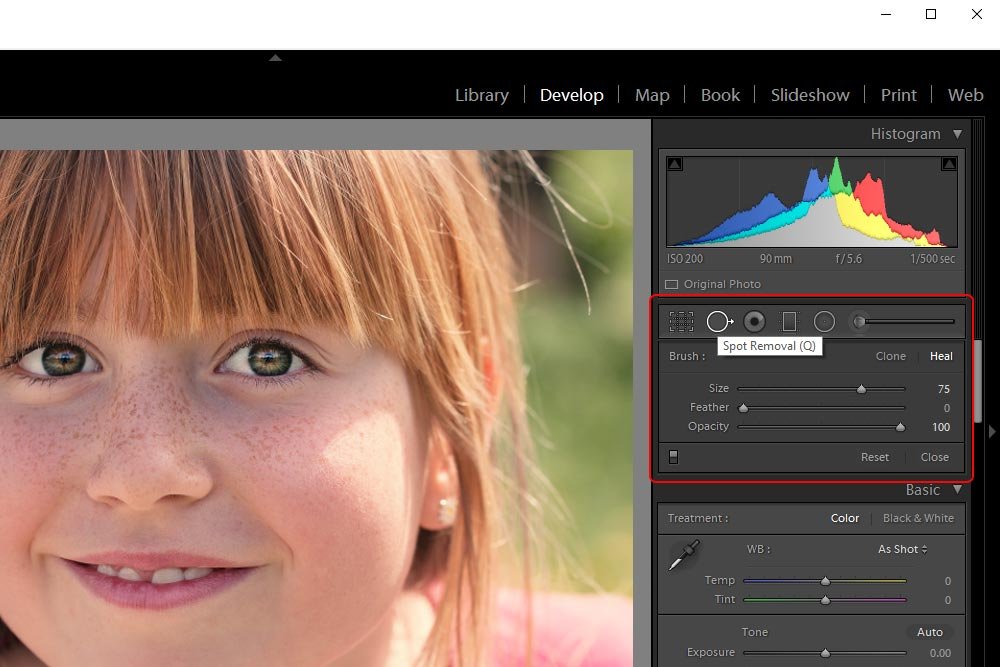
After that, we’re good to go.
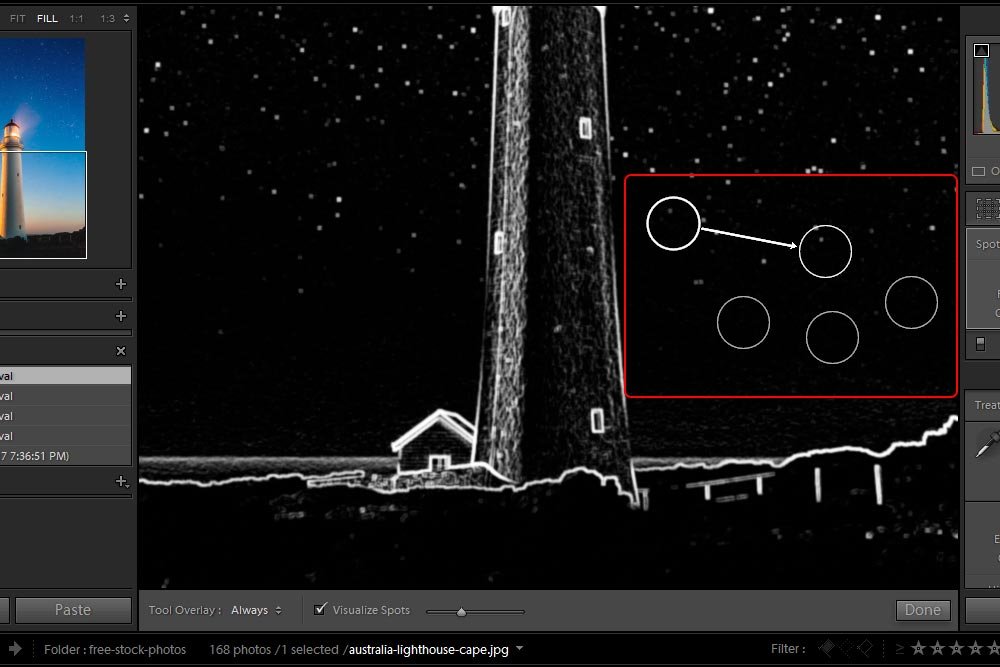
Starting off in the right column (the area in the red box above), I’ll give some definitions.
Spot Edit: With this feature, we’ve got two choices – Clone and Heal. They’re actually quite intuitive to understand.
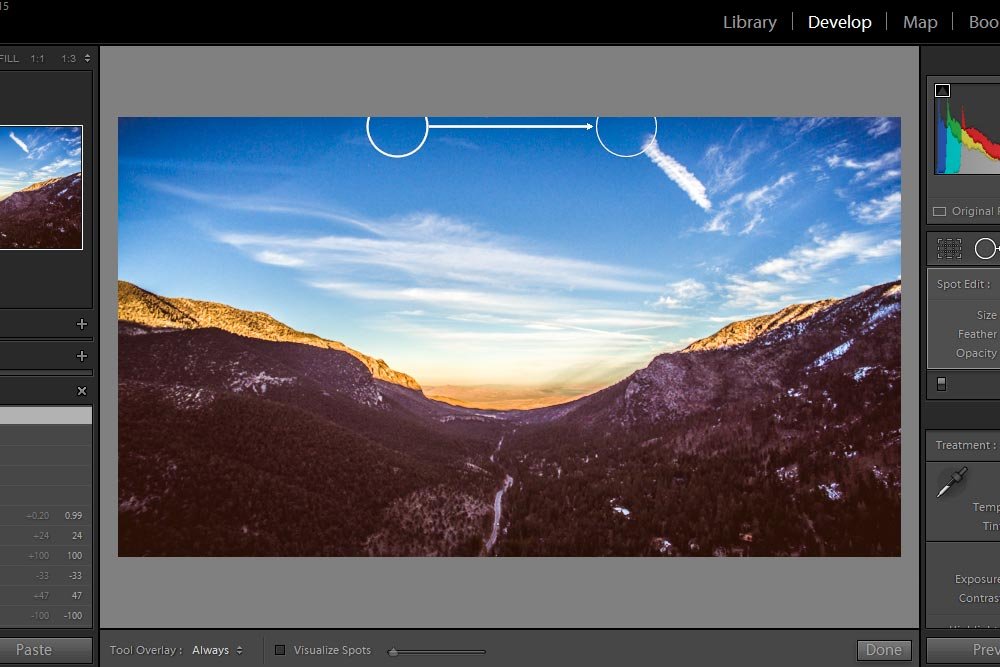
Let’s say you would like to create an exact duplicate of a specific area in a photo in another area. In this case, you’d choose the Clone option. When I click somewhere in the photo, another similar area will appear and I’ll have the ability to drag this new area around until I find something I’d like to replace the first area with. Let me give you an example.
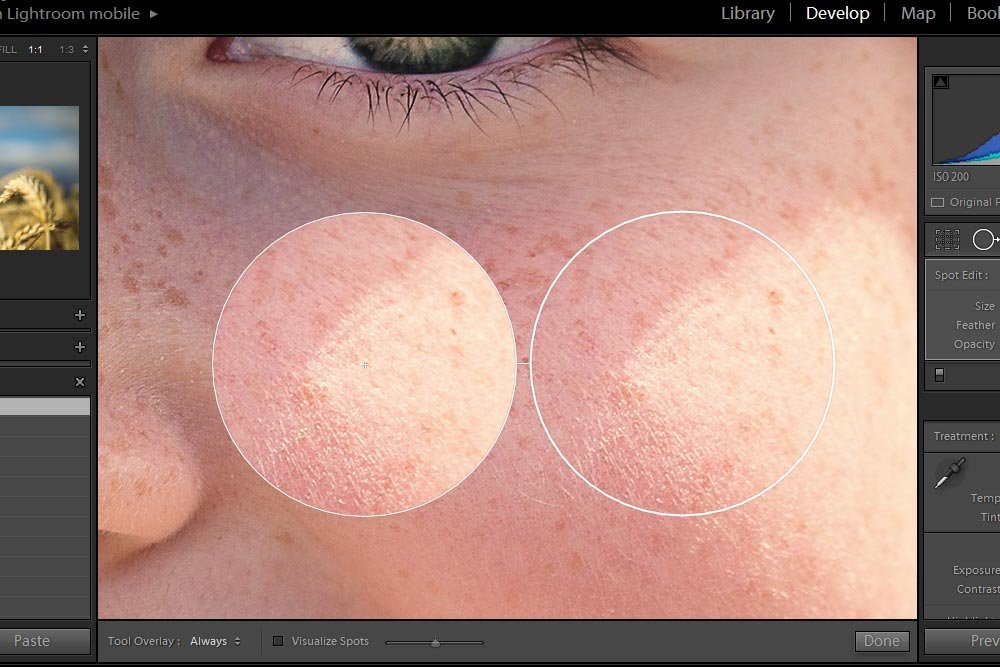
In the above screenshot, I selected the area on the left with the Spot Removal tool. I’m using the Clone feature and I moved the circle on the right so it sits in a fairly distinct spot on the face. I did this because it’s a very clear example of how the Clone feature works. Basically, the area I selected is now replaced by the circle on the right. It’s that simple.
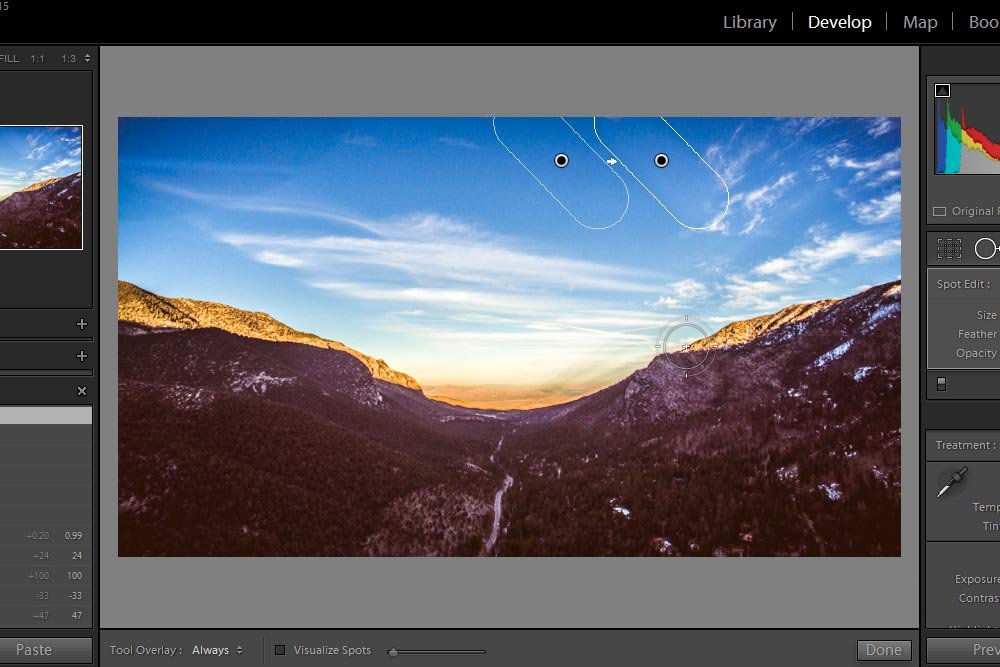
While these two circles are active, I can change which option I’d like to use. I’ll go ahead and now click on the Heal option so you can see what happens.
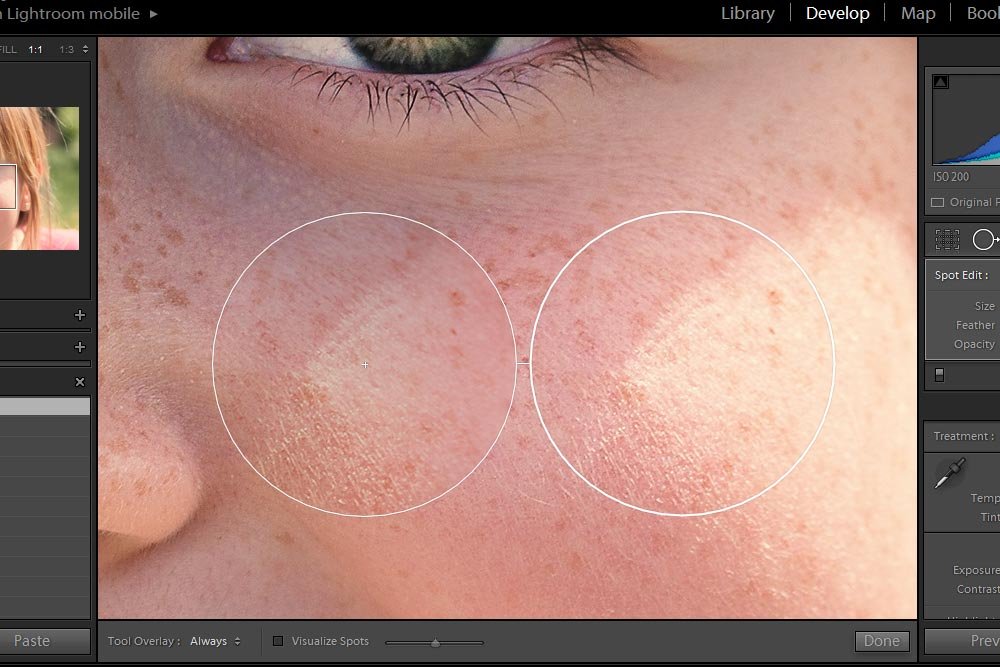
As you can see, the area on the left (the target area) now matches the surrounding area much more. This is because Lightroom attempted to blend the area on the right (the source area) with what was already existing. You can still see the sunlight from the source area, but it’s much more subtle. When removing blemishes on someone’s face, I almost always use Heal. It’s so much more forgiving and easy to work with.
Size: This one is really easy. The Size slider controls the size of the tool. In this next screenshot, I increased the size from the last. I also changed it back to Clone, just because I’m giving examples here.
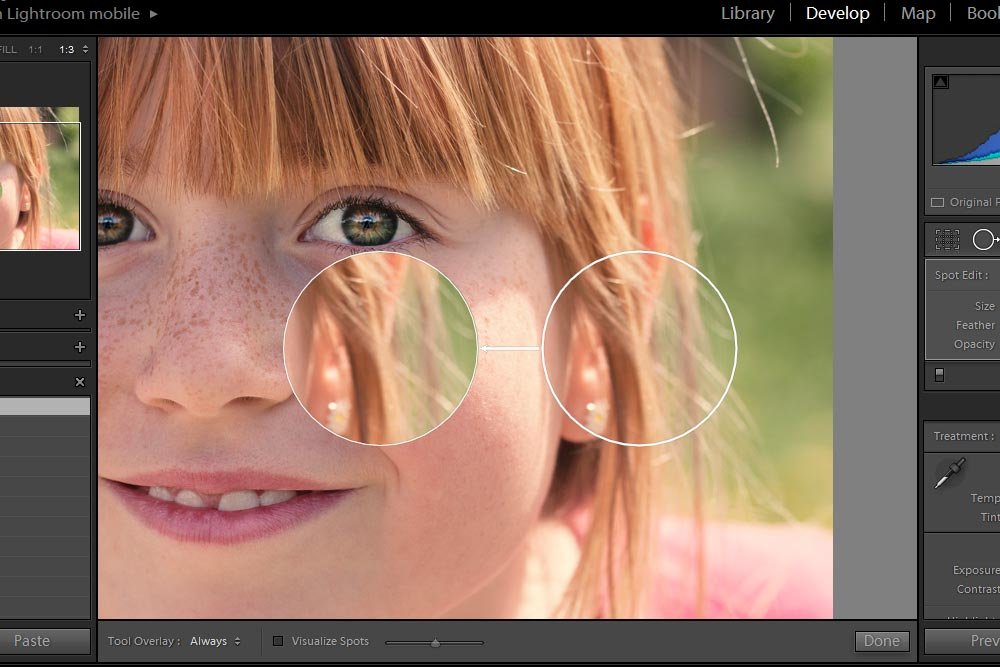
FYI – To increase or decrease the size of the tool, you can either push the slider back and forth or you can press the [ and ] keys on your keyboard. I encourage you to use the keyboard. It’s much faster.
Feather: As things are right now, there is virtually no feathering when using this tool. Feathering is merely how soft the transition is between the edge of the tool and the center of it. I’ll go ahead and move the Feather slider all the way to the right to give you an indication of how soft things can become. Be sure to keep your eye on the left circle.
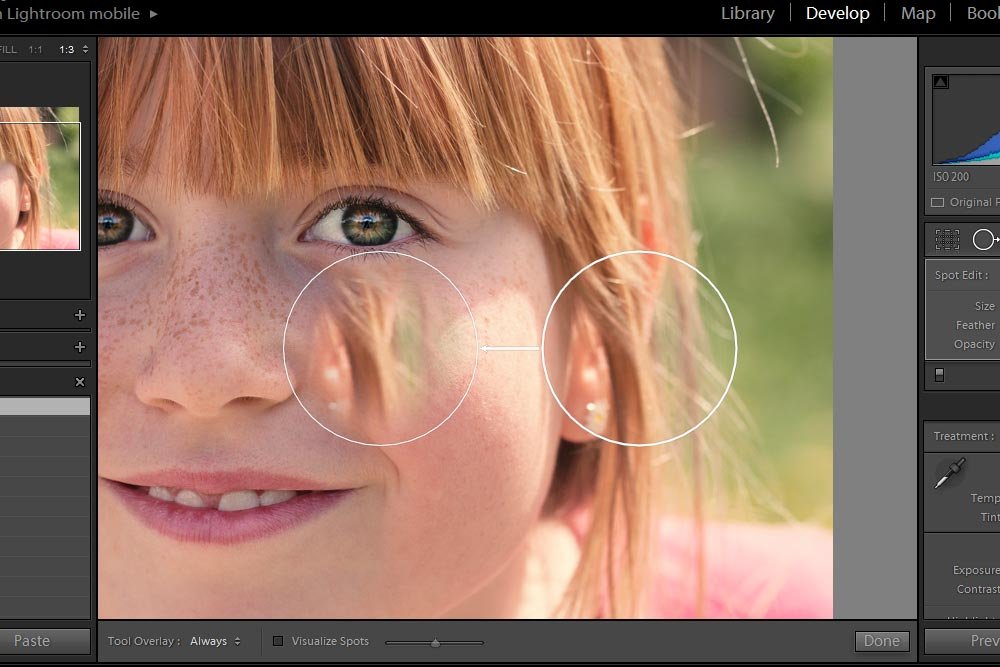
With all this feathering going on, Lightroom is pulling over a soft-edged copy of the right circle.
Opacity: The Opacity slider controls how visible the source circle will be. If it’s at 100%, all of it will be visible and if it’s 0%, none of it will be visible. I’ll move the slider to 50% so you can see what I’m referring to.
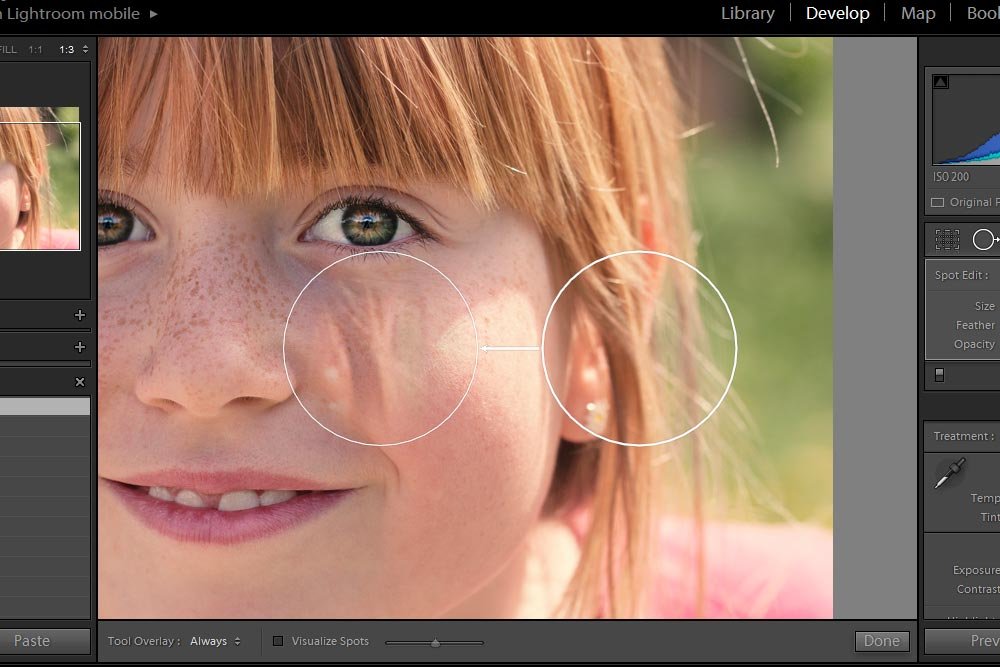
Now, the left circle shows a fairly light copy of the right circle.
To remove some of the freckles, I’ll reduce the size of the brush so it’s just a tad bit larger than the freckle itself. Then, I’ll choose Heal and set the Feather to about 50%. Finally, I’ll keep the Opacity setting at 100%, because I would like the freckle completely gone.
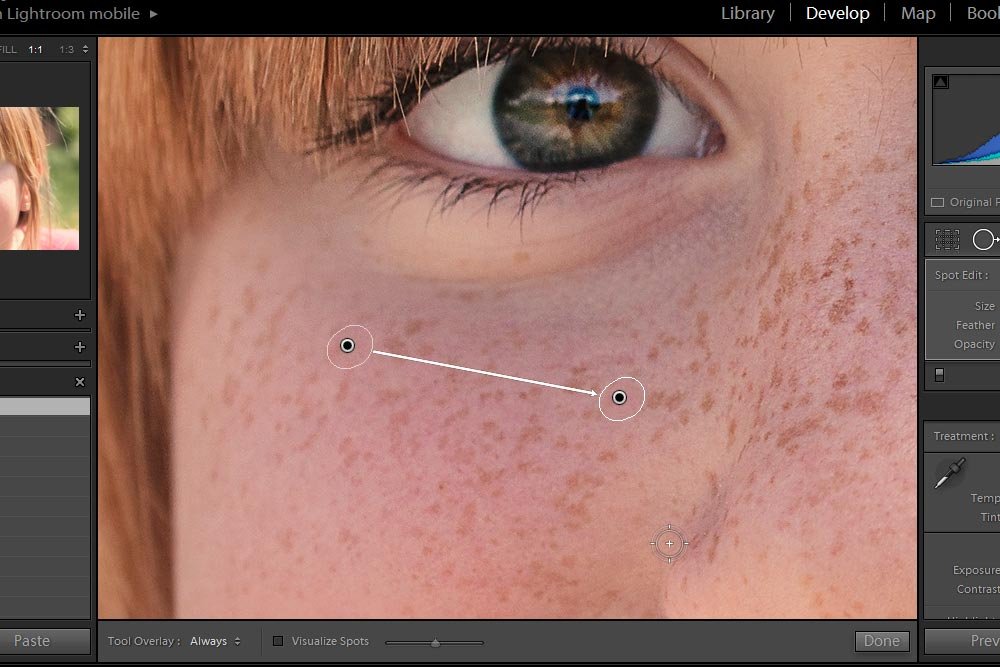
In this case, I clicked and drew over one of the freckles and Lightroom automatically found a similar area to to pull from. When I let go, this is what remained (above). If I continue clicking, drawing and removing freckles, I’m left with many areas that I’ve worked.
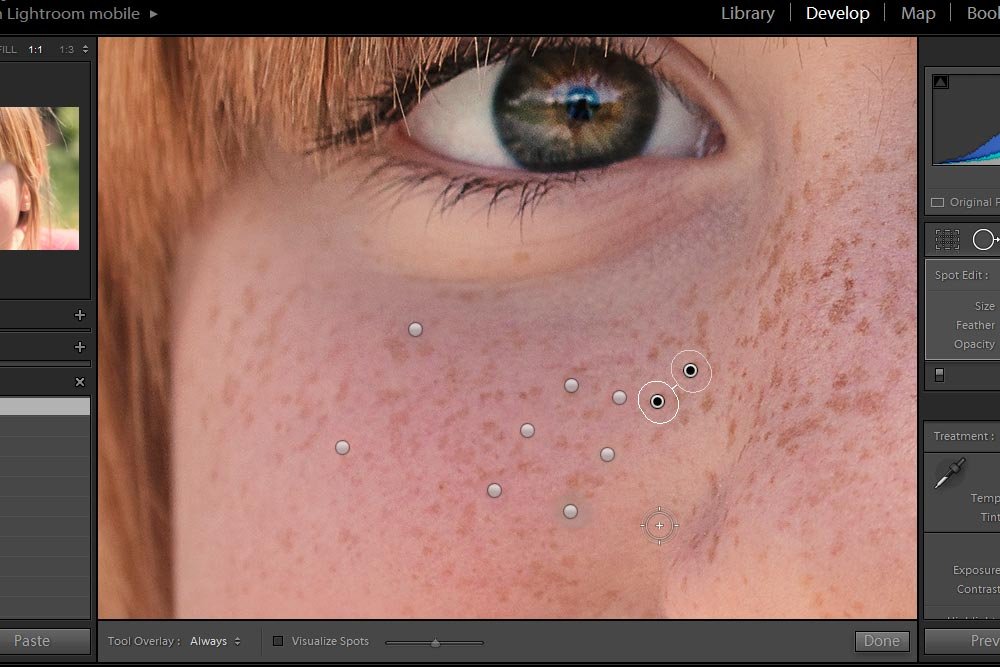
If you make a mistake and don’t want to go through with one of these spot removals, you can easily delete that particular area to start over. I’ll explain exactly how to do this below.
Also, one more point, if you would like to move around either the target area or the source area, all you need to do is to click on either area and drag it where ever you’d like.
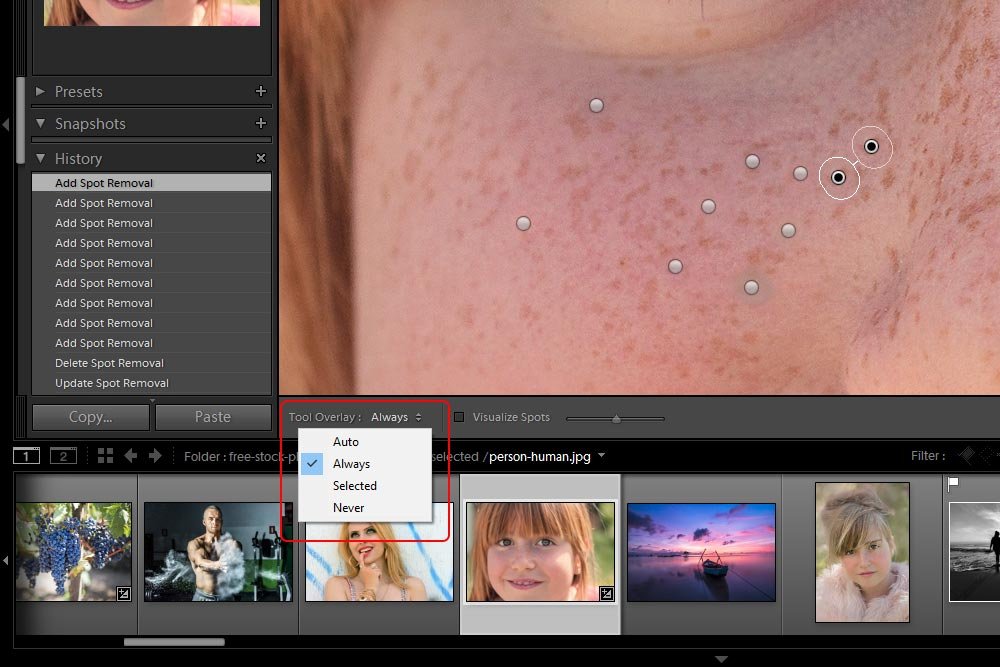
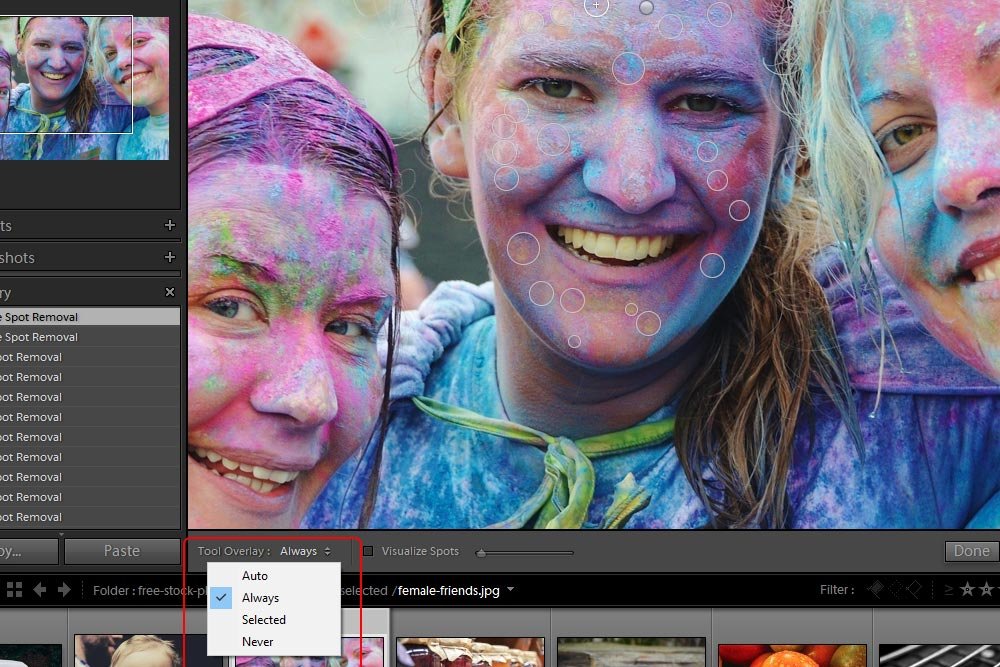
If I click on the drop-down that’s to the right of the Tool Overlay heading, I’ll see four options. They are Auto, Always, Selected and Never. I’ll explain what each of these means below.
Auto: If I choose this option, the pins will only be visible when I roll my mouse over the photograph. When I roll the mouse off the work area, the pins disappear. This is probably the most desirable setting because if gives you quick access to view your changes without any of the source or target area outlines covering things up.
Always: The pins will always be visible when the Spot Removal tool is active. You may like this or you may not. It’s up to you.
Selected: Only the active source and target areas will be highlighted. You’ll need to select them to activate them. All others will be invisible. The way to find the inactive areas is to roll over them with your mouse. When the pointer turns into a hand, that’s when you’ve hit one of them.
Never: None of the spots you’ve worked on will be visible ever.
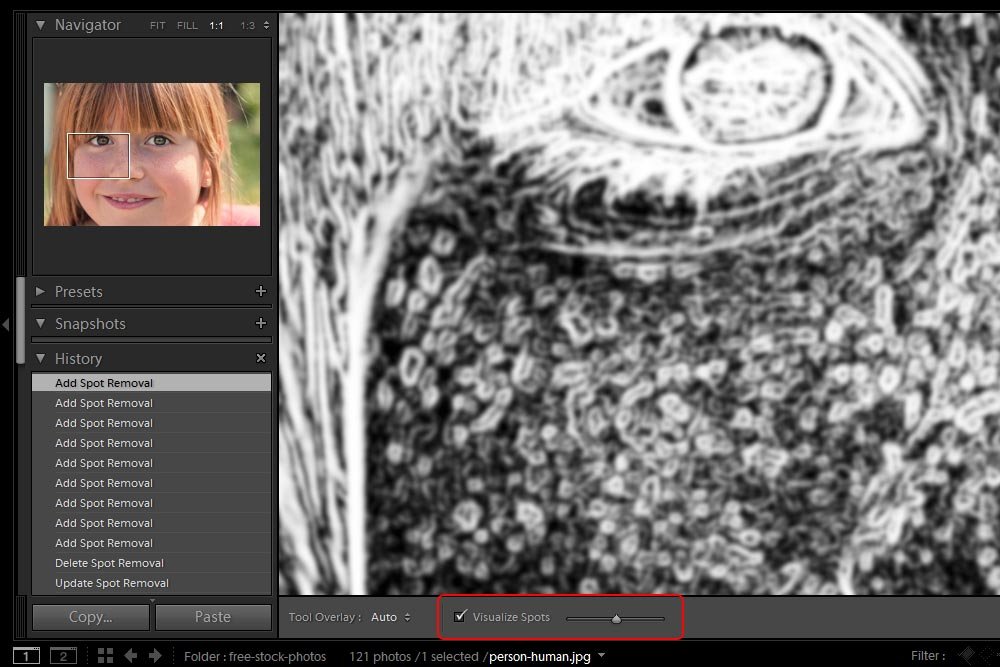
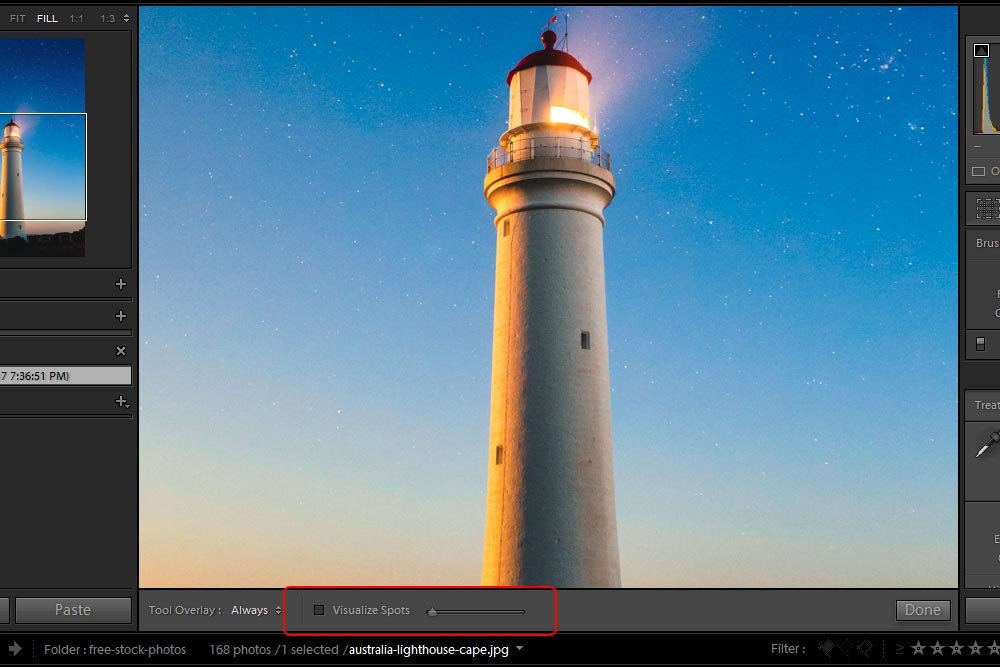
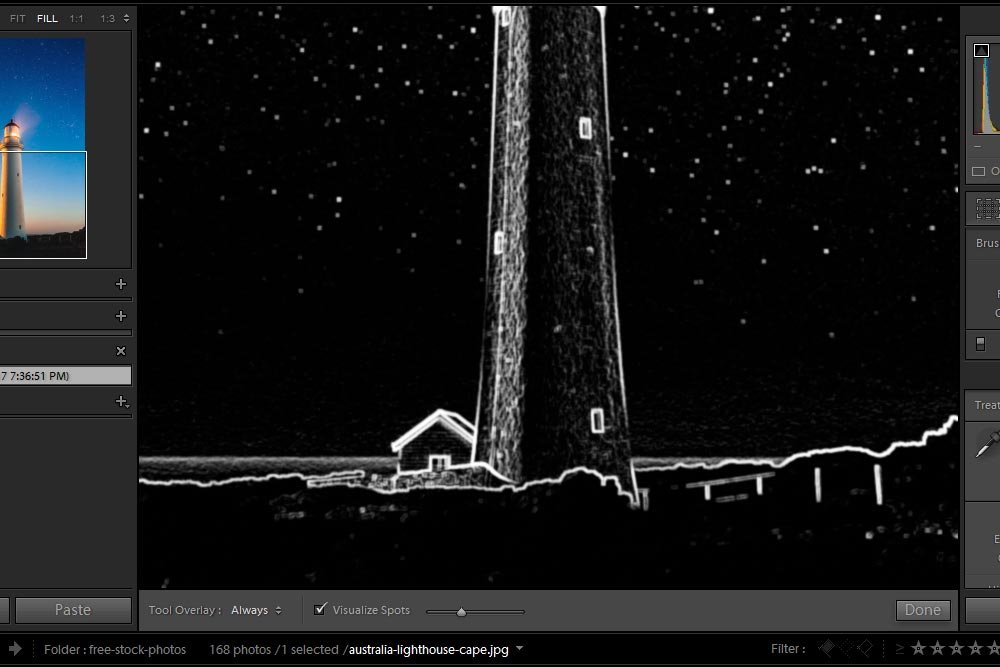
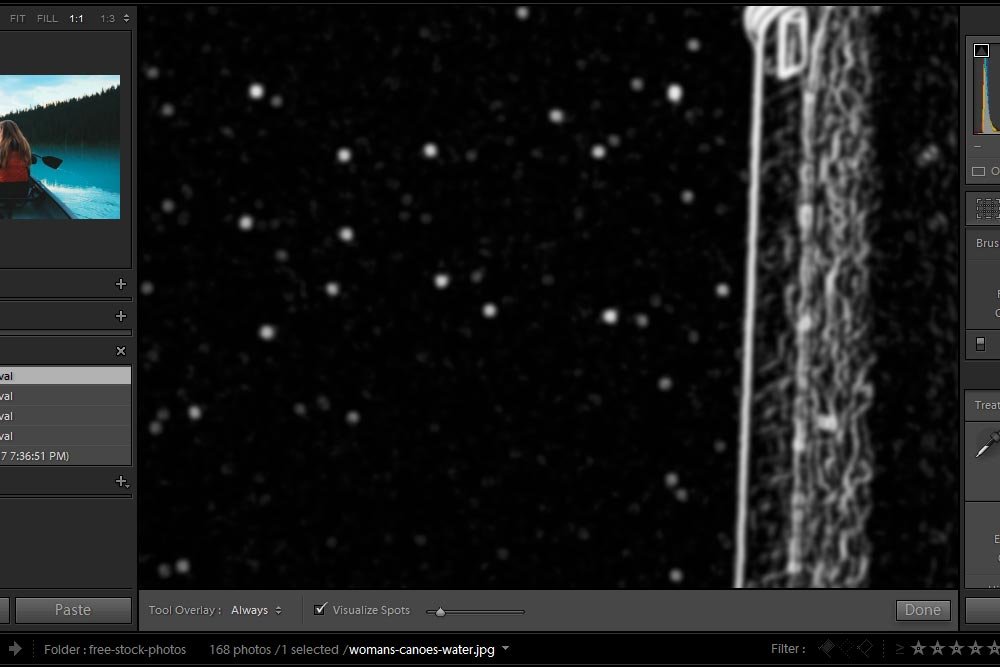
With this feature enabled, every freckle and anything else that is distinct from the background will appear white. The background will remain black. You can also adjust the intensity of the tool by pushing the slider to the left and right. Left lightens the intensity and right darkens it. You can even edit in this view – it’s not only for viewing.
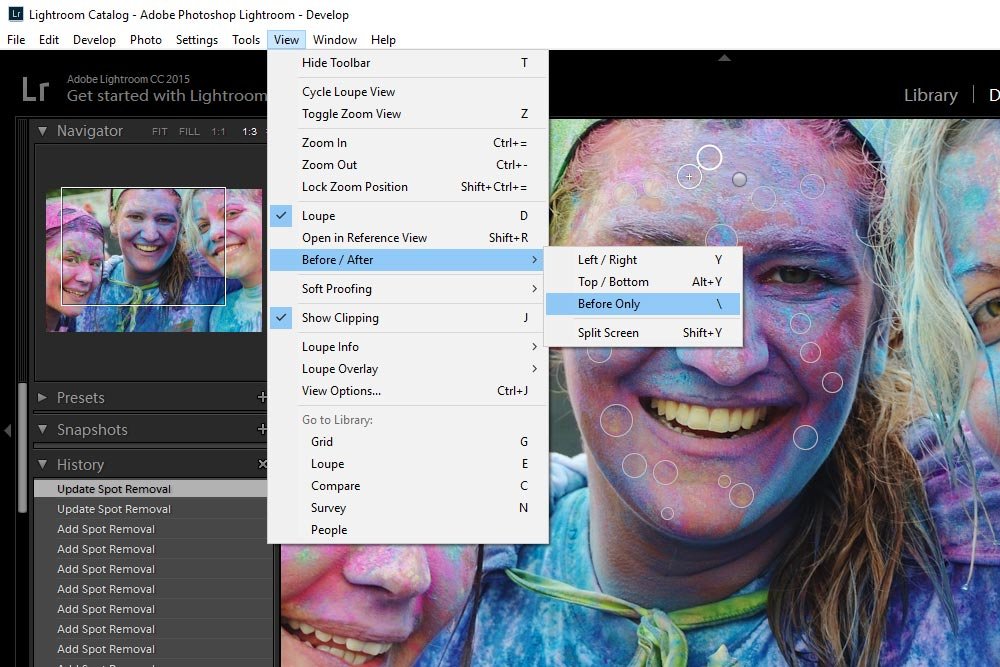
To view the before and after versions of the photo at hand, all you need to do is to set your Tool Overlay setting to Auto or Never and roll the mouse off the work area so the pins disappear. Then, press the backslash (\) key on your keyboard. This will toggle your changes on and off.
Well there you have it – how to work with the Spot Removal tool in Adobe Lightroom. If you have any questions or concerns, please leave them for me in the comment section below. Thanks for reading!
As I’ve said a zillion times, Adobe Camera Raw is Lightroom’s twin. So, if you know how to use this tool over there, you can quickly pick it up over here. There are a few minor interface differences that stand in your way. By the way, if you want to check out the similar post I wrote about Camera Raw, please click through to them via the links below.
How to Remove Face Blemishes in Adobe Camera Raw
Heal & Clone with Spot Removal in Adobe Camera Raw
In today’s post, I’ll walk through the process of removing a spot in a photograph using Adobe Lightroom. Depending on the photo I choose to use as a demo, this “spot” can be a freckle, blemish or some other artifact that someone like you would want to disappear. Let’s see how things go.
The Original Photo
After a bit of searching, I think I’ve located a really good photo to work on for today’s tutorial. The picture is of a young girl who happens to have some wonderful freckles. Now, I want to be clear about this right now – there’s nothing I want to remove in this photo. I think her freckles are awesome. The thing is, working with freckles like this is going to be perfect for what we want to look at in regards to the Spot Removal tool. There are some aspects that I’d like to explain and the photo will lend itself to these aspects very well. It’s going to be great.
Accessing the Spot Removal Tool
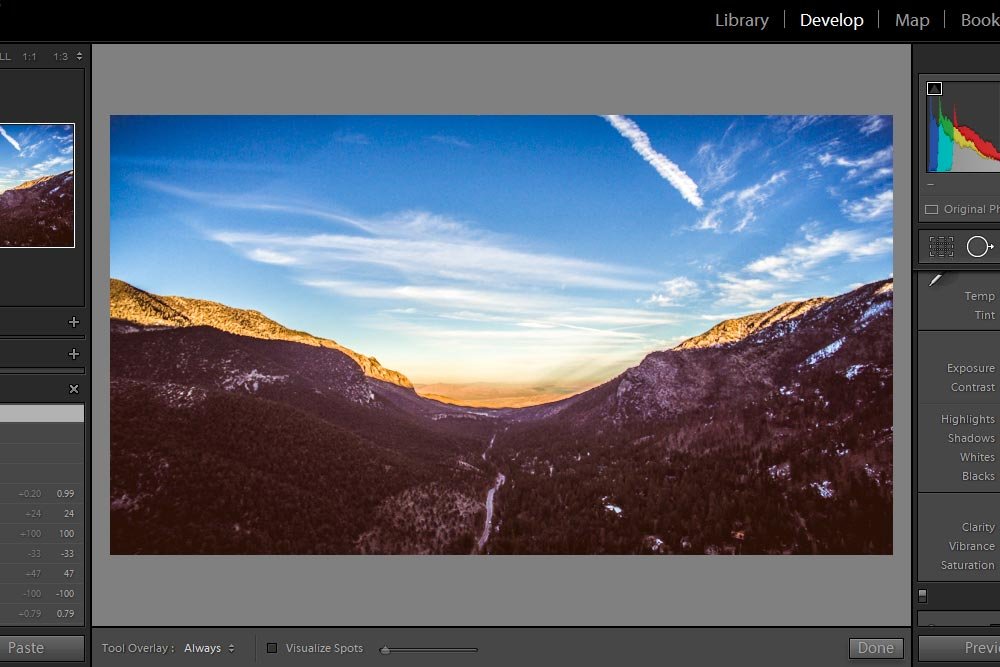
Finding and accessing the Spot Removal tool is easy. After launching Lightroom and locating your photos, simply choose which photo you’d like to work on and then click into the Develop module. That’s exactly what I did here:
Once in that module, you can either press the Q key on your keyboard as a shortcut or you can simply click on the Spot Removal tool icon in the toolbar in the right column.

After that, we’re good to go.
Defining the Tool’s Features
There are many ways to go about learning how to use this tool. I think the best one of them is to first find out what we’re dealing with. To do this, I’ll work my way through each of the most important features this tool offers.Starting off in the right column (the area in the red box above), I’ll give some definitions.
Spot Edit: With this feature, we’ve got two choices – Clone and Heal. They’re actually quite intuitive to understand.
Let’s say you would like to create an exact duplicate of a specific area in a photo in another area. In this case, you’d choose the Clone option. When I click somewhere in the photo, another similar area will appear and I’ll have the ability to drag this new area around until I find something I’d like to replace the first area with. Let me give you an example.

In the above screenshot, I selected the area on the left with the Spot Removal tool. I’m using the Clone feature and I moved the circle on the right so it sits in a fairly distinct spot on the face. I did this because it’s a very clear example of how the Clone feature works. Basically, the area I selected is now replaced by the circle on the right. It’s that simple.
While these two circles are active, I can change which option I’d like to use. I’ll go ahead and now click on the Heal option so you can see what happens.

As you can see, the area on the left (the target area) now matches the surrounding area much more. This is because Lightroom attempted to blend the area on the right (the source area) with what was already existing. You can still see the sunlight from the source area, but it’s much more subtle. When removing blemishes on someone’s face, I almost always use Heal. It’s so much more forgiving and easy to work with.
Size: This one is really easy. The Size slider controls the size of the tool. In this next screenshot, I increased the size from the last. I also changed it back to Clone, just because I’m giving examples here.

FYI – To increase or decrease the size of the tool, you can either push the slider back and forth or you can press the [ and ] keys on your keyboard. I encourage you to use the keyboard. It’s much faster.
Feather: As things are right now, there is virtually no feathering when using this tool. Feathering is merely how soft the transition is between the edge of the tool and the center of it. I’ll go ahead and move the Feather slider all the way to the right to give you an indication of how soft things can become. Be sure to keep your eye on the left circle.

With all this feathering going on, Lightroom is pulling over a soft-edged copy of the right circle.
Opacity: The Opacity slider controls how visible the source circle will be. If it’s at 100%, all of it will be visible and if it’s 0%, none of it will be visible. I’ll move the slider to 50% so you can see what I’m referring to.

Now, the left circle shows a fairly light copy of the right circle.
Removing Some Freckles
Again, I’m just doing this as an example. I really don’t see anything wrong with tons of freckles.To remove some of the freckles, I’ll reduce the size of the brush so it’s just a tad bit larger than the freckle itself. Then, I’ll choose Heal and set the Feather to about 50%. Finally, I’ll keep the Opacity setting at 100%, because I would like the freckle completely gone.

In this case, I clicked and drew over one of the freckles and Lightroom automatically found a similar area to to pull from. When I let go, this is what remained (above). If I continue clicking, drawing and removing freckles, I’m left with many areas that I’ve worked.

If you make a mistake and don’t want to go through with one of these spot removals, you can easily delete that particular area to start over. I’ll explain exactly how to do this below.
Also, one more point, if you would like to move around either the target area or the source area, all you need to do is to click on either area and drag it where ever you’d like.
Tool Overlay
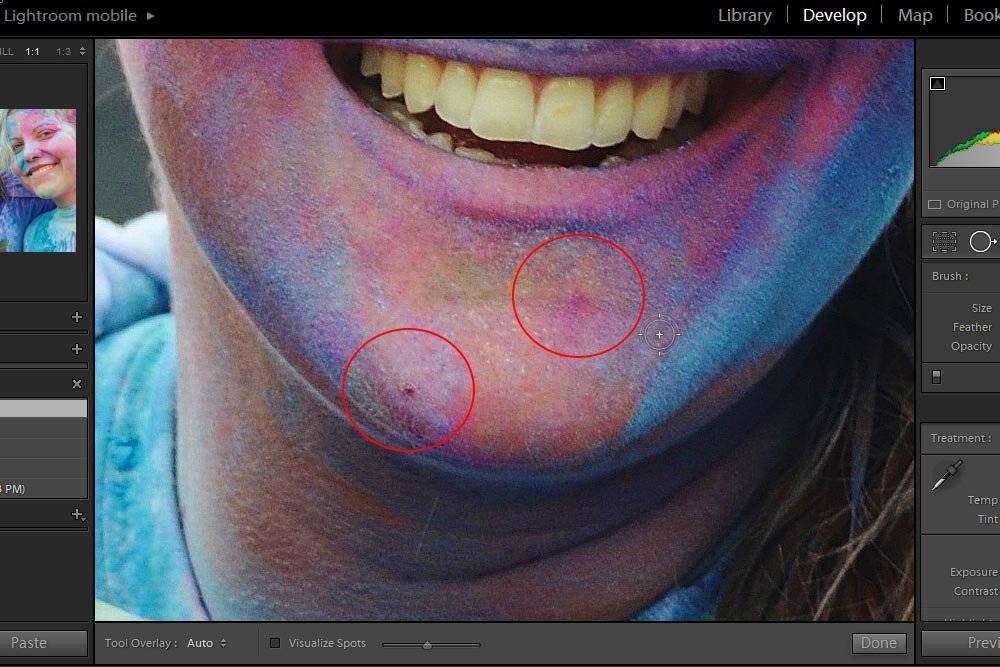
If you look at the screenshot above, you’ll see that there are many spots I altered with the Spot Removal tool. Many editors find the pins distracting. Because of this, Adobe has included a number of settings that control how the pins appear as you’re working inside of Lightroom. They are accessed in the toolbar that’s located directly under the large center photo.
If I click on the drop-down that’s to the right of the Tool Overlay heading, I’ll see four options. They are Auto, Always, Selected and Never. I’ll explain what each of these means below.
Auto: If I choose this option, the pins will only be visible when I roll my mouse over the photograph. When I roll the mouse off the work area, the pins disappear. This is probably the most desirable setting because if gives you quick access to view your changes without any of the source or target area outlines covering things up.
Always: The pins will always be visible when the Spot Removal tool is active. You may like this or you may not. It’s up to you.
Selected: Only the active source and target areas will be highlighted. You’ll need to select them to activate them. All others will be invisible. The way to find the inactive areas is to roll over them with your mouse. When the pointer turns into a hand, that’s when you’ve hit one of them.
Never: None of the spots you’ve worked on will be visible ever.
Visualize Spots
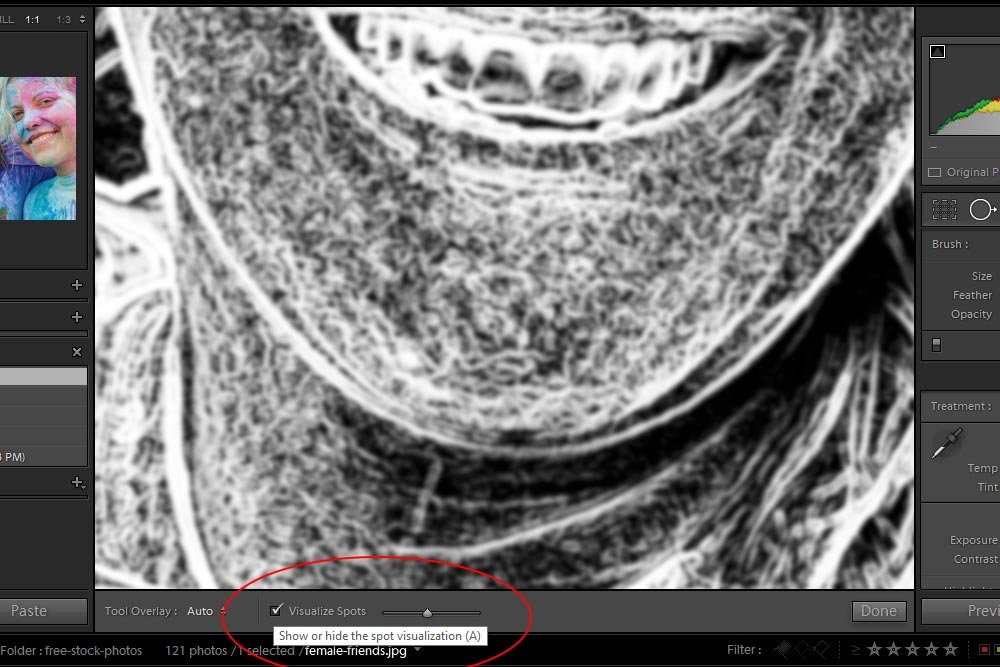
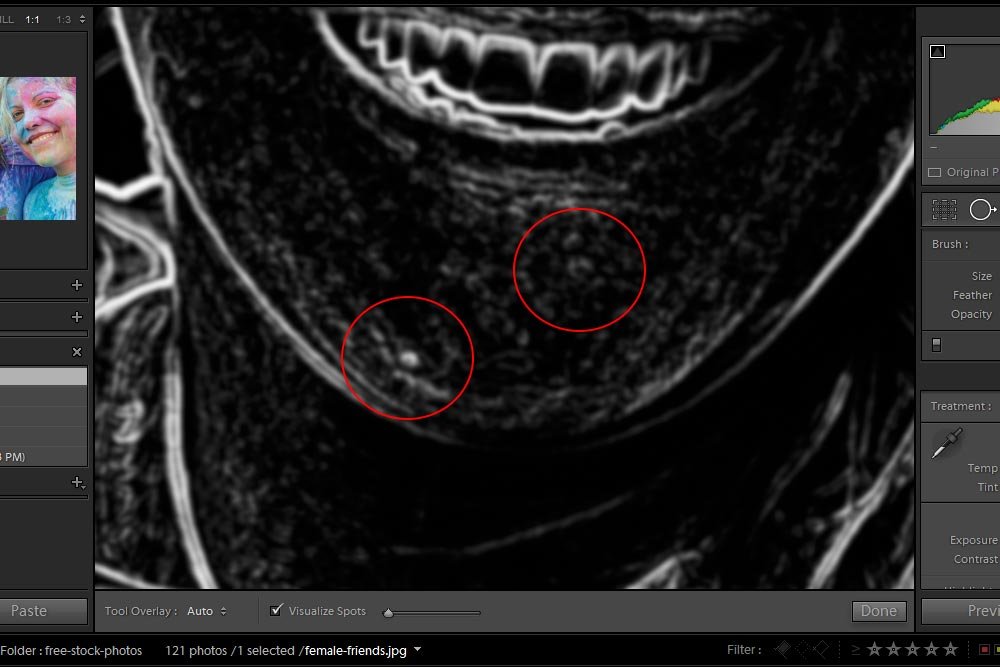
If some of the spots you’d like to work on aren’t all too visible, you can view them another way. Lightroom has an option called Visualize Spots, which turns the photo black and white and makes each and every blemish practically impossible to miss. Let me show you what I’m talking about.
With this feature enabled, every freckle and anything else that is distinct from the background will appear white. The background will remain black. You can also adjust the intensity of the tool by pushing the slider to the left and right. Left lightens the intensity and right darkens it. You can even edit in this view – it’s not only for viewing.
Deleting the Spot Removal Tool Areas
It’s super simple to delete a Spot Removal area you created. All you need to do is to click on it so it’s selected (with the Spot Removal tool active) and then press the Delete key on your keyboard. When you do this, it’ll disappear.Reviewing Before & After Versions
When editing photos in this manner, it’s helpful to look at the before and after versions of the photo itself. Upon viewing these, you may change your mind and make further changes or erase ones you’ve already made. Either way, it’s simple to change these views.To view the before and after versions of the photo at hand, all you need to do is to set your Tool Overlay setting to Auto or Never and roll the mouse off the work area so the pins disappear. Then, press the backslash (\) key on your keyboard. This will toggle your changes on and off.
Well there you have it – how to work with the Spot Removal tool in Adobe Lightroom. If you have any questions or concerns, please leave them for me in the comment section below. Thanks for reading!

