KristinaW
Member
- Joined
- May 7, 2021
- Messages
- 127
- Reaction Score
- 0
- Points
- 18
- #1
I remember a while back when I wrote a post that described how to remove red eye from someone’s eyes using Adobe Camera Raw. If memory serves, I mentioned that I’d do the same type of post, but for Adobe Lightroom. Well, just as luck would have it, red eye is on my mind, so I figured I’d go ahead and write that Lightroom post today. It’s not tough at all, so this should be quick.
In today’s post, I’ll be using a photo of a small boy. He’s staring right at the camera, just like so many others do when they become stricken with this type of condition. I’ll use the Develop module in Lightroom and Lightroom’s Red Eye Correction function to remove the red, so the boy looks normal again.
By the way, if you’re interested in the instructions for how to go about removing red eye in Camera Raw, please take a look at this post:
How to Remove Red Eye From a Photo Using Adobe Camera Raw
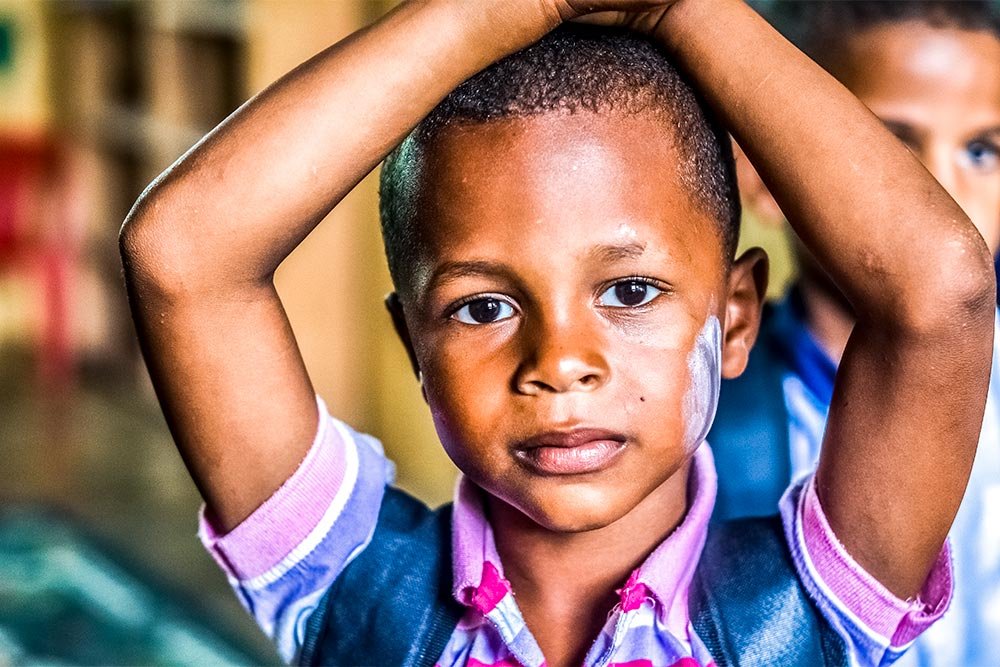
Now, I have to be honest with you here. This is the original photo. Since I was unable to locate one with actual red eye, I had to add some. I think I did a pretty good job at it too. The function in Lightroom works exactly the same as if this were legitimate red eye, so that’s not a concern. It’s the steps of the operation that really matter.
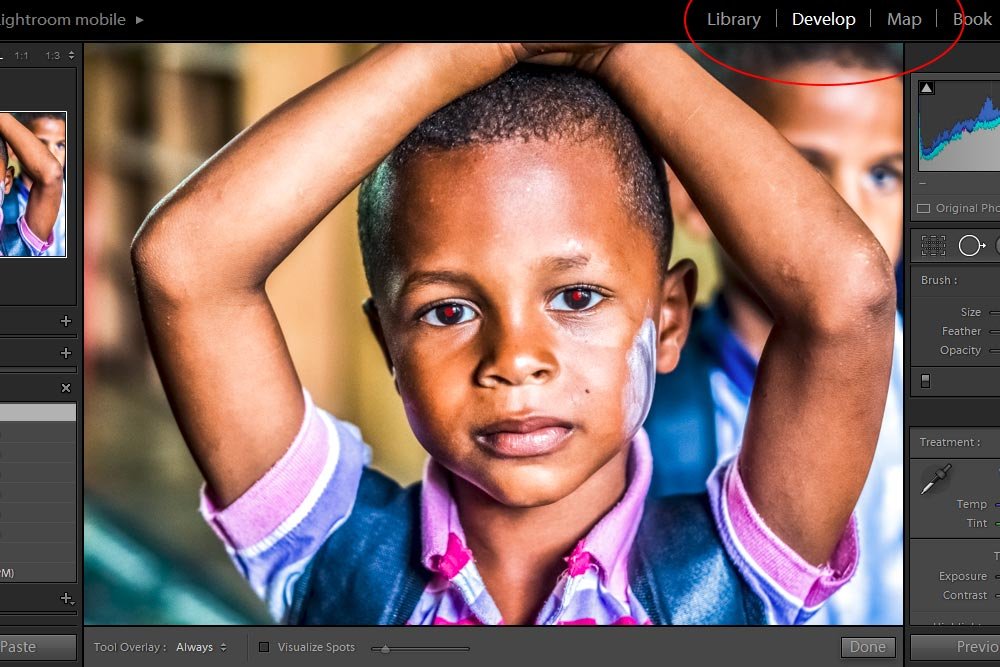
Inside the Develop module, you can find the Red Eye Correction tool, so that’s where I’ll stay.
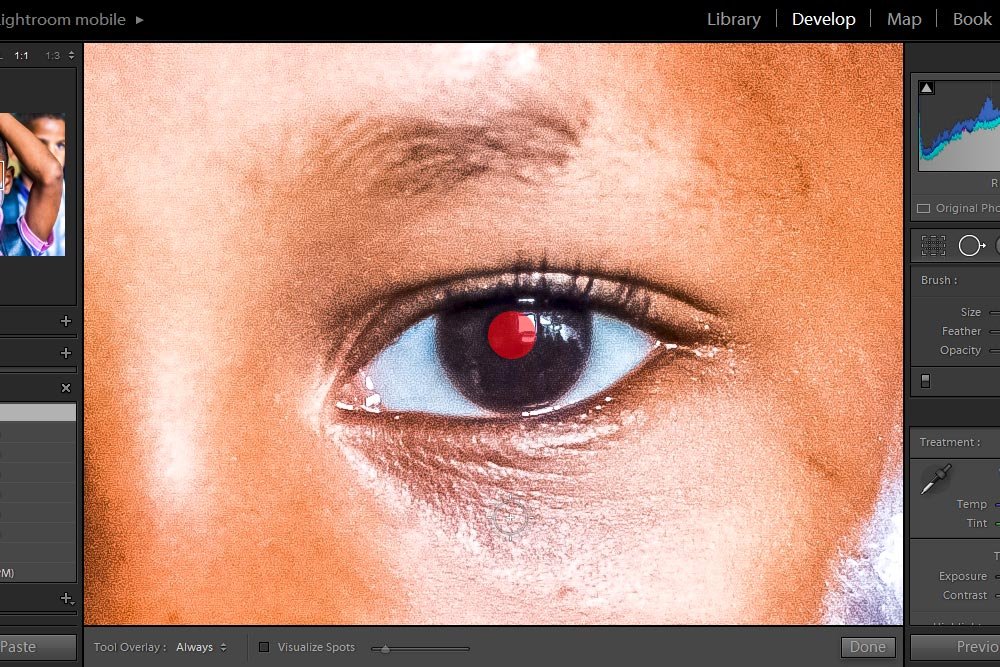
Now that the eye is nice and big, I can see what’s going on. If I head over to the panel on the right and click on the Red Eye Correction tool, I’ll see some buttons appear.
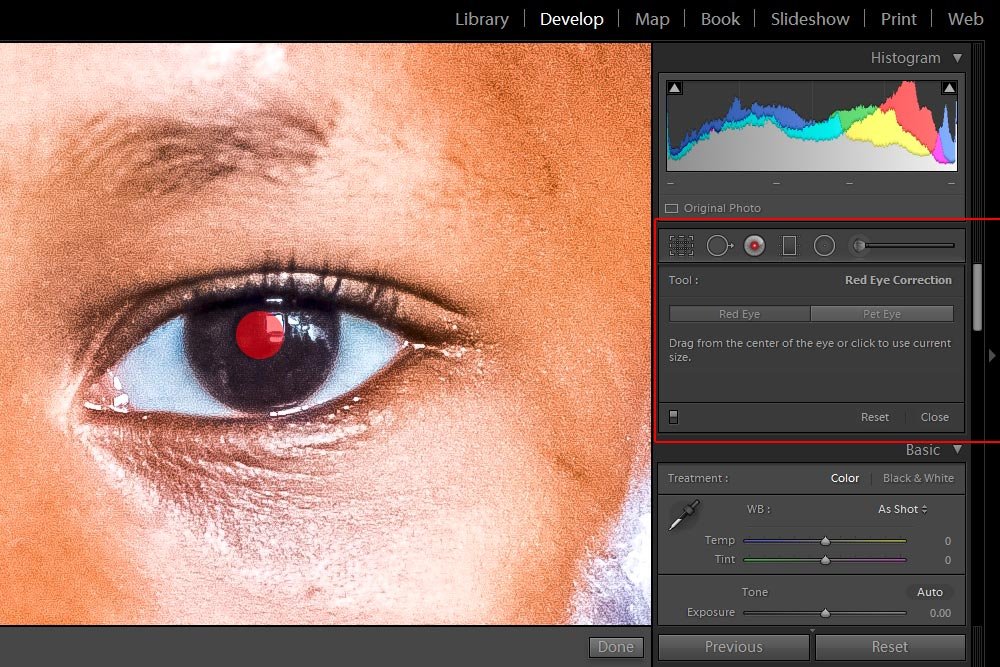
After clicking on this tool, I’ll also notice that my mouse pointer changes from whatever it was to a large crosshair.
Now that the Red Eye Correction panel has been activated, I’ll need to go inside of it and click the Red Eye button to active this specific tool. As you’ll see, there are two buttons available. One for humans and one for pets. I’ll leave the pet eye post for another time.
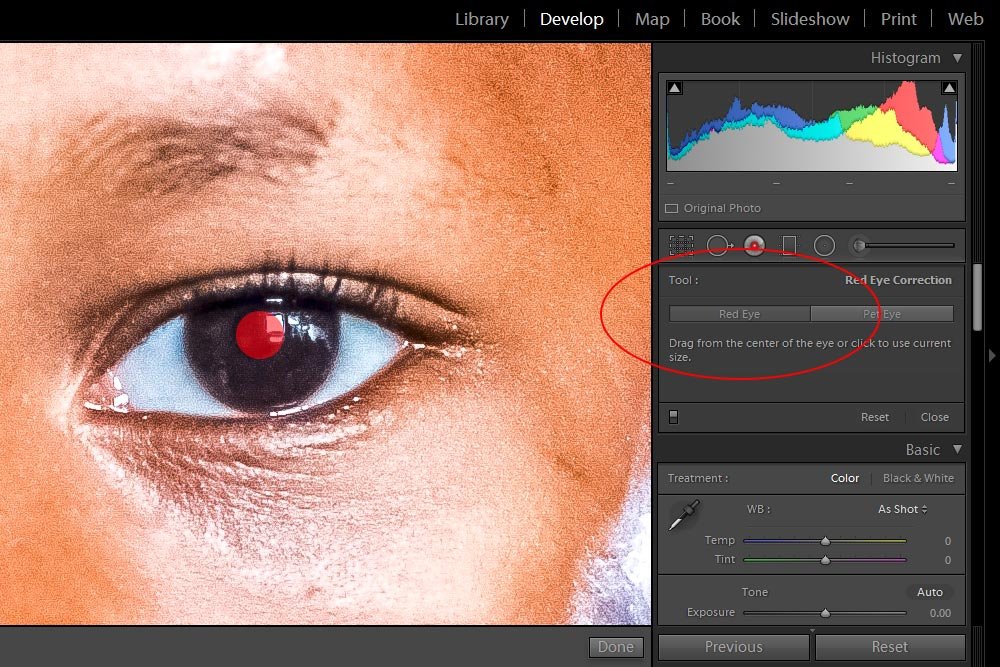
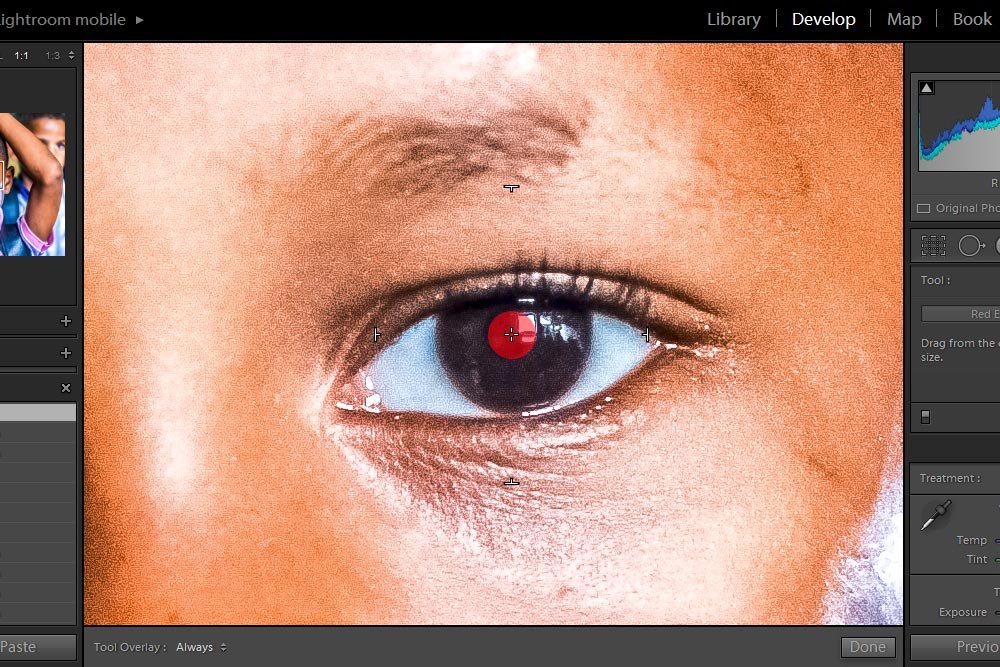
After that, it’s as easy as centering the crosshairs inside of the pupil and clicking. If you look closely in the screenshot below, you’ll see the crosshairs.
After I click on the pupil, Lightroom will perform two operations. First, it’ll search for any red pixels in the target area and desaturate them and second, it will provide two sliders to modify the results of the red eye reduction. As you can see in the screenshot below, a circle remains around the eye that’s able to be dragged around. If Lightroom didn’t target the pupil correctly, the result can be modified.
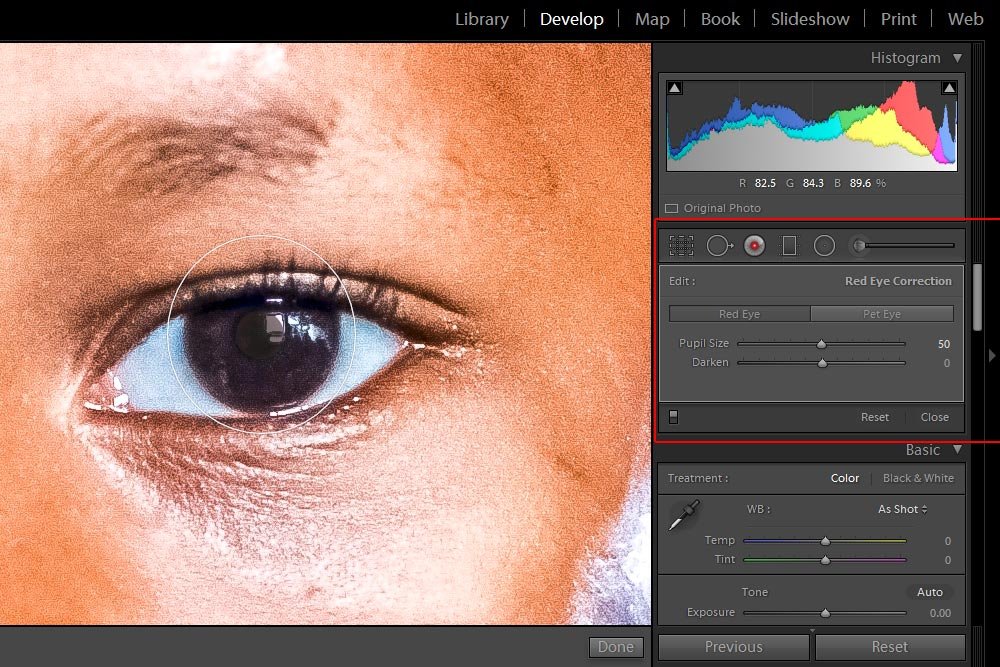
Since I’m happy with this result, I’m not going to push the sliders at all. But just to let you know what they are:
Pupil Size: Shrinks and enlarges the size of the desaturated area that covers the pupil. To grow the pupil size, push the slider to the right and to shrink it, push the slider to the left.
Darken: This slider darkens and lightens the desaturated overlay. To lighten the result, push the slider to the right and to darken it, push it to the left.
Since the boy’s left eye is corrected, I can move on to the right one. To drag the photo over to the other eye while staying inside the Red Eye Correction tool, I’ll hold down the Spacebar on my keyboard. Doing this will change the red eye tool into the little hand grabber tool. Once the other eye is in view, I can perform the same steps as I did above. Here’s the result.
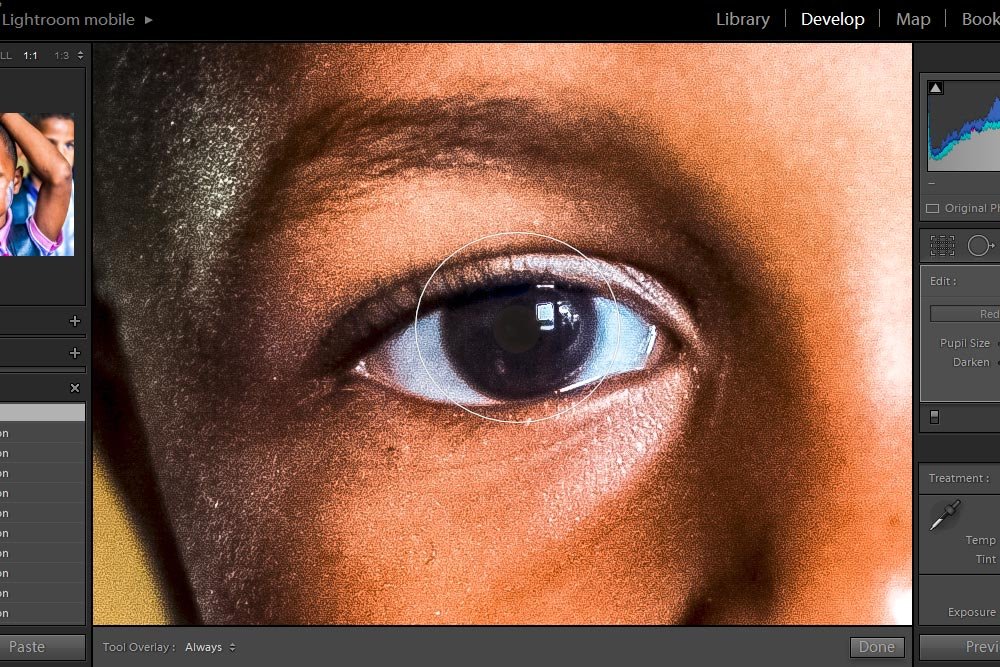
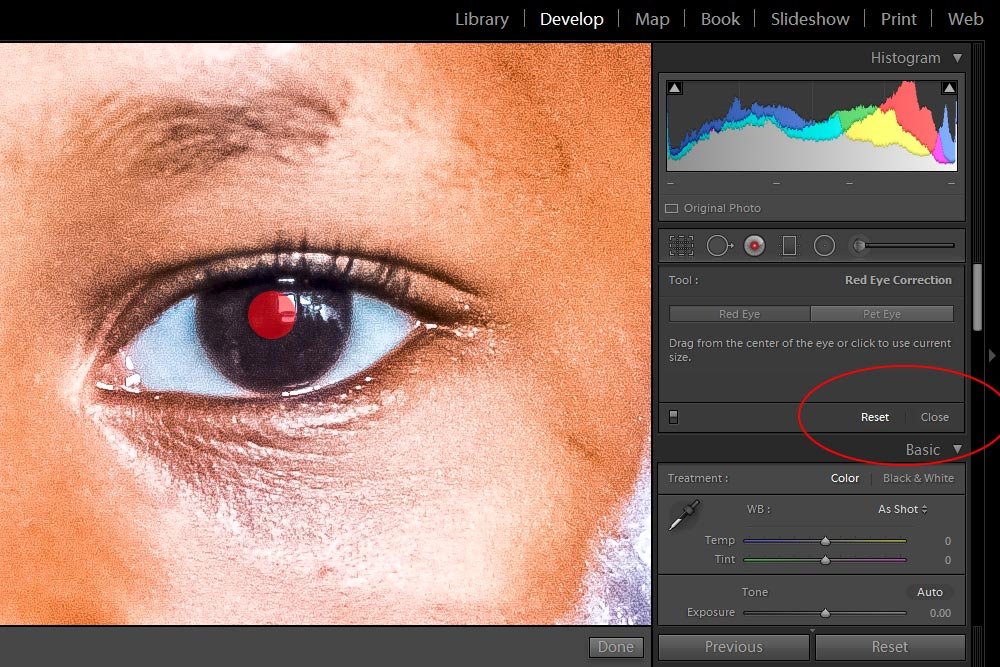
Also, when you’re finished with the tool and want to get out of it, click on the Close button in the same area.
And that’s it!
I told you this one would be quick. Lightroom has made it extra easy to remove red eye from photos. If you have any questions or concerns regarding this post, please let me know in the comment section below. Thanks for reading!
In today’s post, I’ll be using a photo of a small boy. He’s staring right at the camera, just like so many others do when they become stricken with this type of condition. I’ll use the Develop module in Lightroom and Lightroom’s Red Eye Correction function to remove the red, so the boy looks normal again.
By the way, if you’re interested in the instructions for how to go about removing red eye in Camera Raw, please take a look at this post:
How to Remove Red Eye From a Photo Using Adobe Camera Raw
The Photo
This is the photo I’ll be using for the remainder of this post.
Now, I have to be honest with you here. This is the original photo. Since I was unable to locate one with actual red eye, I had to add some. I think I did a pretty good job at it too. The function in Lightroom works exactly the same as if this were legitimate red eye, so that’s not a concern. It’s the steps of the operation that really matter.
The Photo in Lightroom
Okay, I’ve already gone ahead and imported the photo with the red eyes into Lightroom. I’ve also taken the liberty to click on the Develop module and scroll to the photo.
Inside the Develop module, you can find the Red Eye Correction tool, so that’s where I’ll stay.
Red Eye Correction
Before going any further, I’ll want to use the keyboard shortcut Ctrl++ to enlarge the view of the eyes I’ll be working on. In my opinion, the bigger the better.
Now that the eye is nice and big, I can see what’s going on. If I head over to the panel on the right and click on the Red Eye Correction tool, I’ll see some buttons appear.

After clicking on this tool, I’ll also notice that my mouse pointer changes from whatever it was to a large crosshair.
Now that the Red Eye Correction panel has been activated, I’ll need to go inside of it and click the Red Eye button to active this specific tool. As you’ll see, there are two buttons available. One for humans and one for pets. I’ll leave the pet eye post for another time.

After that, it’s as easy as centering the crosshairs inside of the pupil and clicking. If you look closely in the screenshot below, you’ll see the crosshairs.

After I click on the pupil, Lightroom will perform two operations. First, it’ll search for any red pixels in the target area and desaturate them and second, it will provide two sliders to modify the results of the red eye reduction. As you can see in the screenshot below, a circle remains around the eye that’s able to be dragged around. If Lightroom didn’t target the pupil correctly, the result can be modified.

Since I’m happy with this result, I’m not going to push the sliders at all. But just to let you know what they are:
Pupil Size: Shrinks and enlarges the size of the desaturated area that covers the pupil. To grow the pupil size, push the slider to the right and to shrink it, push the slider to the left.
Darken: This slider darkens and lightens the desaturated overlay. To lighten the result, push the slider to the right and to darken it, push it to the left.
Since the boy’s left eye is corrected, I can move on to the right one. To drag the photo over to the other eye while staying inside the Red Eye Correction tool, I’ll hold down the Spacebar on my keyboard. Doing this will change the red eye tool into the little hand grabber tool. Once the other eye is in view, I can perform the same steps as I did above. Here’s the result.

Resetting & Exiting the Tool
If you ever make corrections and want to delete them, you can either click inside the corrected area to activate it and simply press Delete on your keyboard. You can do this one at a time. If you’re interested in undoing all your corrections, you can press the Reset button inside the Red Eye Correction panel.Also, when you’re finished with the tool and want to get out of it, click on the Close button in the same area.

And that’s it!
I told you this one would be quick. Lightroom has made it extra easy to remove red eye from photos. If you have any questions or concerns regarding this post, please let me know in the comment section below. Thanks for reading!
