Cameron
Member
- Joined
- May 10, 2021
- Messages
- 108
- Reaction Score
- 3
- Points
- 23
- #1
You may have never heard about, or even thought about, image review, but I’m sure you’ve seen it. Image review is the brief period of time a photo displays on the back of a camera immediately after the photo is taken. By default, on Canon DSLR cameras, this time is set to 2 seconds. You can change that. That’s easy. The thing is, I want to talk about a few other things regarding this topic before I get to the meat of things. Don’t worry, it’ll be fun.
In today’s post, I’d like to discuss what happens inside your camera right after you take a photo and what you can do to disrupt and “bend” these actions to your liking. I’m going to show you a few small tricks that can truly customize your experience during any photo shoot. Since photographers generally take tons of photos quite often, these small tweaks may play a large role in what you do in the field.
Doing that will give you two options; Cancel or Erase. Use the right arrow on the back of the camera to select the Erase option and then press the Set button to actually do the erasing.
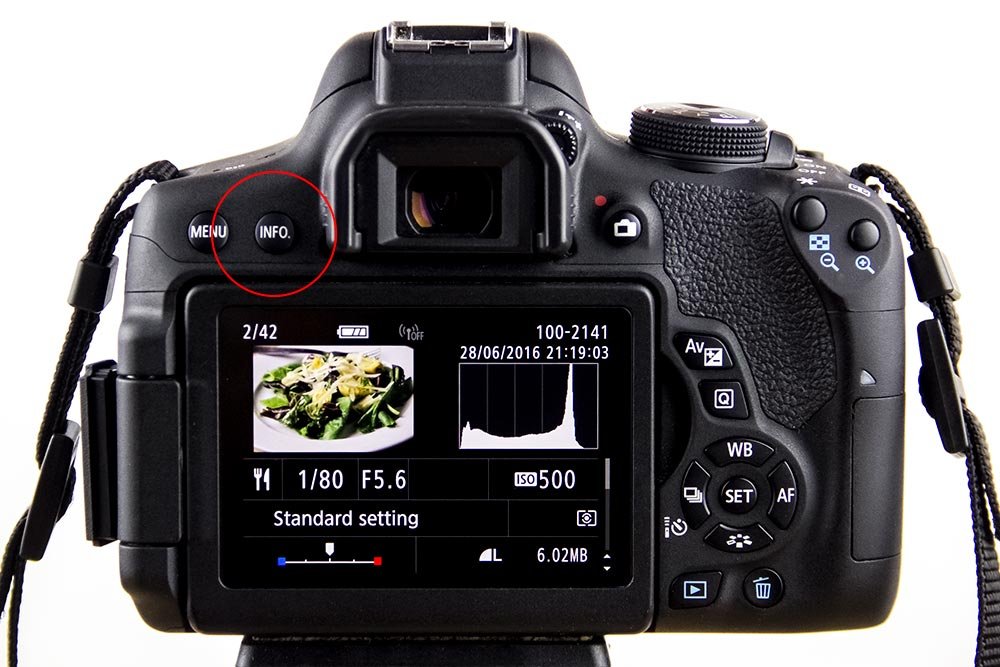
As you can see, there’s all sorts of information available after pushing the Info button. We’ve got shutter speed, ISO, aperture, photo number, file size, the histogram and more. And if you push the same button a few times in a row, you’ll see different screens that display either more or less information. Pretty cool.
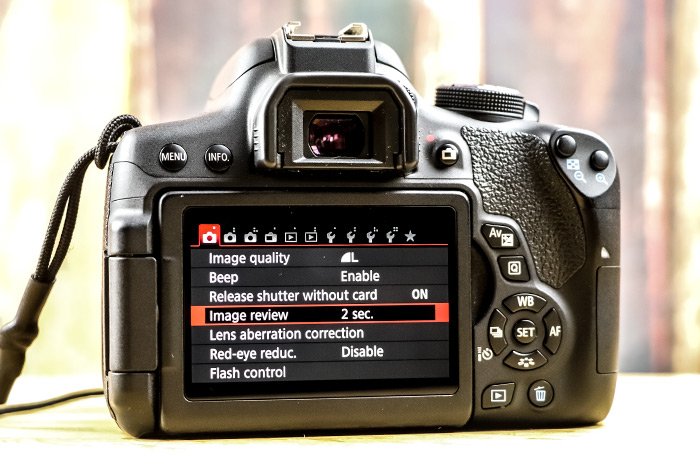
If you press the Menu button on the back of the camera while it’s not in use, you’ll see the camera’s menu area appear.
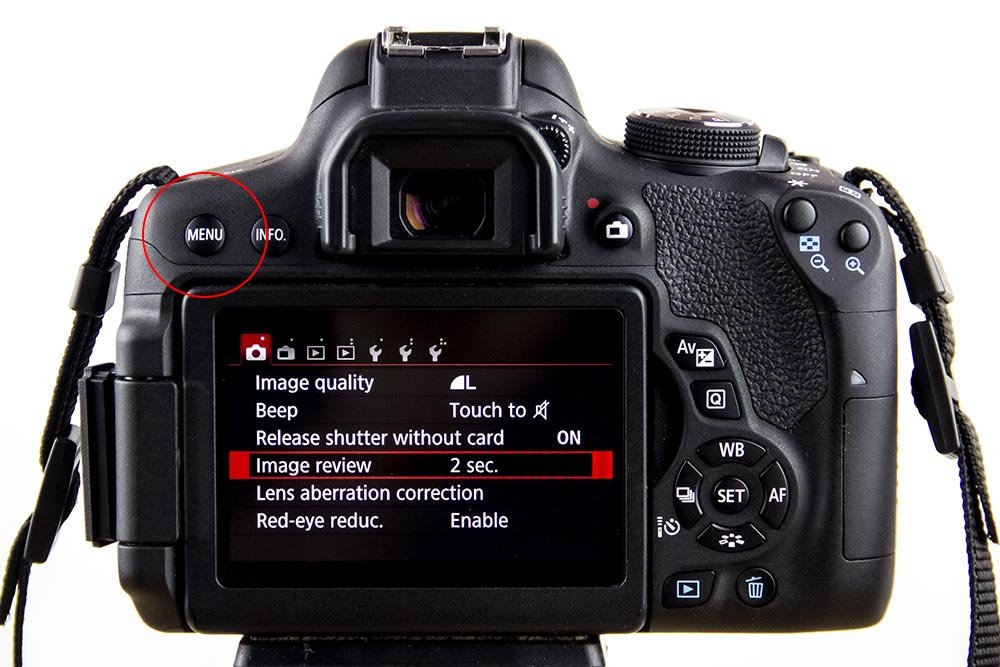
Once the menu appears, use the left or right arrow keys on the back of the camera to switch to the first menu, if it’s not already active.
Next, use the down arrow to highlight the Image Review section. Once it’s highlighted, press the Set button. That will bring you into the Image Review menu area.
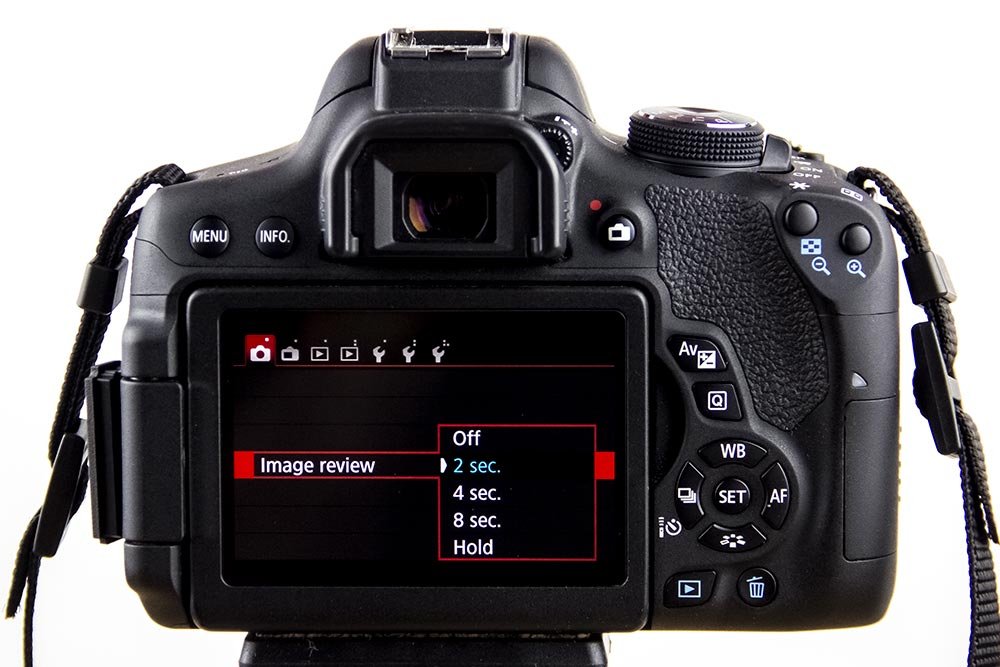
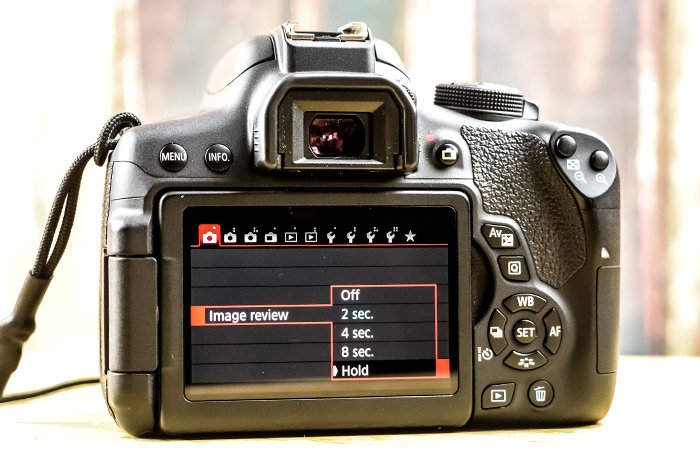
Inside of this menu, you can use the up or down arrows on the back of the camera to alter the setting of the Image Review. The settings range from Off, 2 Second, 4 Second, 8 Second to Hold. Off means that no image review will occur, Hold means that once a photo is taken, it’ll be in review mode for eternity, unless you press another button on the camera to escape it and finally, the second durations set the length of time the photo will stay in review mode.
As I mentioned above, Canon’s default duration is 2 seconds. If I wanted to change this to something else like, say, 4 seconds, I would use the down arrow to move down one notch and then press the Set button to save my edit. After I did that, I’d see the new setting.
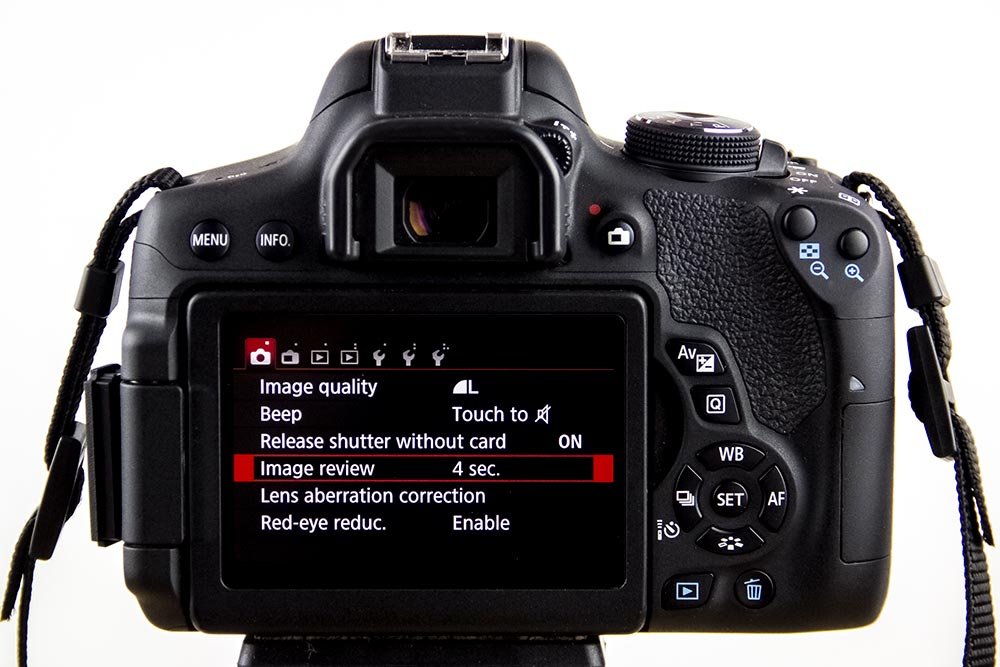
That’s it! To get out of the menu mode, all you need to do is press the Menu button again and you’ll be taking photos in no time. Just remember, even if you choose the Hold setting for Image Review, you can always get out of reviewing the photo by pressing any button on the camera. That’s just the way things work.
PS – This post can definitely help with many Canon Rebel cameras, including the T2i, T3i, T4i, T5i, T6i and the T7i (and T8i).
In today’s post, I’d like to discuss what happens inside your camera right after you take a photo and what you can do to disrupt and “bend” these actions to your liking. I’m going to show you a few small tricks that can truly customize your experience during any photo shoot. Since photographers generally take tons of photos quite often, these small tweaks may play a large role in what you do in the field.
Image Review – What Is It?
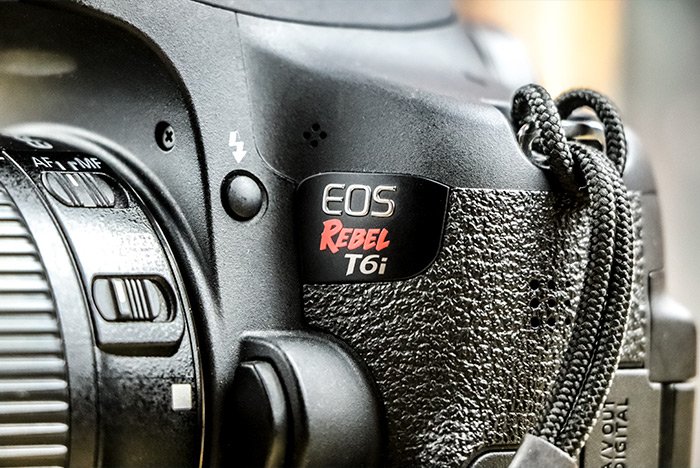
Let’s say you just pressed the shutter button on your favorite Canon Rebel camera. For me, that would be both the Canon T3i and the Canon T6i. Both of these devices operate in generally the same way, barring a few modifications here and there. The shot is taken via either the viewfinder or the LCD screen and the same thing happens. For two seconds, the image that was just captured appears on the LCD screen. Then, the screen goes back to whatever it was doing before the photo was taken. That two seconds is called Image Review. The camera is letting you review the image.Deleting a Photo During Image Review
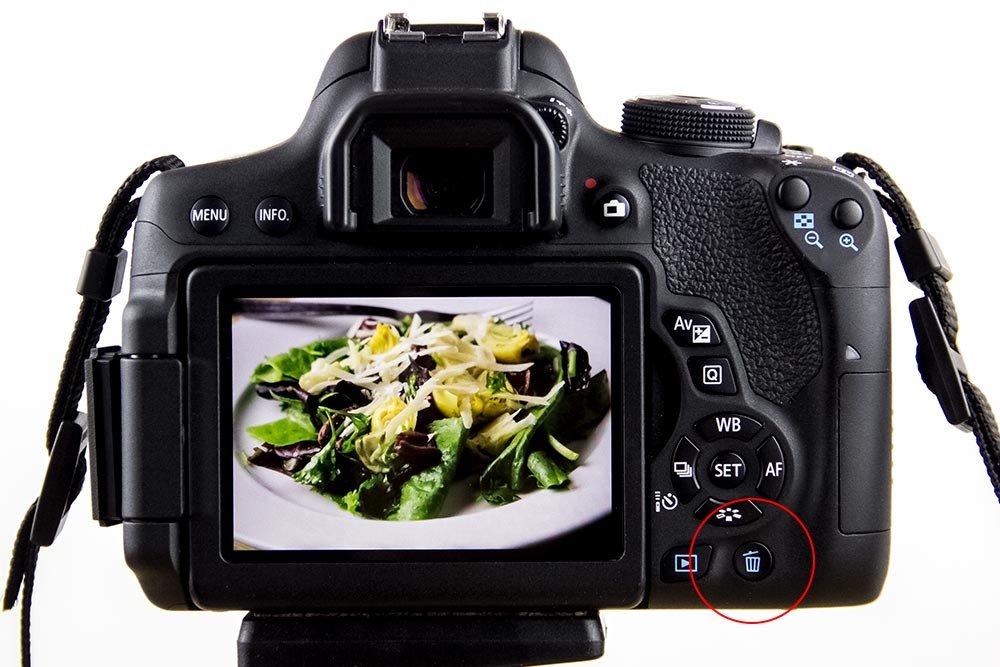
Since many of us take so many photos and since many of us look at our photos right after taking them (via image review), it only makes sense that we should have the ability to quickly get rid of any photo we’d like to get rid of. To delete a photo during image review, simply press the Delete button, or commonly known as the “little button with the garbage can icon on it.”
Doing that will give you two options; Cancel or Erase. Use the right arrow on the back of the camera to select the Erase option and then press the Set button to actually do the erasing.
Displaying Photo Information During Image Review
I love looking at the data associated with photographs I take . Shutter speed, aperture and the histogram are my definite favorites. A really cool little trick for reviewing this type of data right after taking a shot is to press the Info button during Image Review.
As you can see, there’s all sorts of information available after pushing the Info button. We’ve got shutter speed, ISO, aperture, photo number, file size, the histogram and more. And if you push the same button a few times in a row, you’ll see different screens that display either more or less information. Pretty cool.
Adjusting the Image Review Time
There are some folks out there who never look at the backs of their cameras while shooting photos at all. I’m not one of those people. I can image those types want Image Review turned off all together. For me, I’d prefer to have it on longer than the default 2 seconds. Luckily, Canon has given us an area to adjust things that will make us all happy. We can turn the review off, set it to a time or keep it on forever. In this final section, I’ll show you exactly how to adjust this setting.If you press the Menu button on the back of the camera while it’s not in use, you’ll see the camera’s menu area appear.

Once the menu appears, use the left or right arrow keys on the back of the camera to switch to the first menu, if it’s not already active.
Next, use the down arrow to highlight the Image Review section. Once it’s highlighted, press the Set button. That will bring you into the Image Review menu area.

Inside of this menu, you can use the up or down arrows on the back of the camera to alter the setting of the Image Review. The settings range from Off, 2 Second, 4 Second, 8 Second to Hold. Off means that no image review will occur, Hold means that once a photo is taken, it’ll be in review mode for eternity, unless you press another button on the camera to escape it and finally, the second durations set the length of time the photo will stay in review mode.
As I mentioned above, Canon’s default duration is 2 seconds. If I wanted to change this to something else like, say, 4 seconds, I would use the down arrow to move down one notch and then press the Set button to save my edit. After I did that, I’d see the new setting.

That’s it! To get out of the menu mode, all you need to do is press the Menu button again and you’ll be taking photos in no time. Just remember, even if you choose the Hold setting for Image Review, you can always get out of reviewing the photo by pressing any button on the camera. That’s just the way things work.
PS – This post can definitely help with many Canon Rebel cameras, including the T2i, T3i, T4i, T5i, T6i and the T7i (and T8i).

