Phoenix1
Member
- Joined
- May 7, 2021
- Messages
- 135
- Reaction Score
- 0
- Points
- 23
- #1
When you take a photograph with a Canon Rebel DSLR camera while holding it the traditional way and then play back that image for review, it’ll show just as you took it. Horizontally. When you turn the camera so it sits vertically and then take a photograph and play it back, it’ll show…well, it’ll show however you have your camera set up to show it. You can review it either horizontally or vertically. It’s up to you.
In today’s post, I’d like to quickly cover one small setting that can be found inside of most Canon DSLR cameras (e.g., T2i, T3i, T4i, T5i, T6i, T7i, and T8i). It’s a setting that controls both playback for photographs that are being reviewed on the rear LCD screen on the back of the camera as well as playback on your computer screen.

I do want to mention a few things before I continue. First, to me, it doesn’t matter how the image plays back on the computer screen. There’s a handy “rotate” feature that’s built into Adobe Bridge that quickly solves any viewability issues. It rotates an image any way I want. Second, I sort of like it when the camera doesn’t automatically rotate an image during playback. If you’ve ever viewed an image that’s been corrected on the rear screen of your camera, you most likely have noticed that it shrinks quite a bit. The reason I am playing the image back in the first place is to see what I took a photo of and to see if that photo is any good. I like it when it’s larger. I don’t mind having to twist the camera in my hand to see it. It’s for these reasons that I have this feature turned off.
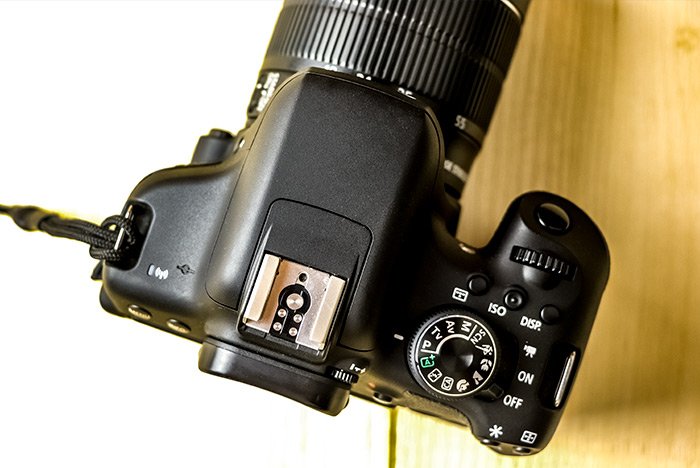
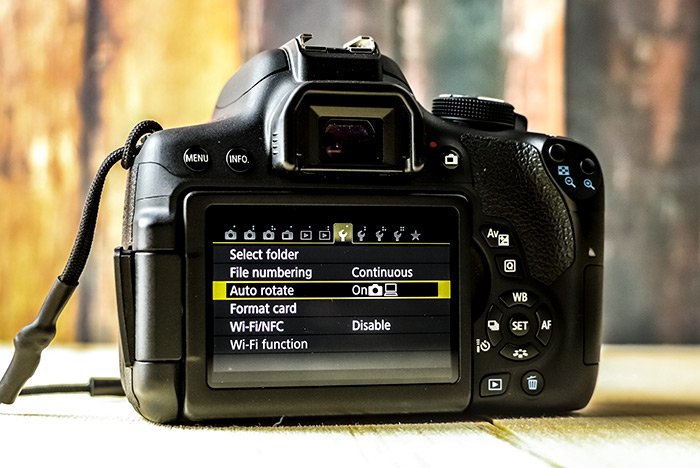
First, with your camera on, press the Menu button on the back of your camera. Next, use the dial on the top of your camera to find the section that has the Auto Rotate option. On my T7i, this is the first yellow section (the wrench).

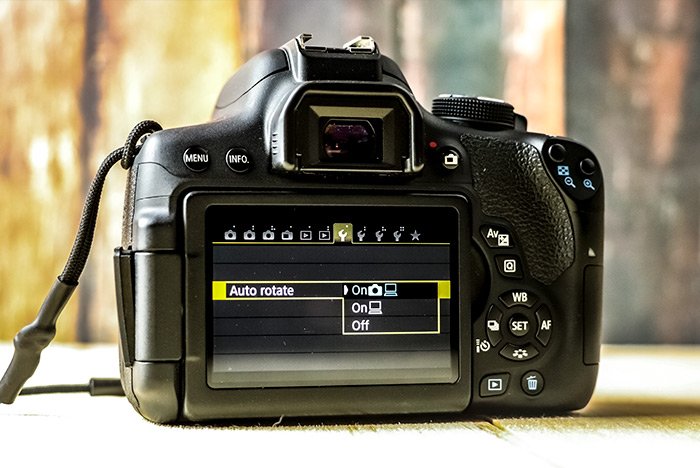
Once you see that option, use your down arrow button to go to it and then press the Set button to see the available options. Use the up and down arrow buttons to navigate to the options you’d like to set your camera to and once there, press the Set button to accept your changes.

Finally, press the Menu button again a few times to back out of the menu area. That’s it. Once you do this, you should be ready to rock and roll.
I hope I clearly explained the various options available when it comes to the auto-rotate feature on Canon DSLR cameras. I also hope I clearly explained how to change this setting. If you have any questions, please go ahead and ask them in the comment section or on the Canon Discussion Board. Thanks for reading!
In today’s post, I’d like to quickly cover one small setting that can be found inside of most Canon DSLR cameras (e.g., T2i, T3i, T4i, T5i, T6i, T7i, and T8i). It’s a setting that controls both playback for photographs that are being reviewed on the rear LCD screen on the back of the camera as well as playback on your computer screen.

The Auto-Rotate Settings
On my Canon Rebel T7i, I’ve got three auto-rotate settings available to me. The first one will auto-rotate a vertically taken photograph so it’s able to be seen horizontally on both the camera as well as the computer screen after download. The second setting covers only the computer screen, while keeping the camera playback image to be viewed exactly as it was taken. Finally, we have the “Off” option for the auto-rotate setting. In this case, as you take it, you see it. If you take a horizontal photo the regular way, you’ll see it that way on both the camera and the computer screen. The same is true if you take a photograph vertically. You’ll see it that way on the camera as well as the computer screen.I do want to mention a few things before I continue. First, to me, it doesn’t matter how the image plays back on the computer screen. There’s a handy “rotate” feature that’s built into Adobe Bridge that quickly solves any viewability issues. It rotates an image any way I want. Second, I sort of like it when the camera doesn’t automatically rotate an image during playback. If you’ve ever viewed an image that’s been corrected on the rear screen of your camera, you most likely have noticed that it shrinks quite a bit. The reason I am playing the image back in the first place is to see what I took a photo of and to see if that photo is any good. I like it when it’s larger. I don’t mind having to twist the camera in my hand to see it. It’s for these reasons that I have this feature turned off.
Changing the Auto-Rotate Setting
In this section, I’ll walk through the steps you’ll need to take to change this setting to whatever you want. There are only a few steps, so this should be fast.First, with your camera on, press the Menu button on the back of your camera. Next, use the dial on the top of your camera to find the section that has the Auto Rotate option. On my T7i, this is the first yellow section (the wrench).

Once you see that option, use your down arrow button to go to it and then press the Set button to see the available options. Use the up and down arrow buttons to navigate to the options you’d like to set your camera to and once there, press the Set button to accept your changes.

Finally, press the Menu button again a few times to back out of the menu area. That’s it. Once you do this, you should be ready to rock and roll.
I hope I clearly explained the various options available when it comes to the auto-rotate feature on Canon DSLR cameras. I also hope I clearly explained how to change this setting. If you have any questions, please go ahead and ask them in the comment section or on the Canon Discussion Board. Thanks for reading!
