KristinaW
Member
- Joined
- May 7, 2021
- Messages
- 127
- Reaction Score
- 0
- Points
- 18
- #1
3 Need to Know Features of the Adjustment Brush in Adobe Lightroom
I’ve written a lot about all types of adjustments in Adobe Camera Raw, Lightroom and Photoshop. I’ve covered adjustment brushes, adjustment layers and adjustment filters. But, as much as I’ve written about these things, I have yet to discuss the Adjustment Brush Tool in Lightroom. While this tool is very similar to the others, there are a few features that I’d like to bring to the forefront in this post.When we’re out in the field taking photos, we can’t always having the proper lighting at our fingertips. In all honesty, about 99% of us have no auxiliary lighting or reflective boards at all. What this leaves us with is fairly decent photos, but with poor visibility of what we’re attempting to showcase. For example, try taking a photo of a bride on her wedding day with no additional lighting available, other than what’s coming from the sky or inside a room. I’d venture to guess that, as good as the photographer is, without retouching, the photo will fall flat. The bride will mix with the background too much and the picture won’t have the impact it’s supposed to. With this in mind, I’m going to use a demo photo of a wedding party dancing to discuss a few different points regarding the Adjustment Brush Tool in Adobe Lightroom. It’s this tool that can add that needed lighting and bring the photo alive.
In today’s post, I’ll focus not only on how to use the brush, but what the difference is between brush flow and density, how an editor is able to continue to make changes to an edited area after they finish painting with the brush tool and how you can alter the overall intensity of the edits by pushing one lonely slider. This is going to be a great post, so please continue reading on below.
Demo Photo
Here’s the photo I’m going to use for this post. As you can see, it’s rather dark. Obviously, the party dancing in a row across the front is the primary focus of the entire scene, so I’ll be working on brightening that area up some.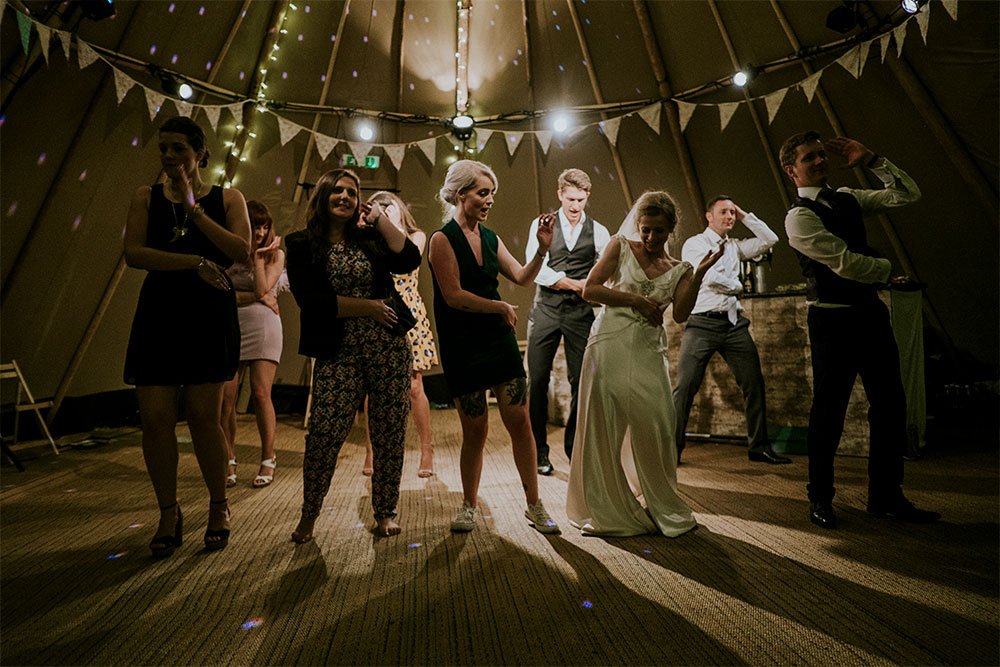
The Adjustment Brush
I already have the photo in question imported into Lightroom. I also have it opened in the Develop module. From here, it’s easy enough to activate the Adjustment Brush by clicking on its icon in the right panel.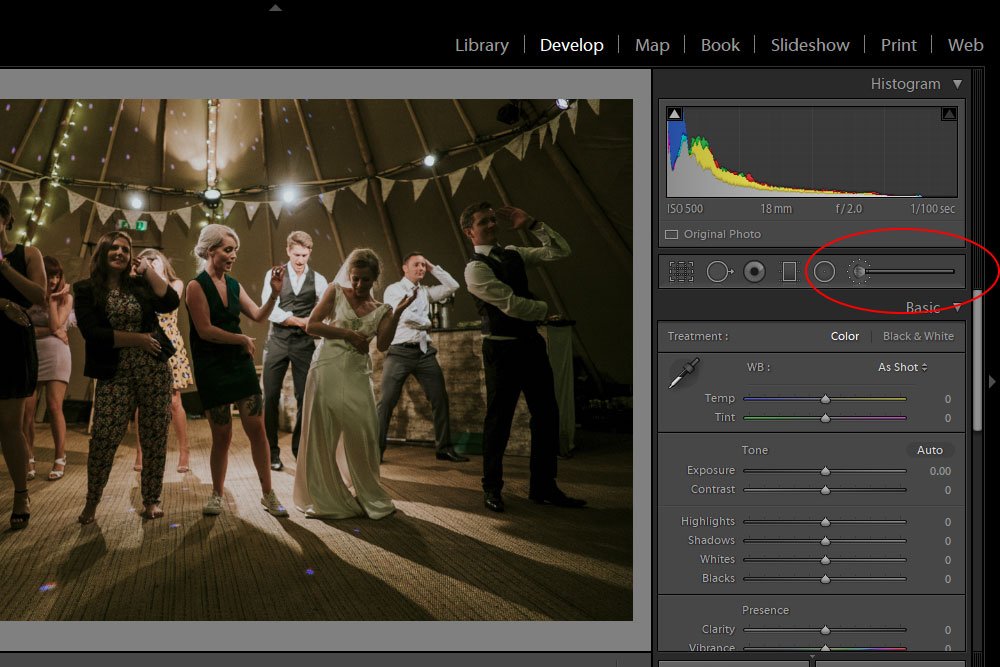
The moment I do this, a bunch of sliders appear right underneath the icon. It’s these sliders that control what the Adjustment Brush tool does. I tried to get them all in this next screenshot.
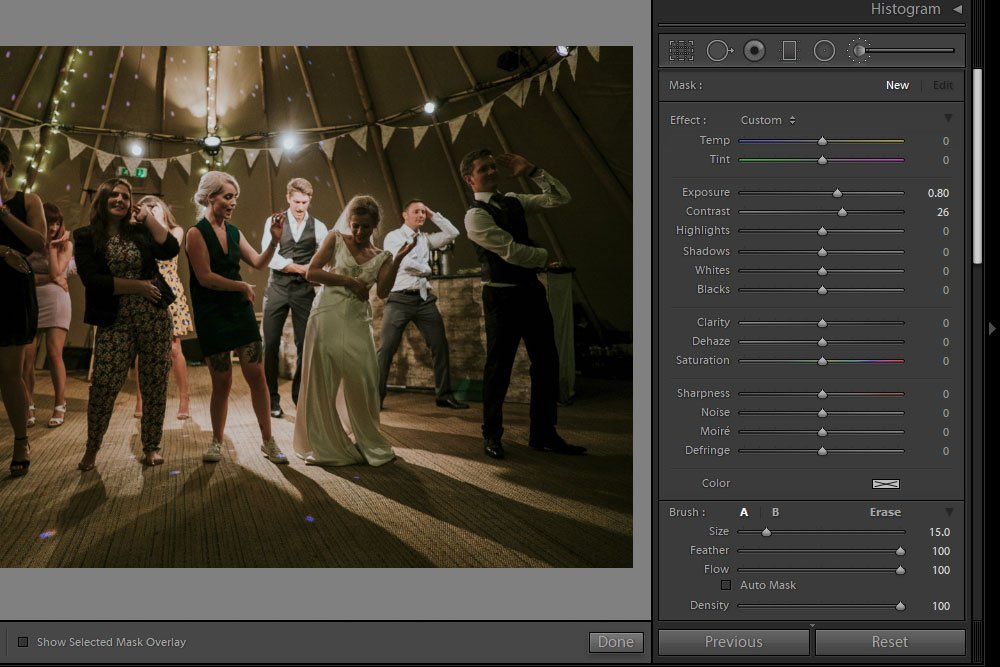
Now, just to let you know, much of the way Lightroom’s adjustment brush operates is the same as the way Camera Raw’s operates. To get a handle on how the tool functions in a more thorough manner than what I share with you today, please read this post:
Enhancing Photos with the Adjustment Brush in Adobe Camera Raw
Camera Raw and Lightroom are like twin sisters. They are almost identical in much of what they do and how they do it.
Okay, next, I’ll make a few slider changes to the brush that I think will benefit the area I’d like to edit in the photo. After that, I’ll paint over the people in the photo to brighten them up. Let’s see the sliders and part of the photo.
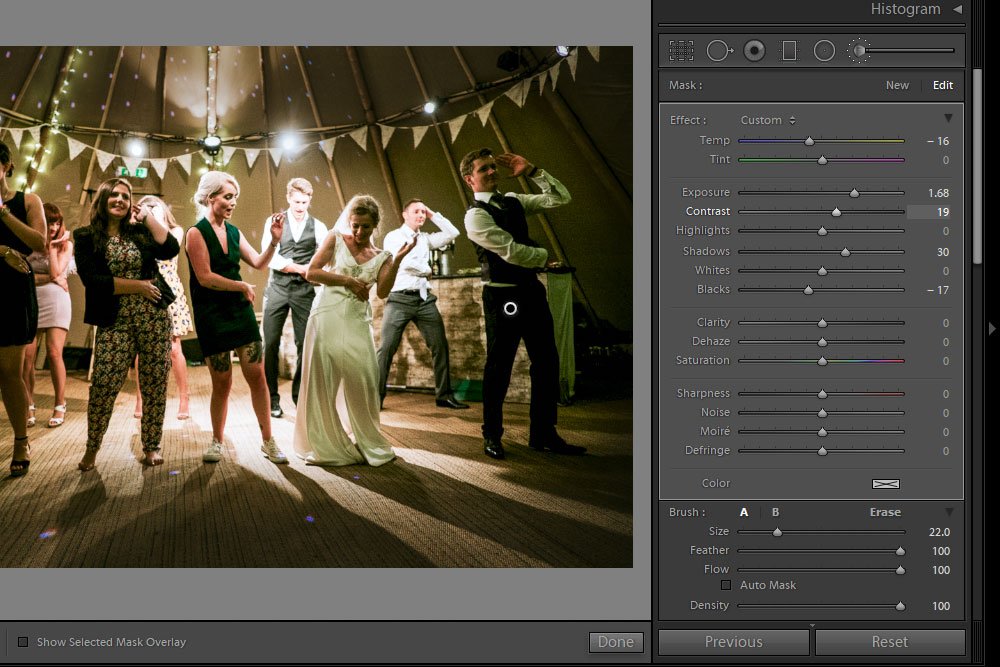
As you can see, I added some exposure, some contrast, increased the shadows and did a few other things. Overall, the photo looks much better than it did before. We’ll get to the finished product later on.
Flow vs. Density
If you look at the slider panel, down towards the bottom, you’ll see some sliders that control the brush itself. Not what the brush does to the photo, per se, but the characteristics of the brush and how it performs.What I’d like to discuss in this section has to do with two of these sliders. They are Flow and Density. The reason I’d like to talk about them is because they are often misunderstood and confused with one another. It’s about time we got to the bottom of how they perform and what they can do for us as photo editors.
Flow: Let’s say that I have the brush sized appropriately and the feather value set to something reasonable. I also have the density set to 100%. If this is the case, I can set the flow value to anything I want. Flow controls how fast the other settings of the brush affect the photo. I’ll use an example to better explain what I’m talking about here.
Pretend you have a can of spray paint that has a small clog in the nozzle. Because of this, the flow of paint being released from the can is inhibited. If you were to spray paint something with the paint, you could surely cover the object thoroughly, but it would take longer than if you had a full stream of paint being released from the nozzle. This is exactly how the Flow slider controls how the brush affects a photo in Lightroom. You can still get a fully actualized result, but if you have a lower flow value (the slider towards the left), it will take you longer to get there.
Density: Let’s use the same example of the spray paint can for this slider as well. When you adjust the Density slider, you are controlling how much change will ultimately take place with the Adjustment Brush Tool. So, if we had the same spray paint can, but with a fully functioning nozzle this time, and realized that the paint inside was actually 50% paint and 50% clear coat, that would be the same as pushing the Density slider to 50%. No matter how much you painted whatever it was you were trying to paint, it would never be completely opaque. There would always be some see-through. If you had a can of spray paint that was 75% paint and 25% clear coat, it would be more opaque than the previous example, but still somewhat see through. Basically, by adjusting density when using this tool, you’re controlling how much of an effect the brush will ultimately have, not how fast it will get there, as the previous slider controls.
I hope I was clear with these two. I know they do get confusing.
Controlling the Adjustment After the Fact
One of the coolest features of tools like the one I’m discussing in this post is the fact that any change you make with them can be edited after you’re finished painting with the brush itself. For instance, I previously made some slider settings for the brush and then painted those adjustments over the photo itself. If I got really lucky, my guesses for slider positions would have been spot on and I wouldn’t have to change a thing. I would simply click the Done button and would move onto another tool or just export the photo.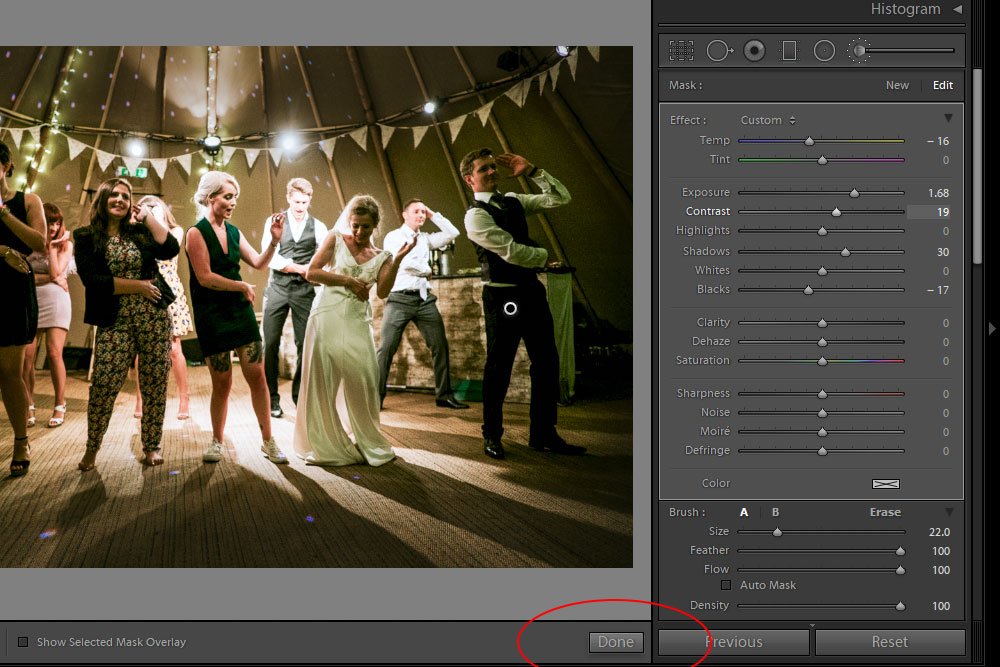
Since people rarely get so lucky, it’s important to have the ability to make edits after the photo has been painted by the brush. To make these edits, all you need to do is push the sliders in the right panel back and forth, left and right. Doing this will have a real-time effect on the painted area of the photo itself. As a side-note, pushing the bottom sliders (Size, Feather, Flow and Density) will have no effect on the photo after you use the brush. Again, those sliders merely control how the brush operates, not what it actually paints.
The Amount Slider
I’d like to thank whoever it was over at Adobe who came up with this really neat feature. It’s simply marvelous and rather genius. When you’re all finished making the slider adjustments in the Adjustment Brush panel, you can collapse that panel to reveal just one slider that will control everything. It’s called the Amount slider and it’s fantastic.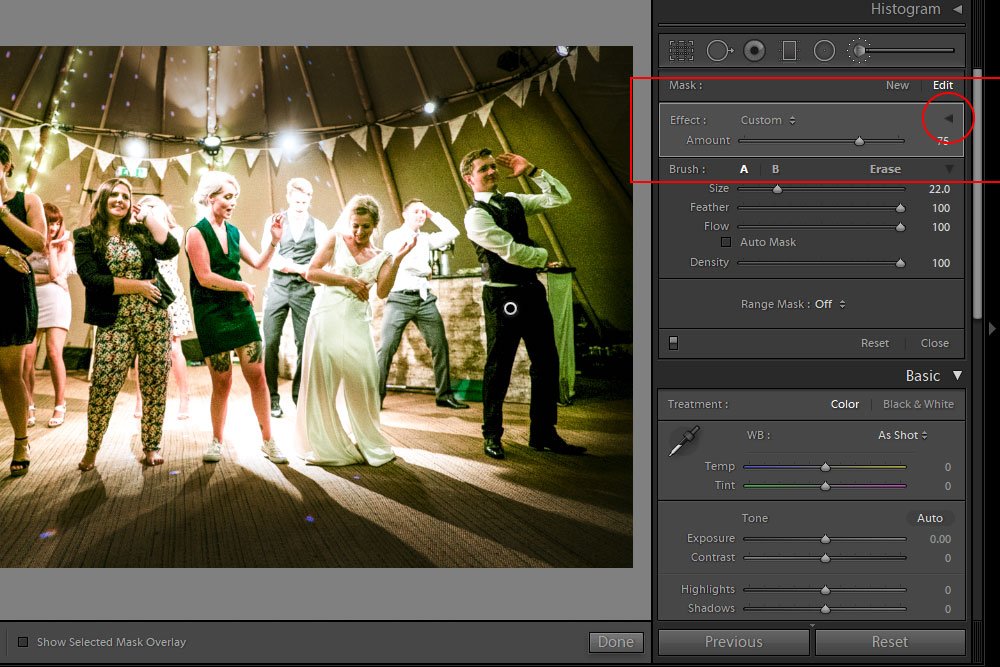
In the above screenshot, I outlined both the small triangle that controls whether the panel is collapsed or not as well as the collapsed panel. These outlines are a circle and rectangle, respectively. I also pushed the Amount slider to the right so it sits at 75%, instead of whatever lower value it was before. As you can see in the photo, the brushed area looks much brighter. As a reminder, you can expand this panel at any time to make individual changes to the separate sliders at any time. As a matter of fact, you can expand and collapse this panel all day long if you wanted to.
Finishing the Edit
As I stated above, when you’re all finished with the edits you made with this tool, you can click on the Done button to exit out of it. From there, you can choose another tool to start working with or export the photo and consider it finished.Now, let’s see how good this picture can look after some editing. This is the finished product.
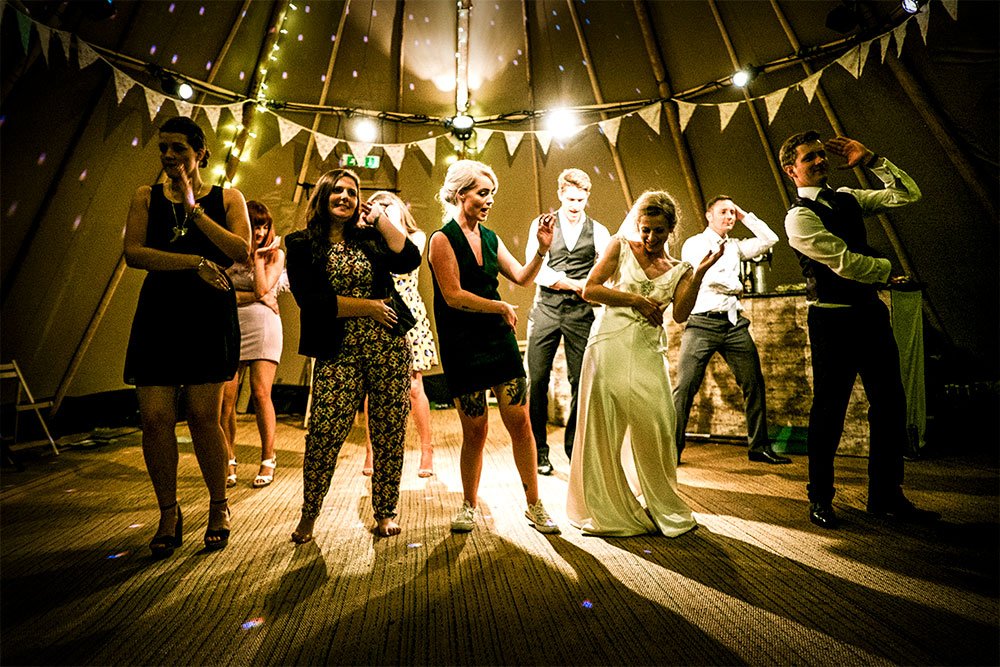
And here’s a nice before and after shot.
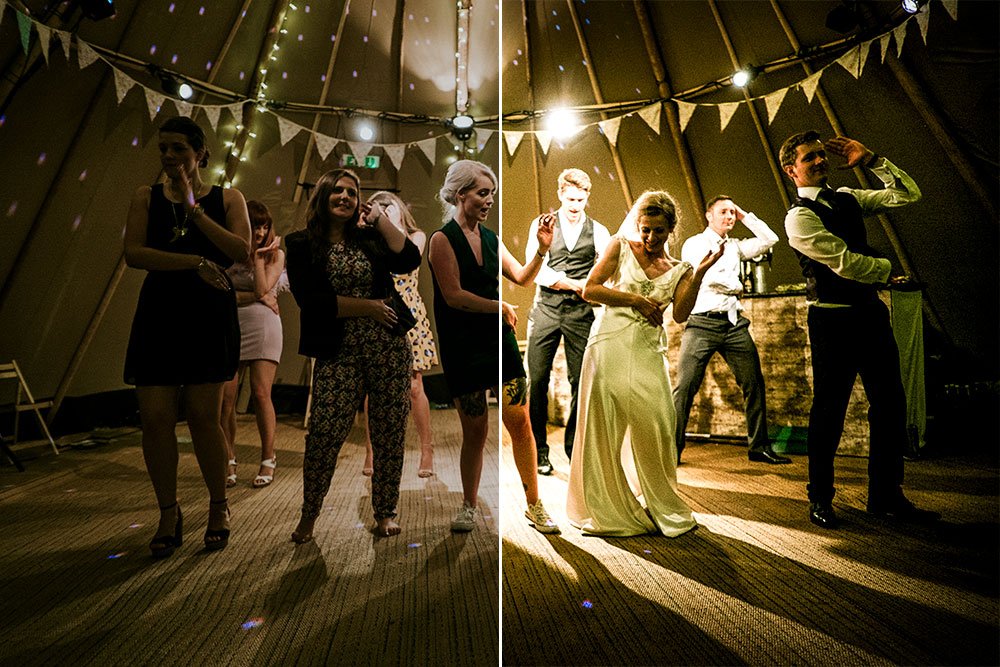
I’d say the changes really helped this image out and that it looks better all around. There’s much more focus on the people in the photo, thanks to the Adjustment Brush tool!
——
My goal with this post was to bring some clarity to a few areas of the Adjustment Brush tool in Adobe Lightroom. I hope I did that thoroughly and clearly. If you have any questions or concerns regarding this post, please leave them in the comment section below. Thanks for reading!
