WendyMay
Member
- Joined
- May 11, 2021
- Messages
- 142
- Reaction Score
- 0
- Points
- 21
- #1
Creating a panoramic image from multiple photos is super easy in Adobe Lightroom. It’s actually just as easy in Lightroom as it is in Camera Raw. As you may know, I already wrote a post that covered this task in Camera Raw, so if you’d like to read through that one, please take a look below.
How to Create a Panoramic Photo in Adobe Camera Raw
In today’s post, I’ll be covering the steps needed to create a panoramic photo in Adobe Lightroom. After you capture the necessary photos and import them into the application, it’s really only a few easy steps until you’re done. There are some details that need to be considered towards the end of the process though, so you’ll definitely need to read about those steps below.
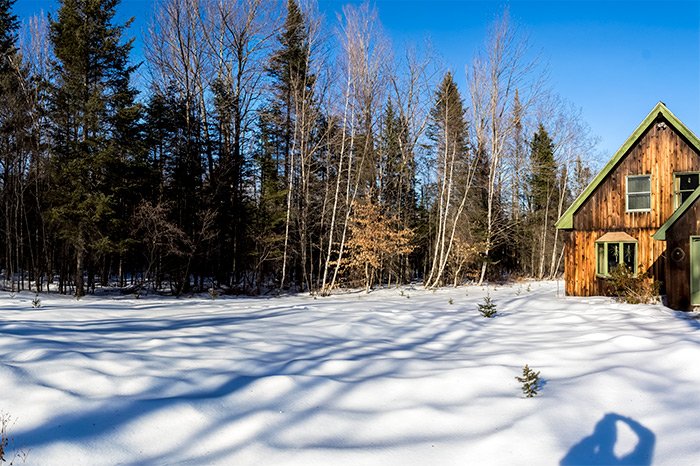

While the first photo may seem like just one image, I’d say it’s about three that have been joined. Overall, I’ll be combining nine photos.
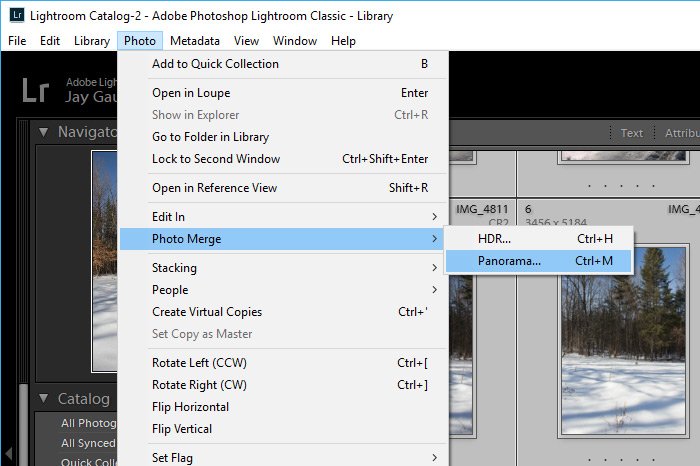
After that, I’ll head up to the Photo > Photo Merge > Panorama menu item and click.
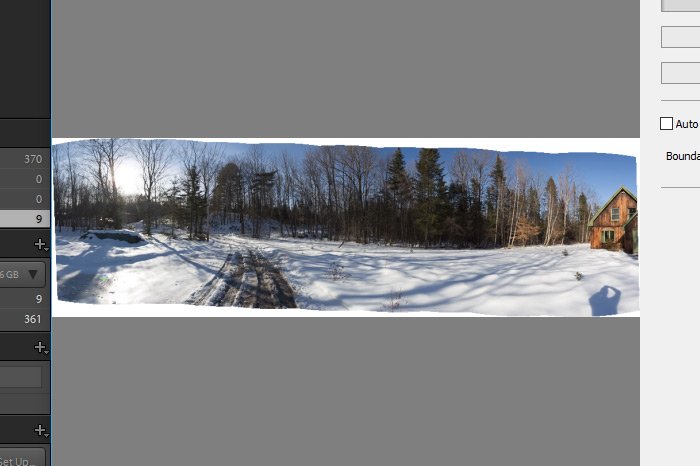
After I do this, the Panorama Merge Preview palette will open up. Here’s the view of mine with the photos I just took roughly merged.
On the right side of this panel are a few options. The first ones you need to consider are:
Spherical: Use this option if you have a very wide panorama. The photos will be merged as if they were situated on the inside of a sphere.
Cylindrical: If you’d like to keep the vertical lines inside of your photos straight, use this option. The photos will appear as if they were merged inside of a cylinder. This option is also good for wide panoramas.
Perspective: If you’re merging architectural photos, this may be the option you want to go with. The photos will appear as if they were merged on a flat surface. Due to edge distortion, this isn’t a great option for wide panoramas.
Personally, I prefer the cylindrical look, so I’ll select that option.
Next I’ll pull the Boundary Warp slider to the right until I feel enough of the white outer edge has disappeared, but not so much as to distort the photos in the merge. As you may have already guessed, this feature tugs on the edges of the photos and stretches them as far as you’d like it to.
Finally, I’ll click the Auto Crop check box to allow Lightroom to automatically crop the blank edges from the panorama. This is what I’ll end up with:
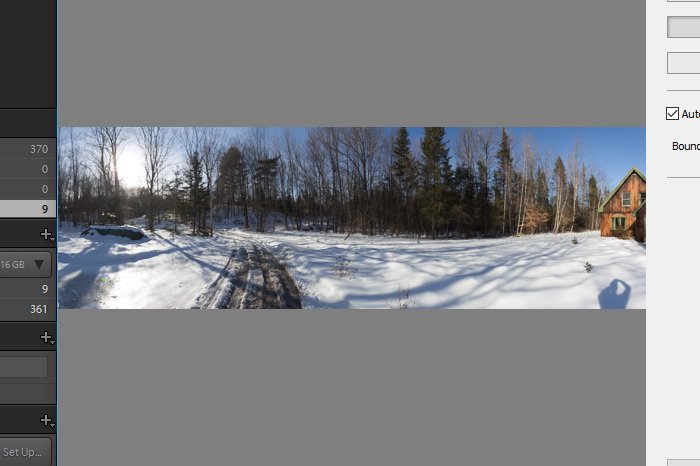
When working with these options, be sure to pull the Boundary Warp slider before you check the Auto Crop box. You wouldn’t want to crop the images first because you would lose too much of the overall output.
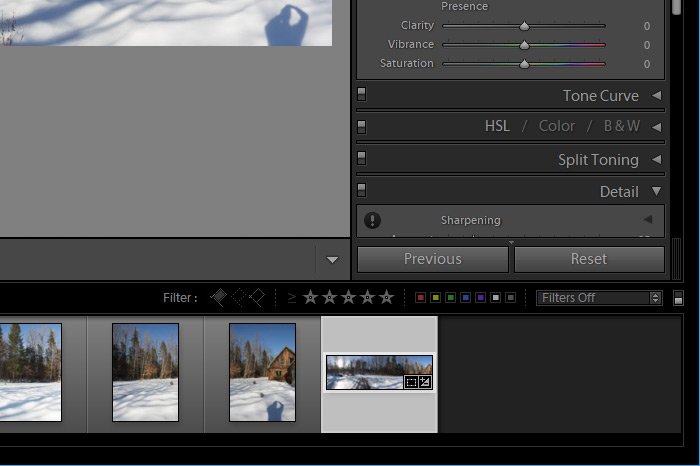
And if I select the thumbnail by clicking on it and then click the Develop module link up top, I can edit the panorama and way I wish, just as if it were a regular photo.
——
I hope I clearly explained how to create a panoramic photo from multiple individual photos in Adobe Lightroom. If you have any questions or concerns regarding this post, please leave them in the comment section below. Thanks for reading!
How to Create a Panoramic Photo in Adobe Camera Raw
In today’s post, I’ll be covering the steps needed to create a panoramic photo in Adobe Lightroom. After you capture the necessary photos and import them into the application, it’s really only a few easy steps until you’re done. There are some details that need to be considered towards the end of the process though, so you’ll definitely need to read about those steps below.
Demo Photos
For this post, I’ll be using a few photos I just took in front of my house. The sun was shining, so I decided to grab a few random shots. Here are the right side of the collection and the collection as a whole, after the photos have been merged.

While the first photo may seem like just one image, I’d say it’s about three that have been joined. Overall, I’ll be combining nine photos.
The Photos in Lightroom
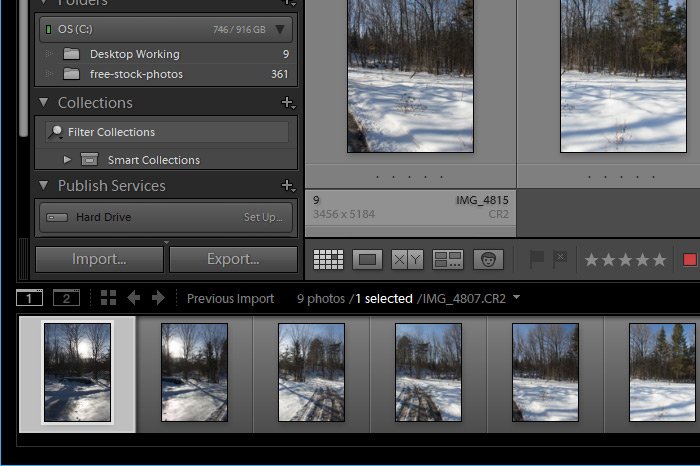
I’ve already imported the images into Lightroom and I can see the thumbnails down in the filmstrip view towards the bottom of the application. I can also see them in the center Content panel.
Merging the Photos into a Panorama
To merge the photos, I’ll first select all the thumbnails in the series. To do this, I’ll click on the first photo in either panel I just mentioned above, hold down the Shift key on my keyboard and then click on the last photo. This should highlight all of them.After that, I’ll head up to the Photo > Photo Merge > Panorama menu item and click.

After I do this, the Panorama Merge Preview palette will open up. Here’s the view of mine with the photos I just took roughly merged.

On the right side of this panel are a few options. The first ones you need to consider are:
Spherical: Use this option if you have a very wide panorama. The photos will be merged as if they were situated on the inside of a sphere.
Cylindrical: If you’d like to keep the vertical lines inside of your photos straight, use this option. The photos will appear as if they were merged inside of a cylinder. This option is also good for wide panoramas.
Perspective: If you’re merging architectural photos, this may be the option you want to go with. The photos will appear as if they were merged on a flat surface. Due to edge distortion, this isn’t a great option for wide panoramas.
Personally, I prefer the cylindrical look, so I’ll select that option.
Next I’ll pull the Boundary Warp slider to the right until I feel enough of the white outer edge has disappeared, but not so much as to distort the photos in the merge. As you may have already guessed, this feature tugs on the edges of the photos and stretches them as far as you’d like it to.
Finally, I’ll click the Auto Crop check box to allow Lightroom to automatically crop the blank edges from the panorama. This is what I’ll end up with:

When working with these options, be sure to pull the Boundary Warp slider before you check the Auto Crop box. You wouldn’t want to crop the images first because you would lose too much of the overall output.
Saving the Image
When I’m all finished manipulating things the way I’d like to see them, I’ll head down to the bottom of this palette and click the Merge button. When I do this, I’ll need to wait a few seconds before the process is completed. But when it is, I’ll see the new combined image file saved as a DNG right in the same area as the individual files.
And if I select the thumbnail by clicking on it and then click the Develop module link up top, I can edit the panorama and way I wish, just as if it were a regular photo.
——
I hope I clearly explained how to create a panoramic photo from multiple individual photos in Adobe Lightroom. If you have any questions or concerns regarding this post, please leave them in the comment section below. Thanks for reading!
