15Katey
Member
- Joined
- May 10, 2021
- Messages
- 130
- Reaction Score
- 0
- Points
- 23
- #1
The HSL panel in Adobe Lightroom is nearly identical to the one in Camera Raw and since I already wrote about the one in Camera Raw, I’ll try not to repeat myself too much here. If you’d like to learn about HSL panels in general, you can click through to check out the post below.
Using Targeted Adjustments with Hue, Saturation & Luminance in Adobe Camera Raw
In today’s post, I’d like to go over some of the HSL controls inside of Adobe Lightroom. We all know that the Hue panel can change existing colors in an image to neighboring colors, the Saturation panel can either strengthen or weaker specific colors and the Luminance panel can either brighten or darken colors. What may not be known though is how to more efficiently use these tools and panels. That’s what I’ll cover below – the tools behind the tools, which are pretty cool, if I don’t say so myself.

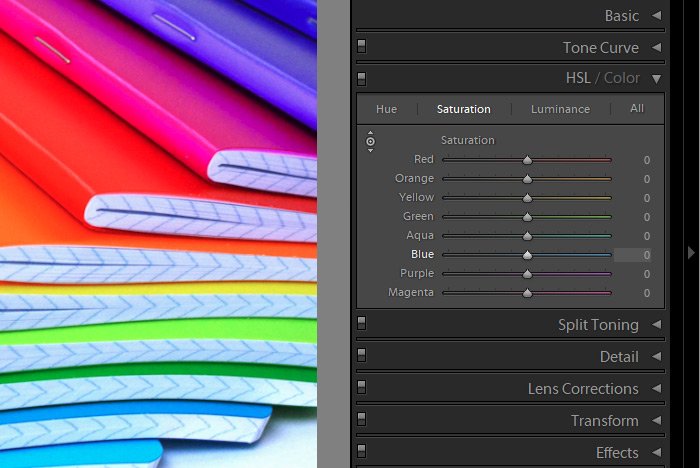
Okay, the first thing I’d like to show you is how to expand all of these panels at once. At the time of this writing, Camera Raw doesn’t include this feature, so I think it’s worth mentioning. Basically, we’ve always been able to click one of the tabs I mentioned above in the HSL panel, but now, inside of Lightroom, we have the option of clicking the All tab to see all the available sliders at once.
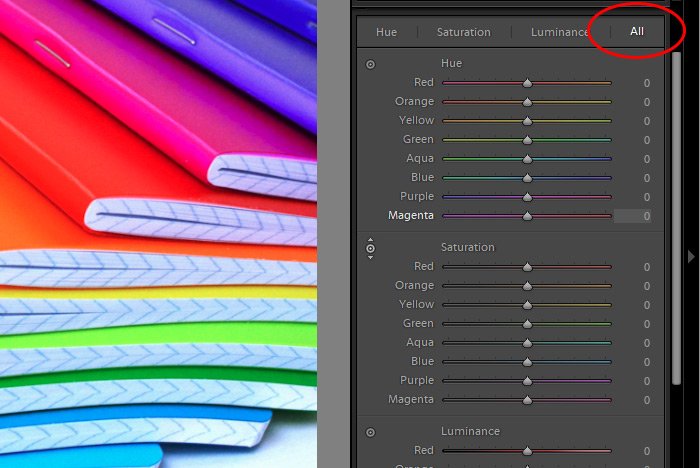
If you enjoy working with as many sliders visible as possible, go ahead and use the All tab. If you’re more focused like I am, simply click on the names of one of the other tabs. Doing this will limit the sliders to only what you’re interested in.
If I click this circle and then move my mouse out to the image and then click and drag up or down, I’ll have the ability to move the sliders for whichever color I clicked on. This, in turn, will adjust those colors in the image. Each tab has this capability. To activate the tool, click the circle. To deactivate it, click the circle again. It’s “on” when two arrows are visible – one above the circle and one below.
Remember, you can push the sliders the same way you always could when this tool is activated. It’s meant to work in tandem with Lightroom’s normal operation.
To view the before and after versions, simply click the On/Off switch that’s located near the top of the panel.
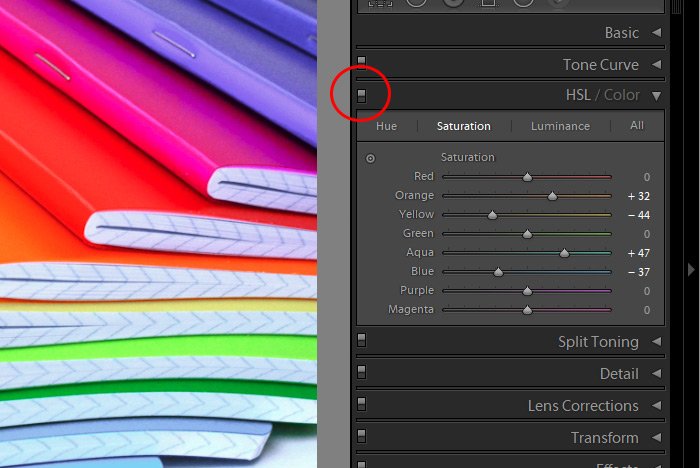
Please note that this is a panel-wide switch and not specific to any one of the contained tabs. But basically, by clicking it, you’ll effectively turn off any changes you made with the sliders and you’ll see the image without those alteration applied.
As you can see, there’s a lot you can do with the three tabs that exist inside of the HSL panel in Adobe Lightroom. The tools I described today should make working with these tabs a lot easier and faster.
I hope I clearly explained some of the available options inside of the HSL panel in Adobe Lightroom. If you have any questions regarding this post, please let me know in the comment section down below. Thanks for reading!
Using Targeted Adjustments with Hue, Saturation & Luminance in Adobe Camera Raw
In today’s post, I’d like to go over some of the HSL controls inside of Adobe Lightroom. We all know that the Hue panel can change existing colors in an image to neighboring colors, the Saturation panel can either strengthen or weaker specific colors and the Luminance panel can either brighten or darken colors. What may not be known though is how to more efficiently use these tools and panels. That’s what I’ll cover below – the tools behind the tools, which are pretty cool, if I don’t say so myself.
Today’s Demo Image
I’ll be using a photo of some colored notebooks for this post. After all, I’m writing about color here, so I think this is appropriate.
The HSL Panels
I should probably start off by telling you how you can access these panels in Lightroom. Over in the right column, you’ll see a whole bunch of panels. The one I’m referring to today is called HSL/Color. Each of these words is a link. Click on the HSL part of this title. Also, to make things easier to see, I’ve gone ahead and collapsed all the other panels by clicking on the small triangles located at the right side of each one. This is what I’m looking at now.
Okay, the first thing I’d like to show you is how to expand all of these panels at once. At the time of this writing, Camera Raw doesn’t include this feature, so I think it’s worth mentioning. Basically, we’ve always been able to click one of the tabs I mentioned above in the HSL panel, but now, inside of Lightroom, we have the option of clicking the All tab to see all the available sliders at once.

If you enjoy working with as many sliders visible as possible, go ahead and use the All tab. If you’re more focused like I am, simply click on the names of one of the other tabs. Doing this will limit the sliders to only what you’re interested in.
Resetting the Sliders
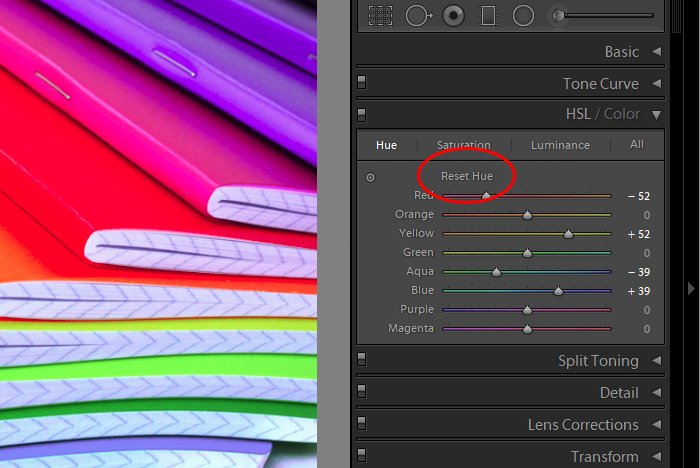
I decided to close all the other tabs and keep only the Hue one open. I also went ahead and randomly pushed some sliders in this tab around. What happens quite often when working with these types of sliders is that things get out of control. As editors, we experiment quite a bit to see what looks good and when we do this, we oftentimes go overboard and would like to reset our sliders back to where we started. One way to reset a slider is to double-click on it. Doing this will snap it back to its center. A fast way to reset all the sliders at once is to hold down the Alt key on your keyboard (Option for Mac) and click on the title inside the tab. When the Alt key is pressed, the word Reset will appear before the title. Simply click that word and all the sliders will move to their center positions.
The Targeted Adjustment Tool
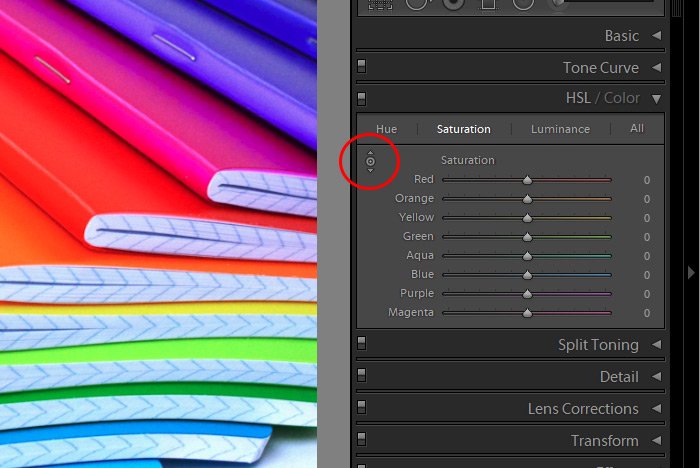
Another neat feature inside of each of these panels is the Targeted Adjustment Tool. This tool is indicated by a small circle in the tab.
If I click this circle and then move my mouse out to the image and then click and drag up or down, I’ll have the ability to move the sliders for whichever color I clicked on. This, in turn, will adjust those colors in the image. Each tab has this capability. To activate the tool, click the circle. To deactivate it, click the circle again. It’s “on” when two arrows are visible – one above the circle and one below.
Remember, you can push the sliders the same way you always could when this tool is activated. It’s meant to work in tandem with Lightroom’s normal operation.
Viewing Before & After Changes
If you make changes to an image via any one (or all) of the tabs I’ve discussed in this post and would like to view the before and after versions of those changes, you’re in luck. With the click of a mouse button, you can do this.To view the before and after versions, simply click the On/Off switch that’s located near the top of the panel.

Please note that this is a panel-wide switch and not specific to any one of the contained tabs. But basically, by clicking it, you’ll effectively turn off any changes you made with the sliders and you’ll see the image without those alteration applied.
As you can see, there’s a lot you can do with the three tabs that exist inside of the HSL panel in Adobe Lightroom. The tools I described today should make working with these tabs a lot easier and faster.
I hope I clearly explained some of the available options inside of the HSL panel in Adobe Lightroom. If you have any questions regarding this post, please let me know in the comment section down below. Thanks for reading!
