KristinaW
Member
- Joined
- May 7, 2021
- Messages
- 127
- Reaction Score
- 0
- Points
- 18
- #1
I’ve covered a lot of noise removal techniques for quite a few applications on this website, but I don’t think I’ve gotten to Adobe Lightroom yet. Lucky for us, removing grain from photos in Lightroom is almost identical to removing grain in Camera Raw. After all, Lightroom does use the Camera Raw engine for much of its processing, so that only makes sense.
In today’s post, I’ll walk you through the very simple process of reducing noise in a photograph using Adobe Lightroom. Since there are only a few sliders that go along with this process, this post should move along rather quickly.
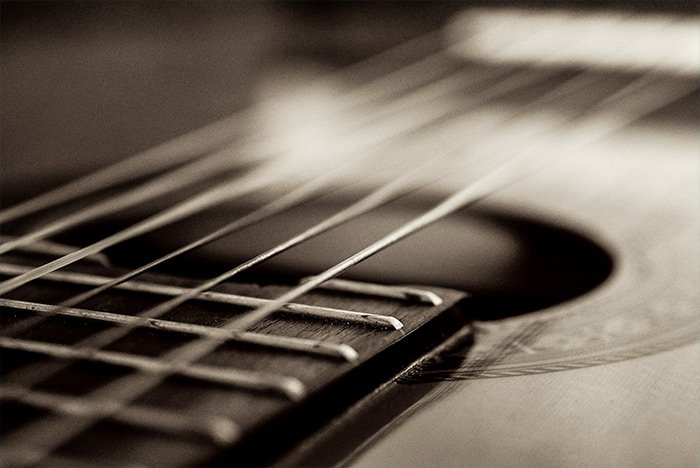
While you may not be able to view the noise in the image while it’s so small, it’s much more clearly visible the closer you look.

Hopefully I can reduce some of this grain to make the image look a little better.
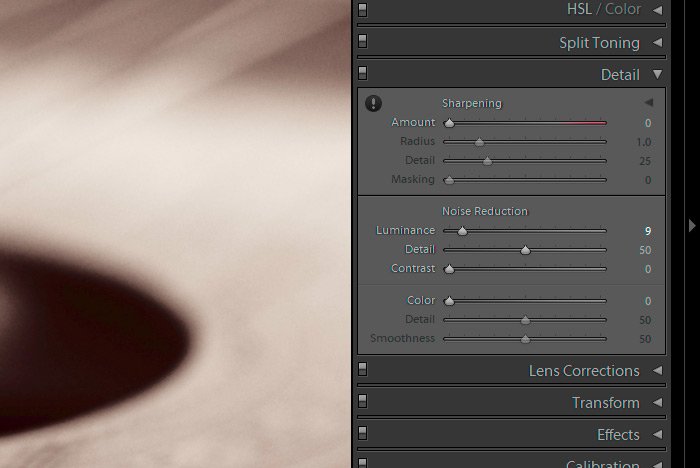
As a first step, it’s important to enlarge the image to 100%. To do this easily, I’ll click on the exclamation mark symbol that’s located in the upper left area of the Detail panel. If there’s no exclamation mark, then the image is already enlarged enough. The reason it’s important to enlarge the image is because we need to see the actual noise clearly in order to obtain satisfactory results. This is also true when it comes to sharpening. We need to know how far to push the sliders.
Obviously, I’m interested in the Noise Reduction settings, but I may choose to push the Amount slider under the Sharpening heading to the right, just to accentuate the noise a bit to see what I’m working with. After I’m done with that, I’ll push that slider back to its beginning position.
The trick with reducing noise in an image is to not go too far. If you push the Luminance slider under the Noise Reduction heading too far to the right, you’ll remove enough detail to make the image look like a cartoon. This is true with any of the applications I’ve discussed on this blog. Too much noise reduction is never a good thing. Also, remember that any noise reduction that’s applied to the area you’re looking at in your image is applied to the entire image. So while you may remove enough noise in the, for example, sky area for it to look wonderful, you may have removed too much detail in other areas of the photo. Remember, noise reduction is also detail reduction, so work in this area with a light touch.
For this image, I’ll be dealing with Luminance noise first and then, if I see any Color noise, I’ll handle that later. I may not need to deal with that though, as I have yet to see any of that type of noise in the photo I’m working on.
I’ll start off by gently nudging the Luminance slider to the right, just until I see the noise begin to smooth out. I know that even the slightest smoothing will make the photo look markedly better, so I will definitely use a light touch. Just to make things fun though, I’ll give you some examples of the noise reduction capabilities of Lightroom when it comes to this photo. In the screenshot below, the left side is no noise reduction, the center is 50% noise reduction and the right is 100% noise reduction.
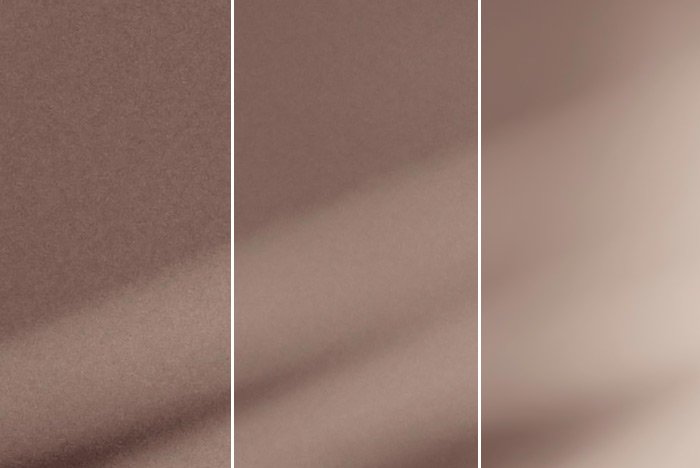
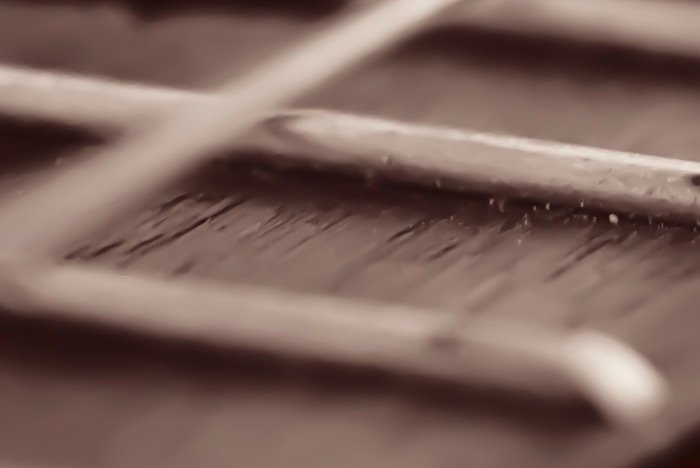
While the right side looks very good for this part of the image, far too much detail was removed. Take a look at the frets and the strings in the example below. You can see how the photo is just too smooth.
After some analysis, I’ve decided that a 50% value for the Luminance slider is sufficient. Next, I’ll adjust the Detail slider. This slider sets the luminance noise threshold, meaning that it puts detail (noise) back into the image. If you push this slider too far to the right, you run the risk of undoing what you just did with the slider above. Generally, a 25% value is good for this slider.
Finally, the Contrast slider controls luminance contrast, which can offer some very specifically targeted detail back into the image. Again though, if you push this slider to the right too far, you can easily reintroduce noise into the image. Again, a value of 25% is safe for this slider.
I looked around and found that there isn’t any color noise in the image I’m working on, but that doesn’t mean that I won’t tell you how to work the sliders in that section. Basically, in this section, there are three additional sliders; Color, Detail and Smoothness. The Color slider controls how much color noise will actually be removed. Push the slider to the right to remove more and to the left to remove less. The Detail slider controls how much color detail is removed from and added back to the image. This is different than luminance detail in that it limits itself to the pixels of varying colors that are adjacent to one another. Push the slider to the right for a more enhanced color detail in the image and to the left for a less enhanced one. Finally, we’ve got the Smoothness slider, which has the potential to very subtly smooth colors pixels that are adjacent to one another. Again, push the slider to the right for more smoothness and to the left for less.
Let’s take a look at the final image where the grain has been reduced.
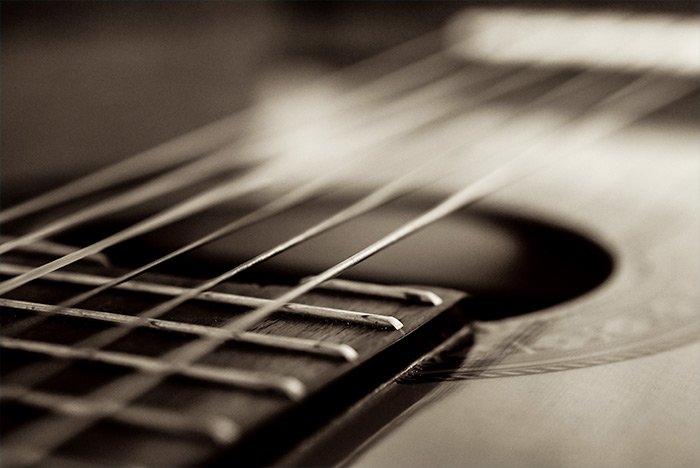
I know you probably can’t see any difference because the image is so small, but let me assure you that it does, in fact, look better. If you look at the more solidly filled areas, you’ll see that they appear smoother and to have less grain. The best part is that the process for making it look better was so fast and simple.
I hope I clearly explained how to reduce the appearance of grain and noise in a photograph with Adobe Lightroom. If you have any questions regarding this post or process, please leave them in the comment section below or in the Lightroom user’s forum. Thanks for reading!
In today’s post, I’ll walk you through the very simple process of reducing noise in a photograph using Adobe Lightroom. Since there are only a few sliders that go along with this process, this post should move along rather quickly.
Demo Photo
This is the photograph I’ll be using for today’s post. It’s of some guitar strings.
While you may not be able to view the noise in the image while it’s so small, it’s much more clearly visible the closer you look.

Hopefully I can reduce some of this grain to make the image look a little better.
Reducing the Noise
I’ve got the photo already imported into Lightroom and I’ve selected it and clicked on the Develop link in the upper right portion of the application. After that, I clicked on the Detail panel to open it up. This is what it looks like inside.
As a first step, it’s important to enlarge the image to 100%. To do this easily, I’ll click on the exclamation mark symbol that’s located in the upper left area of the Detail panel. If there’s no exclamation mark, then the image is already enlarged enough. The reason it’s important to enlarge the image is because we need to see the actual noise clearly in order to obtain satisfactory results. This is also true when it comes to sharpening. We need to know how far to push the sliders.
Obviously, I’m interested in the Noise Reduction settings, but I may choose to push the Amount slider under the Sharpening heading to the right, just to accentuate the noise a bit to see what I’m working with. After I’m done with that, I’ll push that slider back to its beginning position.
The trick with reducing noise in an image is to not go too far. If you push the Luminance slider under the Noise Reduction heading too far to the right, you’ll remove enough detail to make the image look like a cartoon. This is true with any of the applications I’ve discussed on this blog. Too much noise reduction is never a good thing. Also, remember that any noise reduction that’s applied to the area you’re looking at in your image is applied to the entire image. So while you may remove enough noise in the, for example, sky area for it to look wonderful, you may have removed too much detail in other areas of the photo. Remember, noise reduction is also detail reduction, so work in this area with a light touch.
Luminance Versus Color
Inside the Detail panel, you’ll notice two distinct sections. One section (the top one) deals with Luminance noise and the other (the bottom one) deals with Color noise. Luminance noise is what you see in the image in this post. It’s generally monochromatic and it’s quite common in photos that were captured where higher ISO values were used. Color noise generally occupies areas of an image that should contain solid colors. Color noise consists of multi-colored specks.For this image, I’ll be dealing with Luminance noise first and then, if I see any Color noise, I’ll handle that later. I may not need to deal with that though, as I have yet to see any of that type of noise in the photo I’m working on.
I’ll start off by gently nudging the Luminance slider to the right, just until I see the noise begin to smooth out. I know that even the slightest smoothing will make the photo look markedly better, so I will definitely use a light touch. Just to make things fun though, I’ll give you some examples of the noise reduction capabilities of Lightroom when it comes to this photo. In the screenshot below, the left side is no noise reduction, the center is 50% noise reduction and the right is 100% noise reduction.

While the right side looks very good for this part of the image, far too much detail was removed. Take a look at the frets and the strings in the example below. You can see how the photo is just too smooth.

After some analysis, I’ve decided that a 50% value for the Luminance slider is sufficient. Next, I’ll adjust the Detail slider. This slider sets the luminance noise threshold, meaning that it puts detail (noise) back into the image. If you push this slider too far to the right, you run the risk of undoing what you just did with the slider above. Generally, a 25% value is good for this slider.
Finally, the Contrast slider controls luminance contrast, which can offer some very specifically targeted detail back into the image. Again though, if you push this slider to the right too far, you can easily reintroduce noise into the image. Again, a value of 25% is safe for this slider.
I looked around and found that there isn’t any color noise in the image I’m working on, but that doesn’t mean that I won’t tell you how to work the sliders in that section. Basically, in this section, there are three additional sliders; Color, Detail and Smoothness. The Color slider controls how much color noise will actually be removed. Push the slider to the right to remove more and to the left to remove less. The Detail slider controls how much color detail is removed from and added back to the image. This is different than luminance detail in that it limits itself to the pixels of varying colors that are adjacent to one another. Push the slider to the right for a more enhanced color detail in the image and to the left for a less enhanced one. Finally, we’ve got the Smoothness slider, which has the potential to very subtly smooth colors pixels that are adjacent to one another. Again, push the slider to the right for more smoothness and to the left for less.
Let’s take a look at the final image where the grain has been reduced.

I know you probably can’t see any difference because the image is so small, but let me assure you that it does, in fact, look better. If you look at the more solidly filled areas, you’ll see that they appear smoother and to have less grain. The best part is that the process for making it look better was so fast and simple.
I hope I clearly explained how to reduce the appearance of grain and noise in a photograph with Adobe Lightroom. If you have any questions regarding this post or process, please leave them in the comment section below or in the Lightroom user’s forum. Thanks for reading!
