CraigHardy
Member
- Joined
- May 11, 2021
- Messages
- 223
- Reaction Score
- 2
- Points
- 18
- #1
If you’re an illustrator or if you do any type of drawing in Photoshop, you may be interested in this post. It’ll cover a really interested aspect of what you can do with the Brush Tool.
I’ve gone over some areas of how to set some features with this tool before. If you haven’t seen those posts, please take a look below.
How to Adjust the Brush Tool Settings in Adobe Photoshop
How to Customize Bristle Tip Brushes in Adobe Photoshop
How To Create Custom Brushes in Adobe Photoshop
In today’s post, I’ll walk you through the process of choosing a brush and adjusting the various settings that have to do with texture in Adobe Photoshop. If you’ve ever painted, you surely know that the medium on which you paint can vary greatly. Sometimes it’s canvas, sometimes it’s wood and sometimes it’s a smooth piece of material. Whatever type of texture you prefer, there’s likely a method for replicating it inside of Photoshop. With this knowledge, you can replicate what you enjoy engaging in in the real world and bring it into the digital.
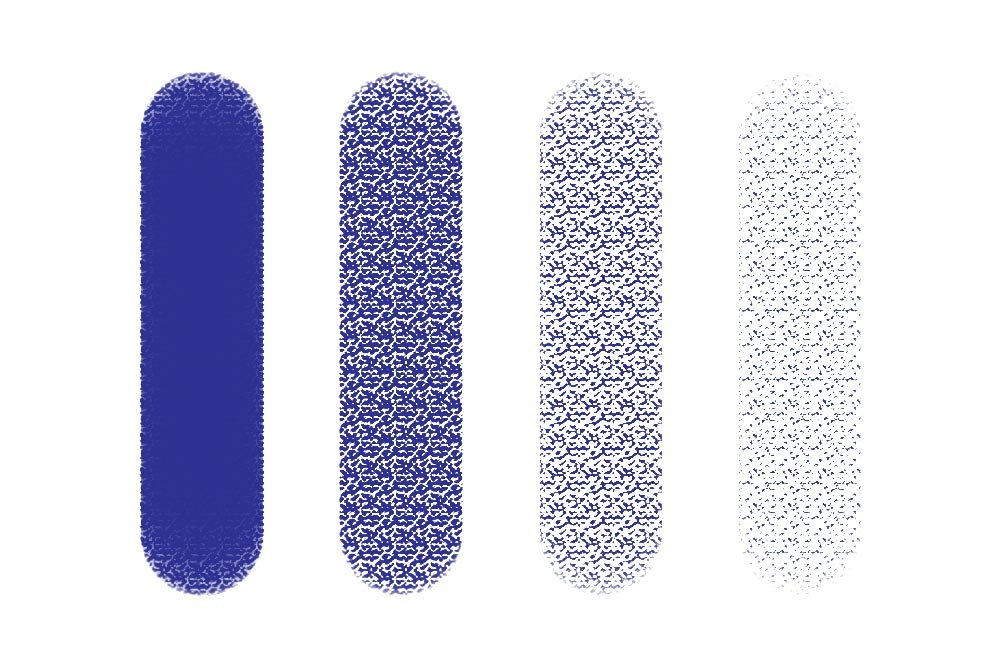
In the following section, I’ll show you where the Brush Tool texture controls can be found. Then, I’ll explain what each setting means and how it can affect your output.
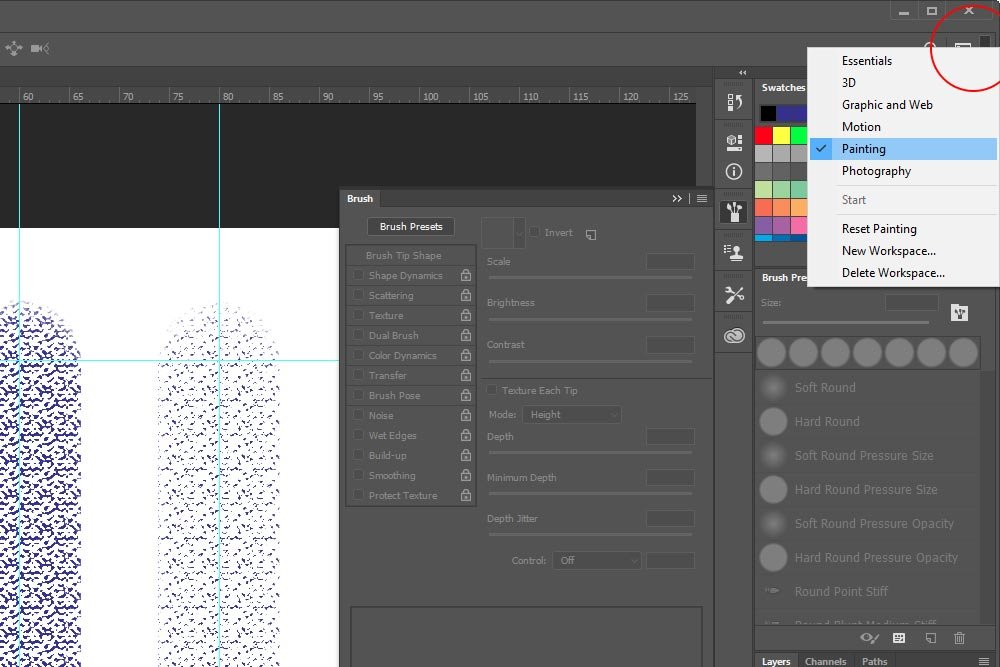
As you can see in the screenshot above, I moved my mouse to the upper right corner and clicked the small drop-down box. Once I did that, I saw a few different options for workspaces. I chose the one called Painting.
You may also notice that the panels on the right side changed once I did this. The Brush Presets panel appeared and the Layers panel was bumped down even further than it was before.
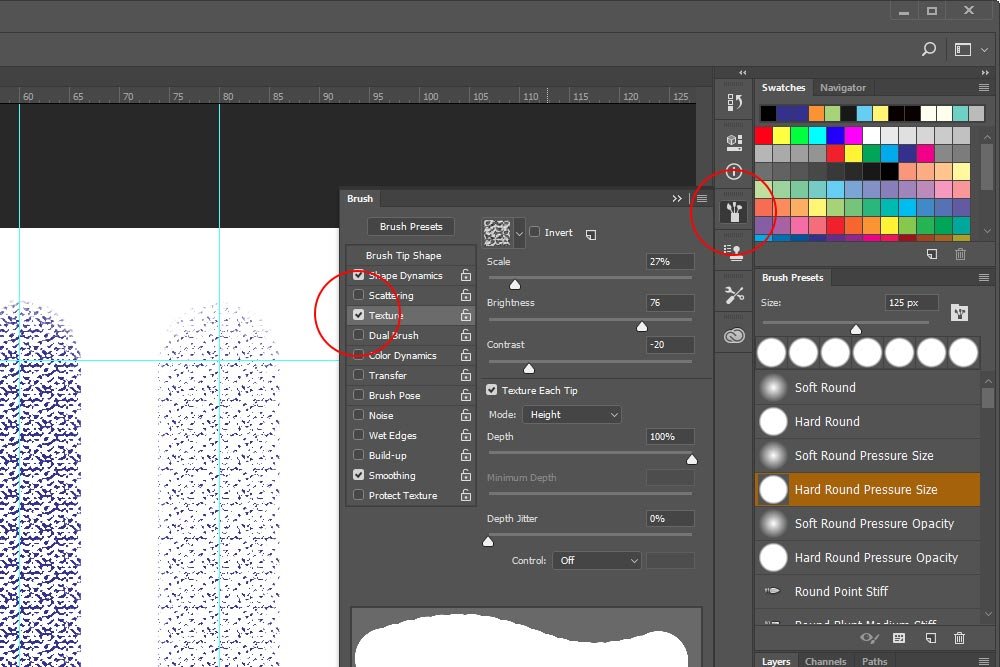
Each step I just made had an effect. First, by selecting the Brush Tool, I woke up the Brush panel. Then, by clicking the Brush icon in the vertical toolbar, I opened the panel and finally, by clicking inside the Texture check box, I changed the contents of the panel to show the texture sliders.
Invert: This setting does exactly what you think it would do. If you think about how, say, canvas looks after you lightly brush some paint on it, this concept will be simple. Basically, the paint will sit on the high points of each bit of texture and will gloss right over the low points. As I mentioned above, the texture settings can emulate this. Now, if you wanted to change the look of things slightly and reverse the high points and the low points to create the opposite pattern, simply click inside the Invert check box.
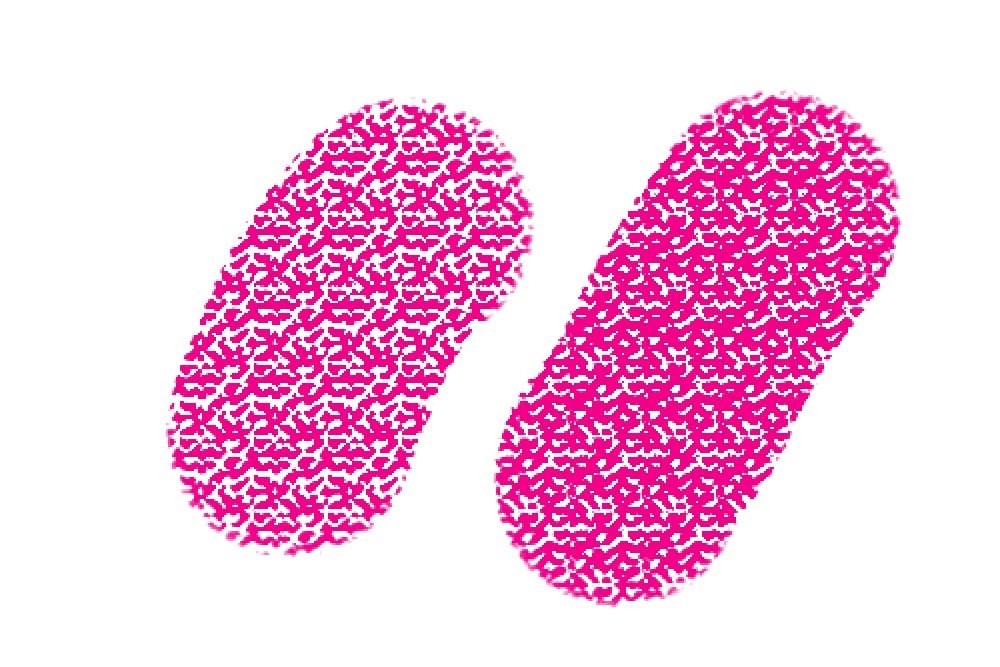
Also, there is a small drop-down box that sits to the left of the Invert check box. If you click this drop-down, you’ll see a small selection of different textures to choose from. While this selection contains only a few options, it’ll be fine for the purposes of this post. Please be aware, though, that you can purchase a whole slew of textures that you can install into your version of Photoshop that will truly open the world of enjoying art.
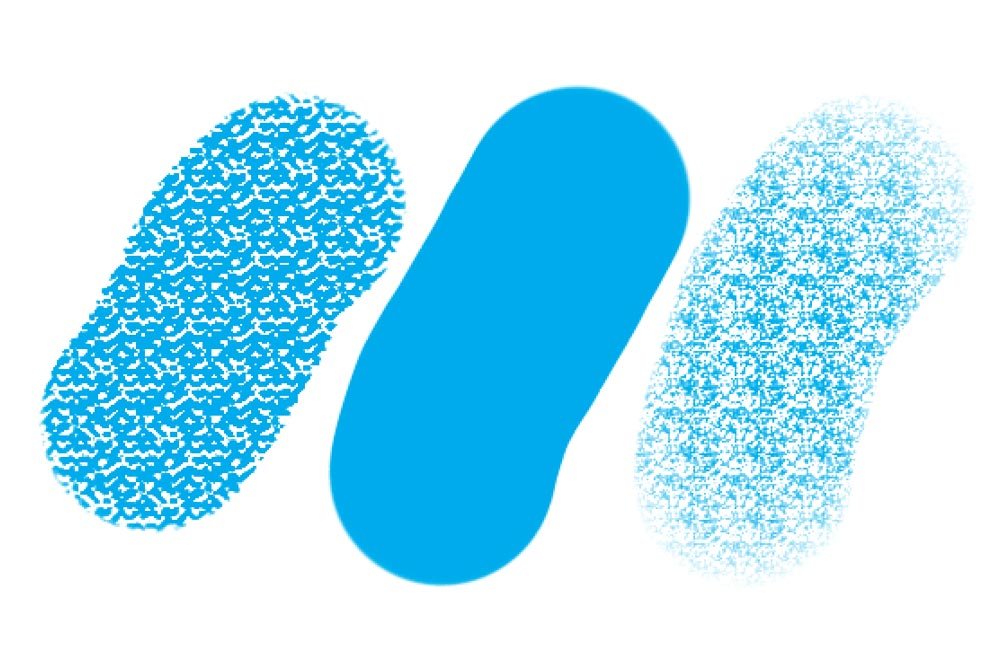
Scale: If you had a physical piece of canvas or another medium in front of you and you looked at it with unaided eyes, you’d see the variations in that texture at one scale. If you took out a magnifying glass and began to move it towards the material slowly, the texture would get larger and larger. If you push the Scale slider to the right, the same thing will happen. The details of the texture will get larger. It’s up to you to find the size you’d like to work with.
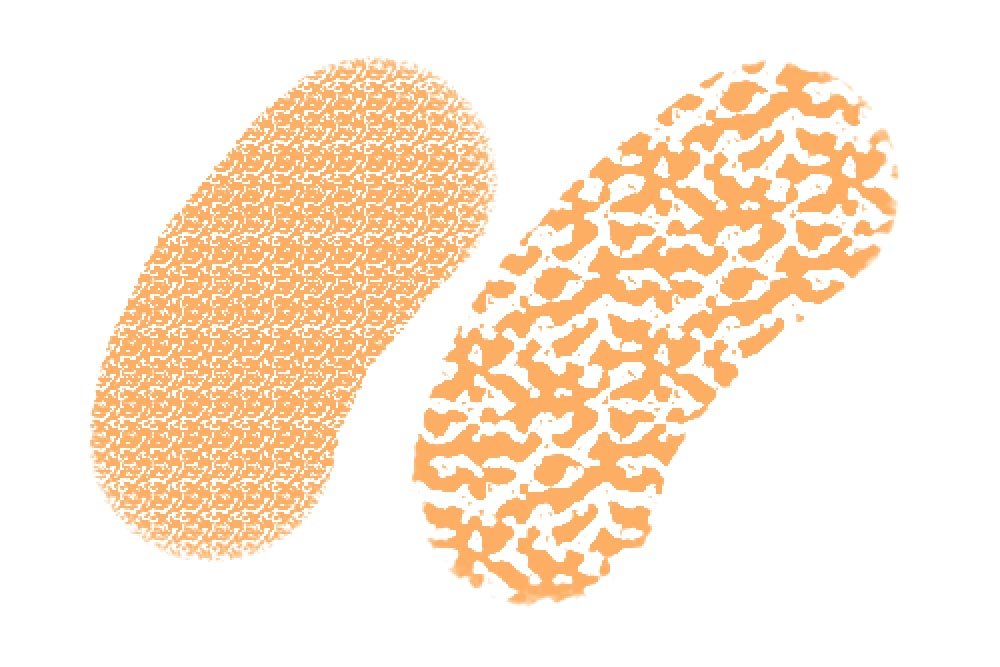
Brightness: This slider controls how bright or how dark the paint goes on the background. Think of it as how “thick” the paint will be applied. If you push the slider to the left, it’ll go on stronger and if you push it to the right, it’ll go on weaker.
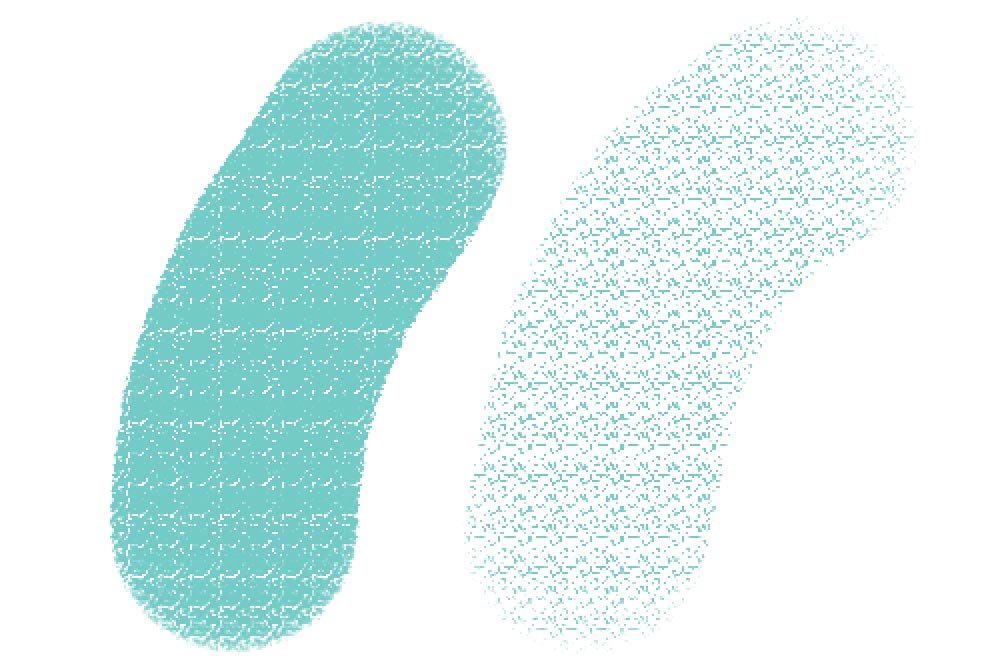
Contrast: The Contrast slider controls how the edges of each piece of the texture behaves. Each small bit of material can go on with a specific blur or sharpness. If you push this slider to the left, the paint goes on smoother and more blurred. If you push it to the right, it’ll go on much more sharply.
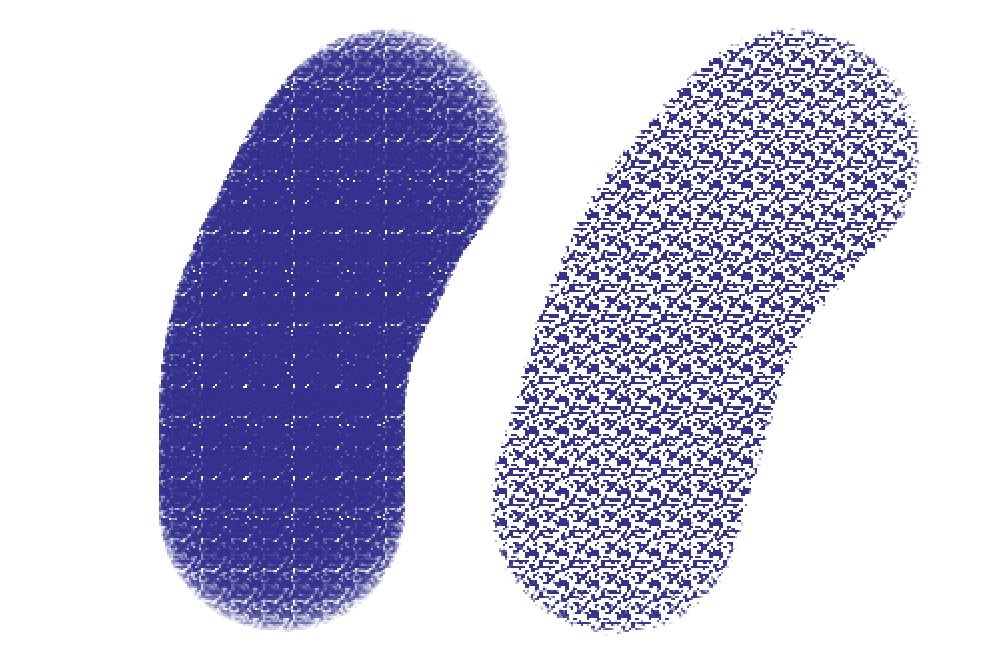
Texture Each Tip: This option is sort of confusing. In the most basic sense, each and every brush mark in the brush stroke has a characteristic. This setting controls whether or not the texture of choice is applied to the brush as a whole or to each brush mark in the stroke. You’ll definitely need to play with this one to get used to what it can do.
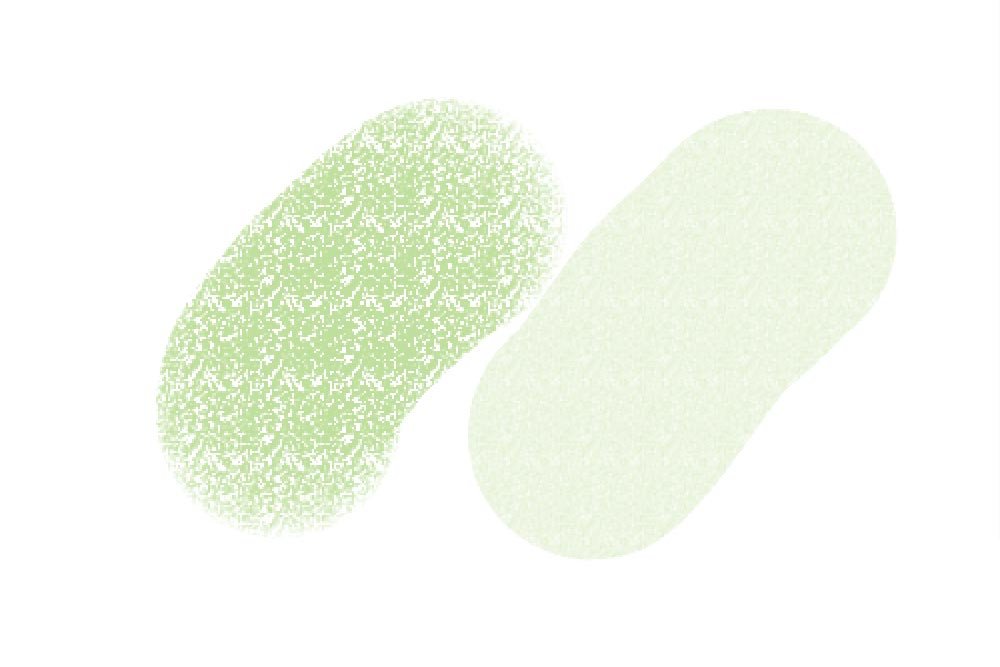
Mode: This is a drop-down that’s located directly after the previous option. It controls the blending mode that’s used to combine brush strokes.
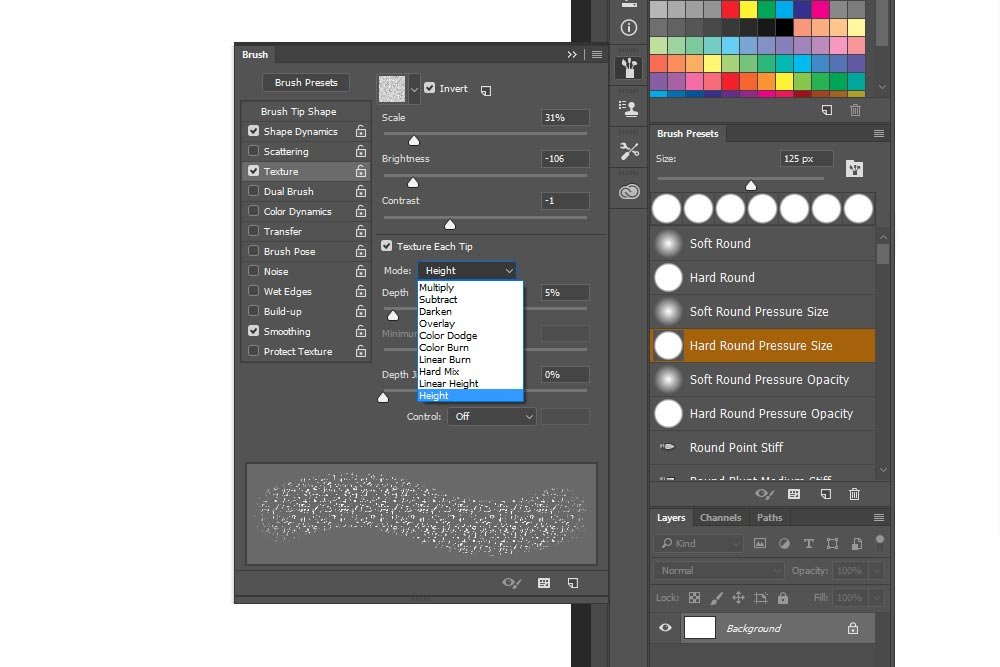
If you look at the screenshot above, you’ll see that the available options are Multiply, Subtract, Darken, Overlay, Color Dodge, Color Burn, Linear Burn, Hard Mix, Linear Height and Height.
Depth: This is a big one. If you experiment in this section and either your brush seems like it’s not there at all or it’s there way too much (completely solid), try adjusting this slider back and forth. This option controls how deeply the “paint” or material soaks into whatever it is your painting on. If you push this slider to the left all the way, no paint will be applied. The further to the right you push this slider, the more material will be applied and will penetrate the canvas or other medium. Of course, if you push the slider too far, too much paint will be applied and eventually, the entire texture will be hidden. Be careful.
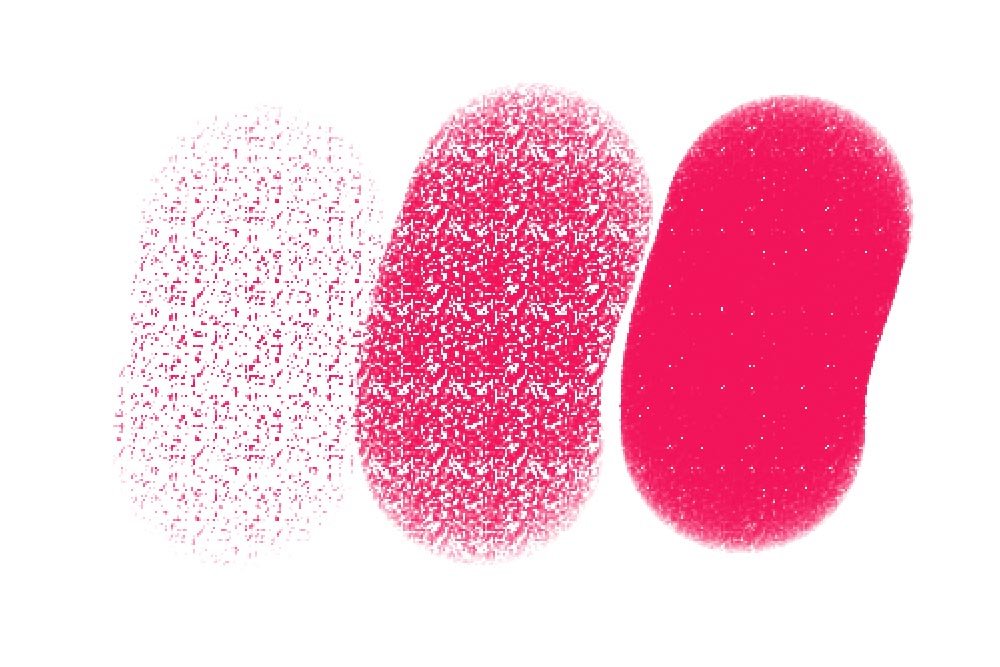
Minimum Depth: This slider sets a marker that controls the minimum depth the paint can penetrate the medium you’re painting on. This setting works in conjunction with the Control drop-down box at the bottom of the sliders. The Control drop-down box includes the following options; Off, Fade, Pen Pressure, Pen Tilt, Stylus Wheel and Rotation. If you have a drawing pad, you’re golden with this setting.
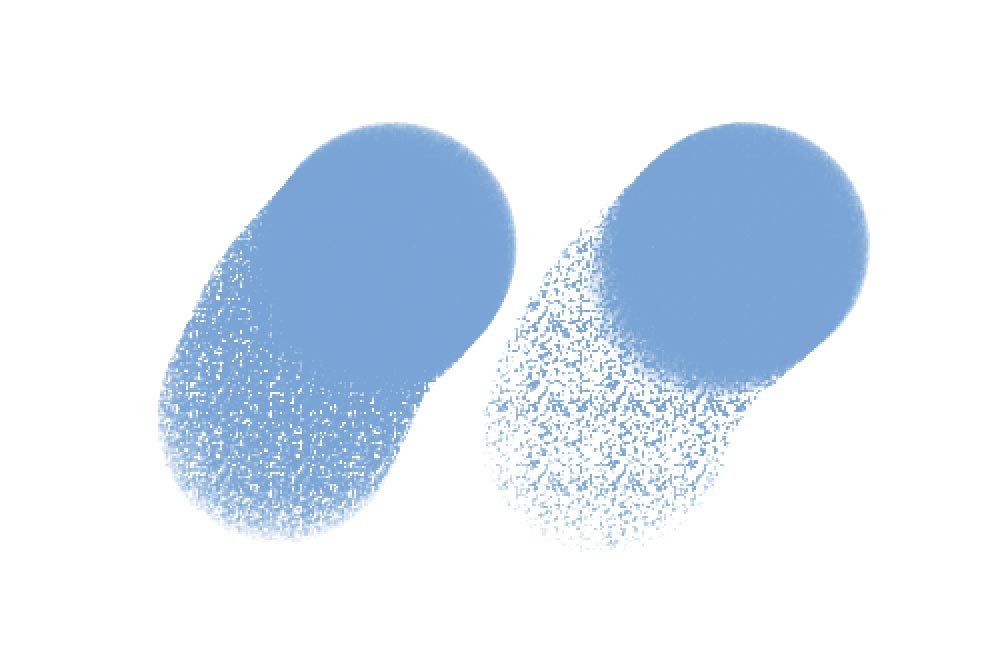
Depth Jitter and Control: This slider works in conjunction with Texture Each Tip. If you push the slider to the left, your brush stroke will appear more solid and uniform. If you push the slider to the right, the stroke with have much more variation. This setting also works well with the settings in the Control drop-down box.
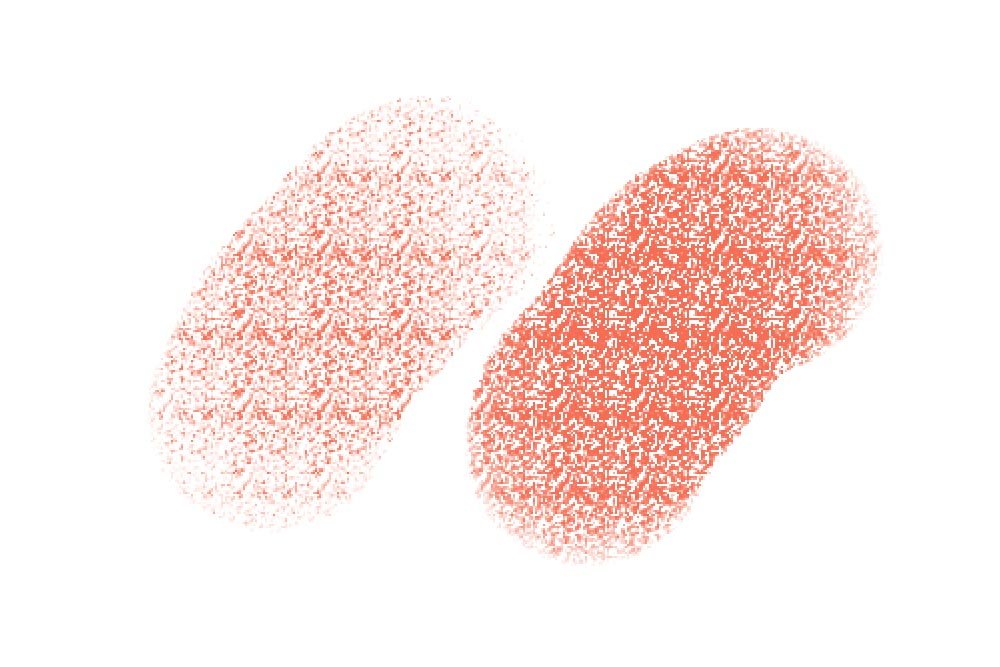
Control: Each of the options in the Control drop-down plays a part in how the outcome of a brush stroke appears when you’re using the Depth sliders. I’ll quickly explain these options below.
Off: Specifies no control over the depth variance of brush marks.
Fade: Fades from the Depth Jitter percentage to the Minimum Depth percentage in the specified number of steps.
Pen Pressure, Pen Tilt, Stylus Wheel and Rotation: Varies the depth based on the pen pressure, pen tilt, position of the pen thumbwheel or rotation of the pen when you’re using a drawing pad.
If you have any questions or concerns about this post, please let me know in the comment section below. I’m always here to help. Thanks for reading!
I’ve gone over some areas of how to set some features with this tool before. If you haven’t seen those posts, please take a look below.
How to Adjust the Brush Tool Settings in Adobe Photoshop
How to Customize Bristle Tip Brushes in Adobe Photoshop
How To Create Custom Brushes in Adobe Photoshop
In today’s post, I’ll walk you through the process of choosing a brush and adjusting the various settings that have to do with texture in Adobe Photoshop. If you’ve ever painted, you surely know that the medium on which you paint can vary greatly. Sometimes it’s canvas, sometimes it’s wood and sometimes it’s a smooth piece of material. Whatever type of texture you prefer, there’s likely a method for replicating it inside of Photoshop. With this knowledge, you can replicate what you enjoy engaging in in the real world and bring it into the digital.
Brush Textures in Photoshop
Before I begin giving you examples, I better explain what I mean by “textures” in Photoshop. Let’s say you lightly apply some paint to a piece of canvas with a paintbrush. If you paint lightly enough, you’ll end up seeing the texture of the canvas show through the paint. Of course, if you apply the paint thick and slowly enough, you won’t actually see the texture right away, but you’ll be able to see the ripples in the paint after it dries, along with being able to feel it with your fingertips. With every piece of art, there will be varying degrees of visible texture. In Photoshop, you can emulate some of this effect.
In the following section, I’ll show you where the Brush Tool texture controls can be found. Then, I’ll explain what each setting means and how it can affect your output.
Setting Your Workspace
Photoshop has a nicely built-in workspace for painters and illustrators. Adobe has taken the most popular panels, arranged them and saved them as a workspace. It’s called Painting. With this in mind, let’s go ahead and set this workspace now.
As you can see in the screenshot above, I moved my mouse to the upper right corner and clicked the small drop-down box. Once I did that, I saw a few different options for workspaces. I chose the one called Painting.
You may also notice that the panels on the right side changed once I did this. The Brush Presets panel appeared and the Layers panel was bumped down even further than it was before.
Finding the Texture Settings
To find the texture sliders, I need to first do a few things. I’ll click on the Brush Tool over in the left vertical toolbar. Then, I’ll click on the small Brush palette icon in the right vertical toolbar and finally, I’ll click in the Texture check box in the left column of the Brush panel. Let’s see if I can circle a few of these areas in red for you below.
Each step I just made had an effect. First, by selecting the Brush Tool, I woke up the Brush panel. Then, by clicking the Brush icon in the vertical toolbar, I opened the panel and finally, by clicking inside the Texture check box, I changed the contents of the panel to show the texture sliders.
What Each Slider Does
In this section, I’ll explain what each setting in the Texture panel does. These are somewhat confusing because many of them have only subtle effects. There are, however, a few that really control most of the show, so I’ll be sure to pay special attention to them. Below, I’ll go right down the list of settings so you can get a clear picture of what’s going on.Invert: This setting does exactly what you think it would do. If you think about how, say, canvas looks after you lightly brush some paint on it, this concept will be simple. Basically, the paint will sit on the high points of each bit of texture and will gloss right over the low points. As I mentioned above, the texture settings can emulate this. Now, if you wanted to change the look of things slightly and reverse the high points and the low points to create the opposite pattern, simply click inside the Invert check box.

Also, there is a small drop-down box that sits to the left of the Invert check box. If you click this drop-down, you’ll see a small selection of different textures to choose from. While this selection contains only a few options, it’ll be fine for the purposes of this post. Please be aware, though, that you can purchase a whole slew of textures that you can install into your version of Photoshop that will truly open the world of enjoying art.

Scale: If you had a physical piece of canvas or another medium in front of you and you looked at it with unaided eyes, you’d see the variations in that texture at one scale. If you took out a magnifying glass and began to move it towards the material slowly, the texture would get larger and larger. If you push the Scale slider to the right, the same thing will happen. The details of the texture will get larger. It’s up to you to find the size you’d like to work with.

Brightness: This slider controls how bright or how dark the paint goes on the background. Think of it as how “thick” the paint will be applied. If you push the slider to the left, it’ll go on stronger and if you push it to the right, it’ll go on weaker.

Contrast: The Contrast slider controls how the edges of each piece of the texture behaves. Each small bit of material can go on with a specific blur or sharpness. If you push this slider to the left, the paint goes on smoother and more blurred. If you push it to the right, it’ll go on much more sharply.

Texture Each Tip: This option is sort of confusing. In the most basic sense, each and every brush mark in the brush stroke has a characteristic. This setting controls whether or not the texture of choice is applied to the brush as a whole or to each brush mark in the stroke. You’ll definitely need to play with this one to get used to what it can do.

Mode: This is a drop-down that’s located directly after the previous option. It controls the blending mode that’s used to combine brush strokes.

If you look at the screenshot above, you’ll see that the available options are Multiply, Subtract, Darken, Overlay, Color Dodge, Color Burn, Linear Burn, Hard Mix, Linear Height and Height.
Depth: This is a big one. If you experiment in this section and either your brush seems like it’s not there at all or it’s there way too much (completely solid), try adjusting this slider back and forth. This option controls how deeply the “paint” or material soaks into whatever it is your painting on. If you push this slider to the left all the way, no paint will be applied. The further to the right you push this slider, the more material will be applied and will penetrate the canvas or other medium. Of course, if you push the slider too far, too much paint will be applied and eventually, the entire texture will be hidden. Be careful.

Minimum Depth: This slider sets a marker that controls the minimum depth the paint can penetrate the medium you’re painting on. This setting works in conjunction with the Control drop-down box at the bottom of the sliders. The Control drop-down box includes the following options; Off, Fade, Pen Pressure, Pen Tilt, Stylus Wheel and Rotation. If you have a drawing pad, you’re golden with this setting.

Depth Jitter and Control: This slider works in conjunction with Texture Each Tip. If you push the slider to the left, your brush stroke will appear more solid and uniform. If you push the slider to the right, the stroke with have much more variation. This setting also works well with the settings in the Control drop-down box.

Control: Each of the options in the Control drop-down plays a part in how the outcome of a brush stroke appears when you’re using the Depth sliders. I’ll quickly explain these options below.
Off: Specifies no control over the depth variance of brush marks.
Fade: Fades from the Depth Jitter percentage to the Minimum Depth percentage in the specified number of steps.
Pen Pressure, Pen Tilt, Stylus Wheel and Rotation: Varies the depth based on the pen pressure, pen tilt, position of the pen thumbwheel or rotation of the pen when you’re using a drawing pad.
Conclusion
Back when I first began writing this post, I intended to go through the explanations of each setting and then give you a few visual examples. As I wrote though, I found that I could offer some comparison examples along the way. This gives me the opportunity to skip the ones I was going to create earlier. I hope you have a clear idea of what each of the texture settings can accomplish.If you have any questions or concerns about this post, please let me know in the comment section below. I’m always here to help. Thanks for reading!
