LukeLewis
Member
- Joined
- May 7, 2021
- Messages
- 134
- Reaction Score
- 0
- Points
- 21
- #1
Sometimes, I sit at my desk and just mess around in Photoshop. I’ll take an image and see what happens when I apply a new tip I found out about or I’ll try to remember something I learned years ago. I suppose you can call this “brushing up” or simply staying in the loop. Today, I did some of this messing around.
I thought I’d open Photoshop to see how fast I could add some saturation and vibrance to an object in an image. Of course, I had to find the perfect image to do this to because that makes life a heck of a lot easier. I found the image and went to work.
In today’s post, I’ll be walking through the process I followed to add saturation, or more enhanced color, to a splash in a photograph. While everything only took a few steps, I think it’s worth sharing what I did. There are some really good tricks I include that I feel you may benefit from, so check out the rest of this post to find out what they are.
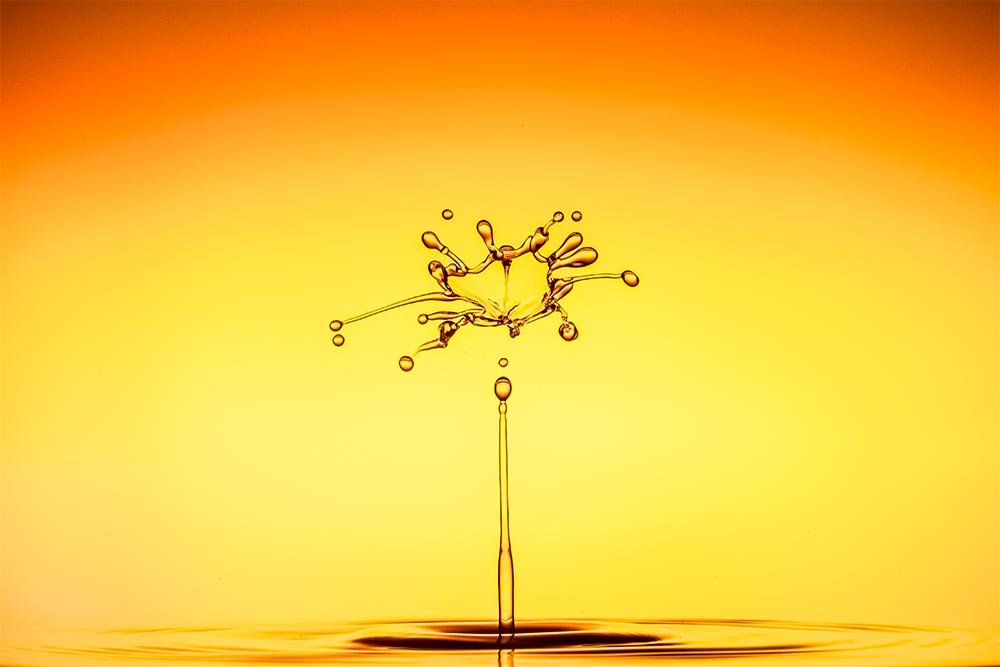
Since the photo above has a nice smooth background and an obvious “object” front and center, I felt that it was appropriate. In the next few sections, you’ll see exactly why that is.
To accomplish this type of selection, I’ll use the Lasso Tool. To activate this tool, I’ll click the third icon from the top on the left vertical toolbar or press L on my keyboard as a shortcut. Once ready, I’ll draw a circle around the object, which will, when I’m finished, create a selection evidenced by some marching ants.
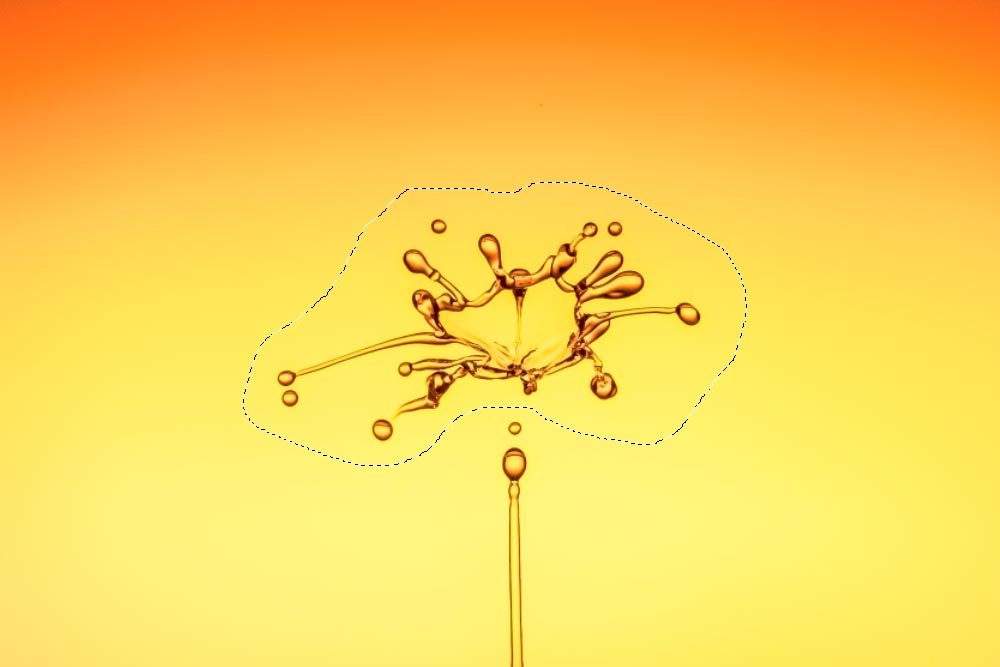
You may be wondering why I wasn’t more careful when making this selection. After all, it’s the liquid I want, not a circle around it. Well, since this is an isolated object and since the background is so smooth, I can take advantage of a little trick. I’ll change tools so the Magic Wand Tool is active and then I’ll hold down the Alt key (Option on Mac). Once the Alt key is pressed, I can click inside the selection on the background area until that area isn’t selected anymore.
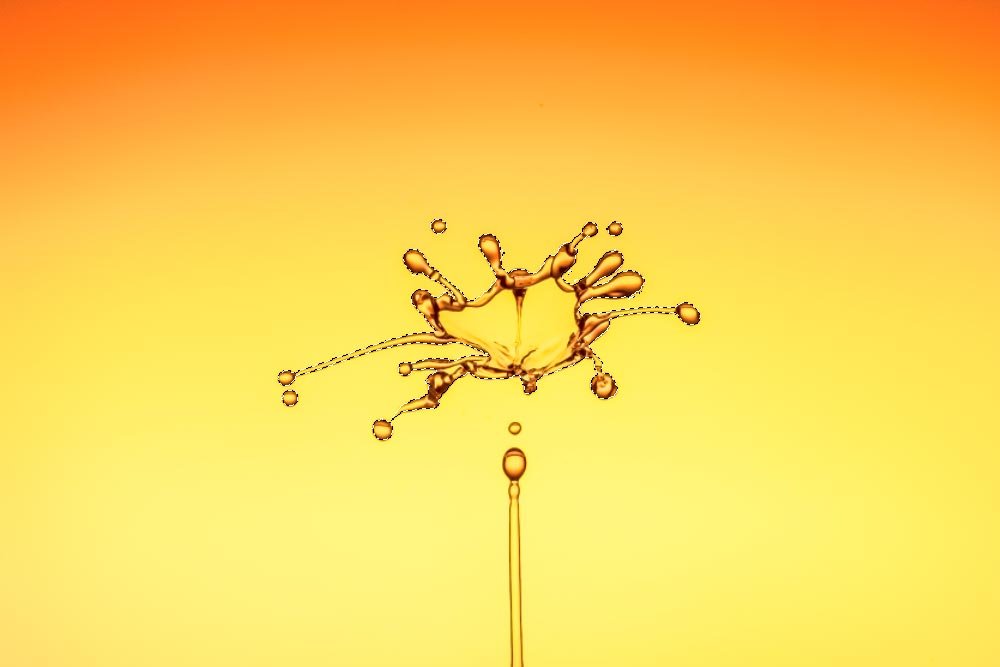
That’s a pretty good tip. To “unselect” something, as opposed to selecting something, just hold down the Alt or Option keys and go about clicking where you don’t want any selection.
If you take a look at the screenshot above, you’ll see that the marching ants are now hugging the droplets.
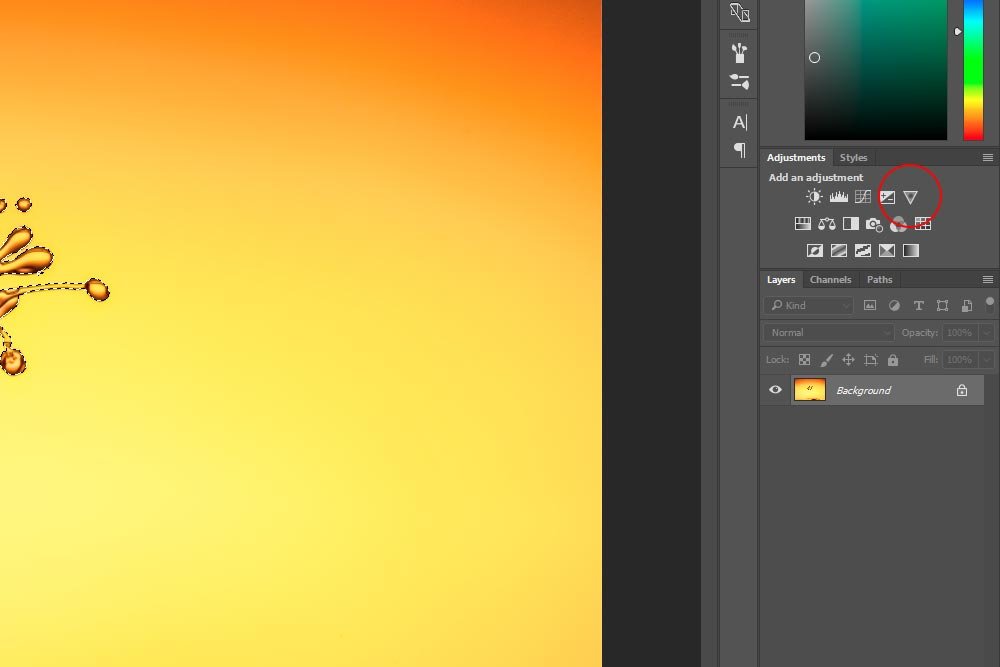
Once I do that, the Properties panel for that adjustment will open up.
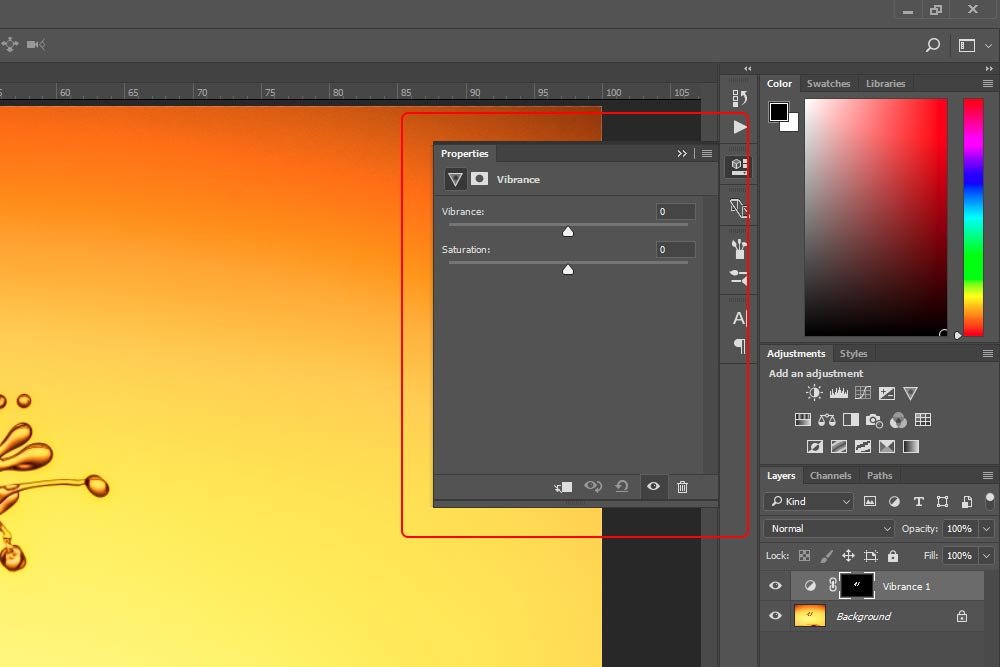
As you can see from the above screenshot, the adjustment layer with the mask in it was also created. It’s sitting as the top layer in the Layers panel.
Anyway, because both the Vibrance and Saturation sliders in the Properties panel are fairly timid, I’ll push them both all the way to the right. This will enhance whatever color already exists and make it more bold.
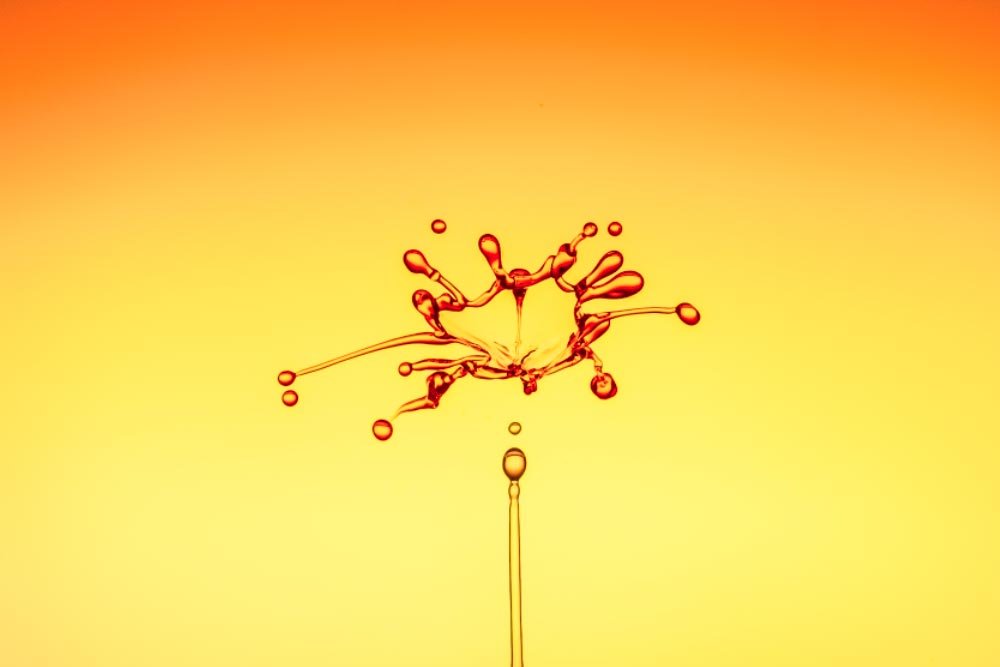
And if I wanted to remove some color, I could push both sliders all the way to the left.
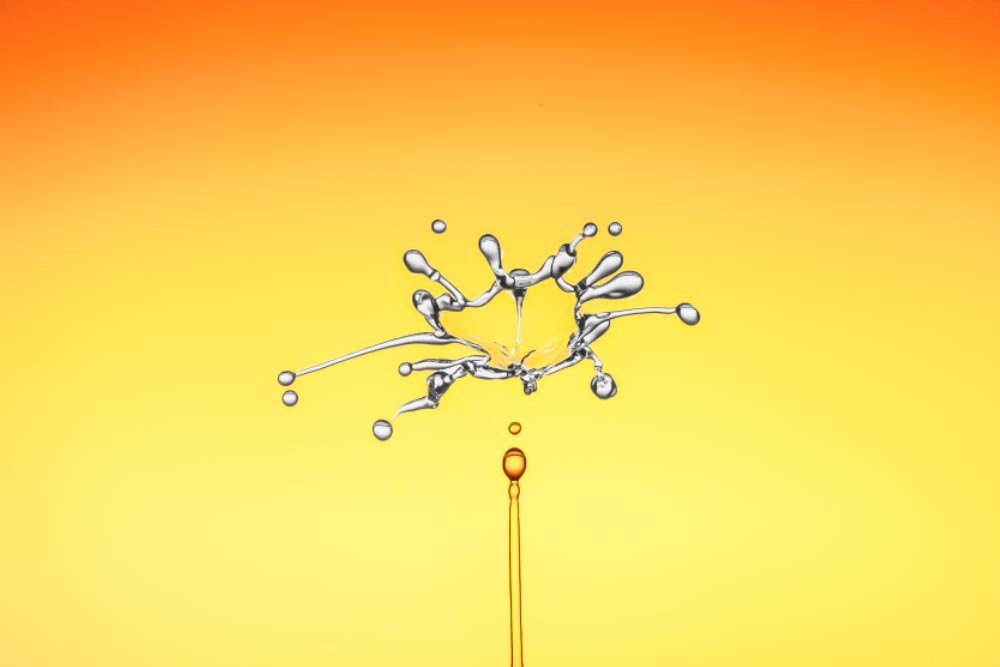
I actually like the second one. The liquid looks like some sort of molten metal.
Because there’s more to this object, I’ll need to colorize or desaturate the vertical stream of liquid as well. To do this, I’ll follow exactly what I did above, with just one minor change.
After following all the steps, I noticed that the bottom part couldn’t be cleanly deselected with the Magic Wand Tool. You can see that below.
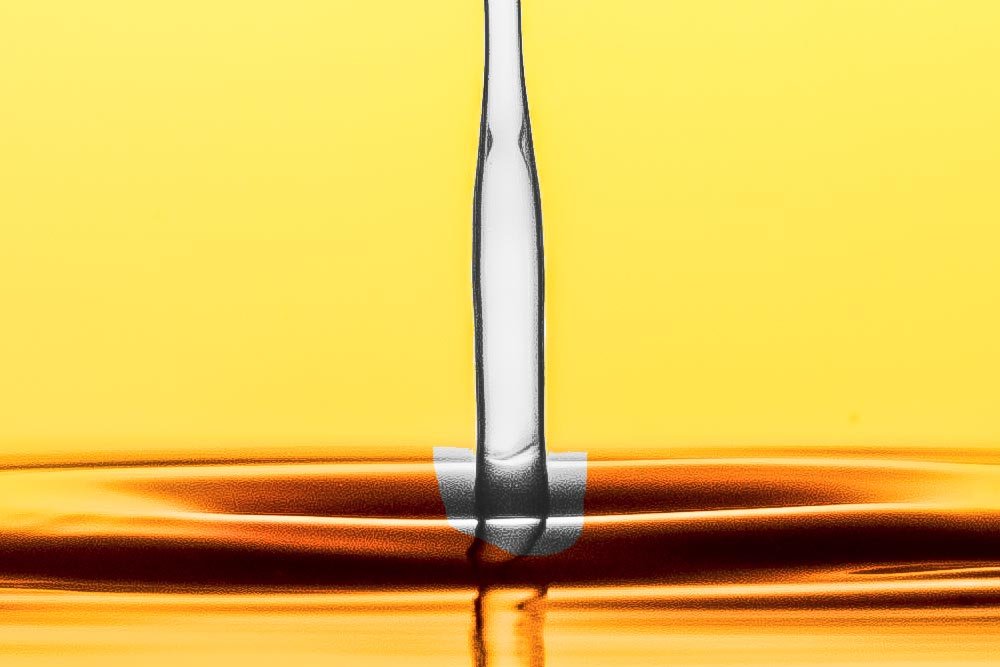
Since I already created the adjustment layer and pushed both sliders to the left, I can clearly see what I need to clean up with the Brush Tool. If you’ve ever worked with masks before, you know that black hides and white reveals. Since I want to hide some of the extra adjustment, I’ll select this tool, resize it, change the color to black and do a bit of painting.
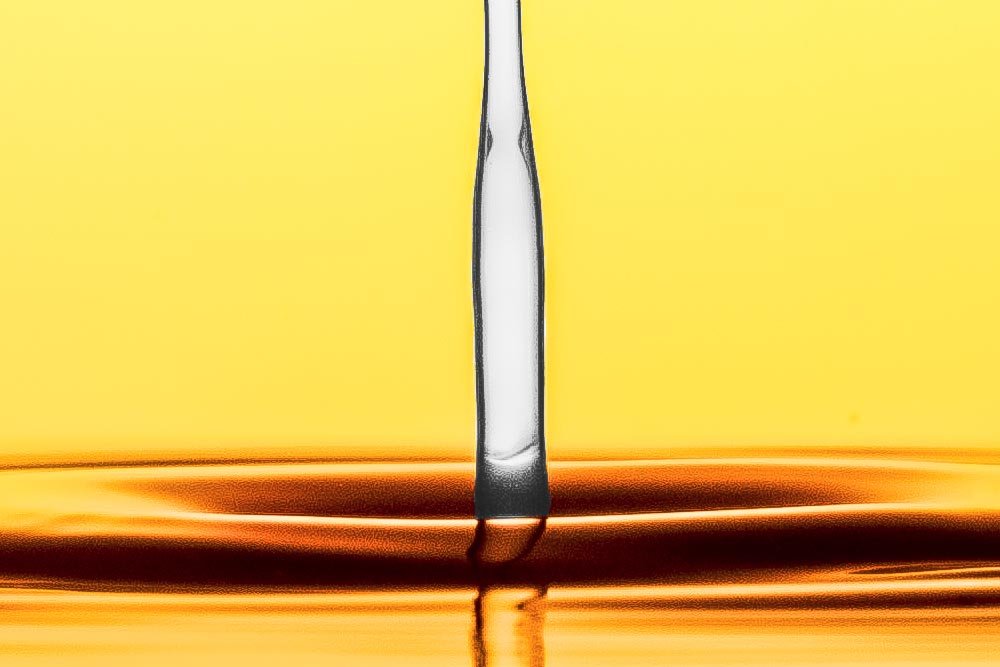
Now, if I take both versions of the final image and place them side by side, you can see the differences. I think it looks pretty cool and this post gives a decent indication of where you can go with these types of edits. Basically, if you want to either add color to or remove color from an object, you can do so by following the steps in this post.
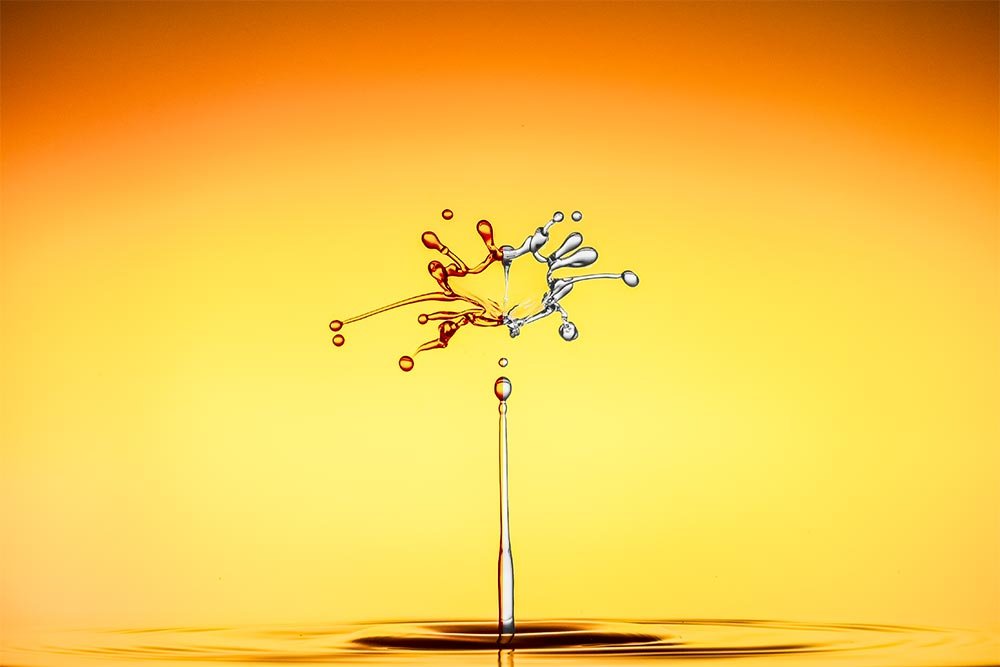
And that’s it! If you have any questions or concerns regarding this post, please let me know in the comment section below. Thanks for reading!
I thought I’d open Photoshop to see how fast I could add some saturation and vibrance to an object in an image. Of course, I had to find the perfect image to do this to because that makes life a heck of a lot easier. I found the image and went to work.
In today’s post, I’ll be walking through the process I followed to add saturation, or more enhanced color, to a splash in a photograph. While everything only took a few steps, I think it’s worth sharing what I did. There are some really good tricks I include that I feel you may benefit from, so check out the rest of this post to find out what they are.
Original Image

Since the photo above has a nice smooth background and an obvious “object” front and center, I felt that it was appropriate. In the next few sections, you’ll see exactly why that is.
Selecting the Object
The objects I’d like to select here are the separate splash of liquid that’s not attached to the liquid below it as well as the vertical stream of liquid that’s touching the pool on the bottom.To accomplish this type of selection, I’ll use the Lasso Tool. To activate this tool, I’ll click the third icon from the top on the left vertical toolbar or press L on my keyboard as a shortcut. Once ready, I’ll draw a circle around the object, which will, when I’m finished, create a selection evidenced by some marching ants.

You may be wondering why I wasn’t more careful when making this selection. After all, it’s the liquid I want, not a circle around it. Well, since this is an isolated object and since the background is so smooth, I can take advantage of a little trick. I’ll change tools so the Magic Wand Tool is active and then I’ll hold down the Alt key (Option on Mac). Once the Alt key is pressed, I can click inside the selection on the background area until that area isn’t selected anymore.

That’s a pretty good tip. To “unselect” something, as opposed to selecting something, just hold down the Alt or Option keys and go about clicking where you don’t want any selection.
If you take a look at the screenshot above, you’ll see that the marching ants are now hugging the droplets.
Adding an Adjustment Layer
By this point, you know that adding adjustment layers add masks. So, since I’ve got my selection ready, all I need to do is click on the Vibrance icon from the Adjustments panel.
Once I do that, the Properties panel for that adjustment will open up.

As you can see from the above screenshot, the adjustment layer with the mask in it was also created. It’s sitting as the top layer in the Layers panel.
Making the Adjustment
As you probably already know, any adjustment I make in the Properties panel will only apply to what’s inside the once selected area (the visible area of the mask) of the image. Also, the reason I chose the Vibrance adjustment as opposed to the Saturation one was because of its mild nature. To be honest, I haven’t used Saturation in years. Perhaps just a smidge here or there, but really, nothing more than that. Even the Saturation slider in the Vibrance panel is a mere shadow of the true Saturation adjustment.Anyway, because both the Vibrance and Saturation sliders in the Properties panel are fairly timid, I’ll push them both all the way to the right. This will enhance whatever color already exists and make it more bold.

And if I wanted to remove some color, I could push both sliders all the way to the left.

I actually like the second one. The liquid looks like some sort of molten metal.
Because there’s more to this object, I’ll need to colorize or desaturate the vertical stream of liquid as well. To do this, I’ll follow exactly what I did above, with just one minor change.
After following all the steps, I noticed that the bottom part couldn’t be cleanly deselected with the Magic Wand Tool. You can see that below.

Since I already created the adjustment layer and pushed both sliders to the left, I can clearly see what I need to clean up with the Brush Tool. If you’ve ever worked with masks before, you know that black hides and white reveals. Since I want to hide some of the extra adjustment, I’ll select this tool, resize it, change the color to black and do a bit of painting.

Now, if I take both versions of the final image and place them side by side, you can see the differences. I think it looks pretty cool and this post gives a decent indication of where you can go with these types of edits. Basically, if you want to either add color to or remove color from an object, you can do so by following the steps in this post.

And that’s it! If you have any questions or concerns regarding this post, please let me know in the comment section below. Thanks for reading!
