WendyMay
Member
- Joined
- May 11, 2021
- Messages
- 142
- Reaction Score
- 0
- Points
- 21
- #1
I’ll be the first to admit that I’ve never been much of an artist. I couldn’t draw if my life depended on it. I suppose that’s part of the reason I’ve yet to look into the drawing tools that Adobe Photoshop has to offer. Hey – if I’m no good at something there’s very little reason for me to bang my head against the wall trying to get better. Well, that’s what I used to think anyway.
Photoshop has got a really nice set of illustration tools for us to take advantage of an enjoy. These tools consist of the Pen Tool, Freeform Pen Tool, Add Anchor Point Tool, Delete Anchor Point Tool, Path Selection Tool, Direct Selection Tool and some others. The best part about a few of these tools is that they exist in some of Adobe’s other applications. For instance, you’ll find the two tools I’m going to discuss in this post today in both Adobe Illustrator as well as Adobe InDesign (in addition to Photoshop). While these tools may have different names here and there, much of their functionality remains the same.
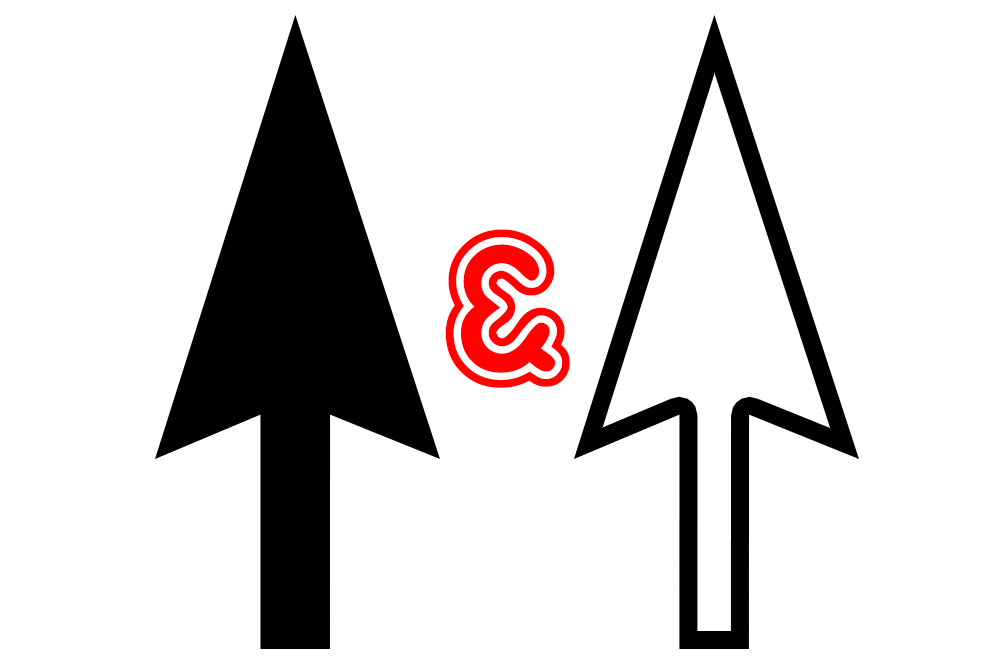
In today’s post, I’m going to take the first few steps of breaking out from my fear of anything that has to do with anchor points and the pen tool. After years and years of meddling with a few of those pesky icons located towards the bottom of the left vertical toolbar in Photoshop (and failing), I’m going to dive right in and get my hands dirty. I’ve been doing a lot of reading and watching videos lately and I believe I’ve got a firm grasp on what’s up with the two, and probably most important, tools when it comes to drawing and manipulating vector objects inside of Adobe Photoshop. The tools I’ll be discussing in today’s post are called the Path Selection Tool and the Direction Selection Tool. One of them is solid black and the other is white with a black outline. I’ll talk about which one is which and what each of them does below.

The black, left leaning arrow you see above is called the Path Selection Tool. Currently, it’s the fifth tool from the bottom in the left vertical toolbar inside of Photoshop. I’m sure you’ve seen it before.
One of the areas we need to look at first is a definition. Before we go on, we’ll need to define what a “path” is in Photoshop and the other appropriate applications. Basically, a path is a shape. It can be either straight or curved. It can go one way or another and it’s made up of anchor points. So if we know what a path is and we’re working with the Path Selection Tool, it only makes sense that this tool “selects” the path, or shape. Let me show you below.
I’ve gone ahead and drawn a black box in a document. I’ve also centered it. Right now, the box isn’t selected by any tool.

If I use the Path Selection Tool and click on the box (providing the layer in the Layers panel is selected first), the path, or shape, will be selected.
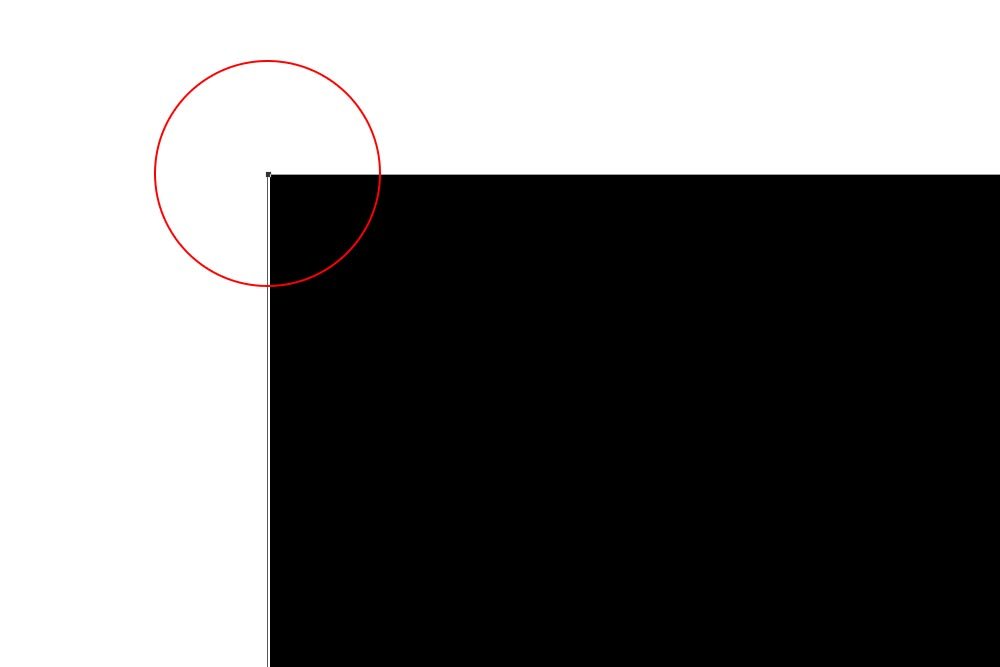
In the above screenshot, I enlarged the view so you can see the anchor point in the corner of the path. That, along with an outline, indicates that it’s selected.
To move the path, I’d simply drag it. To delete it, I’d select it and press the Delete key on my keyboard. I could also do a whole bunch of other things that I’ll lay out in future posts. Basically, what I want you to know is that the Path Selection Tool in Photoshop selects entire paths and easily moves them around.

This tool is different than the previous in that instead of it selecting the entire path, it only selects anchor points and segments of a path. Let me show you what I mean.
If I were to switch tools to the Direct Selection Tool and click inside the black box I created earlier and try to move it, nothing would happen. After clicking the box, the four corner anchor points would appear, but I wouldn’t have the ability to do much dragging.
If I were to click on just one of those anchor points and drag, things would be different. I’ll go ahead and click on the upper left anchor point and drag outward.

See? By directly selecting just that one anchor point, I was able to change the entire shape. If I were to click a segment (the line between two anchor points) and drag, something similar would happen. I’ll show you that below. I’ll go ahead and click between the two right corner anchor points and drag to the right.

As you can see above, by dragging to the right, I’ve stretched that side, making the entire shape longer than it was previously. By the way, to drag either a path or a segment in a fixed, straight line, just hold down the Shift key while dragging. That will keep you on the straight and narrow.
——
I’m going to stop here. There is so much to cover when it comes to these tool that I’ve decided to take things in very small chunks. I’ve found that it’s easier to search this site when some tidbit of knowledge is necessary when the titles and content of the posts are direct and concise. Either way, I hope you enjoyed the post.
If you have any questions or concerns, please leave them in the comment area below. Thanks for reading!

Photoshop has got a really nice set of illustration tools for us to take advantage of an enjoy. These tools consist of the Pen Tool, Freeform Pen Tool, Add Anchor Point Tool, Delete Anchor Point Tool, Path Selection Tool, Direct Selection Tool and some others. The best part about a few of these tools is that they exist in some of Adobe’s other applications. For instance, you’ll find the two tools I’m going to discuss in this post today in both Adobe Illustrator as well as Adobe InDesign (in addition to Photoshop). While these tools may have different names here and there, much of their functionality remains the same.
In today’s post, I’m going to take the first few steps of breaking out from my fear of anything that has to do with anchor points and the pen tool. After years and years of meddling with a few of those pesky icons located towards the bottom of the left vertical toolbar in Photoshop (and failing), I’m going to dive right in and get my hands dirty. I’ve been doing a lot of reading and watching videos lately and I believe I’ve got a firm grasp on what’s up with the two, and probably most important, tools when it comes to drawing and manipulating vector objects inside of Adobe Photoshop. The tools I’ll be discussing in today’s post are called the Path Selection Tool and the Direction Selection Tool. One of them is solid black and the other is white with a black outline. I’ll talk about which one is which and what each of them does below.
The Path Selection Tool
I can’t stress this enough. While this post may seem ultra basic for those who already use Adobe’s drawing tools, it’s absolutely perfect for those who don’t. Take it from me – you need to start at the beginning when it comes to stuff like this. As I mentioned above, I’ve messed with some of these things since the beginning and I was left wondering what I did and why nothing ever worked consistently. The reason is because I never started at the beginning. While it’s simple to click on a tool in Photoshop to test it out, it’s quite another thing to click on a tool and actually achieve something effectively. If you read what I have to say below, you’ll understand a bit of what each of these two tools can do, without a doubt. It’ll be the beginning of a learning process for both you and me.
The black, left leaning arrow you see above is called the Path Selection Tool. Currently, it’s the fifth tool from the bottom in the left vertical toolbar inside of Photoshop. I’m sure you’ve seen it before.
One of the areas we need to look at first is a definition. Before we go on, we’ll need to define what a “path” is in Photoshop and the other appropriate applications. Basically, a path is a shape. It can be either straight or curved. It can go one way or another and it’s made up of anchor points. So if we know what a path is and we’re working with the Path Selection Tool, it only makes sense that this tool “selects” the path, or shape. Let me show you below.
I’ve gone ahead and drawn a black box in a document. I’ve also centered it. Right now, the box isn’t selected by any tool.

If I use the Path Selection Tool and click on the box (providing the layer in the Layers panel is selected first), the path, or shape, will be selected.

In the above screenshot, I enlarged the view so you can see the anchor point in the corner of the path. That, along with an outline, indicates that it’s selected.
To move the path, I’d simply drag it. To delete it, I’d select it and press the Delete key on my keyboard. I could also do a whole bunch of other things that I’ll lay out in future posts. Basically, what I want you to know is that the Path Selection Tool in Photoshop selects entire paths and easily moves them around.
The Direct Selection Tool

This tool is different than the previous in that instead of it selecting the entire path, it only selects anchor points and segments of a path. Let me show you what I mean.
If I were to switch tools to the Direct Selection Tool and click inside the black box I created earlier and try to move it, nothing would happen. After clicking the box, the four corner anchor points would appear, but I wouldn’t have the ability to do much dragging.
If I were to click on just one of those anchor points and drag, things would be different. I’ll go ahead and click on the upper left anchor point and drag outward.

See? By directly selecting just that one anchor point, I was able to change the entire shape. If I were to click a segment (the line between two anchor points) and drag, something similar would happen. I’ll show you that below. I’ll go ahead and click between the two right corner anchor points and drag to the right.

As you can see above, by dragging to the right, I’ve stretched that side, making the entire shape longer than it was previously. By the way, to drag either a path or a segment in a fixed, straight line, just hold down the Shift key while dragging. That will keep you on the straight and narrow.
Tool Keyboard Shortcuts
If you’re a keyboard shortcut fan, listen up. The keyboard shortcut for the Path Selection tool is A on your keyboard. To choose the Direct Selection Tool, press Shift+A. To switch back and jump between both of these tools, continue using the Shift+A shortcut. Just clicking A by itself, once you’re in the tool, won’t do much.——
I’m going to stop here. There is so much to cover when it comes to these tool that I’ve decided to take things in very small chunks. I’ve found that it’s easier to search this site when some tidbit of knowledge is necessary when the titles and content of the posts are direct and concise. Either way, I hope you enjoyed the post.
If you have any questions or concerns, please leave them in the comment area below. Thanks for reading!

