Cameron
Member
- Joined
- May 10, 2021
- Messages
- 108
- Reaction Score
- 3
- Points
- 23
- #1
In my last post, I wrote about the Patch Tool in Adobe Photoshop. Today, I’m going to write about this tool’s twin sister – the Content-Aware Move Tool. This, my friends, is a really cool tool in that it can not only move an object that’s in a photo, it can also copy it, so there’s more than one. And I’ll tell you, it does a very good job.
In today’s post, I’ll use another photo with an airplane in it to show you just how this new tool works. There are some similarities with the Patch Tool regarding the options bar, but there are also some differences. The primary difference is what’s contained in one of the drop-down boxes. Don’t worry, I’ll cover it all below. Basically, I’d like to first show you how you can move an object and then I’ll show you how you can copy the same object. You’re going to love this because everything’s super easy and the tool is really helpful. Once you’re finished reading this post, I bet you’re going to be thinking of all the photos you can use this tool with.

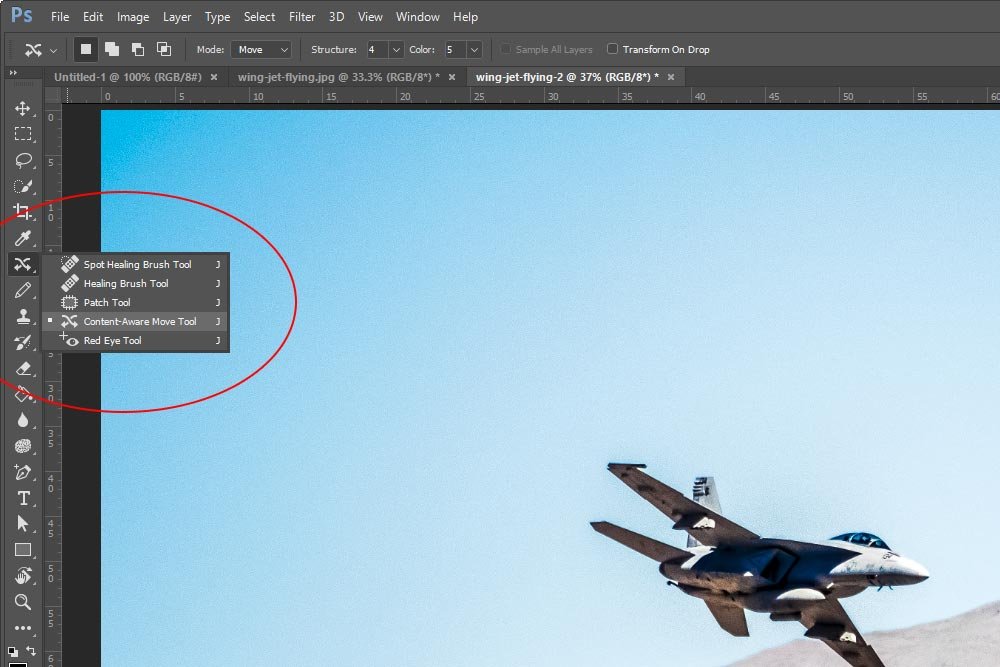
Once I select this tool, I can move on. Also, to have the photo I’m working on fill my workspace, I clicked Ctrl+0 (zero) on my keyboard. That shortcut sizes things perfectly.
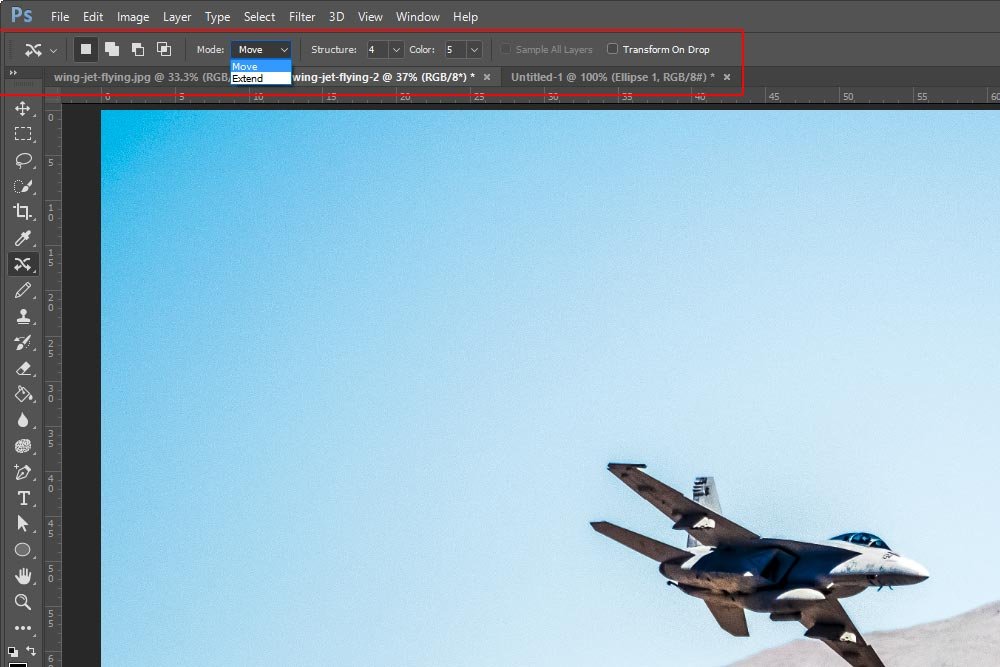
As I mentioned above, this tool allows us to either move an object or copy an object. To move an object, simply select Move in the Mode drop-down. To copy an object, click Extend. I’ll use both of these modes in the examples down below.
Also, if you’d like to change the size of whatever it is you’re moving or copying after you’ve executed either of those tasks, check the Transform On Drop check box. Doing this will place the object in a bounding box with handles. It’ll be treated somewhat like something in one of the Transform Tool‘s bounding boxes.
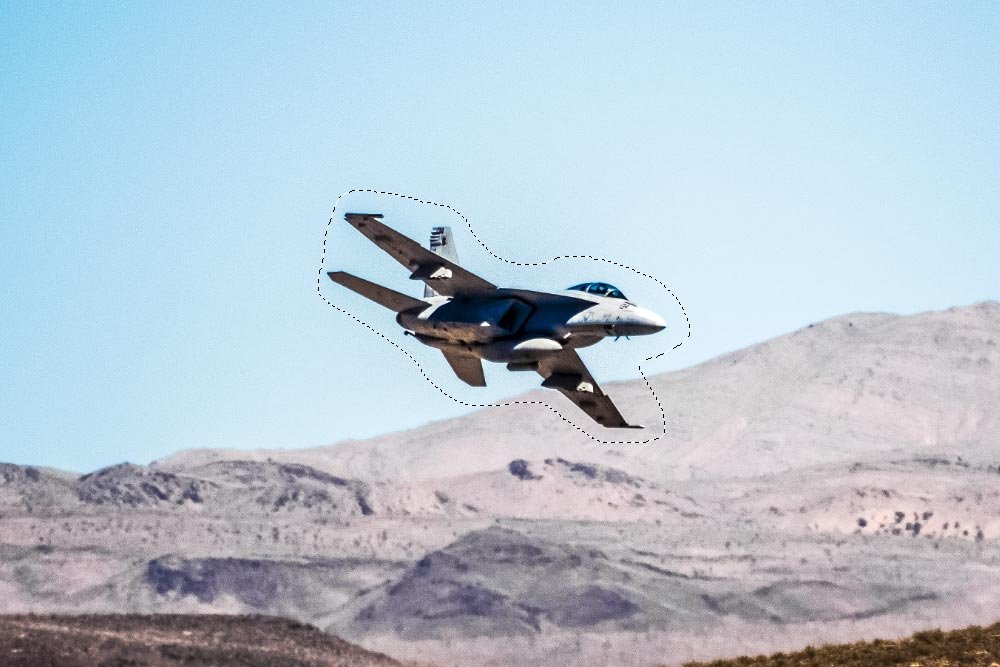
As you can see from the above screenshot, the outline is now Photoshop’s classic marching ants.
For this example, I’ll keep Structure centered at a value of 4 and Color centered at a value of 5. I’m doing this because I played around with this photo earlier and found nothing special about it. These values are good.
Also, since I don’t want to change the object’s size at all after I move or copy it, I’ll leave the Transform On Drop option unchecked and since there’s only one layer in this file, the Sample All Layers option ins’t available. All that’s left are the Modes.
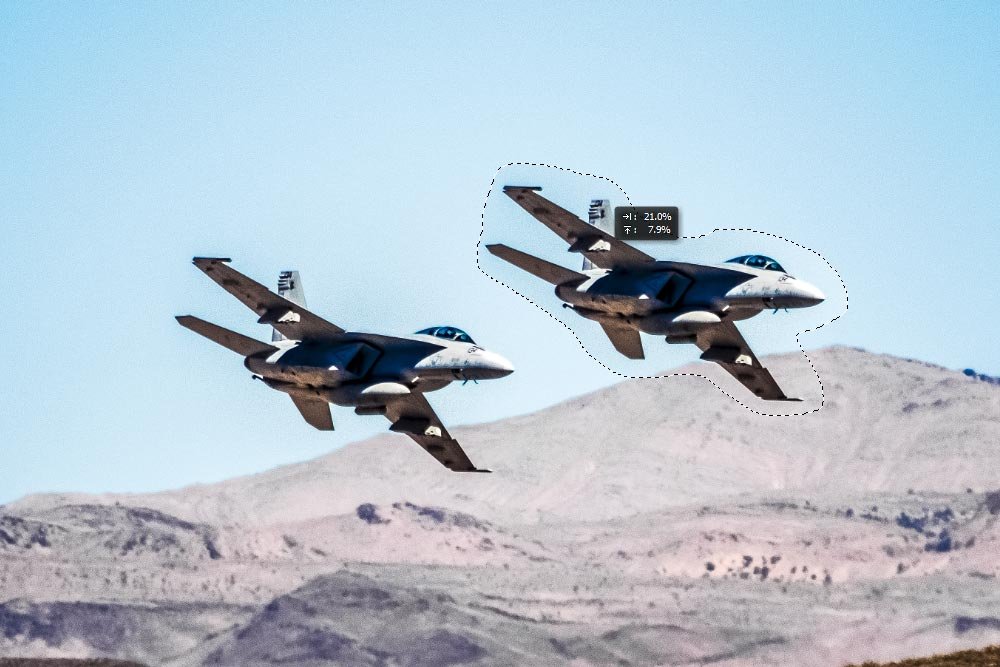
The moment I let go of the object, Photoshop will begin calculating the new Structure and Color. It’ll make things blend right in. Remember, there are two things going on here. First is the movement of the object to its new location and then there’s the filling in of the old location. Let’s see how the result looks once I deselect the object (Select > Deselect).

I have to say, that’s a very good result. If I saw any irregularities, such as an off color or an edge or something like that, I could repeat the process with an adjusted Color setting or I could just use the Spot Healing Brush Tool to remove the edge.

See? It’s that easy. Now imagine that you were performing this type of task on a photo that had texture in it. Things would be even better. I love blending textures.
After you drop the object, transform it to the size you want. Then, press the Enter key on your keyboard to apply the change. That’s it!
——
I hope I clearly demonstrated how to use the different aspects of the Content-Aware Move Tool in Adobe Photoshop. If you have any questions or concerns (or additional tips), please leave them in the comment section below. Thanks for reading!
In today’s post, I’ll use another photo with an airplane in it to show you just how this new tool works. There are some similarities with the Patch Tool regarding the options bar, but there are also some differences. The primary difference is what’s contained in one of the drop-down boxes. Don’t worry, I’ll cover it all below. Basically, I’d like to first show you how you can move an object and then I’ll show you how you can copy the same object. You’re going to love this because everything’s super easy and the tool is really helpful. Once you’re finished reading this post, I bet you’re going to be thinking of all the photos you can use this tool with.
Example Photo
I picked this photo because the object I’d like to move has a dual background. Part of the plane is covering an area of the sky and another part is covering a mountain. Normally, you’d think this would be a problem. Really, it isn’t. Photoshop is actually quite intelligent when it comes to figuring out structure and color blending.
Selecting the Content-Aware Move Tool
Since I’ve already got the photo open in Photoshop, I’ll head right over to the left vertical toolbar and choose the Content-Aware Move Tool. If you click on the Spot Healing Brush Tool and drag out to the right, you’ll see this tool. It’s the fourth one down in the list.
Once I select this tool, I can move on. Also, to have the photo I’m working on fill my workspace, I clicked Ctrl+0 (zero) on my keyboard. That shortcut sizes things perfectly.
The Options Bar
Now that the tool is selected, I’d like to take a quick look at the options bar. Since this one is so similar to the Patch Tool’s options bar, I’ll refer you to that post for the Structure, Color and Sample All Layers definitions. New in this tool are the Mode drop-down and the Transform On Drop check box.
As I mentioned above, this tool allows us to either move an object or copy an object. To move an object, simply select Move in the Mode drop-down. To copy an object, click Extend. I’ll use both of these modes in the examples down below.
Also, if you’d like to change the size of whatever it is you’re moving or copying after you’ve executed either of those tasks, check the Transform On Drop check box. Doing this will place the object in a bounding box with handles. It’ll be treated somewhat like something in one of the Transform Tool‘s bounding boxes.
Outlining the Airplane
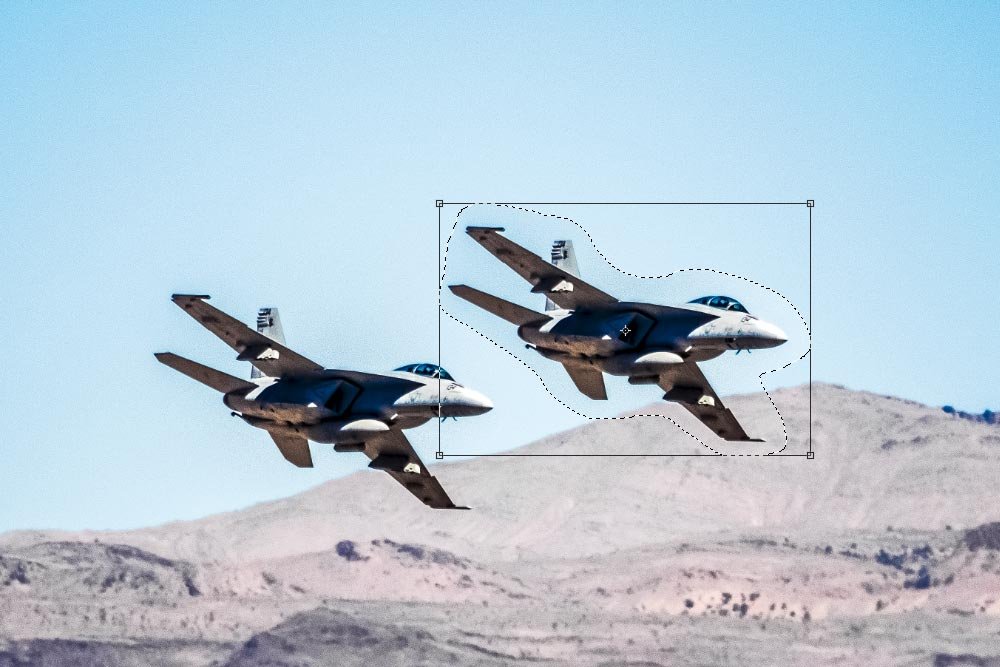
At this point, I can draw around the object I’d like to move or copy. I’ll do this exactly like I would if I were using the Patch Tool or Lasso Tool.
As you can see from the above screenshot, the outline is now Photoshop’s classic marching ants.
For this example, I’ll keep Structure centered at a value of 4 and Color centered at a value of 5. I’m doing this because I played around with this photo earlier and found nothing special about it. These values are good.
Also, since I don’t want to change the object’s size at all after I move or copy it, I’ll leave the Transform On Drop option unchecked and since there’s only one layer in this file, the Sample All Layers option ins’t available. All that’s left are the Modes.
Moving An Object With the Content-Aware Move Tool
This really ins’t difficult. To change the location of the object, all I need to do is drag it to the area I’d like to see it and line up the mountain border inside the marching ants with the mountains in the new locations. I’ll do that now.
The moment I let go of the object, Photoshop will begin calculating the new Structure and Color. It’ll make things blend right in. Remember, there are two things going on here. First is the movement of the object to its new location and then there’s the filling in of the old location. Let’s see how the result looks once I deselect the object (Select > Deselect).

I have to say, that’s a very good result. If I saw any irregularities, such as an off color or an edge or something like that, I could repeat the process with an adjusted Color setting or I could just use the Spot Healing Brush Tool to remove the edge.
Copying An Object With the Content-Aware Move Tool
To copy this airplane, I’m going to follow exactly the same instructions as above. The only thing I’m going to change is the Mode setting. I’ll set that to Extend, which I guess means “Copy” in Photoshop world.
See? It’s that easy. Now imagine that you were performing this type of task on a photo that had texture in it. Things would be even better. I love blending textures.
Transform On Drop
Before I end this post, I’ll give you a screenshot that shows the bounding box if I were to check the Transform On Drop option. If you didn’t understand what I was referring to above, I think this will help.
After you drop the object, transform it to the size you want. Then, press the Enter key on your keyboard to apply the change. That’s it!
——
I hope I clearly demonstrated how to use the different aspects of the Content-Aware Move Tool in Adobe Photoshop. If you have any questions or concerns (or additional tips), please leave them in the comment section below. Thanks for reading!
