CaptainDan
Member
- Joined
- May 9, 2021
- Messages
- 113
- Reaction Score
- 0
- Points
- 16
- #1
It's long been known that cameras can't see the dynamic range that humans can see. If you aren't aware of what dynamic range in regards to photography is, I encourage you to read through a few previous posts on this website:
What is Dynamic Range in Photography?
Contrast: The Effects of Light on a Scene
What's the Right Level of Contrast for a Photo?
Basically, if you attempted to take a photo of a scene that contains both very dark and very light areas, you're camera would need to make a decision between those areas. Would it choose to properly expose the darker areas or the lighter areas? No matter what the camera decides, the photo simply won't come out well because the exposure won't be correct. The photo will contain either full black areas or full white areas. Neither of these are optimal because there's a lack of detail in both.
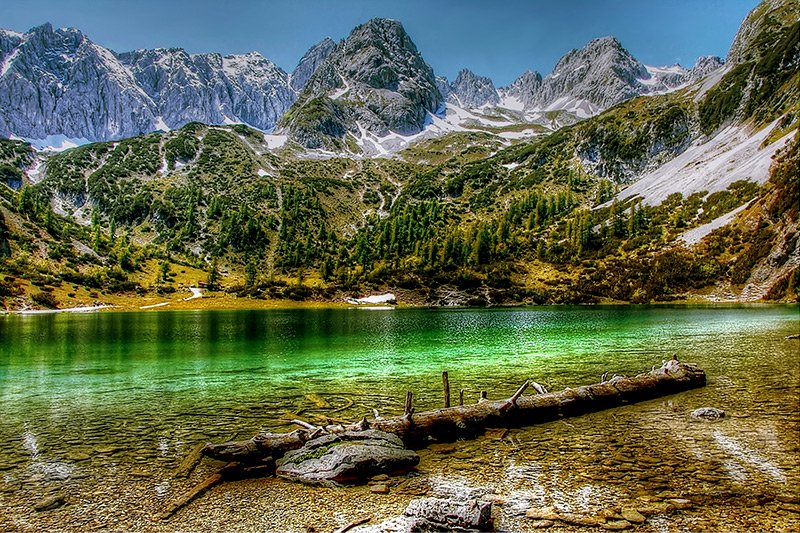
So really, the goal is to somehow capture a photo that can include a very wide dynamic range. But if camera's aren't capable of doing that, what are our options? I'll tell you what they are: HDR. That means High Dynamic Range. To sum it up, HDR images are those that are taken at different exposures and then combined to reveal the best of all worlds. So if you capture a scene that includes very dark shadows, you'd need to take an overexposed photo to show the detail in those shadows (brighten them up). If your scene includes very bright areas, such as the afternoon sky, you'd need to take an underexposed photo to show details in the sky (darken them down). For good measure, you'd also need to take a regular pretty well exposed photo that captures the middle of everything.
In this post, I'll discuss the process involved for taking three different photos for use in HDR photography with the Canon Rebel T7i (800D). The photos will be captured automatically by the camera and will include one that's underexposed by two stops, one that's properly exposed (in the middle), and one that's overexposed by two stops. In my next post, I'll demonstrate how to combine these three images into one HDR photo in Adobe Camera Raw.
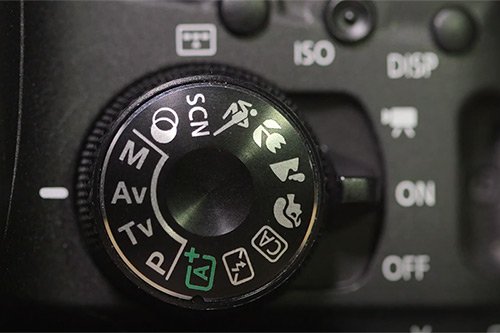
To start, you'll likely want to (after turning your camera on) set your camera to Av mode, or aperture priority mode. The reason for this is to lock your lens into one aperture so the depths of field for the objects in your scene remain the same between shots. There's no sense in your images resulting in varying depths of field for the same scene. So, use the top dial on your camera to set Av mode.
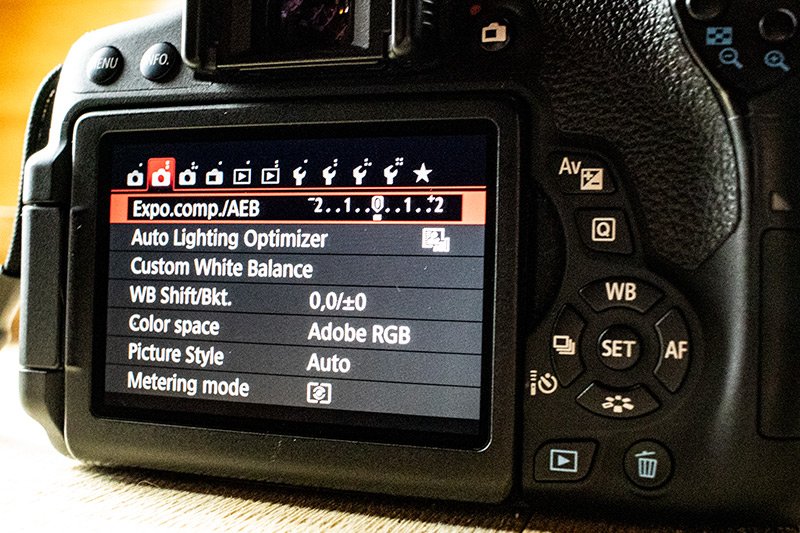
Next, press the Menu button on the back of your camera to navigate to the second page of the red settings. You'll see the top option read Expo.comp./AEB. You can navigate back and forth between the settings on the rear LCD screen by using either the dial located on the top of your camera or the left and right arrow buttons on the rear of your camera. When you make it to this setting, press the SET button that sits at the center of the arrow buttons.
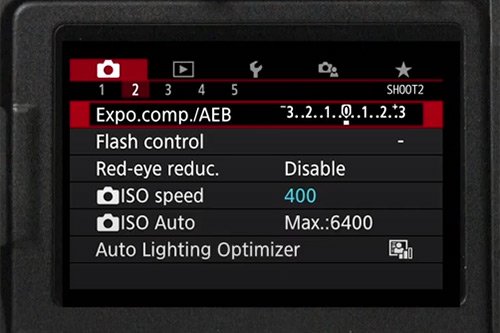
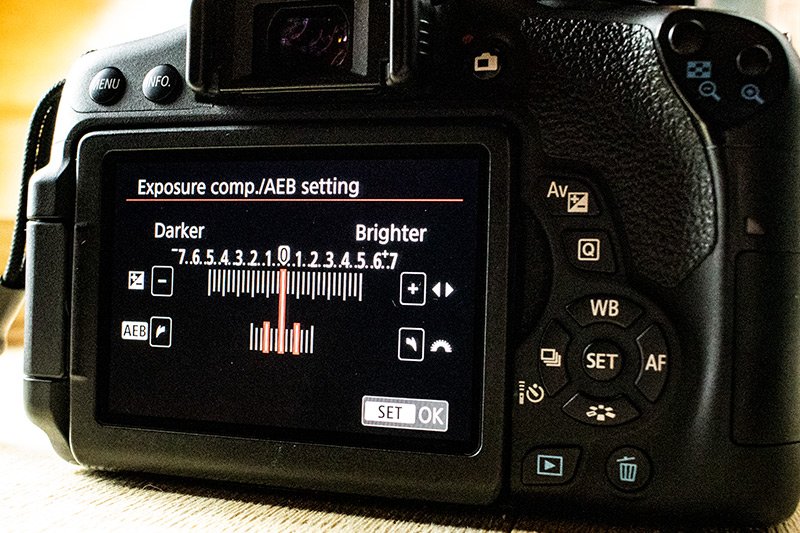
When you do this, you'll see a new screen that looks like this:
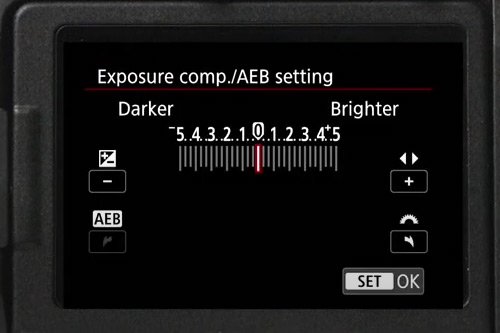
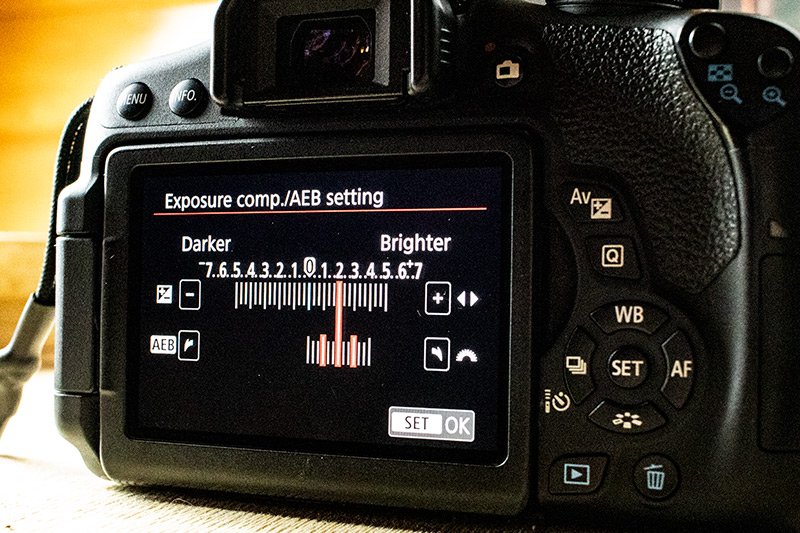
If you roll the dial at the top of your camera back and forth, you'll see some new lines appear. These lines represent the underexposure and overexposure that will be occurring within your future photographs. I always choose +2ev and -2ev, so I roll the top dial until the rear screen looks like this:
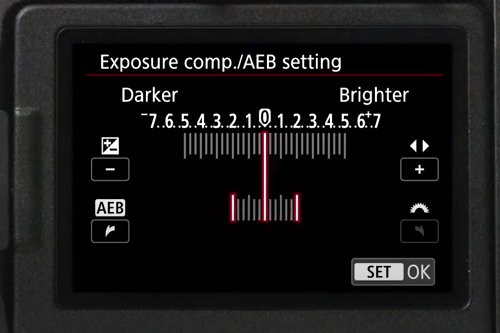
So as you can see, there will be three photos taken; one under, one mid, and one overexposed. If you find that the center marker line isn't aligned perfectly in the center, you can use the left and right arrow keys to correct this and move that line back to the middle. When this is finished, press the SET button to accept the changes. Then, press either the Menu button again or the shutter button half-way to exit the menu area of your camera. But wait, you're only half way done.
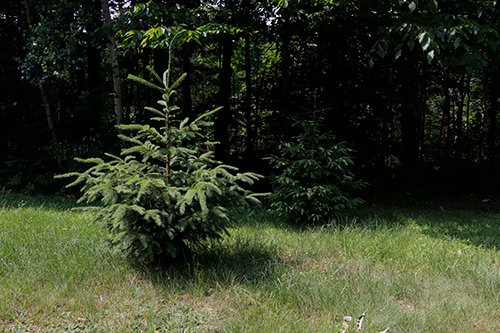
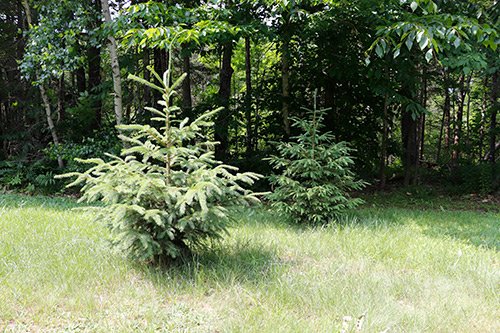
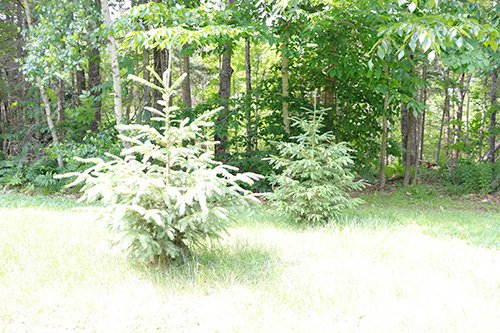
If you'll notice in the above photos, one shows all the detail in the highlights, one shows all the midtones, and one shows all the details in the shadows. Next, we'll merge these three images into one HDR image using Adobe Camera Raw.
Whoops, I just realized there's already a post that covers this. Check it out:
How to Merge to HDR in Adobe Camera Raw
What is Dynamic Range in Photography?
Contrast: The Effects of Light on a Scene
What's the Right Level of Contrast for a Photo?
Basically, if you attempted to take a photo of a scene that contains both very dark and very light areas, you're camera would need to make a decision between those areas. Would it choose to properly expose the darker areas or the lighter areas? No matter what the camera decides, the photo simply won't come out well because the exposure won't be correct. The photo will contain either full black areas or full white areas. Neither of these are optimal because there's a lack of detail in both.
So really, the goal is to somehow capture a photo that can include a very wide dynamic range. But if camera's aren't capable of doing that, what are our options? I'll tell you what they are: HDR. That means High Dynamic Range. To sum it up, HDR images are those that are taken at different exposures and then combined to reveal the best of all worlds. So if you capture a scene that includes very dark shadows, you'd need to take an overexposed photo to show the detail in those shadows (brighten them up). If your scene includes very bright areas, such as the afternoon sky, you'd need to take an underexposed photo to show details in the sky (darken them down). For good measure, you'd also need to take a regular pretty well exposed photo that captures the middle of everything.
In this post, I'll discuss the process involved for taking three different photos for use in HDR photography with the Canon Rebel T7i (800D). The photos will be captured automatically by the camera and will include one that's underexposed by two stops, one that's properly exposed (in the middle), and one that's overexposed by two stops. In my next post, I'll demonstrate how to combine these three images into one HDR photo in Adobe Camera Raw.
Setting the T7i (800D) for Exposure Bracketing
The method we'll use for capturing these photos is called exposure bracketing. The camera will take three photos automatically in succession; one dark, one medium, and one bright. Again, later on I'll instruct you on how to merge the images for your final result.To start, you'll likely want to (after turning your camera on) set your camera to Av mode, or aperture priority mode. The reason for this is to lock your lens into one aperture so the depths of field for the objects in your scene remain the same between shots. There's no sense in your images resulting in varying depths of field for the same scene. So, use the top dial on your camera to set Av mode.

Next, press the Menu button on the back of your camera to navigate to the second page of the red settings. You'll see the top option read Expo.comp./AEB. You can navigate back and forth between the settings on the rear LCD screen by using either the dial located on the top of your camera or the left and right arrow buttons on the rear of your camera. When you make it to this setting, press the SET button that sits at the center of the arrow buttons.

When you do this, you'll see a new screen that looks like this:

If you roll the dial at the top of your camera back and forth, you'll see some new lines appear. These lines represent the underexposure and overexposure that will be occurring within your future photographs. I always choose +2ev and -2ev, so I roll the top dial until the rear screen looks like this:

So as you can see, there will be three photos taken; one under, one mid, and one overexposed. If you find that the center marker line isn't aligned perfectly in the center, you can use the left and right arrow keys to correct this and move that line back to the middle. When this is finished, press the SET button to accept the changes. Then, press either the Menu button again or the shutter button half-way to exit the menu area of your camera. But wait, you're only half way done.
Setting the T7i (800D) for Continuous Shooting Drive Mode
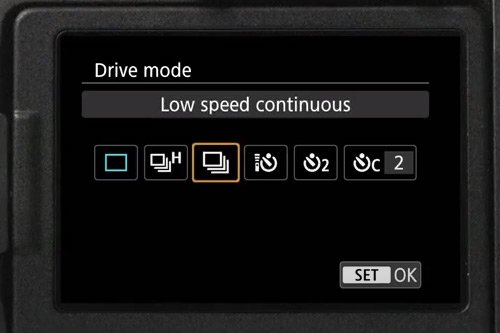
You've already set your T7i camera for exposure bracketing, but now you must set it to actually take the photos with differing exposures in succession. To do this, press the left arrow button on the rear of your camera to enter Drive Mode. Then, press the right arrow button twice (or however many times necessary) to land on Low Speed Continuous mode. To accept and save this setting, press the SET button once again. Basically, you'll now be able to press and hold the shutter button of your camera and it'll take the three photos you need, one right after the other, without any further input from you.
How to Take the Photos
You'll definitely want to use a tripod when capturing exposure bracketed photographs. You don't want any movement in the images at all. If it's windy, wait for the wind to die down some as well. When you're all set up on your tripod and the scene has been focused upon, press and hold the camera's shutter button until you hear click, click, click. When you let go of the button, your job is done. Review your photos to see the three images that look something like this:


If you'll notice in the above photos, one shows all the detail in the highlights, one shows all the midtones, and one shows all the details in the shadows. Next, we'll merge these three images into one HDR image using Adobe Camera Raw.
Whoops, I just realized there's already a post that covers this. Check it out:
How to Merge to HDR in Adobe Camera Raw

