LukeLewis
Member
- Joined
- May 7, 2021
- Messages
- 134
- Reaction Score
- 0
- Points
- 21
- #1
I’ve done a lot of graphics in my day. My favorites, by far, were some car and motorcycle show flyers I used to create a few times a year for some radio station events back between 2002 and 2007. The radio stations I worked for hosted many events like this and being responsible for all the media kept me very busy. It was rewarding though and I actually have a few of the fliers in frames in my office. I’m looking at them right now.
I decided that it might be fun to walk through the process of making one of these fliers, step by step, on this blog. I’ll start with the background graphics and move onto the logos, text and anything else that might make the flier look really good. It’s these step by step projects that are the most helpful to those who are looking to learn how to operate Photoshop, in my opinion.
In today’s post, I’ll be creating a background for a flier I’m going to develop inside of Adobe Photoshop. Doing this sort of thing isn’t really difficult at all. All it takes is a few skills, some imagination and some direction. The colors and shapes need to match up with the vision of the rest of the final product, so when making something like this, it’s important to stay focused and to not go overboard. With that said though, this part of the process should be fun.
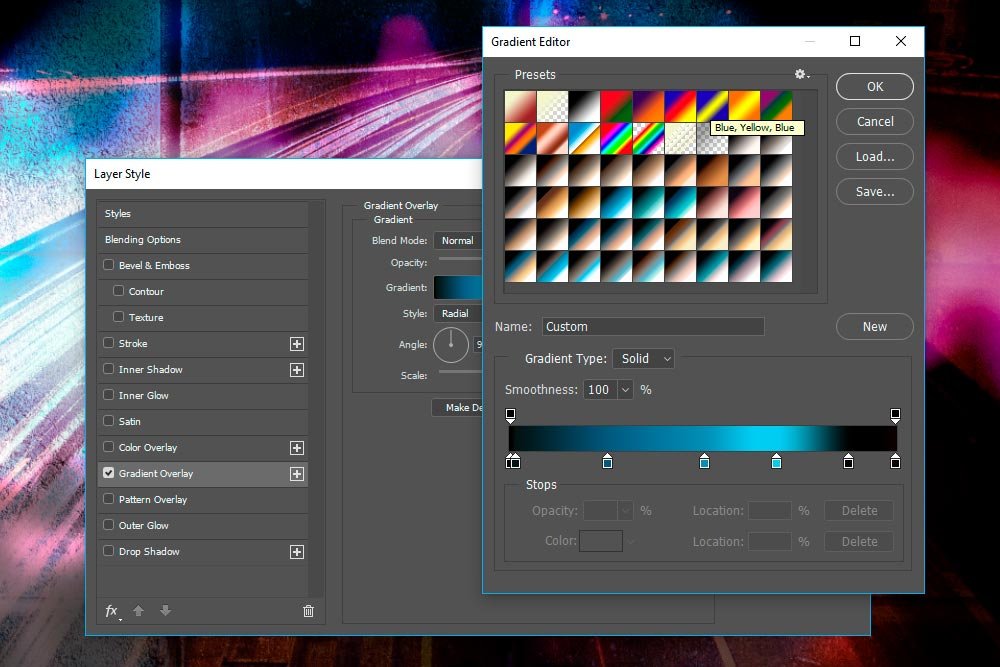
To create this background, I’ll be taking advantage of a gradient layer as well as three other image layers. I’ll be using different blend modes to make everything come together seamlessly. Don’t worry, I’ll walk you through every step of this process.
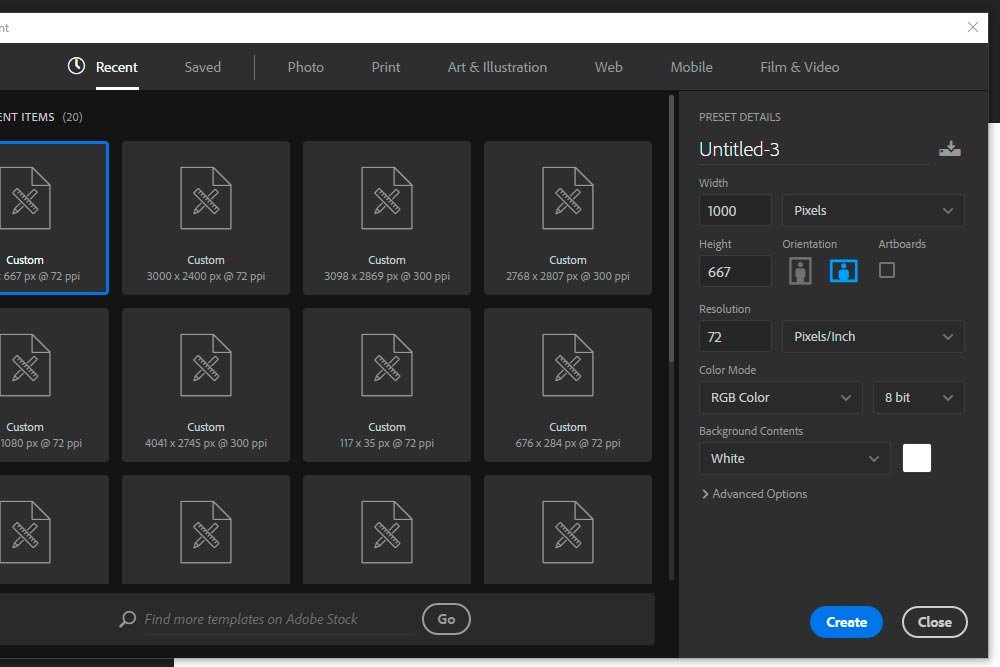
To create a new document, I’ll head up to the File > New menu item and click. Once I do that, a dialog box will appear that calls for some specs. I’ll fill the fields in with the information I just shared with you and when I’m finished, I’ll click on the Create button.
Now that the file is created, I’m going to head over to the Layers panel on the right and click on the small lock icon in the layer that’s currently called Background. Doing this will unlock the layer (removing the lock icon) and will allow me to work with it. Once I do that, I’ll double click on the word “Background” and I’ll type Gradient in it’s place and press the Enter key on my keyboard. Renaming this layer is just to keep things organized. Now it’s time to actually create the gradient.
There are a few different methods for creating a gradient in Adobe Photoshop, but for now, I think the easiest one to use would be via the Layer Style dialog box. To access this box, I’ll double click on the white thumbnail of the Gradient layer in the Layers panel. When I do that, the dialog box appears. Once that opens, I’ll click on the Gradient Overlay check box and then click right on the words “Gradient Overlay.” Clicking on the check box activates the style and clicking on the words actually gets you into the area to change the related settings.
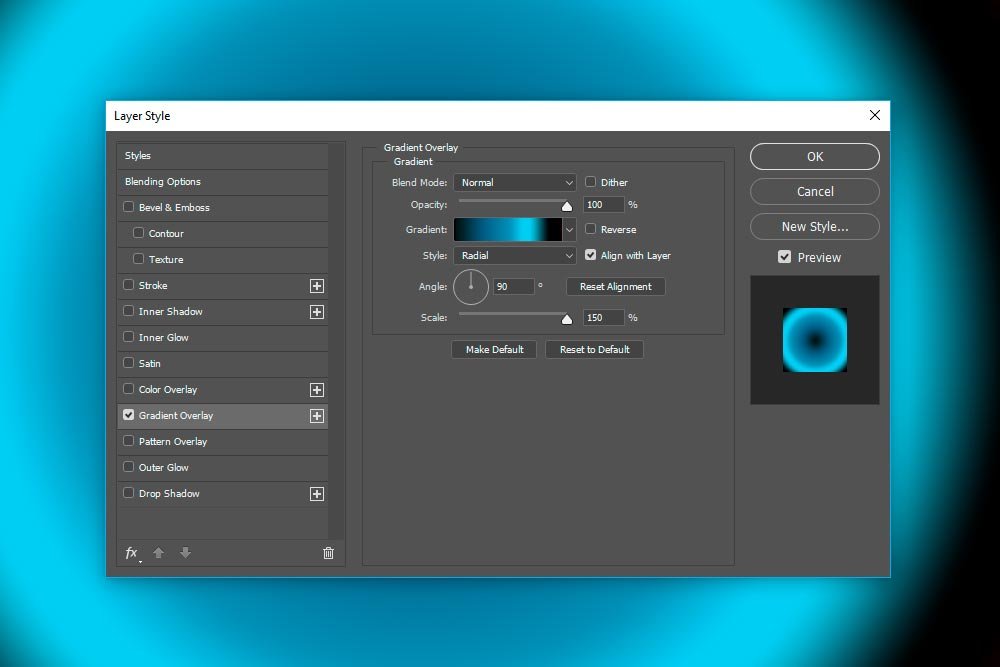
There’s sort of a lot to creating gradients in Photoshop. It’s not too terribly challenging, but a thorough look is beyond the scope of this post. You can count on the fact that I’ll write something in the future that will cover every last detail, but for now, I’ll simply show you the settings I used for the gradient I created for this project.
If you look at the screenshot above, you’ll see the settings I’m referring to here. I kept the Blend Mode set to Normal and the Opacity set to 100%. Below the Gradient box, I set the Style to Radial and kept the Angle set to 90 degrees. Finally, I set the Scale to 150%. As far as the colors of the gradient itself, I clicked right onto the gradient color bar and waited for the Gradient Editor panel to appear.
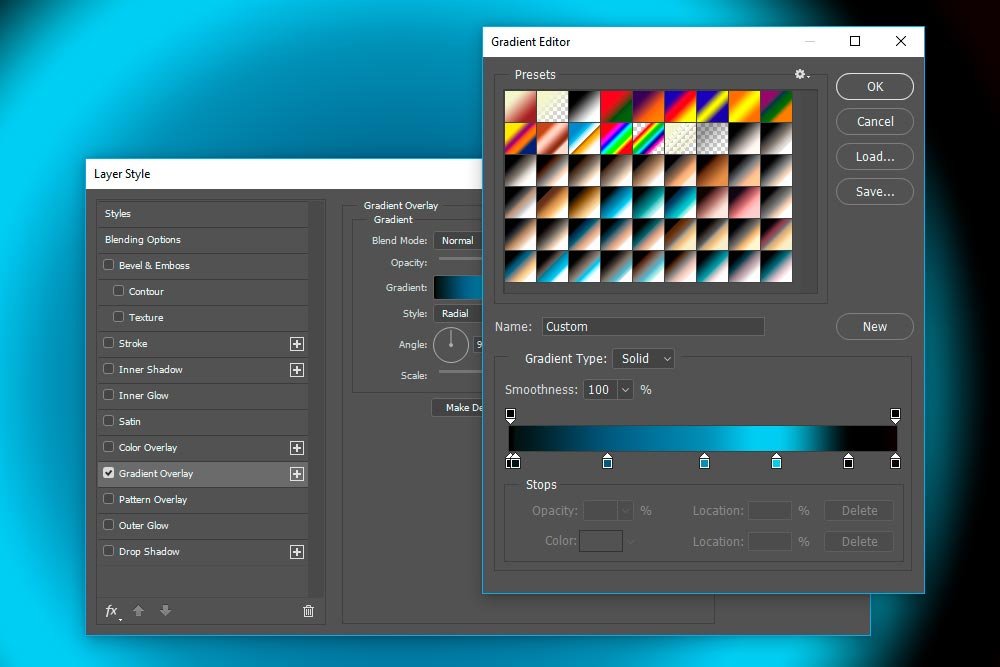
Once I was in the editor, I clicked on one of the gradients I previously imported and adjusted the colors from there. Again, I’ll cover how to adjust the colors in a later post.
How to Load Additional Gradients into Adobe Photoshop
When I was finished, I clicked both OK buttons and returned to the image I created so far.
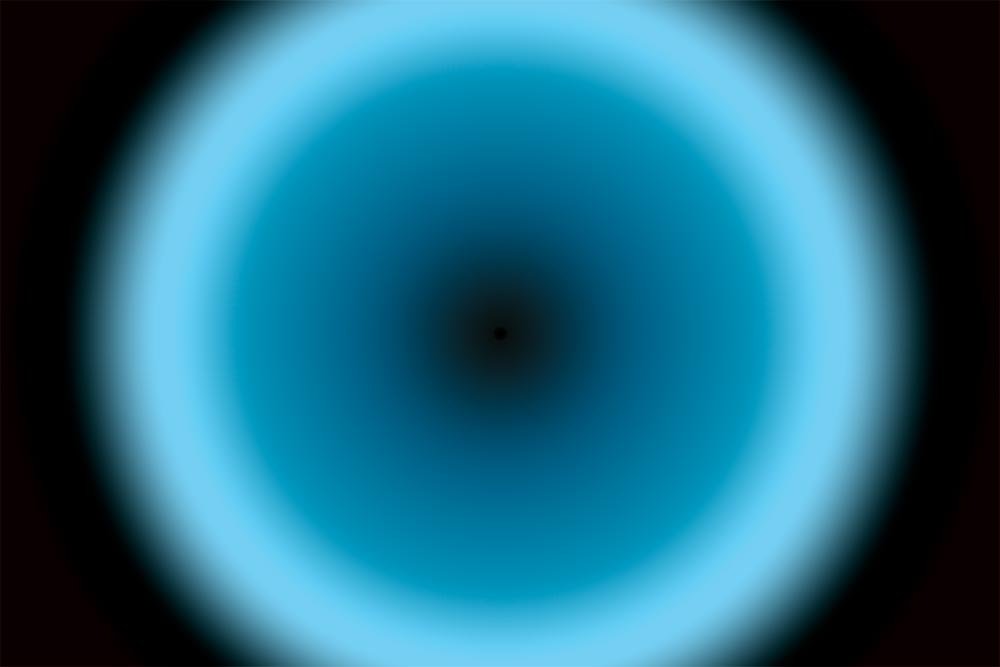
If I need to alter the look of the gradient later on, I can easily do that. It’s super simple because of the method I chose to create it.
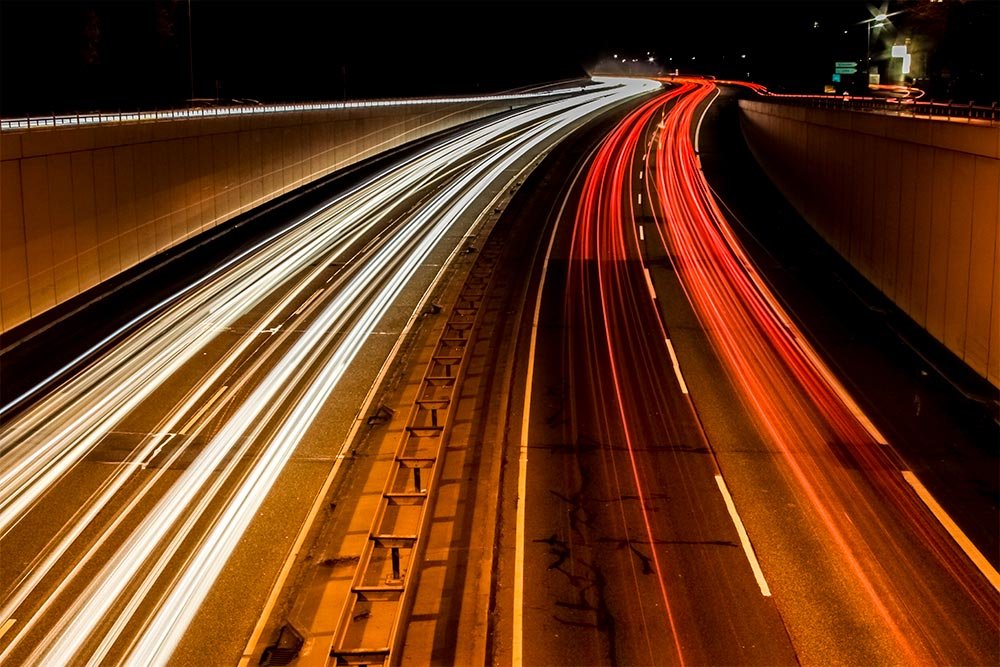
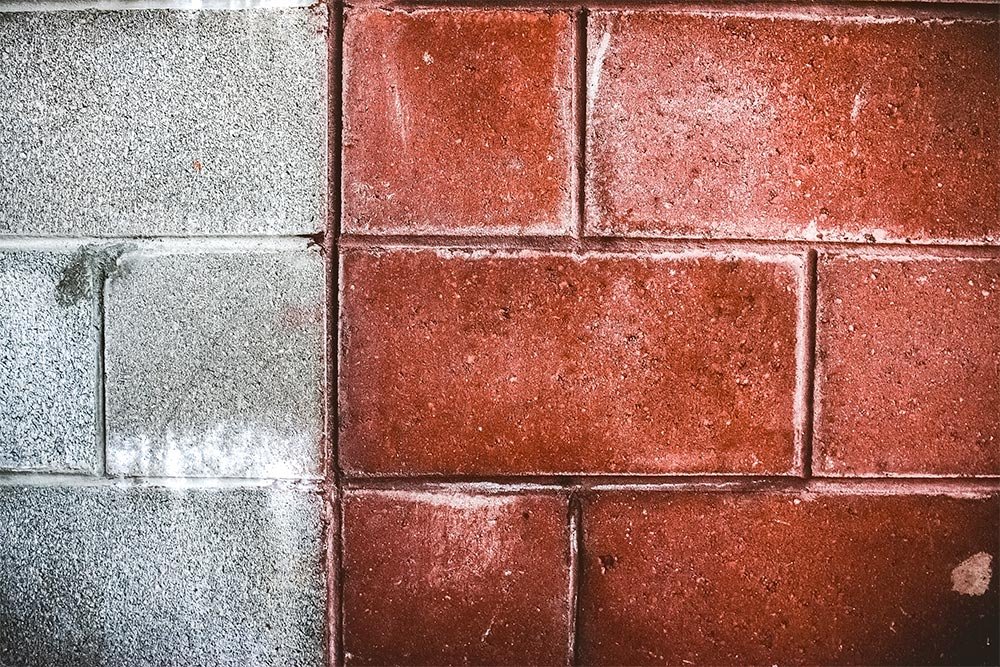
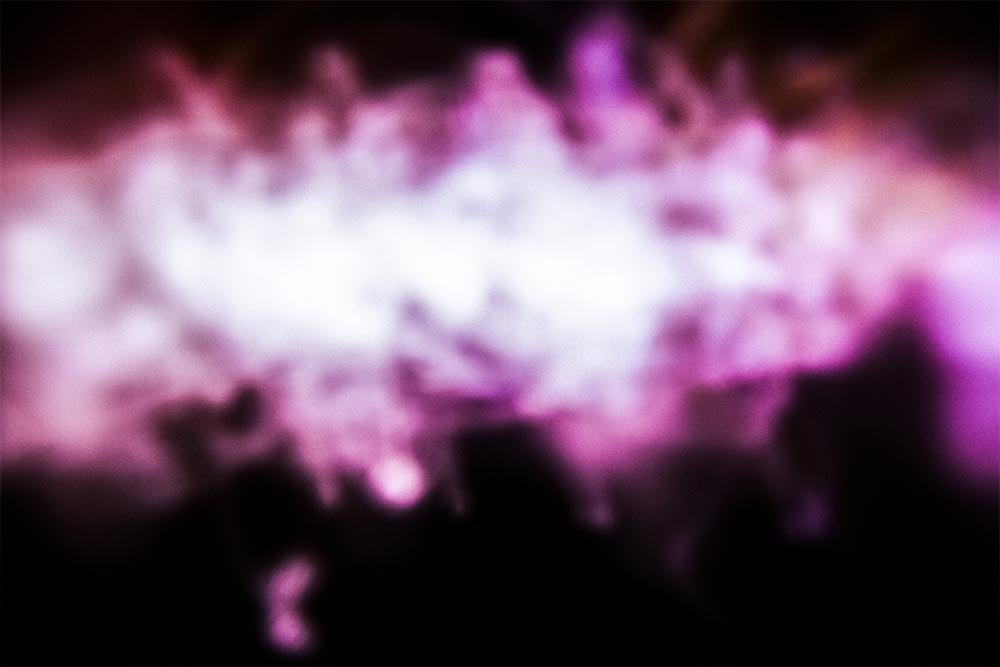
I’ll stack these images on top of the gradient and then use blending modes to seamlessly integrate them with each other.
Doing this will sort of mix these two layers together and will give me this result.


If you look at the above image, you can see parts of the gradient, the highway and the block wall. They’re all sort of mixed together.
I think you can see where I’m going with this. My goal is to create a background that you can’t quite put your finger on. As it stands, it’s pretty cool. I do want to make a few changes though.
Doing this lessens the intensity of the gradient layer and lightens up the highway a bit so it’s more visible. Here’s the result.

I’d say this is a good start. As you can see, creating a background layer of almost any look isn’t that difficult. If you have good source photography along with some interesting ideas, you can make a graphic that will knock people’s socks off. And the best part is, a background like the one I just made it completely adjustable. I know I haven’t gone any further in the project yet, but if I find that I need a different look, I can easily apply it. In the next few posts on this topic, I’ll be adding graphics and text, so be sure to check those out.
I hope I clearly demonstrated how to combine multiple images, along with a gradient layer to create a composite in Adobe Photoshop. If you have any questions or concerns regarding this post, please let me know in the comment section below. Thanks for reading!
I decided that it might be fun to walk through the process of making one of these fliers, step by step, on this blog. I’ll start with the background graphics and move onto the logos, text and anything else that might make the flier look really good. It’s these step by step projects that are the most helpful to those who are looking to learn how to operate Photoshop, in my opinion.
In today’s post, I’ll be creating a background for a flier I’m going to develop inside of Adobe Photoshop. Doing this sort of thing isn’t really difficult at all. All it takes is a few skills, some imagination and some direction. The colors and shapes need to match up with the vision of the rest of the final product, so when making something like this, it’s important to stay focused and to not go overboard. With that said though, this part of the process should be fun.

To create this background, I’ll be taking advantage of a gradient layer as well as three other image layers. I’ll be using different blend modes to make everything come together seamlessly. Don’t worry, I’ll walk you through every step of this process.
Creating a New File & a Gradient
Since this project is only going to be posted on this blog, I’ll stick with the pixel dimension of 1000×667, like I always use. If I were to go to print with something like this, I’d use 300dpi resolution, instead of 72dpi, CMYK colors, instead of RGB and I’d have the physical size set to whatever the final print dimensions call for. Since this is only for web, things will be much more straightforward.To create a new document, I’ll head up to the File > New menu item and click. Once I do that, a dialog box will appear that calls for some specs. I’ll fill the fields in with the information I just shared with you and when I’m finished, I’ll click on the Create button.

Now that the file is created, I’m going to head over to the Layers panel on the right and click on the small lock icon in the layer that’s currently called Background. Doing this will unlock the layer (removing the lock icon) and will allow me to work with it. Once I do that, I’ll double click on the word “Background” and I’ll type Gradient in it’s place and press the Enter key on my keyboard. Renaming this layer is just to keep things organized. Now it’s time to actually create the gradient.
There are a few different methods for creating a gradient in Adobe Photoshop, but for now, I think the easiest one to use would be via the Layer Style dialog box. To access this box, I’ll double click on the white thumbnail of the Gradient layer in the Layers panel. When I do that, the dialog box appears. Once that opens, I’ll click on the Gradient Overlay check box and then click right on the words “Gradient Overlay.” Clicking on the check box activates the style and clicking on the words actually gets you into the area to change the related settings.

There’s sort of a lot to creating gradients in Photoshop. It’s not too terribly challenging, but a thorough look is beyond the scope of this post. You can count on the fact that I’ll write something in the future that will cover every last detail, but for now, I’ll simply show you the settings I used for the gradient I created for this project.
If you look at the screenshot above, you’ll see the settings I’m referring to here. I kept the Blend Mode set to Normal and the Opacity set to 100%. Below the Gradient box, I set the Style to Radial and kept the Angle set to 90 degrees. Finally, I set the Scale to 150%. As far as the colors of the gradient itself, I clicked right onto the gradient color bar and waited for the Gradient Editor panel to appear.

Once I was in the editor, I clicked on one of the gradients I previously imported and adjusted the colors from there. Again, I’ll cover how to adjust the colors in a later post.
How to Load Additional Gradients into Adobe Photoshop
When I was finished, I clicked both OK buttons and returned to the image I created so far.

If I need to alter the look of the gradient later on, I can easily do that. It’s super simple because of the method I chose to create it.
Adding Additional Images
For this part of the project, I’m going to open three additional photos into Photoshop and drag them over into the project file. Here’s a look at the original photos I’ll be using.


I’ll stack these images on top of the gradient and then use blending modes to seamlessly integrate them with each other.
Adding the First Image
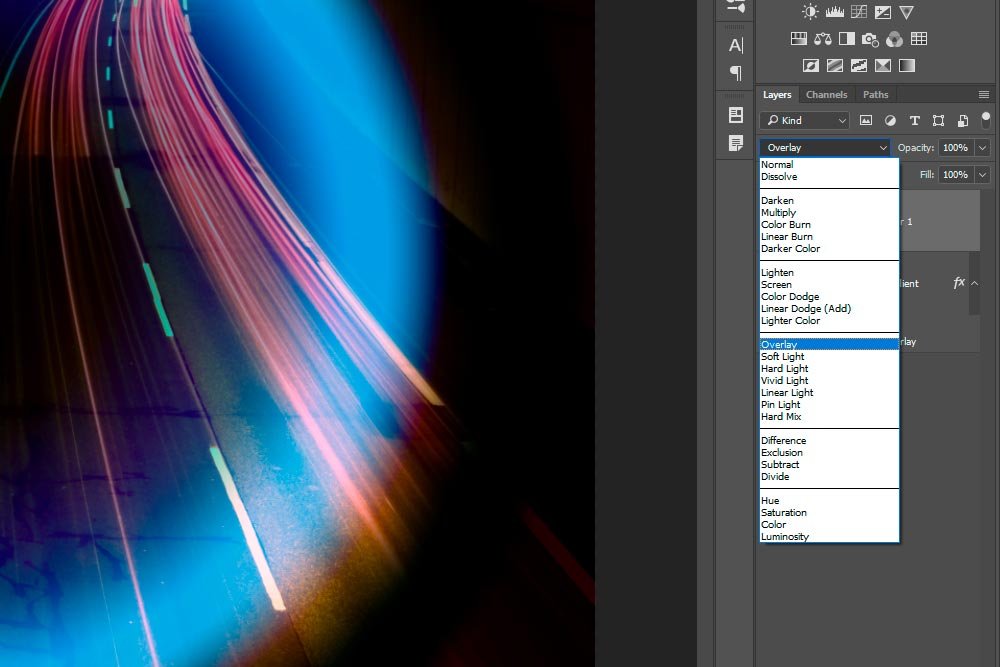
I’ll drag the first image over into the project file. This will be the one with the cars traveling on the highway at night. Once I have this image included in the project file and I have it sized and centered to match the file dimensions, I’ll go ahead and apply the Overlay blending mode to it that inside the drop-down box at the top of the Layers panel.
Doing this will sort of mix these two layers together and will give me this result.

Adding the Second Image
Next, I’ll do the same exact thing for the second image. This will be the block wall photo. I’ll drag it over into the project file and after I’m finished sizing and positioning it, I’ll apply the same Overlay blend mode to it. I’ll get this result.
If you look at the above image, you can see parts of the gradient, the highway and the block wall. They’re all sort of mixed together.
Adding the Third Image
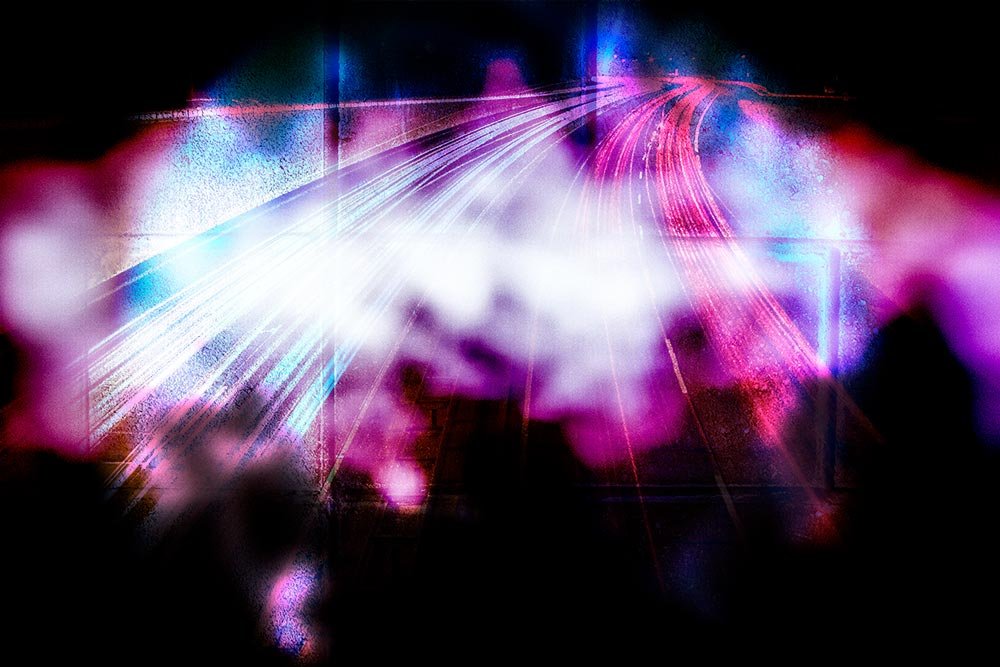
This one is going to be a bit different. I’ll drag the white and purple blur over into the project file, but this time, I’m going to apply the Hard Light blend mode to it. This is going to offer a slightly different look to the image than it would have if I applied the Overlay blend mode. Actually, the Hard Light blend mode is the opposite of the Overlay blend mode. Here’s the result.
I think you can see where I’m going with this. My goal is to create a background that you can’t quite put your finger on. As it stands, it’s pretty cool. I do want to make a few changes though.
Adjusting the Layer Opacity
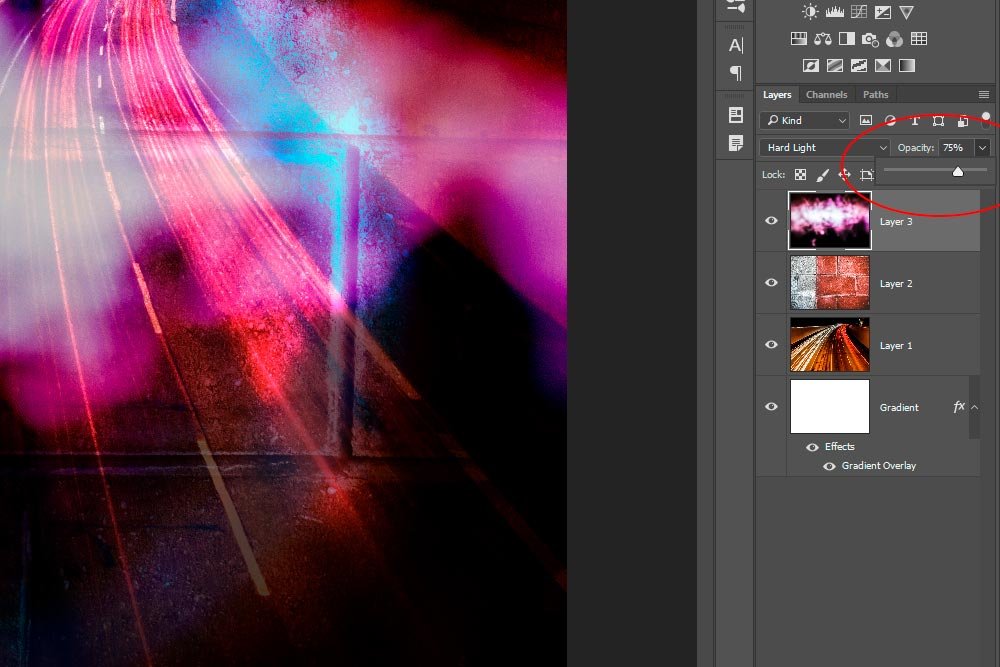
I did some experimenting and I found that if I reduce the opacity of the bottom, gradient layer and the top layer that I just added to 75%, things look a little less over the top. To do this, I clicked on the Opacity slider in the Layer panel and dragged it to the left.
Doing this lessens the intensity of the gradient layer and lightens up the highway a bit so it’s more visible. Here’s the result.

I’d say this is a good start. As you can see, creating a background layer of almost any look isn’t that difficult. If you have good source photography along with some interesting ideas, you can make a graphic that will knock people’s socks off. And the best part is, a background like the one I just made it completely adjustable. I know I haven’t gone any further in the project yet, but if I find that I need a different look, I can easily apply it. In the next few posts on this topic, I’ll be adding graphics and text, so be sure to check those out.
I hope I clearly demonstrated how to combine multiple images, along with a gradient layer to create a composite in Adobe Photoshop. If you have any questions or concerns regarding this post, please let me know in the comment section below. Thanks for reading!
