KristinaW
Member
- Joined
- May 7, 2021
- Messages
- 127
- Reaction Score
- 0
- Points
- 18
- #1
The Clone Stamp Tool in Adobe Photoshop can be an extremely handy solution to many issues you may face while editing photos and images in Adobe Photoshop. There are actually a few other newer tools that can handle situations in similar manners today, but the Clone Stamp Tool has been around a long time and is definitely a staple in many an editor's toolbox. In simple terms, this tool can make problem areas in images go away. When used, it takes a snapshot (or sample) of one area of an image and then that area, at the user's behest, gets painted over another area. So, if you wanted to remove a blemish on a model's cheek, you'd sample an area of the cheek that has no blemish and simply use that sampled area to paint over the blemish. It really is that simple.
In today's post, I'll be working through a quick demonstration in order to teach you exactly how the Clone Stamp Tool works inside of Photoshop. Again, this isn't a difficult tool to work with, but you do need to understand a few key concepts to get the most out of it.
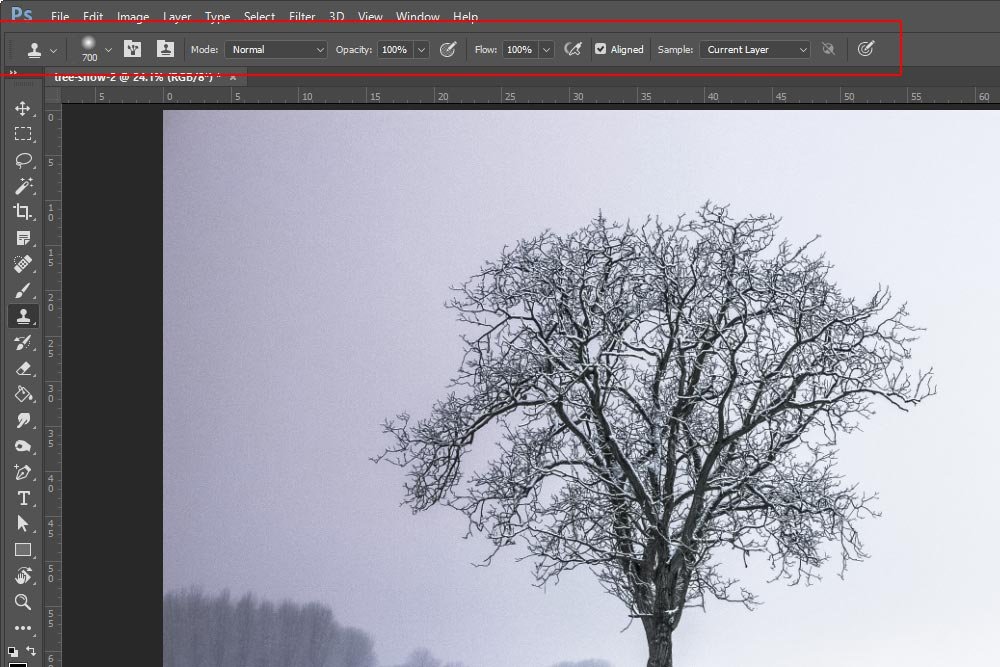
After I click the tool, I'll notice the options bar up top change. This is what it looks like:

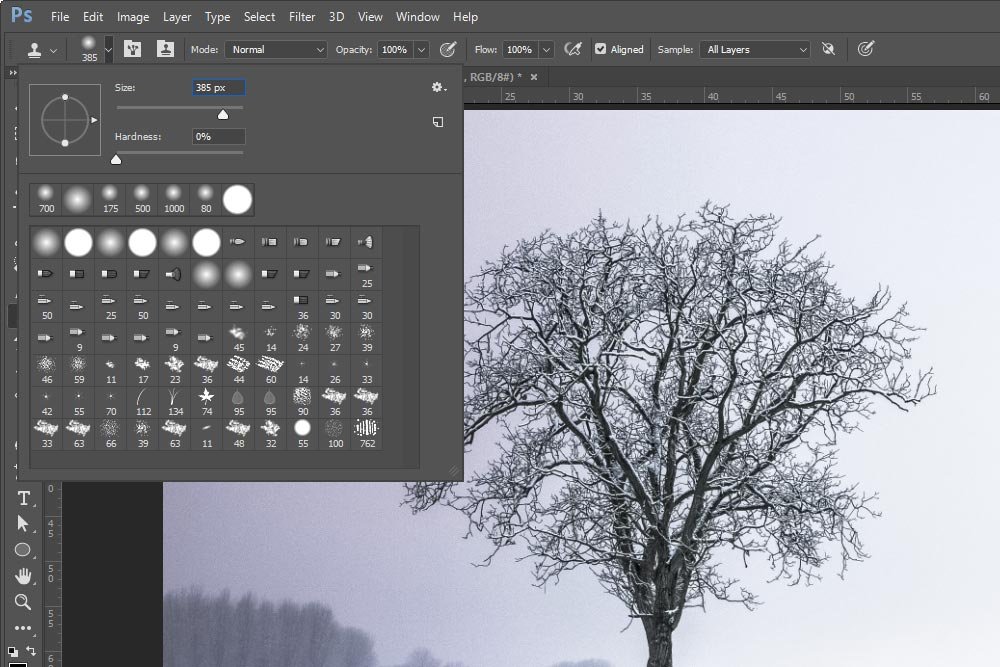
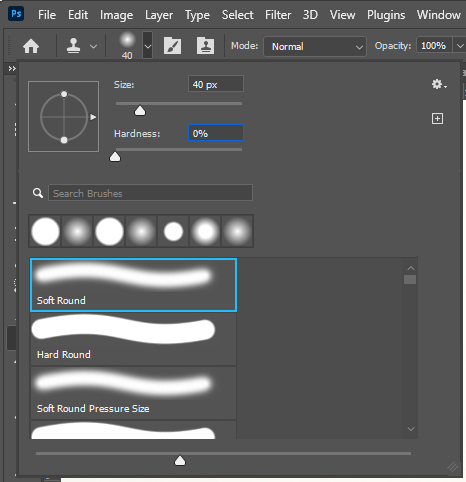
For this tutorial, I'll concern myself with Opacity, Flow, Size, and Hardness. I'll keep the Opacity at 100% and the Flow at 100%. Inside the brush panel, I'll set the Size to 40 pixels and Hardness to 0%. My goal is to remove one of the birds in the photo and I think 40 pixels will do that just fine. Also, since I'm working on a photograph with slight gradients and textures, I want any work I do to blend into the background, so a softer edged brush would be beneficial for that. A lower Hardness level is a softer edge.

After I sample the area I want to replace the duck with (the sky), I'll then move my mouse pointer, or Clone Stamp Tool brush, over the duck. Let's see what that looks like.

Do you see how the sky is beginning to be painted over the duck? It's soft, but it's there. I'll now click and paint until the entire duck is gone.
And that's what the Clone Stamp Tool in Adobe Photoshop is used for.
But wait, there's more.
For instance, let's say I sample the area directly in front of the first duck. Then, I go off and paint over that first duck. The duck disappears as expected, but if I continue painting to the left in the area that was behind the duck, the duck will reappear in that different location. The reason for this is that I am actually repainting the entire image, not just the one spot, as I alluded to above.
Compare these two images:


Do you see how I moved the first duck? To do that, I simply sampled in front of it and painted it until it was gone. Then, I continued on painting behind it and it reappeared in a new location. Pretty cool.

See how easy that is?
The Clone Stamp Tool in Adobe Photoshop is very easy to begin working with, will frustrate you after a few minutes, and then will become easy to work with again after you give it some time. It's an extremely helpful tool and if you want to become serious and get better with working in Photoshop, I encourage you to begin using it regularly. It'll assist you greatly in the future.
Do you have any questions regarding this post? If so, drop 'em down below. Any concerns or something to add? Drop that down below too. Thanks!
In today's post, I'll be working through a quick demonstration in order to teach you exactly how the Clone Stamp Tool works inside of Photoshop. Again, this isn't a difficult tool to work with, but you do need to understand a few key concepts to get the most out of it.
How to Access the Clone Stamp Tool
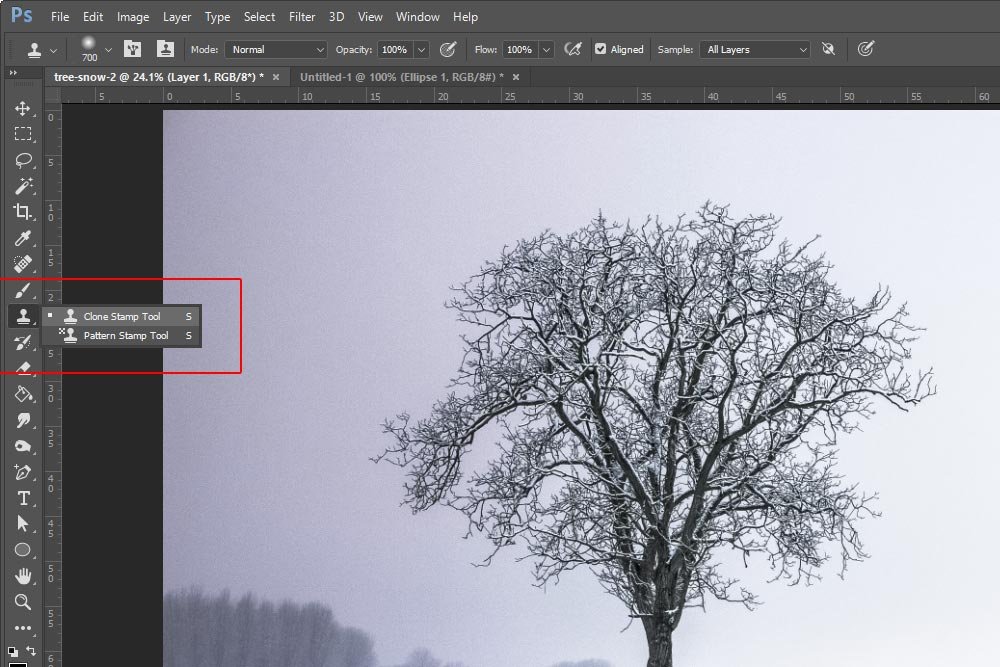
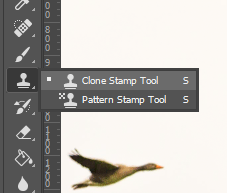
After opening Photoshop and launching the image I'd like to work on, I'll head over to the left toolbar, where I'll click the tenth (at the time of this writing) tool down from the top. If I hover my mouse pointer over the tool, I'll see a popup that says Clone Stamp Tool (s). If I click and drag out to the right, I'll see two tools; the Clone Stamp Tool as well as the Pattern Stamp Tool. I'll make sure to select the top one.
After I click the tool, I'll notice the options bar up top change. This is what it looks like:

For this tutorial, I'll concern myself with Opacity, Flow, Size, and Hardness. I'll keep the Opacity at 100% and the Flow at 100%. Inside the brush panel, I'll set the Size to 40 pixels and Hardness to 0%. My goal is to remove one of the birds in the photo and I think 40 pixels will do that just fine. Also, since I'm working on a photograph with slight gradients and textures, I want any work I do to blend into the background, so a softer edged brush would be beneficial for that. A lower Hardness level is a softer edge.

The Original Image
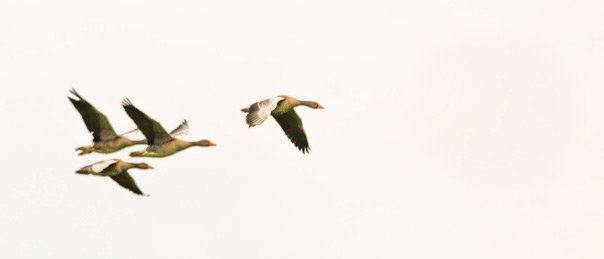
Let's take a look at the image I'll be working on today. I haven't done anything to this yet.
Using the Clone Stamp Tool
Let's see - I think I'll go ahead and remove the first duck in the group. As I mentioned above, to operate the Clone Stamp Tool, I'll need to select, or sample, an area of the photo that I'd like to replace the duck with. In this case, I'll Alt+click about two inches in front of the duck. That'll put the sky in my clipboard as a sample. So yes, in order to sample, I'll need to hold the Alt key on my keyboard down and then click an area of the image.After I sample the area I want to replace the duck with (the sky), I'll then move my mouse pointer, or Clone Stamp Tool brush, over the duck. Let's see what that looks like.

Do you see how the sky is beginning to be painted over the duck? It's soft, but it's there. I'll now click and paint until the entire duck is gone.

And that's what the Clone Stamp Tool in Adobe Photoshop is used for.
But wait, there's more.
How Far Does the Clone Stamp Tool Go?
This is kind of a tricky concept to grasp. When I click someplace in the image to sample, the tool doesn't just sample that specific spot. It actually samples the entire image. So If I paint over just a small area, like I did above, everything is fine. But if I continue painting to my heart's content, other objects in the image will appear where they're unexpected.For instance, let's say I sample the area directly in front of the first duck. Then, I go off and paint over that first duck. The duck disappears as expected, but if I continue painting to the left in the area that was behind the duck, the duck will reappear in that different location. The reason for this is that I am actually repainting the entire image, not just the one spot, as I alluded to above.
Compare these two images:


Do you see how I moved the first duck? To do that, I simply sampled in front of it and painted it until it was gone. Then, I continued on painting behind it and it reappeared in a new location. Pretty cool.
Moving Objects with the Clone Stamp Tool
If what I just shared above is true, that means that I should be able to sample an actual object in the photo and then paint that object somewhere else. Let's see if that works. I'll go ahead and sample the cluster of three birds and then paint them directly in front of the new first bird in the group.
See how easy that is?
The Clone Stamp Tool in Adobe Photoshop is very easy to begin working with, will frustrate you after a few minutes, and then will become easy to work with again after you give it some time. It's an extremely helpful tool and if you want to become serious and get better with working in Photoshop, I encourage you to begin using it regularly. It'll assist you greatly in the future.
Do you have any questions regarding this post? If so, drop 'em down below. Any concerns or something to add? Drop that down below too. Thanks!


