EmeraldHike
Member
- Joined
- May 10, 2021
- Messages
- 133
- Reaction Score
- 0
- Points
- 21
- #1
I’ve been using shapes for various things in Adobe Photoshop for as long as I can remember. I never actually learned everything I needed to know about them though. There’s a lot to them. Much more than the typical adding a curve or a bend to something and a custom shape, like a paw print, to another. The topic of shapes is extensive, so I thought I’d begin the process of working through them on this blog today.
Before I begin, I’d like to let you know that while I’ll be working with the Ellipse Tool and the Custom Shape Tool, both of which are already considered shapes, it’s just as simple to create a shape from text. While I’ll be discussing this in much more depth in future posts, to create a “shape” from text, all you need to do is right-click on the text layer you’d like to convert (in the Layers panel) and choose Convert to Shape. Again, I’ll talk about that much more in the future, but I wanted to let you know that.
In today’s post, I’m going to initially draw out one shape in my workspace in Adobe Photoshop. A circle. Then, I’ll draw out another shape on top of that. Probably something that looks like a sun. My goal is going to be to overlap both shapes and then to cut the sun shape out of the circle shape, so the sun is hollow. It’ll be sort of like filling in a big circle on a piece of paper with a pencil and then using an eraser to remove part of the circle so a shape is visible. The benefit of doing something like this is that if you’d like to use a background that you’d like to be visible through the shape, it will be. As you read further below, it’s my hope that you’ll be thinking of applications for something like what I’m attempting to explain.
This is what I’d like the final product to look like.

Notice how the background gradient is showing through the shape? I’ll show you how to do this below.
After I create the new document, I’ll create a new layer in the Layers panel and then head over to the Ellipse Tool and click to activate that tool.

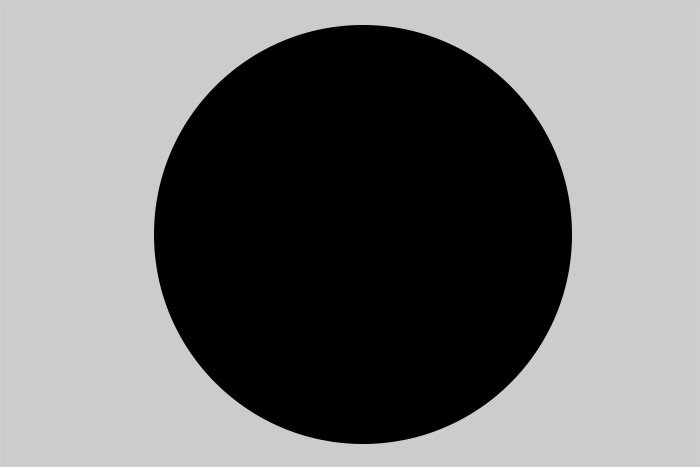
After that, I’ll draw a nice big circle right in the center of my document. I’ll use the options bar up top to change the fill color to black. Here’s what I have so far.
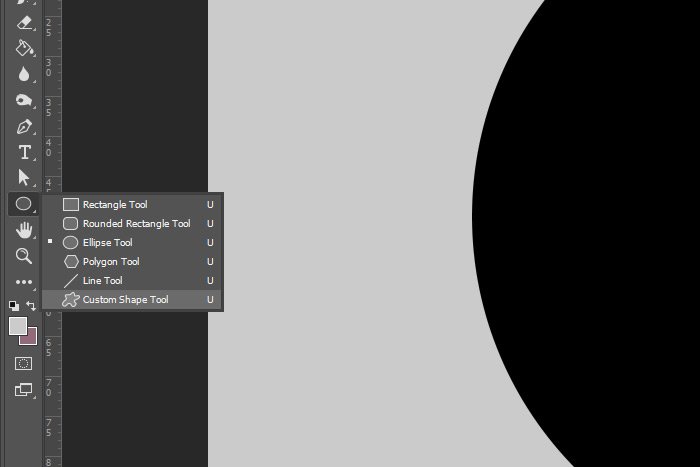
Next, I’ll head back into the Layers panel and I’ll create a new layer. Then, I’ll go back to the left toolbar and select the Custom Shape Tool.
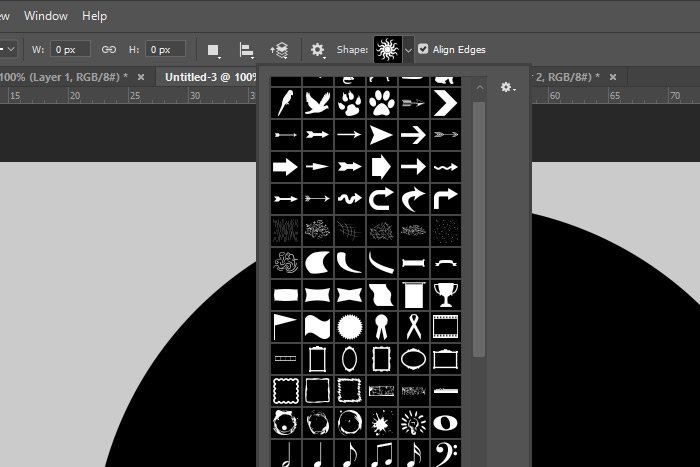
Once that’s active, I’ll go up to the options bar and I’ll choose the Sun shape from the Shape drop-down.
Making sure the new empty layer is active in the Layers panel, I’ll draw the new shape, right on top of the circle. I’ll hold my Shift key down to make sure it’s a perfect circle. When I’m finished, I’ll also use my Move Tool to position this new shape right at the center of the first shape. I’ll also make this new shape white.
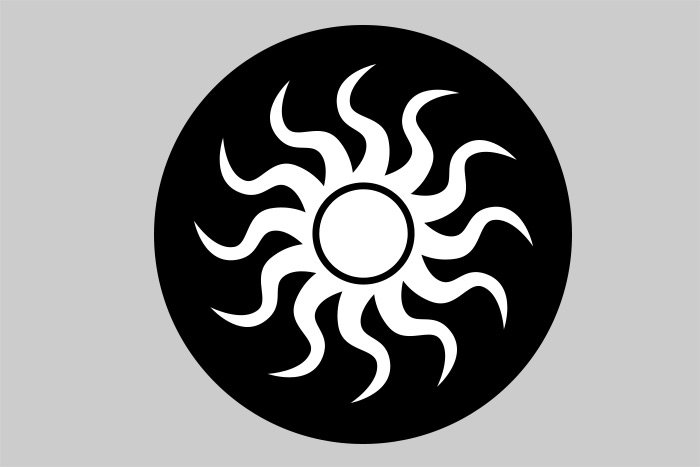
As it stands, I have a light gray background, then a black circle and then a white sun on top. If you have any questions up to this point, please be sure to ask.
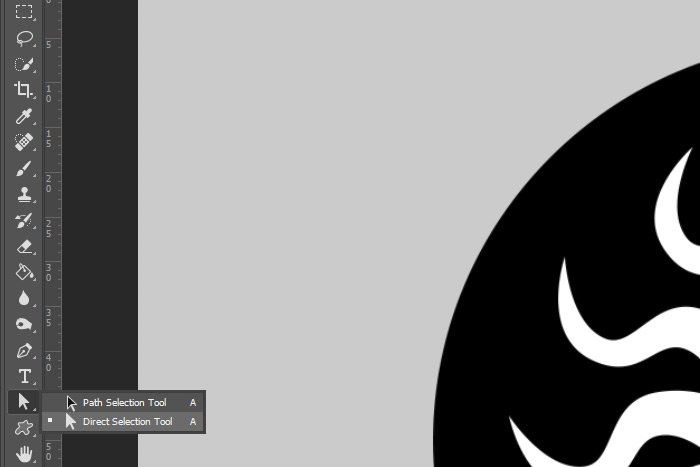
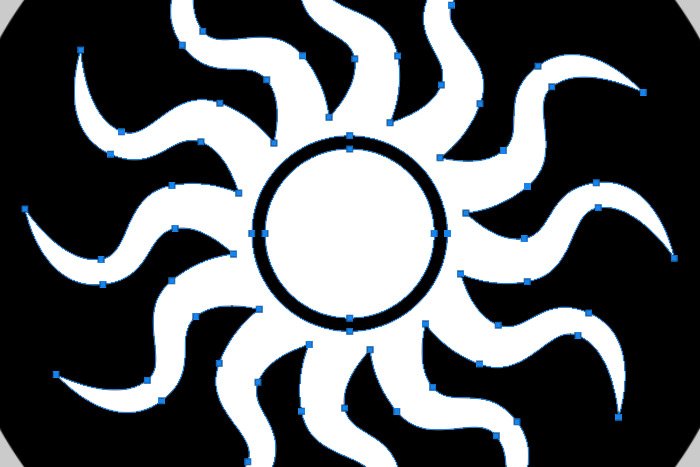
Once I have that tool active, I’ll need to hold down the Alt key on my keyboard and click somewhere on the sun shape to select the entire thing. I’ll see that it’s selected by the blue outline and handles.
Next, I’ll use the keyboard shortcut of Ctrl+X to cut the shape from its current location. I could also use the Edit > Cut menu item for this.
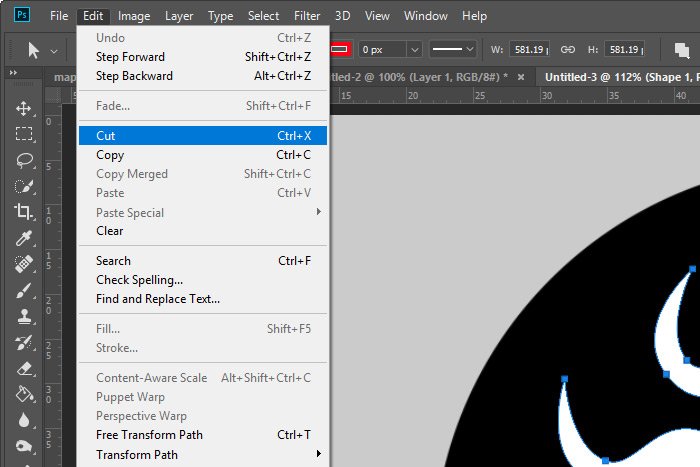
Once the sun shape is cut, it will disappear and the layer in the Layers panel will disappear as well.
My next step will be to paste the layer on top of the circle layer. So, making sure the circle layer is active in the Layers panel, I’ll use the keyboard shortcut of Ctrl+V, I’ll paste it back in. Alternately, I could have just as easily used the Edit > Paste menu item.
This is what things will look like.

At this point, I’d like both the sun shape as well as the circle shape selected, so since only the sun shape is currently selected, I’ll need to hold down my Shift key and my Alt key (while the Direct Selection Tool is still active) and click somewhere in the circle shape. After doing this, I’ll notice both shapes are outlined in blue.
Finally, I’ll head up to the Path Operations drop-down and I’ll choose Exclude Overlapping Shapes to remove the sun shape from the circle shape.
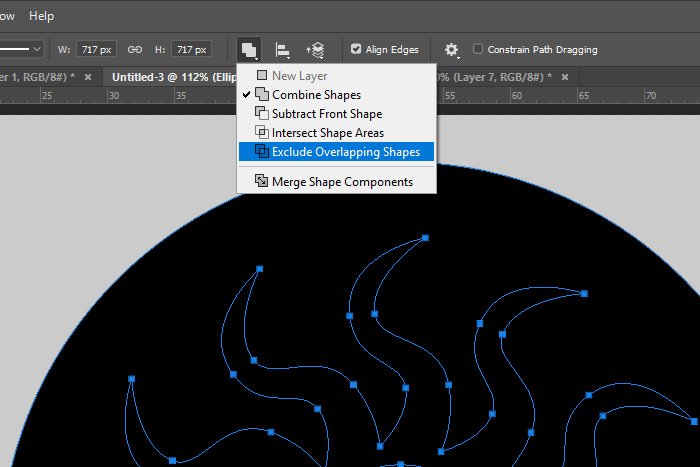
Here’s what I’m left with. Exactly what I want.

Do you see how the gray background can now be seen through the circle shape where the sun was? Let me add a gradient to the gray bottom layer so it’s more clear. I’ll need to click on the lock in the bottom layer in the Layers panel to unlock that layer first.
Would you like to know how to create a gradient as a layer effect? Click the link below.
Layer Effects & Styles in Adobe Photoshop

Now how cool is that? And the best part is, I can apply this same concept to almost anything I would like to do with any shape I work with. The possibilities are endless. Want to create a frame for a photo? Want to create a graphic with shapes upon shapes in it? You can do anything.
——
I hope I clearly explained how to cut one shape from another shape in Adobe Photoshop. If you have any questions about this post, please leave them in the comment section below. Thanks for reading!
COMMENT: I’m trying to make a rectangular cut in a circle to split the circle into halfs of bracket but i cant do it, can you explain the process in a simple way please??
COMMENT: Thank you very much – this is the first tutorial I’ve ever come across that lays it out so simply and quickly. It’s crazy that the way to accomplish this small thing is so convoluted in Photoshop in 2020, but there you have it. Thanks again!
Before I begin, I’d like to let you know that while I’ll be working with the Ellipse Tool and the Custom Shape Tool, both of which are already considered shapes, it’s just as simple to create a shape from text. While I’ll be discussing this in much more depth in future posts, to create a “shape” from text, all you need to do is right-click on the text layer you’d like to convert (in the Layers panel) and choose Convert to Shape. Again, I’ll talk about that much more in the future, but I wanted to let you know that.
In today’s post, I’m going to initially draw out one shape in my workspace in Adobe Photoshop. A circle. Then, I’ll draw out another shape on top of that. Probably something that looks like a sun. My goal is going to be to overlap both shapes and then to cut the sun shape out of the circle shape, so the sun is hollow. It’ll be sort of like filling in a big circle on a piece of paper with a pencil and then using an eraser to remove part of the circle so a shape is visible. The benefit of doing something like this is that if you’d like to use a background that you’d like to be visible through the shape, it will be. As you read further below, it’s my hope that you’ll be thinking of applications for something like what I’m attempting to explain.
This is what I’d like the final product to look like.

Notice how the background gradient is showing through the shape? I’ll show you how to do this below.
Drawing the Shapes
For this example, I’ll start off by creating a new document that’s 1200×800 pixels. This document will have a light gray background, just so we can more clearly see what’s going on.After I create the new document, I’ll create a new layer in the Layers panel and then head over to the Ellipse Tool and click to activate that tool.

After that, I’ll draw a nice big circle right in the center of my document. I’ll use the options bar up top to change the fill color to black. Here’s what I have so far.

Next, I’ll head back into the Layers panel and I’ll create a new layer. Then, I’ll go back to the left toolbar and select the Custom Shape Tool.

Once that’s active, I’ll go up to the options bar and I’ll choose the Sun shape from the Shape drop-down.

Making sure the new empty layer is active in the Layers panel, I’ll draw the new shape, right on top of the circle. I’ll hold my Shift key down to make sure it’s a perfect circle. When I’m finished, I’ll also use my Move Tool to position this new shape right at the center of the first shape. I’ll also make this new shape white.

As it stands, I have a light gray background, then a black circle and then a white sun on top. If you have any questions up to this point, please be sure to ask.
Cutting Out the Sun
Really, all I need to do is one more thing. I’d like to cut the sun shape out of the circle shape, so the background shows through. To do this, I’ll need to introduce a new tool. It’s called the Direct Selection Tool. I’ll go to the left toolbar and activate that by clicking on it.
Once I have that tool active, I’ll need to hold down the Alt key on my keyboard and click somewhere on the sun shape to select the entire thing. I’ll see that it’s selected by the blue outline and handles.

Next, I’ll use the keyboard shortcut of Ctrl+X to cut the shape from its current location. I could also use the Edit > Cut menu item for this.

Once the sun shape is cut, it will disappear and the layer in the Layers panel will disappear as well.
My next step will be to paste the layer on top of the circle layer. So, making sure the circle layer is active in the Layers panel, I’ll use the keyboard shortcut of Ctrl+V, I’ll paste it back in. Alternately, I could have just as easily used the Edit > Paste menu item.
This is what things will look like.

At this point, I’d like both the sun shape as well as the circle shape selected, so since only the sun shape is currently selected, I’ll need to hold down my Shift key and my Alt key (while the Direct Selection Tool is still active) and click somewhere in the circle shape. After doing this, I’ll notice both shapes are outlined in blue.
Finally, I’ll head up to the Path Operations drop-down and I’ll choose Exclude Overlapping Shapes to remove the sun shape from the circle shape.

Here’s what I’m left with. Exactly what I want.

Do you see how the gray background can now be seen through the circle shape where the sun was? Let me add a gradient to the gray bottom layer so it’s more clear. I’ll need to click on the lock in the bottom layer in the Layers panel to unlock that layer first.
Would you like to know how to create a gradient as a layer effect? Click the link below.
Layer Effects & Styles in Adobe Photoshop

Now how cool is that? And the best part is, I can apply this same concept to almost anything I would like to do with any shape I work with. The possibilities are endless. Want to create a frame for a photo? Want to create a graphic with shapes upon shapes in it? You can do anything.
——
I hope I clearly explained how to cut one shape from another shape in Adobe Photoshop. If you have any questions about this post, please leave them in the comment section below. Thanks for reading!
COMMENT: I’m trying to make a rectangular cut in a circle to split the circle into halfs of bracket but i cant do it, can you explain the process in a simple way please??
COMMENT: Thank you very much – this is the first tutorial I’ve ever come across that lays it out so simply and quickly. It’s crazy that the way to accomplish this small thing is so convoluted in Photoshop in 2020, but there you have it. Thanks again!
