Cameron
Member
- Joined
- May 10, 2021
- Messages
- 108
- Reaction Score
- 3
- Points
- 23
- #1
Have you ever seen those photos or videos that have a typed out word with texture behind it? You know what I’m talking about here. Let’s say you see a video and there’s a word on top of that video. Inside the word (the letters to be more precise) is another video playing. Of course, you can’t see much of that top video, but it’s there playing, just like the other one.
Or, perhaps you’re looking at a photograph or just a plain solid background. There’s text written out on top of that background and inside the letters of the word is either a photograph, video, pattern or something else. Basically, what I’m describing here is something that almost everyone in the design world has seen a number of times but rarely has come to understand. What you’re looking at is type being used as a layer mask. Don’t worry, everything will be explained thoroughly down below.
In today’s post, I’m going to be demonstrating how to go about setting up some type in conjunction with a clipping mask in Adobe Photoshop. For this demonstration, I’ll be using two video clips. Now, I don’t want you to concern yourselves about my use of video. The same exact instructions I offer below can be used with static assets. It really makes no difference. Also, I want you to understand that these instructions are really very simple. Don’t get caught up on the fact that there are moving parts.
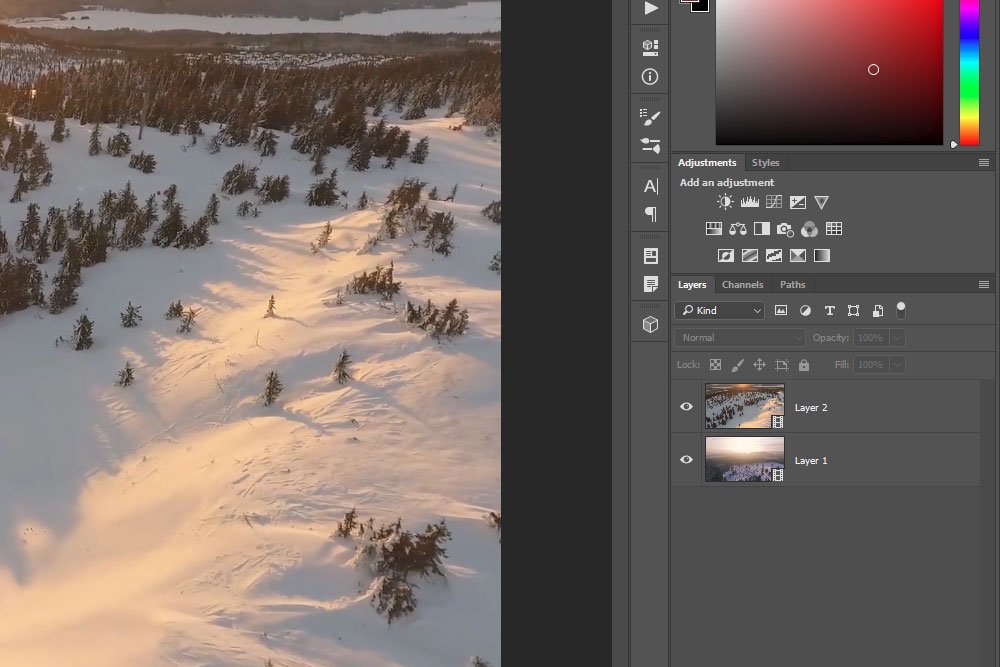
First, I have two separate layers stacked in the Layers panel. There are no groups, just single layers.
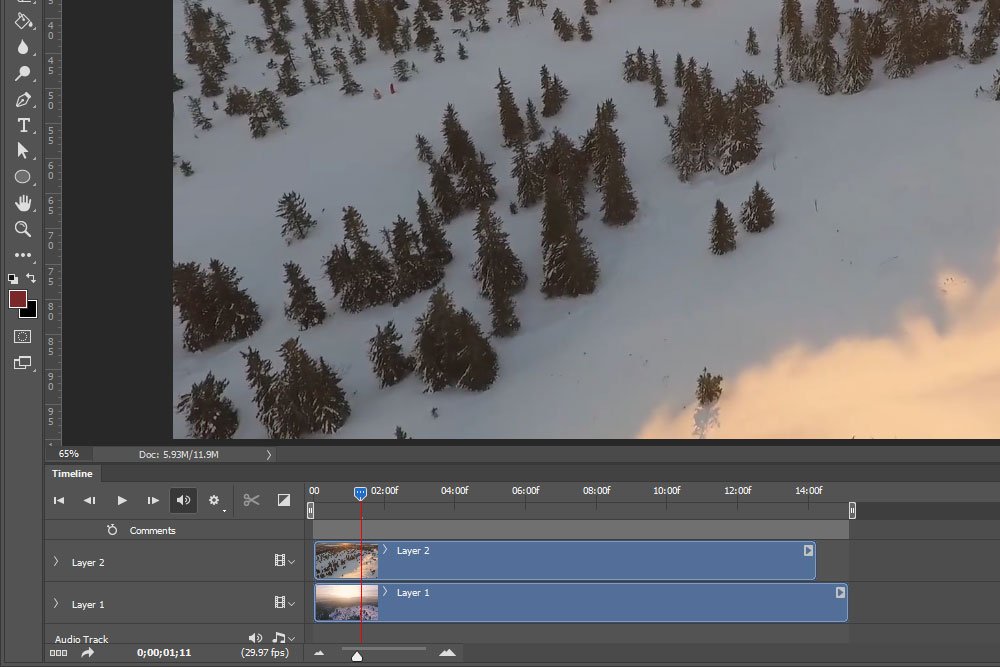
Next, I have the same two layers visible in the Timeline panel. One clip is 14 seconds long and the other is 15 seconds long. The length makes no difference at this point in the lesson. Or anywhere for that matter.
And as you can see, I now have a new layer on top of the others in the Layers panel.
Okay, so here’s the thing. I now have three layers. I would like one to be the background, one to be the text (which it already is) and one to be masked by the text. I’ll need the masked layer to be the very top layer with the text layer directly underneath that one and the background all the way at the bottom. I’ll arrange the layers now.
What are Clipping Masks in Adobe Photoshop?
The top video layer has now been clipped to the text layer and it has been masked accordingly. The way I can see that this is done is to look at the text itself, which will be visible and consisting of the video, and to look at the layers themselves in the Layers panel. The top video layer will have a small down-facing arrow on its left side and both the video layer and the text layer will be indented. Take a look at the screenshot below.
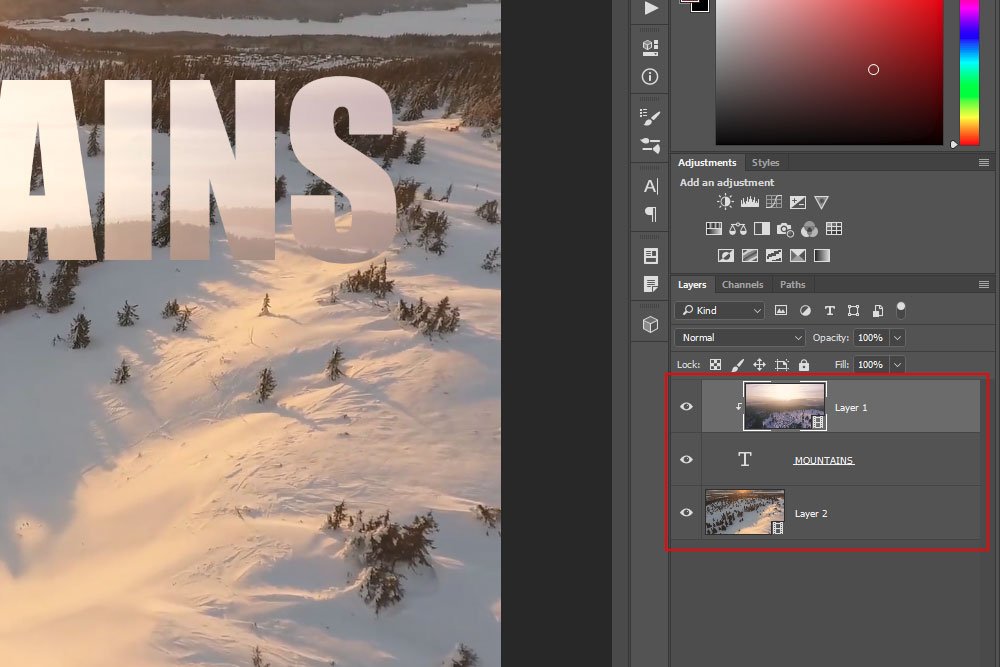
Now, if I go ahead and play the video, I’ll find that I’ve done a good job. The task is almost complete.
I’ll go from this:
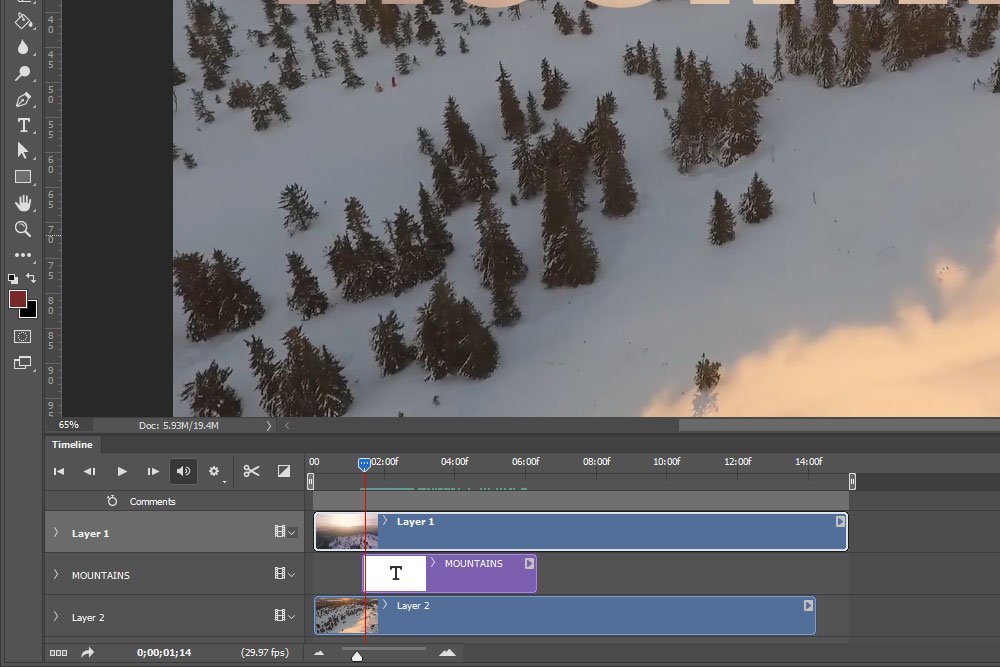
To this:
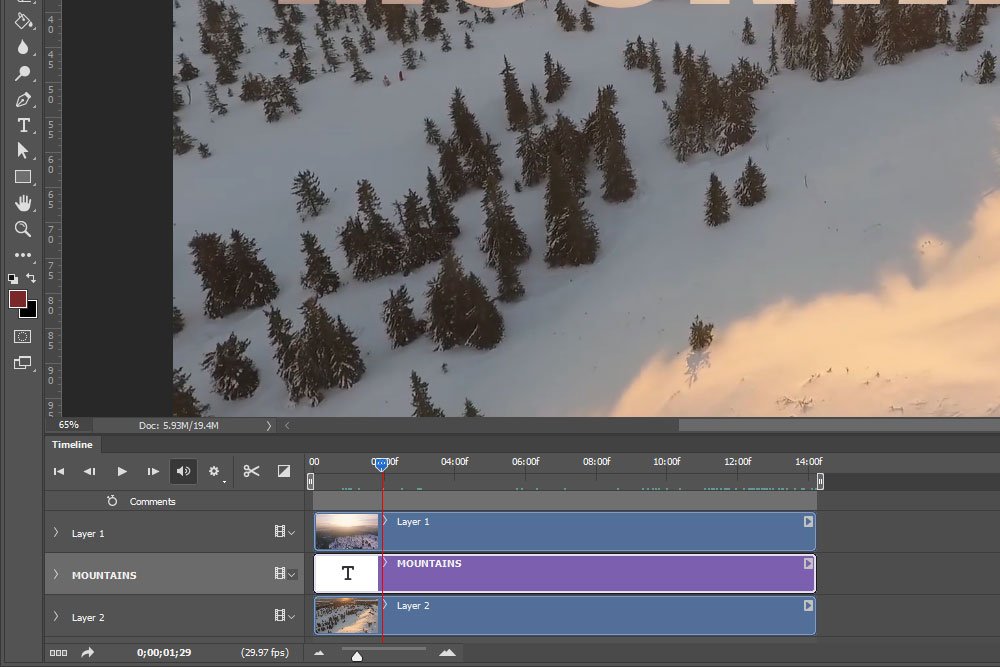
As you can see, I also shortened the top video duration so it would match with the other one.
Personally, I like the text where it was because the movement inside of it is subtle. It’s almost as if it isn’t there. Actually, perhaps I’ll position it directly in the center of the project. That looks really good.
Using the Adobe Photoshop Curves Tool For Photography
Once I have the Curves Properties panel open, I’ll take advantage of one of the contrast Presets.
How to Enhance Color Using Curves in Adobe Photoshop
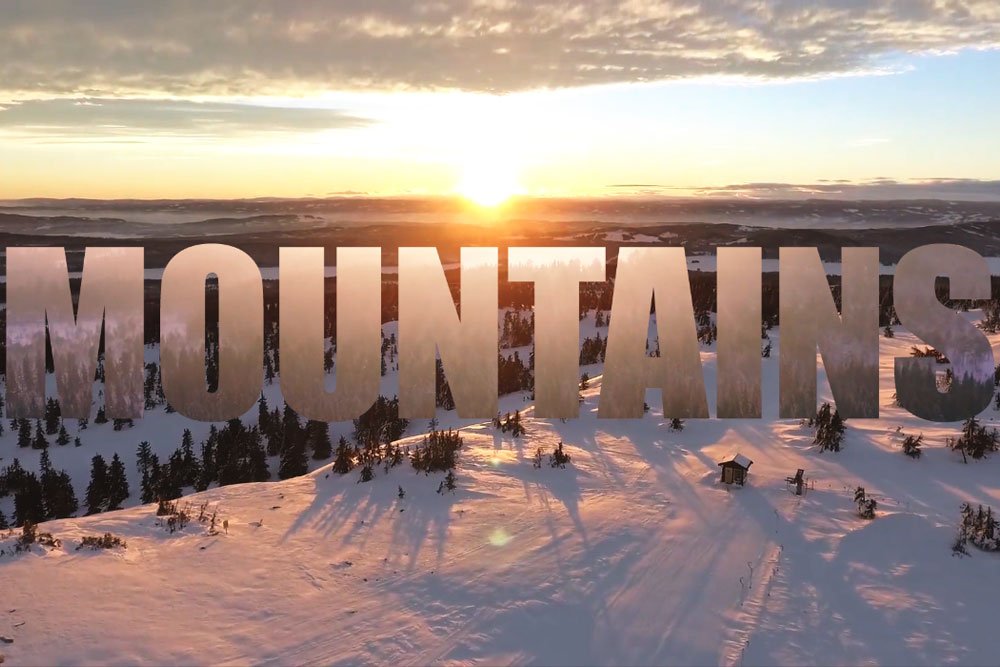
And here’s the final video.
I’d say that’s pretty awesome.
——
In this post, I hope I clearly explained how to go about adding a text based video clipping mask in Adobe Photoshop. If you have any questions or concerns regarding this topic, please let me know via a comment below. Thanks for reading!
Or, perhaps you’re looking at a photograph or just a plain solid background. There’s text written out on top of that background and inside the letters of the word is either a photograph, video, pattern or something else. Basically, what I’m describing here is something that almost everyone in the design world has seen a number of times but rarely has come to understand. What you’re looking at is type being used as a layer mask. Don’t worry, everything will be explained thoroughly down below.
In today’s post, I’m going to be demonstrating how to go about setting up some type in conjunction with a clipping mask in Adobe Photoshop. For this demonstration, I’ll be using two video clips. Now, I don’t want you to concern yourselves about my use of video. The same exact instructions I offer below can be used with static assets. It really makes no difference. Also, I want you to understand that these instructions are really very simple. Don’t get caught up on the fact that there are moving parts.
Demo Video Clips
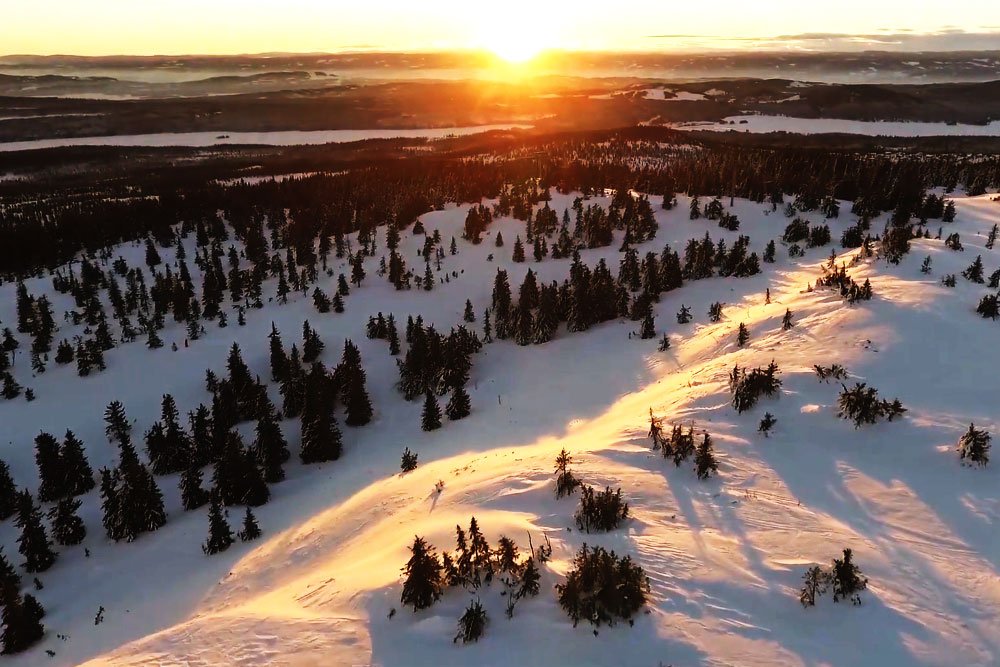
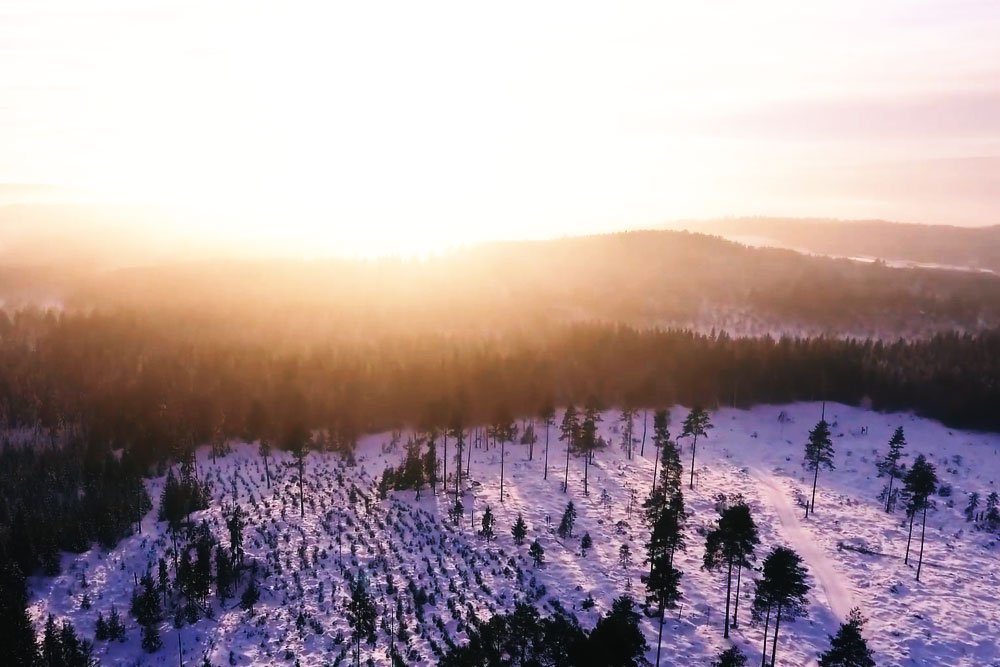
For this post, I decided to go ahead with different scene footage taken by some drones. They’re both in the mountains and there’s snow in both clips. I didn’t choose either of these files for any other reason than they looked interesting. What I do below could be done with anything. Here are some still shots of the videos.

Setting Up the Files in Photoshop
I already have the video files imported into Photoshop. I’ve dragged one over to the other’s tab and aligned them properly. Let’s take a look at what I have so far in the Layers panel and in the Timeline panel.First, I have two separate layers stacked in the Layers panel. There are no groups, just single layers.

Next, I have the same two layers visible in the Timeline panel. One clip is 14 seconds long and the other is 15 seconds long. The length makes no difference at this point in the lesson. Or anywhere for that matter.

Creating Type & Arranging Layers
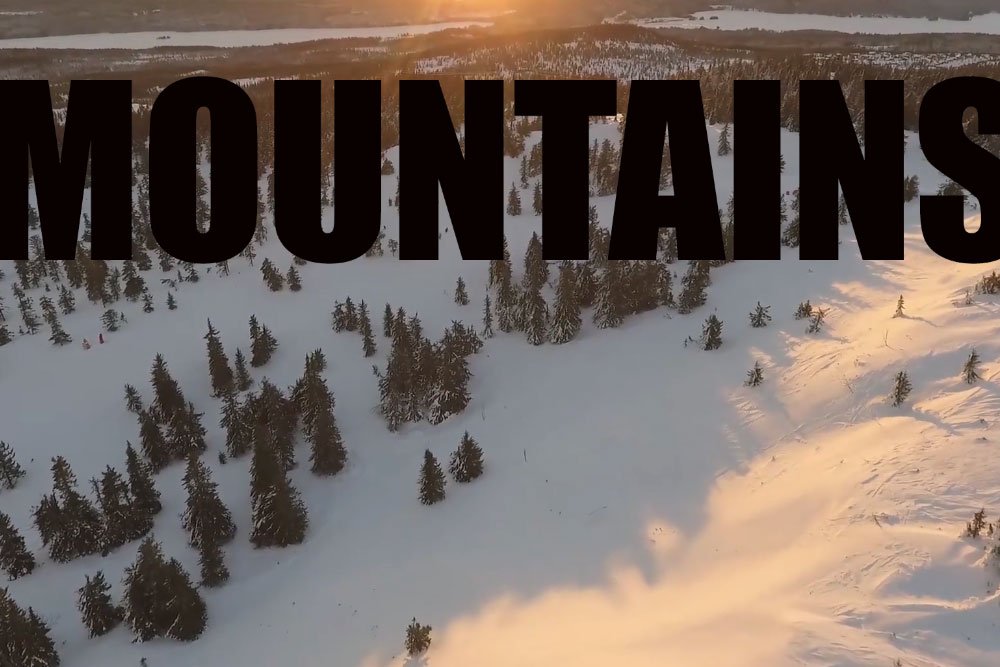
To kick things off, I’m going to type out a word across the top of the video with the heaviest font I can find. I need a heavy font because I want a lot of video to show through this mask. In this case, I’ll use the Impact font because it’s huge. The most bold one I’m aware of that’s installed on my machine. With it and the Horizontal Type Tool, I’ll click and type out the word Mountains. It makes no difference what color the type is.
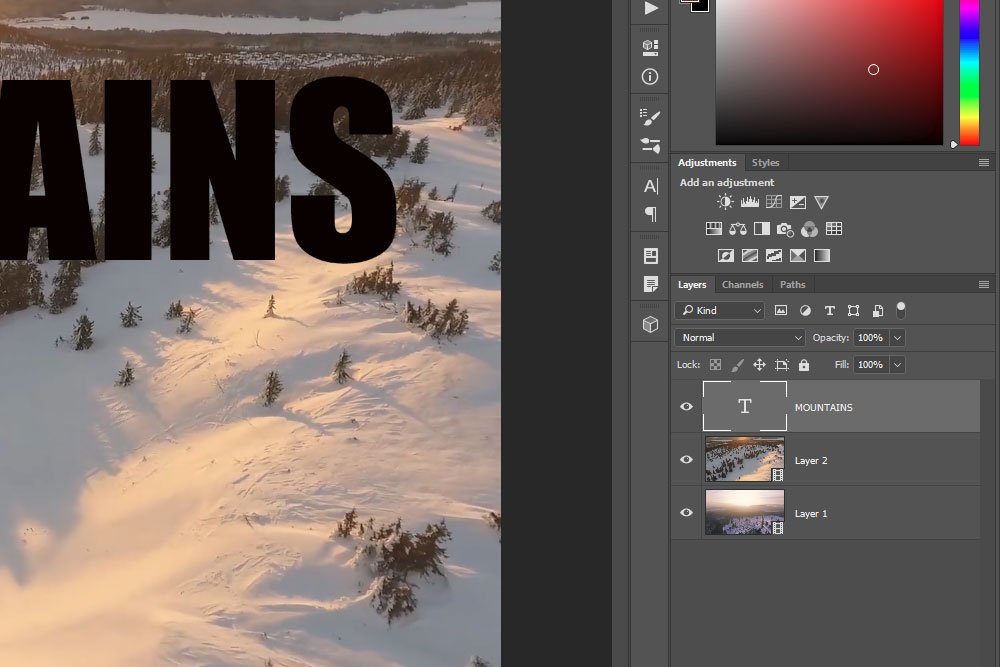
And as you can see, I now have a new layer on top of the others in the Layers panel.

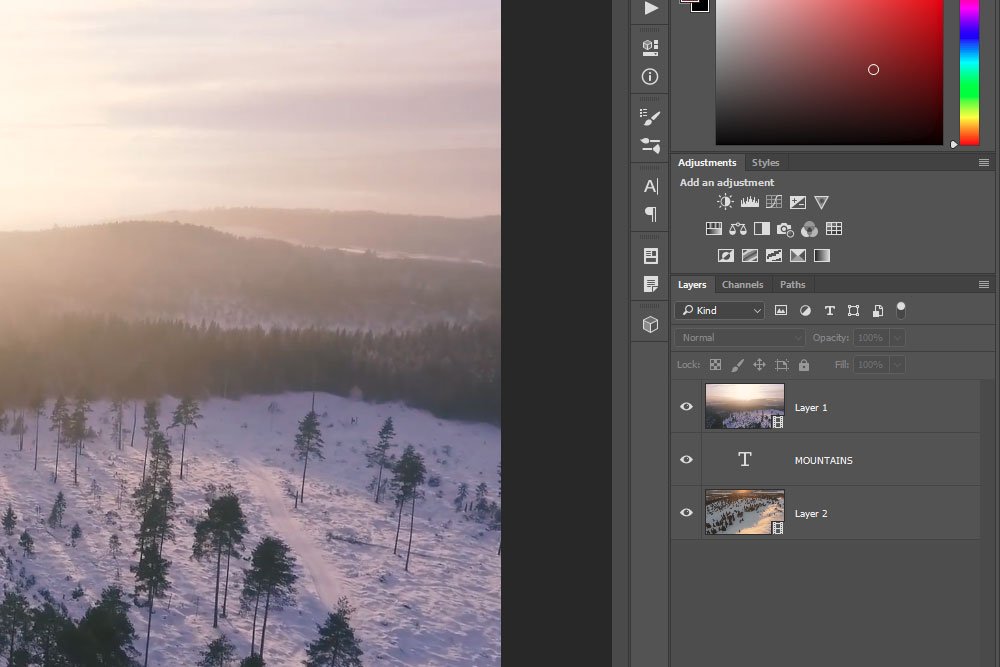
Okay, so here’s the thing. I now have three layers. I would like one to be the background, one to be the text (which it already is) and one to be masked by the text. I’ll need the masked layer to be the very top layer with the text layer directly underneath that one and the background all the way at the bottom. I’ll arrange the layers now.

Creating a Clipping Mask
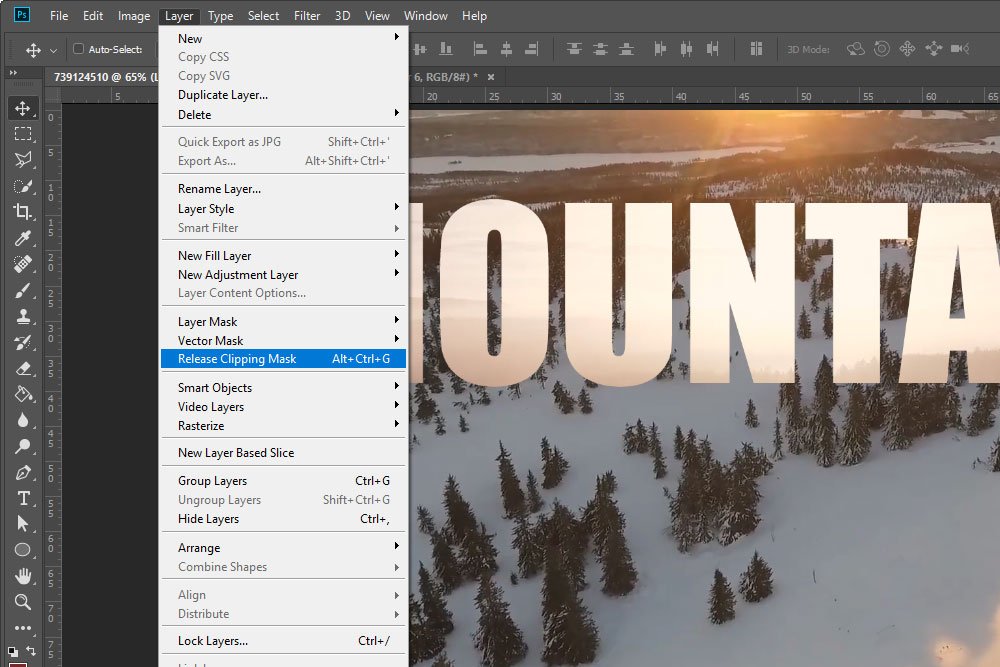
Now that the layers are in the proper order, I can go ahead with selecting the top layer that’s to be masked. From there, I’ll head up to the Layer > Create Clipping Mask menu item and click.
What are Clipping Masks in Adobe Photoshop?
The top video layer has now been clipped to the text layer and it has been masked accordingly. The way I can see that this is done is to look at the text itself, which will be visible and consisting of the video, and to look at the layers themselves in the Layers panel. The top video layer will have a small down-facing arrow on its left side and both the video layer and the text layer will be indented. Take a look at the screenshot below.

Now, if I go ahead and play the video, I’ll find that I’ve done a good job. The task is almost complete.
Expanding the Duration of the Type Layer
By default, when you place type into a video project in Photoshop, that type only exists for a few seconds on the timeline. Since I would like it to be visible for the entire video length, I’ll click and drag both sides of the type block down in the Timeline panel and stretch it in both directions until I’m happy.I’ll go from this:

To this:

As you can see, I also shortened the top video duration so it would match with the other one.
Adjusting the Look of the Text & Mask
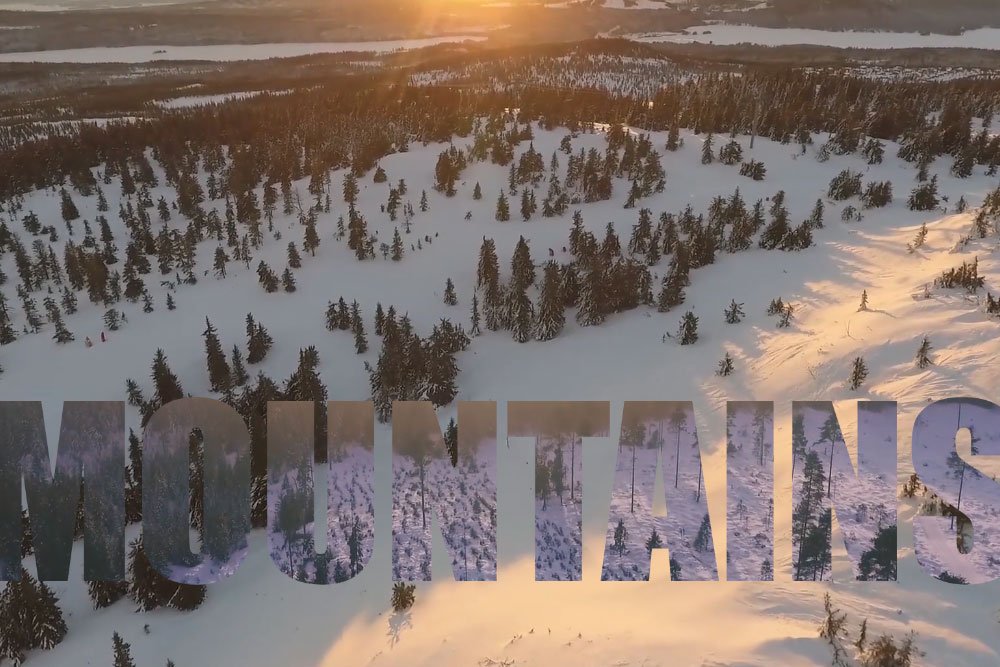
As you may have noticed, not much of the video is actually showing within the text. Only the sky is visible. I wanted to let you in on a little secret; things don’t have to be this way. At any time, I can click a layer to select it and then drag that layer anywhere I want in the workspace. So, if I want more trees to show inside the text and keep the text where it is, I can drag the masked video layer up so the trees and mountains are more visible. If I wanted to move the text down to get the same effect, while keeping the video layer where it is, I can do that as well. It’s very simple.
Personally, I like the text where it was because the movement inside of it is subtle. It’s almost as if it isn’t there. Actually, perhaps I’ll position it directly in the center of the project. That looks really good.
Adding Some Additional Contrast to the Entire Project
If I wanted to add some contrast to only the masked video layer, I could do this via a clipped adjustment layer. I’ll discuss this technique in another post, because it really should be by itself. Today, I’ll simply add a Curves adjustment layer above all the other layers. That’s easy enough.Using the Adobe Photoshop Curves Tool For Photography
Once I have the Curves Properties panel open, I’ll take advantage of one of the contrast Presets.
How to Enhance Color Using Curves in Adobe Photoshop
The Final Result
I simply love this outcome. Check out an image of the scene.
And here’s the final video.
I’d say that’s pretty awesome.
——
In this post, I hope I clearly explained how to go about adding a text based video clipping mask in Adobe Photoshop. If you have any questions or concerns regarding this topic, please let me know via a comment below. Thanks for reading!
